Docker installation and use of images
Preface
————————————————————————————————————————
The basis for installing docker in this article is the Linux centos7 system. Use the terminal simulation software xshell. If you need an installation tutorial, you can visit my previous blog to
download VMware, install and create a virtual machine.
VMware installs Centos7. The ultimate step-by-step detailed graphic process
because docker can also be installed and used under the window system (currently It seems that only the 64-bit version of Windows 10 Pro is supported). Here is an installation and usage tutorial under Windows system.
Installation and use of DOCKER in WIN10.
Contents of the previous section↓
Getting started with Docker from scratch - 0. Concepts
1.Install docker
Without further ado, let’s get into the topic. There is actually more than one way to install Docker under centos7 system, but since we are practicing using it here, of course the simpler the installation method is, the better. Here is a link to a more comprehensive one. For the installation method, we choose the simplest
Centos 7 to install Docker (yum installation, rpm installation and script installation)
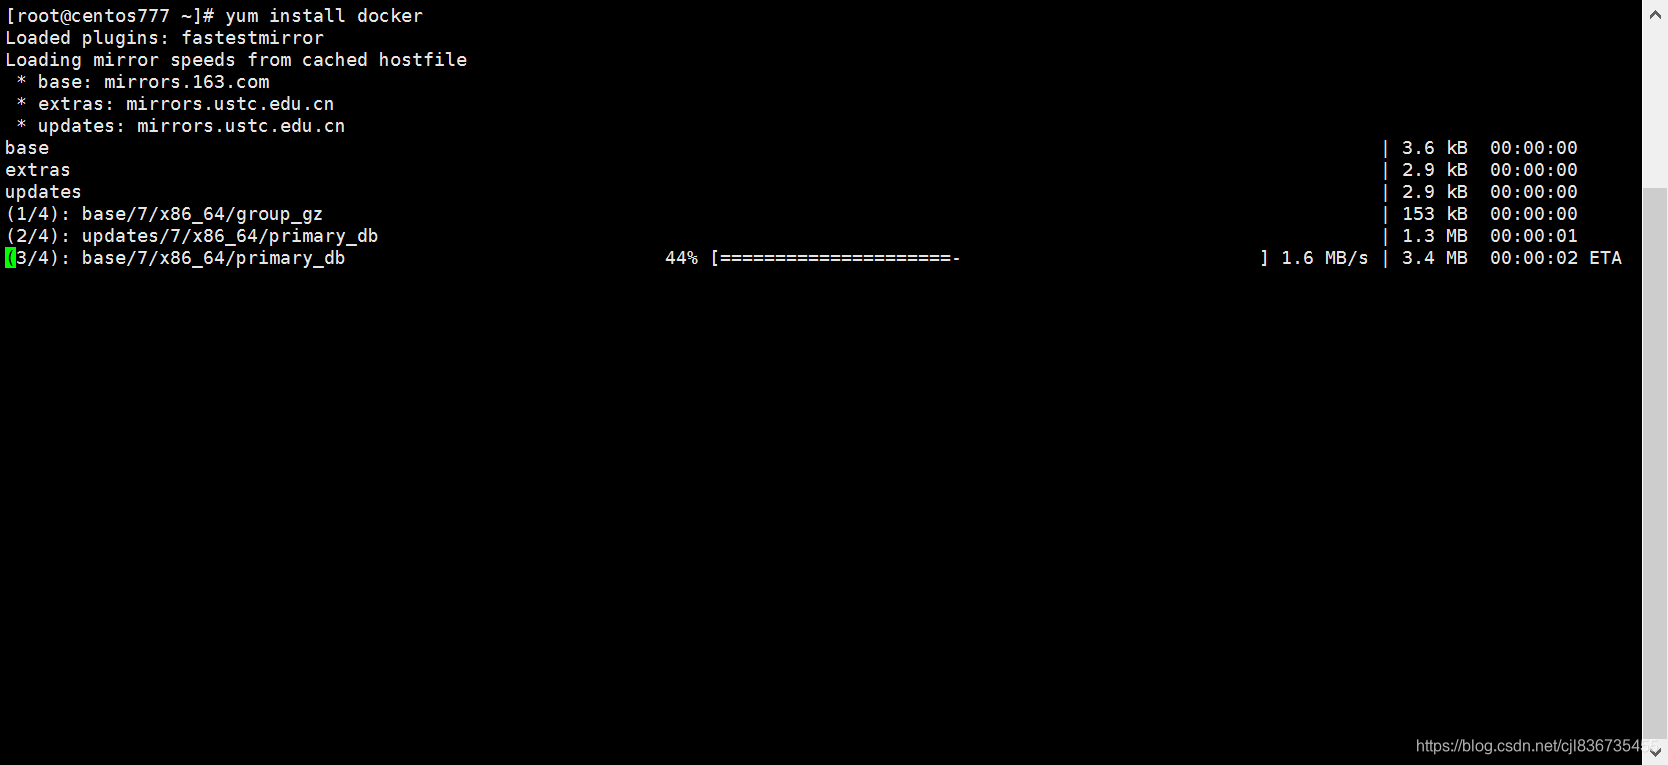
- Docker packages are included in the default CentOS-Extras repository. Therefore, if you want to install docker, you only need to run the following yum command
yum install docker

You will be asked twice during the process if you are OK. No brainer, just enter y and you are done. The installation is also very fast and can be completed in a minute or two.

Isn’t it very simple? The latest version of docker is automatically installed here. You can check the installed docker version by running the following command.
docker version

My version is version 1.13.1, and it says below that it is not connected to the docker daemon Daemon. Nonsense, I haven't started it yet. . . Then we will start docker and enter the following command
systemctl start docker

Well, there is no feedback on this startup. We use the command to check the running status of the docker service.
systemctl status docker

Here it is confirmed that the docker service is started successfully, and it is also confirmed that the docker daemon process Daemon is started. Here we then set up the docker service to start automatically at boot, otherwise it will have to be started every time.
systemctl enable docker.service

Let’s check the settings for docker service self-starting
systemctl list-unit-files | grep docker

OK, no problem, the installation here comes to an end first.
2. Use Alibaba Cloud docker image acceleration
In view of domestic network problems, subsequent pulling of Docker images is very slow, and domestic image acceleration needs to be configured.
I will not take step-by-step screenshots here. I will attach a link and the operation is relatively simple.
Accelerate using Alibaba Cloud docker image
3.Use of docker image
I won't explain how to build an image here, but just explain the use of the image, because the construction of the image can be summarized into a large piece of other content, which will be explained in the next blog post.
If you have used Git before, then the docker commands are very friendly to you.
- Get image
Syntax → docker pull [Mirror warehouse] Image name: Mirror version
Example → docker pull ubuntu:16.04
can also be abbreviated as docker pull Image name: Mirror version
This will automatically specify the mirror warehouse as docker hub

There are various images built by others on docker hub. You can search and obtain them through commands.
- View all images in the local repository
docker images

Here you can see the mirror image we just pulled down.
- Delete image
docker rmi imagesID (image id)
We can find the image ID by viewing all the images in the local warehouse. We can delete the image in the local warehouse through the image ID. rmi is the abbreviation of remove image.

The picture shows that the image has been deleted. In addition, we mentioned in the previous concept chapter that the image is built from multiple read-only layers, so when it is deleted, it is also deleted layer by layer. Only then will you See that five deleted appear in the picture.
Okay, the use of images is actually very simple. The content is more about the construction of images, the use of containers, etc. We will see you in the next issue.