Table of contents
1.3 Create login and registration interface
2.2 Add the global configuration of vue-axios
2.2 ssm project preparation (backend)
3.1 Cross-domain request issues
3.2 Cross-domain problem handling
1. Build the project
1.1 Install Element-UI
First make sure the vue-cli scaffolding tool is installed !!!
Detailed operation --- > Install and use vue-cli to build SPA project
After building the project, install element-ui through npm
cd 项目根路径                               #进入新建项目的根目录
npm install element-ui -S                  #安装element-ui模块
1.2 Import components
Open main.js in the src directory. This file is the entry file of the project, so import it here. Other components can be used and there is no need to import it again.
import Vue from 'vue'

//新添加1
import ElementUI from 'element-ui'
//新增加2,避免后期打包样式不同,要放在import App from './App';之前
import 'element-ui/lib/theme-chalk/index.css'

import App from './App'
import router from './router'

Vue.use(ElementUI)   //新添加3
Vue.config.productionTip = false
1.3 Create login and registration interface
I created a new views in the src directory to store some interface components. The interface can be designed by yourself. The following is what I wrote:
1. Create user login componentLogin.vue
<template>
  <div class="login-wrap">
    <el-form class="login-container">
      <h1 class="title">用户登录</h1>
      <el-form-item label="">
        <el-input type="text" v-model="username" placeholder="登录账号" autocomplete="off"></el-input>
      </el-form-item>
      <el-form-item label="">
        <el-input type="password" v-model="password" placeholder="登录密码" autocomplete="off"></el-input>
      </el-form-item>
      <el-form-item>
        <el-button type="warning" style="width:100%;" @click="doSubmit()">提交</el-button>
      </el-form-item>
      <el-row style="text-align: center;margin-top:-10px">
        <el-link type="primary">忘记密码</el-link>
        <el-link type="primary" @click="gotoRegister()">用户注册</el-link>
      </el-row>
    </el-form>
  </div>
</template>

<script>
  export default {
    name: 'Login',
    data() {
      return {
        username: '',
        password: ''
      }
    },
    methods: {
      gotoRegister() {
        this.$router.push("/Register");
      }
    }
  }
</script>

<style scoped>
  .login-wrap {
   box-sizing: border-box;
   width: 100%;
   height: 100%;
   padding-top: 10%;
   background-image: url('/static/imgs/books2.jpg');
   /* background-color: #3b7cf5; */
   background-repeat: no-repeat;
   background-position: center right;
   background-size: 100%;
  }

  .login-container {
   border-radius: 10px;
   margin: 0px auto;
   width: 350px;
   padding: 30px 35px 15px 35px;
   border: 1px solid #eaeaea;
   text-align: left;
   background-color: rgba(229, 229, 229, 0.8);
  }

  .title {
    margin: 0px auto 40px auto;
    text-align: center;
    color: #0b0b0b;
  }
</style>
Create user registration component Register.vue
<template>
  <div class="login-wrap">
    <el-form class="login-container">
      <h1 class="title">用户注册</h1>
      <el-form-item label="">
        <el-input type="text" v-model="username" placeholder="注册账号" autocomplete="off"></el-input>
      </el-form-item>
      <el-form-item label="">
        <el-input type="password" v-model="password" placeholder="注册密码" autocomplete="off"></el-input>
      </el-form-item>
      <el-form-item>
        <el-button type="warning" style="width:100%;" @click="doSubmit()">提交</el-button>
      </el-form-item>
      <el-row style="text-align: center;margin-top:-10px">
        <el-link type="primary">忘记密码</el-link>
        <el-link type="primary" @click="gotoLogin()">用户注册</el-link>
      </el-row>
    </el-form>
  </div>
</template>

<script>
  export default {
    name: 'Register',
    data() {
      return {
        username: '',
        password: ''
      }
    },
    methods: {
      gotoLogin() {
        this.$router.push("/");
      }
    }
  }
</script>

<style scoped>
  .login-wrap {
    box-sizing: border-box;
    width: 100%;
    height: 100%;
    padding-top: 10%;
    background-image: url('/static/imgs/books2.jpg');
    /* background-color: #3b7cf5; */
    background-repeat: no-repeat;
    background-position: center right;
    background-size: 100%;
  }

  .login-container {
    border-radius: 10px;
    margin: 0px auto;
    width: 350px;
    padding: 30px 35px 15px 35px;
    border: 1px solid #eaeaea;
    text-align: left;
    background-color: rgba(229, 229, 229, 0.8);
  }

  .title {
    margin: 0px auto 40px auto;
    text-align: center;
    color: #0b0b0b;
  }
</style>
Note 1: <style scoped>
In the vue component, add the scoped attribute to the style tag to indicate that its style acts on the current module, which achieves the purpose of style privatization.Note 2: auto-complete="off"
The autocomplete attribute is a new attribute in HTML5, off-----disables auto-complete
2. Configure routing
import Vue from 'vue'
import Router from 'vue-router'
import HelloWorld from '@/components/HelloWorld'
// 导入Login登录组件
import Login from '@/views/Login'
// 导入Register注册组件
import Register from '@/views/Register'

Vue.use(Router)

export default new Router({
  routes: [
    {
      path: '/',
      name: 'Login',
      component: Login
    },{
      path: '/Register',
      name: 'Register',
      component: Register
    }
  ]
})
3. Operational effect
Execute npm run dev command in the project root directory
. Interface effect:

2. Background interaction
2.1 Introducing axios
axios is a lightweight version of ajax advocated by vue2. It is a promise-based HTTP library. It creates XMLHttpRequests from the browser and works great with Vue.
Tips: vue.js has the famous family bucket series: vue-router, vuex, vue-resource, plus the construction tool vue-cli, which is the core component of a complete vue project. Among them, vue-resource is a plug-in for Vue.js. It can initiate requests and process responses through XMLHttpRequest or JSONP. However, after vue was updated to 2.0, the author announced that he would no longer update vue-resource, but recommended axios.
Installation instructions:
npm i axios -S
2.2 Add the global configuration of vue-axios
Axios is an HTTP client based on Promise for browsers and nodejs. It is essentially an encapsulation of native XHR, but it is an implementation version of Promise and complies with the latest ES specifications.
vue-axios is a plug-in extended based on axios . It extends $http and other attributes on the Vue.prototype prototype, making it easier to use axios.
Implement lightweight encapsulation of axios through vue-axios:
Step 1: Download and install vue-axios and qs libraries
npm i vue-axios -S
The qs library is used to solve the problem of POST requests, because the format of the parameters submitted by POST is Request Payload, so the background cannot get the data.
npm install qs -S
Step 2: Import the api module and add the global configuration of axios
Add the api module in the src directory of the SPA project. The api module contains two files: action.js ( encapsulation definition for the background request interface ) and http.js ( global configuration for axios ).
-
action.js
/**
 * 对后台请求的地址的封装,URL格式如下:
 * 模块名_实体名_操作
 */
export default {
	'SERVER': 'http://localhost:8080/ssm_vue', //服务器
	'SYSTEM_USER_DOLOGIN': '/user/userLogin', //登陆
	'SYSTEM_USER_DOREG': '/user/userRegister', //注册
	'getFullPath': k => { //获得请求的完整地址,用于mockjs测试时使用
		return this.SERVER + this[k];
	}
}
Encapsulation of the address requested by the background, URL format: module name entity name operation
-
http.js
/**
 * vue项目对axios的全局配置
 */
import axios from 'axios'
import qs from 'qs'

//引入action模块,并添加至axios的类属性urls上
import action from '@/api/action'
axios.urls = action

// axios默认配置
axios.defaults.timeout = 10000; // 超时时间
// axios.defaults.baseURL = 'http://localhost:8080/j2ee15'; // 默认地址
axios.defaults.baseURL = action.SERVER;

//整理数据
// 只适用于 POST,PUT,PATCH,transformRequest` 允许在向服务器发送前,修改请求数据
axios.defaults.transformRequest = function(data) {
  data = qs.stringify(data);
  return data;
};


// 请求拦截器
axios.interceptors.request.use(function(config) {
  return config;
}, function(error) {
  return Promise.reject(error);
});

// 响应拦截器
axios.interceptors.response.use(function(response) {
  return response;
}, function(error) {
  return Promise.reject(error);
});

//最后,代码通过export default语句将axios导出,以便在其他地方可以引入和使用这个axios实例。
export default axios;
Step 3: Modify main.js to configure vue-axios
Introduce the api module and vue-axios module into the main.js file, so that we can easily use axios to make HTTP requests in the Vue project, and we can use the functions provided by the VueAxios plug-in to simplify the processing and management of HTTP requests.
import axios from '@/api/http'
import VueAxios from 'vue-axios'
Vue.use(VueAxios,axios)2.2 ssm project preparation (backend)
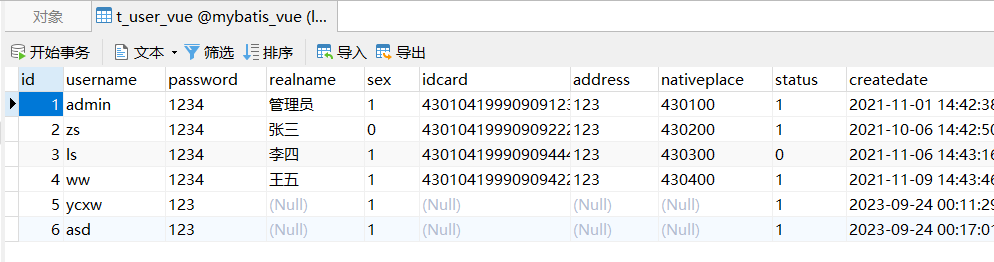
2.2.1 Prepare data sheet

2.2.2 Import ssm project
You can create a new project to connect to the database to automatically generate code, and modify the jdk and maven paths .

2.2.3 Writing a controller
package com.zking.ssm.controller;

import com.zking.ssm.service.IUserService;
import com.zking.ssm.util.JsonResponseBody;
import com.zking.ssm.util.PageBean;
import com.zking.ssm.vo.UserVo;
import org.springframework.beans.factory.annotation.Autowired;
import org.springframework.stereotype.Controller;
import org.springframework.web.bind.annotation.RequestMapping;
import org.springframework.web.bind.annotation.ResponseBody;

import javax.servlet.http.HttpServletRequest;
import javax.servlet.http.HttpServletResponse;
import java.util.HashMap;
import java.util.List;
import java.util.Map;
import com.zking.ssm.jwt.*;

@Controller
@RequestMapping("/user")
public class UserController {

    @Autowired
    private IUserService userService;

    //登录方法
    @RequestMapping("/userLogin")
    @ResponseBody
    public JsonResponseBody<?> userLogin(UserVo userVo, HttpServletResponse response){
        if(userVo.getUsername().equals("ycxw")&&userVo.getPassword().equals("123")){
            //私有要求claim
//            Map<String,Object> json=new HashMap<String,Object>();
//            json.put("username", userVo.getUsername());
            //生成JWT,并设置到response响应头中
//            String jwt=JwtUtils.createJwt(json, JwtUtils.JWT_WEB_TTL);
//            response.setHeader(JwtUtils.JWT_HEADER_KEY, jwt);
            return new JsonResponseBody<>("用户登陆成功!",true,0,null);
        }else{
            return new JsonResponseBody<>("用户名或密码错误!",false,0,null);
        }
    }

    //注册方法
    @RequestMapping("/userRegister")
    @ResponseBody
    public JsonResponseBody<?> userRegister(UserVo user, HttpServletResponse response) {
        int i = userService.insertSelective(user);
        if (i > 0) {
            return new JsonResponseBody<>("用户注册成功!", true, 0, null);
        } else {
            return new JsonResponseBody<>("用户注册失败!", false, 0, null);
        }
    }

}
2.3 Front-end writing
1. Add the code to send the get request in the listening function of the Login.vue submit button :
<script>
  export default {
    name: 'Login',
    data() {
      return {
        username: '',
        password: ''
      }
    },
    methods: {
      gotoRegister() {
        this.$router.push("/Register");
      },
      doSubmit() {
        //定义后台登录方法连接地址
        let url = this.axios.urls.SYSTEM_USER_DOLOGIN;
        //获取数据
        let params = {
          username: this.username,
          password: this.password
        };
        /* get请求进行参数传递 */
        this.axios.get(url, {params:params}).then(r => {
          console.log(r);
           //判断是否登录成功
           if (r.data.success) {
             //利用ElementUI信息提示组件返回登录信息
             this.$message({
               message: r.data.msg,
               type: 'success'
             });
             //登陆成功,返回指定界面
             this.$route.push('主界面');
           } else {
             //弹出登录失败信息
             this.$message.error(r.data.msg);
           }
         }).catch(e => {
           //异常信息
         });

        /* post请求方式 */
        /* this.axios.post(url, params).then(r => {
          console.log(r);
          //判断是否登录成功
          if (r.data.success) {
            //利用ElementUI信息提示组件返回登录信息
            this.$message({
              message: r.data.msg,
              type: 'success'
            });
            //登陆成功,返回指定界面
            this.$route.push('主界面');
          } else {
            //弹出登录失败信息
            this.$message.error(r.data.msg);
          }
        }).catch(function(error) {
          console.log(error);
        }); */
      }
    }
  }
</script>
2. Add the code to send the post request to the listening function of the Register.vue submit button :
<script>
  export default {
    name: 'Register',
    data() {
      return {
        username: '',
        password: ''
      }
    },
    methods: {
      gotoLogin() {
        this.$router.push("/");
      },
      doSubmit() {
        //定义后台注册方法连接地址
        let url = this.axios.urls.SYSTEM_USER_DOREG;
        //获取数据
        let params = {
          username: this.username,
          password: this.password
        };

        /* post请求方式 */
        this.axios.post(url, params).then(r => {
          //判断是否注册成功
          if (r.data.success) {
            //利用ElementUI信息提示组件返回登录信息
            this.$message({
              message: r.data.msg,
              type: 'success'
            });
            //注册成功,返回指定界面
            //this.$route.push('主界面');
          } else {
            //弹出注册失败信息
            this.$message.error(r.data.msg);
          }
        }).catch(function(error) {
          console.log(error);
        });
      }
    },
  }
</script>
2.4 Login test
1. Start the ssm project and deploy the tomcat server
2. Run the vue project - command: npm run dev
Note: The project uses port 8080 by default when running. If other programs also use this port, conflicts will occur. If tomcat also uses port 8080 by default, the port number needs to be changed to avoid conflicts.
Open the config/index.js file in the project directory and modify the port in the dev part.

3. Error testing

4. Test correctly
The backend receives parameters:

2.5 Register for testing
View the database:
3. CORS cross-domain
3.1 Cross-domain request issues
Because we use a separation method for front-end and back-end development, the front-end and back-end are on different servers. Based on security considerations, the browser has a same-origin policy, so cross-domain issues arise.
The same origin policy [same origin policy] is a security feature of the browser. Client scripts from different origins cannot read or write each other's resources without explicit authorization. The same-origin policy is the cornerstone of browser security.
Note: axios cross-domain issues
will always report an error: "http://127.0.0.1:8848' has been blocked by CORS policy: No 'Access-Control-Allow-Origin' header" because the front-end and back-end are separated to develop cross-domain access. .
3.2 Cross-domain problem handling
Solution:
You need to configure tomcat to allow cross-domain access. There are many cross-domain configuration methods for tomcat, but the simplest way is to write a CorsFilter filter yourself and add a response header Access-Control-Allow-Origin.
package com.zking.ssm.util;

import java.io.IOException;

import javax.servlet.Filter;
import javax.servlet.FilterChain;
import javax.servlet.FilterConfig;
import javax.servlet.ServletException;
import javax.servlet.ServletRequest;
import javax.servlet.ServletResponse;
import javax.servlet.http.HttpServletResponse;

/**
 * 配置tomcat允许跨域访问
 *
 * @author Administrator
 *
 */
public class CorsFilter2 implements Filter {

	@Override
	public void init(FilterConfig filterConfig) throws ServletException {
	}

	@Override
	public void doFilter(ServletRequest servletRequest, ServletResponse servletResponse, FilterChain filterChain)
			throws IOException, ServletException {
		HttpServletResponse httpResponse = (HttpServletResponse) servletResponse;

		// Access-Control-Allow-Origin就是我们需要设置的域名
		// Access-Control-Allow-Headers跨域允许包含的头。
		// Access-Control-Allow-Methods是允许的请求方式
		httpResponse.setHeader("Access-Control-Allow-Origin", "*");// *,任何域名
		httpResponse.setHeader("Access-Control-Allow-Headers", "responseType,Origin, X-Requested-With, Content-Type, Accept");
		httpResponse.setHeader("Access-Control-Allow-Methods", "POST, GET, PUT, DELETE");

		//允许客户端处理一个新的响应头jwt
		//httpResponse.setHeader("Access-Control-Expose-Headers", "jwt,Content-Disposition");
		filterChain.doFilter(servletRequest, servletResponse);
	}

	@Override
	public void destroy() {

	}
}
Configure the above code into web.xml and intercept all requests to solve cross-domain problems.
  <!--CrosFilter跨域过滤器-->
  <filter>
    <filter-name>corsFilter</filter-name>
    <filter-class>com.zking.ssm.util.CorsFilter2</filter-class>
  </filter>
  <filter-mapping>
    <filter-name>corsFilter</filter-name>
    <url-pattern>/*</url-pattern>
  </filter-mapping>