Hello everyone, today I will introduce to you a summary of the methods of solidifying and updating uboot, zImage and dtb with imx6ull . I hope this article will be helpful to you.
The prerequisite for solidification and updating is that uboot.imx , zImage , imx6ull.dtb and rootfs have been compiled and can be started and mounted successfully.
Before explaining the methods of imx6ull solidification and updating uboot, zImage and dtb, let me first take you to understand some of the partitioning conditions of imx6ull and their respective functions.
imx6ull eMMC partition, as shown below:
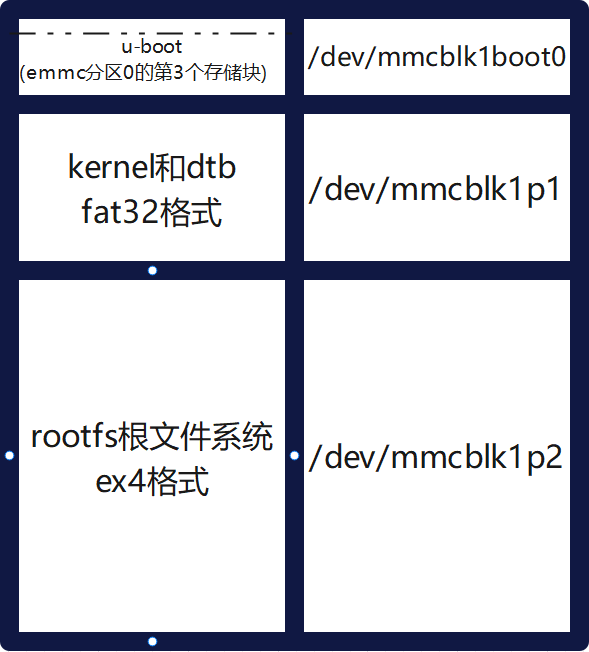
EMMC has three partitions:
-
Partition 0 (/dev/mmcblk1boot0): The first two blocks (sectors) of partition 0 of EMMC contain the partition table, and uboot is stored starting from the third block;
-
Partition 1 (/dev/mmcblk1p1): stores the Linux kernel kernel and dtb device tree;
-
Partition 2 (/dev/mmcblk1p2): stores the rootfs root file system.
1. Curing system
1. Use mfgtool host computer curing system
Copy the MFG_TOOL factory firmware burning tool mfgtool file to the PC.
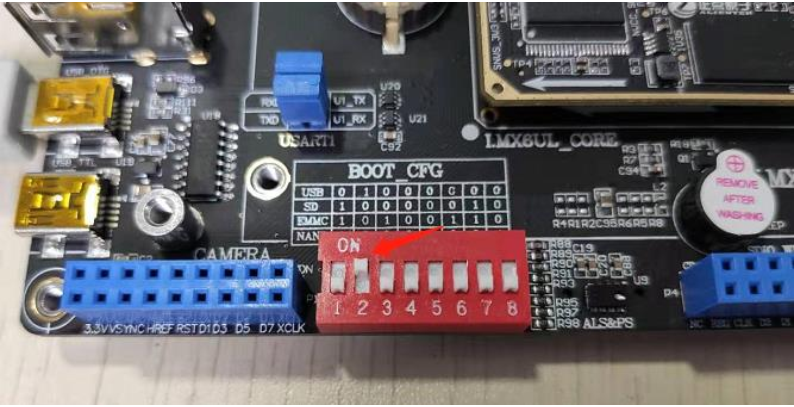
The DIP switch for imx6ull startup mode, the corresponding relationship is as follows:
| Start mode | DIP switch |
|---|---|
| USB OTG programming | 0100 0000 |
| SD card boot | 1000 0010 |
| EMMC start | 1010 0110 |
| NAND FLASH start | 1000 1001 |
-
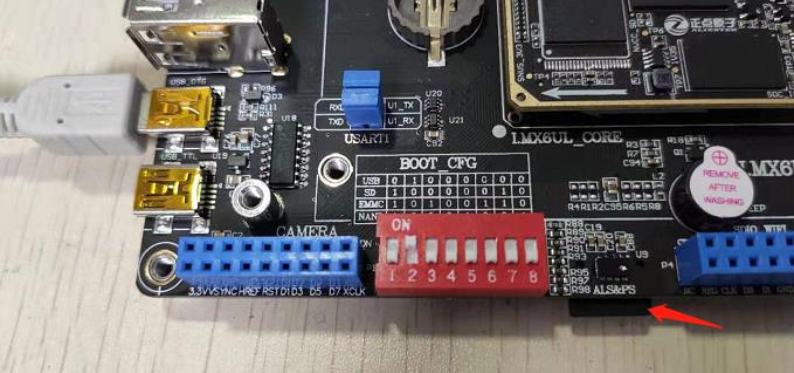
Note: OFF is 0, ON is 1;【D0-D1-D2-D3-D4-D5-D6-D7-D8】
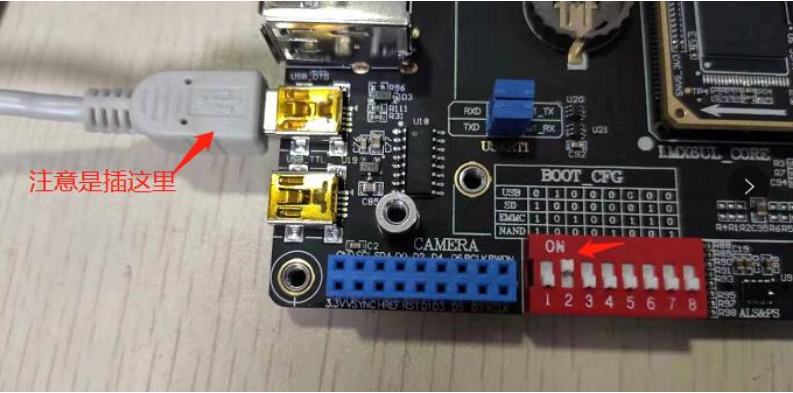
The bottom panel dial switch (BOOT_CFG) is set as follows, refer to BOOT_CFG, set to USB connection mode, "1" means ON, "0" means "OFF". Turn the dial number 2 to ON, and the others to OFF. As shown below:
Use a USB cable to connect the USB_OTG interface on the backplane to the PC (computer).
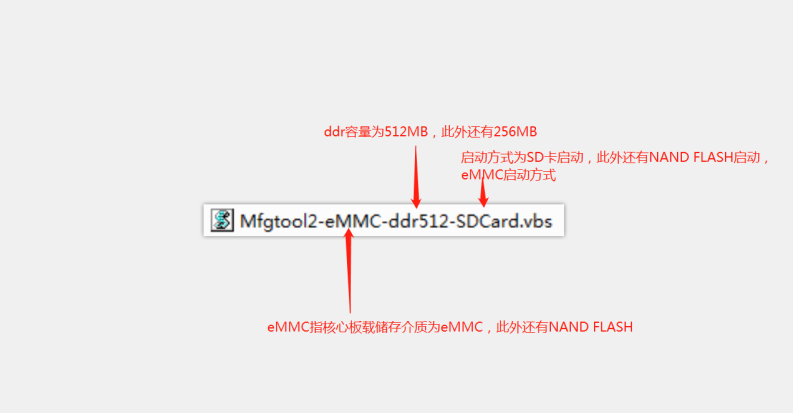
Enter the mfgtool folder and view the vbs script information, as shown below:
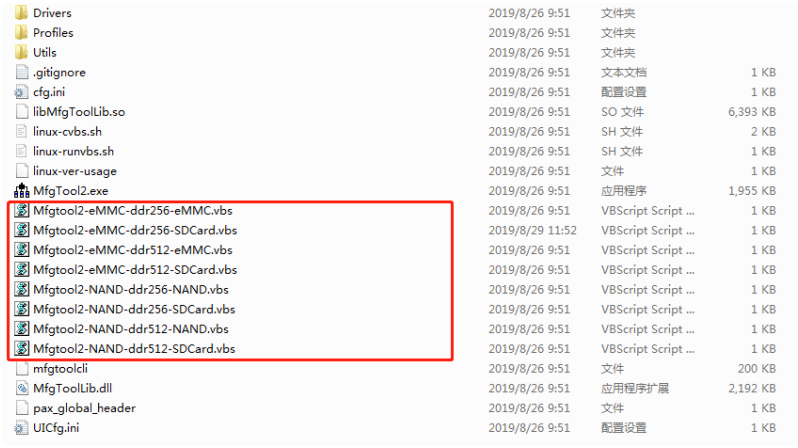
The reason why there are so many different vbs scripts is to provide different curing methods according to the curing needs. We can choose different vbs script curing systems according to the type of individual core boards. (Note, it is best not to run mfgtool under the Chinese path!).
Here is a brief introduction to the functions of these vbs script files. The explanation of the naming of vbs scripts is as follows:
1.1 mfgtool solidifies the system to SD card
Prepare an SD card (TF card used here) (note that the SD card will be formatted, so be sure to back up important data). According to the previous vbs script naming explanation, for example, we need to boot from the SD card and confirm that the core board storage medium is eMMC and the DDR capacity is 512MB.
Then we choose to double-click Mfgtool2-eMMC-ddr512-SDCard.vbs to program. The interface is as follows:
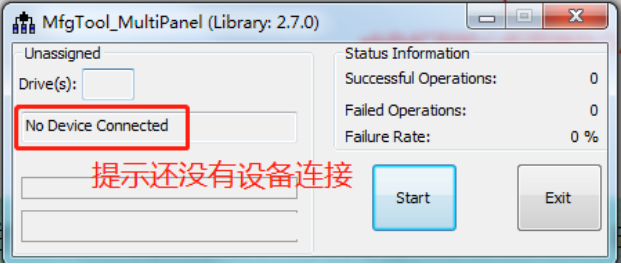
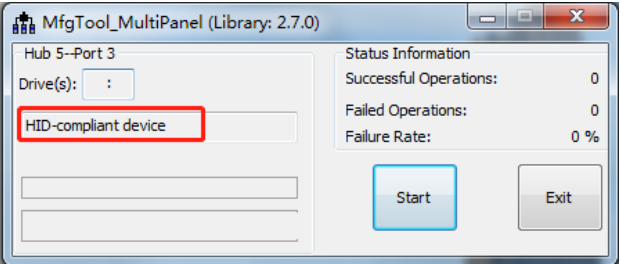
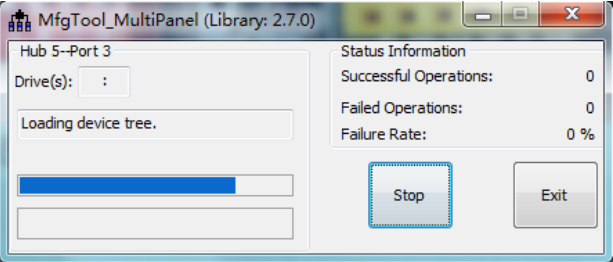
After operating according to the above mfgtool pre-use instructions, turn on the power switch of the baseboard. If it is the first time to use the development board OTG to connect to a PC (computer), you need to wait for the PC to automatically install the driver. (Click the small icon that is installing the driver in the lower right corner. Do not let winodws search for the driver from Windows Update. Click Skip. The driver will be installed naturally. Otherwise, if you use the driver from Windows Update, it may get stuck during the programming process. Hold on and do not run down.) After waiting for the driver installation to be completed, the mfgtool host computer interface will prompt that it has been connected to the device HID-compliant device. (Please be careful not to open the virtual machine. If the virtual machine is opening, otg will connect to the virtual machine. .When programming, if you encounter an anti-virus error, it is recommended to turn off the anti-virus software!) As shown below:
At this time, insert the SD card into the card slot (if your SD card already has a system, you need to power on the development board first and then insert the SD card into the card slot, otherwise your system will start from the SD card when powering on, so mfgtool will not be able to connect to the development board device), insert the SD card as shown below:
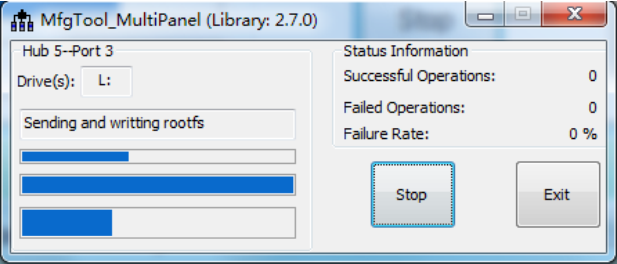
Directly click the Start button of mfgtool to solidify the system to the SD card. The picture below is a screenshot after clicking the Start button. It will take a few minutes to harden the system to the SD card, please wait patiently.
The curing process is as follows, writing to the file system:
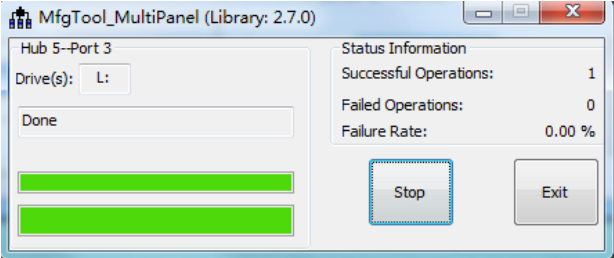
When curing is completed, as shown below, click Stop and then Exit to exit the mfgtool host computer software.
Test to start the system from the SD card, switch the DIP switch to SD card boot mode 10000010, and start the system.
1.2 mfgtool solidifies the system to eMMC
Double-click the vbs script file Mfgtool2-eMMC-ddr512-eMMC.vbs to solidify. For the steps, refer to 1.1 mfgtool curing system to SD card. After curing is completed, set the DIP switch to eMMC startup mode 10100110 and start the system.
Prerequisite: User core board type with eMMC storage medium. Please confirm that your ddr size is 512MB or 256MB. Currently, my development board is an eMMC core board with a ddr size of 512MB.
1.3 mfgtool solidification system to NAND FLASH
Double-click the Mfgtool2-NAND-ddr256-NAND.vbs vbs script file to solidify. Please refer to the steps of 1.1mfgtool to solidify the system to the SD card. After the solidification is completed, set the DIP switch to NANDFLASH startup mode 10001001 and start the system.
Prerequisites: User core board type with NAND FLASH storage medium. Please make sure your ddr size is 512MB or 256MB.
2. Use scripts to solidify the system
Script curing systems can generally be used for batch curing and system upgrades. Unlike the mfgtool host computer, which requires a PC and USB data cable, users can modify the curing system scripts by themselves and conduct automated curing tests, so that the system can be cured in batches without the participation of professionals.
2.1 Script to solidify system to SD card
Move the entire files folder of the MFG_TOOL burning tool mfgtool to the Ubuntu virtual machine, as shown below:

Use the chmod command to modify the permissions of the solidified SD card system script imx6mksdboot.sh
chmod +x imx6mksdboot.sh
Insert the SD card into the Ubuntu virtual machine with a card reader and wait for the Ubuntu host to recognize it, as shown below. (Because the author has made an SD card, the Ubuntu host will recognize two partitions. If your SD card is blank and only one partition is recognized, you will see only one USB icon (the pattern may be different). Same)) .
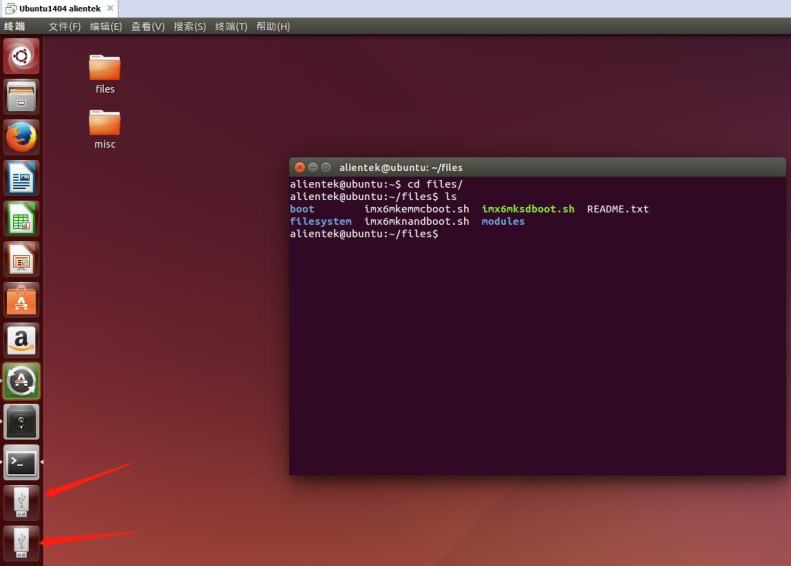
Enter the following command to view the SD card mounting node, as shown in the figure below. The author's SD card capacity is 8GB (7984MB≈8GB), and you can see that the mounted node is /dev/sdb.
sudo fdisk -l

Directly execute ./imx6mksdboot.sh --help to see how to use the script
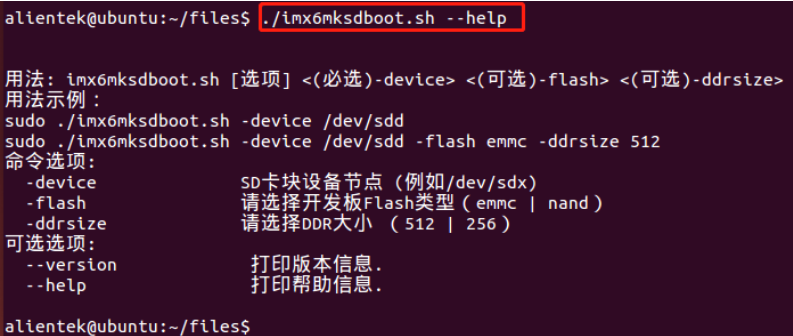
Instructions for use:
用法: imx6mksdboot.sh [选项] <(必选)-device> <(可选)-flash> <(可选)-ddrsize>
-
-device: Specifies the device node (the node mounted on the SD card such as /dev/sdx). This parameter must be added when executing the script.
-
-flash: Specify the media storage medium on the core board, optional (emmc|nand)
-
-ddrsize: Specifies the ddr capacity size on the core board, optional (512|256) MB
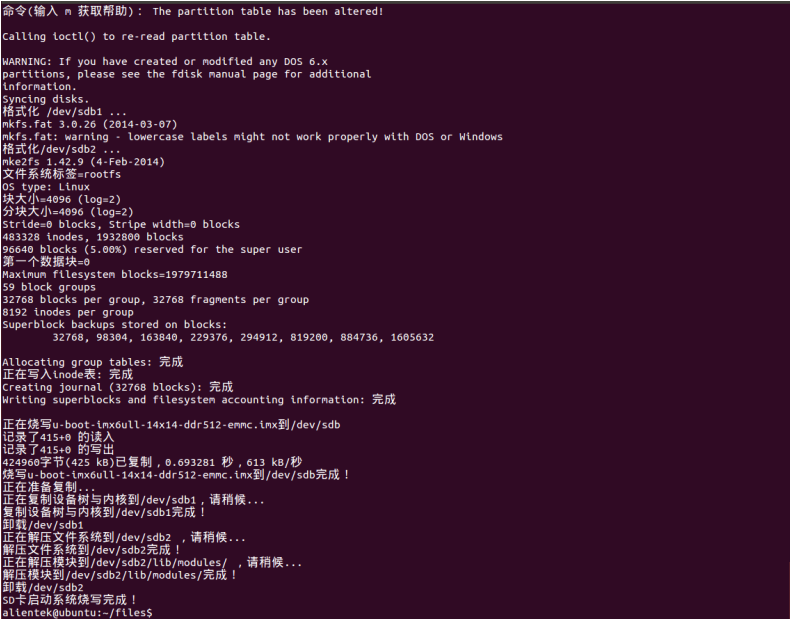
The current ddr capacity size is 512MB, and the media storage medium is eMMC. The SD card mounting node is /dev/sdb. Then the instructions to solidify the SD card are as follows. After executing the instructions, the script will have Chinese characters and ask again whether the node mounted on the SD card corresponds to it. All data on the SD card will be cleared. Please be careful to back up important data. Press the Enter key to confirm and continue. It will take about a few minutes to solidify the SD card. Depending on the personal computer and the SD card used, the time it takes may vary greatly.
sudo ./imx6mksdboot.sh -device /dev/sdb -flash emmc -ddrsize 512

During curing, there is a combination of Chinese and English to indicate the curing process. The curing process is completed as shown below:
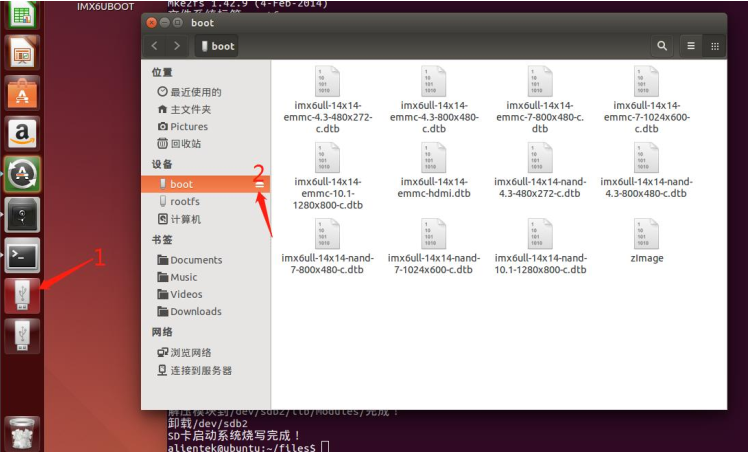
After completing the curing, uninstall the SD card and then take it out, click the USB icon, click the small triangle at "2" to uninstall and exit, and then directly pull out the card reader.
Test to start the system from the SD card, switch the DIP switch to SD card boot mode 10000010, and start the system.
2.2 Script to solidify system to eMMC
Here to use the script to solidify the system to eMMC, you need to use the SD system boot card made in 2.1. Copy the entire files folder of the MFG_TOOL programming tool mfgtool to the /home/root directory in the prepared SD system boot card (this article is copied to the /home/root directory, readers can choose any directory). As shown below:

Modify the permissions of the eMMC solidification script
chmod +x im6mkemmcboot.sh
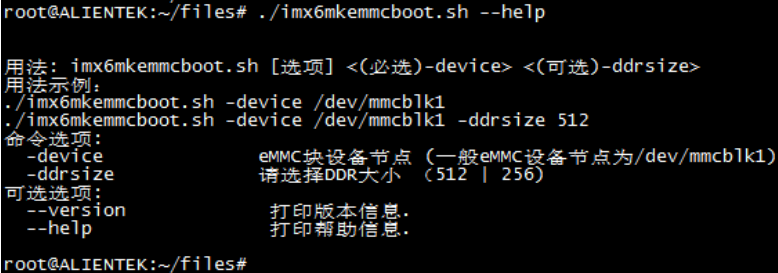
Execute ./imx6mkemmcboot.sh --help to view the instructions for using the script
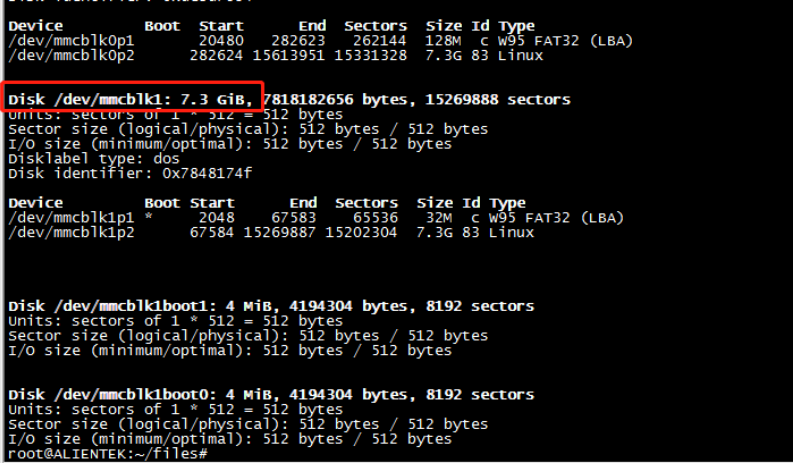
Use the fdisk command to view the eMMC mounting node. Generally, the mounting node is /dev/mmcblk1. The eMMC tested in this article has a storage capacity of 8GB. As you can see in the picture below, /dev/mmcblk1 is the mounting node of eMMC.
fdisk -l
Instructions for use:
用法: imx6mkemmcboot.sh [选项] <(必选)-device> <(可选)-ddrsize>
-
-device: indicates the device node (the node mounted by eMMC such as /dev/mmcblk1), this parameter must be added when executing the script
-
-ddrsize: Specifies the ddr capacity size on the core board, optional (512|256) MB
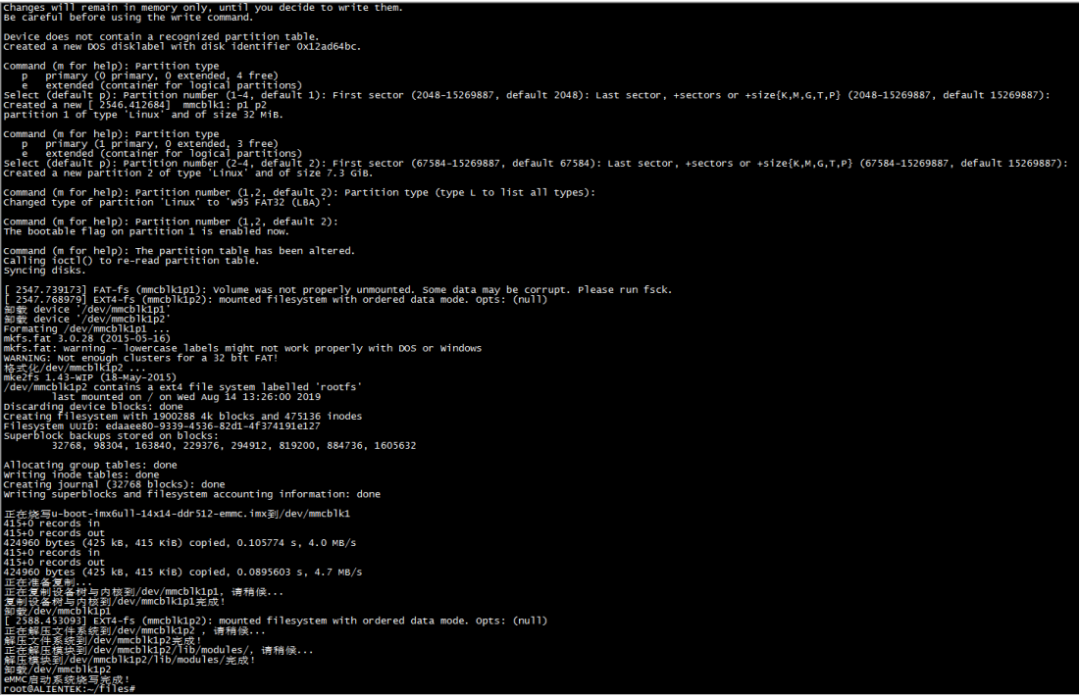
The current ddr capacity is 512MB, and the eMMC mounting node is /dev/mmcblk1. Then the solidified instructions are as follows. After executing the instructions, the script will have Chinese characters and ask again whether the node mounted on the eMMC corresponds to it. All data on the eMMC will be cleared. Please be careful to back up important data. Press the Enter key to confirm and continue. It will take about a few minutes to solidify the system to eMMC.
./imx6mkemmcboot.sh -device /dev/mmcblk1 -ddrsize 512

The curing system is completed as shown below:
After curing is completed, set the DIP switch to eMMC boot mode 10100110 to start the system.
2.3 Script solidification system to NAND FLASH
Here to use the script to solidify the system to eMMC, you need to use the SD system boot card made in 2.1. Copy the entire files folder of the MFG_TOOL programming tool mfgtool to the /home/root directory in the prepared SD system boot card (this article is copied to the /home/root directory, readers can choose any directory). As shown below:

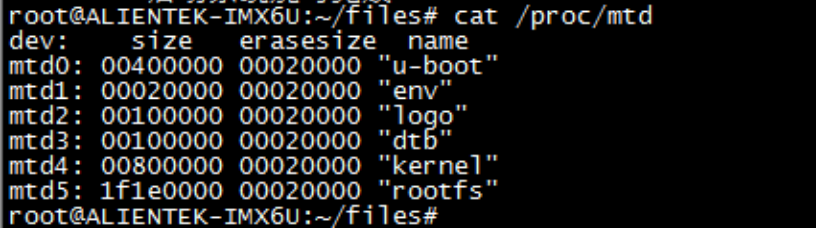
Use the cat command to view the MTD partition table. The printed result as shown below indicates the presence of Nand Flash.
Modify the permissions of NandFlash solidification script
chmod +x imx6mknandboot.sh
Execute ./imx6mknandboot.sh --help to view the instructions for using the script
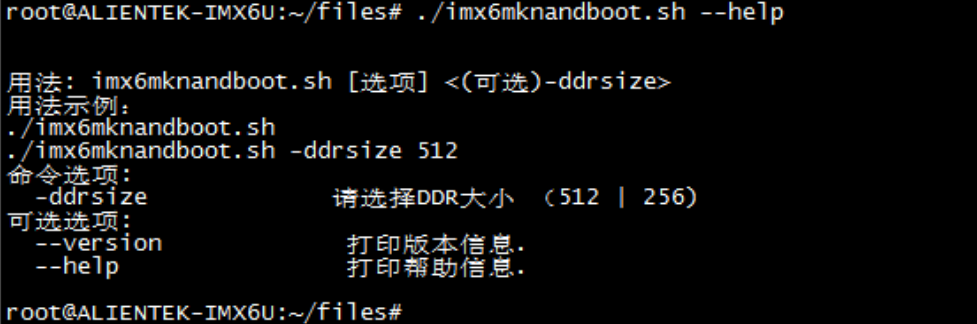
Instructions for use:
Usage: imx6mknandboot.sh [options] <(optional)-ddrsize>
-
-ddrsize: Specify the ddr capacity size on the core board, optional (512|256) MB.
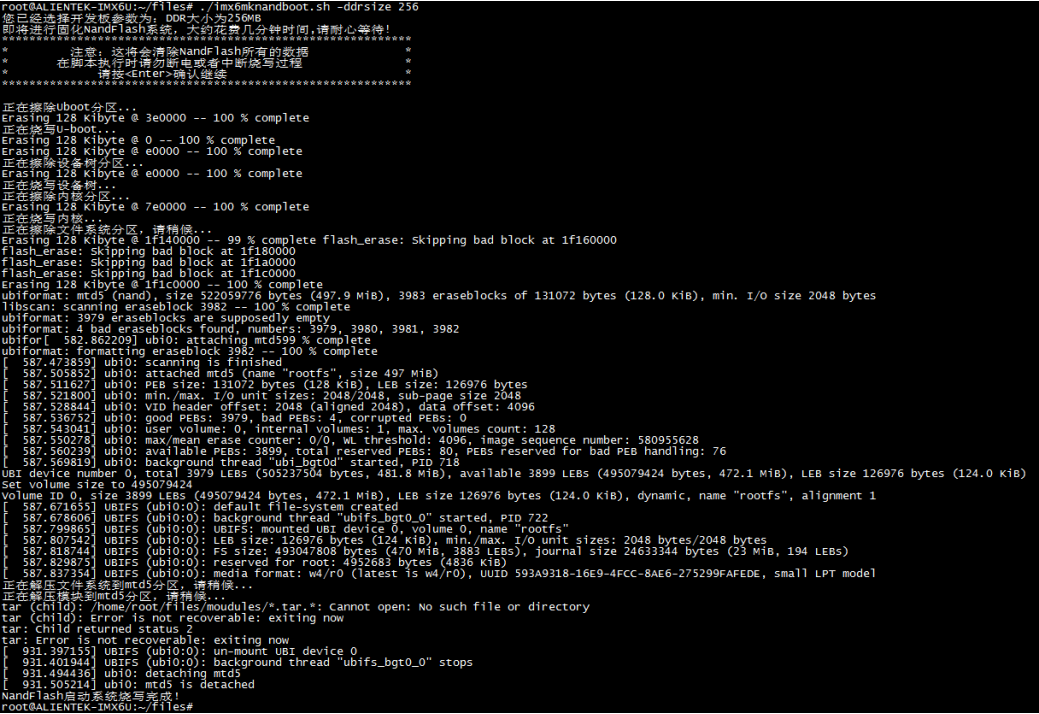
The current ddr capacity is 256MB, so the solidified instructions are as follows. This will clear all the data on the NandFlash, please pay attention to backup important data. Press Enter to confirm and continue. It will take about a few minutes to cure the system to NandFlash.
./imx6mknandboot.sh -ddrsize 256

The curing system is completed as shown below:
After curing is completed, set the DIP switch to Nand Flash startup mode 10001001 to start the system.
2. Update system
When we are in the development process, we may have more needs or functional modifications to compile u-boot and Linux kernel or root file system at any time. At this time, it is impossible to use the above solidification method after every modification, which is too time-consuming. You need to use a simple and convenient method to replace the old image with the new one. Here we will introduce some common update methods.
1. Update under u-boot
1.1 Update u-boot image under u-boot
To update the u-boot image in eMMC and SD card under u-boot, you need to use the tftp+mmc command. The details are as follows: Set up a tftp server: PC: tftpd32 server; u-boot has its own tftp function.
-
Update u-boot in eMMC:
1.tftp 0x80800000 u-boot.imx   ------通过tftp将u-boot.imx下载到内存中
2.mmc dev 1 0                  ------切换操作emmc的分区0
3.mmc write 80800000 2 33e     ------将内存中u-boot.imx烧写到emmc的分区0的第3个存储块(424960/512(块大小) = 0x33E)
4.mmc partconf 1 1 0 0         ------分区配置,EMMC 需要这一步!
5.reset                        ------复位,启动更新后的uboot
Note: The first two blocks of eMMC partition 1 store MBR (partition table), do not write data to these two blocks. If you accidentally write it, you can use the mfgtool tool to download the data to emmc using USB again to restore it.
-
Update u-boot in SD card:
1.tftp 0x80800000 u-boot.imx    ------通过tftp将u-boot.imx下载到内存中
2.mmc dev 0 0                   ------切换操作SD的分区0
3.mmc write 80800000 2 33e      ------将内存中u-boot.imx烧写到SD的分区1的第3个存储块(424960/512(块大小) = 0x33E)
4.reset                         ------复位,启动更新后的uboot
1.2 Update kernel and dtb under uboot
-
Update kernel and dtb in eMMC:
tftp 0x80800000 zImage;           ------通过TFTP从网络下载zImage文件到内存地址0x80800000
fatwrite mmc 1:1 80800000 zImage 0x552f30(实际文件大小)

tftp 0x83000000 imx6ull-toto.dtb  ------通过TFTP从网络下载imx6ull-toto.dtb文件到内存地址0x83000000
fatwrite mmc 1:1 83000000 imx6ull-toto.dtb 0x8d6a(实际文件大小)
The fatwrite command parameters are explained as follows:
-
fatwrite: This is the U-Boot command to write files to a FAT file system partition.
-
mmc 0:1: Specify the storage device and partition to be written, mmc means using MMC storage device (such as SD card or eMMC),
-
1:1 means using the first partition with device number 1.
-
83000000: Specifies the address of the data file in memory. 0x83000000 means the data will start from memory address 0x83000000.
-
imx6ull-toto.dtb: This is the filename to write to.
-
0x8d6a: This is the file size in bytes to write. 0x8d6a means the size of the file is 0x8d6a bytes.
2. Update the kernel and dtb in the SD card:
tftp 0x80800000 zImage;
fatwrite mmc 0:1 80800000 zImage 0x552f30(实际文件大小)

tftp 0x83000000 imx6ull-toto.dtb
fatwrite mmc 0:1 83000000 imx6ull-toto.dtb 0x8d6a(实际文件大小)
1.3 u-boot starts the linux kernel method
Different ways to start the linux kernel and rotofs mounting methods under u-boot need to set the two environment variables bootcmd and bootargs.
-
Boot Linux system and NFS mount rootfs from network
setenv bootcmd 'tftp 80800000 zImage; tftp 83000000 imx6ull-toto.dtb; bootz 80800000 - 83000000'
setenv bootargs 'console=ttymxc0,115200 root=/dev/nfs rw
nfsroot=192.168.0.105:/home/ubuntu/My_WorkSpace/Linux/nfs/rootfs
ip=192.168.0.123:192.168.0.105:192.168.0.1:255.255.255.0::eth0:off'
saveenv
-
Boot Linux system from sd and mount rootfs
setenv bootargs 'console=ttymxc0,115200 root=/dev/mmcblk0p2 rootwait rw'
setenv bootcmd 'mmc dev 0; fatload mmc 0:1 80800000 zImage; fatload mmc 0:1 83000000 imx6ull-toto.dtb; bootz 80800000 - 83000000;'
saveenv
-
Boot Linux system from EMMC and mount rootfs
setenv bootargs 'console=ttymxc0,115200 root=/dev/mmcblk1p2 rootwait rw'
setenv bootcmd 'mmc dev 1; fatload mmc 1:1 80800000 zImage; fatload mmc 1:1 83000000 imx6ull-toto.dtb; bootz 80800000 - 83000000;'
saveenv
2. Update in Linux system
2.1 Update u-boot in Linux system
-
Update u-boot in SD card:
dd if=u-boot.imx of=/dev/mmcblk0 bs=1024 seek=1 conv=fsync
-
Update u-boot in eMMC:
echo 0 > /sys/block/mmcblk1boot0/force_ro                        ------Enable writes to /dev/mmcblk1boot0
dd if=/dev/zero of=/dev/mmcblk1boot0                             ------Precaution: Erase entire eMMC boot region.
dd if=u-boot.imx of=/dev/mmcblk1boot0 bs=1024 seek=1 conv=fsync  ------Copy U-Boot to eMMC boot region.
echo 1 >/sys/block/mmcblk1boot0/force_ro                         ------Disable writes to /dev/mmcblk1boot0
2.2 Update kernel and dtb in Linux system
-
Update kernel and dtb in SD card:
/ # mount /dev/mmcblk0p1 /mnt/boot/
/ # ls /mnt/boot/
imx6ull-toto.dtb  zImage

用最新的zImage和imx6ull-toto.dtb替换到/mnt/boot/文件中的zImage和imx6ull-toto.dtb即可。
-
Update kernel and dtb in eMMC:
/ # mount /dev/mmcblk1p1 /mnt/boot/
/ # ls /mnt/boot/
imx6ull-toto.dtb  zImage

用最新的zImage和imx6ull-toto.dtb替换到/mnt/boot/文件中的zImage和imx6ull-toto.dtb即可。
That concludes today’s content, thank you all for watching .