Use mondo rescue to back up your Linux system and create an ISO image
Use background
Due to work reasons, the software configuration and files of the Centos7 system need to be packaged into an iso image file for later mass production of system equipment. I googled related methods and saw that many bloggers recommended this tool, so I decided to give it a try.
Introduction to mondo rescue
1.What is MondoRescue
Mondo Rescue (Mondo for short): is an open source free fault recovery and backup tool. It can be said to be the Ghost under the Linux operating system. You can easily create ISO images of system (Linux or Windows) clones or backups. You can convert these Images are stored on CDs, DVDs, tapes, USB devices, hard drives, and NFS.
If data is lost, all system data can be restored from backup media or required data can be restored based on actual conditions. In addition, mondo can also be used to quickly restore or redeploy working images to other systems.
Mondo supports LVM 1/2, RAID, ext 2/3/4, JFS, XFS, ReiserFS, VFAT, etc., and can easily support other file systems, supports software RAID and most hardware RAID controllers, and supports disk geometry adjustment , including migration from non-RAID to RAID. Supports BIOS and UEFI boot modes.
Mondo runs on all major Linux distributions (Fedora, RHEL, OpenSUSE, SLES, Mageia, Debian, Ubuntu, Gentoo) and can be used to back up non-Linux partitions such as NTFS.
2.Installation
Download the installation package
You can download it from the official website http://www.mondorescue.org/ according to your system type . Since there will be many dependencies, the conditions allow the proposer to install it through the network yum.
First enter the /etc/yum.repos.d directory to obtain the source corresponding to the platform
cd /etc/yum.repos.d
The most recommended blog is
wget ftp://ftp.mondorescue.org/rhel/6/x86_64/mondorescue.repo
However, an error may be reported later. This is because it is related to the system version number. Mine is Centos7, so it should be
wget ftp://ftp.mondorescue.org/rhel/7x86_64/mondorescue.repo
If you still get an error later, you can give it a try
wget http://mondorescue.org/ftp/centos/7/x86_64/mondorescue.repo
yum makecache mondorescue
Next source installation tool
yum install -y mondo --nogpgcheck
3. Backup operation
After installing the tool, run it to enter the visual operation page, command:
mondoarchive
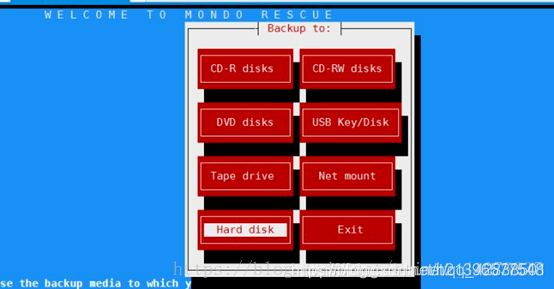
(1) What media to back up to?
Select Hard disk to back up the ISO image to the hard disk as shown below:
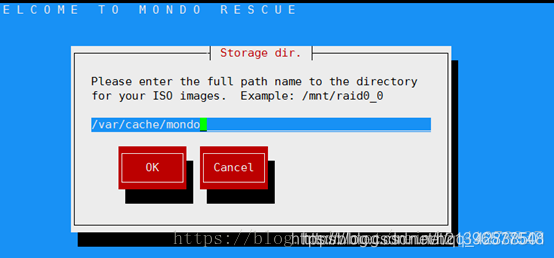
(2) Backup location selection
Enter the full path name of the directory where the backup ISO image is located or the default. The default is as shown below:
(3) Compression type selection. Select
the compression type: select gzip compression rate. It is recommended to choose the following picture:

(4) Compression rate selection. Select
the compression option and select Maximum, as shown below:

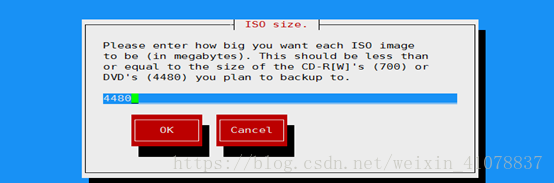
(5) Select each image size and
type in The desired size of each ISO image, in MB (megabytes). This value should be less than or equal to the capacity of CD-R(W) (700) or DVD (4480). The default is fine. The default is just the dvd capacity as shown in the figure below:
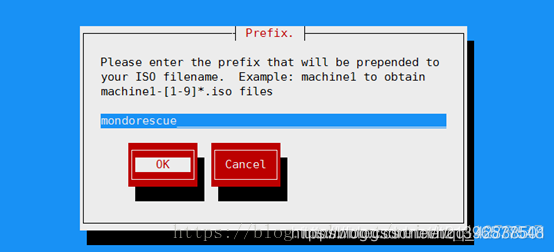
(6) Specify the image name
Please specify the file name of the ISO image: such as test. (You can customize it) or if the default image exceeds the set size, the next image will be automatically generated as shown below:
(7) Select the directory to be backed up
and enter the file directory you want to back up. The default is the root directory. To back up the entire system, the root directory is selected by default. As shown in the figure below:

(8) Exclude directories that do not need to be backed up
Please exclude the file systems that you do not want to back up (separated by "|"). For example: Generally speaking, there may be some files that are unnecessary and need to be excluded. If you want to completely back up your system, just press Enter. As shown below:

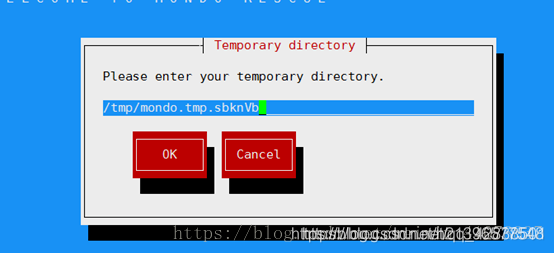
(9) Select the temporary directory path,
enter your temporary directory path, and select the default path, as shown below:
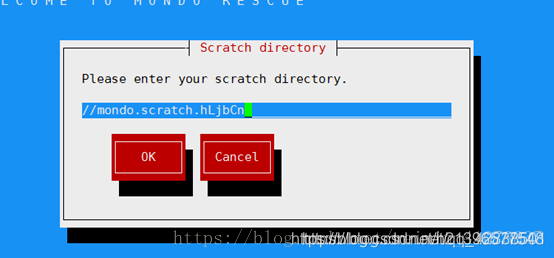
(10) Select the temporary directory path,
enter your temporary directory path, and select the default path, as shown below:
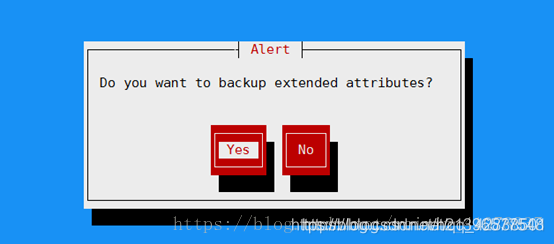
( 11) Choose whether to back up the extended attributes
Select to backup the extended attributes, select yes, as shown in the figure below:
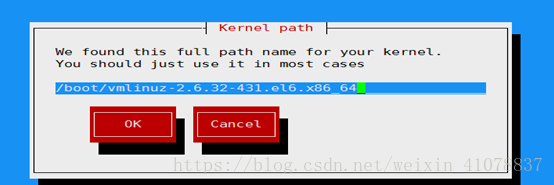
(12) Back up the kernel of the machine. To back up the
kernel of the machine, just select the default. Just select ok and press Enter as shown below:
(13) Verify the backup file.
If you want to verify your backup file, then after Mondo creates the backup file , click "Yes". As shown below: 
(14) Create the "/" file system directory
. The software will automatically back up without manual interaction.
Create the "/" file system directory and execute it automatically, as shown in the following figure:

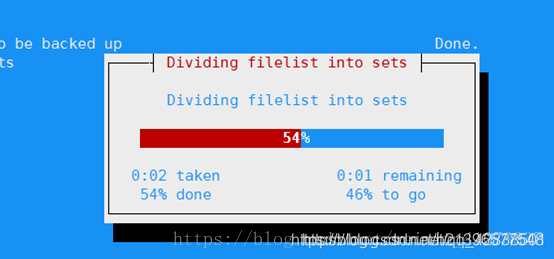
(15) Divide the file list into sets
. The file list is divided into sets and automatically executed as shown below:
(16) Call MINDI to create a boot+data disk.
Call MINDI to create a boot+data disk. Automatically execute, as shown below:

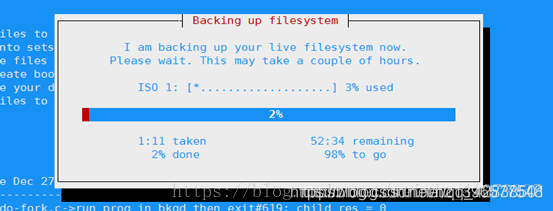
(17) Back up file system
Back up file system. This process may take several hours, please wait patiently for automatic execution, as shown below:
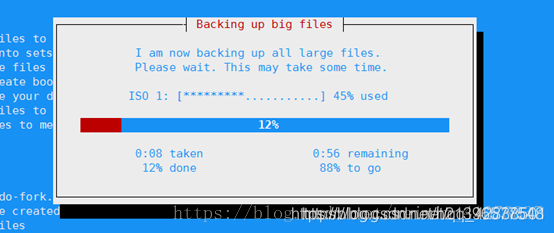
(18) Back up large files.
Back up large files. Automatically execute, as shown below:
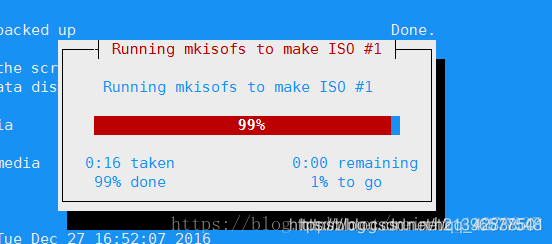
(19) Run "mkisofs" to create an ISO image.
Run "mkisofs" to create an ISO image. The automatic execution is as shown below:
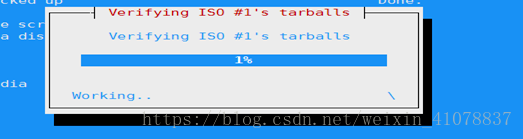
(20) Verify the compressed package of the ISO image
. Verify the compressed package of the ISO image. The automatic execution is as shown below:
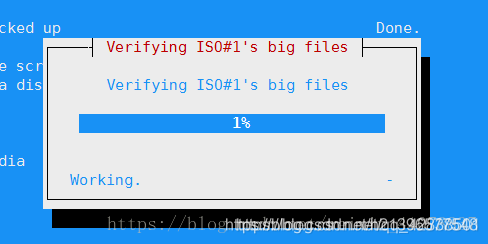
(21) Verify the large file of the ISO image.
Verify large files of ISO images. The automatic execution is as shown below:
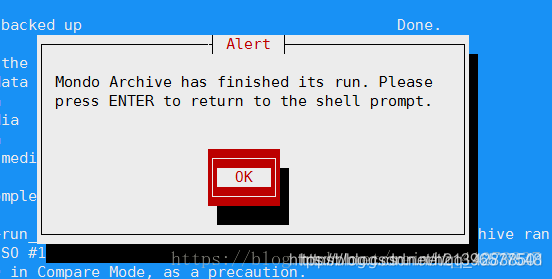
(22). Archiving completed
. Finally, Mondo archiving is completed. Select OK and press Enter to return to the shell prompt interface. As shown below:
If you have selected the default backup path, you will see an ISO image file under "/var/cache/mondo/". At this point, you can burn the backup image to CD/DVD for later system recovery.
I used Softdisk to burn the iso file to a USB flash drive for booting, entered nuke to restore everything, and then an error occurred during the recovery image:
mondorescue can’t open /tmp/CDROM-LIVES-HERE’:No such file or directory
From the search, it seems that it cannot be made into a bootable USB flash drive. I hope that my martial arts colleagues who have a solution can discuss it together...