1. Software installation and use
ISAT is a semi-automatic segmentation and annotation software derived from segment anything, github address: https://github.com/yatengLG/ISAT_with_segment_anything.git
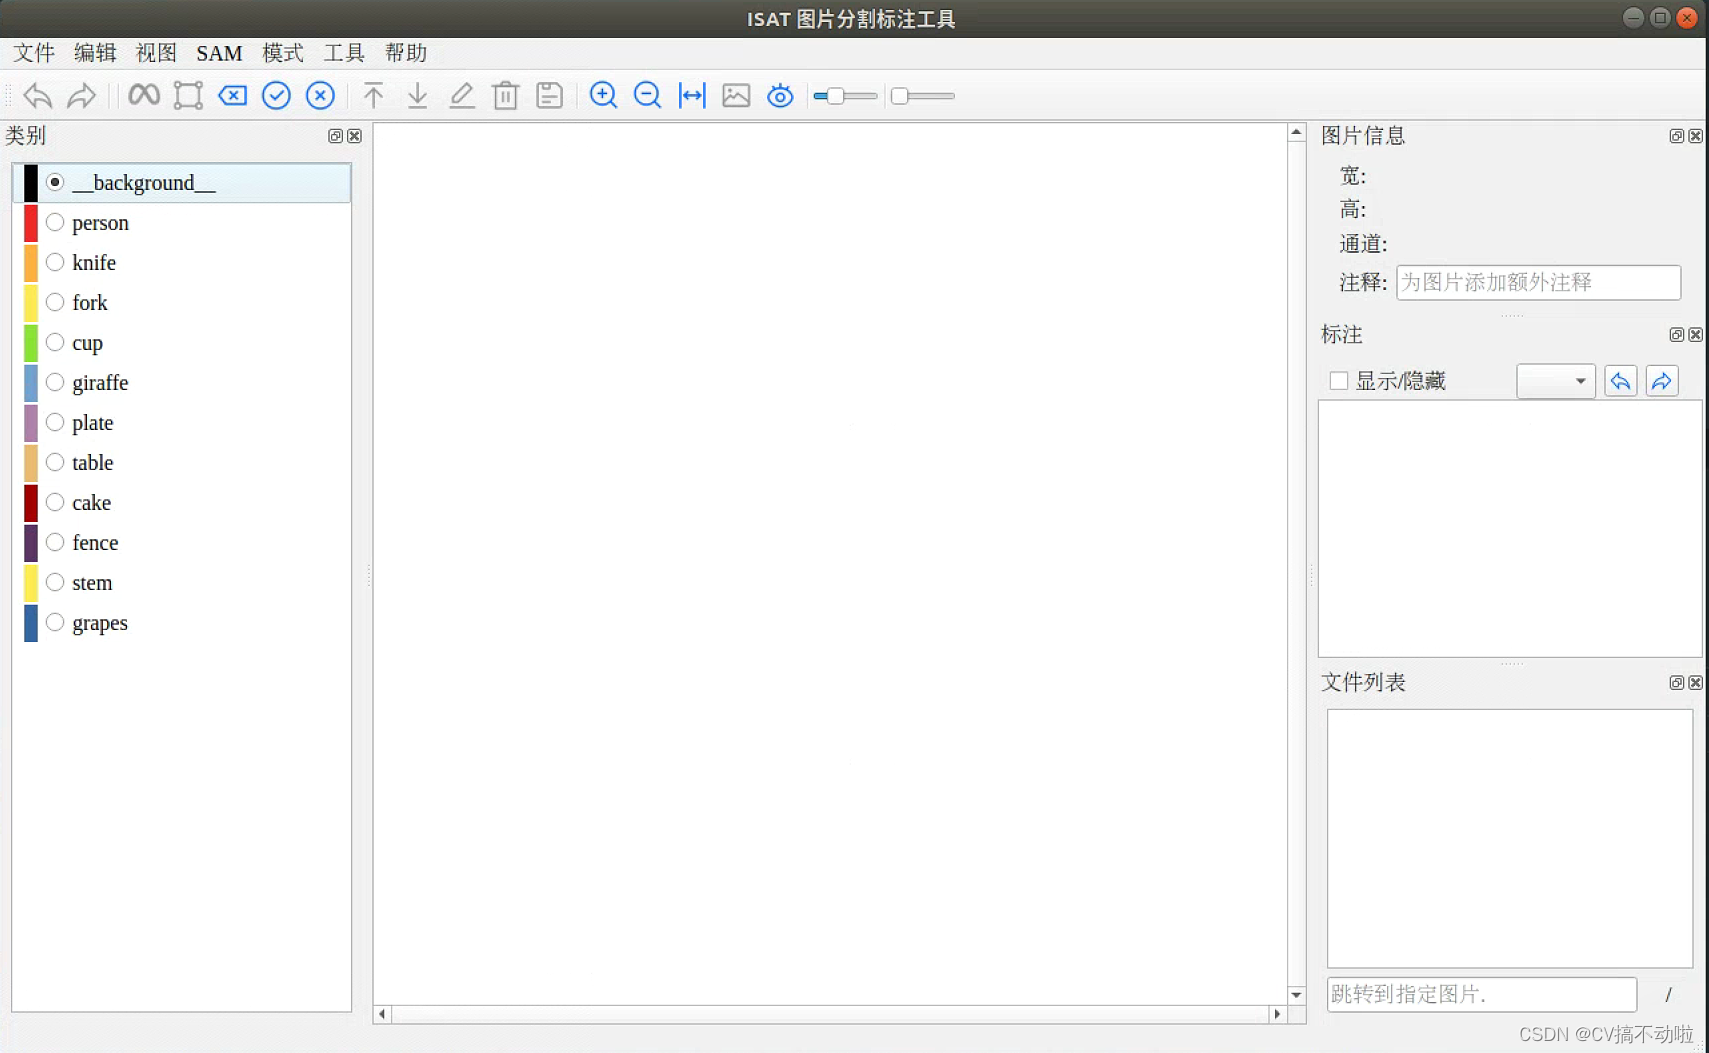
Install the corresponding dependencies and corresponding weights according to the author's readme. The software interface is as follows:
Use process:
1. Select the picture folder
2. Determine the label saving folder
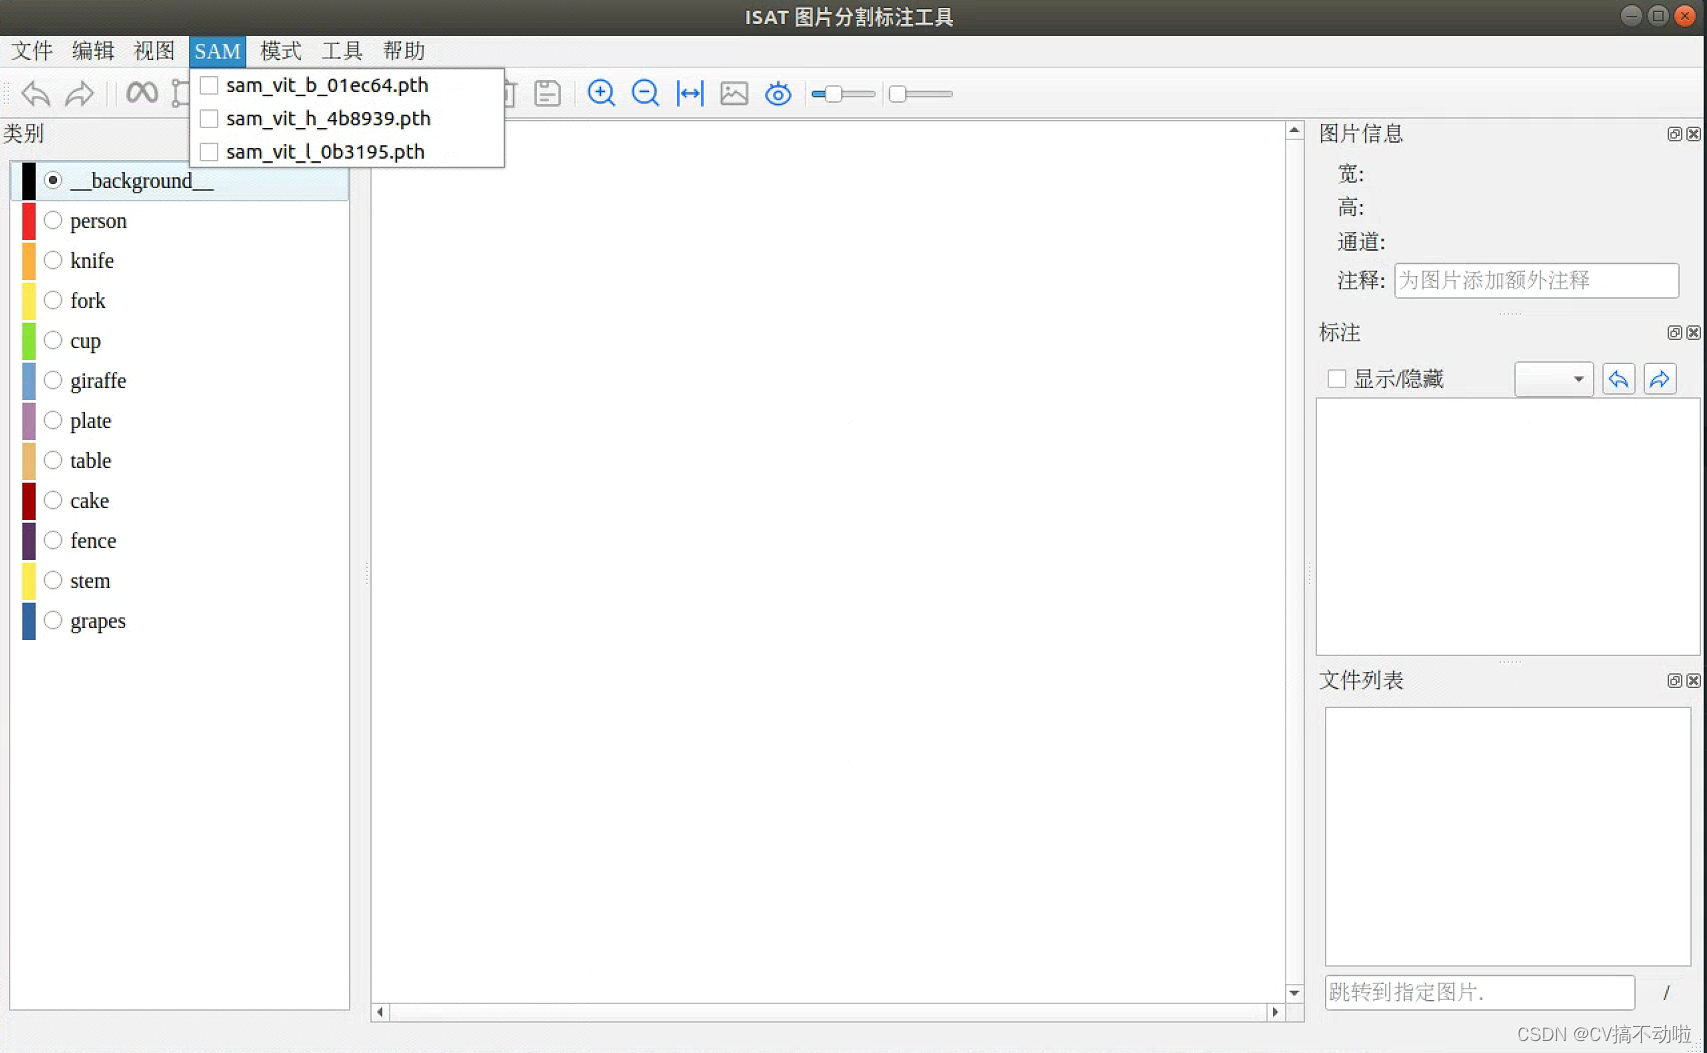
3. Click SAM and select the downloaded model (complete preparations before labeling)
hot key:
Q: Start labeling
E: complete annotation
S: save tab
Z: return to the previous step
A: The last picture
D: next picture
Left mouse button: Select area of interest
Right mouse button: select areas of interest
Annotation example:

Select the check mark to complete the labeling, and press S to save the label. The label file is in json format, but it is different from the COCO format. The software comes with ISAT to convert it into the COCO format, but it has a bug and is useless;
2. Data type conversion
The following is another GitHub address: GitHub - mushroom-x/SegConvert: Instance segmentation annotation file format conversion script tool set
For ISAT to COCO format, it also includes direct conversion to YOLO format.
Change the path in the code below to the previous image path and label path, and change the label name and serial number to your own category name.
ISAT2COCO:
import json
import os
import numpy as np
from collections import defaultdict

# ISAT标注数据路径
ISAT_FOLDER = "./annotations"
# 图像所在的路径
IMAGE_FOLDER = "./images"
# COCO格式的JSON文件存放路径
# 可以自己指定,这里是直接定义在图像文件夹下
COCO_PATH = os.path.join(IMAGE_FOLDER, "coco.json")

# 定义类别名称与ID号的映射
# 需要注意的是,不需要按照ISAT的classesition.txt里面的定义来
# 可以选择部分自己需要的类别, ID序号也可以重新填写(从0开始)
category_mapping = {"color_block": 0}
# 定义COCO格式的字典
# - "info"/"description" 里面写一下,你这个是什么的数据集
coco = {
    "info": {
        "description": "Color Block Segmentation",
        "version": "1.0",
        "year": 2023,
        "contributor": "",
        "date_created": ""
    },
    "images": [],
    "annotations": [],
    "categories": []
}
# 填写annotations栏目
for class_id, class_name in category_mapping.items():
    coco["categories"].append({"id": class_id, "name": class_name, "supercategory": "object"})
# 图像序号
image_id = 1
# 遍历所有的ISAT文件夹
for filename in os.listdir(ISAT_FOLDER):
    # 判断是否为ISAT格式数据
    if not filename.endswith(".json"):
        continue
    # 载入ISAT数据
    with open(os.path.join(ISAT_FOLDER, filename), "r") as f:
        isat = json.load(f)
    # 获取图像名称
    image_filename = isat["info"]["name"]

    # 填写文件路径
    image_path = os.path.join(IMAGE_FOLDER, image_filename)
    image_info = {
        "id": image_id,
        "file_name": image_filename,
        "width": isat["info"]["width"],
        "height": isat["info"]["height"]
    }
    image_id += 1
    # 添加图像信息
    coco["images"].append(image_info)
    # 标注序号
    annotation_id = 1
    # 遍历标注信息
    for annotation in isat["objects"]:
        # 获取类别名称
        category_name = annotation["category"]
        # 位置类别名称(选择跳过)
        if category_name not in category_mapping:
            # print(f"未知类别名称: {category_name}")
            continue
        # 获取类别ID
        category_id = category_mapping[category_name]
        # 提取分割信息
        segmentation = annotation["segmentation"]
        segmentation = np.uint32(segmentation)
        # 转换为一行的形式 [[x1, y1, x2, y2, ..., xn, yn]]
        segmentation = [(segmentation.reshape(-1)).tolist()]
        # 提取面积信息
        area = annotation["area"]
        # 定义标注信息
        annotation_info = {
            "id": annotation_id,
            "image_id": image_id,
            "category_id": category_id,
            "segmentation": segmentation,
            "area": area,
            "iscrowd": 0
        }
        # 追加到annotations列表
        coco["annotations"].append(annotation_info)
        # 标注编号自增1
        annotation_id += 1
# 保存coco格式
with open(COCO_PATH, "w") as f:
    json.dump(coco, f)
The running result is a json file generated.
ISAT2YOLO:
import json
import os

# 定义类别名称与ID号的映射
# 需要注意的是,不需要按照ISAT的classesition.txt里面的定义来
# 可以选择部分自己需要的类别, ID序号也可以重新填写(从0开始)
category_mapping = {"color_block": 0}
# ISAT格式的实例分割标注文件
ISAT_FOLDER = "./annotations/"
# YOLO格式的实例分割标注文件
YOLO_FOLDER = "./labels"

# 创建YoloV8标注的文件夹
if not os.path.exists(YOLO_FOLDER):
    os.makedirs(YOLO_FOLDER)

# 载入所有的ISAT的JSON文件
for filename in os.listdir(ISAT_FOLDER):
    if not filename.endswith(".json"):
        # 不是json格式, 跳过
        continue
    # 载入ISAT的JSON文件
    with open(os.path.join(ISAT_FOLDER, filename), "r") as f:
        isat = json.load(f)
    # 提取文件名(不带文件后缀)
    image_name = filename.split(".")[0]
    # Yolo格式的标注文件名, 后缀是txt
    yolo_filename = f"{image_name}.txt"
    # 写入信息
    with open(os.path.join(YOLO_FOLDER, yolo_filename), "w") as f:
        # 获取图像信息
        # - 图像宽度
        image_width = isat["info"]["width"]
        # - 图像高度
        image_height = isat["info"]["height"]
        # 获取实例标注数据
        for annotation in isat["objects"]:
            # 获取类别名称
            category_name = annotation["category"]
            # 如果不在类别名称字典里面,跳过
            if category_name not in category_mapping:
                continue
            # 从字典里面查询类别ID
            category_id = category_mapping[category_name]
            # 提取分割信息
            segmentation = annotation["segmentation"]
            segmentation_yolo = []
            # 遍历所有的轮廓点
            for segment in segmentation:
                # 提取轮廓点的像素坐标 x, y
                x, y = segment
                # 归一化处理
                x_center = x/image_width
                y_center = y/image_height
                # 添加到segmentation_yolo里面
                segmentation_yolo.append(f"{x_center:.4f} {y_center:.4f}")
            segmentation_yolo_str = " ".join(segmentation_yolo)
            # 添加一行Yolo格式的实例分割数据
            # 格式如下: class_id x1 y1 x2 y2 ... xn yn\n
            f.write(f"{category_id} {segmentation_yolo_str}\n")
The running result is the txt file corresponding to all tags

The first one is the label number, and the following numbers are the normalized coordinates of the label point.
3. Divide the training set, validation set, and test set
Code: Fill in the corresponding custom path in the default of the main function
# 将图片和标注数据按比例切分为 训练集和测试集
import shutil
import random
import os
import argparse

# 检查文件夹是否存在
def mkdir(path):
    if not os.path.exists(path):
        os.makedirs(path)


def main(image_dir, txt_dir, save_dir):
    # 创建文件夹
    mkdir(save_dir)
    images_dir = os.path.join(save_dir, 'images')
    labels_dir = os.path.join(save_dir, 'labels')

    img_train_path = os.path.join(images_dir, 'train')
    img_test_path = os.path.join(images_dir, 'test')
    img_val_path = os.path.join(images_dir, 'val')

    label_train_path = os.path.join(labels_dir, 'train')
    label_test_path = os.path.join(labels_dir, 'test')
    label_val_path = os.path.join(labels_dir, 'val')

    mkdir(images_dir);mkdir(labels_dir);mkdir(img_train_path);mkdir(img_test_path);mkdir(img_val_path);mkdir(label_train_path);mkdir(label_test_path);mkdir(label_val_path);


    # 数据集划分比例,训练集75%,验证集15%,测试集15%,按需修改
    train_percent = 0.8
    val_percent = 0.1
    test_percent = 0.1


    total_txt = os.listdir(txt_dir)
    num_txt = len(total_txt)
    list_all_txt = range(num_txt)  # 范围 range(0, num)

    num_train = int(num_txt * train_percent)
    num_val = int(num_txt * val_percent)
    num_test = num_txt - num_train - num_val

    train = random.sample(list_all_txt, num_train)
    # 在全部数据集中取出train
    val_test = [i for i in list_all_txt if not i in train]
    # 再从val_test取出num_val个元素,val_test剩下的元素就是test
    val = random.sample(val_test, num_val)

    print("训练集数目:{}, 验证集数目:{},测试集数目:{}".format(len(train), len(val), len(val_test) - len(val)))
    for i in list_all_txt:
        name = total_txt[i][:-4]

        srcImage = os.path.join(image_dir, name+'.jpg')
        srcLabel = os.path.join(txt_dir, name + '.txt')

        if i in train:
            dst_train_Image = os.path.join(img_train_path, name + '.jpg')
            dst_train_Label = os.path.join(label_train_path, name + '.txt')
            shutil.copyfile(srcImage, dst_train_Image)
            shutil.copyfile(srcLabel, dst_train_Label)
        elif i in val:
            dst_val_Image = os.path.join(img_val_path, name + '.jpg')
            dst_val_Label = os.path.join(label_val_path, name + '.txt')
            shutil.copyfile(srcImage, dst_val_Image)
            shutil.copyfile(srcLabel, dst_val_Label)
        else:
            dst_test_Image = os.path.join(img_test_path, name + '.jpg')
            dst_test_Label = os.path.join(label_test_path, name + '.txt')
            shutil.copyfile(srcImage, dst_test_Image)
            shutil.copyfile(srcLabel, dst_test_Label)


if __name__ == '__main__':
    """
    python split_datasets.py --image-dir my_datasets/color_rings/imgs --txt-dir my_datasets/color_rings/txts --save-dir my_datasets/color_rings/train_data
    """
    parser = argparse.ArgumentParser(description='split datasets to train,val,test params')
    parser.add_argument('--image-dir', default = '', type=str, help='image path dir')
    parser.add_argument('--txt-dir', default = '', type=str, help='txt path dir')
    parser.add_argument('--save-dir', default = '', type=str, help='save dir')
    args = parser.parse_args()
    image_dir = args.image_dir
    txt_dir = args.txt_dir
    save_dir = args.save_dir

    main(image_dir, txt_dir, save_dir)
Complete the data set partition
4.yolov5 model training
There are yaml files in the data folder. The picture below is the content of data/coco128-seg.yaml.
path: is the path where the --save-dir segmented image is stored above;
Train, val, and test are respectively filled in according to actual conditions for the folders in images;
names: It is the category name and the assigned subscript, in the same order as above when converting to txt

Complete the creation of the data set
train:
python segment/train.py --epochs 300 --data coco128-seg.yaml --weights yolov5m-seg.pt --img 640 --cfg models/segment/yolov5m-seg.yaml --batch-size 16 --device 2