Edge detection is a kind of picture technology that shows the key information in the picture. Its result is not to get the edge of the picture literally, but to outline the useful information of the picture. It is similar to the result of sketching, but it has been removed. A lot of information. As shown below, an original picture looks like this:
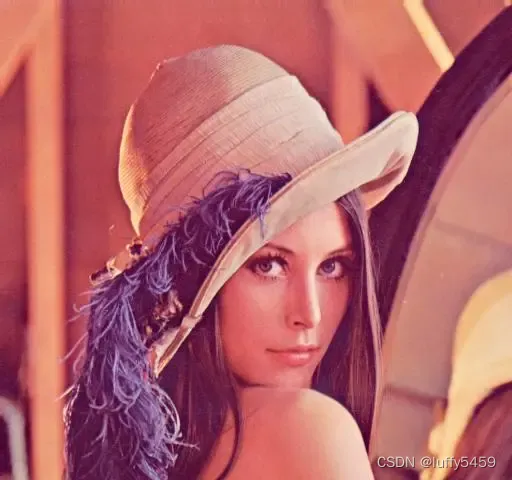
Through the edge detection algorithm, the final picture we get may look like this:

Although the color and many details have been lost, this picture can still be seen from the silhouette of the mountain, which is the model Lenna.
There are many ways to implement the edge detection algorithm, and the results are not the same. The most common one is the edge detection algorithm of the Canny operator. The Canny edge detection algorithm is roughly described as follows: .
- Grayscale
- Apply Gaussian filtering to remove noise
- Calculate image intensity gradient and orientation
- Non-maximum suppression non-max-suppresion
- Dual threshold tracking boundaries
The opencv library provides the Canny algorithm, which can easily perform edge detection. The code is as follows:
import cv2
import matplotlib.pyplot as plt
img = cv2.imread('lenna.png', 0)
# 灰度
img_gray = cv2.cvtColor(img, cv2.COLOR_BGR2RGB)
# 高斯滤波 卷积 3 * 3
img_blur = cv2.GaussianBlur(img_gray, (3, 3), 0)
# x梯度
xgrad = cv2.Sobel(img_blur, cv2.CV_16SC1, 1, 0)
# y梯度
ygrad = cv2.Sobel(img_blur, cv2.CV_16SC1, 0, 1)
# 使用梯度参数进行边缘检测 阈值 50 ~ 150
edge1 = cv2.Canny(xgrad, ygrad, 50, 150)
# 直接用高斯滤波结果进行边缘检测 阈值 50 ~ 150
edge2 = cv2.Canny(img_blur, 50, 150)
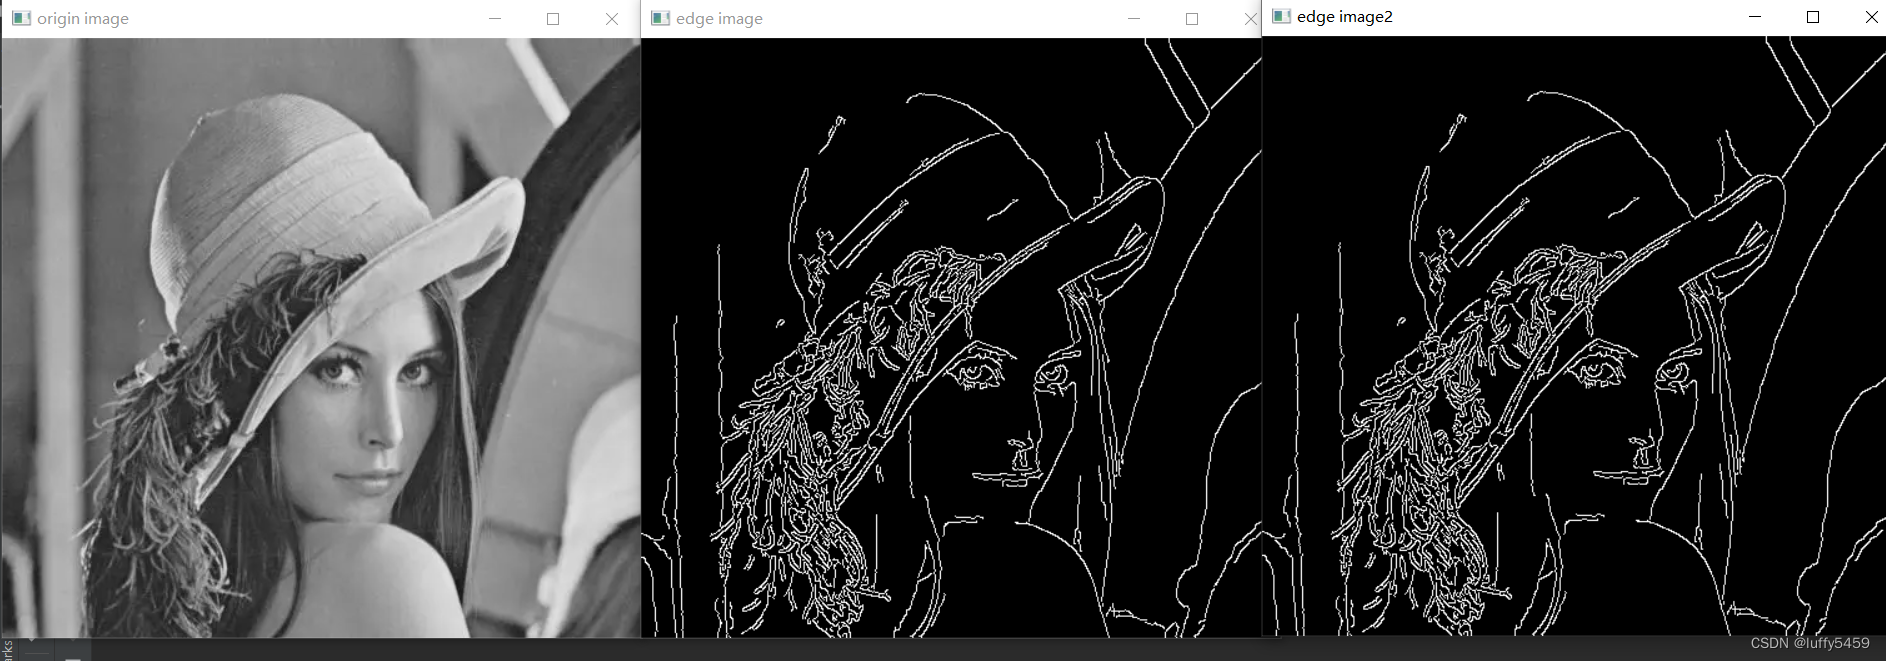
cv2.imshow('origin image', img)
cv2.imshow('edge image', edge1)
cv2.imshow('edge image2', edge2)
cv2.waitKey()The general meaning of this code is to load lenna.png first, then convert it to grayscale, smooth the image with Gaussian filtering, calculate the gradient, and use the Canny algorithm for edge detection.
Algorithm running results:
According to the above-mentioned algorithm steps and some theoretical formulas, in fact, there are many Canny operator edge detection algorithms implemented directly using python code, as shown below, these functions are organized according to the above algorithm steps:
import numpy as np
import math
import cv2


# 灰度化
def gray(img_path):
    """
    计算公式:
    Gray(i,j) = 0.299 * R(i,j) + 0.587 * G(i,j) + 0.114 * B(i,j)
    """

    # 读取图片
    img = cv2.imread(img_path, 0)
    # BGR 转换成 RGB 格式
    img_rgb = cv2.cvtColor(img, cv2.COLOR_BGR2RGB)
    # 灰度化
    img_gray = np.dot(img_rgb[..., :3], [0.299, 0.587, 0.114])
    return img_gray


# 去除噪音 - 使用 5x5 的高斯滤波器
def smooth(img_gray):
    # 生成高斯滤波器
    """
    要生成一个 (2k+1)x(2k+1) 的高斯滤波器,滤波器的各个元素计算公式如下:
    H[i, j] = (1/(2*pi*sigma**2))*exp(-1/2*sigma**2((i-k-1)**2 + (j-k-1)**2))
    """
    sigma1 = sigma2 = 1.4
    gau_sum = 0
    gaussian = np.zeros([5, 5])
    for i in range(5):
        for j in range(5):
            gaussian[i, j] = math.exp((-1 / (2 * sigma1 * sigma2)) * (np.square(i - 3) + np.square(j - 3))) / (
                    2 * math.pi * sigma1 * sigma2)
            gau_sum = gau_sum + gaussian[i, j]

    # 归一化处理
    gaussian = gaussian / gau_sum

    # 高斯滤波
    W, H = img_gray.shape
    new_gray = np.zeros([W - 5, H - 5])

    for i in range(W - 5):
        for j in range(H - 5):
            new_gray[i, j] = np.sum(img_gray[i:i + 5, j:j + 5] * gaussian)

    return new_gray


# 计算梯度幅值
def gradients(new_gray):
    """
    :type: image which after smooth
    :rtype:
        dx: gradient in the x direction
        dy: gradient in the y direction
        M: gradient magnitude
        theta: gradient direction
    """
    W, H = new_gray.shape
    dx = np.zeros([W - 1, H - 1])
    dy = np.zeros([W - 1, H - 1])
    M = np.zeros([W - 1, H - 1])

    for i in range(W - 1):
        for j in range(H - 1):
            dx[i, j] = new_gray[i + 1, j] - new_gray[i, j]
            dy[i, j] = new_gray[i, j + 1] - new_gray[i, j]
            # 图像梯度幅值作为图像强度值
            M[i, j] = np.sqrt(np.square(dx[i, j]) + np.square(dy[i, j]))
    return dx, dy, M


def NMS(M, dx, dy):
    d = np.copy(M)
    W, H = M.shape
    NMS = np.copy(d)
    NMS[0, :] = NMS[W - 1, :] = NMS[:, 0] = NMS[:, H - 1] = 0
    for i in range(1, W - 1):
        for j in range(1, H - 1):
            # 如果当前梯度为0,该点就不是边缘点
            if M[i, j] == 0:
                NMS[i, j] = 0
            else:
                gradX = dx[i, j]  # 当前点 x 方向导数
                gradY = dy[i, j]  # 当前点 y 方向导数
                gradTemp = d[i, j]  # 当前梯度点

                # 如果 y 方向梯度值比较大,说明导数方向趋向于 y 分量
                if np.abs(gradY) > np.abs(gradX):
                    weight = np.abs(gradX) / np.abs(gradY)  # 权重
                    grad2 = d[i - 1, j]
                    grad4 = d[i + 1, j]

                    # 如果 x, y 方向导数符号一致
                    # 像素点位置关系
                    # g1  g2
                    #     c
                    #     g4  g3

                    if gradX * gradY > 0:
                        grad1 = d[i - 1, j - 1]
                        grad3 = d[i + 1, j + 1]

                    # 如果 x,y 方向导数符号相反
                    # 像素点位置关系
                    #     g2  g1
                    #     c
                    # g3  g4

                    else:
                        grad1 = d[i - 1, j + 1]
                        grad3 = d[i + 1, j - 1]

                # 如果 x 方向梯度值比较大
                else:
                    weight = np.abs(gradY) / np.abs(gradX)
                    grad2 = d[i, j - 1]
                    grad4 = d[i, j + 1]

                    # 如果 x, y 方向导数符号一致
                    # 像素点位置关系
                    #      g3
                    # g2 c g4
                    # g1
                    if gradX * gradY > 0:
                        grad1 = d[i + 1, j - 1]
                        grad3 = d[i - 1, j + 1]

                    # 如果 x,y 方向导数符号相反
                    # 像素点位置关系
                    # g1
                    # g2 c g4
                    #      g3
                    else:
                        grad1 = d[i - 1, j - 1]
                        grad3 = d[i + 1, j + 1]

                # 利用 grad1-grad4 对梯度进行插值
                gradTemp1 = weight * grad1 + (1 - weight) * grad2
                gradTemp2 = weight * grad3 + (1 - weight) * grad4

                # 当前像素的梯度是局部的最大值,可能是边缘点
                if gradTemp >= gradTemp1 and gradTemp >= gradTemp2:
                    NMS[i, j] = gradTemp
                else:
                    # 不可能是边缘点
                    NMS[i, j] = 0

    return NMS


def double_threshold(NMS):
    W, H = NMS.shape
    DT = np.zeros([W, H])

    # 定义高低阈值
    TL = 0.1 * np.max(NMS)
    TH = 0.3 * np.max(NMS)

    for i in range(1, W - 1):
        for j in range(1, H - 1):
            # 双阈值选取
            if (NMS[i, j] < TL):
                DT[i, j] = 0
            elif (NMS[i, j] > TH):
                DT[i, j] = 1
            # 连接
            elif (NMS[i - 1, j - 1:j + 1] < TH).any() or (
                    NMS[i + 1, j - 1:j + 1].any() or (NMS[i, [j - 1, j + 1]] < TH).any()):
                DT[i, j] = 1
    return DT


def canny(img):
    img_gray = gray(img)
    new_gray = smooth(img_gray)
    dx, dy, M = gradients(new_gray)
    nms = NMS(M, dx, dy)
    return double_threshold(nms)


if __name__ == '__main__':
    img_url = 'lenna.png'
    img = cv2.imread(img_url)
    edgedetect = canny(img_url)
    img_gray = cv2.cvtColor(img,cv2.COLOR_BGR2RGB)
    img_blur = cv2.GaussianBlur(img_gray, (3, 3), 0)
    cv2.imshow('origin img', img)
    opencvedge = cv2.Canny(img_blur, 50, 150)
    cv2.imshow('opencv edge', opencvedge)
    cv2.imshow('python edge', edgedetect)
    cv2.waitKey()
Algorithm operation results;
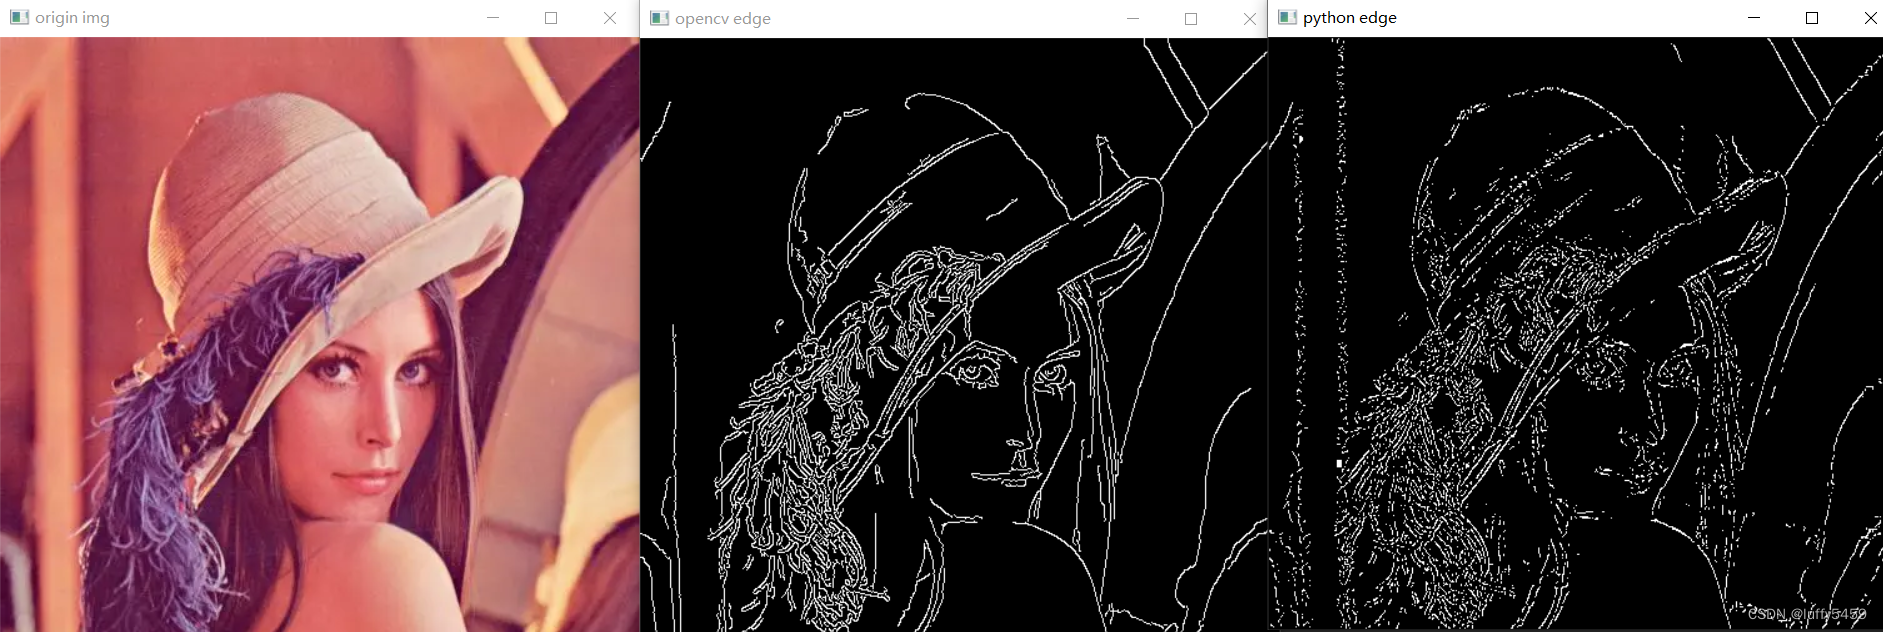
The edge detection we implemented through the python algorithm does not seem to be very smooth. Although the outline is out, the lines are very rough. This is actually a place where the gradient is calculated in the code, which is just reversed.
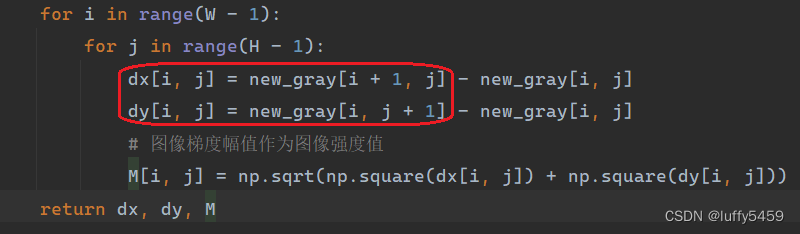
We adjust the code as follows:
dx[i, j] = new_gray[i, j + 1] - new_gray[i, j]
dy[i, j] = new_gray[i + 1, j] - new_gray[i, j]
The execution results are as follows;

Although the results are somewhat different from those of the opencv Canny algorithm, the lines are significantly smoother, which is better than the previous results.