Image pixel access
1. Test case
1.1. Color reduction algorithm
Let's consider a simple color reduction method. By using unsigned char C and C++ types to store matrix elements, a pixel channel can have up to 256 distinct values. For a three-channel image, more than 16 million colors can be combined. Using so many hues can place a heavy burden on our algorithm performance. However, sometimes just using a little less can achieve the same end result.
In this case we usually do a color space reduction. This means we divide the current value of the color space by a new input value to get fewer colors. For example, the new value [0] replaces every value between (0~9), the new value [10] accepts every value between (10~19) accepts 10, and so on.
When you divide an uchar (unsigned char, value between 0 and 255) by an int value, the result is also a char. These values may only be character values. Therefore, any fractions will be rounded up. Using this fact, operations in the uchar field can be expressed as
I new = ( I old 10 ) ∗ 10 I_{new}=(\frac{I_{old}}{10})*10Inew=(10Iold)∗10
A simple color space reduction algorithm involves: accessing each pixel of the image matrix and applying this formula. It is worth noting that we performed division and multiplication. These operations are very expensive for a system. If possible, it's worth avoiding them by using more efficient operations like subtraction, addition, or in the best case simple assignment. Also, note that for the above operation, we only have a limited number of input values. In the [uchar] system, this is [256].
Therefore, for larger images, it is wise to compute all possible values beforehand and use a lookup table for assignment during assignment. Lookup tables are simple arrays (with one or more dimensions) that hold the final output value for a given input value variable. Its advantage is that we don't need to do calculations, we just need to get results.
1.2. Example of color reduction
Our test case program (and the code sample below) will do the following: (1) read the image passed as a command line argument (it can be color or grayscale); (2) get the integer given in the command line argument value; (3) apply the color reduction algorithm. In OpenCV, there are currently three main ways to access an image pixel by pixel. To make things more interesting, we'll use each of these methods to scan an image and print out the time it takes.
./how_to_scan_images <imageNameToUse> <divideWith> [G]
The last command-line parameter (G) is optional. If there is no such parameter, the color image will be processed by default, otherwise the image will be converted to grayscale for processing. First, we need to calculate the lookup table, the code snippet is as follows:
int divideWith = 0; // convert our input string to number - C++ style
stringstream s;
s << argv[2];
s >> divideWith;
if (!s || !divideWith)
{


    cout << "Invalid number entered for dividing. " << endl;
    return -1;
}
uchar table[256];
for (int i = 0; i < 256; ++i)
   table[i] = (uchar)(divideWith * (i/divideWith));
2. Storage and access of image matrix
2.1, image storage method
As you've already read in my Mat-The Basic Image Container tutorial, the size of the matrix depends on the color system used. More precisely, it depends on the number of channels used. For grayscale images, we have something like the image below, and

for multi-channel images, each column contains as many sub-columns as there are channels . For example, in the case of the BGR color system, the pixel distribution is as shown in the figure below. For example, the [0,0] position contains three sub-columns, corresponding to the BGR channel. Note that the order of the channels is reversed: BGR instead of RGB

. Because in many cases memory is large enough to store rows in a contiguous fashion, creating a single long row. Therefore, all the pixels are stored one by one in the same memory area, which helps to speed up the pixel access speed. We can use cv::Mat::isContinure()functions to ask whether pixels are stored contiguously in memory.
2.2. How to access images
2.2.1, C pointer: efficient access method
In terms of performance, the fastest is still classic C-style operator[] (pointer)access. Therefore, the most efficient method we recommend is as follows:
Mat& ScanImageAndReduceC(Mat& I, const uchar* const table)
{


    // accept only char type matrices
    CV_Assert(I.depth() == CV_8U);
    int channels = I.channels();
    int nRows = I.rows;
    int nCols = I.cols * channels;

	// 判断图像矩阵在内存中是否连续存储
    if (I.isContinuous())
    {


        nCols *= nRows;
        nRows = 1;
    }

    // 根据每一行的首指针,逐个访问元素
    int i,j;
    uchar* p;
    for( i = 0; i < nRows; ++i)
    {


        p = I.ptr<uchar>(i);
        for ( j = 0; j < nCols; ++j)
        {


            p[j] = table[p[j]];
        }
    }
    return I;
}
Here we're basically just getting a pointer to the start of each line, and iterating over it until the end. In the special case where the matrix is stored in a continuous manner, we only need to request the pointer once to the end, otherwise we need to obtain the row start pointer multiple times . For color images: we have three channels, so we need to move the pointer three times in each row.
2.2.2. Iterator: safe access method
For efficiency, make sure to pass the correct number of uchar fields and skip possible gaps between lines (meaning memory discontinuities). The iterator method is considered a safer method because it takes over these tasks from the user. All you need to do is get the start and end position of the image matrix, then just increment the start iterator until the end. To get the value indicated by the iterator, you can use the * operator (add it before it), the specific code is as follows:
Mat& ScanImageAndReduceIterator(Mat& I, const uchar* const table)
{


    // accept only char type matrices
    CV_Assert(I.depth() == CV_8U);
    const int channels = I.channels();
    switch(channels)
    {


    case 1:
        {


            MatIterator_<uchar> it, end;
            for( it = I.begin<uchar>(), end = I.end<uchar>(); it != end; ++it)
                *it = table[*it];
            break;
        }
    case 3:
        {


        	// 迭代器访问图像矩阵:取出矩阵开始和结束的指针即可
            MatIterator_<Vec3b> it, end;
            for( it = I.begin<Vec3b>(), end = I.end<Vec3b>(); it != end; ++it)
            {


                (*it)[0] = table[(*it)[0]];
                (*it)[1] = table[(*it)[1]];
                (*it)[2] = table[(*it)[2]];
            }
        }
    }
    return I;
}
For color images, each column has three uchar elements, which may be thought of as a short 3-element length vector of uchar elements, which has been named Vec3b in OpenCV (assigned to a concrete data type). To access the nth subcolumn, we use simple operator[] access. Importantly, OpenCV iterators iterate over the columns and automatically skip to the next row. Thus, in the case of color images, if a simple uchar iterator is used, only the blue channel value can be accessed.
Knowledge points involved:
- MatIterator_: CV iterator;
- Get pointers to the start and end of the matrix:
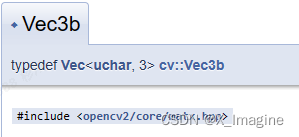
I.begin()<Vec3b>,I.end()<Vec3b>;- Get the specific value: add an asterisk before the pointer position, ( ∗ it *it∗it)[];
- The data definition of Vec3b, as shown in the figure below, it can store 3 uchar values,
2.2.3. Row and column index: dynamically calculate address
The last method is not recommended for accessing images. It is used to obtain or modify random elements in an image. Its basic usage is to specify the row and column number of the element to be accessed. In our earlier method of pixel access, it is very important to be clear about the data type of the image to be accessed. It's no different here, as you need to manually specify the type to use in the autolookup. cv::Mat::at ()This can be observed for the grayscale image of the following source code ( usage of the function):
Mat& ScanImageAndReduceRandomAccess(Mat& I, const uchar* const table)
{


    // accept only char type matrices
    CV_Assert(I.depth() == CV_8U);
    const int channels = I.channels();
    switch(channels)
    {


    case 1:
        {


            for( int i = 0; i < I.rows; ++i)
                for( int j = 0; j < I.cols; ++j )
                    I.at<uchar>(i,j) = table[I.at<uchar>(i,j)];
            break;
        }
    case 3:
        {


			 // 根据行号和列号,动态寻址,访问像素
             Mat_<Vec3b> _I = I;
             for( int i = 0; i < I.rows; ++i)
                for( int j = 0; j < I.cols; ++j )
                {


                   _I(i,j)[0] = table[_I(i,j)[0]];  // 或者 _I.at<Vec3b>(i,j)[0],需要指定数据类型
                   _I(i,j)[1] = table[_I(i,j)[1]];  // 或者 _I.at<Vec3b>(i,j)[1]
                   _I(i,j)[2] = table[_I(i,j)[2]];  // 或者 _I.at<Vec3b>(i,j)[2]
                }
             I = _I;
             break;
        }
    }
    return I;
}
Supplementary knowledge points:
- Mat_ inherits Mat and contains some special processing methods, as shown in the following figure
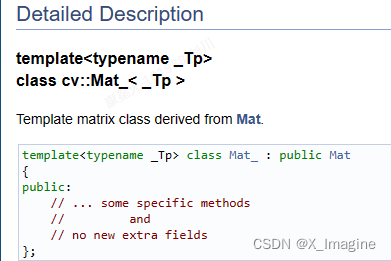
- The class Mat_<_Tp> is a simplified template wrapper over the Mat class. It doesn't have any extra data fields. Neither this class nor Mat have any virtual methods. Therefore, references or pointers to these two classes can be freely converted to each other, but you also need to pay attention to the specific writing. Refer to the code snippet below,
// 创建 100x100 8-bit 矩阵
Mat M(100,100,CV_8U);
// this will be compiled fine. no any data conversion will be done.
Mat_<float>& M1 = (Mat_<float>&)M;
- Multi-channel images or matrices use Mat_, pass Vec as Mat_ parameter, examples are as follows
// 创建 320x240 彩色图像,填充为绿色的值
Mat_<Vec3b> img(240, 320, Vec3b(0,255,0));
// 对角的像素值改为白色
for(int i = 0; i < 100; i++)
    img(i,i)=Vec3b(255,255,255);
2.2.4, LUT query function
This is an additional way to implement lookup table modifications in images. In image processing, it is often necessary to modify all given image values to other values. OpenCV provides a function to modify image values without writing image access logic. We use cv::LUT()the functions of the core module. First, we build a Matlookup table of type
Mat lookUpTable(1, 256, CV_8U);
uchar* p = lookUpTable.ptr();
for( int i = 0; i < 256; ++i)
    p[i] = table[i];
Finally call the function (I is the input image, J is the output image):
LUT(I, lookUpTable, J);
2.3, access performance comparison
The image size is 512x512, and the loop runs 1000 times. The average running time of each run is as follows:
