I introduced two methods of iOS performance testing before, tidevice and xcode instruments ( iOS performance testing method-get mobile phone memory data_ios get memory usage_Vermouth_00's blog-CSDN blog ), this time I used xcode's debug navigator and Logs are used to obtain performance data.
1. iOS environment construction
1.git
To access the git warehouse, you need to configure ssh-key and apply for code warehouse permissions
2.xcode
You can install xcode directly from the app store
3.homebrew
Refer to Homebrew — The Missing Package Manager for macOS (or Linux) to install homebrew
After the installation is complete, set homebrew's source image of the University of Science and Technology of China
cd "$(brew --repo)"
git remote set-url origin https://mirrors.ustc.edu.cn/brew.git

cd "$(brew --repo)/Library/Taps/homebrew/homebrew-core"
git remote set-url origin https://mirrors.ustc.edu.cn/homebrew-core.git

cd "$(brew --repo)"/Library/Taps/homebrew/homebrew-cask
git remote set-url origin https://mirrors.ustc.edu.cn/homebrew-cask.git

brew update-reset
Change the address of the Homebrew installation binary to the mirror address
echo 'export HOMEBREW_BOTTLE_DOMAIN=https://mirrors.ustc.edu.cn/homebrew-bottles' >> ~/.zshrc && source ~/.zshrc4. Install other tools
brew install xcproj coreutils openssl5.rvm install ruby
install gpg
brew install gpg2To install rvm, follow the instructions in RVM: Ruby Version Manager - RVM Ruby Version Manager - Documentation
# 如果找不到 gpg2 命令,需要先执行 brew install gpg2
gpg --recv-keys 409B6B1796C275462A1703113804BB82D39DC0E3 7D2BAF1CF37B13E2069D6956105BD0E739499BDB


\curl -sSL https://get.rvm.io | bash -s stable

# 如果安装过程中遇到 raw.githubusercontent.com 连接失败的问题,尝试使用以下命令安装
# curl -sSL https://hyperloop-s3.sankuai.com/tools/commonscripts/rvm/install.sh | bash -s stable


#让rvm在当前命令行启用
source ~/.zshrc


#把 rvm 的源地址换成国内镜像的地址
echo "ruby_url=https://cache.ruby-china.com/pub/ruby" > ~/.rvm/user/db
rvm install ruby
rvm install --default 2.6.5If installing ruby with rvm fails, you can try to install ruby with rbenv:
(1) Install the rbenv tool. You can use Homebrew to install:
brew install rbenv
(2) Initialize rbenv. Run the following command to add the following to your shell configuration file (eg ~/.bashrc or ~/.zshrc):
eval "$(rbenv init -)"
This will initialize rbenv and add it to your shell environment.
(3) Install the required Ruby version. You can list the available Ruby versions with the following command:
rbenv install -l
Select the version you want to install, for example 2.6.5:
rbenv install 2.6.5
(4) Add environment variables in ~/.bash_profile
export PATH="$HOME/.rbenv/bin:$PATH"
(5) Set the global Ruby version. You can set the global Ruby version to 2.6.5 with the following command:
rbenv global 2.6.5
Or, if you just want to use Ruby 2.6.5 in the current directory, you can use the following command:
rbenv local 2.6.5
This will create a .ruby-version file in the current directory containing the selected Ruby version number.
(6) Confirm that the Ruby version has been installed correctly:
ruby -v
This should display the Ruby version number you just installed.
2. Pull the code
Enter the code warehouse, git clone the code locally, and switch to the corresponding branch;
bundle installafter finishing
pod installIf pod install prompts command not found, use the following command instead:
bundle exec pod installThree, xcode settings
Open the project, configure the development certificate, run the project, and the app will automatically open on the phone after the build is successful.
4. Performance Statistics
1.cpu
After switching to the debug navigator, you can intuitively see the change of the cpu. After the curve in the blue icon tends to be stable, take an average value;

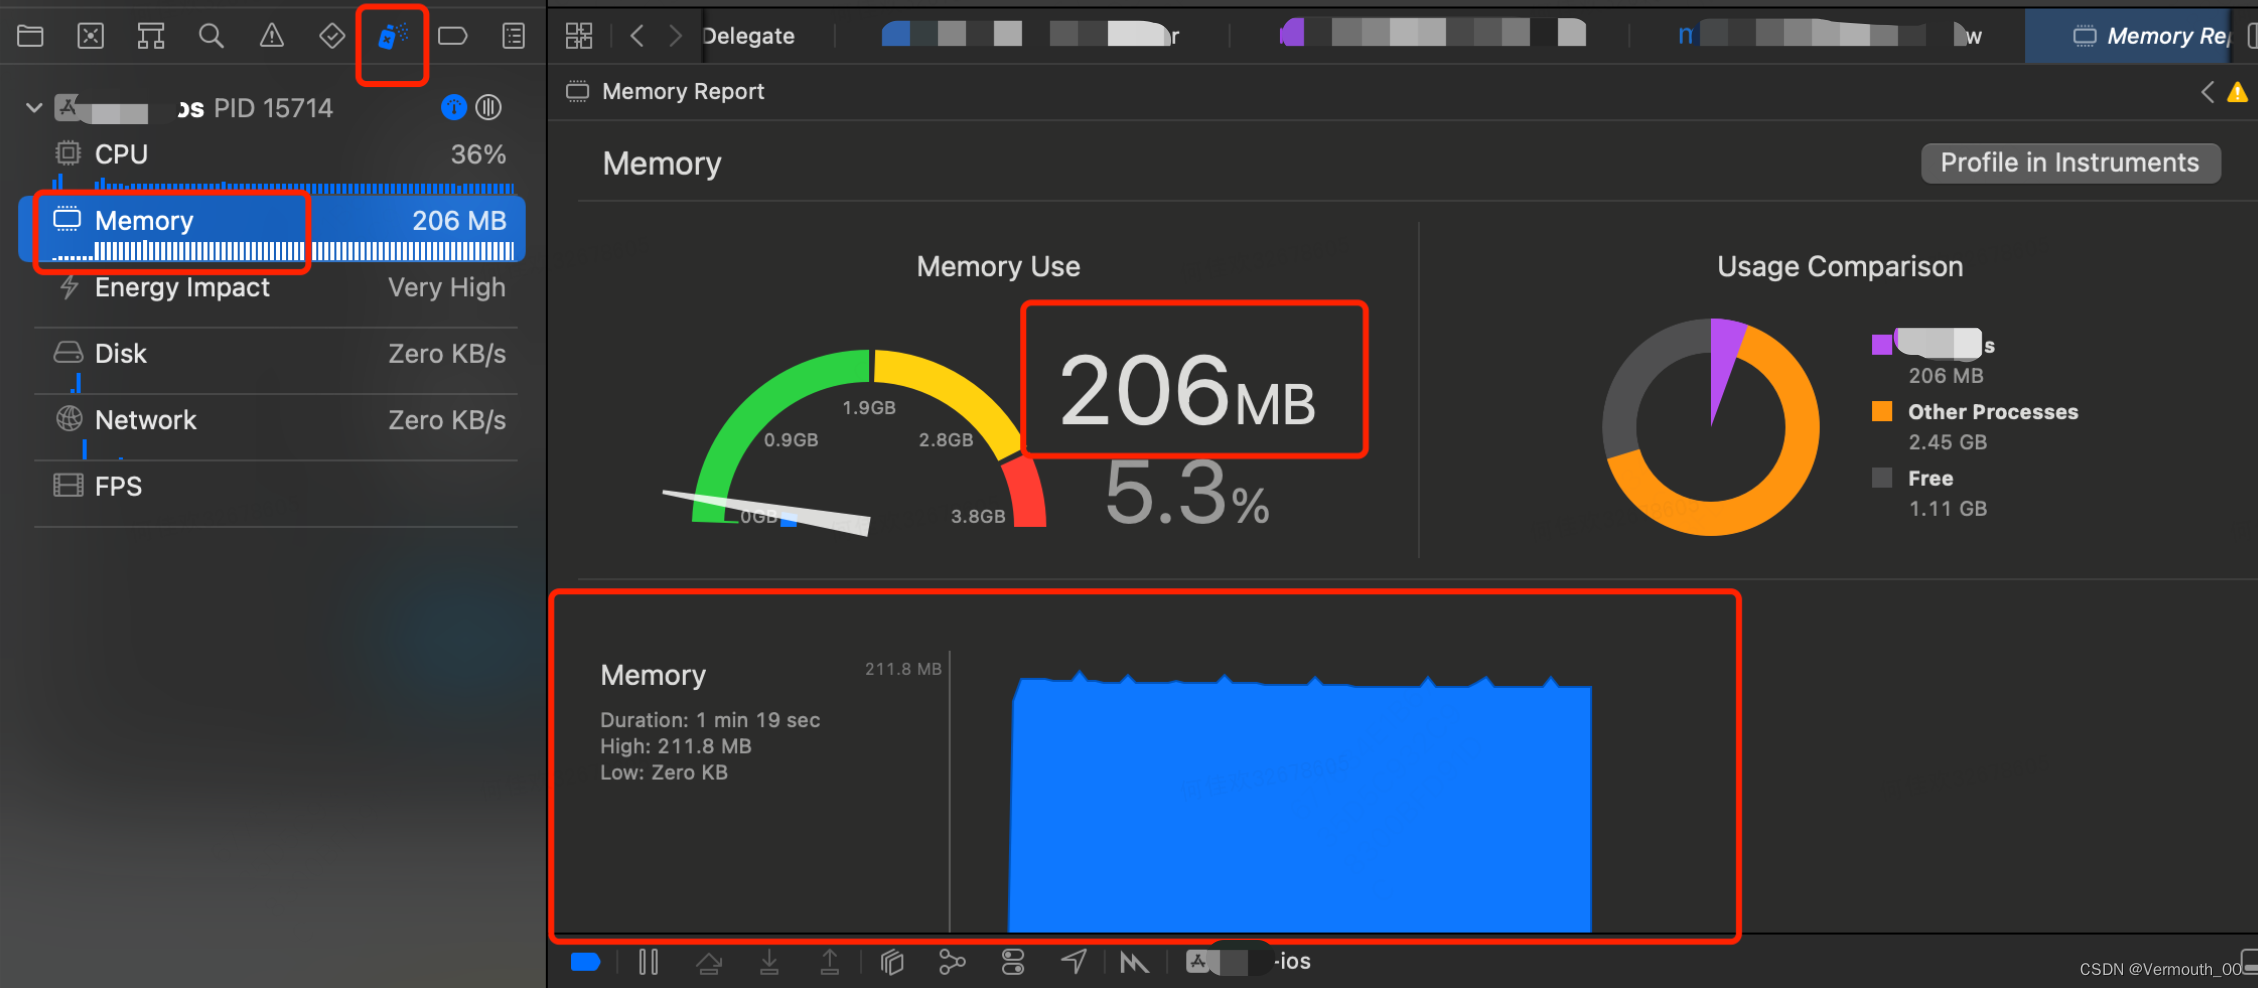
2. Memory
After switching to the debug navigator, you can see the memory changes intuitively. After the curve in the blue icon tends to be stable, take an average value;
3. log
After the project is running, you can see the output log under xcode. You can filter through the search box to get only the information you need, and then process the data on these contents