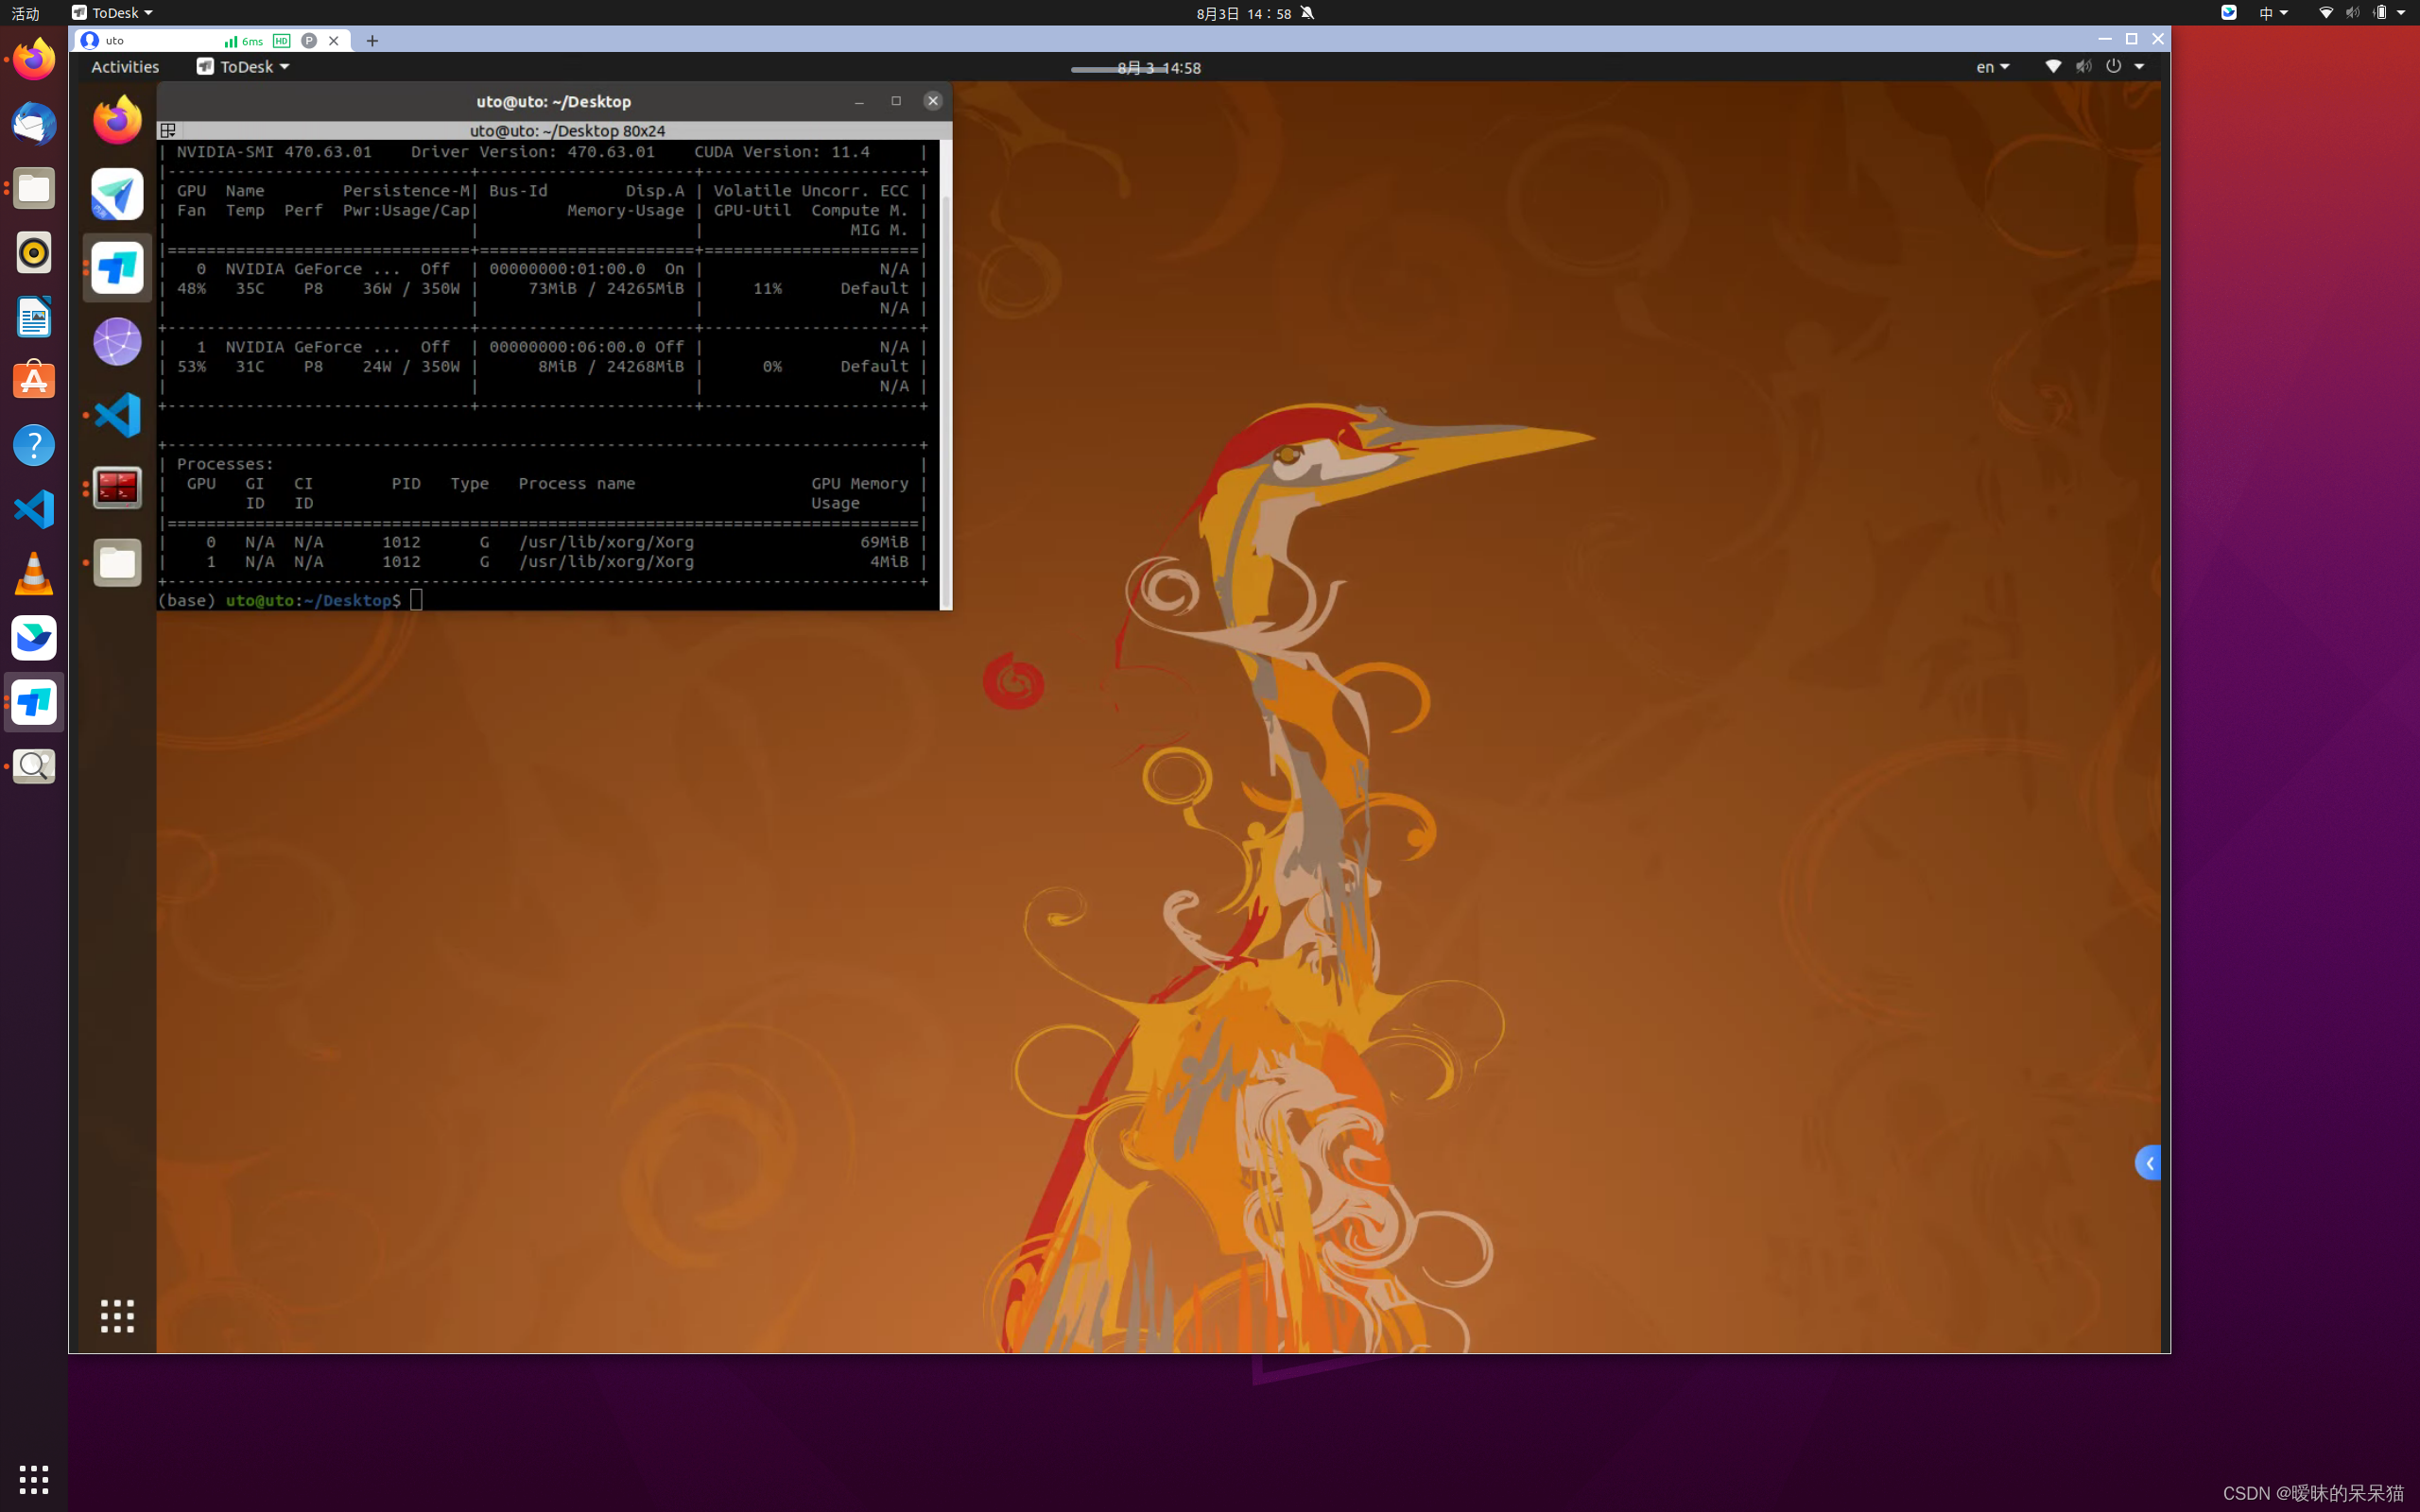
The server configuration is as follows:
Cuda version: 11.1
Cudnn version: 8.2.0
Graphics card version: RTX3090
使用转换脚本将.pth模型转换为ONNX格式
python mmdeploy/tools/deploy.py \
    mmdeploy/configs/mmdet/detection/detection_onnxruntime_dynamic.py \
    mmdetection/configs/yolox/yolox_x_8xb8-300e_coco.py \
    mmdetection/checkpoint/yolox_x_8x8_300e_coco_20211126_140254-1ef88d67.pth \
    mmdetection/demo/demo.jpg \
    --work-dir mmdeploy_models/mmdet/yolox \
    --device cpu \
    --show \
    --dump-info
In the generated folder,
end2end.onnx: inference engine files. reasoning availableONNX Runtime.*.json: informationmmdeploy SDKneeded for reasoningmeta

2--MMDeploy installation
2-1--Download code warehouse
cd xxxx # xxxx indicates the address where the warehouse code is stored
git clone -b master https://github.com/open-mmlab/mmdeploy.git MMDeploy
cd MMDeploy
git submodule update --init --recursive
2-2--Install the build and compile toolchain
Install cmake: (version ≥ 3.14.0)
Install gcc: (version 7+)
2-3--Create a Conda virtual environment
① Create mmdeploy environment:
conda create -n mmdeploy python=3.8 -y
conda activate mmdeploy
② Install pytorch: (version ≥ 1.8.0)
conda install pytorch==1.8.0 torchvision==0.9.0 cudatoolkit=11.1 -c pytorch -c conda-forge③Install mmcv-full
export cu_version=cu111 # cuda 11.1
export torch_version=torch1.8
pip install mmcv-full==1.4.0 -f https://download.openmmlab.com/mmcv/dist/${cu_version}/${torch_version}/index.html
2-4--Install MMDeploy SDK dependencies
①Install spdlog:
sudo apt-get install libspdlog-dev② Install opencv: (version ≥ 3.0)
sudo apt-get install libopencv-dev③ Install pplcv (emphasis! This is different from the official website)
cd XXXX # xxxx表示存放pplcv安装包的地址

git clone https://github.com/openppl-public/ppl.cv.git
cd ppl.cv
export PPLCV_DIR=$(pwd)
git checkout tags/v0.6.2 -b v0.6.2
First enter the address of the installation package ppl.cv, modify the code of cuda.cmake, and add the following parts:
if (CUDA_VERSION_MAJOR VERSION_GREATER_EQUAL "11")
    set(_NVCC_FLAGS "${_NVCC_FLAGS} -gencode arch=compute_80,code=sm_80")
    if (CUDA_VERSION_MINOR VERSION_GREATER_EQUAL "1")
    # cuda doesn't support `sm_86` until version 11.1
    set(_NVCC_FLAGS "${_NVCC_FLAGS} -gencode arch=compute_86,code=sm_86")
    endif ()
endif ()
Because this version of ppl.cv does not support the computing power of cuda11.1 and RTX3090 8.6, you need to modify the cuda.cmake program before compiling and installing ppl.cv
./build.sh cuda2-5--Installing the inference engine
①Install ONNX Runtime
Install the python package of ONNXRuntime
pip install onnxruntime==1.8.1Install the precompiled package of ONNXRuntime
cd xxxx # xxxx表示存放ONNXRuntime编译包的地址

wget https://github.com/microsoft/onnxruntime/releases/download/v1.8.1/onnxruntime-linux-x64-1.8.1.tgz
tar -zxvf onnxruntime-linux-x64-1.8.1.tgz
cd onnxruntime-linux-x64-1.8.1
export ONNXRUNTIME_DIR=$(pwd)
export LD_LIBRARY_PATH=$ONNXRUNTIME_DIR/lib:$LD_LIBRARY_PATH
②Install TensorRT
Download the TensorRT installation package from the official website:
https://developer.nvidia.com/nvidia-tensorrt-downloadcd /the/path/of/tensorrt/tar/gz/file
tar -zxvf TensorRT-8.2.3.0.Linux.x86_64-gnu.cuda-11.4.cudnn8.2.tar.gz
pip install TensorRT-8.2.3.0/python/tensorrt-8.2.3.0-cp37-none-linux_x86_64.whl
export TENSORRT_DIR=$(pwd)/TensorRT-8.2.3.0
export LD_LIBRARY_PATH=$TENSORRT_DIR/lib:$LD_LIBRARY_PATHInstall the uff package and the graphsurgeon package:
cd XXXX # XXXX表示解压后TensorRT的地址

cd uff
pip install uff-0.6.9-py2.py3-none-any.whl  # 视具体文件而定

cd graphsurgeon
pip install graphsurgeon-0.4.5-py2.py3-none-any.whl # 视具体文件而定
2-6--Set PATH
sudo ~/.bashrc


根据个人情况修改
export PATH="/root/anaconda3/bin:$PATH"

export PATH=/usr/local/cuda-11.1/bin:${PATH:+:${PATH}}
export LD_LIBRARY_PATH=/usr/local/cuda-11.1/lib64:${LD_LIBRARY_PATH:+:${LD_LIBRARY_PATH}}

export MMDEPLOY_DIR=/root/MMDeploy
export LD_LIBRARY_PATH=$MMDEPLOY_DIR/build/lib:$LD_LIBRARY_PATH

export PPLCV_DIR=/root/ppl.cv

export TENSORRT_DIR=/root/Downloads/TensorRT-8.2.3.0
export LD_LIBRARY_PATH=$TENSORRT_DIR/lib:$LD_LIBRARY_PATH

export CUDNN_DIR=/root/Downloads/cuda
export LD_LIBRARY_PATH=$CUDNN_DIR/lib64:$LD_LIBRARY_PATH

export ONNXRUNTIME_DIR=/root/onnxruntime-linux-x64-1.8.1
export LD_LIBRARY_PATH=$ONNXRUNTIME_DIR/lib:$LD_LIBRARY_PATH
source ~/.bashrc
2-7--Compile and install dependent libraries
cd ${MMDEPLOY_DIR}
pip install -e .
3--Compile MMDeploy SDK and Python API test
① Activate the mmdeploy environment
②Set the Path and library directory (you don’t need to reset it every time after setting ~/.bashrc)
# 根据实际安装地址设置
# 设置PATH和库目录 (在~/.bashrc中设置就不需要每次导入)
export ONNXRUNTIME_DIR=/root/onnxruntime-linux-x64-1.8.1
export LD_LIBRARY_PATH=$ONNXRUNTIME_DIR/lib:$LD_LIBRARY_PATH
export DTENSORRT_DIR=/root/Downloads/TensorRT-8.2.3.0
export LD_LIBRARY_PATH=$DTENSORRT_DIR/lib:$LD_LIBRARY_PATH
③Compile custom operator
# 进入MMDeploy根目录下
cd ${MMDEPLOY_DIR}

# 删除build文件夹 (这是本人之前已经编译过了,所以要删除)
rm -r build

# 新建并进入build文件夹
mkdir -p build && cd build

# 编译自定义算子
cmake -DMMDEPLOY_TARGET_BACKENDS="ort;trt" -DTENSORRT_DIR=${TENSORRT_DIR} -DCUDNN_DIR=${CUDNN_DIR} -DONNXRUNTIME_DIR=${ONNXRUNTIME_DIR} ..
make -j$(nproc)
④Compile MMDeploy SDK
# 编译MMDeploy SDK (cmake这步有时容易出bug,可能需要再执行一遍cmake操作,再执行make操作)
cmake .. -DMMDEPLOY_BUILD_SDK=ON \
-DCMAKE_CXX_COMPILER=g++-7 \
-DTENSORRT_DIR=${TENSORRT_DIR} \
-DMMDEPLOY_TARGET_BACKENDS="ort;trt" \
-DMMDEPLOY_CODEBASES=mmdet \
-DCUDNN_DIR=${CUDNN_DIR} \
-DMMDEPLOY_TARGET_DEVICES="cuda;cpu" \
-Dpplcv_DIR=/root/ppl.cv/cuda-build/install/lib/cmake/ppl

make -j$(nproc)
make install
⑤python API test (you need to install the source code of MMDetection here; create a new Checkpoints folder according to the actual situation, use the pre-training weight .pth file; the address where the model is saved --work-dir; the test picture demo.jpg, etc.;)
The following provides two examples, which need to be changed according to the personal path:
fasterrcnn:
https://github.com/open-mmlab/mmdetection/tree/master/configs/faster_rcnn# 进入MMDeploy根目录
cd ${MMDEPLOY_DIR}
## faseter_RCNN 实例
# 调用pythonAPI 转换模型: pytorch→onnx→engine
python tools/deploy.py configs/mmdet/detection/detection_tensorrt_dynamic-320x320-1344x1344.py /root/mmdetection/configs/faster_rcnn/faster_rcnn_r50_fpn_1x_coco.py /root/mmdetection/checkpoints/faster_rcnn_r50_fpn_1x_coco_20200130-047c8118.pth /root/mmdetection/demo/demo.jpg --work-dir work_dirs/faster_rcnn/ --device cuda --show --dump-infomaskrcnn:
https://github.com/open-mmlab/mmdetection/tree/master/configs/mask_rcnn

## mask_RCNN 实例
# 调用pythonAPI 转换模型: pytorch→onnx→engine
python tools/deploy.py \
configs/mmdet/instance-seg/instance-seg_tensorrt_dynamic-320x320-1344x1344.py \
/root/mmdetection/configs/mask_rcnn/mask_rcnn_x101_64x4d_fpn_mstrain-poly_3x_coco.py \
/root/MMDeploy/cheackpoints/mask_rcnn_x101_64x4d_fpn_mstrain-poly_3x_coco_20210526_120447-c376f129.pth \
/root/mmdetection/demo/demo.jpg --work-dir work_dirs/mask_rcnn/ \
--device cuda --show --dump-info
4--C++ reasoning test
# 进入MMDeploy根目录
cd ${MMDEPLOY_DIR}

## 以后可以从这部分开始运行
# 进入example文件夹
cd build/install/example
Compile object_detection.cpp
# 编译object_detection.cpp
mkdir -p build && cd build
cmake -DMMDeploy_DIR=${MMDEPLOY_DIR}/build/install/lib/cmake/MMDeploy ..
make object_detection
# 设置log等级
export SPDLOG_LEVEL=warnRun the instance splitter
# Run the instance segmentation program (parameter 1: gpu acceleration; parameter 2: address of inference model; parameter 3: address of inference test image) ./object_detection
cuda /root/MMDeploy/work_dirs/mask_rcnn/ /root/mmdetection/demo/demo .jpg # Test image./object_detection
cuda /root/MMDeploy/work_dirs/mask_rcnn/ /root/MMDeploy/tests/data/tiger.jpeg # Test image
# 查看输出图片
ls
xdg-open output_detection.png
5--Modify object_detection.cpp to display reasoning time
#include <iostream> // new adding
#include <ctime> // new adding
Add the code for recording time before and after the reasoning process "status = mmdeploy_detector_apply(detector, &mat, 1, &bboxes, &res_count);":
clock_t startTime,endTime; // new adding
startTime = clock(); // 推理计时开始 // new adding
status = mmdeploy_detector_apply(detector, &mat, 1, &bboxes, &res_count); // 推理过程
endTime = clock(); // 推理计时结束 // new adding
std::cout << "The inference time time is: " <<(double)(endTime - startTime) / CLOCKS_PER_SEC << "s" << "!!!"<< std::endl; // 打印时间 // new adding
7--Supplementary questions
①When calling the Python API to convert the model, an error is reported: Could not load the Qt platform plugin "xcb"
Guess the reason: I subsequently configured different versions of Opencv and Pyqt5 in the original Conda environment, resulting in incompatible versions.
Solution: reduce the version of opencv-python and PyQt5.
pip install opencv-python==4.3.0.36 PyQt5==5.15.2