Some code experience sharing
code writing
1. When using kotlin to write event callbacks, you can use Lambda expressions to simplify, such as:
view.bt_apply.setOnClickListener { viewModel.onApplyClick() }
2. Print project dependencies
/gradlew: project name: dependencies > file to be saved.txt
Example: ./gradlew:biz-aer:dependencies > 1depen.txt
3. Use fastJson to parse kotlin objects, it is easy to fail, it is recommended to convert to Java objects
4. Software version distinction
● alpha version: internal testing version. α is the first letter of the Greek letter, which means the earliest version. General users should not download this version. This version contains many bugs and functions are not complete. It is mainly for developers and testers to test and find bugs.
● beta: A public beta version. β is the second letter of the Greek letter. As the name suggests, this version was released later than the alpha version, mainly for "horde" users and loyal users to test. There are still many bugs in this version, but it is more stable than the alpha version . This stage version of the software will continue to add new features. If you are an audiophile, you can download this version.
● rc version: Release Candidate (candidate version), this version is a step further than the beta version, the functions of this version will not be added, and the functions of the final release version are the same. This version is a bit like a preview version before the final release, and the release of this indicates that the final release is not far away. As an ordinary user, if you are in a hurry to use this software, you can also download this version.
● stable version: stable version. In the open source software, there is a stable version. This is the final release version of the open source software, and users can use it with confidence.
5. Touch point position calculation
event.getX(): Indicates the distance between the touched point and its left border
event.getRawX: Indicates the distance between the touched point and the left border of the screen
6. The setTag and getTag in AdapterView are for the convenience of ViewHolder reuse.
The setTag of ItemView cannot be used to maintain the state. For example, if the textView is expanded, the List data should be modified to drive the UI with data. Because the reuse of AdapterView will lead to state confusion.
7. Fragment cannot add field parameters through the constructor, and needs to get parameters through getArguments. Otherwise, it is easy to crash when the system restores Fragment
8. During compilation, Transform monitor can be added between class -> dex to customize the plug-in to modify the bytecode.
It turns out that our custom Transform is added to the extension, and then after compiling java->class in the packaging phase, before class->dex, traverse the Transform in the extension (including our custom ones) and add it to the TransformManager to register as a TransformTask, when When executing the Task, call the transform method of Transform, so as to achieve the purpose of modifying the bytecode before dex
Link: https://juejin.cn/post/6974962797973078046
9. After using the debug package to develop the function, you must use the release package to re-verify the function.
Example: Guess the price to answer the question, a bug that does not appear in the question
10. Pay attention to null judgment when using Handler. Similarly, you must judge null before using an object; especially when the object may be assigned a value of null.
11. Decompile
-
Install
brew install jadx -
Start method: jadx-gui
-
Choose to open the specified apk
-
Find the corresponding source code according to the package name
12.PermissionX
Now, the industry generally recognizes the use of another small trick to achieve. What kind of trick? Recall that all previous operations for applying for runtime permissions were performed in Activity. In fact, Android also provides the same API in Fragment, so that we can also apply for runtime permissions in Fragment.
But the difference is that Fragment does not have to have an interface like Activity. We can add a hidden Fragment to Activity, and then encapsulate the runtime permission API in this hidden Fragment. This is a very lightweight approach, so you don't have to worry about the impact of hiding the Fragment on the performance of the Activity.
https://juejin.cn/post/6903709311906938893
https://github.com/guolindev/PermissionX
Summary of Bug Fixes
Add view reports an error: java.lang.IllegalArgumentException: Cannot add a null child view to a ViewGroup
Cause: When executing addHighLightView, it is not determined whether the view to be added is empty.
Solution: You need to judge whether it is empty before adding view, and you can add it if it is not empty.
Summary: If you encounter an error, you can check the source code and find the problem
"Cannot add a null child view to a ViewGroup"
(http://androidxref.com/9.0.0_r3/xref/frameworks/base/core/java/android/view /ViewGroup.java)
2. The Data data parsed by the network request must be serialized, otherwise it will be confused and cause parsing failure.
3. For new interface requests, when mapping javaben, be sure to check in the obfuscation file to see if confusion has been prevented.
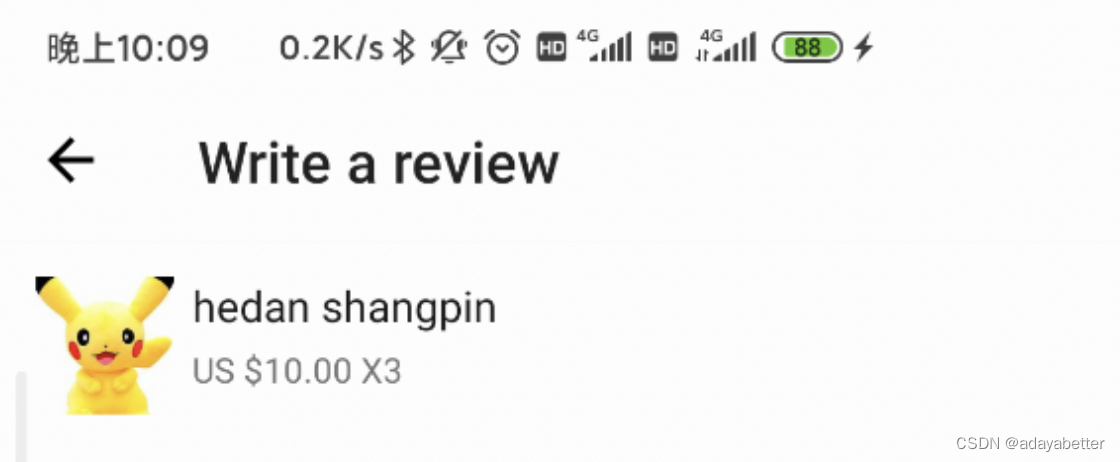
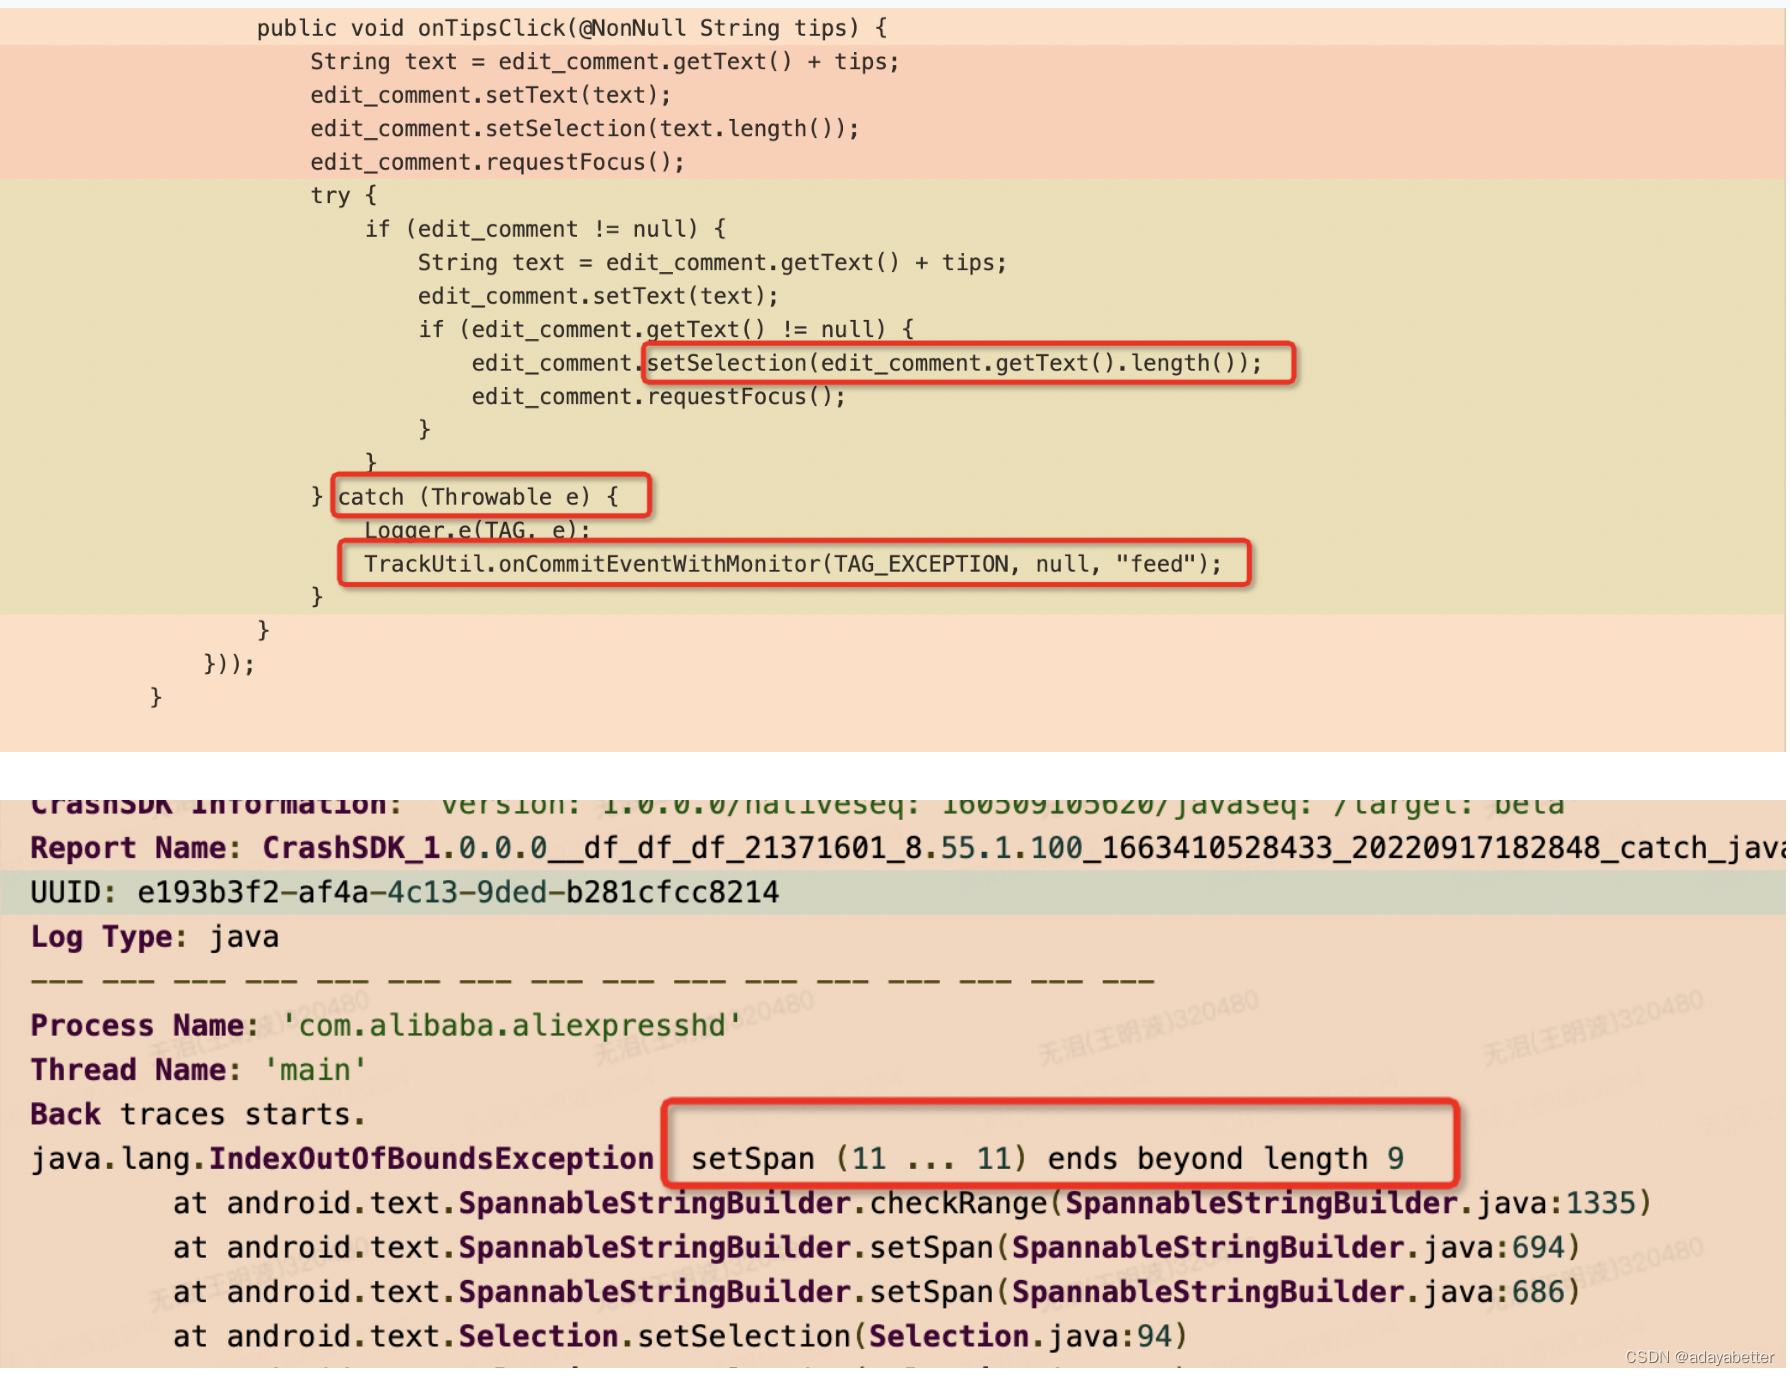
4. Pay attention to protection when calling the EditText setSelection method to avoid crash
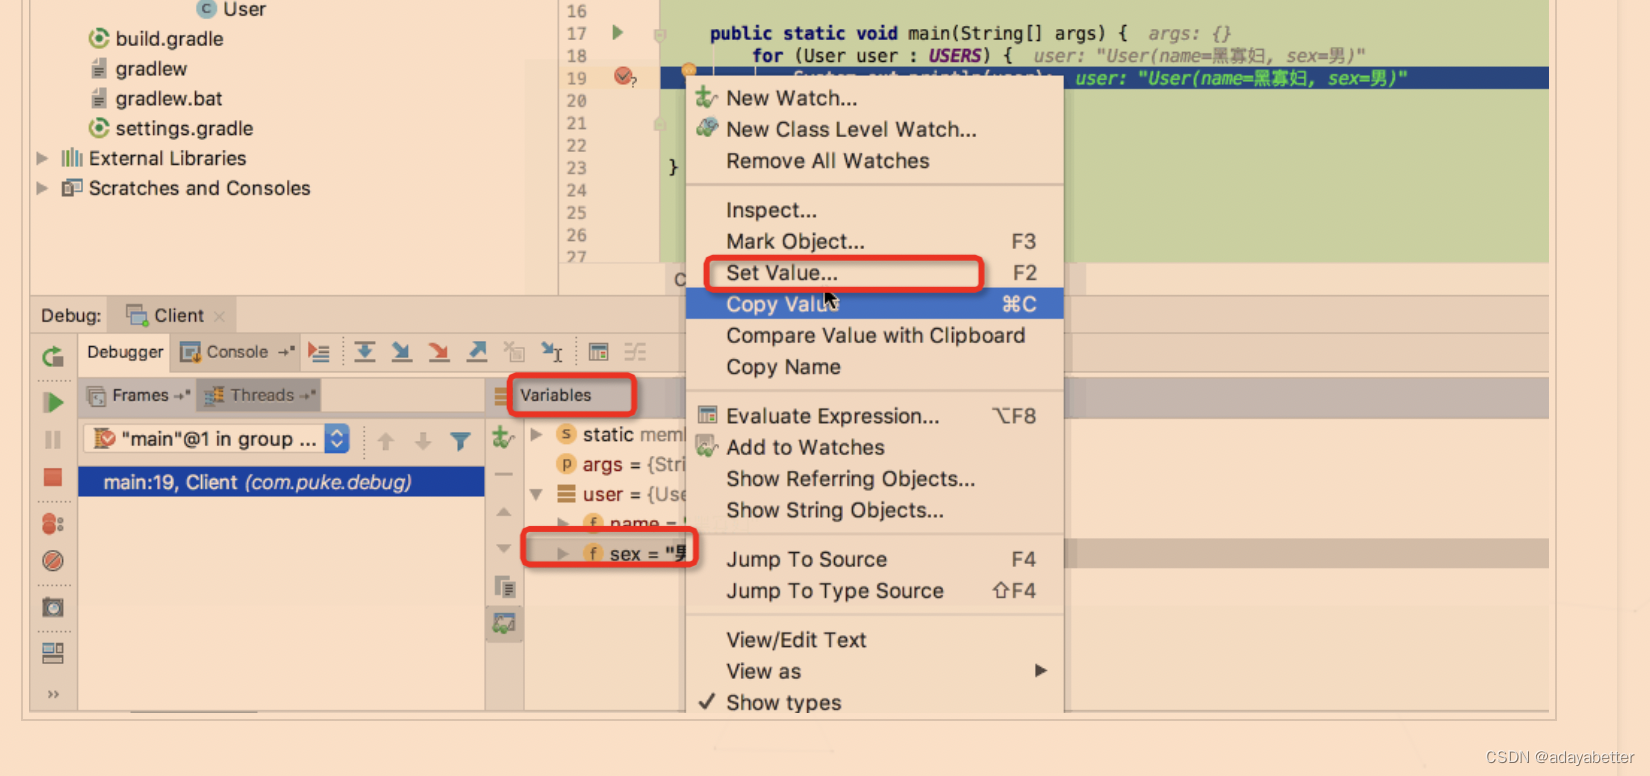
5. When AndroidStudio debugs, you can set variable values to simulate NullpointerException scenarios.
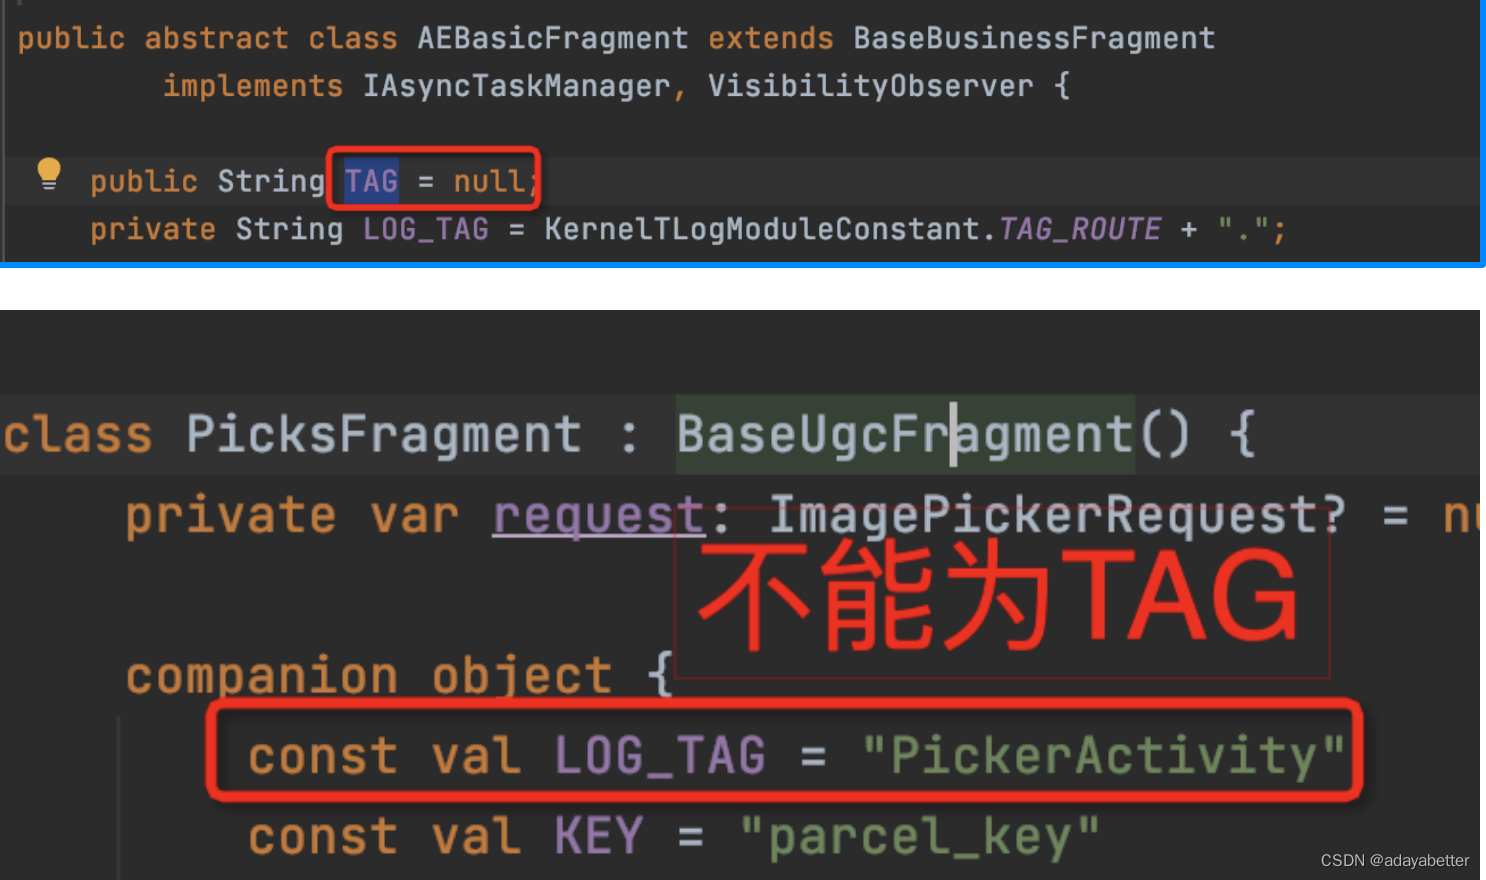
6. The public String TAG instance variable is defined in the base class, and the subclass (Kotlin code) uses the static constant companion object { const val TAG = “xxx” } of the same name, which will cause a crash exception message: java.lang.IncompatibleClassChangeError: Expected 'xx ' to be a instance field rather than a static field Note: In the subclass (Kotlin) code, click the variable TAG, and it will track and enter the parent class code. When the subclass is Java code, no such exception has been found yet. View after converting Kotlin code to Java:

Problem Analysis:
If a field that is not declared private was not declared static and is changed to be declared static, or vice versa, then a linkage error, specifically an IncompatibleClassChangeError, will result if the field is used by a pre-existing binary which expected a field of the other kind. Such changes are not recommended in code that has been widely distributed.
Translation:
If a field that was not declared private was not declared static and is changed to be declared static, or Vice versa, then if the field is used by a pre-existing binary that is expecting a field of another type, it will result in a linkage error, specifically an IncompatibleClassChangeError. Such changes are not recommended in widely distributed code.
https://docs.oracle.com/javase/specs/jls/se7/html/jls-13.html#:~:text=If%20a%20field%20that%20is,that%20has%20been%20widely%20distributed.
Accumulation of UI features
1. Dialog:
Customize Dialog, inherit Dialog, https://www.jianshu.com/p/809623bbc3b6
Customize DialogFragment, https://blog.csdn.net/u011272795/article/details/102822028
2. FrameLayout, RelativeLayout, and LinearLayout can all achieve the cascading effect of views
RelativeLayout: through alignBottom, alignTop, alignParentLeft, etc.
LinearLayout: through marginTop="-12dp" etc.
3. RemoteImageView set rounded corners:
Method 1:
RemoteImageView imageView = (RemoteImageView) view.findViewById(R.id.iv_photo);
// Set the edge of the banner image as rounded corners, with a radius of 8 imageView.setPainterImageShapeType(PainterShapeType.ROUND_CORNER);
imageView.cornerRadius(AndroidUtil.dp2px(viewGroup.getContext(), 8));
imageView.load(banner.imageUrl);
方式二:
<androidx.cardview.widget.CardView
android:id=“@+id/cv_img_container”
android:layout_width=“@dimen/space_80dp”
android:layout_height=“@dimen/space_80dp”
app:cardCornerRadius=“@dimen/space_8dp”
android:layout_below=“@id/view_divide”
android:layout_marginEnd=“@dimen/space_6dp”
app:cardElevation=“@dimen/space_0dp”>
<com.ugc.aaf.widget.widget.imageview.ForeExtendedRemoteImageView
android:id=“@+id/riv_product”
android:layout_width=“@dimen/space_80dp”
android:layout_height=“@dimen/space_80dp”
app:imageScaleType=“centerCrop”
app:imgRadioH=“1”
app:imgRadioW=“1” />
</androidx.cardview.widget.CardView>
4. TextView font size adaptive
android:autoSizeMaxTextSize="12sp"
android:autoSizeMinTextSize="4sp"
android:autoSizeTextType="uniform"
5. When SpannableStringBuilder calls setSpan continuously, the parameter Object what cannot use the same reference
, otherwise only the last setting is valid
https://blog.csdn.net/BigBoySunshine/article/details/48706451
6. Create a new iconFont icon library
- Go to the iconFont website to download the icon ttf file you need to use. https://www.iconfont.cn/manage/index?manage_type=myprojects&projectId=3494273&keyword=&project_type=&page=
- The ugc_iconfont.ttf file is placed under the res/font folder
Add style under the style.xml file
4.使用
<androidx.appcompat.widget.AppCompatTextView
style=“@style/UGCIconFont”
android:text=“@string/icAdd”
android:textColor=“@color/gray_cccccc”
android:textSize=“20sp”
android:layout_width=“@dimen/space_24dp”
android:layout_height=“@dimen/space_24dp”
android:layout_gravity=“center”
/>
7. Set the status bar to white, Toolbar font black background color to white
<android.support.v7.widget.Toolbar xmlns:android="http://schemas.android.com/apk/res/android"
    xmlns:app="http://schemas.android.com/apk/res-auto"
    android:id="@+id/toolbar_actionbar"
    android:layout_width="match_parent"
    android:layout_height="wrap_content"
    app:theme="@style/MMyorderLeaveFeedBackTitleTheme"
    android:background="@color/white"
    />
<style name="MMyorderLeaveFeedBackTitleTheme" parent="@style/ThemeOverlay.AppCompat.Light">
    <item name="colorPrimary">#FFFFFF</item>
    <item name="colorPrimaryDark">#FFFFFF</item>
    <item name="textColorPrimary">#000000</item>
    <item name="colorControlNormal">#000000</item>   <!-- 重要,控制左侧箭头为黑色>
</style>
<!-- navigation icon color -->
   <item name="colorControlNormal">@color/my_color</item>

    <!-- color of the menu overflow icon -->
    <item name="android:textColorSecondary">@color/my_color</item
Set the status bar to white:
Execute after Activity onCreate setContentView
try { StatusBarUtil.setTranslucentForImageView(this, 0, findViewById(R.id.ll_content)); if (Build.VERSION.SDK_INT >= Build.VERSION_CODES.M) { StatusBarUtil.setColor (this, getColor(R.color.white), 0); } StatusBarUtil.setLightMode(this); } catch (Throwable e) { }