I. Overview
1. What is MyBatis?
MyBatis is an excellent persistence layer framework that supports custom SQL, stored procedures, and advanced mapping. MyBatis eliminates almost all JDBC code and the work of setting parameters and getting result sets. MyBatis can configure and map primitive types, interfaces and Java POJOs (Plain Old Java Objects, Plain Old Java Objects) as records in the database through simple XML or annotations.
2. Install
To use MyBatis, just put the mybatis-xxxjar file in the classpath (classpath).
If you use Maven to build the project, you need to put the following dependency code in the pom.xml file.
<dependency>
	<groupId>org.mybatis</groupId>
	<artifactId>mybatis</artifactId>
	<version>x.x.x</version>
</dependency>
3. Why use MyBatis?
- Help developers store data into the database.
- Convenience: Traditional JDBC code is too complex. MyBatis is more simplified and automated.
- You can also do without MyBatis. It's easier to get started with MyBatis. There is no distinction between high and low technology
- Advantages of MyBatis:
(1) Easy to learn
(2) Flexible
(3) The separation of sql and code improves maintainability.
(4) Provide mapping tags, support ORM field relationship mapping between objects and databases
(5) Provide object-relational mapping tags, support object-relationship creation and maintenance
(6) Provide xml tags, support writing dynamic sql - The most important point: many people use it
4. The first MyBatis program
- build database
CREATE DATABASE `mybatis`;
USE `mybatis`;
CREATE TABLE `user`(
  `id` INT(20) NOT NULL PRIMARY KEY,
  `name` VARCHAR(30) DEFAULT NULL,
  `pwd` VARCHAR(30) DEFAULT NULL
)ENGINE=INNODB DEFAULT CHARSET=utf8;

INSERT INTO `user`(`id`,`name`,`pwd`) VALUES
(1,'狂神','123456'),
(2,'张三','123456'),
(3,'李四','123890');
- Import dependencies in Maven projects
    <!--导入依赖-->
    <dependencies>
        <!--MySQL驱动-->
        <dependency>
            <groupId>mysql</groupId>
            <artifactId>mysql-connector-java</artifactId>
            <version>5.1.47</version>
        </dependency>

        <!--Mybatis-->
        <!-- https://mvnrepository.com/artifact/org.mybatis/mybatis -->
        <dependency>
            <groupId>org.mybatis</groupId>
            <artifactId>mybatis</artifactId>
            <version>3.5.2</version>
        </dependency>

        <!--Junit单元测试-->
        <dependency>
            <groupId>junit</groupId>
            <artifactId>junit</artifactId>
            <version>4.12</version>
        </dependency>
    </dependencies>
- Write the database connection configuration file db.properties
driver=com.mysql.jdbc.Driver
url=jdbc:mysql://localhost:3306/mybatis?useSSL=true&useUnicode=true&characterEncoding=UTF-8
username=root
password=121314
- Write the core configuration file mybatis-config.xml of MyBatis
<?xml version="1.0" encoding="UTF-8" ?>
<!DOCTYPE configuration
        PUBLIC "-//mybatis.org//DTD Config 3.0//EN"
        "http://mybatis.org/dtd/mybatis-3-config.dtd">
<!--configuration核心配置文件-->
<configuration>

    <!--引入外部配置文件-->
    <properties resource="db.properties"/>

    <environments default="development">
        <environment id="development">
            <transactionManager type="JDBC"/>
            <dataSource type="POOLED">
                <property name="driver" value="${driver}"/>
                <property name="url" value="${url}"/>
                <property name="username" value="${username}"/>
                <property name="password" value="${password}"/>
            </dataSource>
        </environment>
    </environments>
</configuration>
- Write MyBatis tool class MybatisUtils
public class MybatisUtils {


    private static SqlSessionFactory sqlSessionFactory;

    static {


        try {


            //使用Mybatis的第一步:获取sqlSessionFactory对象
            String resource = "mybatis-config.xml";
            InputStream inputStream = Resources.getResourceAsStream(resource);
            sqlSessionFactory = new SqlSessionFactoryBuilder().build(inputStream);
        } catch (IOException e) {


            e.printStackTrace();
        }
    }

    //既然有了SqlSessionFactory,顾名思义,我们就可以从中获得SqlSession的实例了
    //SqlSession完全包含了面向数据库执行SQL命令所需的所有方法
    public static SqlSession getSqlSession(){


        return sqlSessionFactory.openSession();
    }
}
- Write pojo entity class
//实体类
public class User {


    private int id;
    private String name;
    private String pwd;

    public User() {


    }
    public User(int id, String name, String pwd) {


        this.id = id;
        this.name = name;
        this.pwd = pwd;
    }

    public int getId() {


        return id;
    }

    public void setId(int id) {


        this.id = id;
    }

    public String getName() {


        return name;
    }

    public void setName(String name) {


        this.name = name;
    }

    public String getPwd() {


        return pwd;
    }

    public void setPwd(String pwd) {


        this.pwd = pwd;
    }

    @Override
    public String toString() {


        return "User{" +
                "id=" + id +
                ", name='" + name + '\'' +
                ", pwd='" + pwd + '\'' +
                '}';
    }
}
- Create the Mapper interface
public interface UserMapper {


	List<User> getUserList();
}
- Write a Mapper configuration file (the interface implementation class is changed from the original UserDaoImpl to a Mapper configuration file)
<?xml version="1.0" encoding="UTF-8" ?>
<!DOCTYPE mapper
        PUBLIC "-//mybatis.org//DTD Mapper 3.0//EN"
        "http://mybatis.org/dtd/mybatis-3-mapper.dtd">
<!--namespace=绑定一个对应的Dao/Mapper接口-->
<mapper namespace="com.carry.dao.UserMapper">

    <!--select查询语句-->
    <select id="getUserList" resultType="com.carry.pojo.User">
        select * from mybatis.user
    </select>

</mapper>
- Register Mapper.XML in the Mybatis core configuration file
    <!--每一个Mapper.XML都需要在Mybatis核心配置文件中注册!-->
    <mappers>
        <mapper resource="com/carry/dao/UserMapper.xml"/>
    </mappers>
- test
@Test
public void test(){


  //第一步:获得SqlSession对象
  SqlSession sqlSession = MybatisUtils.getSqlSession();
  UserDao userDao = sqlSession.getMapper(UserDao.class);
  List<User> userList = userDao.getUserList();
  for (User user : userList) {


    System.out.println(user);
 }
  //关闭SqlSession
  sqlSession.close();
}
2. Configuration analysis
1. The core configuration file of MyBatis
mybatis-config.xml is the core configuration file of MyBatis, which contains settings and property information that will deeply affect the behavior of MyBatis. The top-level structure of the configuration document is as follows:
- configuration
- properties
- settings
- typeAliases (type aliases)
- typeHandlers (type handlers)
- objectFactory (object factory)
- plugins
- environments (environment configuration)
- environment (environment variable)
- transactionManager (transaction manager)
- dataSource (data source)
- environment (environment variable)
- databaseIdProvider (database vendor ID)
- mappers
2. Attribute configuration
These properties are externally configurable and can be replaced dynamically. These properties can either be configured in a typical Java properties file, or set in child elements of the properties element. For example:
(1) Configure the db.properties file
driver=com.mysql.jdbc.Driver
url=jdbc:mysql://localhost:3306/mybatis?useSSL=true&useUnicode=true&characterEncoding=UTF-8
username=root
password=123456
(2) Introduce external configuration files and add settings in sub-elements of the properties element
	<!--引入外部配置文件-->
	<properties resource="db.properties">
		<property name="username" value="root"/>
		<property name="pwd" value="11111"/>
	</properties>
If a property is configured in more than one place, MyBatis will load it in the following order:
- The properties specified in the body of the properties element are read first.
- Then read the property file under the class path according to the resource attribute in the properties element, or read the property file according to the path specified by the url attribute, and overwrite the previously read property with the same name.
- Finally the property passed as a method parameter is read and overwrites a previously read property of the same name.
3. Settings
These are extremely important tuning settings in MyBatis that change the runtime behavior of MyBatis. The following table lists the meanings and default values of some settings in the settings.
| setting name | describe | effective value | Defaults |
|---|---|---|---|
| cacheEnabled | Globally turns on or off any caches configured in all mapper configuration files. | true false | true |
| logImpl | Specify the specific implementation of the log used by MyBatis, and will automatically find it if it is not specified. | SLF4J、LOG4J、LOG4J2、JDK_LOGGING、COMMONS_LOGGING、STDOUT_LOGGING、NO_LOGGING | not set |
4. Type aliases
A type alias sets an abbreviated name for a Java type. It is only used for XML configuration and is intended to reduce redundant writing of fully qualified class names. For example:
<!--可以给实体类起别名-->
<typeAliases>
	<typeAlias type="org.example.pojo.User" alias="User"/>
</typeAliases>
You can also specify a package name, and MyBatis will search for the required Java Bean under the package name, for example:
<!--可以给实体类起别名-->
<typeAliases>
	<package name="org.example.pojo"/>
</typeAliases>
Scan the package of the entity class, and its default alias is the class name of this class, with the first letter lowercase. For example, the alias of org.example.pojo.User is user. If you need to change the alias, you can add the annotation Alias on the entity class.
@Alias("user1")
public class User {

    }
5. Environment configuration
MyBatis can be configured to adapt to a variety of environments. This mechanism helps to apply SQL mapping to a variety of databases. There are many reasons to do so in reality. For example, development, test, and production environments need to have different configurations; or you want to use the same SQL mapping in multiple production databases with the same schema. There are many similar usage scenarios.
But remember: Although multiple environments can be configured, only one can be selected per instance of SqlSessionFactory.
    <environments default="development">
        <environment id="development">
            <transactionManager type="JDBC"/>
            <dataSource type="POOLED">
                <property name="driver" value="${driver}"/>
                <property name="url" value="${url}"/>
                <property name="username" value="${username}"/>
                <property name="password" value="${password}"/>
            </dataSource>
        </environment>
    </environments>
transactionManager (transaction manager)
There are two types of transaction managers in MyBatis:
- JDBC: This configuration uses JDBC's commit and rollback facilities directly, relying on connections obtained from data sources to manage transaction scope.
- MANAGED: This configuration does almost nothing. It never commits or rolls back a connection, but lets the container manage the entire lifecycle of the transaction. By default it closes the connection. However, some containers do not want the connection to be closed, so the closeConnection property needs to be set to false to prevent the default close behavior.
dataSource (data source)
The dataSource element uses the standard JDBC data source interface to configure the resources of the JDBC connection object. There are three built-in data source types:
- UNPOOLED: The implementation of this data source will open and close the connection each time it is requested. Although a little slow, it is a good choice for simple applications that do not require high availability of database connections.
- POOLED: The implementation of this data source uses the concept of "pool" to organize JDBC connection objects, avoiding the initialization and authentication time necessary to create new connection instances. This approach is popular and enables concurrent web applications to respond quickly to requests.
- JNDI: This data source implementation is intended for use in containers such as EJBs or application servers, which can configure data sources centrally or externally, and place a reference to the data source in a JNDI context.
6. Mapper
Before defining SQL mapping statements, we need to tell MyBatis where to find these statements. In terms of automatically finding resources, Java does not provide a good solution, so the best way is to directly tell MyBatis where to find the mapping file. We can use resource references relative to the classpath, or class and package names, etc. For example:
Method 1: Use resource references relative to the class path
<!--使用相对于类路径的资源引用-->
<mappers>
	<mapper resource="org/example/dao/UserMapper.xml"/>
</mappers>
Method 2: Use the fully qualified class name of the mapper interface implementation class
<!--使用映射器接口实现类的完全限定类名-->
<mappers>
	<mapper class="org.example.dao.UserMapper"/>
</mappers>
Method 3: Register all mapper interface implementations in the package as mappers
<!--将包内的映射器接口实现全部注册为映射器-->
<mappers>
	<package name="org.example.dao"/>
</mappers>
Three, add, delete, modify and check
1.select
The steps to execute a select statement in MyBatis are as follows:
(1) Create a new Mapper interface
//根据ID查询用户
User getUserById(int id);
(2) Make corresponding configurations in mapper.xml
<select id="getUserById" parameterType="int" resultType="org.example.pojo.User">
    select * from mybatis.user where id = #{id}
</select>
- id : is the method name in the corresponding namespace;
- resultType: the return value of the Sql statement execution!
- parameterType : parameter type
(3) test
  @Test
  public void getUserById() {


    SqlSession sqlSession = MybatisUtils.getSqlSession();
    UserMapper mapper = sqlSession.getMapper(UserMapper.class);
    User user = mapper.getUserById(1);
    System.out.println(user);
    sqlSession.close();
 }
2.insert
<!--对象中的属性,可以直接取出来-->
<insert id="addUser" parameterType="com.kuang.pojo.User">
	insert into mybatis.user (id, name, pwd) values (#{id},#{name},#{pwd});
</insert>
3.update
<update id="updateUser" parameterType="com.kuang.pojo.User">
	update mybatis.user set name=#{name},pwd=#{pwd} where id = #{id} ;
</update>
4.delete
<delete id="deleteUser" parameterType="int">
	delete from mybatis.user where id = #{id};
</delete>
5. Universal Map
If there are too many fields, entity classes or parameters in our database table, we can use the universal Map to store attributes.
Examples are as follows:
  //万能的Map
  int addUser2(Map<String,Object> map);
<!--对象中的属性,可以直接取出来  传递map的key-->
<insert id="addUser" parameterType="map">
	insert into mybatis.user (id, pwd) values (#{userid},#{passWord});
</insert>
 @Test
public void addUser2(){


	SqlSession sqlSession = MybatisUtils.getSqlSession();
	UserMapper mapper = sqlSession.getMapper(UserMapper.class);
	Map<String, Object> map = new HashMap<String, Object>()
	map.put("userid",5);
	map.put("passWord","2222333");
	mapper.addUser2(map);
	sqlSession.close();
}
6. The problem that the field name is inconsistent with the attribute name
In actual use, it often happens that the field names in the database are inconsistent with the attribute names in the entity class, which will result in the inability to retrieve values from the database. To this end, we can use aliases or ResultMap (result set mapping) to solve this problem.
(1) The database tables are as follows:
| id | name | pwd |
|---|---|---|
| 1 | Zhang San | 123456 |
| 2 | Li Si | 123321 |
(2) The entity class is as follows:
//实体类
public class User {


	private int id;
	private String name;
	private String password;
}
It can be seen that the password attribute name of the entity class is inconsistent with the pwd field name of the database.
Solution 1: Create an alias
<select id="getUserById" resultType="com.kuang.pojo.User">
 	select id,name,pwd as password from mybatis.user where id = #{id}
</select>
Solution 2: Result set mapping
<!--结果集映射-->
<resultMap id="UserMap" type="User">
	<!--column数据库中的字段,property实体类中的属性-->
	<result column="id" property="id"/>
	<result column="name" property="name"/>
	<result column="pwd" property="password"/>
</resultMap>
<select id="getUserById" resultMap="UserMap">
	select * from mybatis.user where id = #{id}
</select>
7. Paging query
(1) Limit pagination
Use SQL to implement pagination, the syntax of limit in SQL
SELECT * from user limit startIndex,pageSize;
SELECT * from user limit 3;  #[0,n]
An example of using Limit pagination is as follows:
1. Interface
//分页
List<User> getUserByLimit(Map<String,Integer> map);
2.mapper.xml file
<!--分页-->
<select id="getUserByLimit" parameterType="map" resultMap="UserMap">
	select * from mybatis.user limit #{startIndex},#{pageSize}
</select>
3. Test
@Test
public void getUserByLimit(){


	SqlSession sqlSession = MybatisUtils.getSqlSession();
	UserMapper mapper = sqlSession.getMapper(UserMapper.class);
	HashMap<String, Integer> map = new HashMap<String, Integer>();
  	map.put("startIndex",1);
 	map.put("pageSize",2);
  	List<User> userList =  mapper.getUserByLimit(map);
	for (User user : userList) {


		System.out.println(user);
	}
	sqlSession.close();
}
(2) RowBounds pagination
SQL is no longer used to implement paging.
An example of paging using RowBounds is as follows:
1. Interface
//分页
List<User> getUserByRowBounds();
2.mapper.xml file
<!--分页-->
<select id="getUserByRowBounds" resultMap="UserMap">
	select * from mybatis.user
</select>
3. Test
@Test
public void getUserByRowBounds(){


	SqlSession sqlSession = MybatisUtils.getSqlSession();
	//RowBounds实现
	RowBounds rowBounds = new RowBounds(1, 2);
	//通过Java代码层面实现分页
	List<User> userList = sqlSession.selectList("org.example.dao.UserMapper.getUserByRowBounds",null,rowBounds);
	for (User user : userList) {


		System.out.println(user);
	}
	sqlSession.close();
}
(3) Plug-in page

just understand
4. Log
1. Brief description
Mybatis provides logging functionality by using the built-in logging factory. The built-in logging factory will delegate logging work to one of the following implementations:
- SLF4J
- Apache Commons Logging
- Log4j 2
- Log4j
- JDK logging
MyBatis's built-in log factory will select a log delegate implementation based on runtime instrumentation information. It will use the first implementation it finds (in the order listed above). When none of these implementations are found, logging will be disabled.
2. STDOUT_LOGGING standard log output
In the mybatis core configuration file, configure our logs
<settings>
	<!--标准的日志工厂实现-->
	<setting name="logImpl" value="STDOUT_LOGGING"/>
</settings>
STDOUT_LOGGING outputs the result on the console: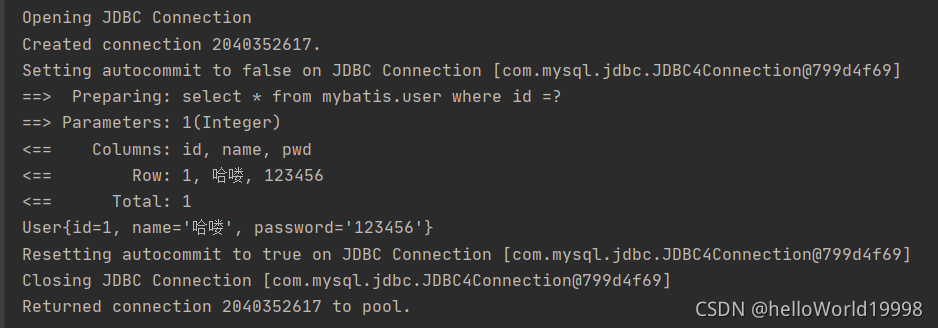
3.Log4j
1. Import Log4j dependencies
 <!-- https://mvnrepository.com/artifact/log4j/log4j -->
<dependency>
	<groupId>log4j</groupId>
	<artifactId>log4j</artifactId>
	<version>1.2.17</version>
</dependency>
2. Configure log4j.properties
#将等级为DEBUG的日志信息输出到console和file这两个目的地,console和file的定义在下面的代码
log4j.rootLogger=DEBUG,console,file

#控制台输出的相关设置
log4j.appender.console = org.apache.log4j.ConsoleAppender
log4j.appender.console.Target = System.out
log4j.appender.console.Threshold=DEBUG
log4j.appender.console.layout = org.apache.log4j.PatternLayout
log4j.appender.console.layout.ConversionPattern=[%c]-%m%n

#文件输出的相关设置
log4j.appender.file = org.apache.log4j.RollingFileAppender
log4j.appender.file.File=./log/example.log
log4j.appender.file.MaxFileSize=10mb
log4j.appender.file.Threshold=DEBUG
log4j.appender.file.layout=org.apache.log4j.PatternLayout
log4j.appender.file.layout.ConversionPattern=[%p][%d{yy-MM-dd}][%c]%m%n

#日志输出级别
log4j.logger.org.mybatis=DEBUG
log4j.logger.java.sql=DEBUG
log4j.logger.java.sql.Statement=DEBUG
log4j.logger.java.sql.ResultSet=DEBUG
log4j.logger.java.sql.PreparedStatement=DEBUG
3. Configure log4j as the implementation of the log
<settings>
	<!--LOG4J日志工厂实现-->
    <setting name="logImpl" value="LOG4J"/>
</settings>
4. Test results

Five, the use of annotations
1. Interface-oriented programming
(1) The fundamental reason for using interface-oriented development: decoupling, scalability, and improved reuse. In layered development, the upper layer does not care about the specific implementation. Everyone abides by common standards, making development easier and more standardized .
(2) Understanding of interfaces
- From a deeper understanding of the interface, it should be the separation of definition (specification, constraint) and implementation (principle of separation of name and reality).
- The interface itself reflects the system designer's abstract understanding of the system.
- The interface shall be of two types:
- The first category is an abstraction of an individual, which can correspond to an abstract class;
- The second category is the abstraction of a certain aspect of an individual, that is, forming an abstract surface (interface);
- A solid may have multiple abstract aspects. There is a difference between an abstract body and an abstract surface.
(3) The difference between the three orientations
- Object-oriented means that when we consider a problem, we take the object as the unit and consider its properties and methods.
- Process-oriented means that when we consider a problem, we take a specific process (business process) as a unit and consider its realization.
- Interface design and non-interface design are for reuse technology, and object-oriented (process) is not a problem. It is more reflected in the overall architecture of the system.
2. Use annotations to add, delete, modify and check
public interface UserMapper {


	@Select("select * from user")
	List<User> getUsers();

	// 方法存在多个参数,所有的参数前面必须加上 @Param("id")注解
	@Select("select * from user where id = #{id}")
	User getUserByID(@Param("id") int id);

	@Insert("insert into user(id,name,pwd) values (#{id},#{name},#{password})")
	int addUser(User user);

	@Update("update user set name=#{name},pwd=#{password} where id = #{id}")
	int updateUser(User user);

	@Delete("delete from user where id = #{uid}")
	int deleteUser(@Param("uid") int id);
}
3.Lombok
Steps for usage:
- Install the Lombok plugin in IDEA!
- Import the jar package of lombok in the project
<dependency>
	<groupId>org.projectlombok</groupId>
	<artifactId>lombok</artifactId>
	<version>1.18.10</version>
</dependency>
- Just add annotations on the entity class!
@Data
@AllArgsConstructor
@NoArgsConstructor
@Getter and @Setter
@FieldNameConstants
@ToString
@EqualsAndHashCode
@AllArgsConstructor, @RequiredArgsConstructor and @NoArgsConstructor
@Log, @Log4j, @Log4j2, @Slf4j, @XSlf4j, @CommonsLog, @JBossLog, @Flogger
@Data
@Builder
@Singular
@Delegate
@Value
@Accessors
@Wither
@SneakyThrows
Six, one-to-many and many-to-one
1. What is many-to-one and one-to-many

- Many students correspond to one teacher
- For students, association: multiple students, associated with one teacher [many-to-one]
- For teachers, set: A teacher has many students [one-to-many]

Create the following database table to simulate the situation of one-to-many and many-to-one.
CREATE TABLE `teacher` (
 `id` INT(10) NOT NULL,
 `name` VARCHAR(30) DEFAULT NULL,
 PRIMARY KEY (`id`)
) ENGINE=INNODB DEFAULT CHARSET=utf8

INSERT INTO teacher(`id`, `name`) VALUES (1, '秦老师');

CREATE TABLE `student` (
 `id` INT(10) NOT NULL,
 `name` VARCHAR(30) DEFAULT NULL,
 `tid` INT(10) DEFAULT NULL,
 PRIMARY KEY (`id`),
 KEY `fktid` (`tid`),
 CONSTRAINT `fktid` FOREIGN KEY (`tid`) REFERENCES `teacher` (`id`)
) ENGINE=INNODB DEFAULT CHARSET=utf8

INSERT INTO `student` (`id`, `name`, `tid`) VALUES ('1', '小明', '1');
INSERT INTO `student` (`id`, `name`, `tid`) VALUES ('2', '小红', '1');
INSERT INTO `student` (`id`, `name`, `tid`) VALUES ('3', '小张', '1');
INSERT INTO `student` (`id`, `name`, `tid`) VALUES ('4', '小李', '1');
INSERT INTO `student` (`id`, `name`, `tid`) VALUES ('5', '小王', '1');
2. Many to one
(1) According to query nesting processing
    <!--按照查询嵌套处理-->
    <select id="getStudent" resultMap="StudentTeacher">
        select * from student
    </select>
    <resultMap id="StudentTeacher" type="Student">
        <result property="id" column="id"/>
        <result property="name" column="name"/>
        <!--复杂的属性,我们需要单独处理  对象;association  集合:collection-->
        <association property="teacher" column="tid" javaType="Teacher" select="getTeacher"/>
    </resultMap>
    <select id="getTeacher" resultType="Teacher">
        select * from teacher where id = #{id}
    </select>
(2) Nested processing according to the result
    <!--按照结果嵌套查询-->
    <select id="getStudent2" resultMap="StudentTeacher2">
        select s.id sid,s.name sname,t.name tname
        from student as s , teacher as t
        where s.tid = t.id
    </select>
    <resultMap id="StudentTeacher2" type="Student">
        <result property="id" column="sid"/>
        <result property="name" column="sname"/>
        <association property="teacher" javaType="Teacher">
            <result property="name" column="tname"/>
        </association>
    </resultMap>
3. Many to one
(1) According to query nesting processing
    <!--按照查询嵌套处理-->
    <select id="getTeacher2" resultMap="TeacherStudent2">
        select * from mybatis.teacher where id = #{tid}
    </select>
    <resultMap id="TeacherStudent2" type="Teacher">
        <collection property="students" javaType="ArrayList" ofType="Student" select="getStudentByTeacherId" column="id"/>
    </resultMap>
    <select id="getStudentByTeacherId" resultType="Student">
        select * from mybatis.student where tid= #{tid}
    </select>
(2) Nested processing according to the result
    <!--按结果嵌套查询-->
    <select id="getTeacher" resultMap="TeacherStudent">
        select s.id sid,s.name sname,t.name tname,t.id tid
        from student as s , teacher as t
        where s.tid = t.id and t.id = #{tid}
    </select>
    <resultMap id="TeacherStudent" type="Teacher">
        <result property="id" column="tid"/>
        <result property="name" column="tname"/>
        <!--复杂的属性,我们需要单独处理  对象;association  集合:collection
        javaType="" 指定属性的类型
        集合中的泛型信息,我们使用ofType获取
        -->
        <collection property="students" ofType="Student">
            <result property="id" column="sid"/>
            <result property="name" column="sname"/>
            <result property="tid" column="tid"/>
        </collection>
    </resultMap>
4. Summary
- Association- association [many to one]
- Collection- collection [one-to-many]
- javaType & ofType
- JavaType is used to specify the type of attributes in entity classes
- ofType is used to specify the pojo type mapped to List or collection, and the constraint type in generics!
Seven, dynamic sql
Dynamic SQL refers to generating different SQL statements according to different conditions
1.if
	<select id="queryBlogIF" parameterType="map" resultType="blog">
		select * from mybatis.blog where 1=1
		<if test="title != null">
		and title = #{title}
		</if>
		<if test="author != null">
		and author = #{author}
		</if>
	</select>
2.choose
    <select id="queryBlogChoose" parameterType="map" resultType="blog">
        select * from mybatis.blog
        <where>
            <choose>
                <when test="title != null">
                    title = #{title}
                </when>
                <when test="author != null">
                    and author = #{author}
                </when>
                <otherwise>
                    and views = #{views}
                </otherwise>
            </choose>
        </where>
    </select>
3.trim (where,set)
    <update id="updateBlog" parameterType="map">
        update mybatis.blog
        <set>
            <if test="title != null">
                title = #{title},
            </if>
            <if test="author != null">
                author = #{author}
            </if>
        </set>
        where id = #{id}
    </update>
4. SQL fragment
- Extract common parts using SQL tags
    <sql id="if-title-author">
        <if test="title != null">
            title = #{title}
        </if>
        <if test="author != null">
            and author = #{author}
        </if>
    </sql>
- Just use the Include tag reference where you need to use it
    <select id="queryBlogIF" parameterType="map" resultType="blog">
        select * from mybatis.blog
        <where>
            <include refid="if-title-author"></include>
        </where>
    </select>
5.Foreach
    <!--
        select * from mybatis.blog where 1=1 and (id=1 or id=2 or id=3)
        我们现在传递一个万能的map,这map中可以存在一个集合!
    -->
    <select id="queryBlogForeach" parameterType="map" resultType="blog">
        select * from mybatis.blog
        <where>
            <foreach collection="ids" item="id" open="and (" close=")" separator="or">
                id = #{id}
            </foreach>
        </where>
    </select>
8. Cache
1 Introduction
- What is cache
Temporary data stored in memory. Put the data frequently queried by the user in the cache (memory), and the user does not need to query the data from the disk (relational database data file), but from the cache, thereby improving the query efficiency and solving the performance problem of the high-concurrency system . - Why use caching?
Reduce the number of interactions with the database, reduce system overhead, and improve system efficiency - Two levels of cache are defined by default in the MyBatis system: level 1 cache and level 2 cache
(1) By default, only level 1 cache is enabled. (SqlSession level cache, also known as local cache).
(2) The second-level cache needs to be manually enabled and configured. It is based on the namespace-level cache.
(3) In order to improve scalability, MyBatis defines the cache interface Cache. We can customize the second-level cache by implementing the Cache interface
2. Level 1 cache
Level 1 cache is also called local cache: SqlSession. The data queried during the same session with the database will be placed in the local cache. If you need to get the same data in the future, you can get it directly from the cache, and there is no need to query the database again.
Test steps:
- Turn on the log!
- Test to query the same record twice in one session
- View log output
3. Second level cache
The second-level cache is also called the global cache. The scope of the first-level cache is too low, so the second-level cache was born. Cache based on namespace level, a namespace corresponds to a second-level cache;
working mechanism
- When a session queries a piece of data, the data will be placed in the first-level cache of the current session;
- If the current session is closed, the first-level cache corresponding to this session is gone; but what we want is that when the session is closed, the data in the first-level cache is saved to the second-level cache;
- The new session query information can get the content from the second-level cache;
- The data detected by different mappers will be placed in their corresponding cache (map)
step:
- Enable global cache
    <settings>
        <!--显示的开启全局缓存-->
        <setting name="cacheEnabled" value="true"/>
    </settings>
- Open it in the Mapper that will use the second-level cache, or you can customize the parameters
    <!--在当前Mapper.xml中使用二级缓存-->
    <cache/>
- test
4. Custom cache (ehcache)
Ehcache is a widely used open source Java distributed cache. Primarily for general purpose caching
(1) To use ehcache in the program, first import the package!
	<!-- https://mvnrepository.com/artifact/org.mybatis.caches/mybatis-ehcache -->
	<dependency>
        <groupId>org.mybatis.caches</groupId>
        <artifactId>mybatis-ehcache</artifactId>
    	<version>1.1.0</version>
 	</dependency>
(2) Specify to use our ehcache cache implementation in mapper!
    <!--在当前Mapper.xml中使用二级缓存-->
    <cache type="org.mybatis.caches.ehcache.EhcacheCache"/>
(3) Configure ehcache.xml
<?xml version="1.0" encoding="UTF-8"?>
<ehcache xmlns:xsi="http://www.w3.org/2001/XMLSchema-instance"
        xsi:noNamespaceSchemaLocation="http://ehcache.org/ehcache.xsd"
        updateCheck="false">
    <!--
        diskStore:为缓存路径,ehcache分为内存和磁盘两级,此属性定义磁盘的缓存位置。参数解释如下:
            user.home – 用户主目录
            user.dir – 用户当前工作目录
            java.io.tmpdir – 默认临时文件路径
    -->
    <diskStore path="./tmpdir/Tmp_EhCache"/>
    <defaultCache
            eternal="false"
            maxElementsInMemory="10000"
            overflowToDisk="false"
            diskPersistent="false"
            timeToIdleSeconds="1800"
            timeToLiveSeconds="259200"
            memoryStoreEvictionPolicy="LRU"/>
    <cache
            name="cloud_user"
            eternal="false"
            maxElementsInMemory="5000"
            overflowToDisk="false"
            diskPersistent="false"
            timeToIdleSeconds="1800"
            timeToLiveSeconds="1800"
            memoryStoreEvictionPolicy="LRU"/>
    <!--
        defaultCache:默认缓存策略,当ehcache找不到定义的缓存时,则使用这个缓存策略。只能定义一个.
    -->
    <!--
        name:缓存名称。
        maxElementsInMemory:缓存最大数目。
        maxElementsOnDisk:硬盘最大缓存个数。
        eternal:对象是否永久有效,一但设置了,timeout将不起作用。
        overflowToDisk:是否保存到磁盘,当系统宕机时
        timeToIdleSeconds:设置对象在失效前的允许闲置时间(单位:秒)。仅当eternal=false对象不是永久有效时使用,可选属性,默认值是0,也就是可闲置时间无穷大。
        timeToLiveSeconds:设置对象在失效前允许存活时间(单位:秒)。最大时间介于创建时间和失效时间之间。仅当eternal=false对象不是永久有效时使用,默认是0.,也就是对象存活时间无穷大。
        diskPersistent:是否缓存虚拟机重启期数据 Whether the disk store persists between restarts of the Virtual Machine. The default value is false.
        diskSpoolBufferSizeMB:这个参数设置DiskStore(磁盘缓存)的缓存区大小。默认是30MB。每个Cache都应该有自己的一个缓冲区。
        diskExpiryThreadIntervalSeconds:磁盘失效线程运行时间间隔,默认是120秒。
        memoryStoreEvictionPolicy:当达到maxElementsInMemory限制时,Ehcache将会根据指定的策略去清理内存。默认策略是LRU(最近最少使用)。你可以设置为FIFO(先进先出)或是LFU(较少使用)。
        clearOnFlush:内存数量最大时是否清除。
        memoryStoreEvictionPolicy:可选策略有:LRU(最近最少使用,默认策略)、FIFO(先进先出)、LFU(最少访问次数)。
        FIFO:first in first out,这个是大家最熟的,先进先出。
        LFU:Less Frequently Used,就是上面例子中使用的策略,直白一点就是讲一直以来最少被使用的。如上面所讲,缓存的元素有一个hit属性,hit值最小的将会被清出缓存。
        LRU:Least Recently Used,最近最少使用的,缓存的元素有一个时间戳,当缓存容量满了,而又需要腾出地方来缓存新的元素的时候,那么现有缓存元素中时间戳离当前时间最远的元素将被清出缓存。
    -->
</ehcache>