foreword
What is WeChat Cloud Development Management Tool?
Provides a set of background management tools for cloud development and low-code development tools. Developers can connect to business databases based on low-code tools, drag and drop components to generate front-end UIs, and customize various management applications.
Some students here will definitely ask what is the difference between it and cloud development content management CMS ?
It can be understood as more flexible and customizable content management, which is easier and more flexible to use when combined with the micro-build.
If you don’t know about micro-build, you can read the low-code platform micro-build tutorial I wrote before.
to experience
At present, the WeChat cloud development management tool is still in internal testing. If you need to apply for internal testing permissions, click here to apply for the entrance
Open the homepage
When we successfully opened the permissions
- Download/update the latest version of WeChat developer tools
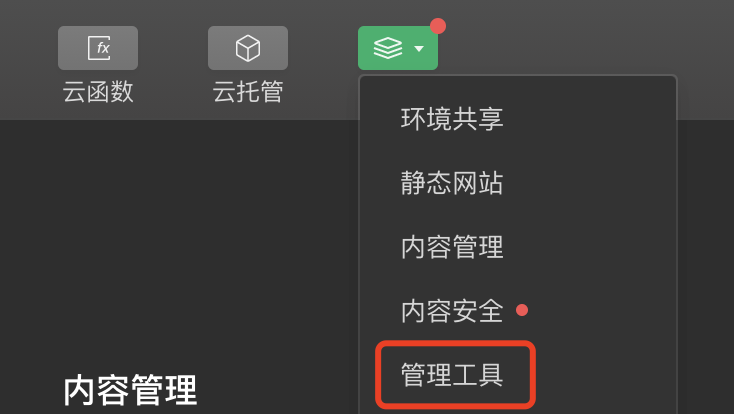
- Enter the cloud development IDE console

3. Select "Management Tools" in "More"
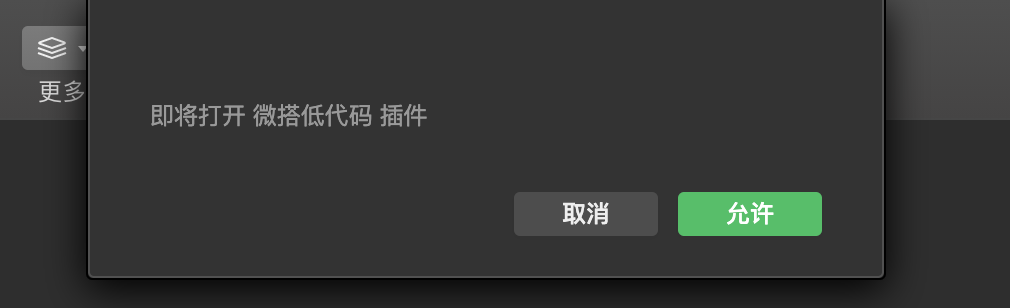
4. After opening, it will prompt whether to open the micro-build low-code plug-in prompt, select "Allow"
template experience
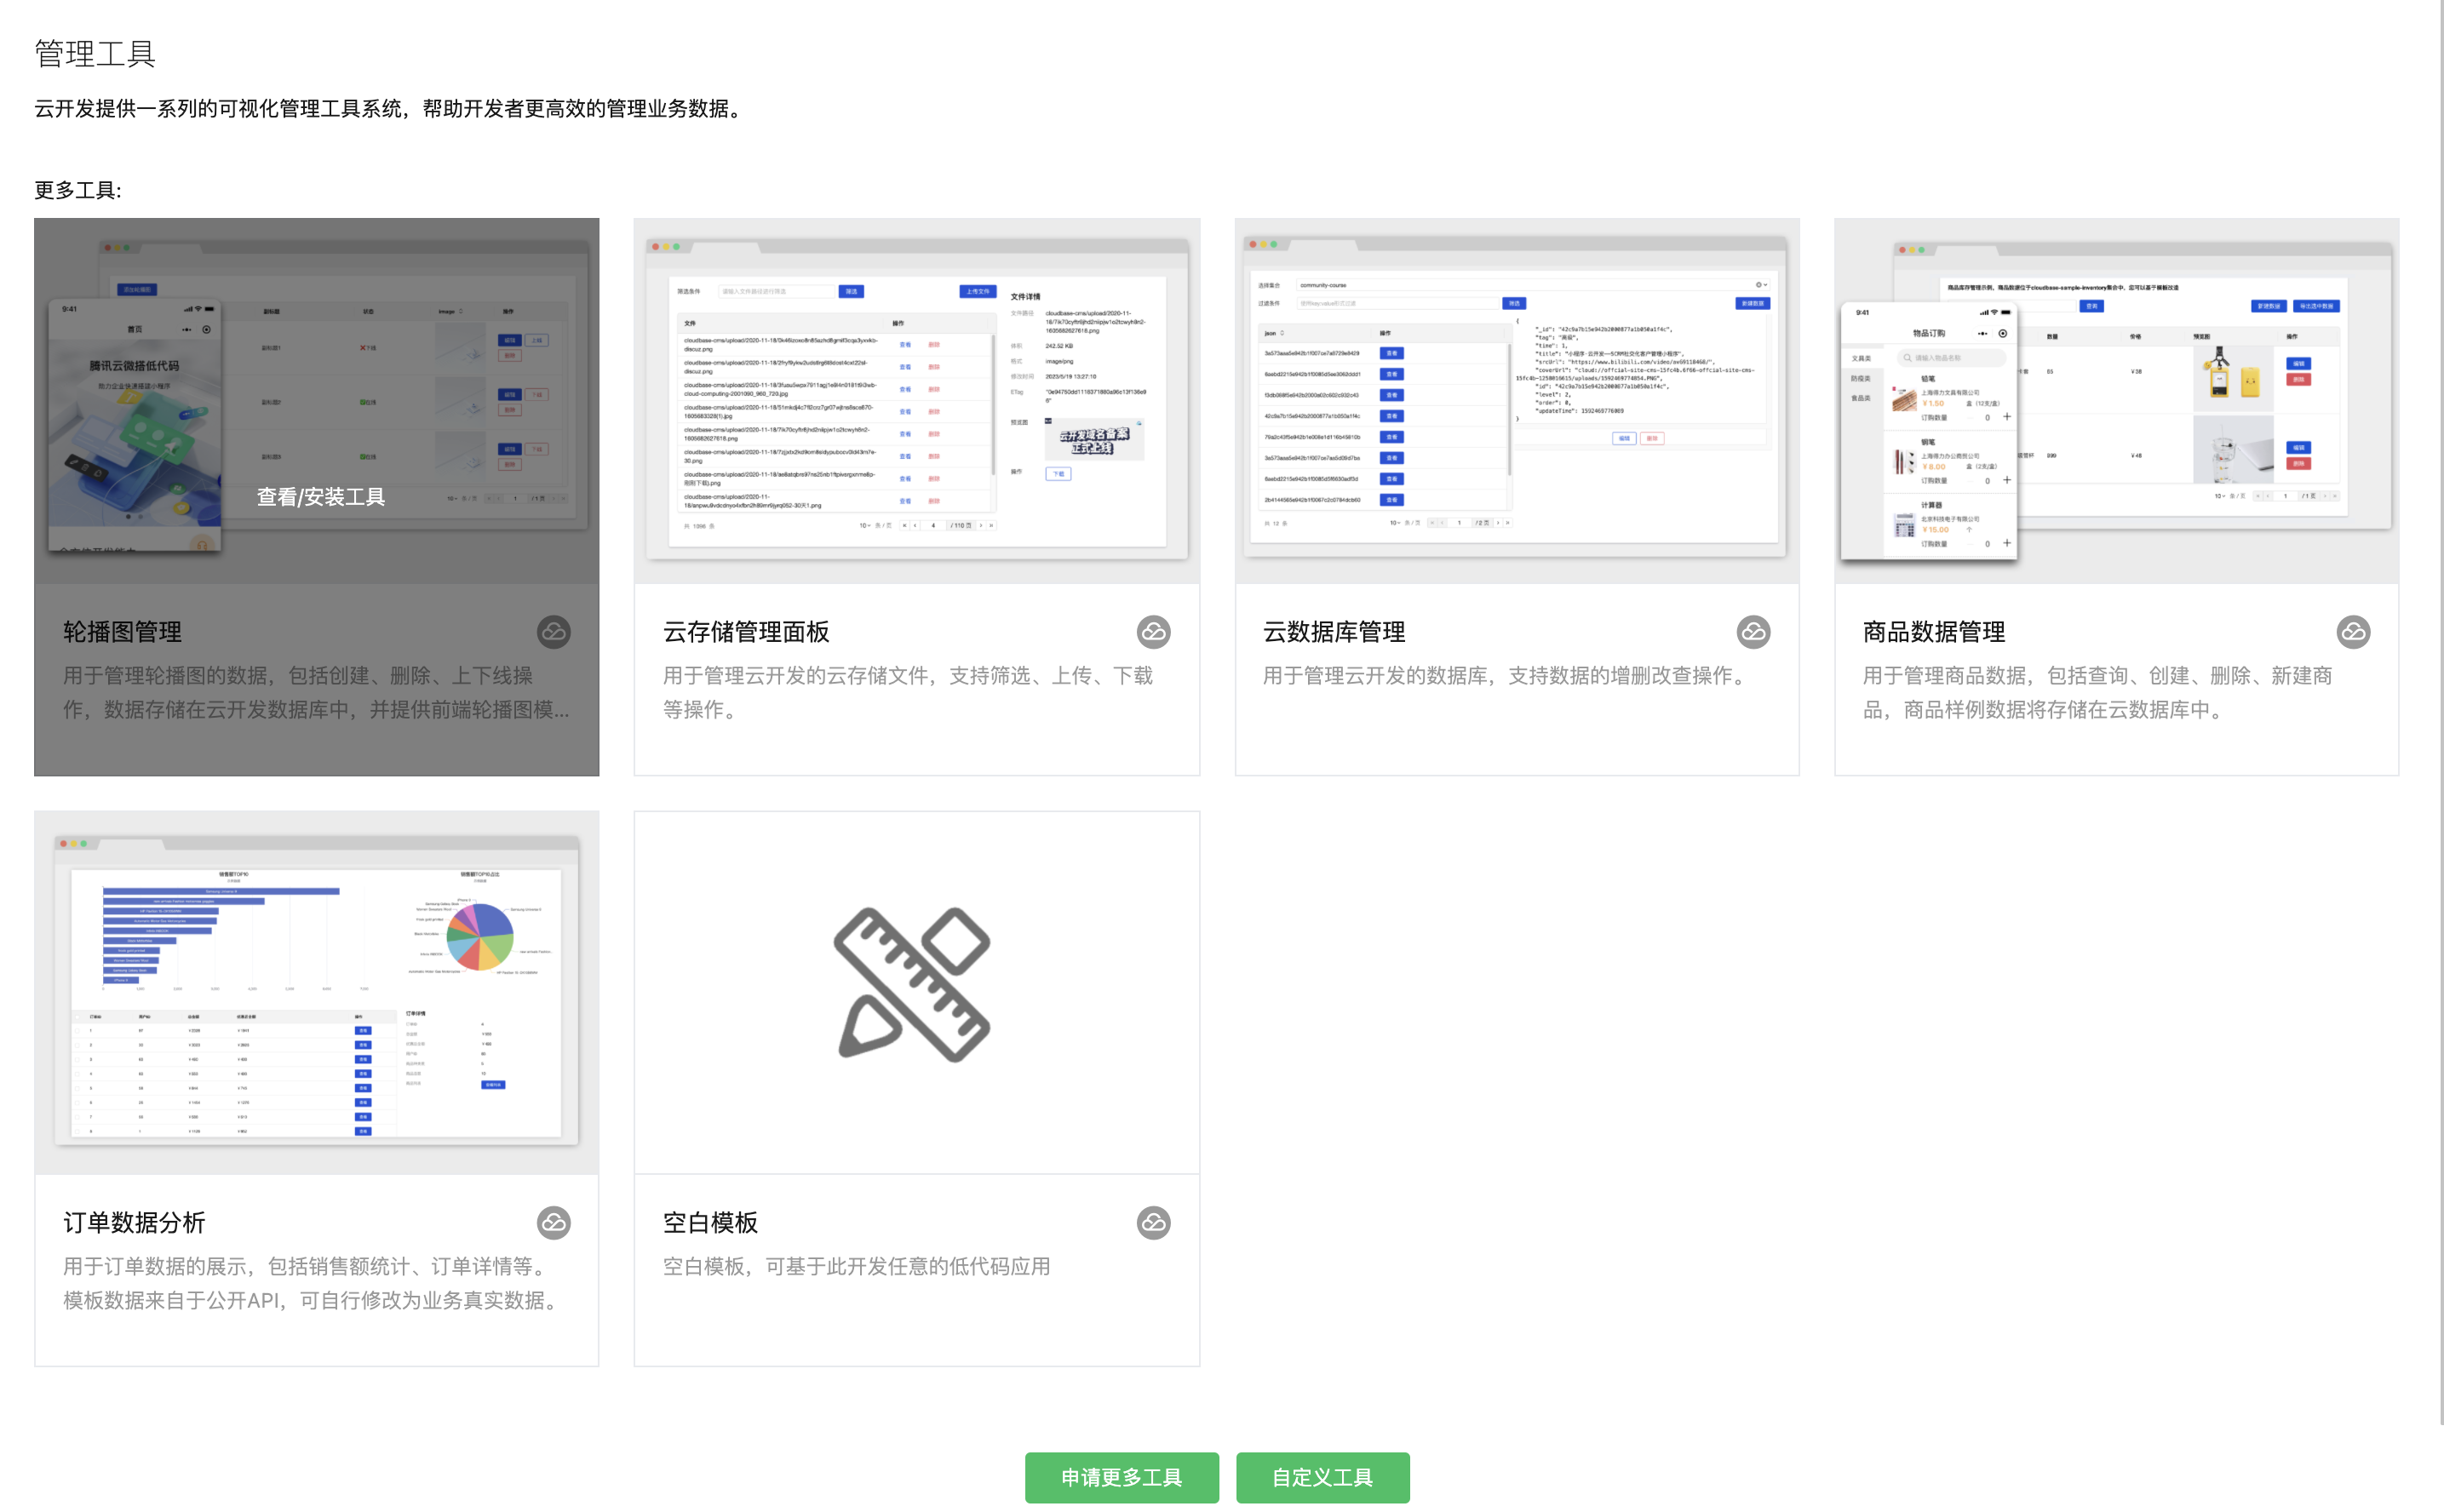
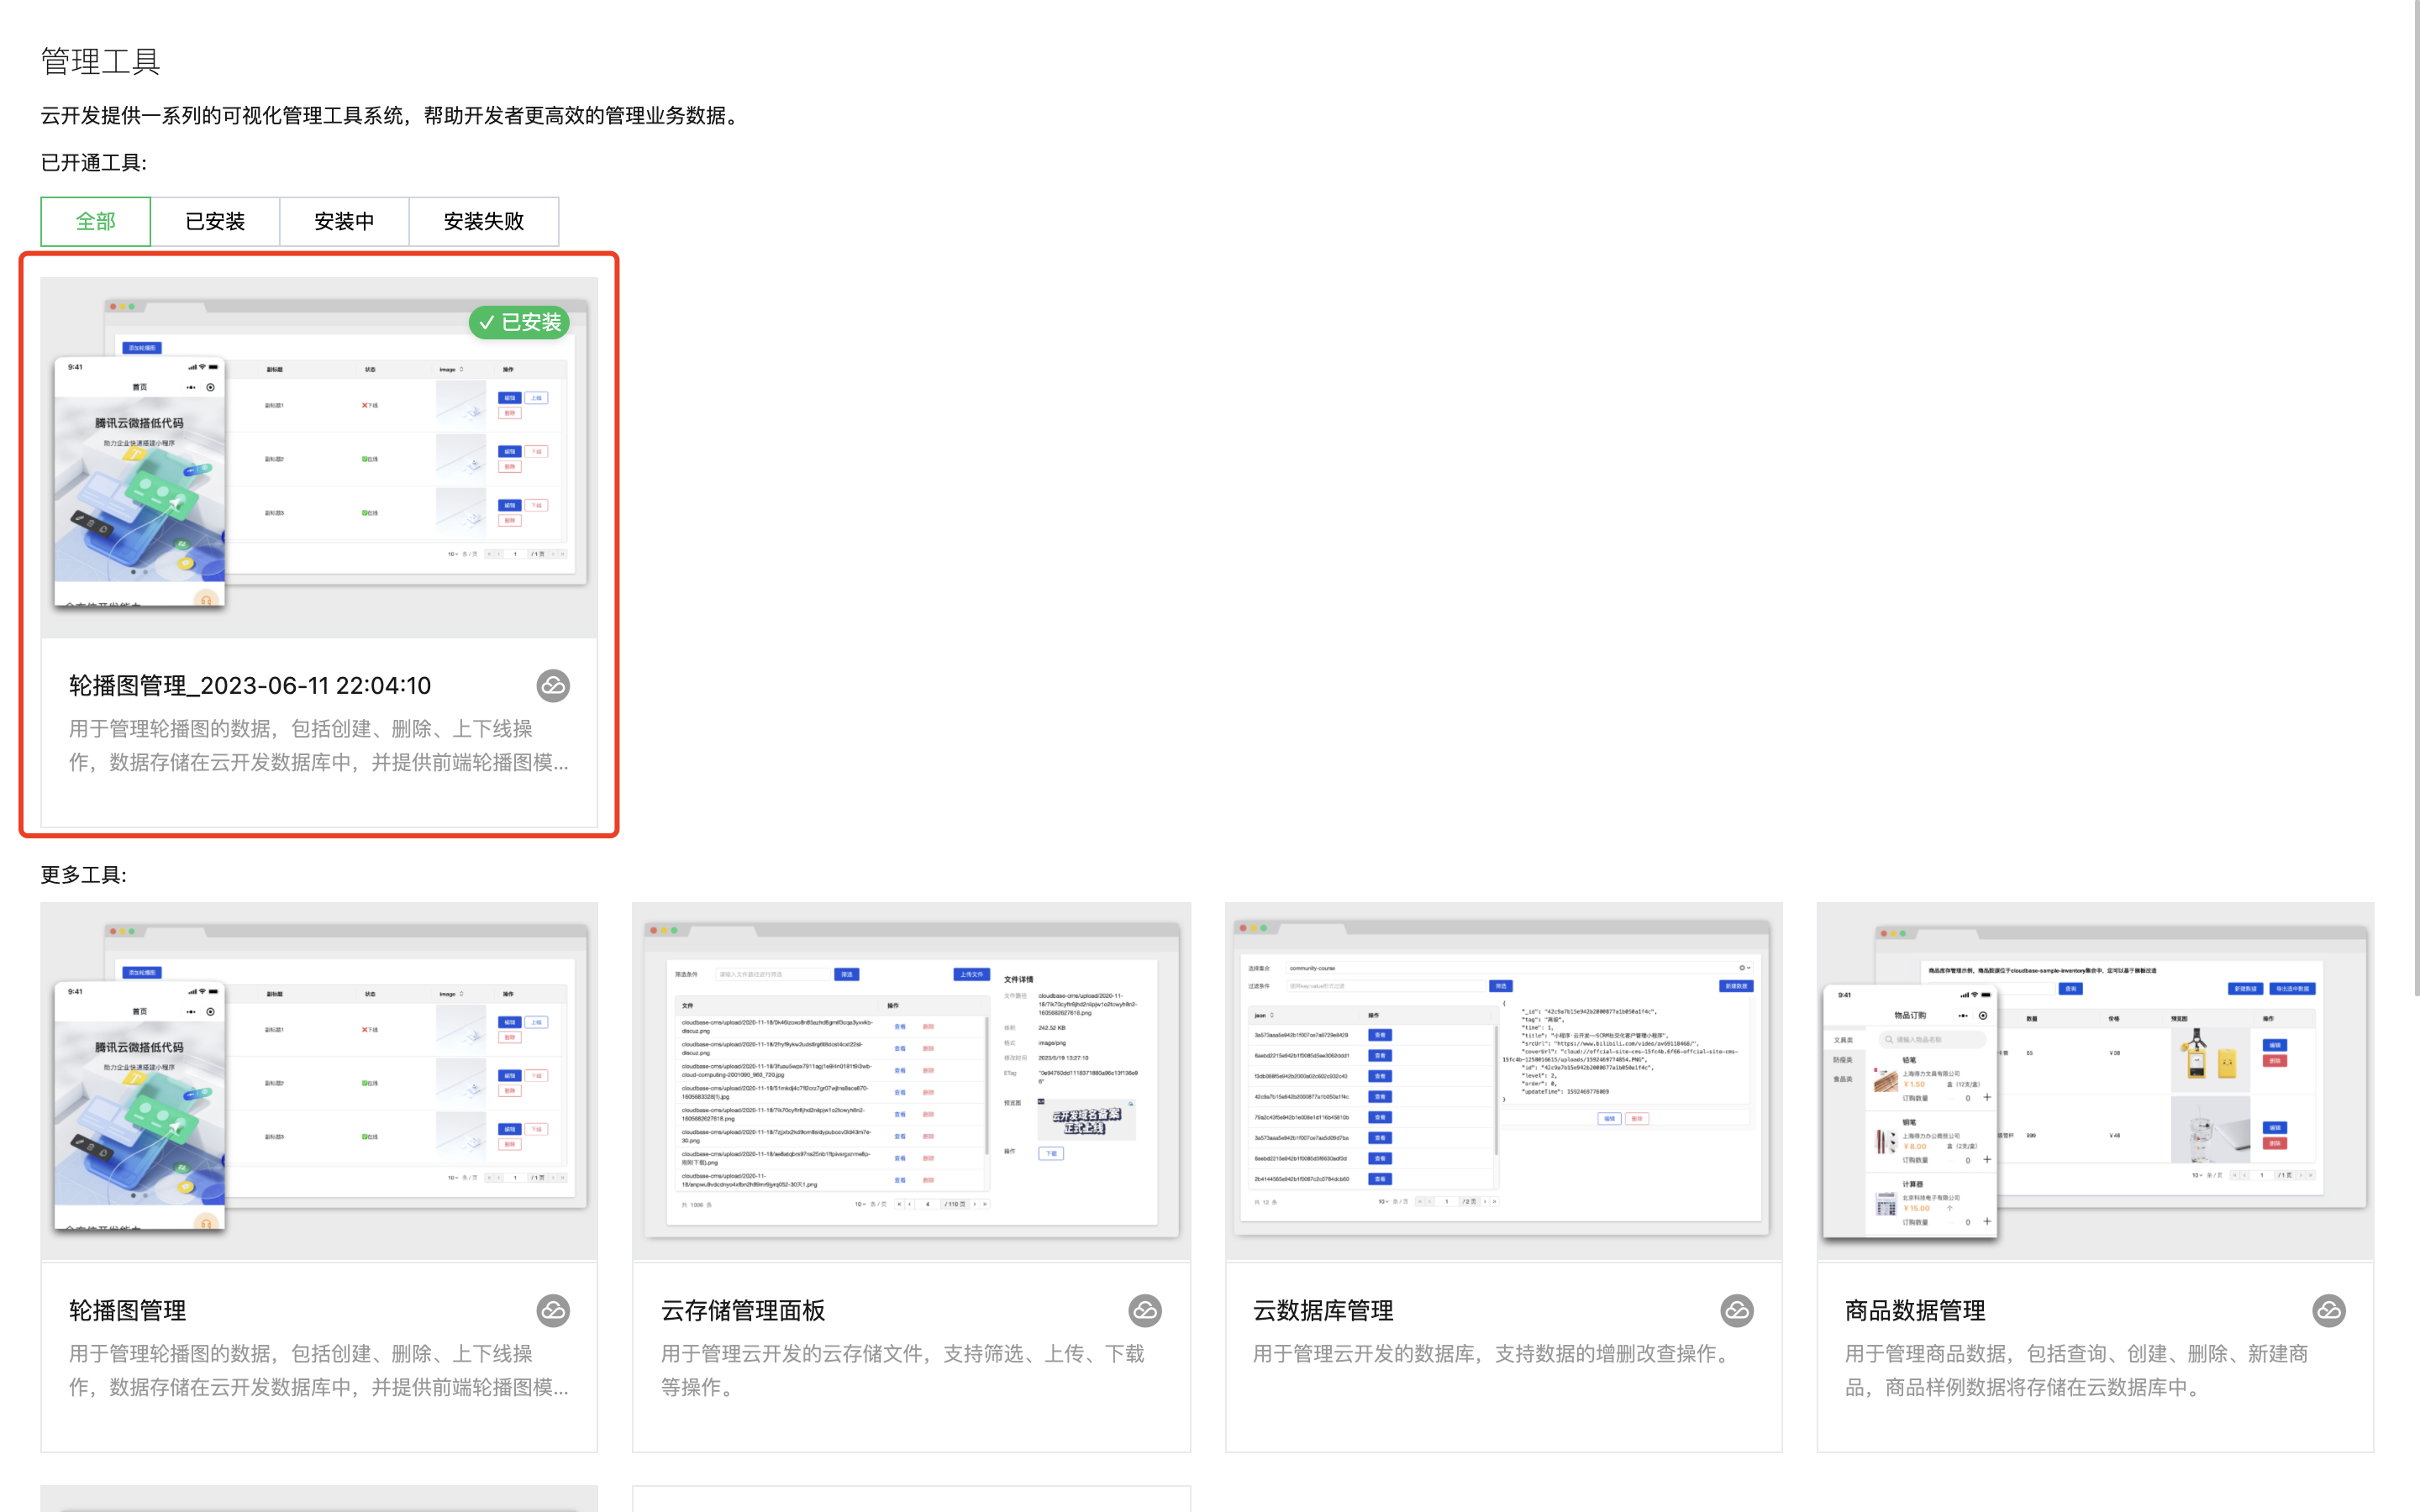
From this step, you have officially entered the management tool. The first thing you can see is the template page. Currently, commonly used templates have been built in. You need to click "View/Install Tools" for the template.
This makes me feel that this is like an App market on a mobile phone system. You can install whatever you need. As long as there are enough templates, developers can improve a lot of efficiency and development costs can be greatly improved. If this template market can support developers to access and release, similar to how App developers can freely publish App market, and can also make paid templates, then there is still a lot of room for imagination.
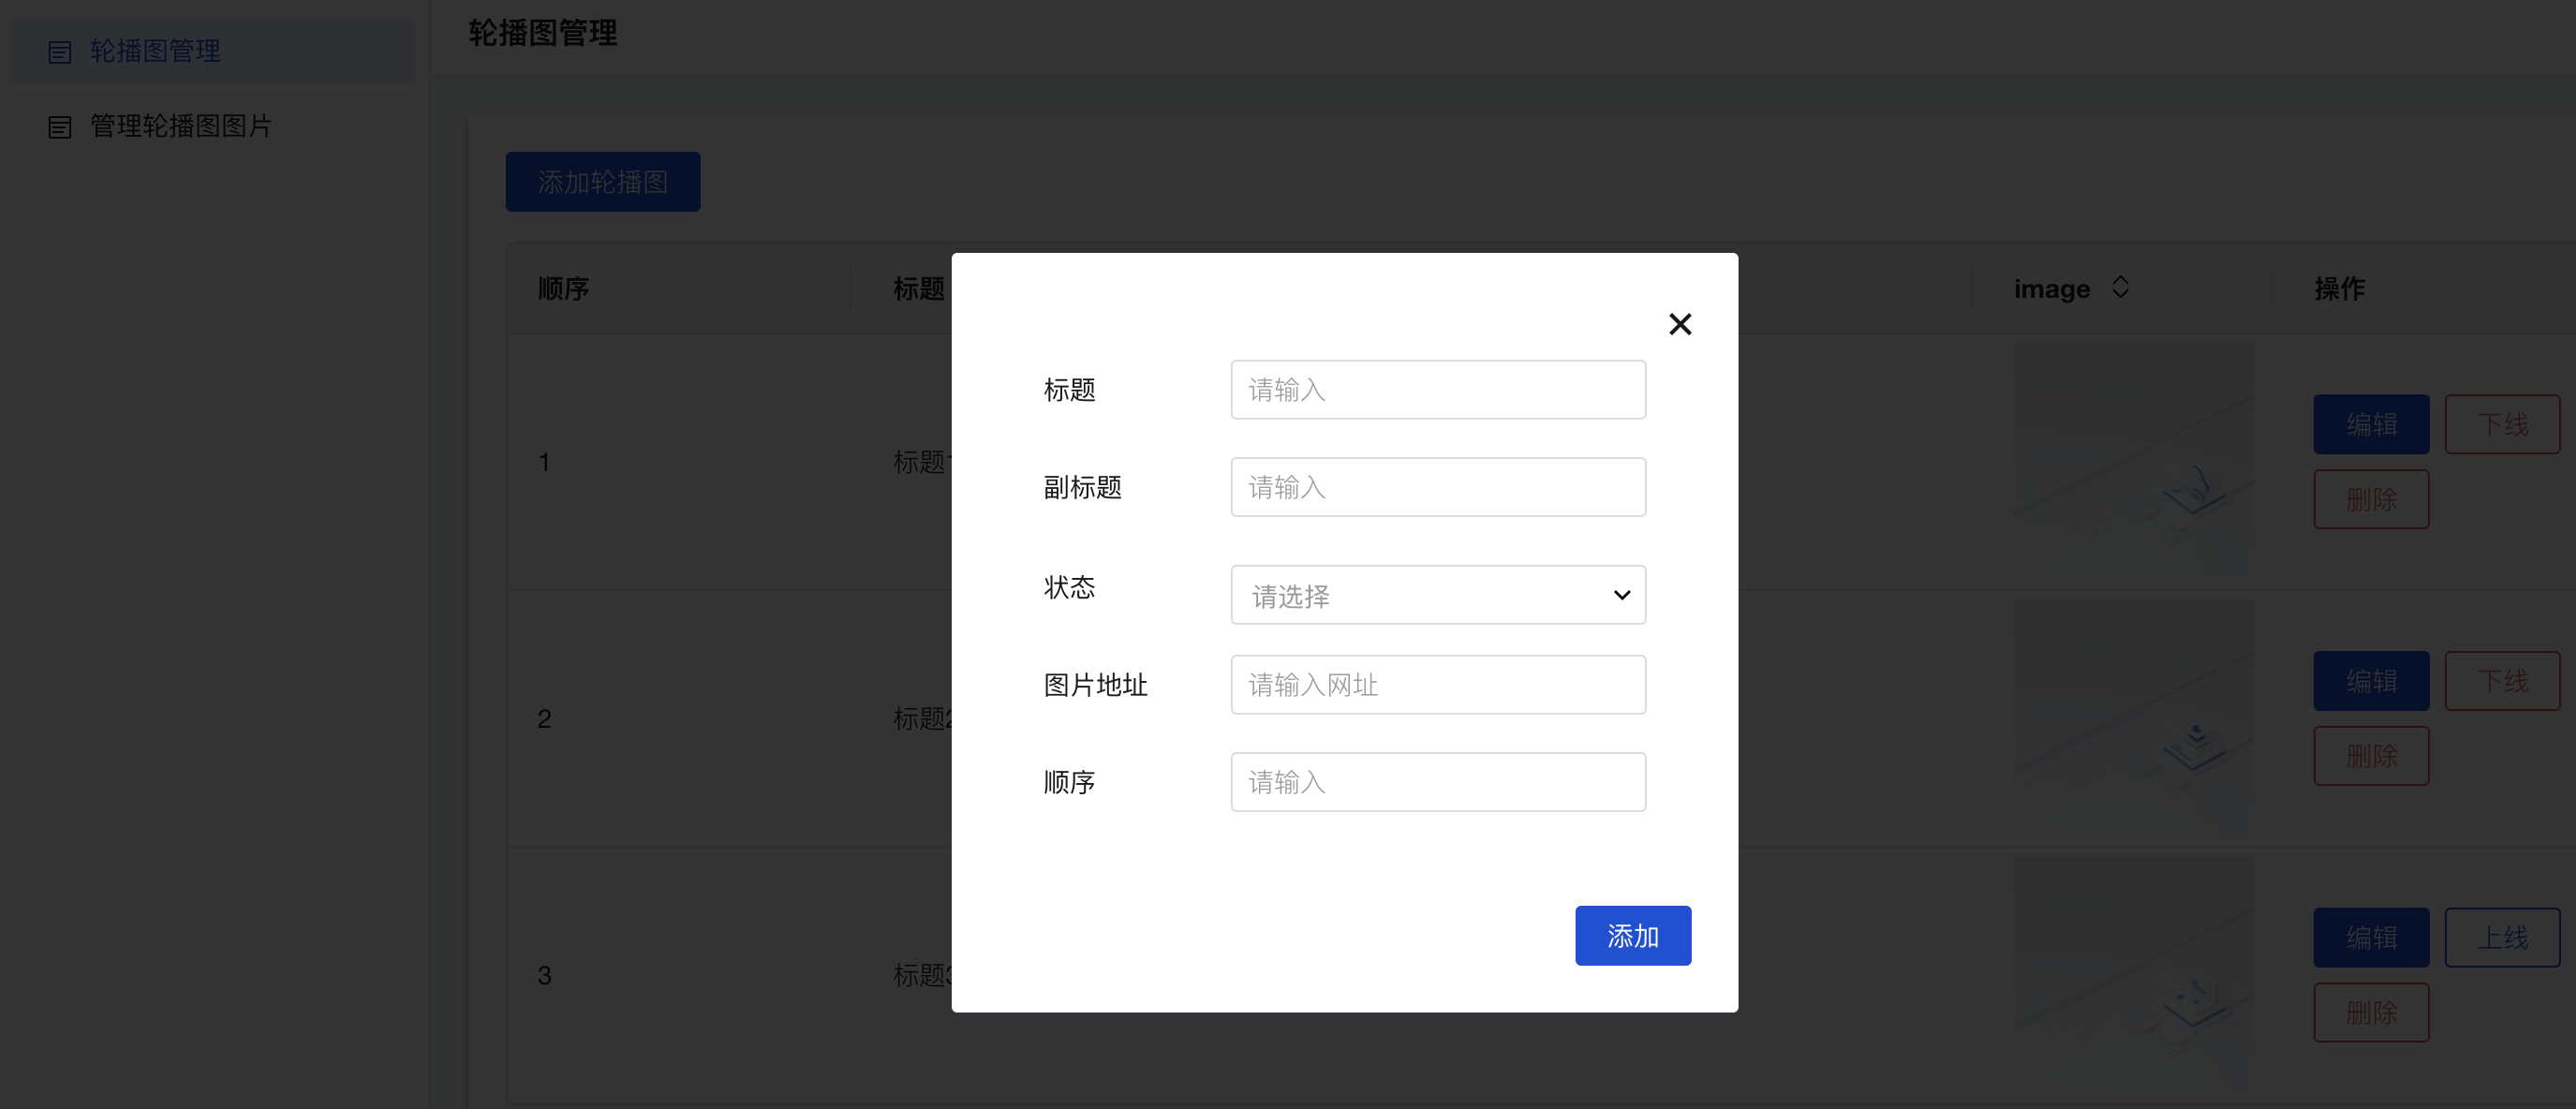
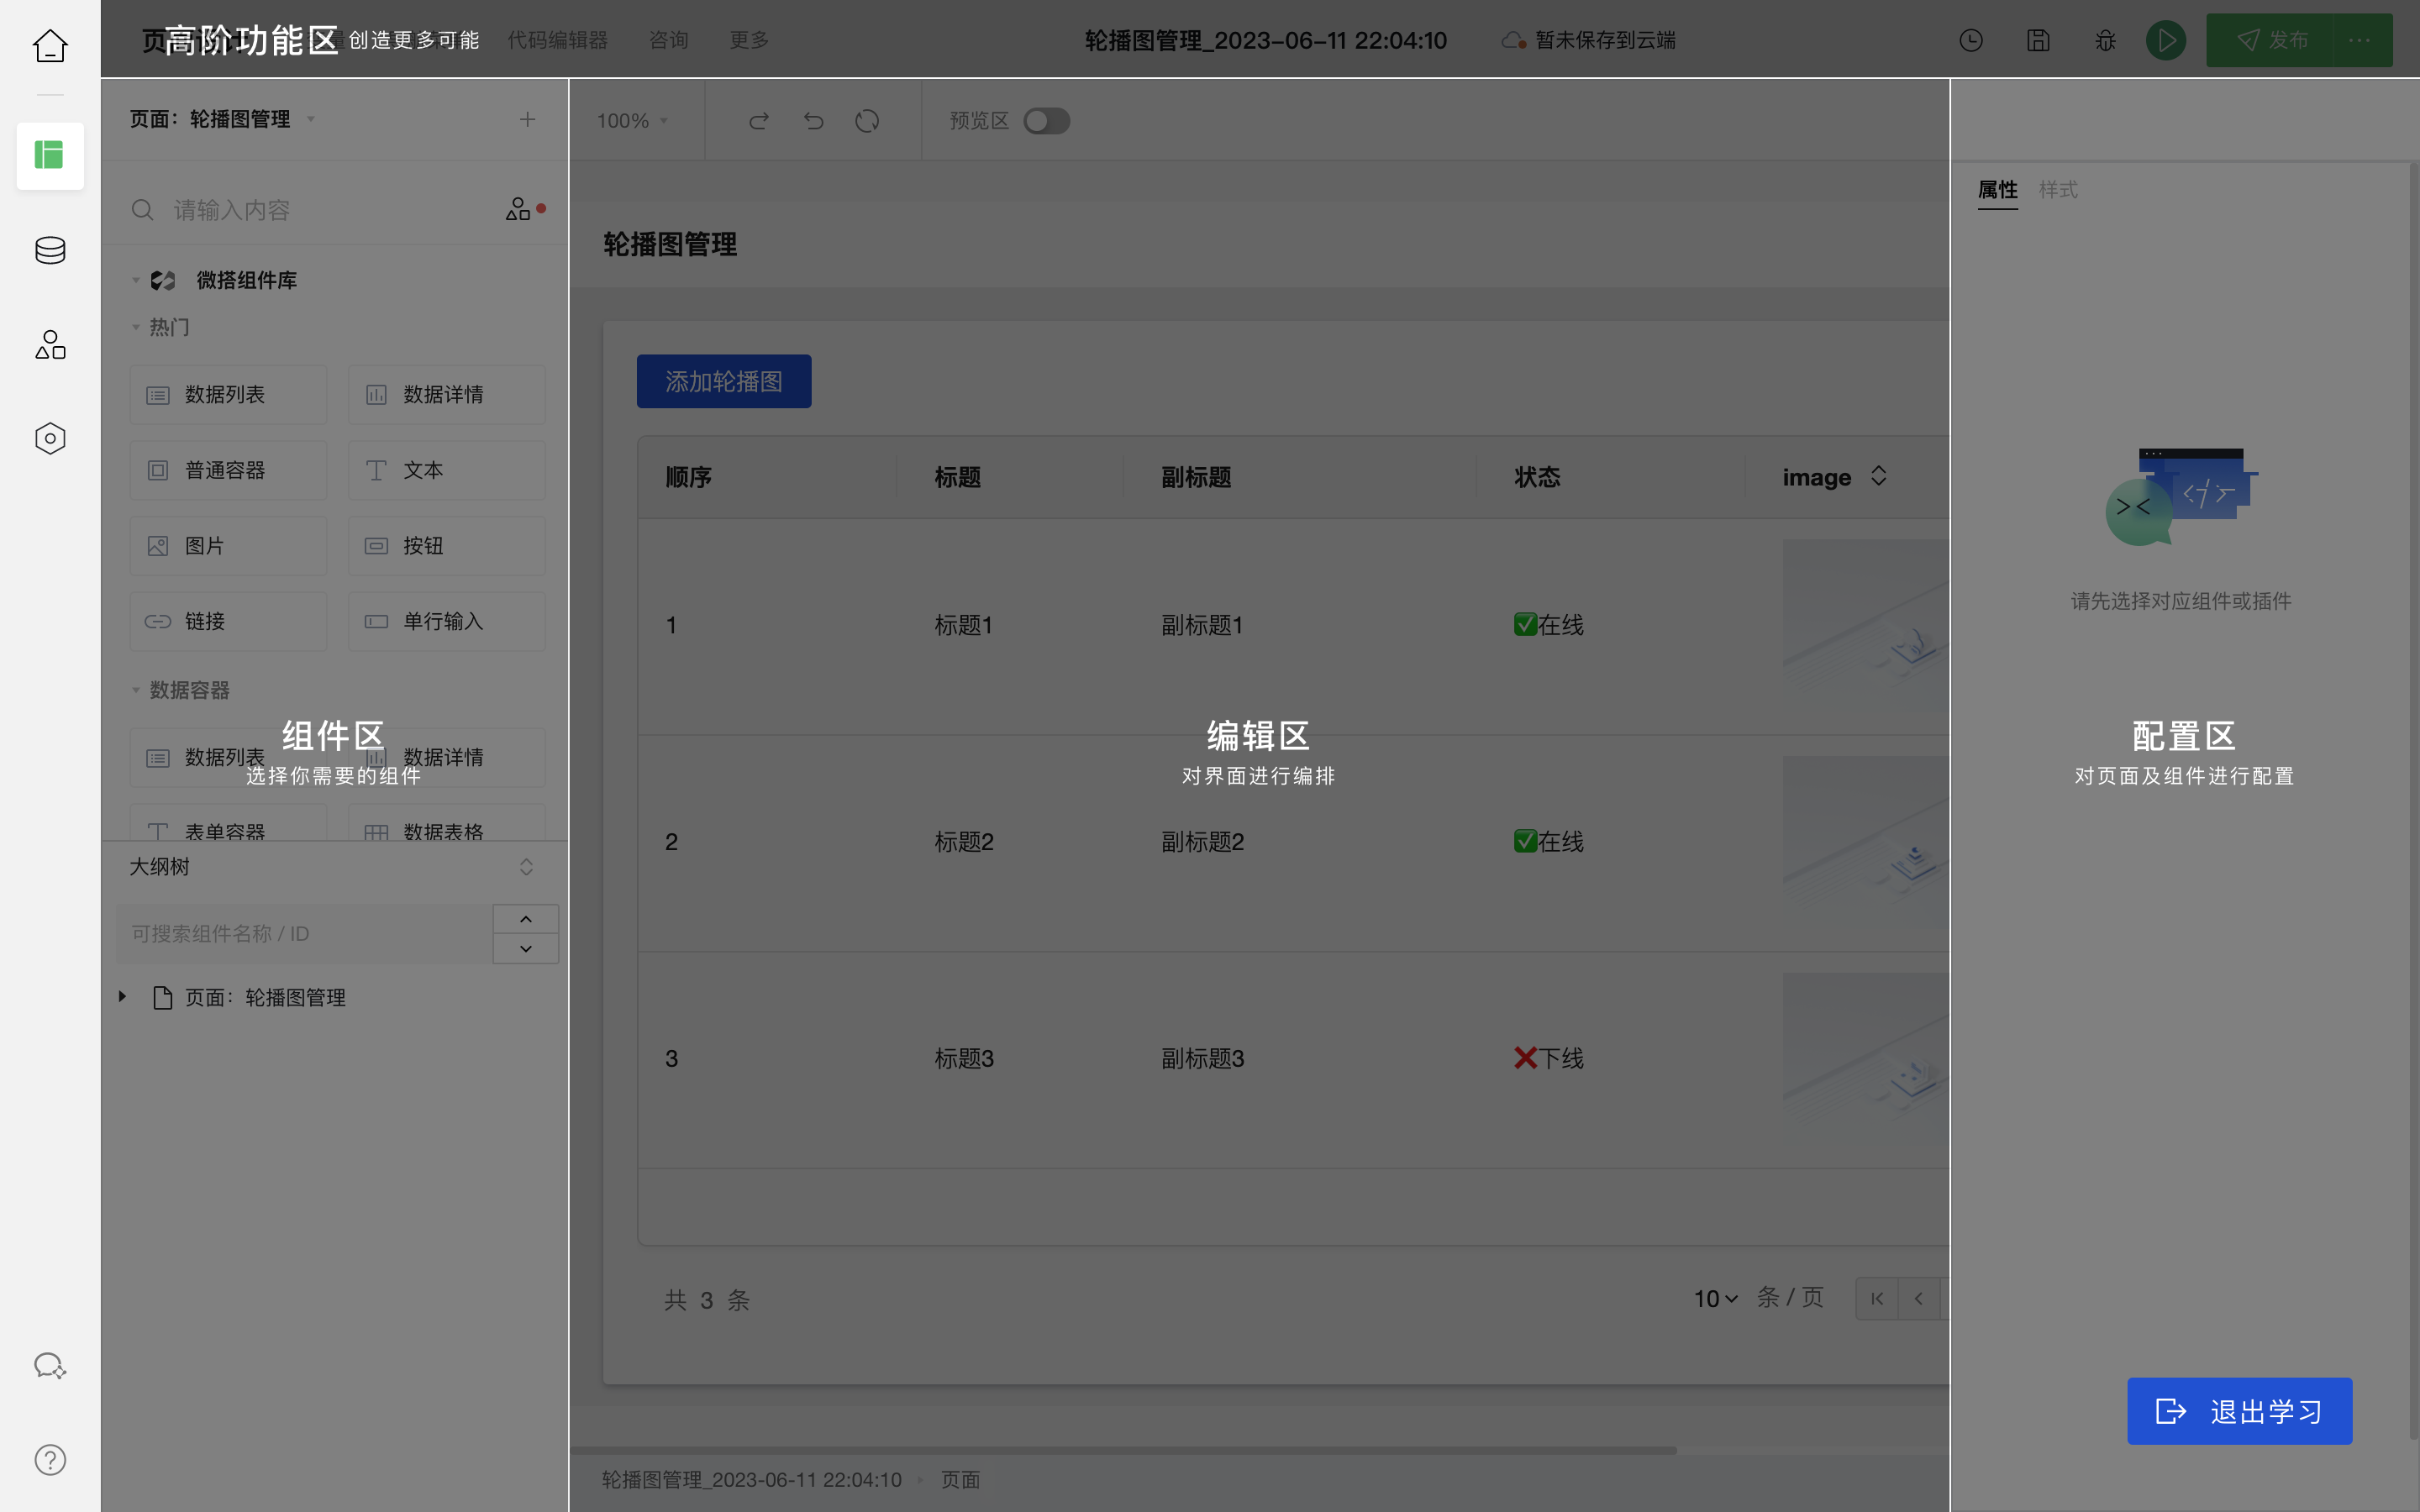
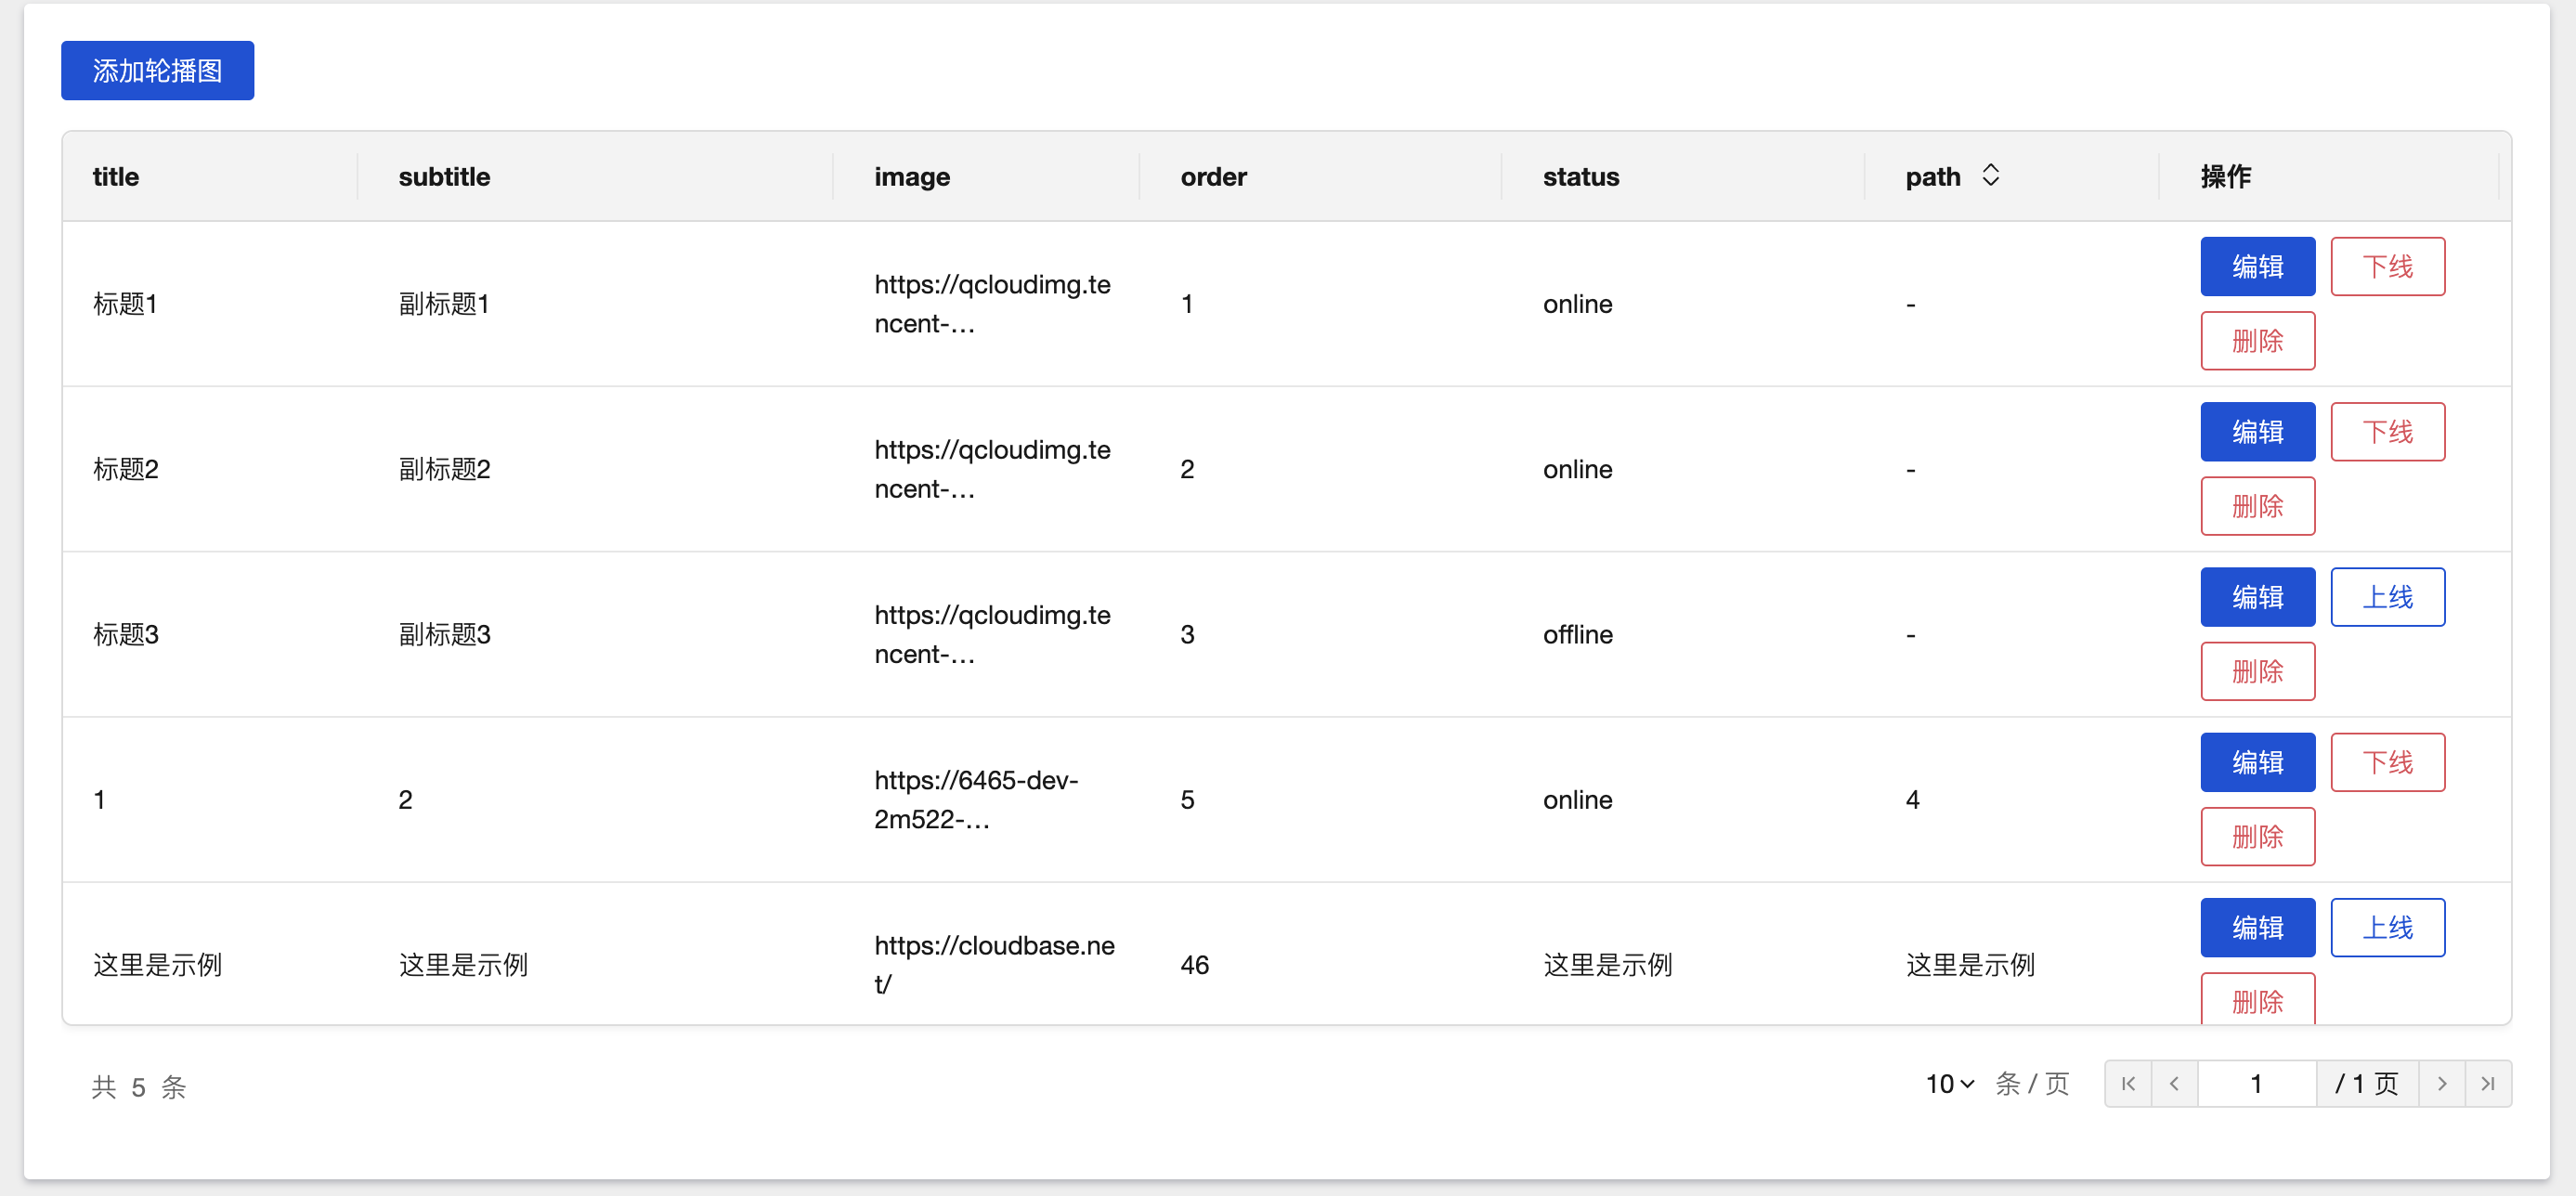
I first choose a carousel image to manage and test the effect.
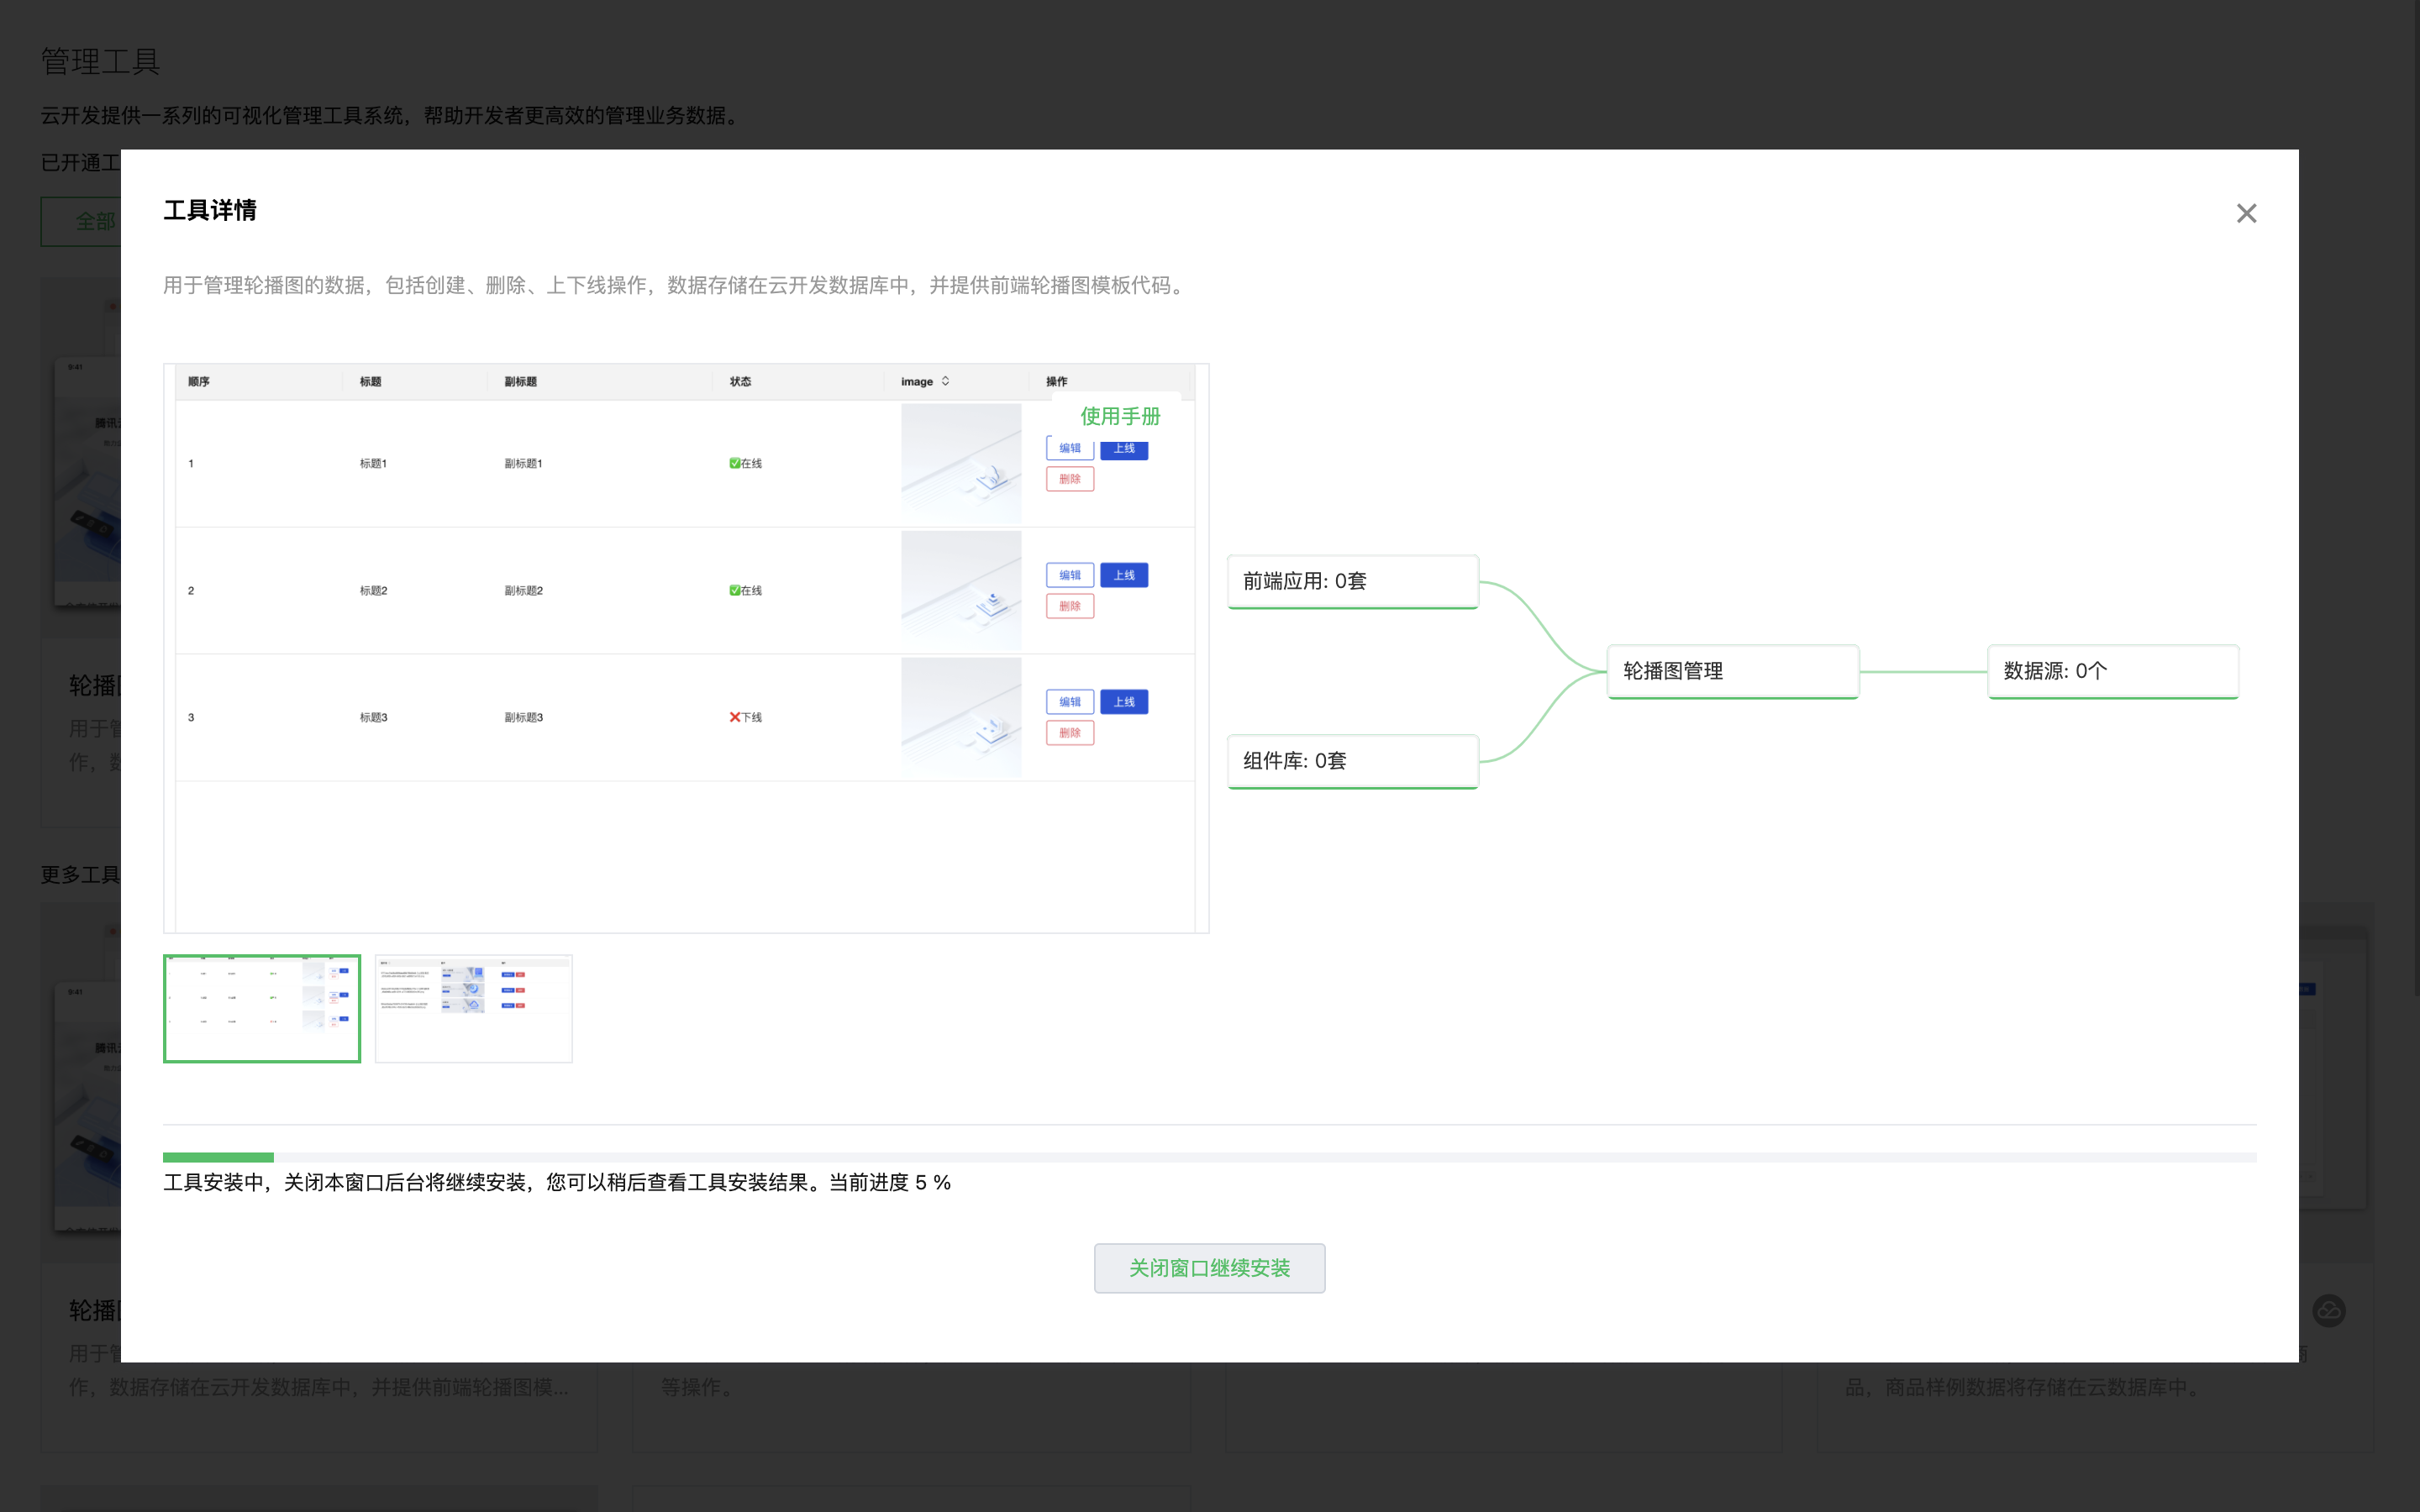
Tip: The first loading will be slow, you need to wait patiently
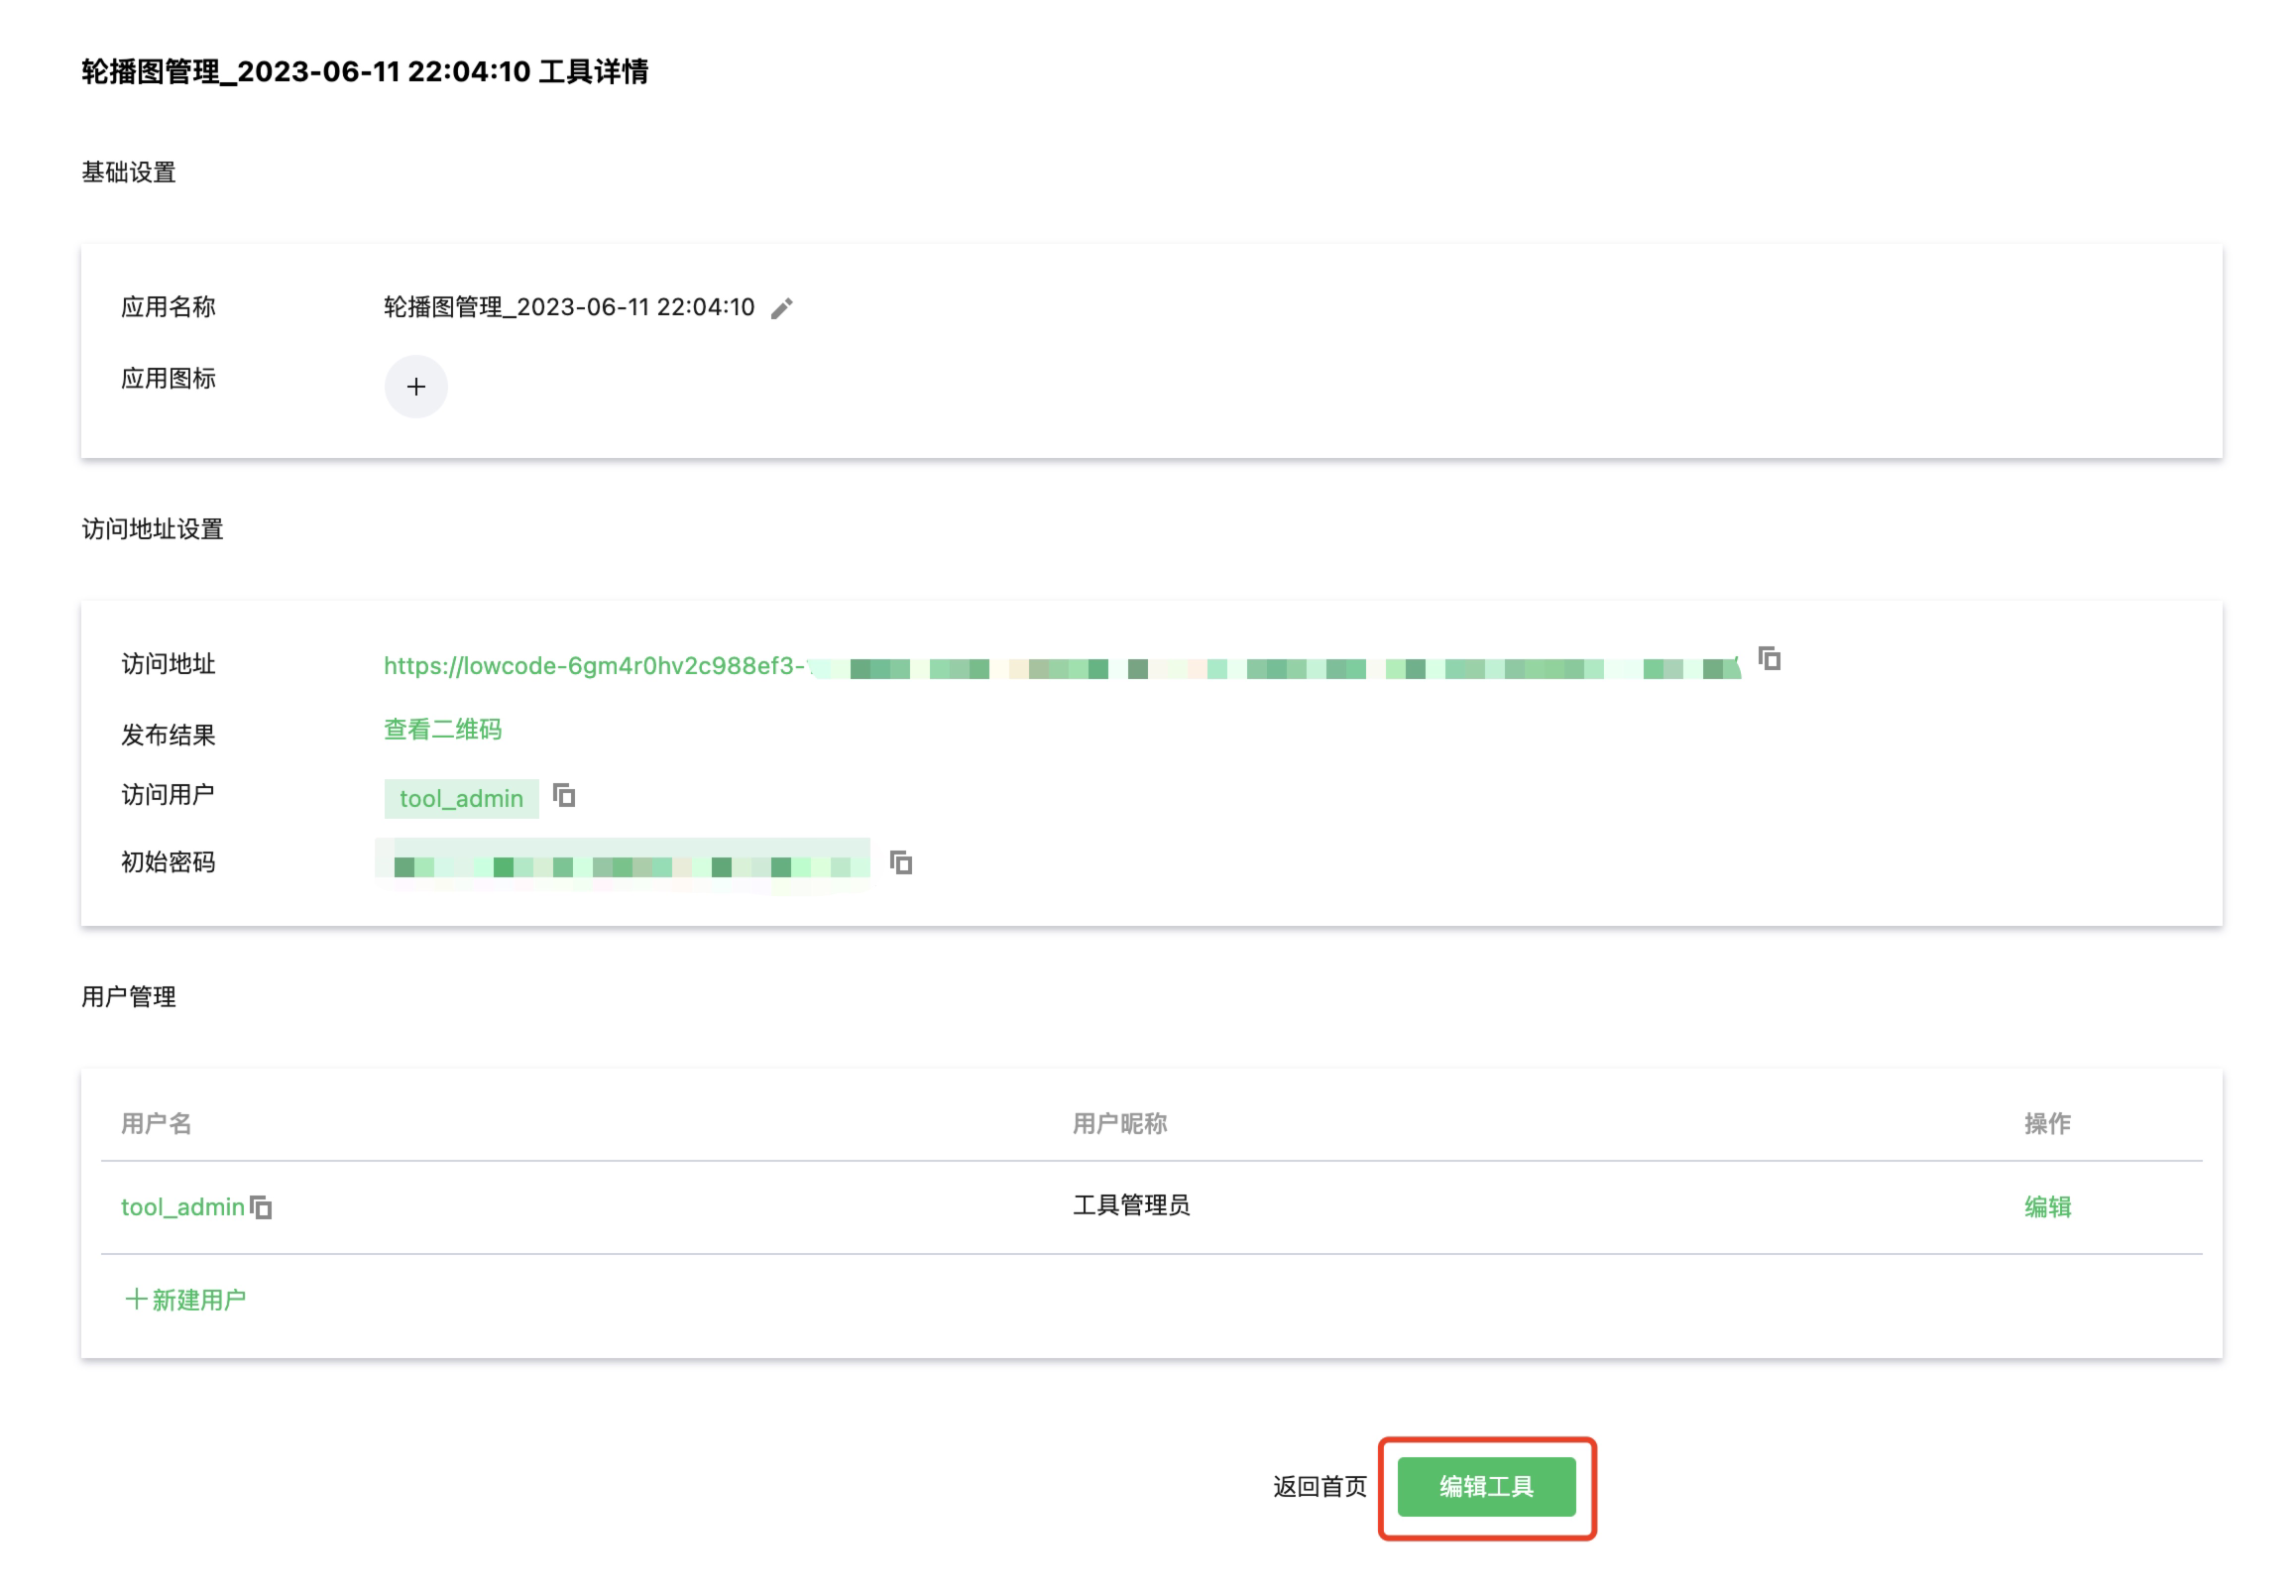
After the installation is successful, you can get the management background address and administrator account password
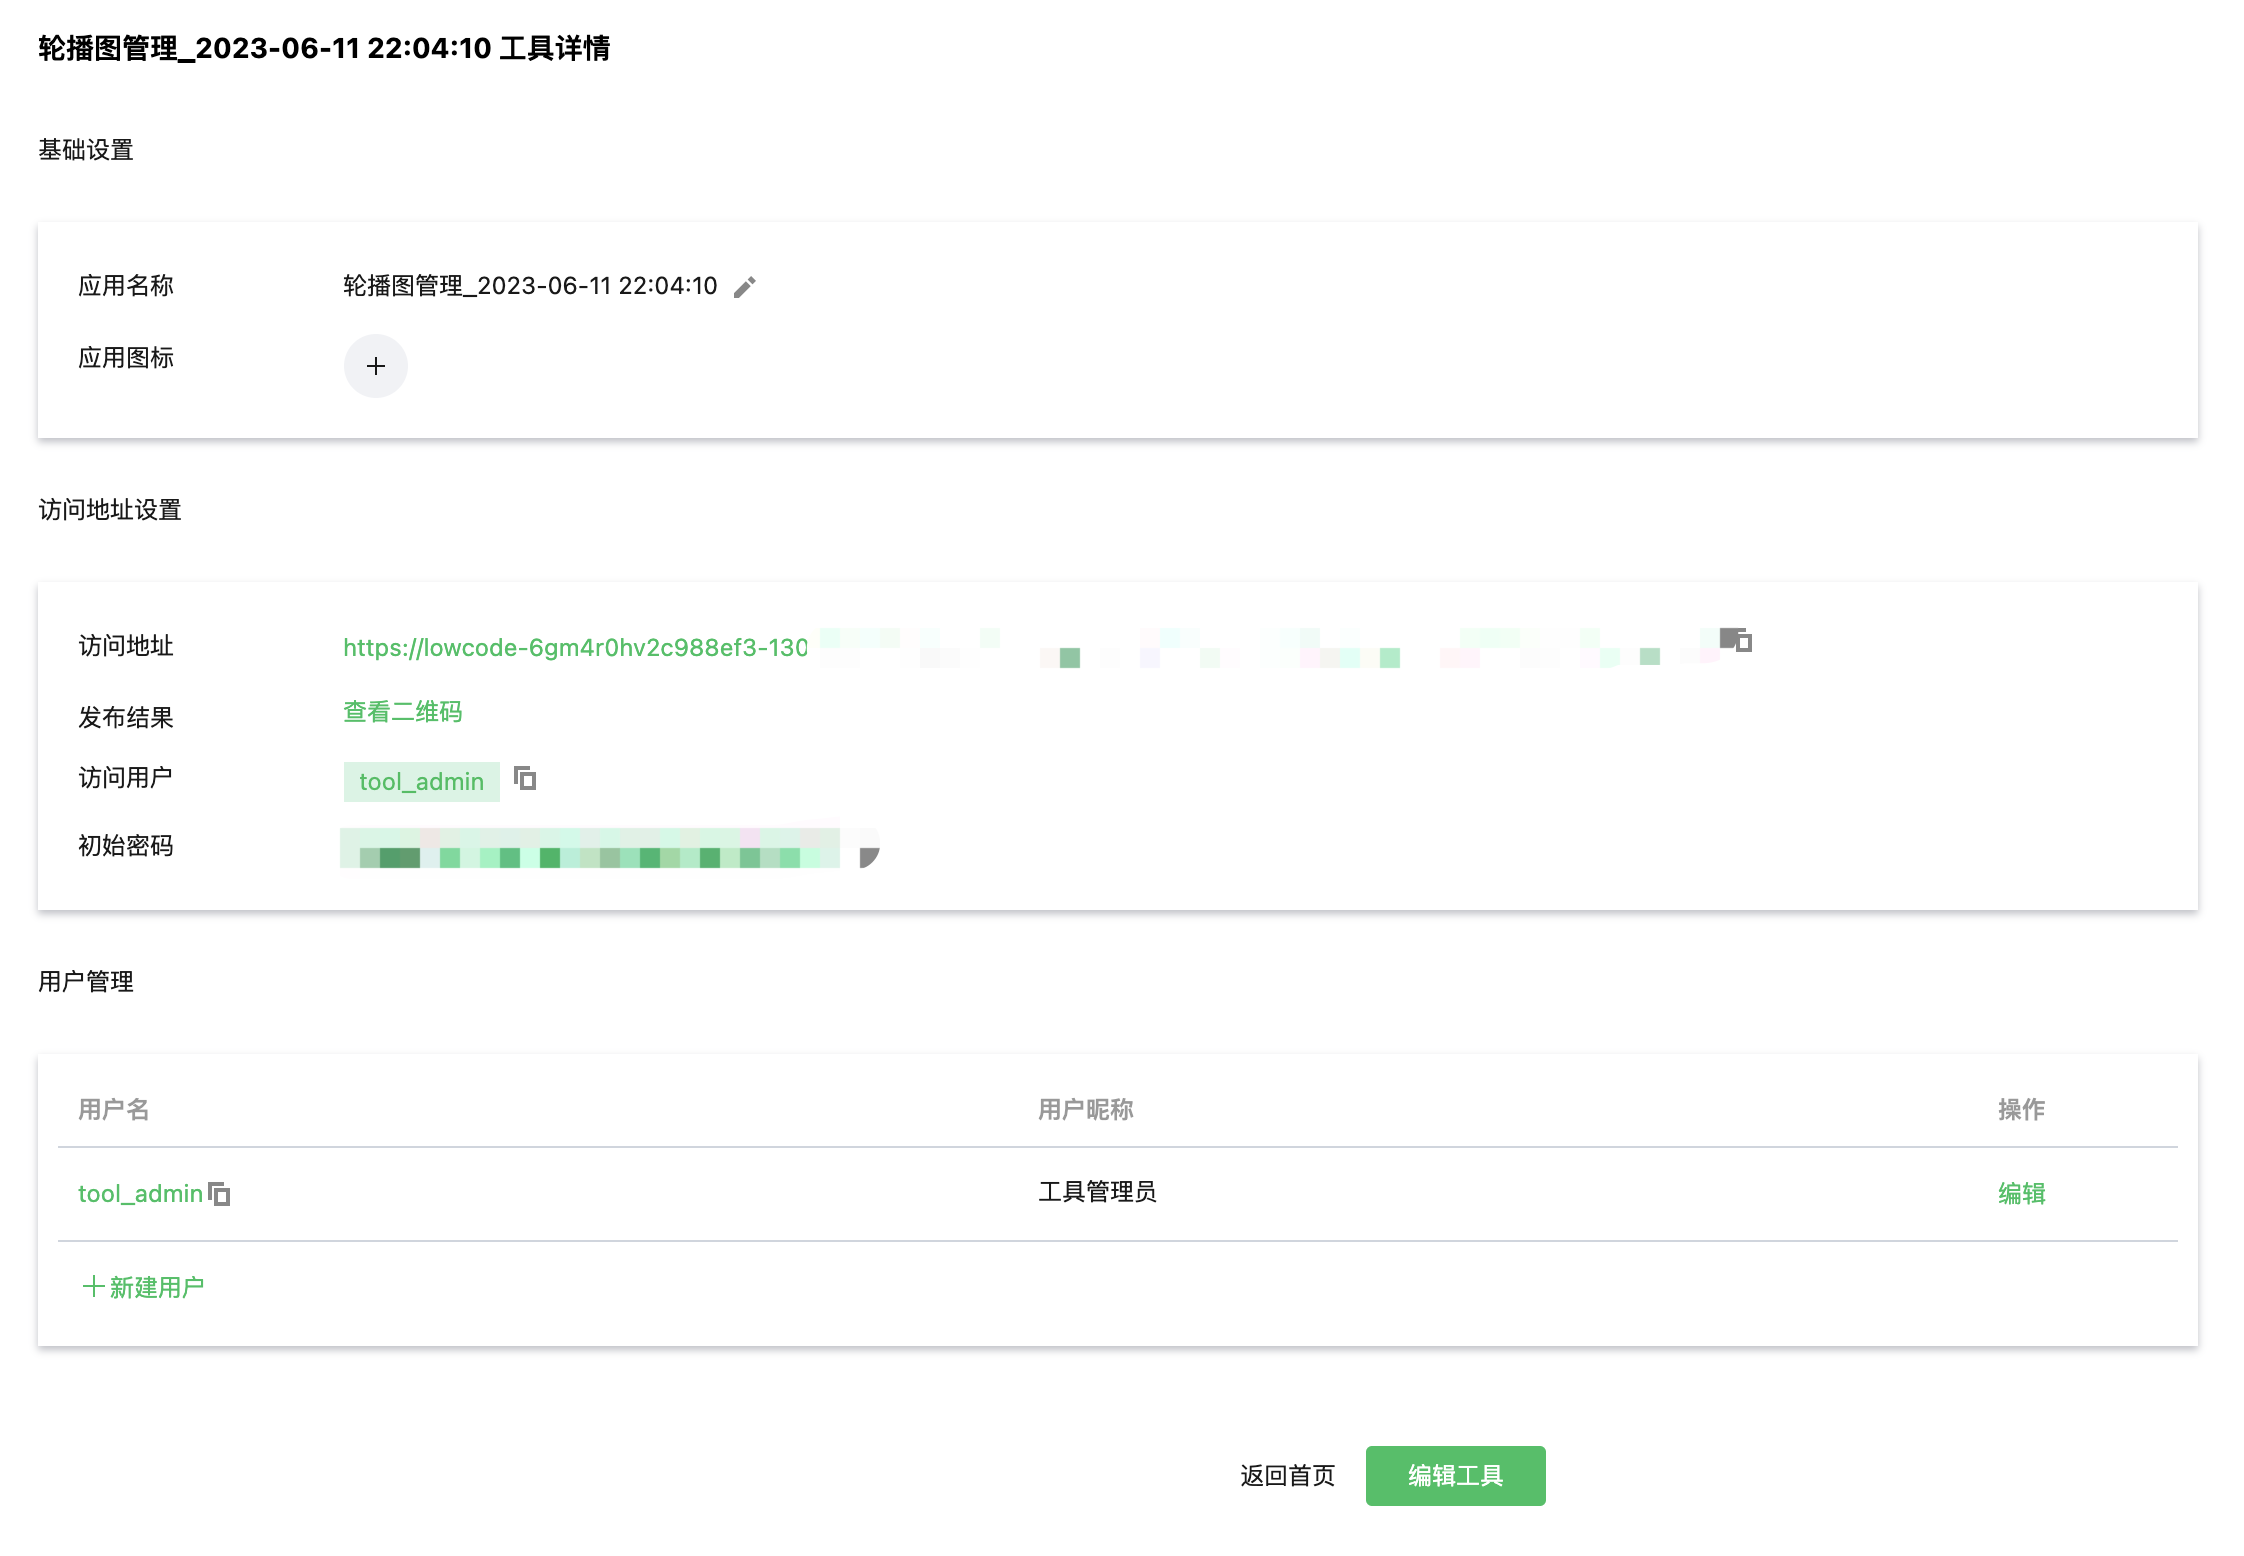
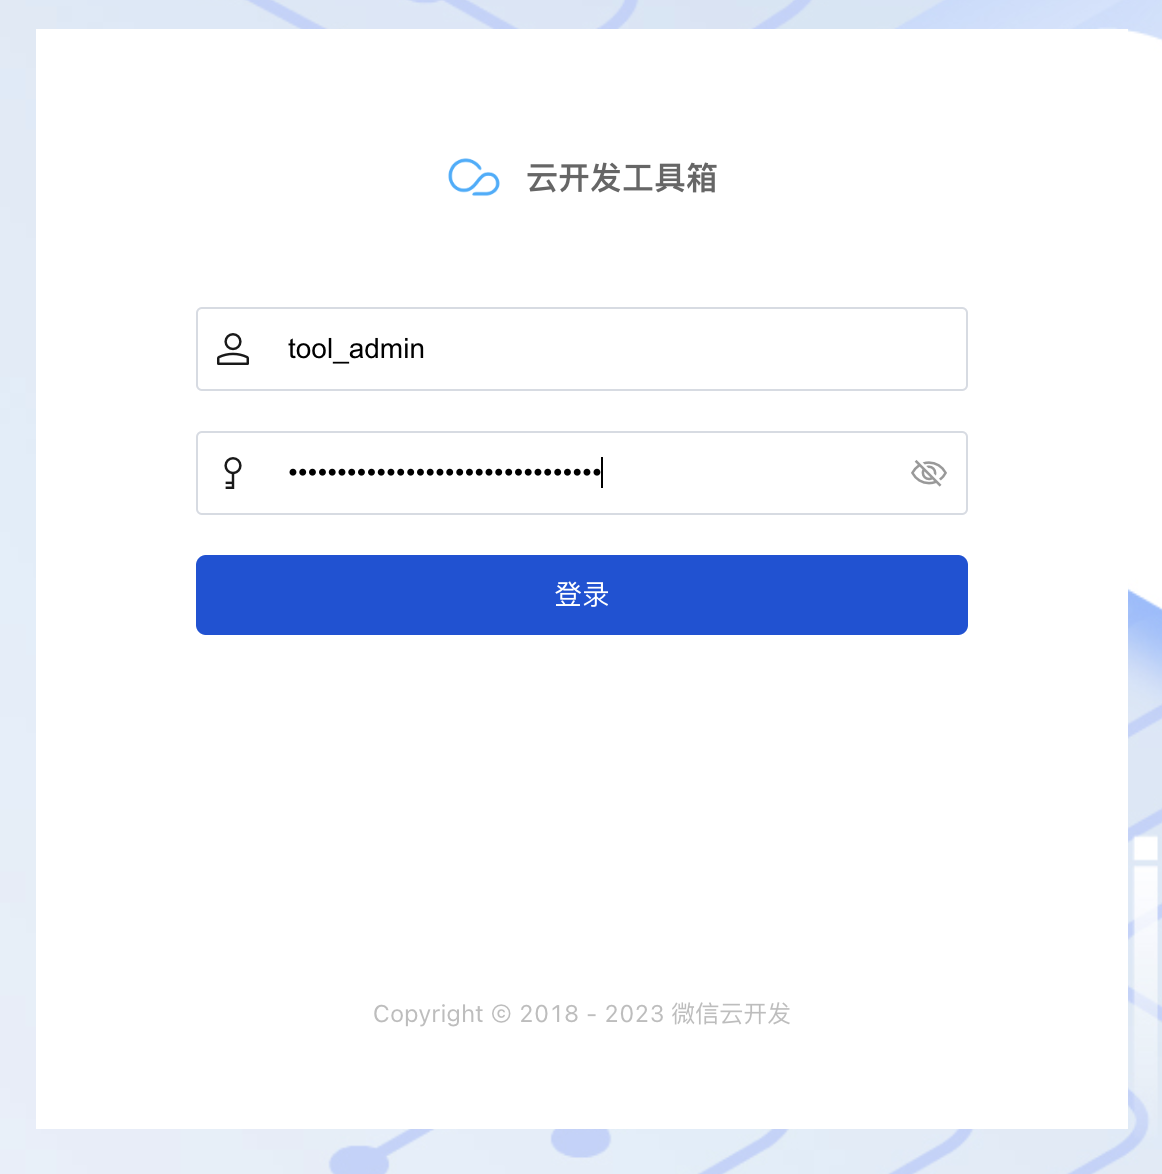
Copy the link and enter the account password to enter the background management
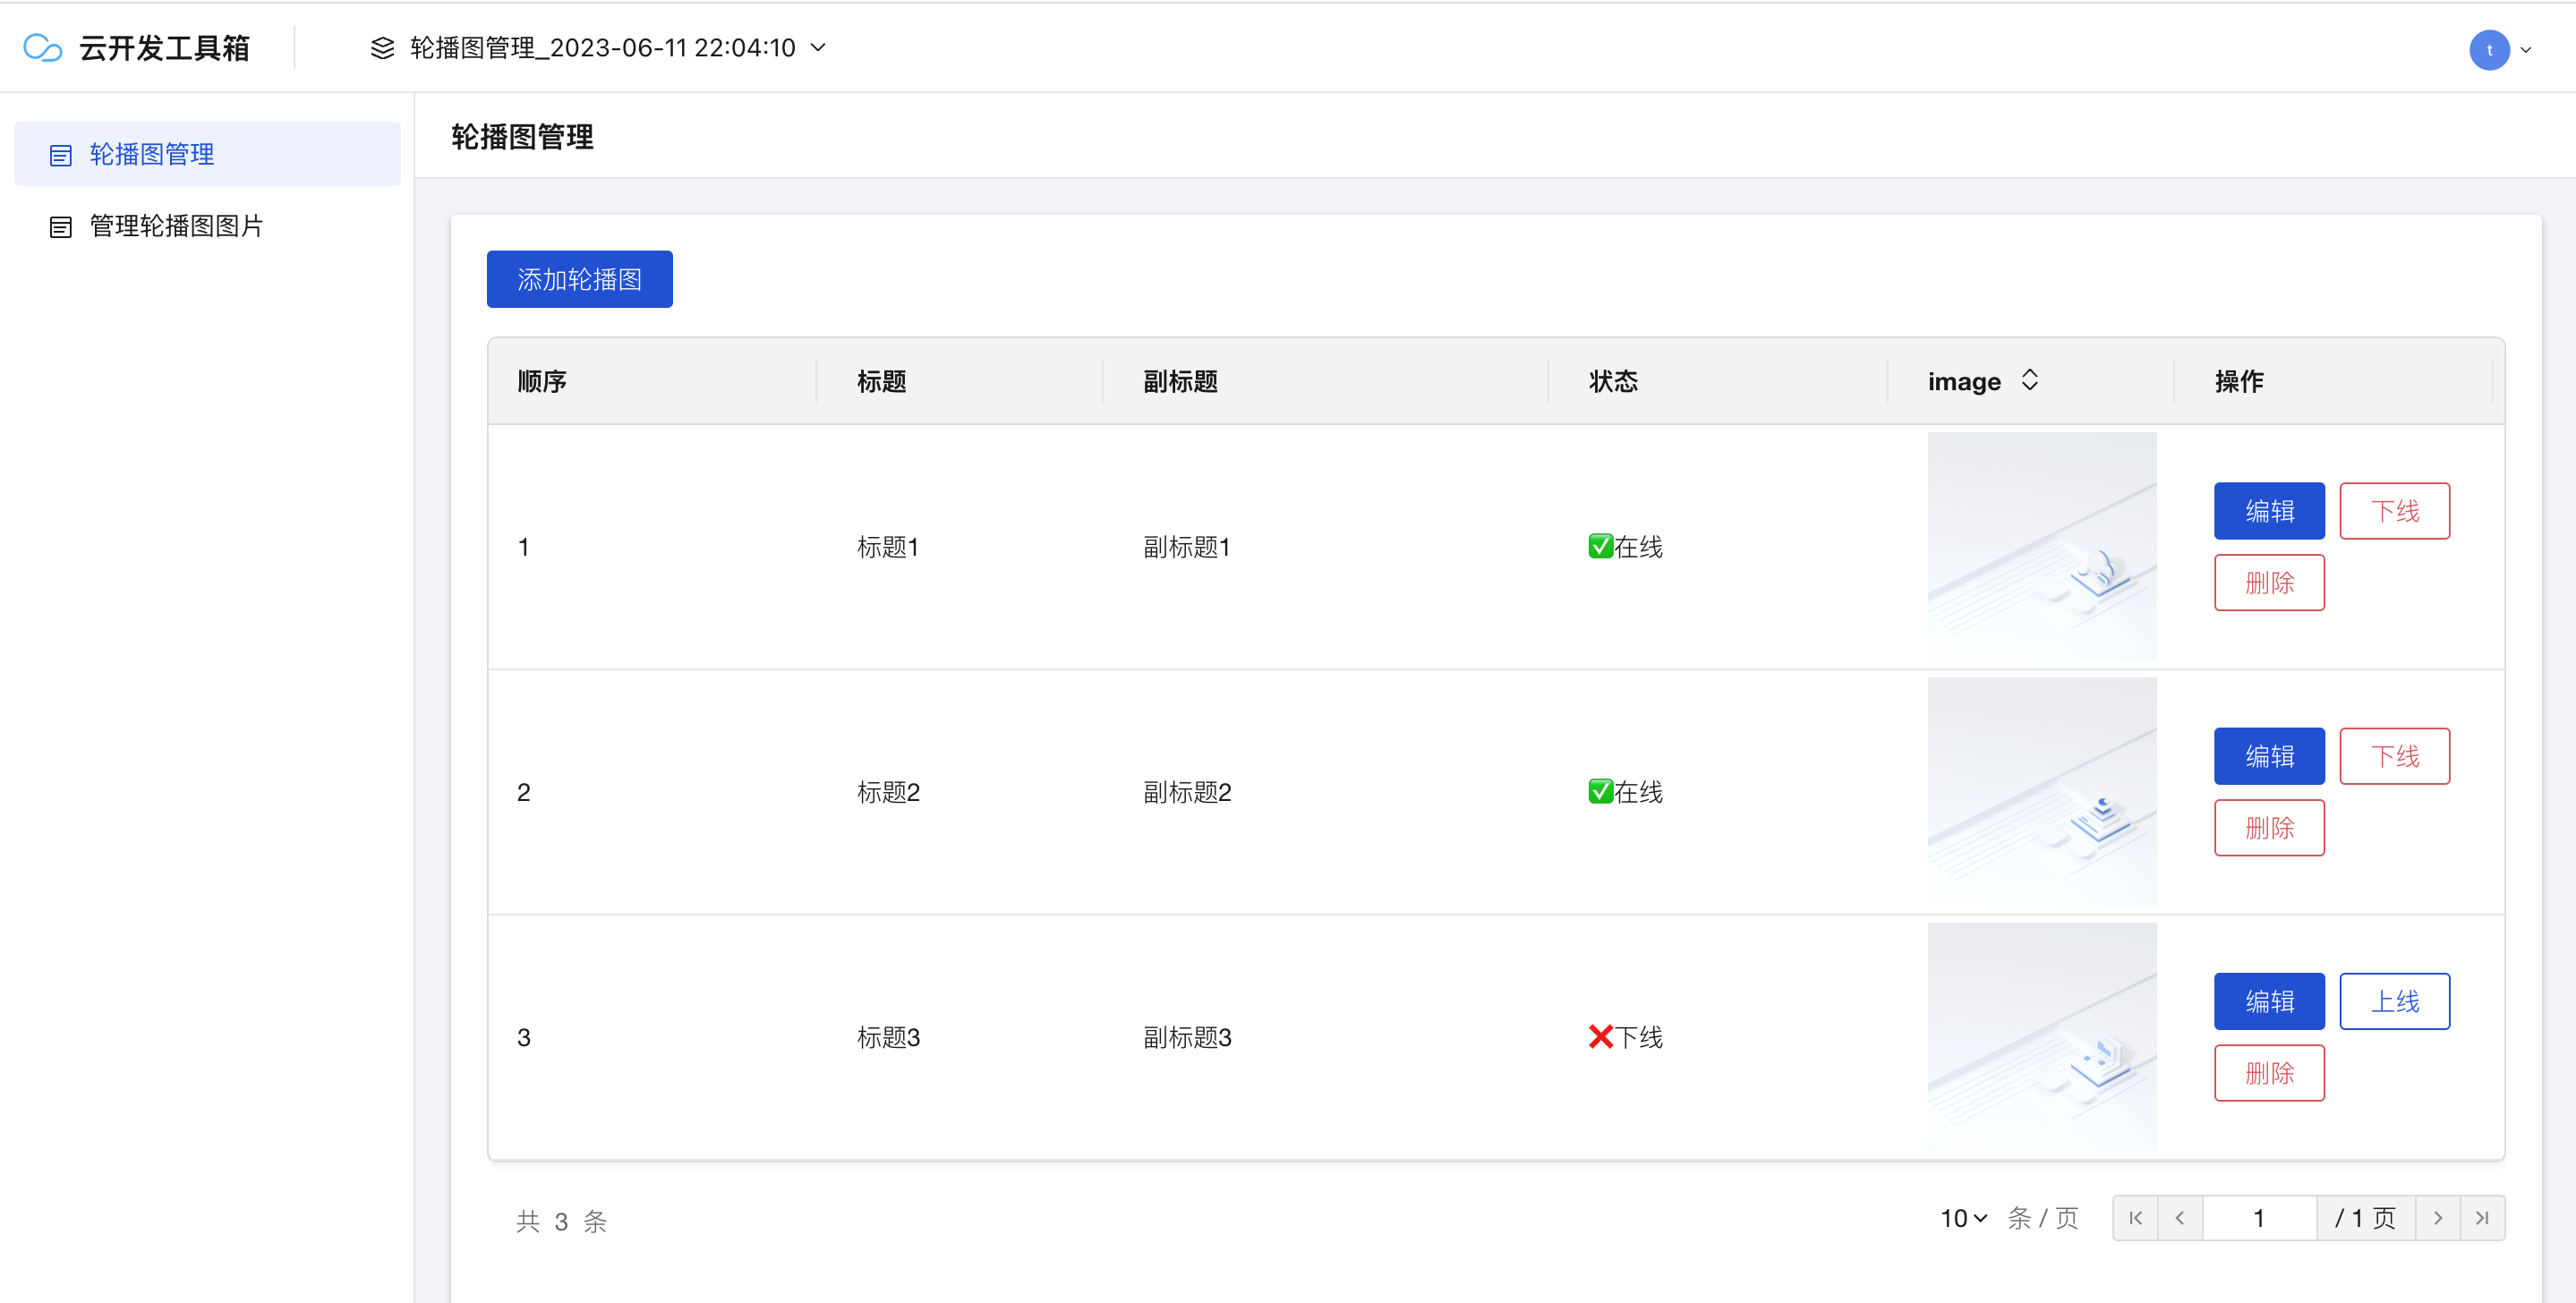
There is a simple banner in the management background. The management background case data
menus are: carousel image management, carousel image management
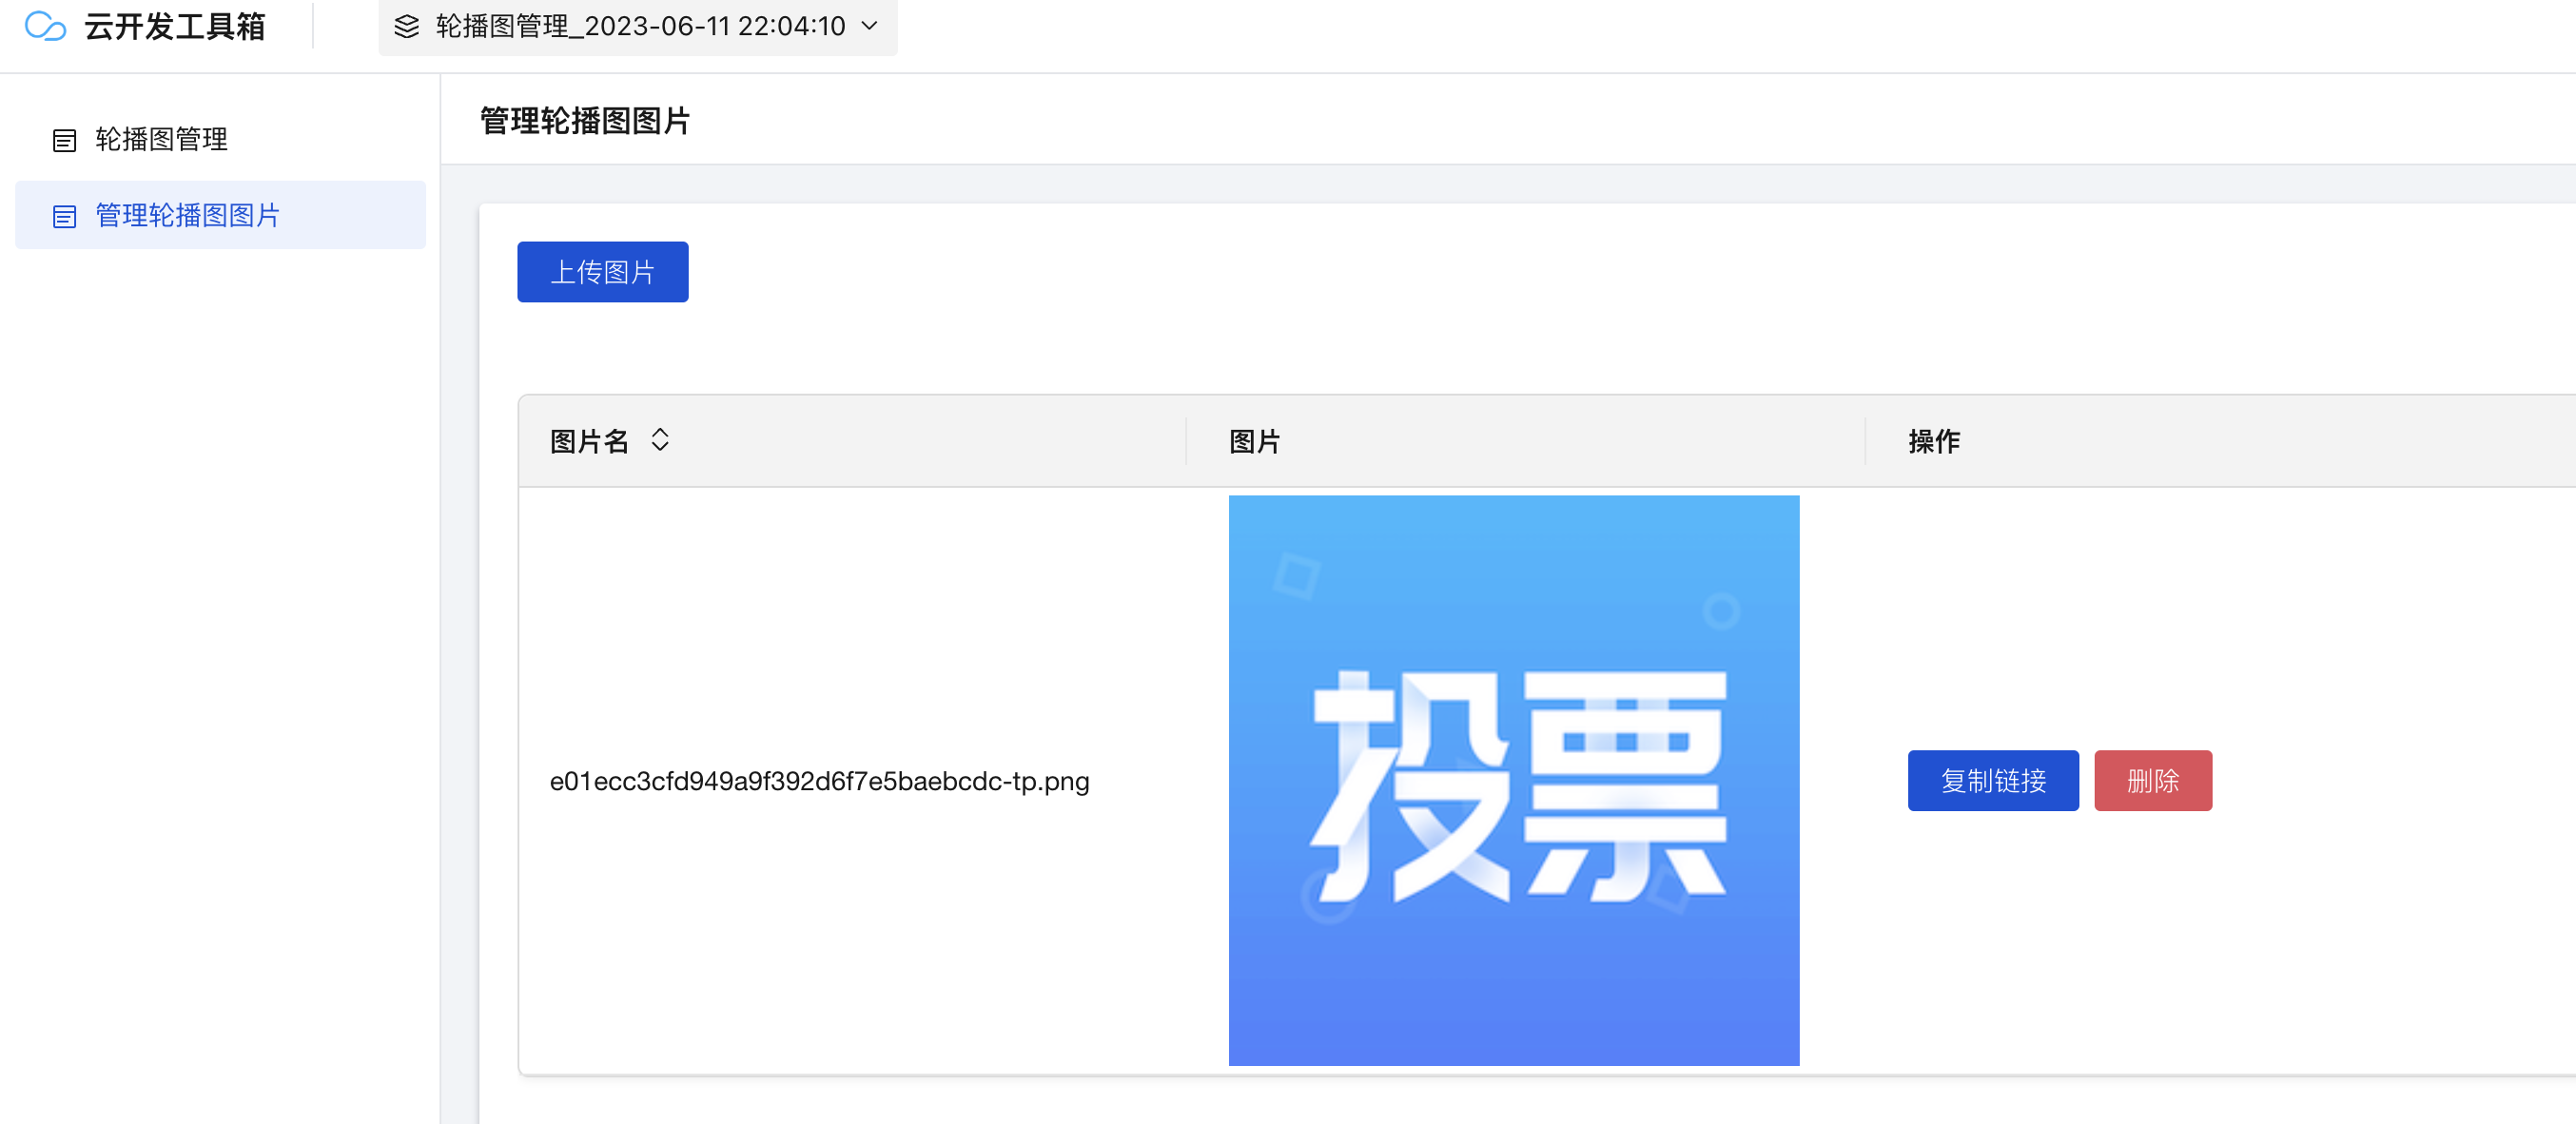
If you need to customize the carousel, you need to upload pictures now in picture management
Then go to the carousel map management to add
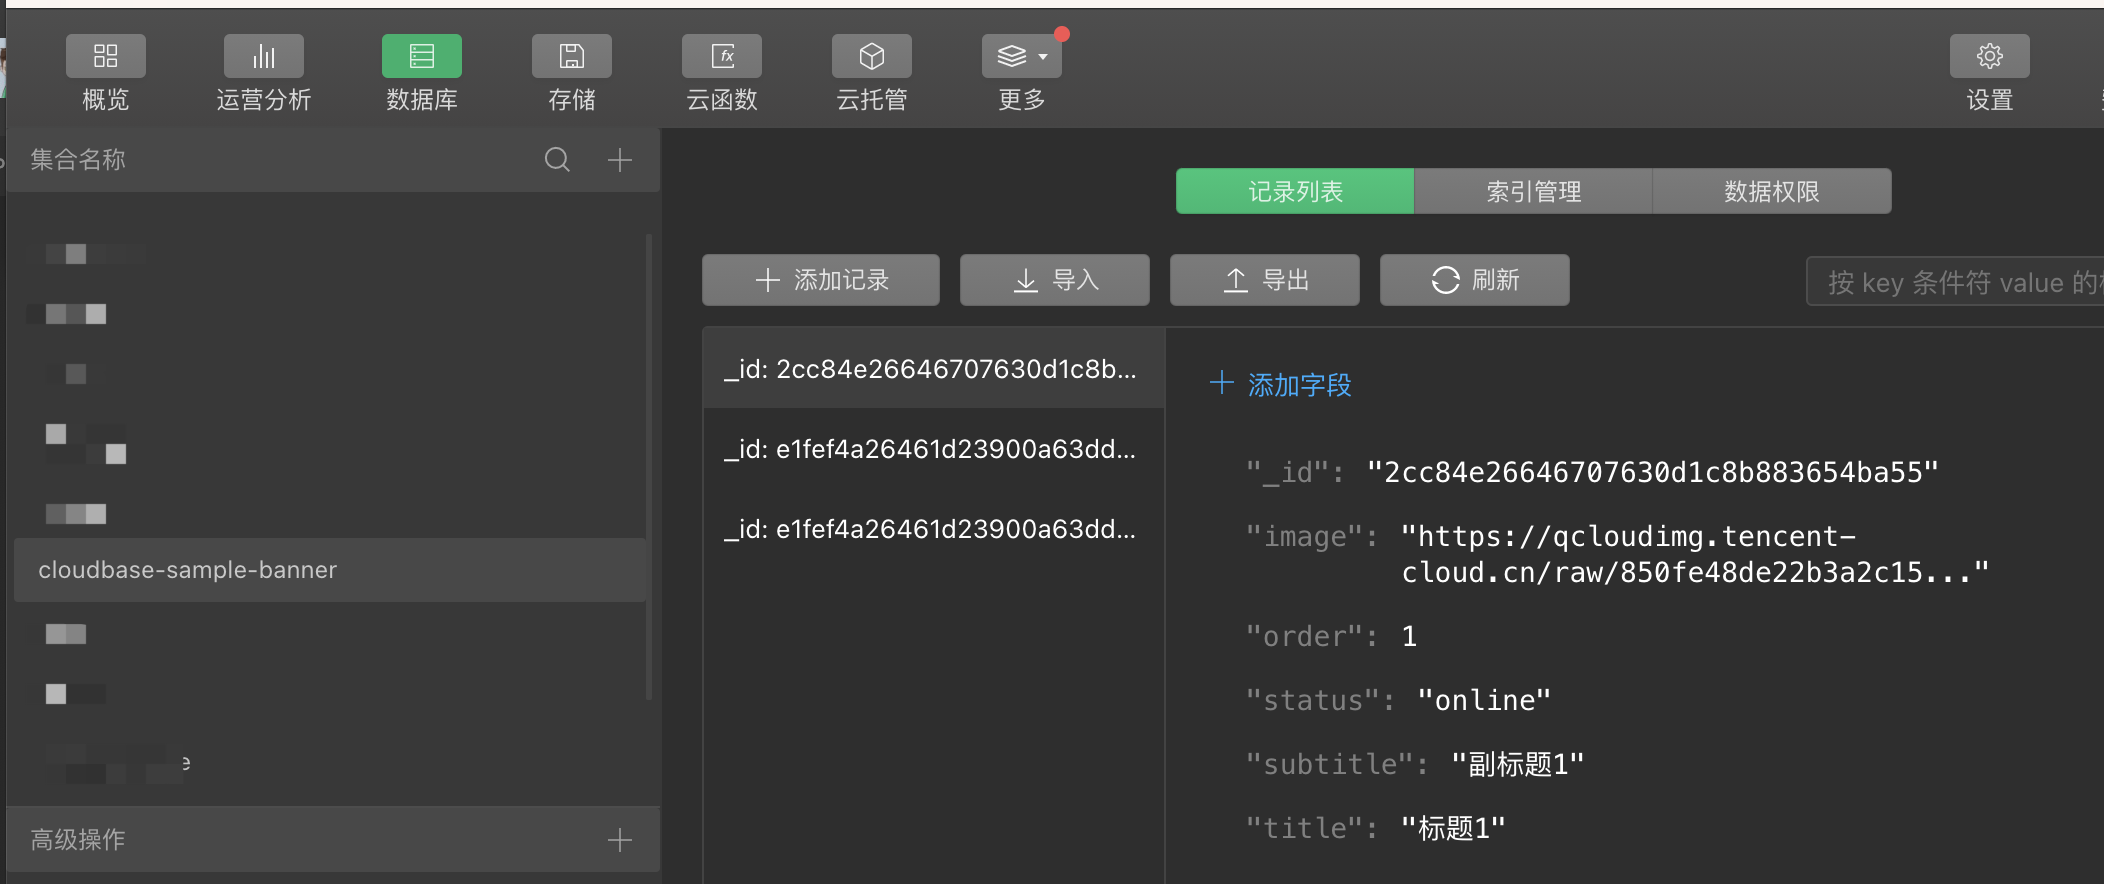
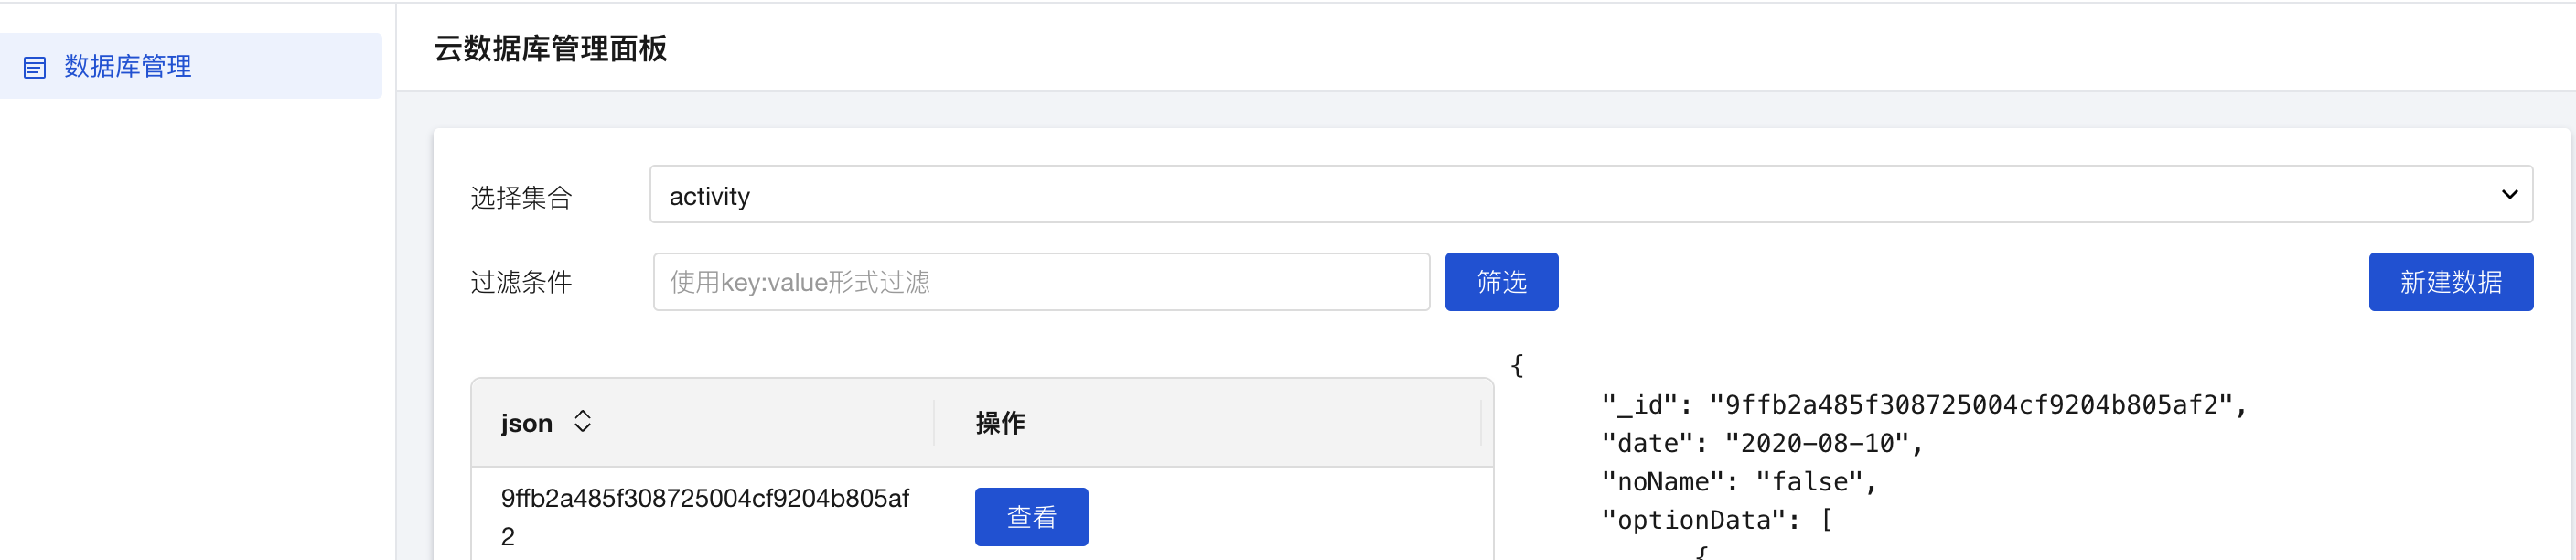
So how does the applet get the data? We can go back to the cloud development IDE console and see that there is an additional table cloudbase-sample-banner in the database, which contains three pieces of data
Applet to get data code
wx.cloud
      .database()
      .collection("cloudbase-sample-banner")
      .where({
        status: "online",
      })
      .get({
        success: (res) => {
          this.setData({
            banner: res.data,
          });
        },
      });
Copy
edit template
So what if the carousel image template cannot meet our needs?
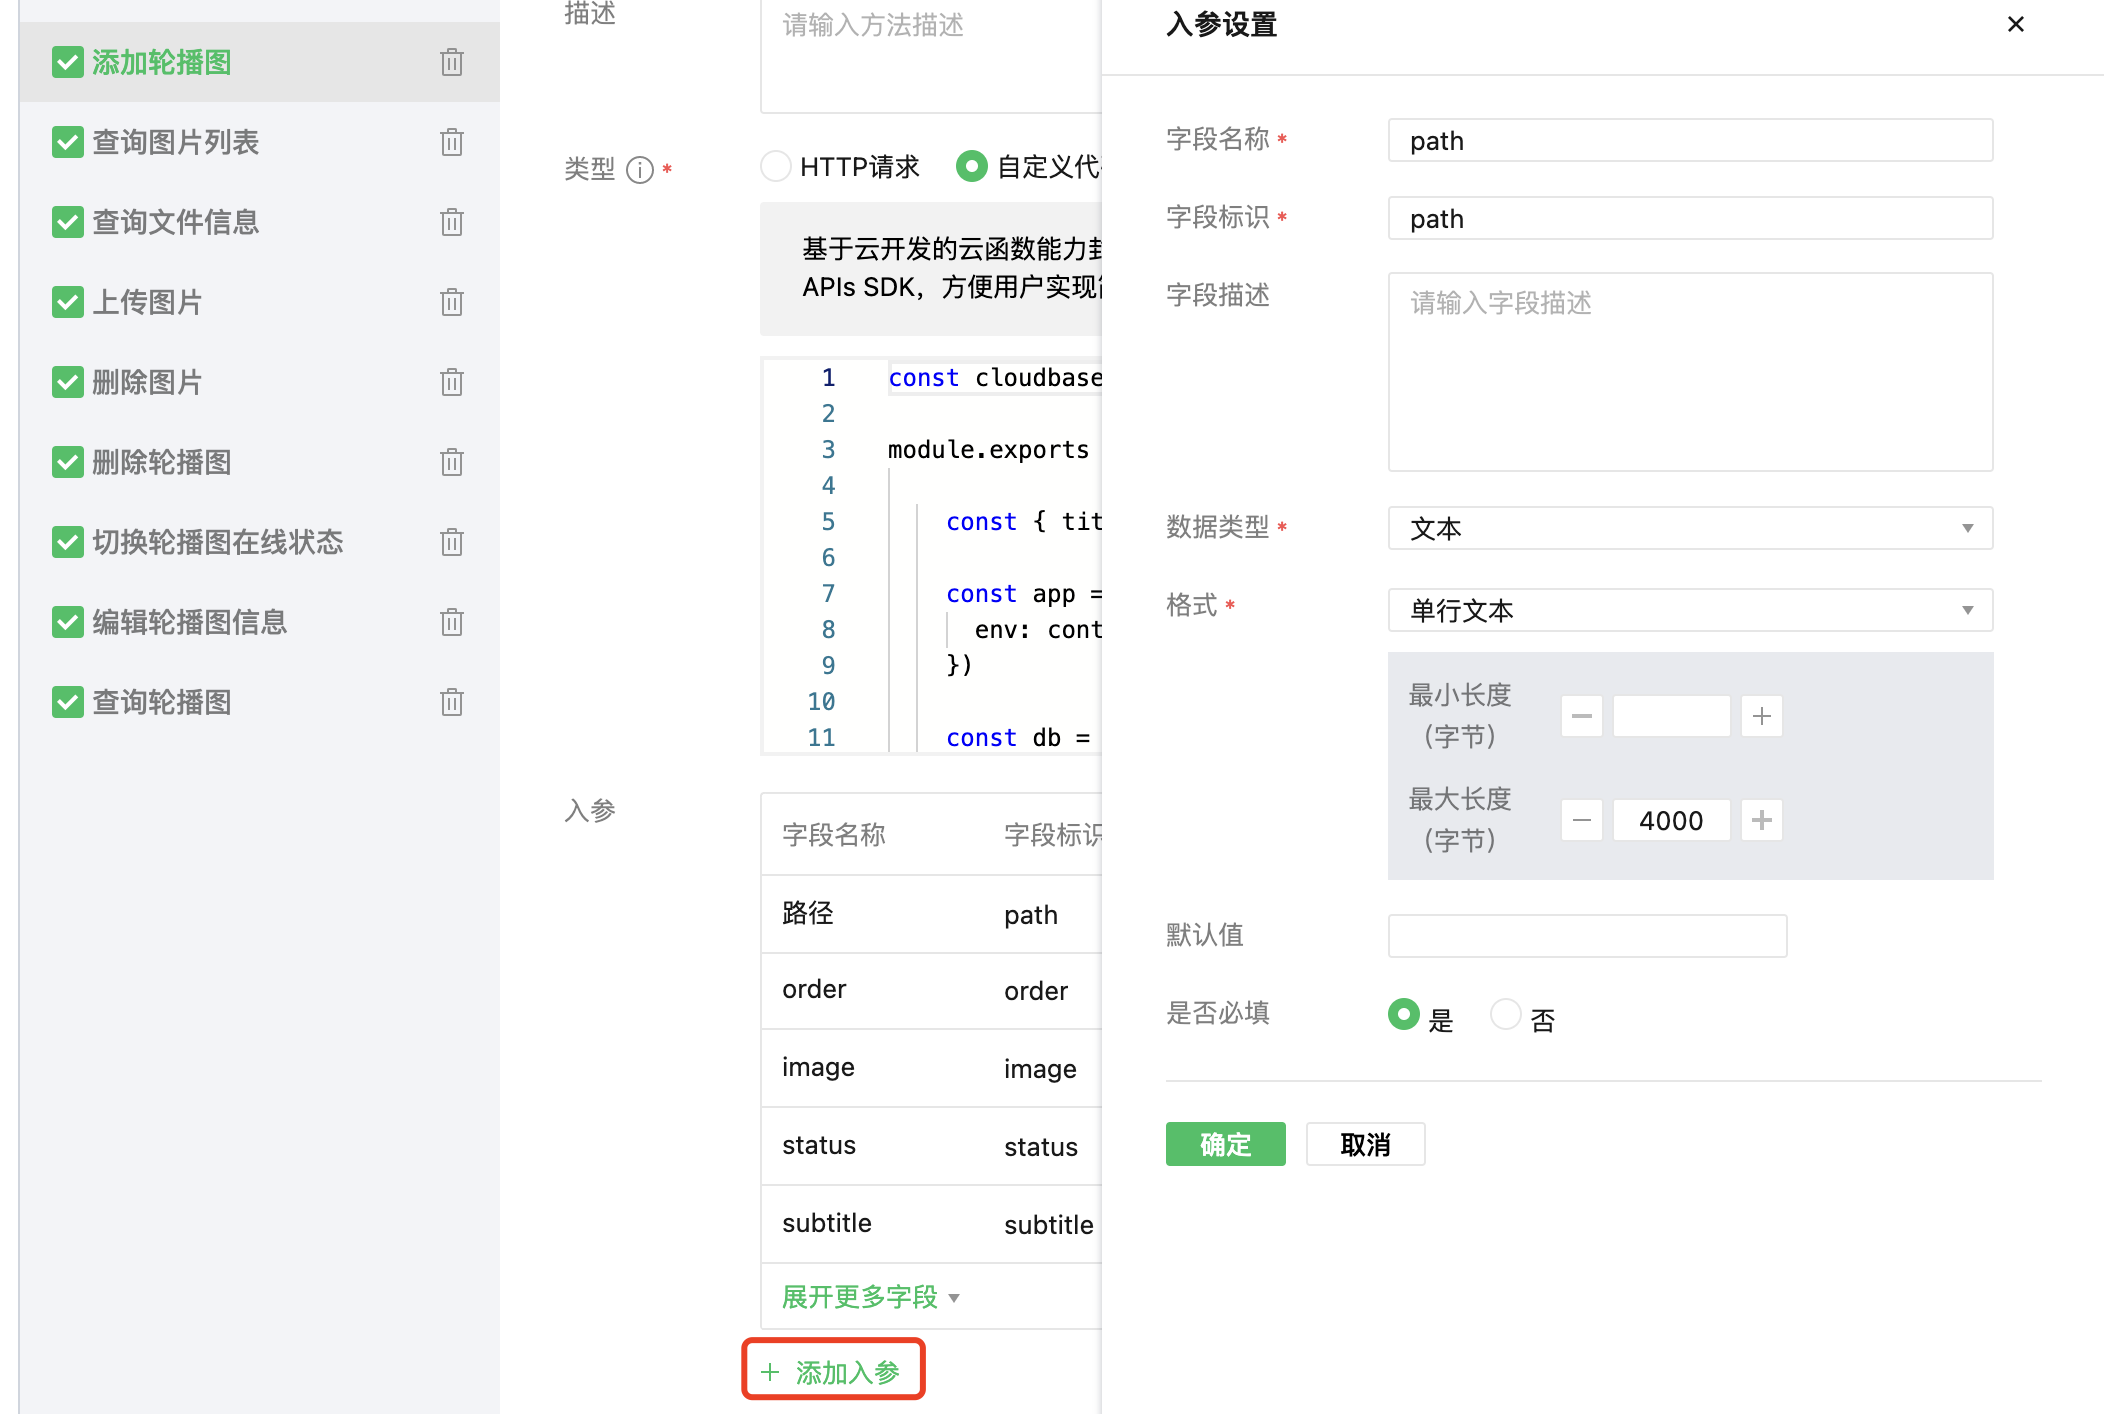
For example: the carousel map needs to be clicked to jump to display the official account articles. At this time, the article path field needs to be added.
Based on the above requirements, let’s modify it. First, return to the management tool home page
Click on the carousel image template to view the details, and select the "Edit Tool" at the bottom
Here you can perform "page design" on the management page
The display of data on all pages is of course inseparable from the data. The second menu is "Data Source"

The remaining two menus are: material and application settings. These two menus are relatively simple and will not be introduced too much.
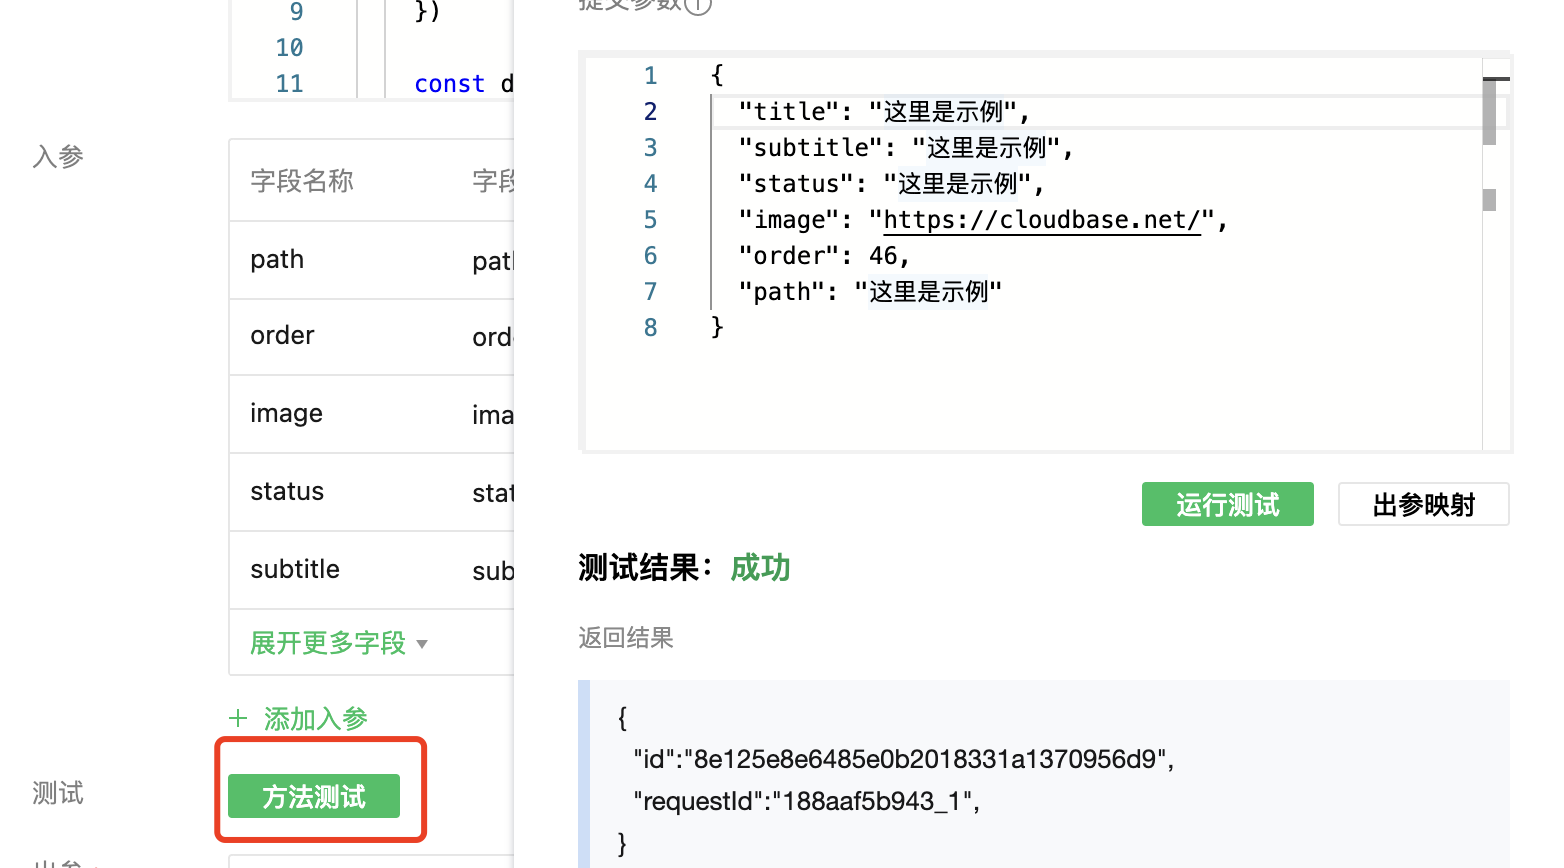
To add a new field, you need to find "Add Carousel" in "Data Source" and click "Edit"
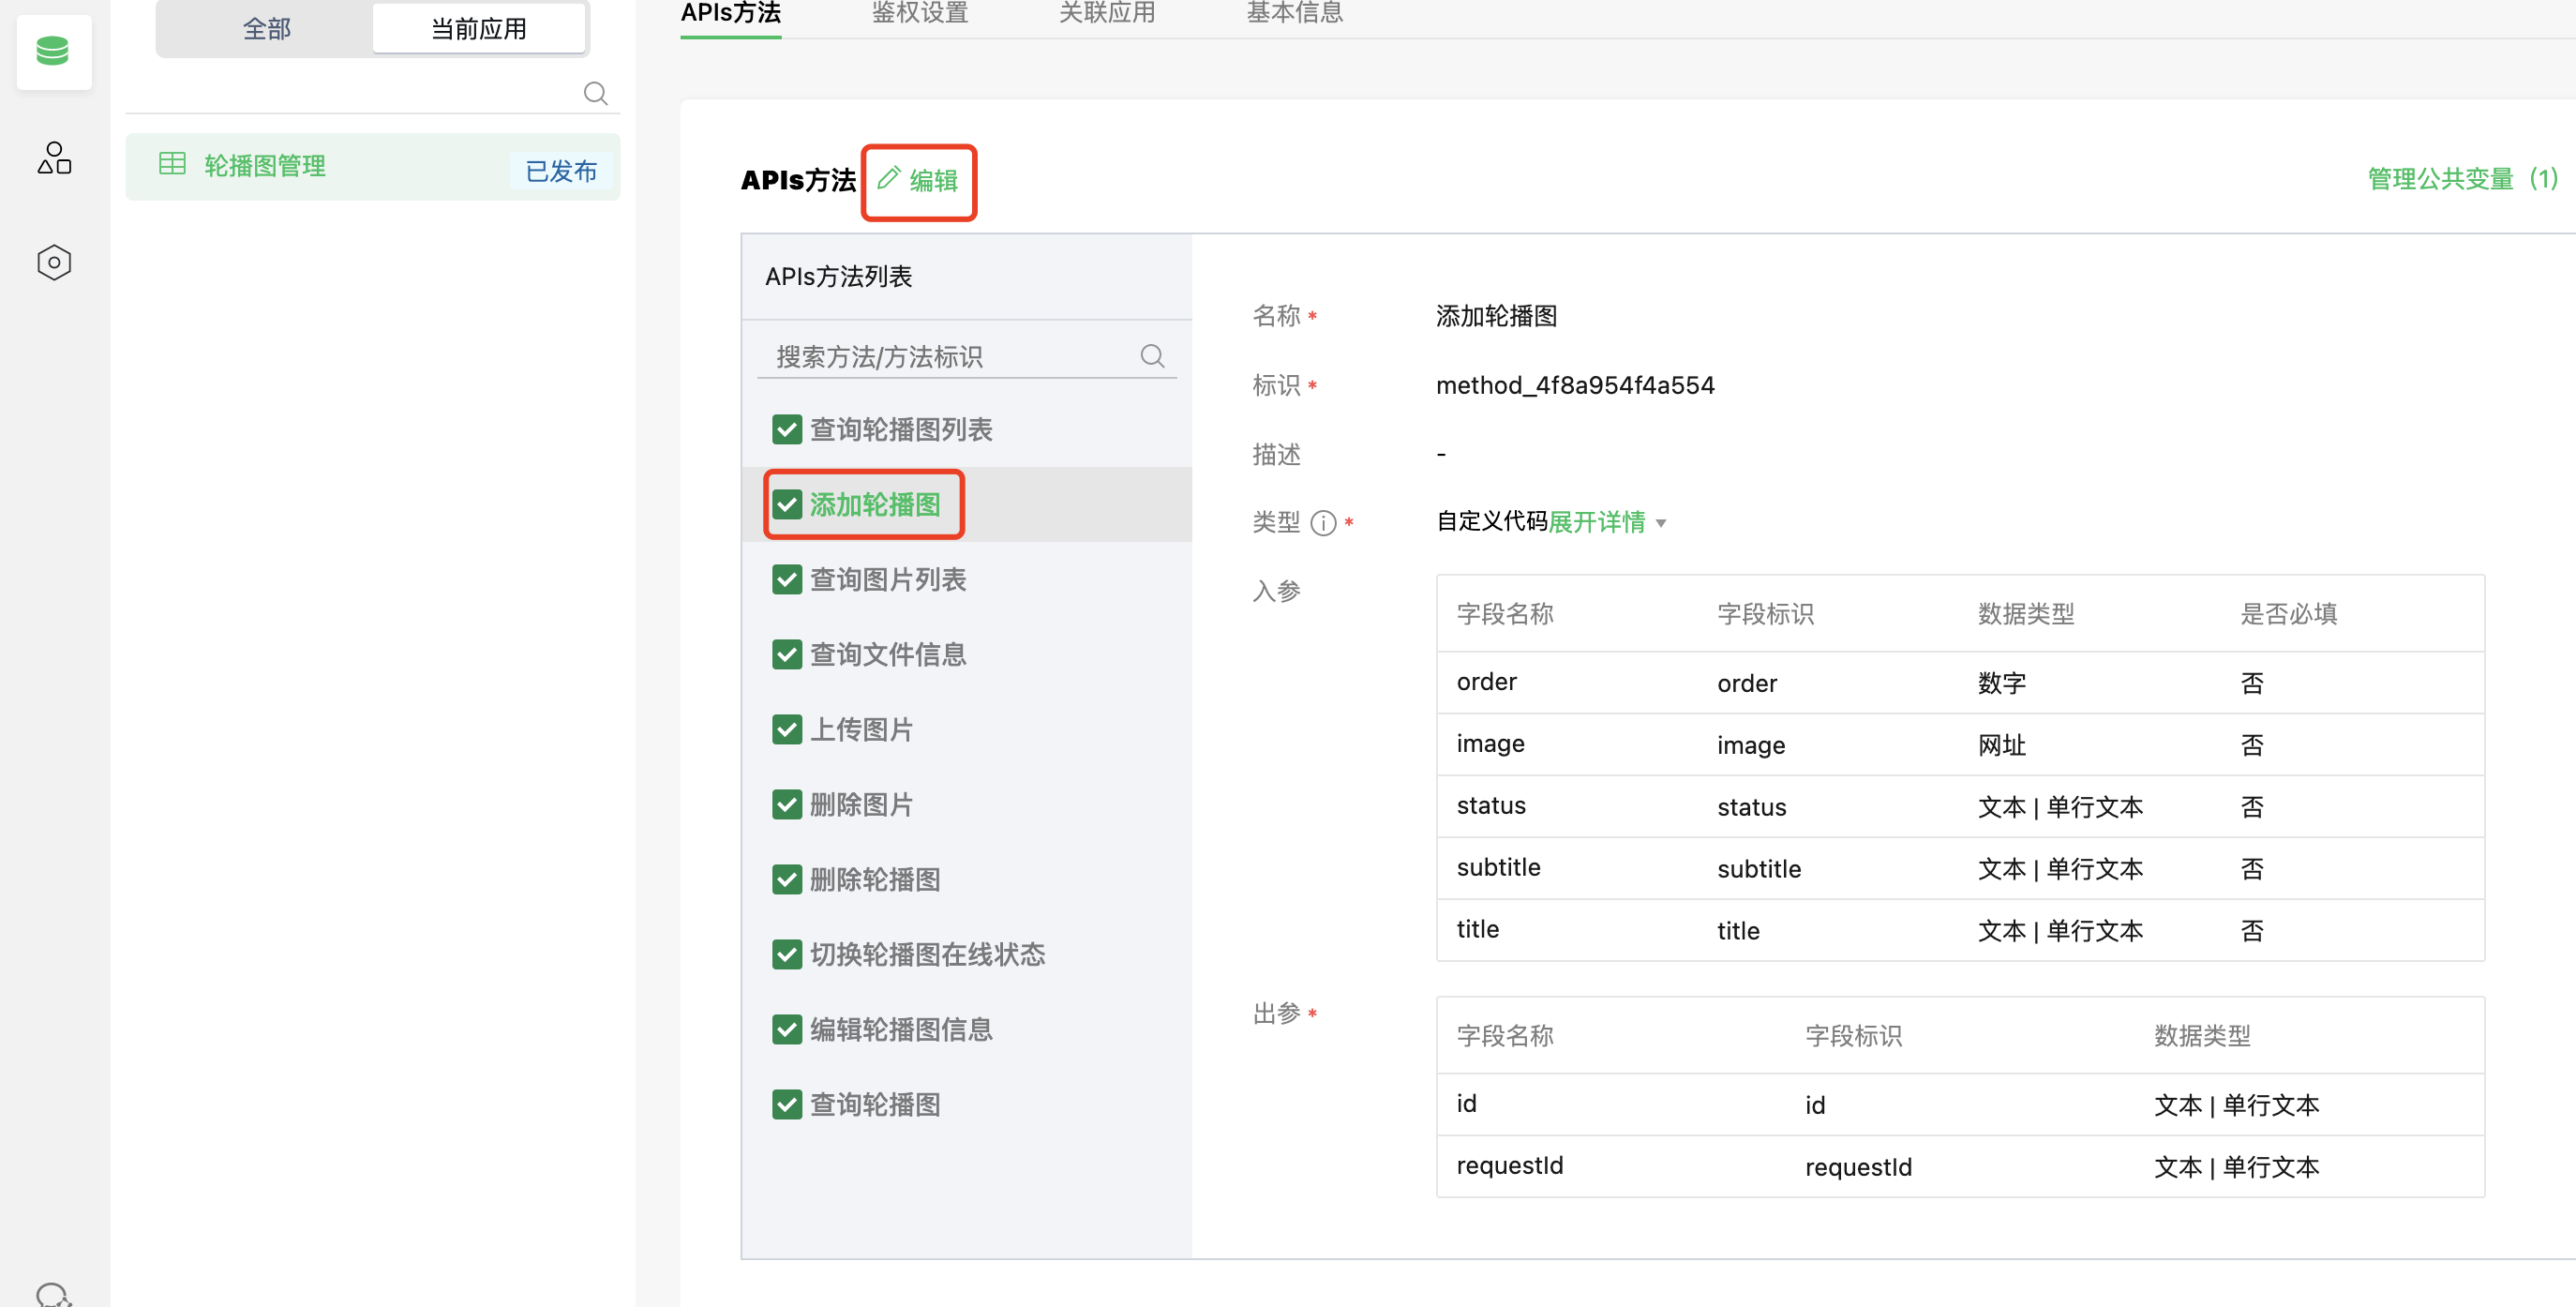
Add an input parameter, the path parameter represents the path of the article (the operation of editing carousel information is similar)
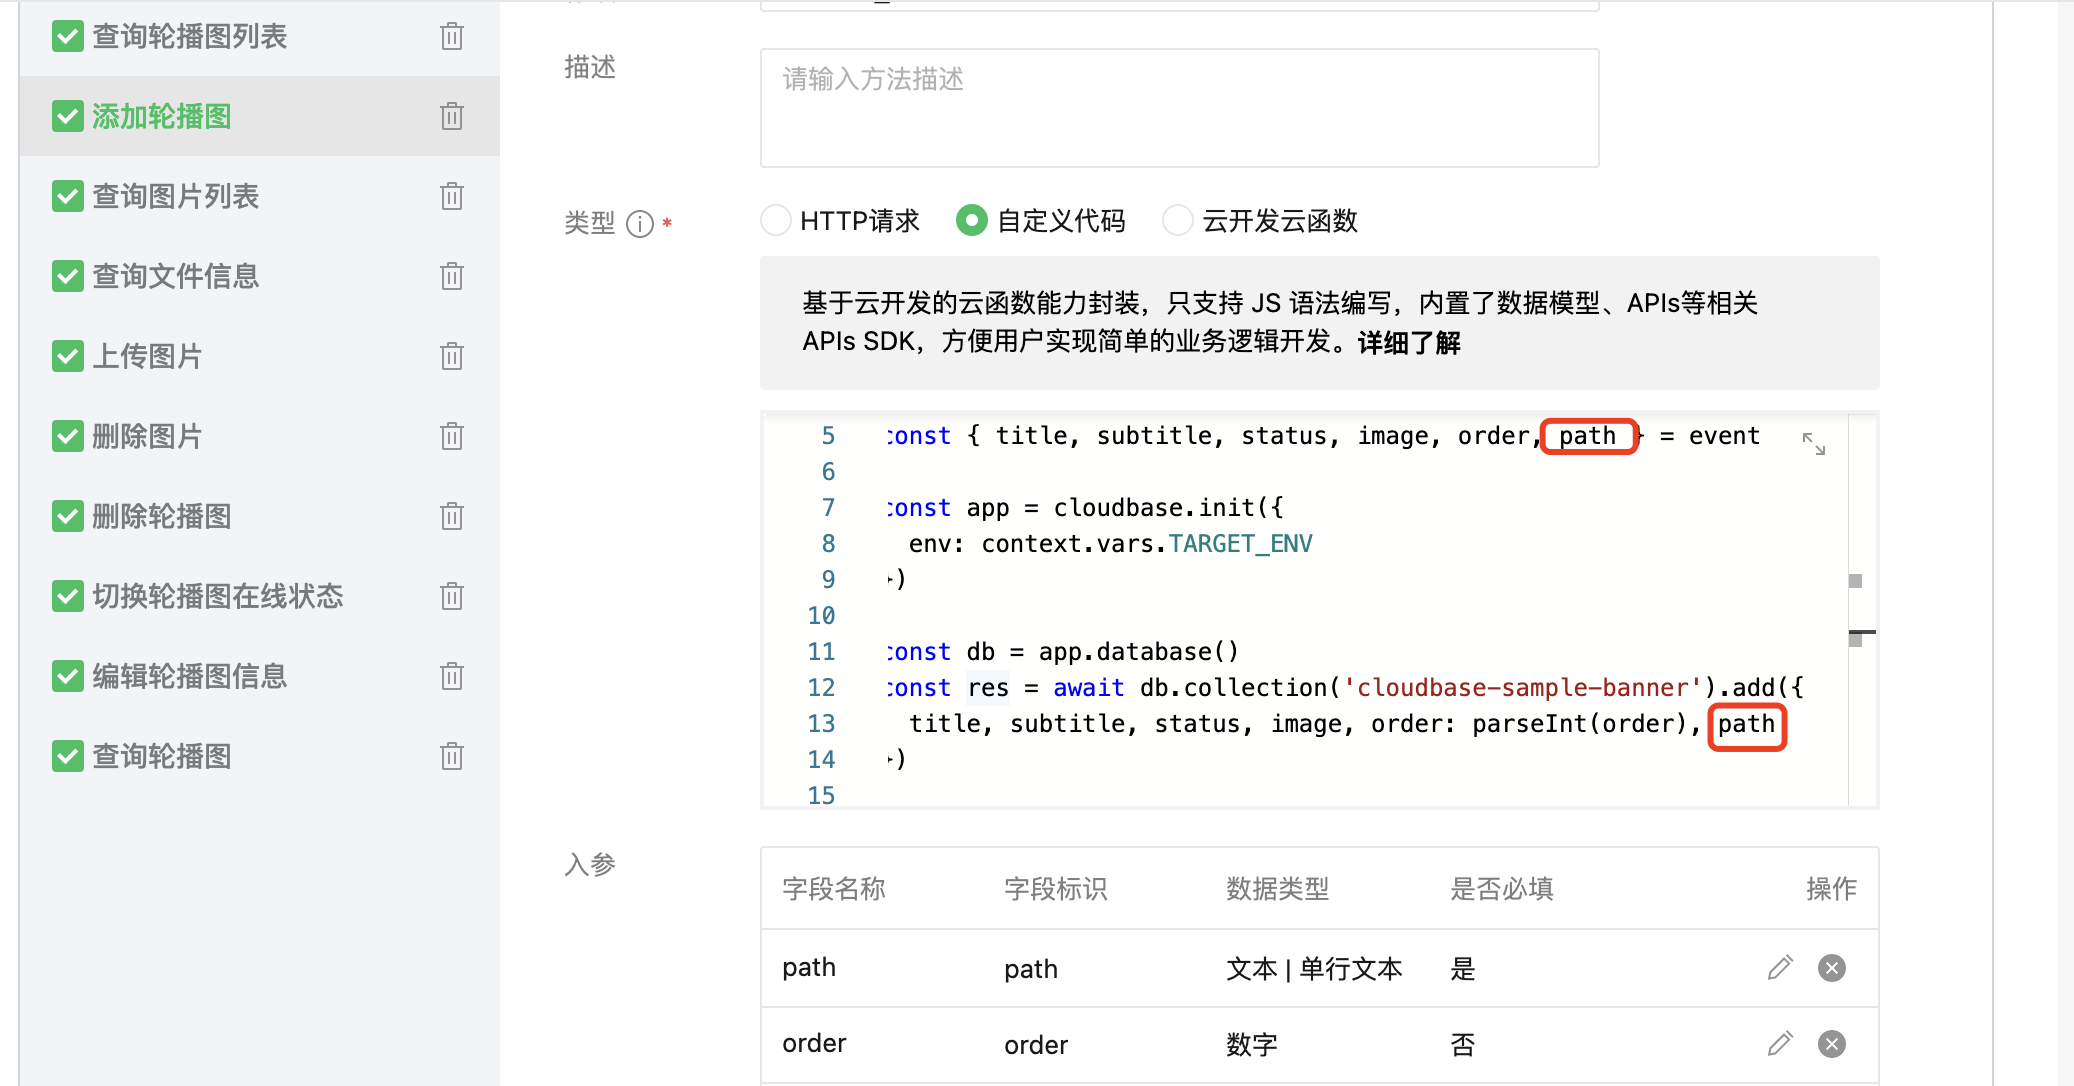
Then modify the code and add the attribute path to the place where the parameters are obtained and added
Finally, click "Method Test" to add a piece of data to see the effect
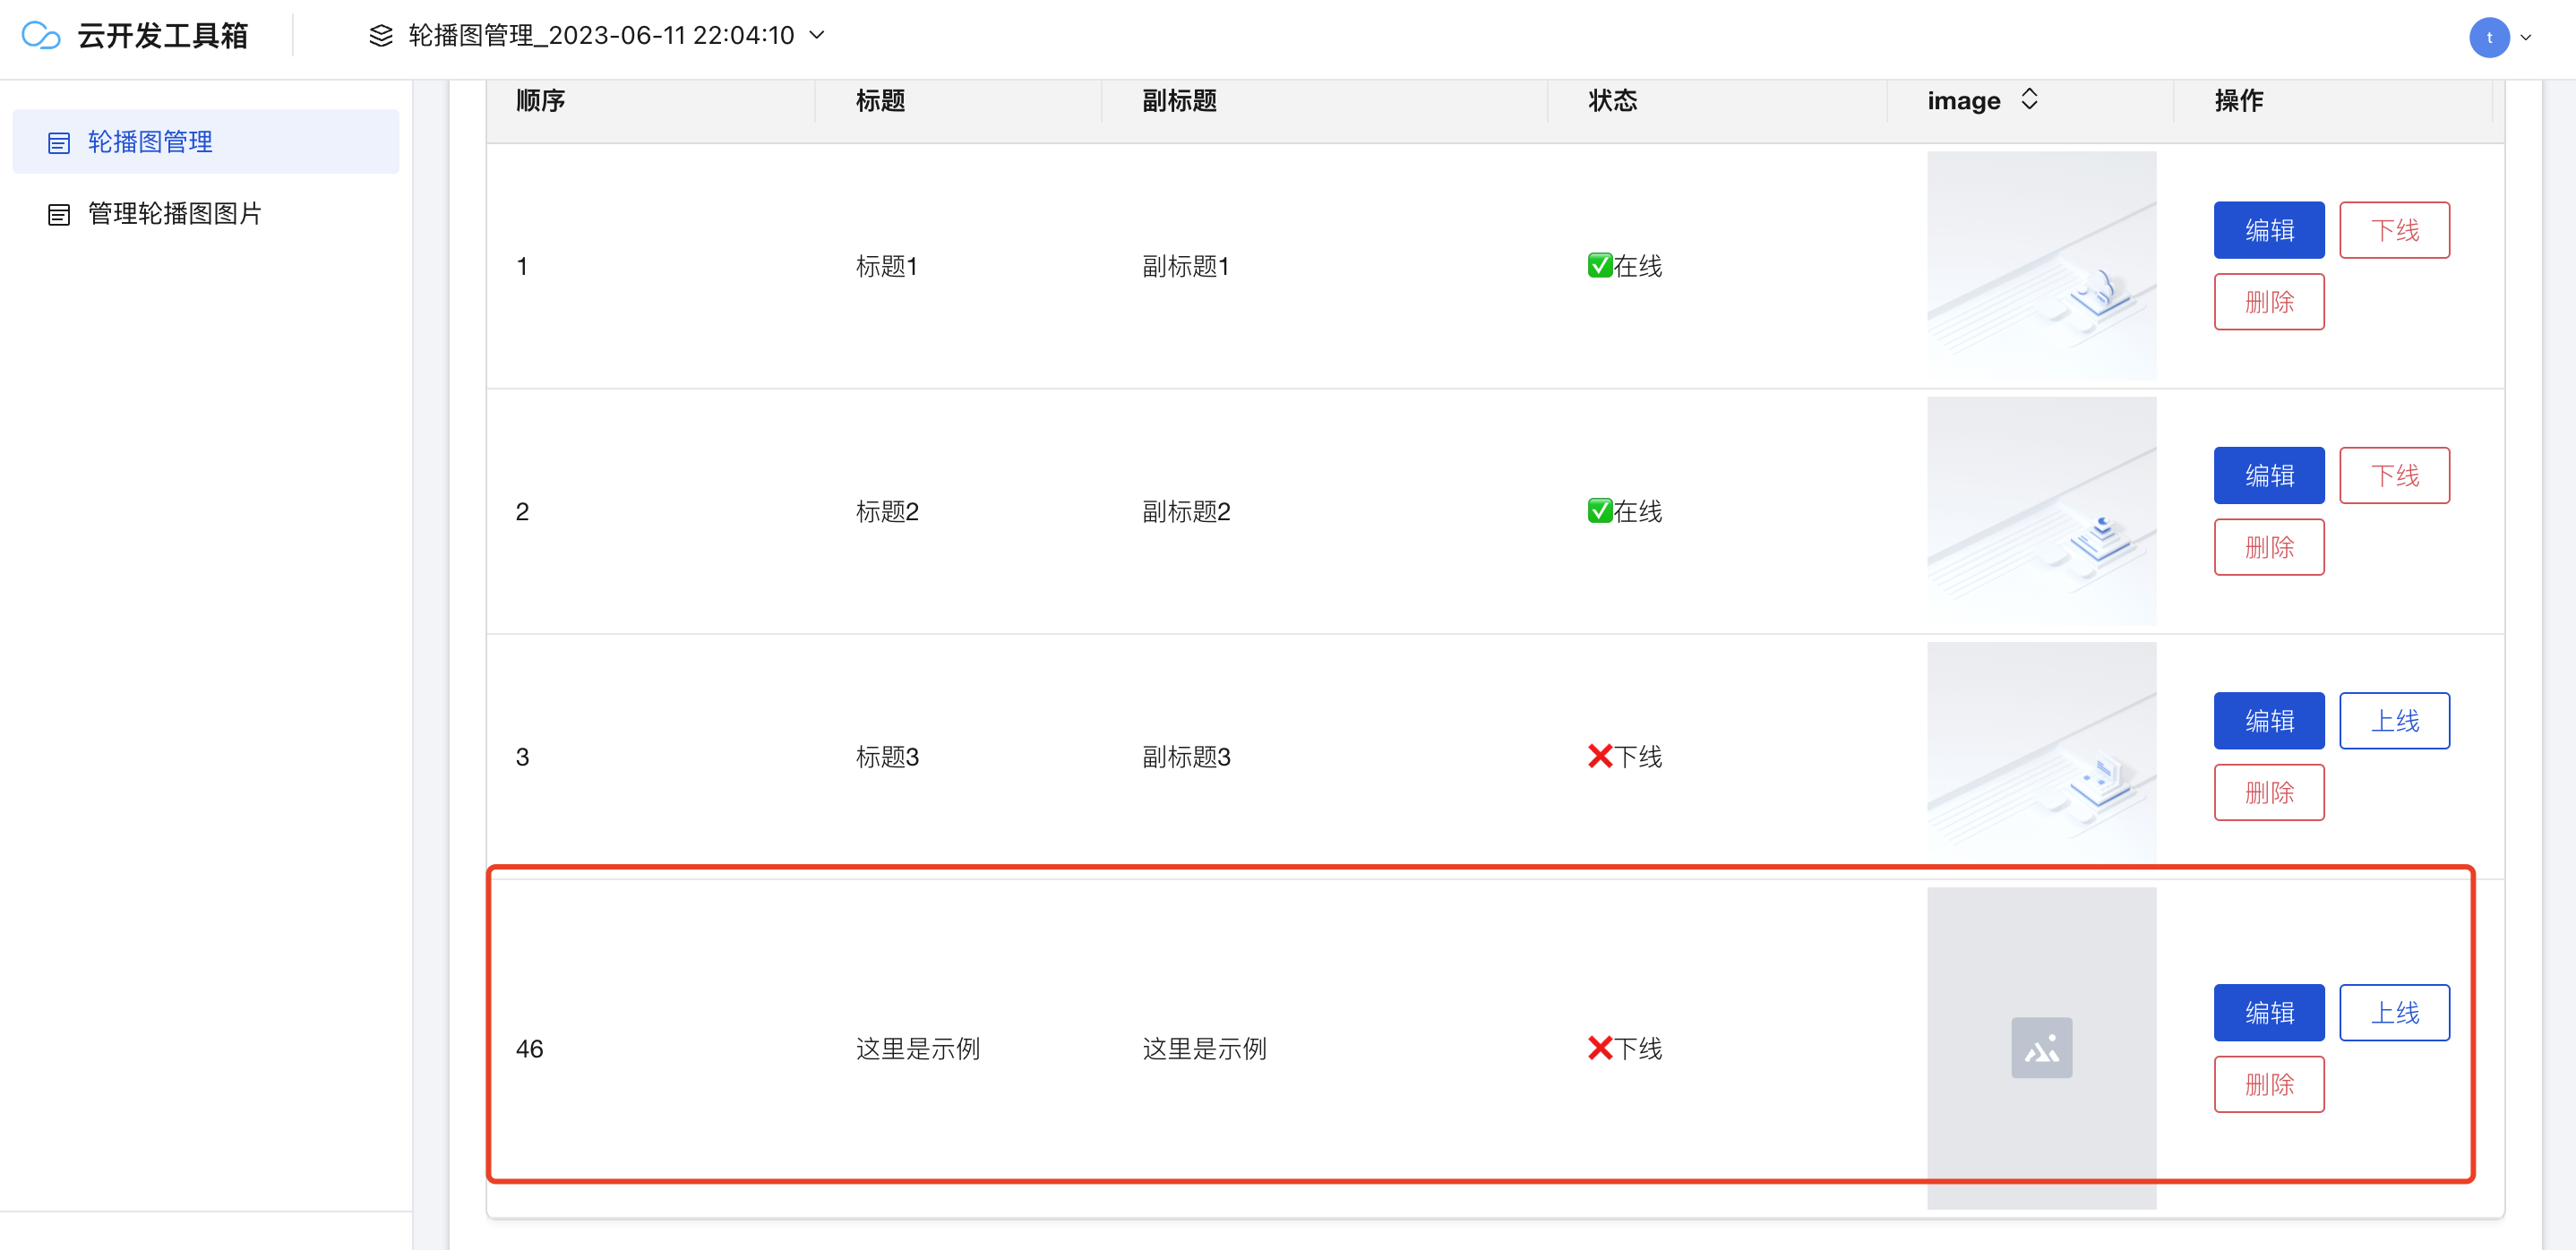
You can see that the data has been added successfully through the background management page or the cloud development IDE database

The adding method has been modified, and the next step is to modify the query method, select "Query Carousel List" and then add a subset in "Output Parameters". Because the query data is multiple, it is an array, and what we want to query and display is the data object inside. (The operation of querying carousel map information is similar, the difference is adding parameters instead of subsets)

What field is added is what kind of field is displayed
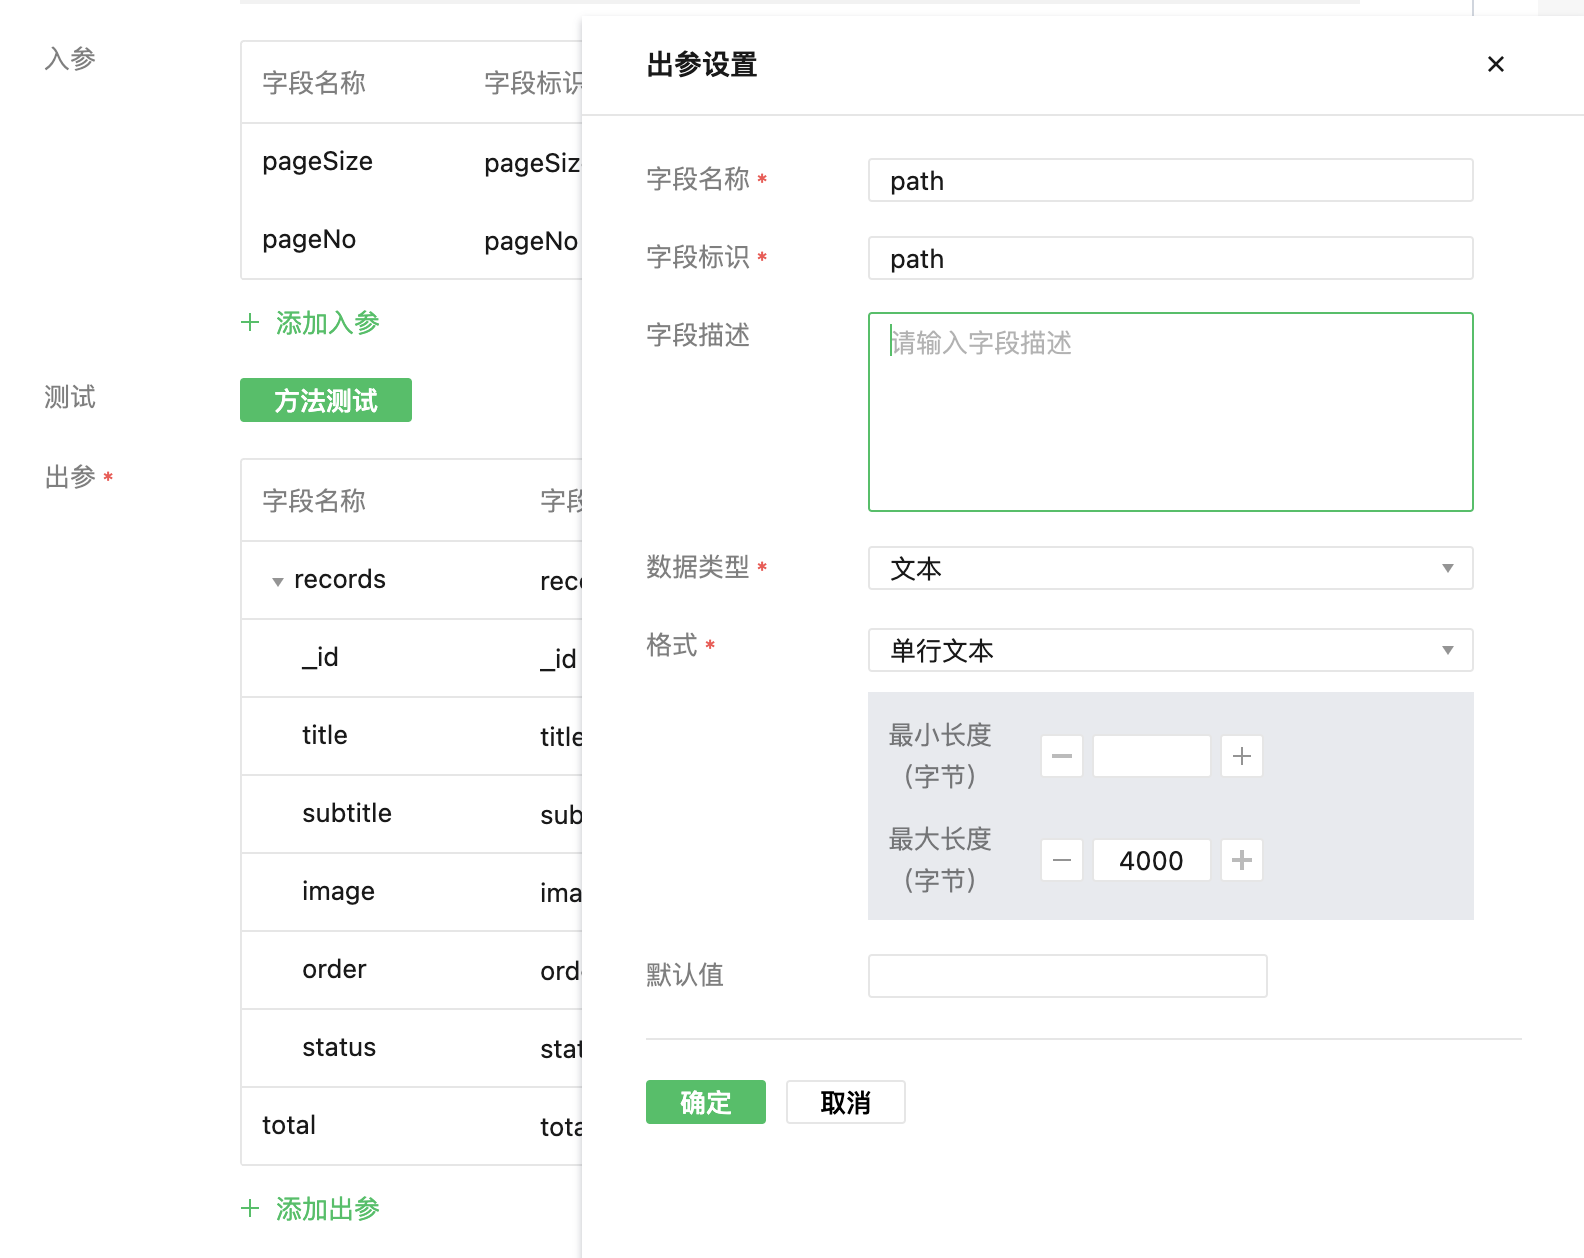
The data source part is done!
The next step is to modify the background management page "Add" and "Query", switch to the "Page Design" menu and
click "Add Carousel" to see its layout structure A form container contains many components
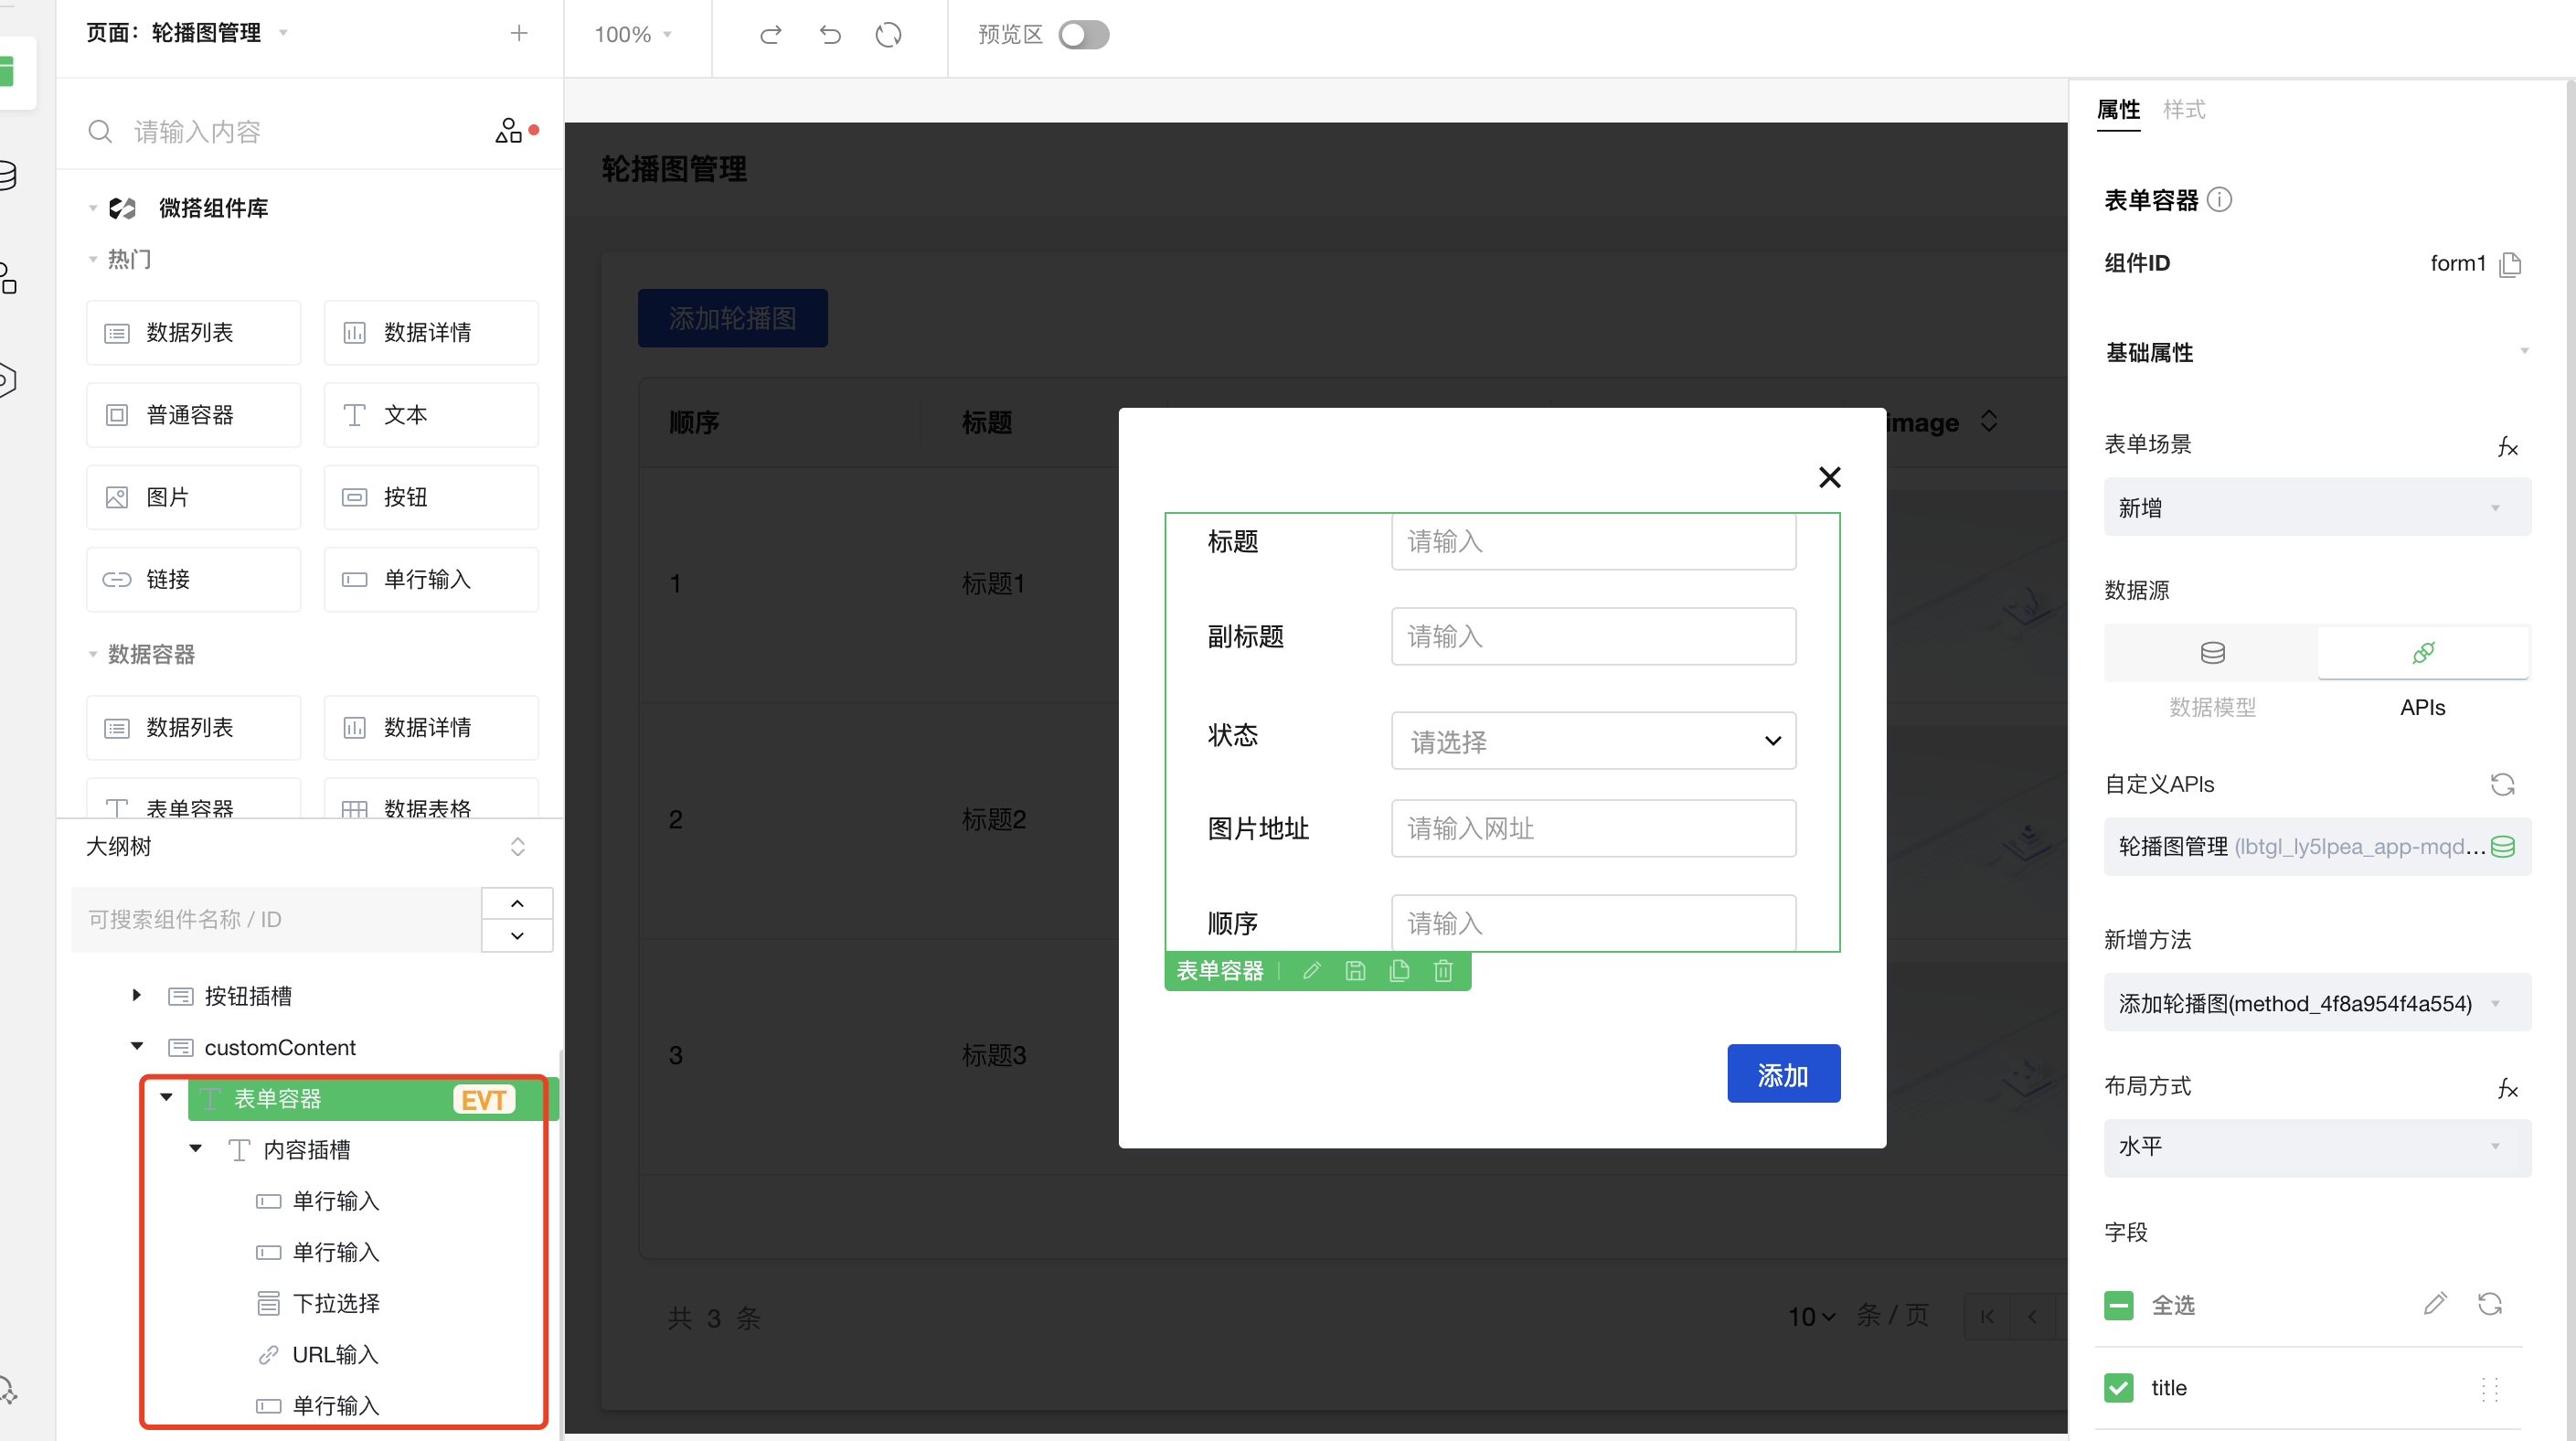
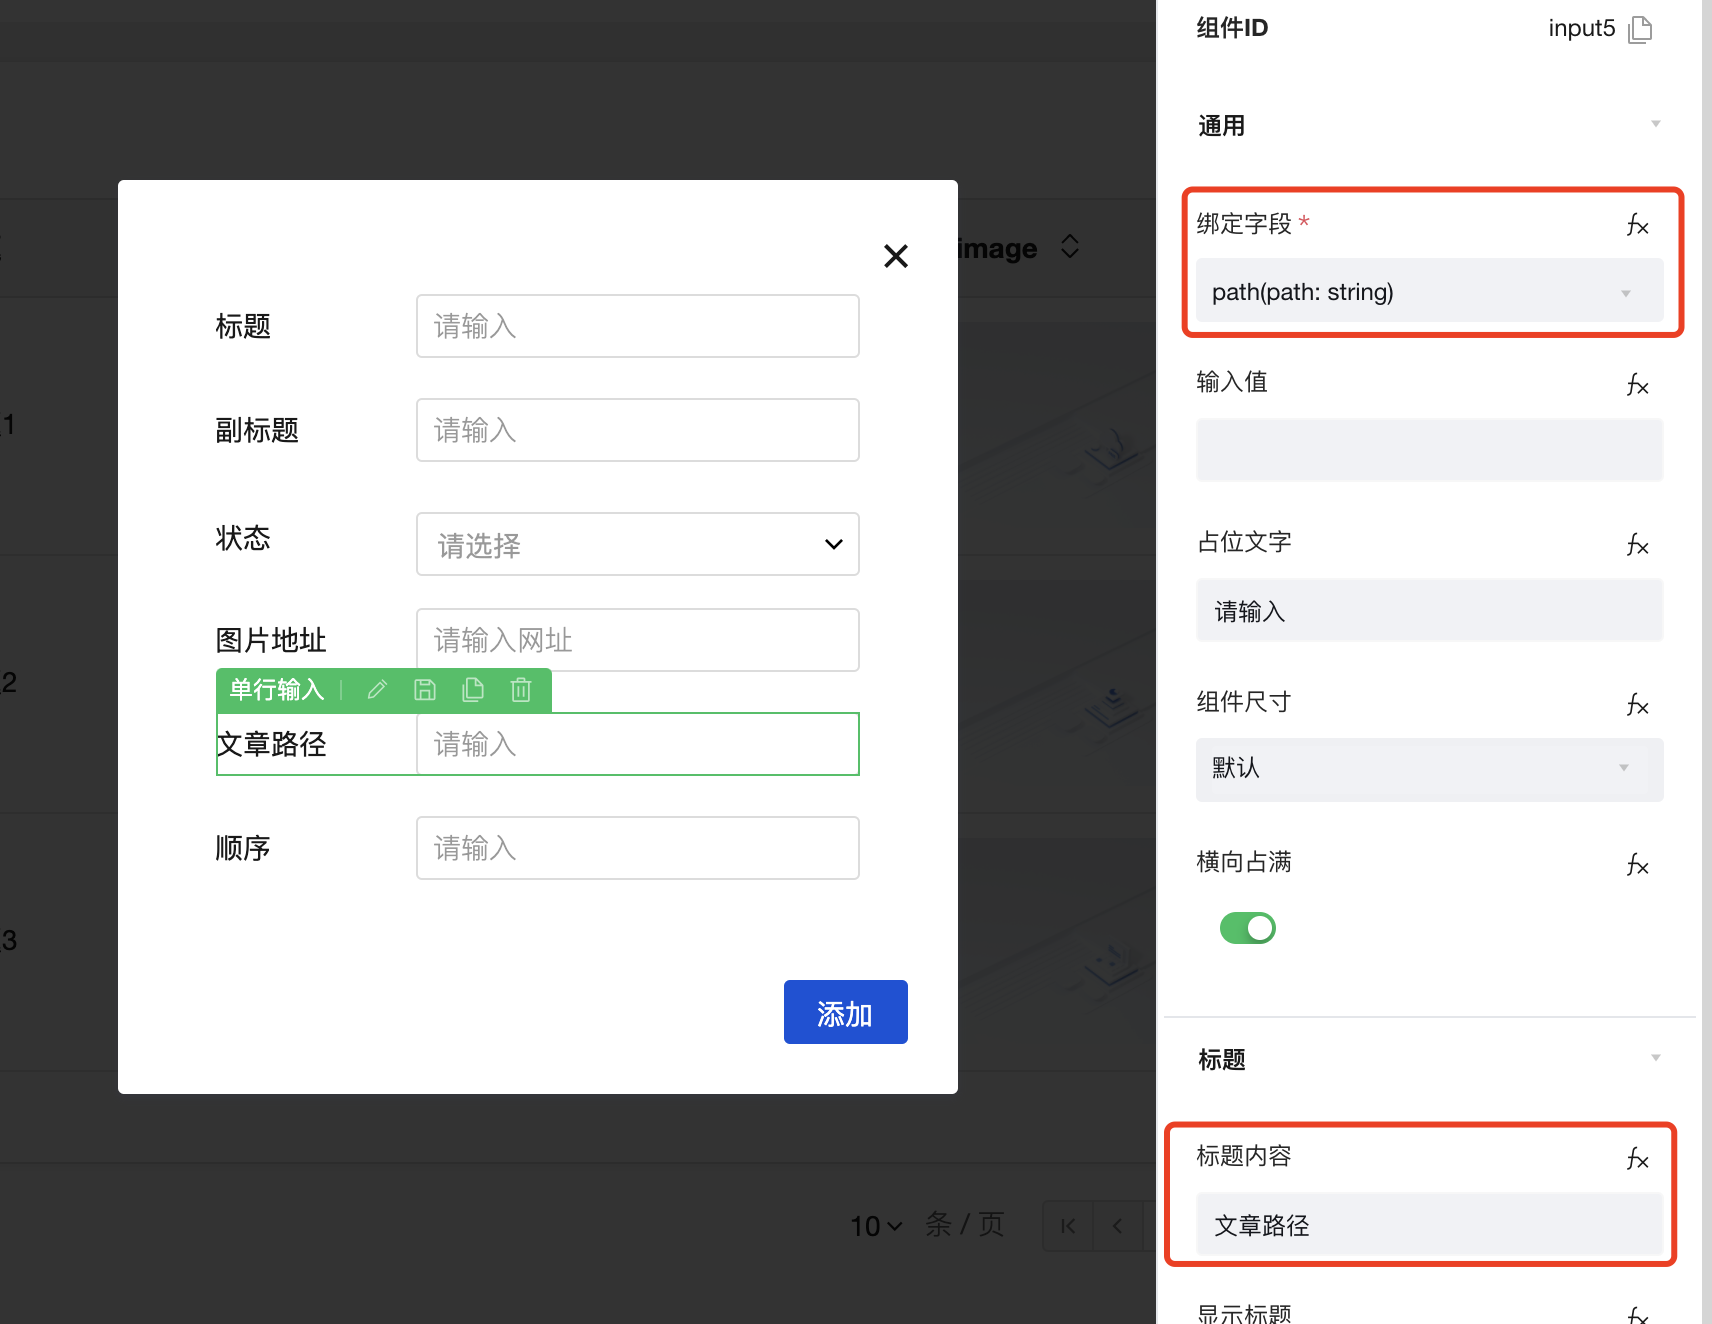
Our article path needs to be input, so we can drag a single-line input component from the top into the layout
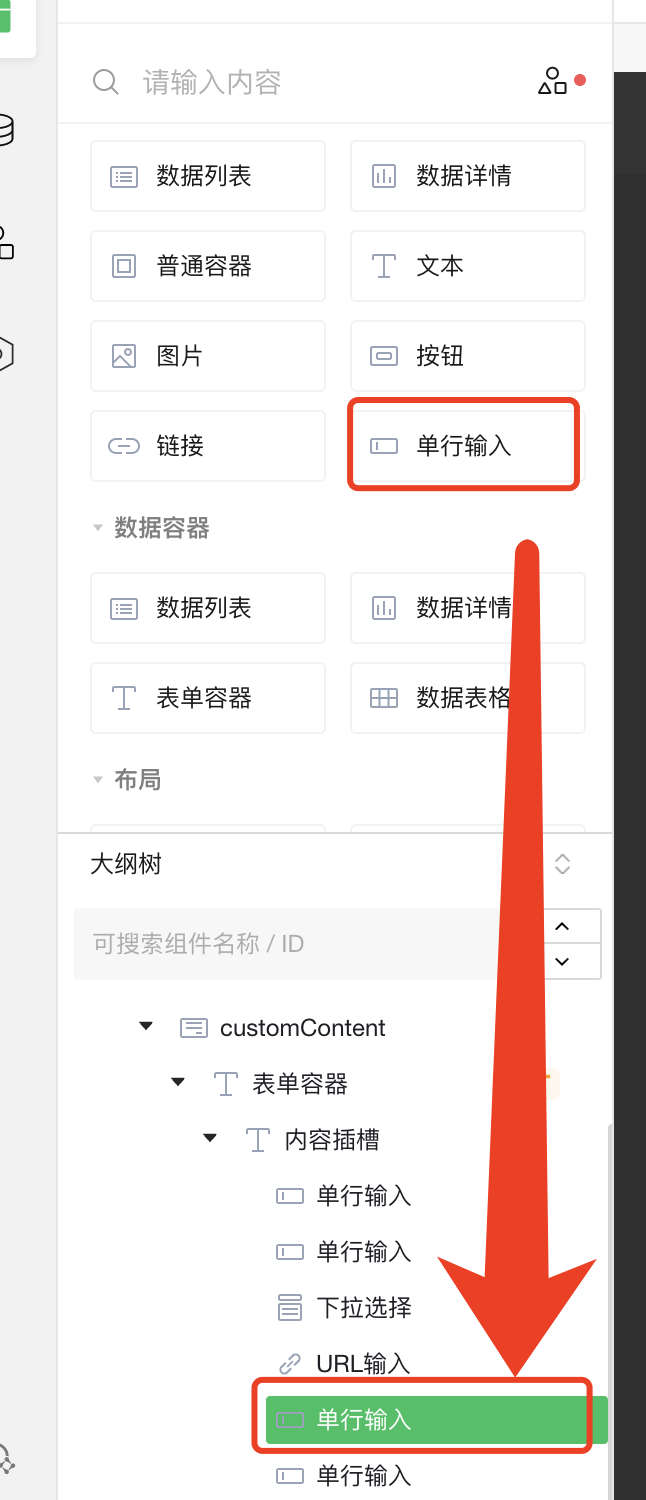
Then modify the display title and binding fields
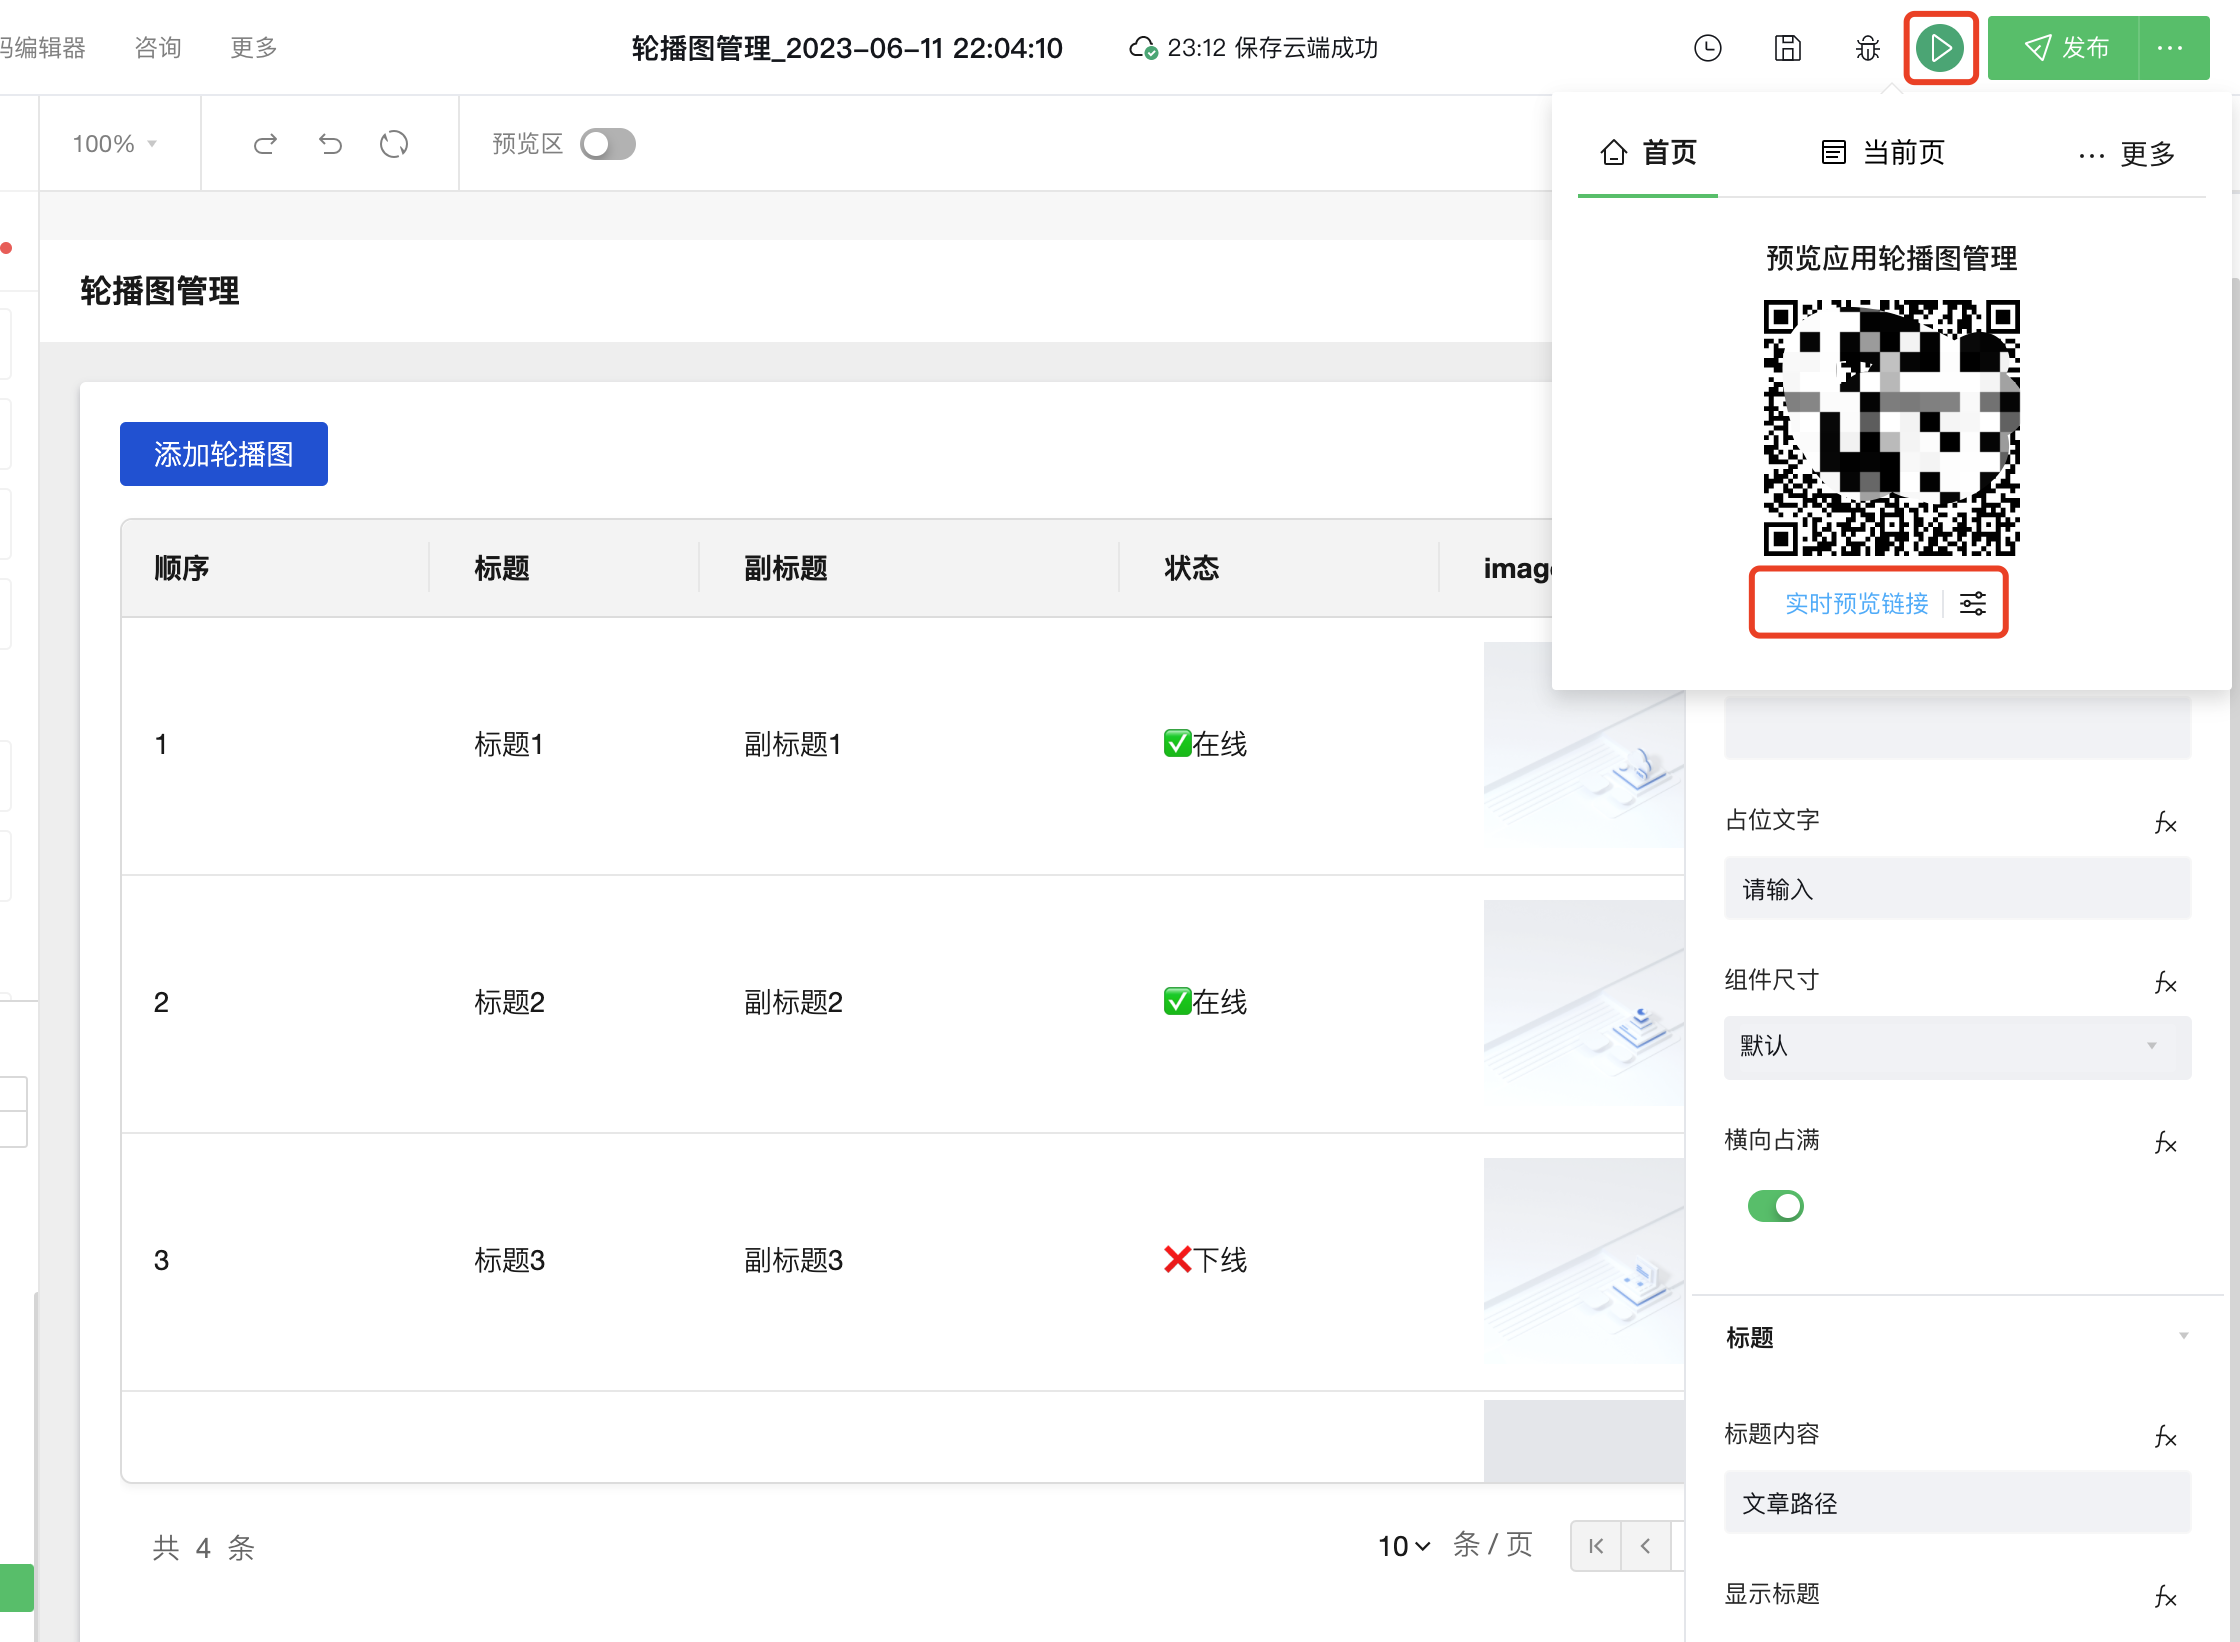
When we finish editing, we can click "Preview" in the upper right corner and then click "Live Preview"
In this way, a separate window can be opened for functional testing. After the addition and modification are completed, we will modify the "List Display", select the "Data Table" component and add the path in the "Column Management"
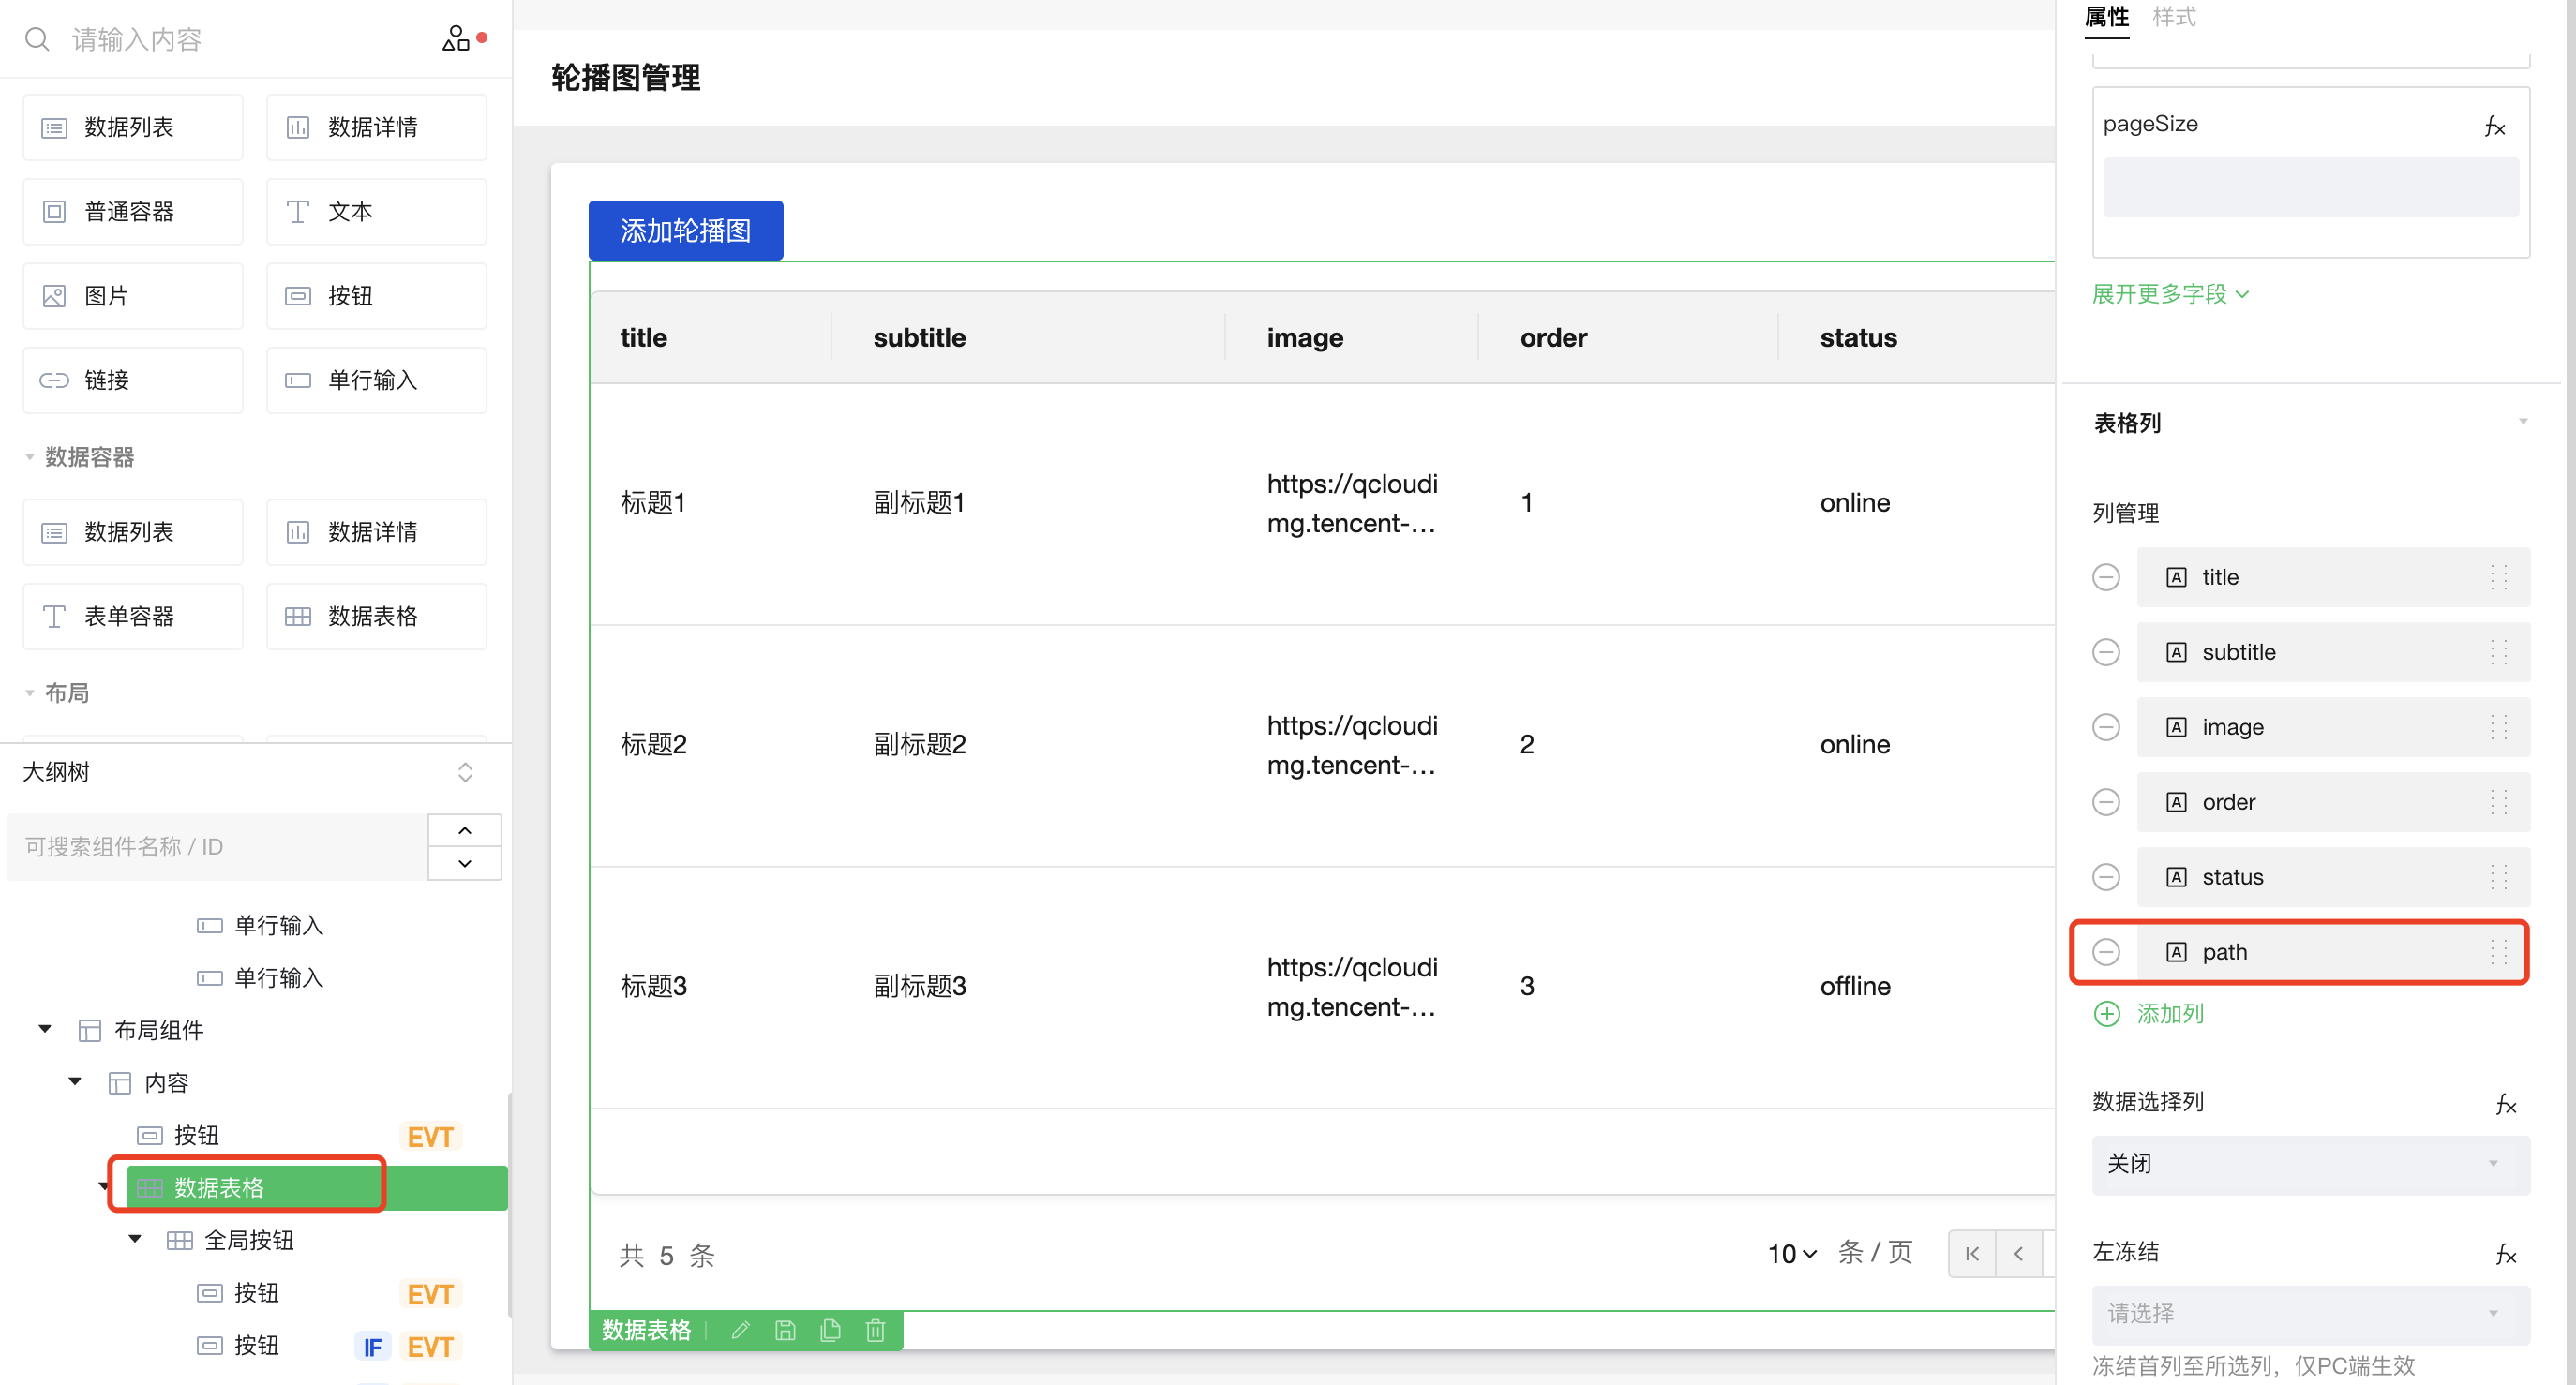
List display effect
After the modification is completed, you need to click "Publish" in the upper right corner to synchronize the online version background.
custom template
Another situation is that the current template cannot meet the business needs. For example, the following "cloud database management" template can only display json for general purpose, and the query cannot be fuzzy, so it needs to be customized at this time.
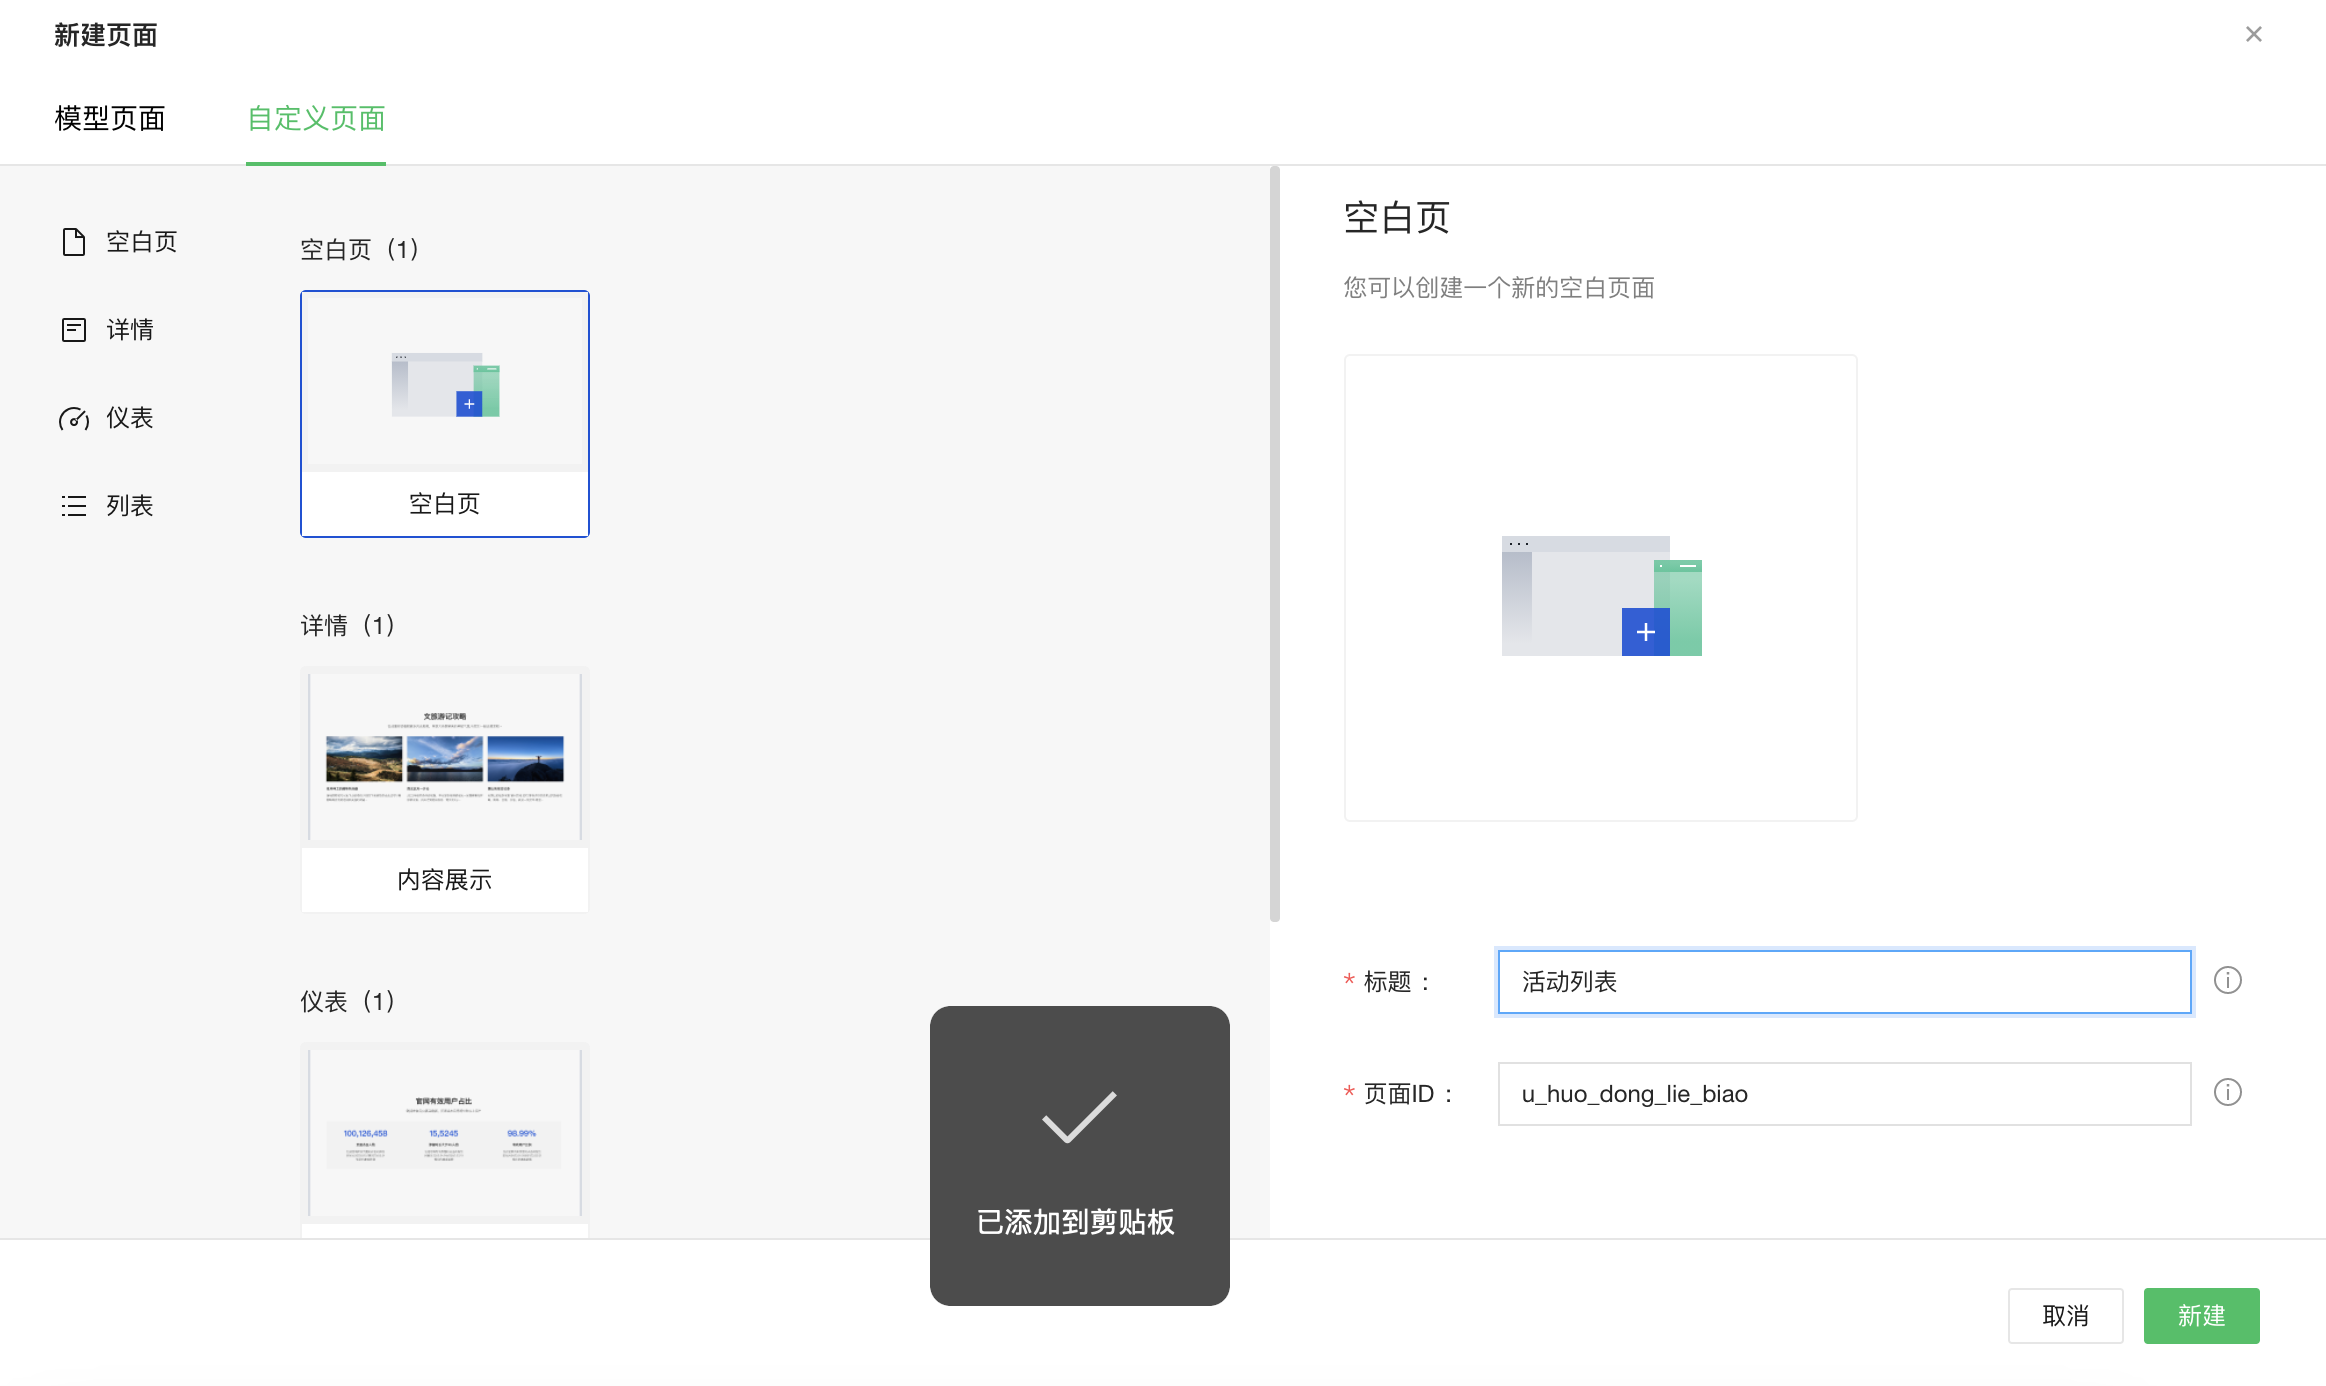
Next, we will make an activity list display by ourselves, and then make a fuzzy query. This requirement can be said to be the most commonly used operation.
access data
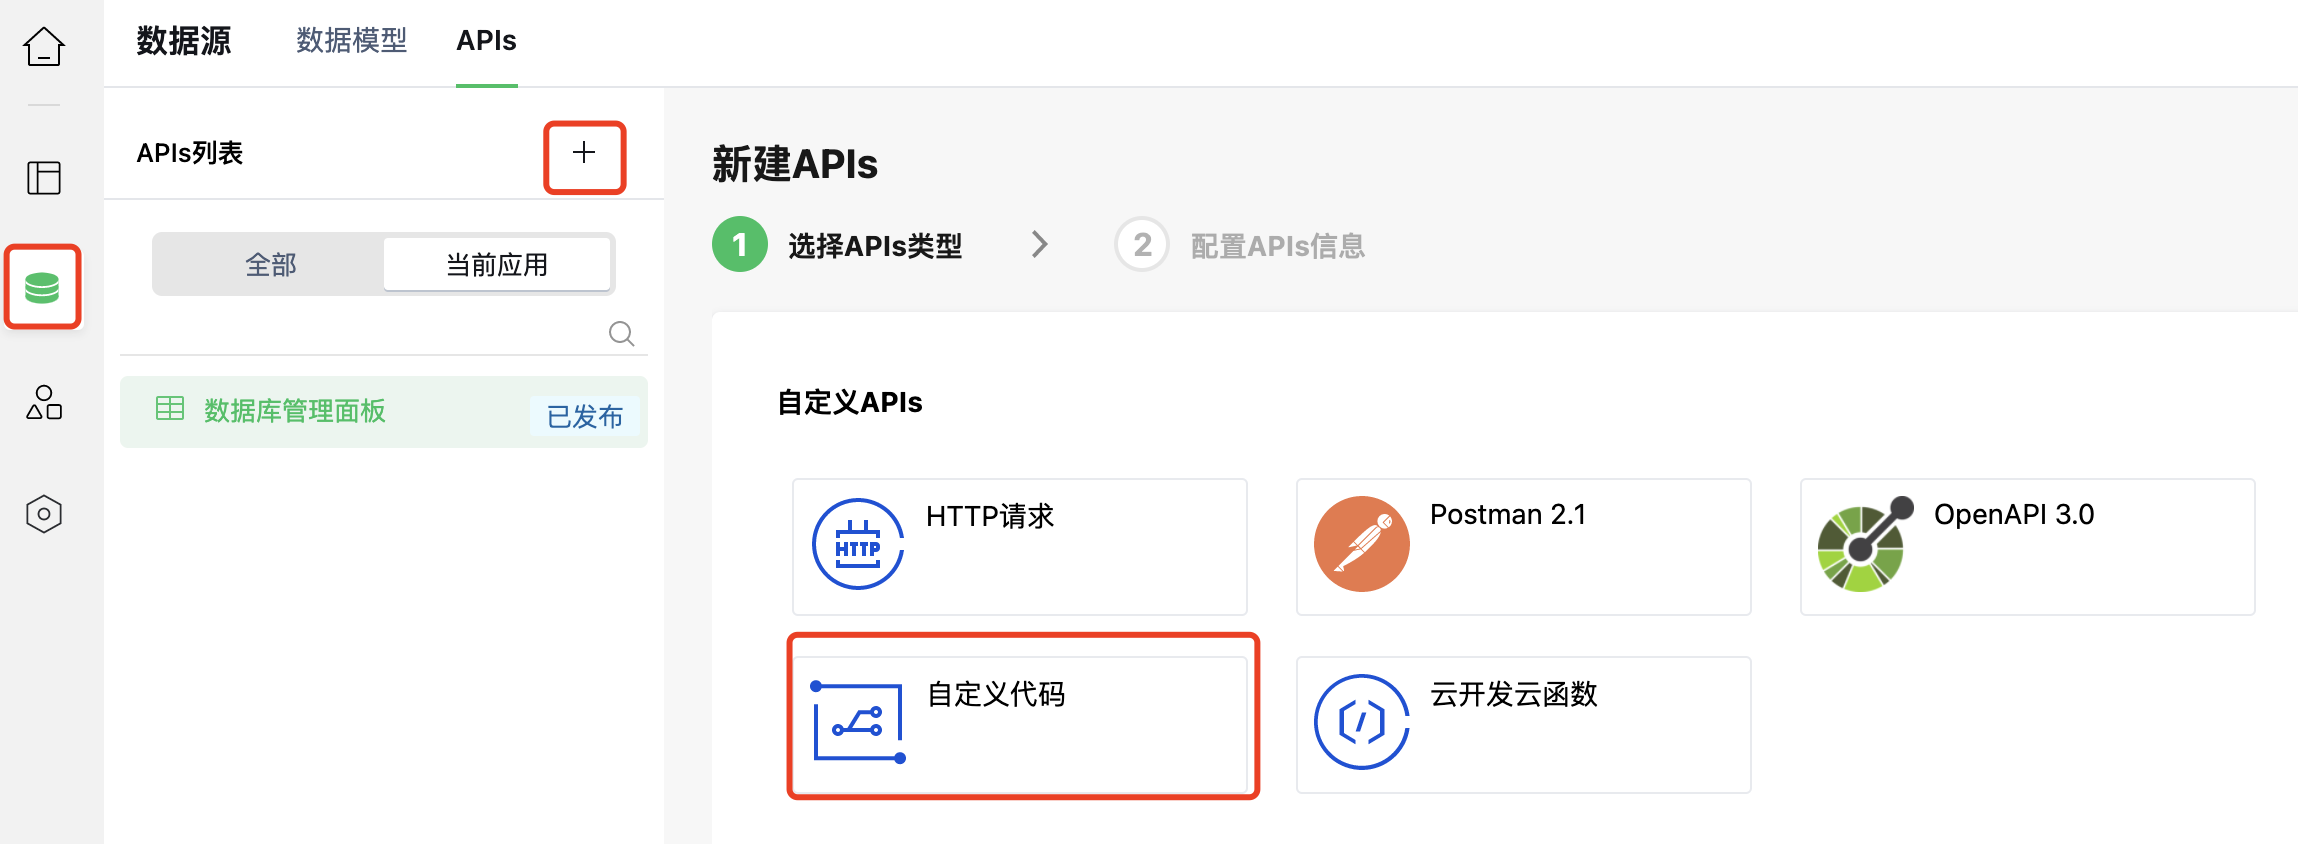
We add a query activity list page based on the "Cloud Database Management" template, first switch to "Data Source" and click the + sign to select "Custom Code"
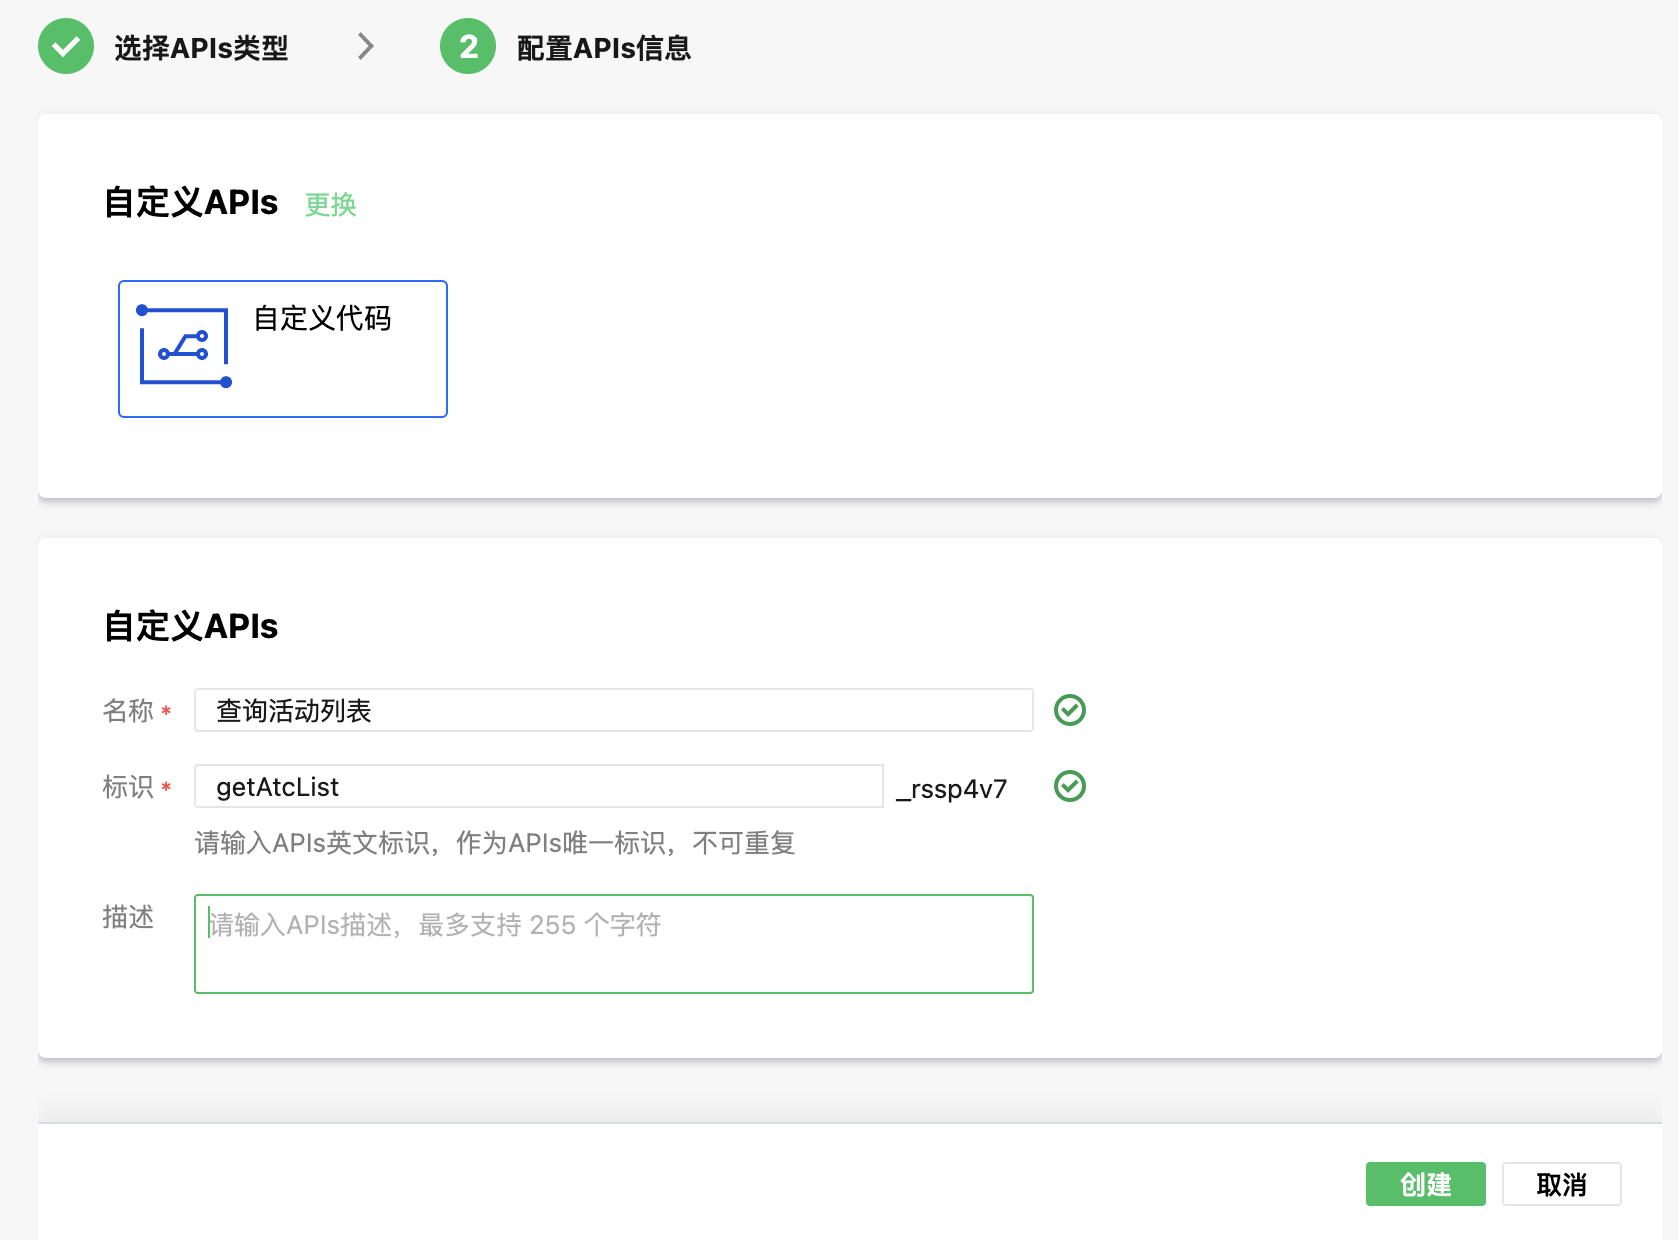
Enter a name and ID and click Create
add method

Query code, other operations can be found in cloudbase node sdk documentation
const cloudbase = require("@cloudbase/node-sdk");

const envId = "<云开发环境ID>";
const collectionName = "<云数据库集合名>";

const app = cloudbase.init({
  env: envId,
});

const db = app.database();

module.exports = async (event, context) => {
  let { pageNo, pageSize } = event;
  if (pageNo < 1) pageNo = 1;

  // 查询条件先固定为空,即查询集合内的所有数据
  const query = db.collection(collectionName).where({});

  const recordsRes = await query
    .skip((pageNo - 1) * pageSize)
    .limit(pageSize)
    .get();
  const totalRes = await query.count();

  return {
    records: recordsRes.data,
    total: totalRes.total,
  };
};
Copy
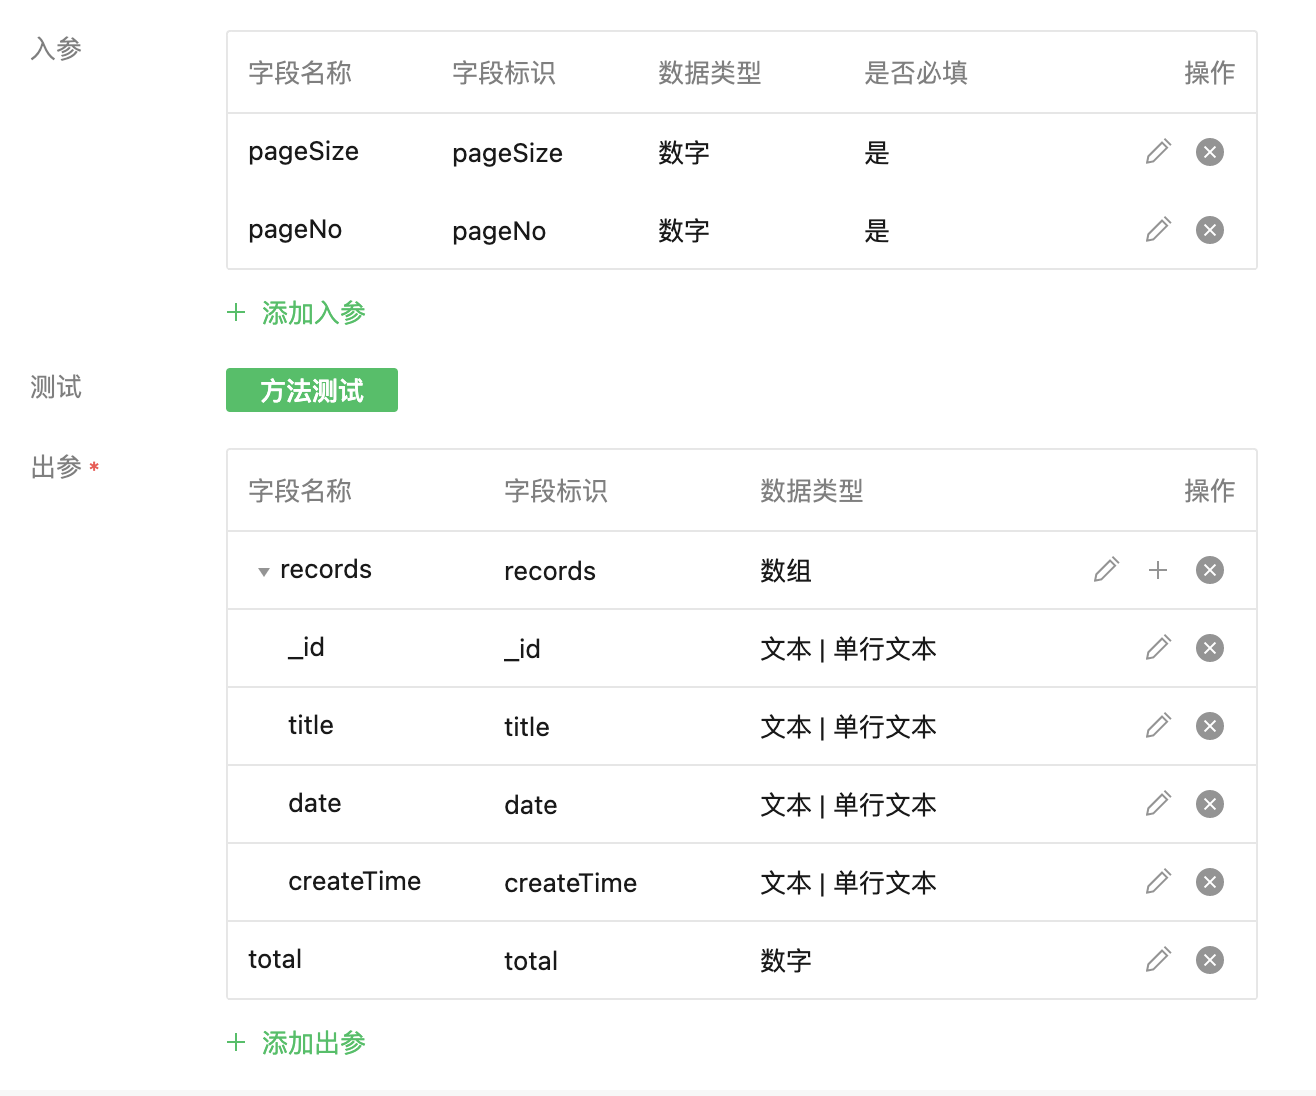
Input parameter configuration: pageSize, pageNo
Output parameter configuration: use "method test" to run the test and then use the output parameter mapping
Data Display
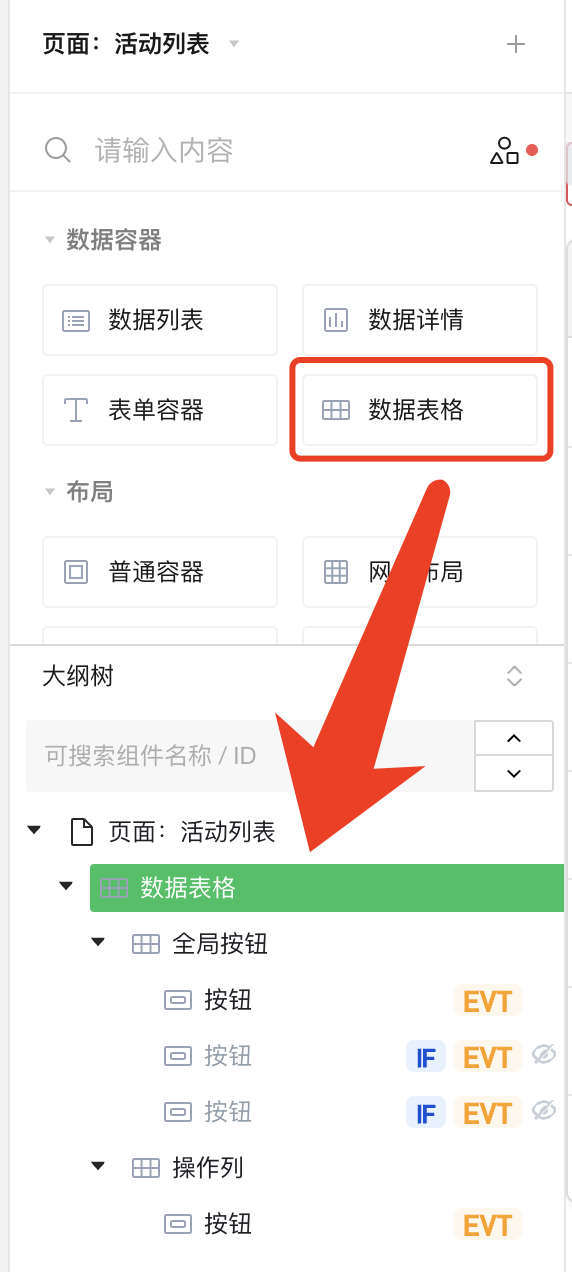
Switch to "Page Design" and click the + sign in the upper right corner
Drag and drop a data table component into the layout
Set data table data source
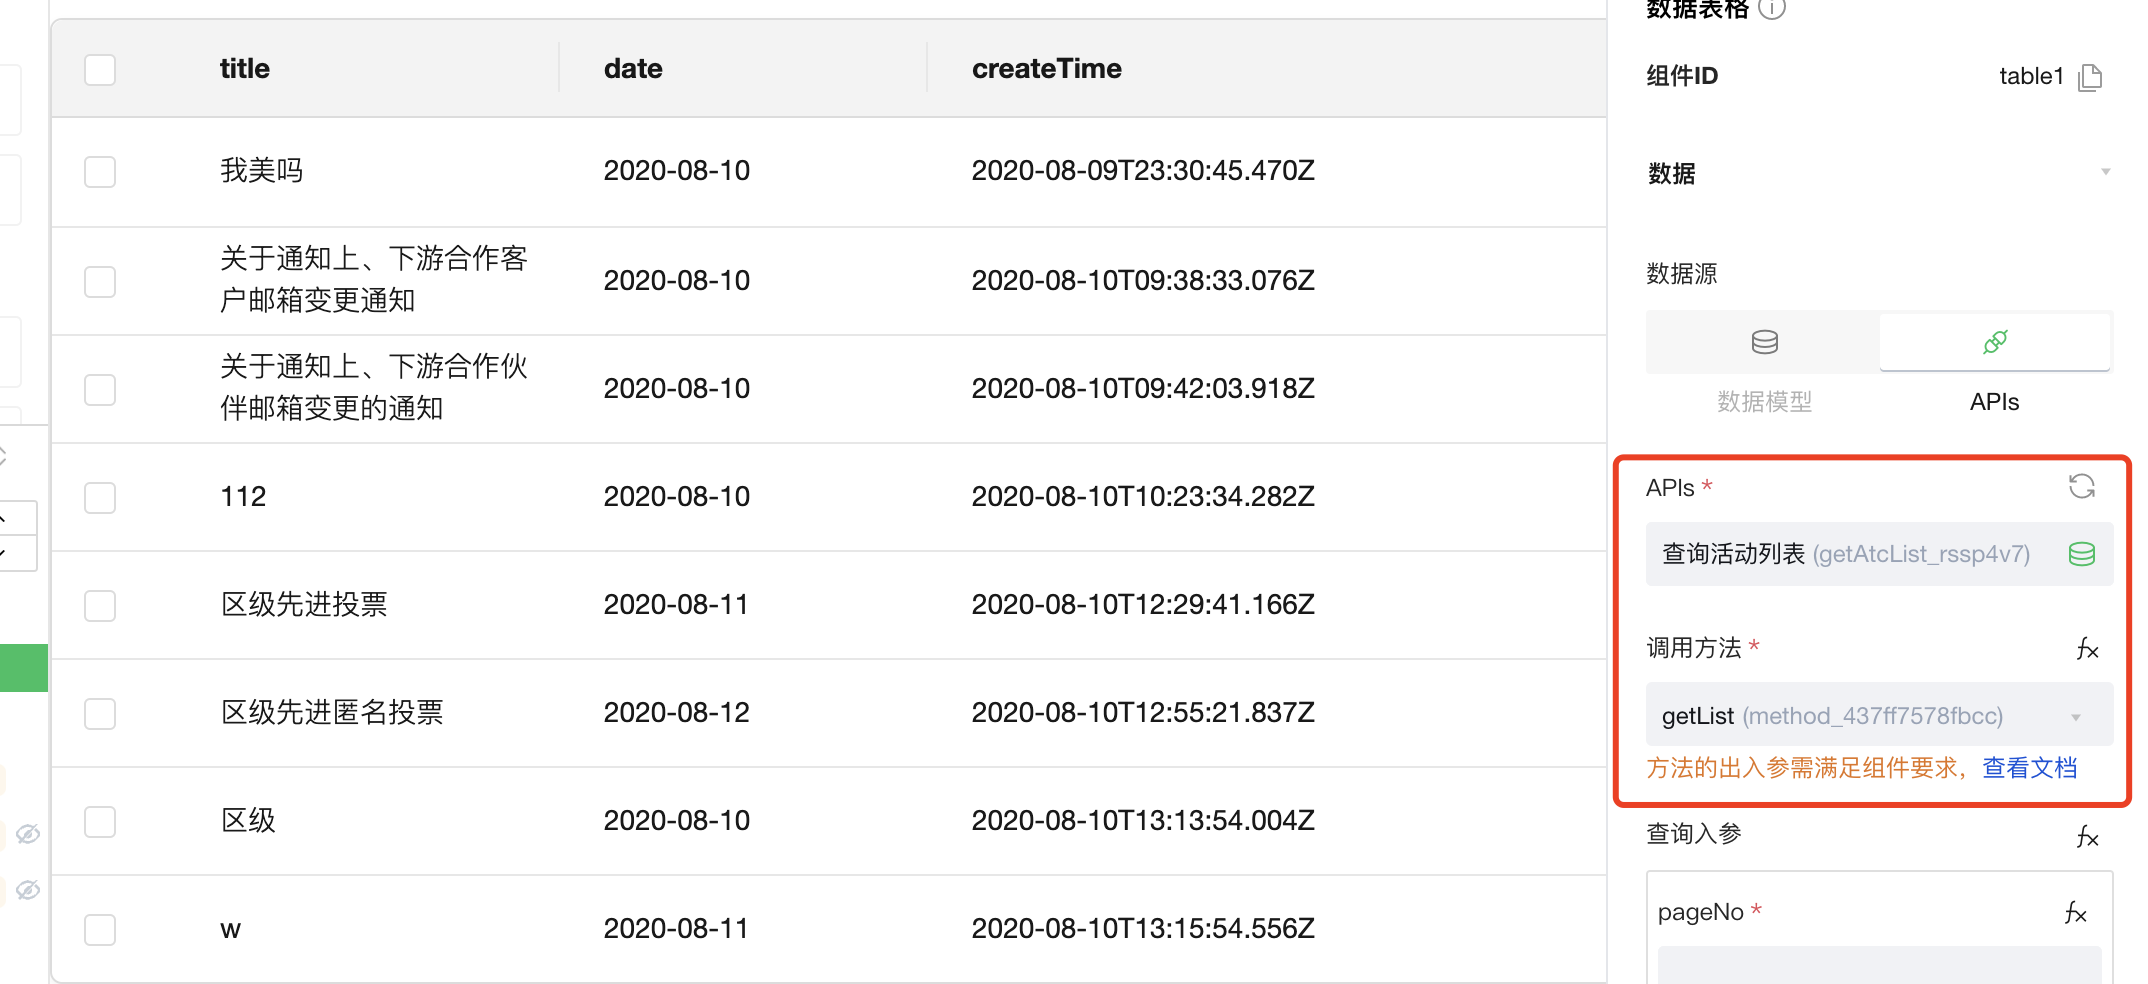
The data in the list is displayed, but we will find that the time field is repeated, and the header is the field name, which users may not be able to understand.
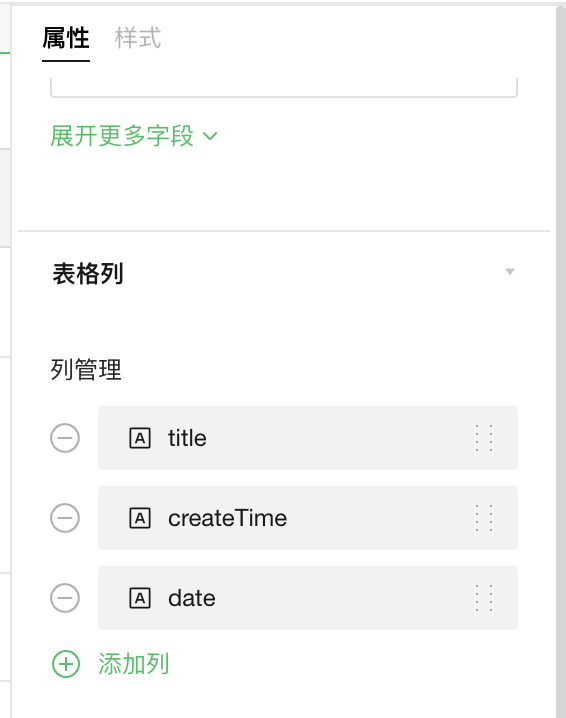
We can delete unnecessary fields in the attribute column management
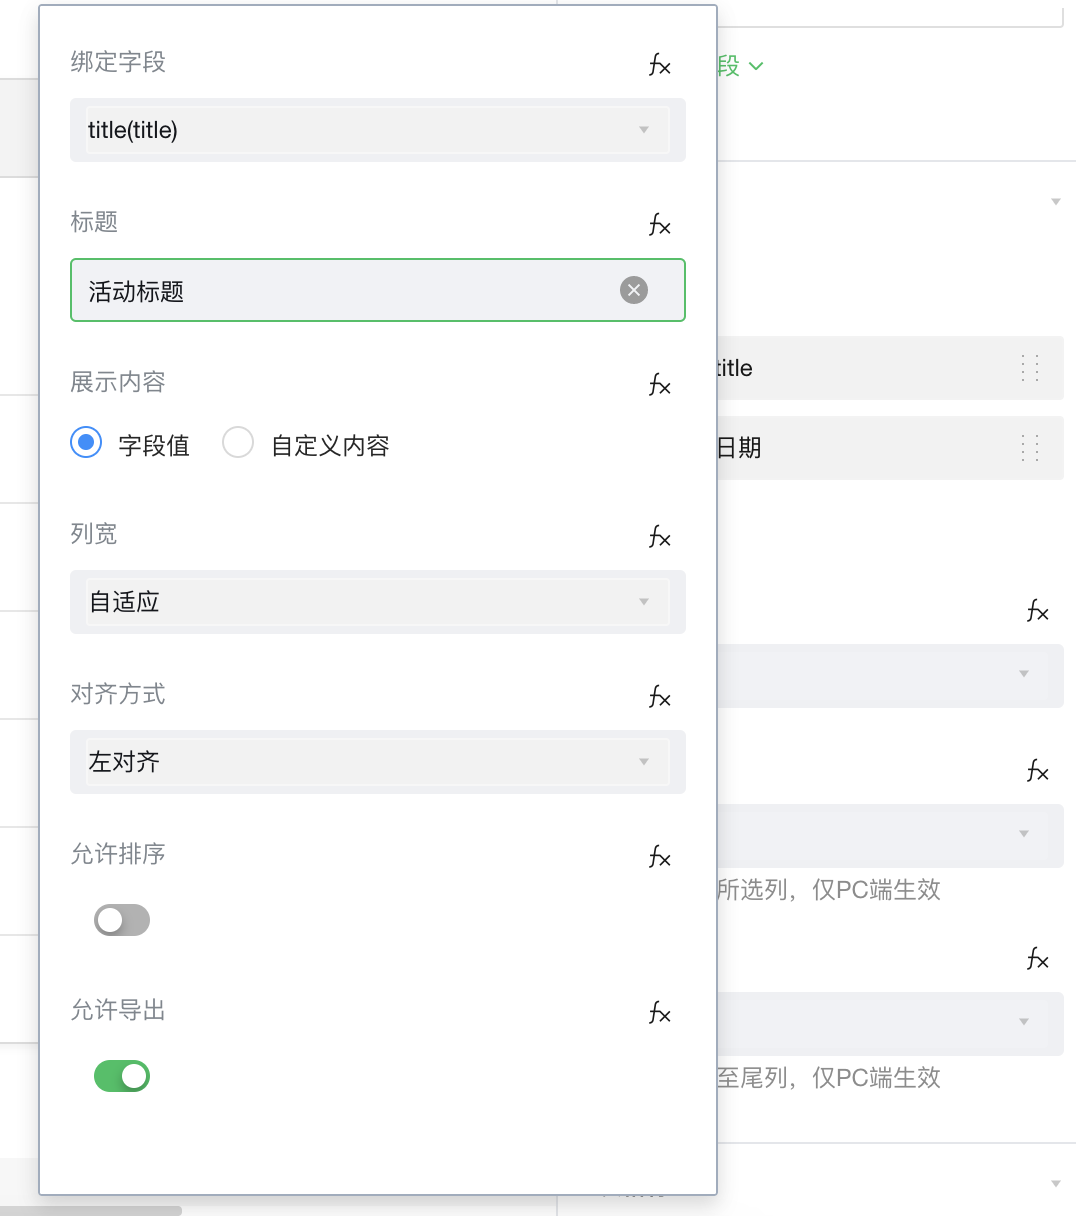
You can also modify the attribute title, the effect is as follows:

suggestion
1. Templates need to be richer to meet more developer scenarios.
2. Self-contained template business thinking is not comprehensive enough, too simple to be direct.
3. Custom template operations are too complicated and need to be simplified, such as: automatically generate basic additions, deletions, query and modification codes
Related Tutorials
Official Cloud Development Management Tool Tutorial
Cloud Development Node.js SDK API
Micro-build Component List