Full-text catalog navigation
0. Preface
Longhorn is a distributed block storage service that comes with the Rancher store. It is easy to deploy and configure, and provides a beautiful and easy-to-use UI.
The data volume backup function in Longhorn requires external storage, such as s3 or nfs, and this article uses the nfs service as the backup storage service.
1. NFS installation configuration
1.1 Install nfs and rpcbind
-
There is an external network environment to directly download and install yum
yum -y install nfs-utils rpcbind -
Download offline package installation without external network environment
repotrack nfs-utils repotrack rpcbind -
start service
systemctl start nfs && systemctl enable nfs
systemctl start rpcbind && systemctl enable rpcbind
1.2 Create a shared directory
-
Create a directory and assign permissions
mkdir -p /home/nfs && chmod -R 777 /home/nfs
1.3 Configure access permissions
-
Restrict access to specified hosts
# 单个主机地址 echo "/home/nfs 192.168.1.101(rw,sync,no_root_squash)" >> /etc/exports # 多个主机地址 echo "/home/nfs 192.168.1.101(rw,sync,no_root_squash) 192.168.1.102(rw)" >> /etc/exports -
Restrict host IP range access
# 192.168.1 网段可以访问 echo "/home/nfs 192.168.1.*(rw,sync,no_root_squash)" >> /etc/exports -
Unrestricted access (unsecured)
echo "/home/nfs *(rw)" >> /etc/exports -
load configuration
exportfs -r
1.4 Limitations showmount -ePreventing Vulnerability Scanning
-
configuration
/etc/hosts.allow# 此处配置允许挂载及 showmount -e 查看共享目录的主机 mountd:192.168.1.101 mountd:192.168.1.102 rpcbind:192.168.1.101 rpcbind:192.168.1.102 -
configuration
/etc/hosts.deny# 此处拦截除 allow 中配置的主机以外的所有 mountd:all rpcbind:all -
Verify that the configuration was successful
# 从 192.168.1.103 查看,无权访问
[root@103 ~]# showmount -e 192.168.1.101
clnt_create: RPC: Port mapper failure - Authentication error
# 从 192.168。1.102 查看,有权访问 [root@102 ~]# showmount -e 192.168.1.101 Export list for 192.168.1.101: /home/nfs-data 192.168.1.101,192.168.1.102
1.5 Firewall configuration
Since several ports in the nfs service are random and cannot be specified in the firewall, it is necessary to modify the configuration file to specify the relevant ports.
-
/etc/sysconfig/nfsAdd the following to the file# custom add RQUOTAD_PORT=1001 LOCKD_TCPPORT=32803 LOCKD_UDPPORT=32769 MOUNTD_PORT=892 -
Configure firewall rules
firewall-cmd --permanent --add-port=111/tcp
firewall-cmd --permanent --add-port=111/udp
firewall-cmd --permanent --add-port=2049/tcp
firewall-cmd --permanent --add-port=2049/udp
firewall-cmd --permanent --add-port=32803/tcp
firewall-cmd --permanent --add-port=32803/udp
firewall-cmd --permanent --add-port=32769/tcp
firewall-cmd --permanent --add-port=32769/udp
firewall-cmd --permanent --add-port=1001/tcp
firewall-cmd --permanent --add-port=1001/udp
firewall-cmd --permanent --add-port=892/tcp
firewall-cmd --permanent --add-port=892/udp
firewall-cmd --reload
If you need higher security, you can specify which ip or ip range the above ports are developed for
2. Longhorn backup configuration
2.1 Configure in Longhorn UI
In the cluster dashboard, go to Longhornthe management interface

Open【Setting】-【General】
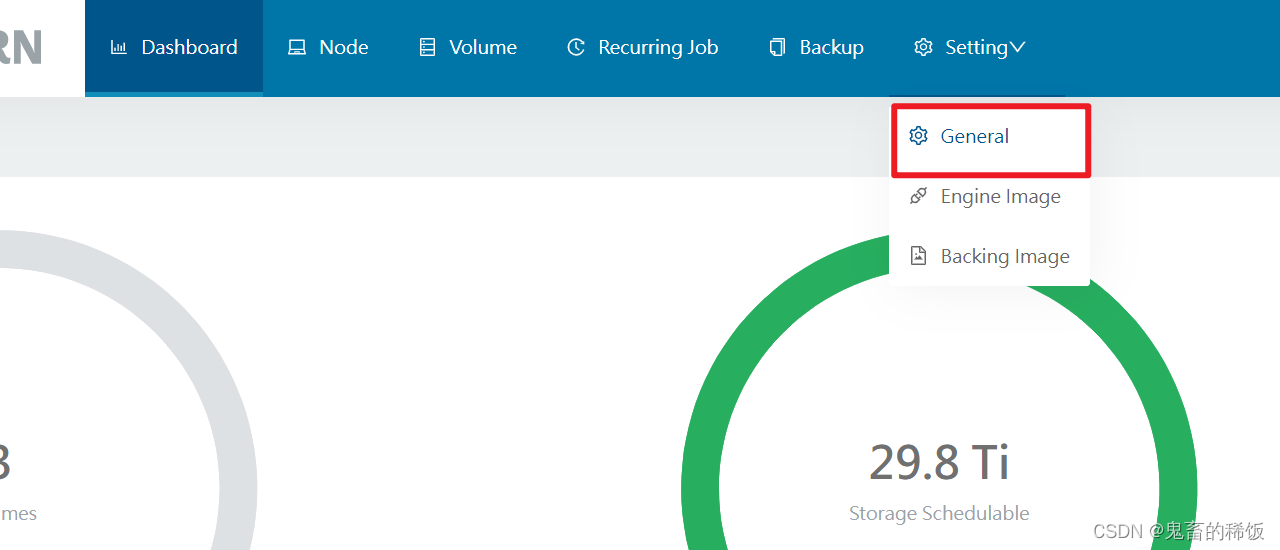
Find Backup Targetthe item, fill in nfsthe path and click the save button at the bottom of the page
nfs://192.168.1.101:/home/nfs-data

3. Data volume backup and recovery operations
3.1 Create a sample workload
Take the postgres database service as the test object
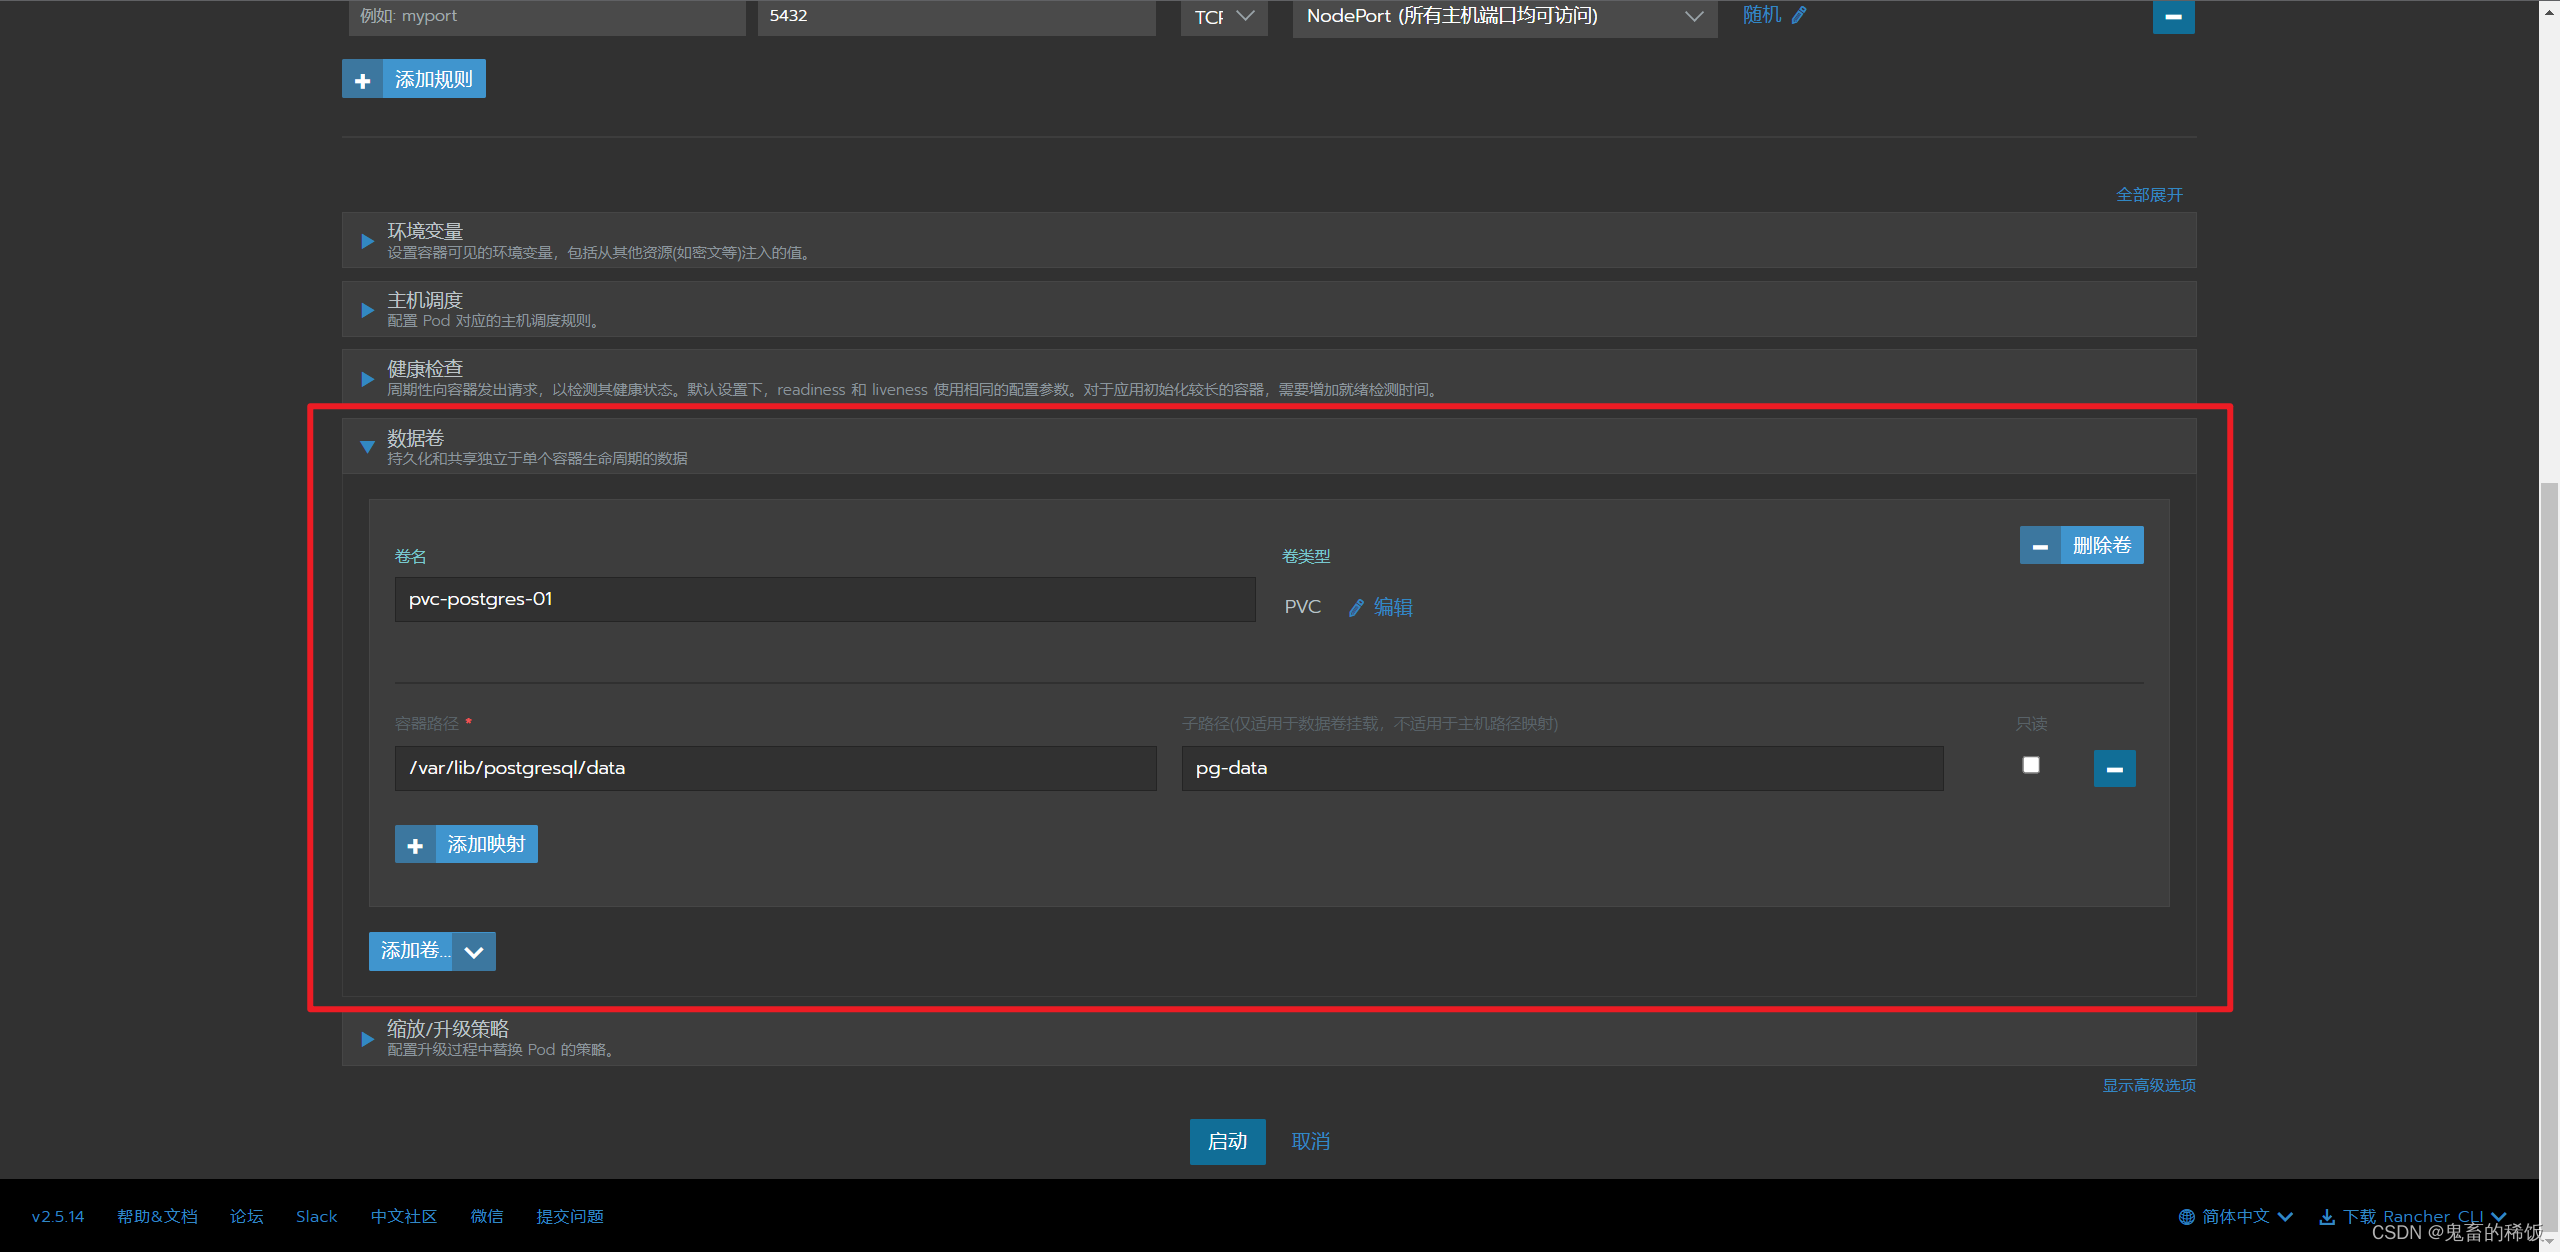
- Deploy stateful workloads and create pvc data volumes
3.2 Create test data
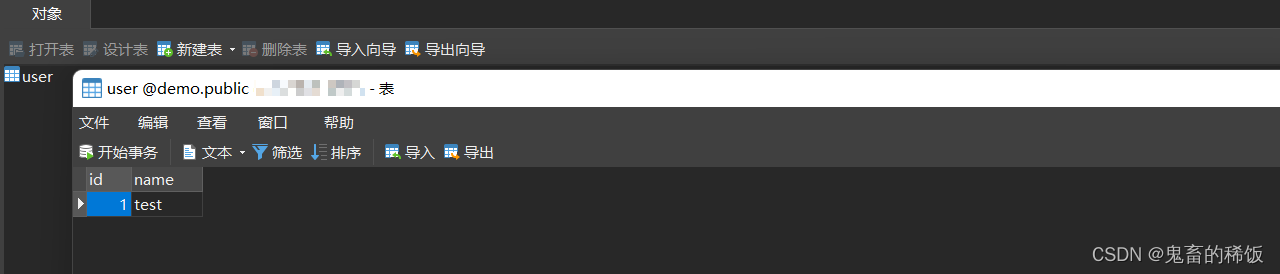
Use navicat to connect to the database service and create test data
- Create
demoa database,usertable, and insert a piece of test data into the table
3.3 Create data volume backup
In the Volume menu of the Longhorn UI, select the data volume just created, click the Create Backup button in the menu bar, and add labels (Labels) as needed
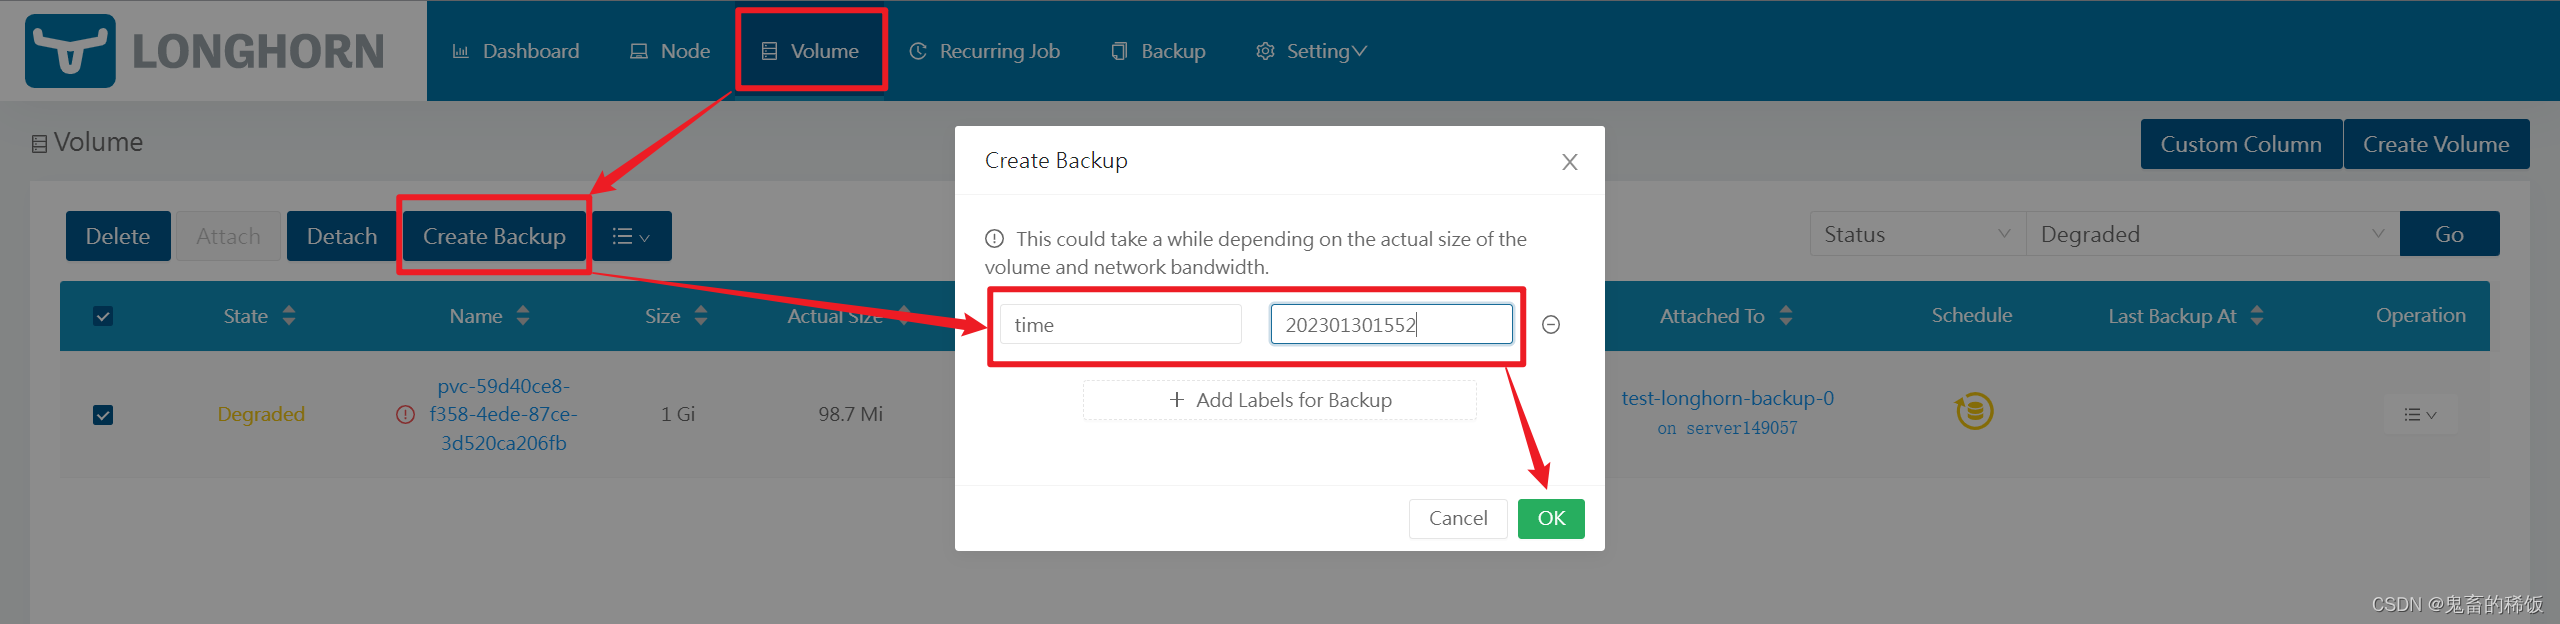
After the creation is complete, you can see the backup information created this time in the Backup (Backup) menu

3.4 Delete database data
Delete the database just created in Navicat demo, and then stop the database service

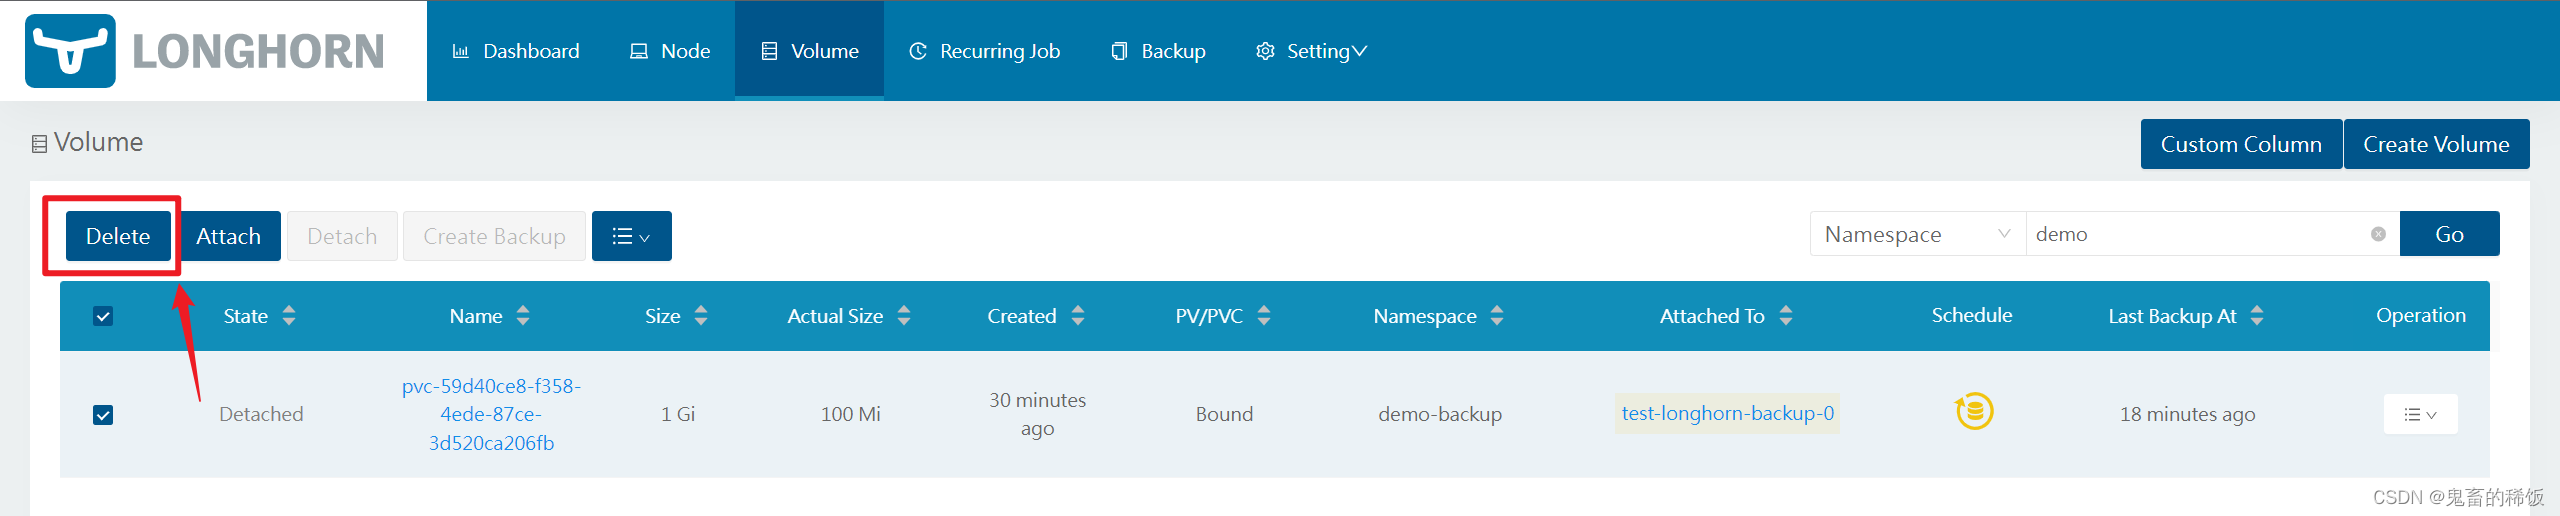
3.5 Restoring data volumes
- Delete the current data volume in the Volume list
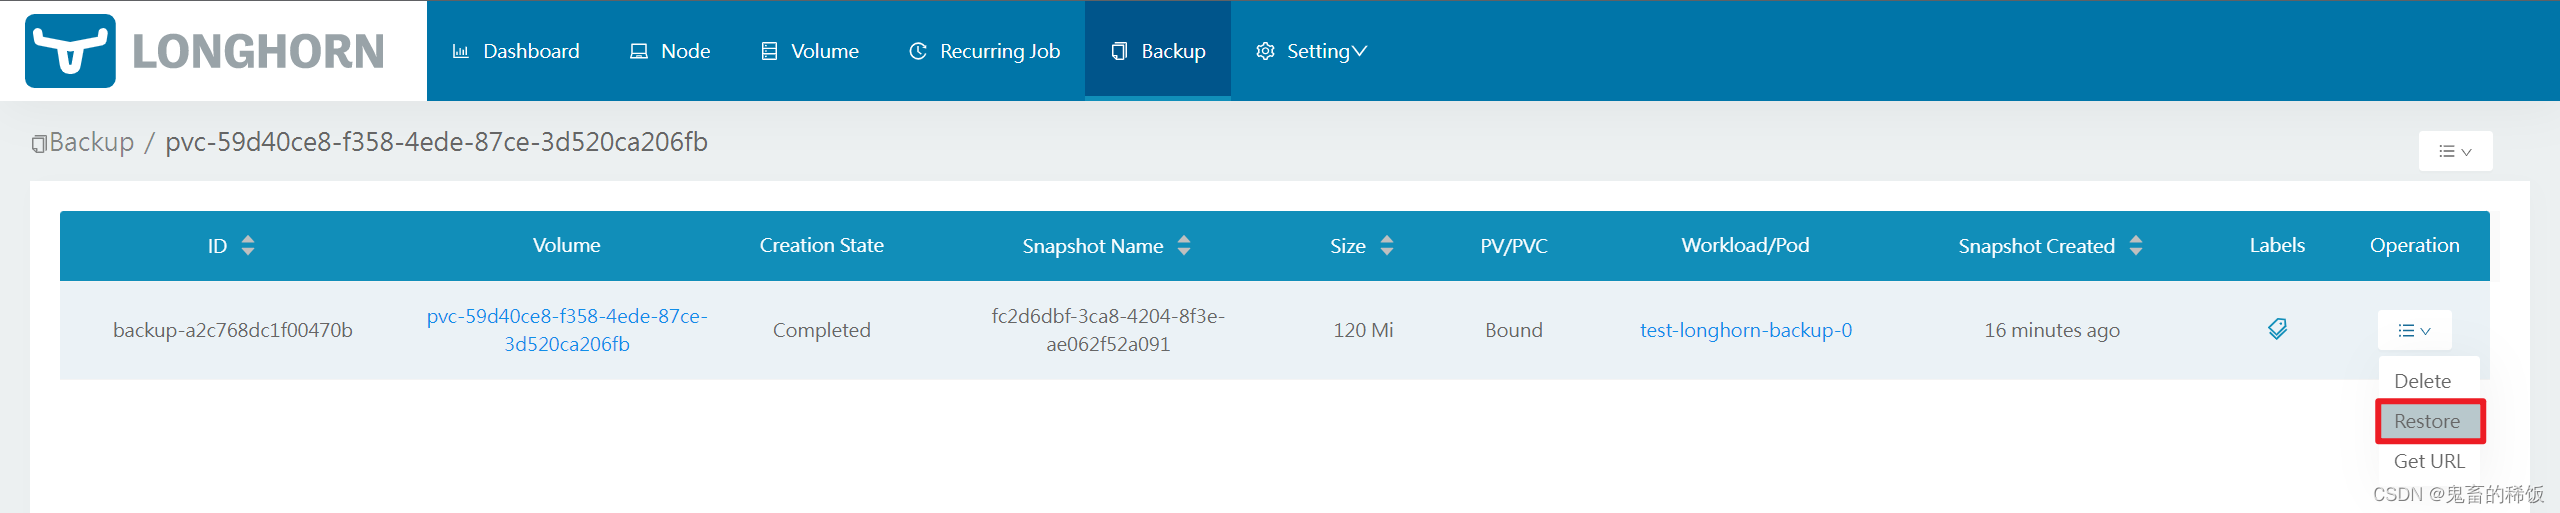
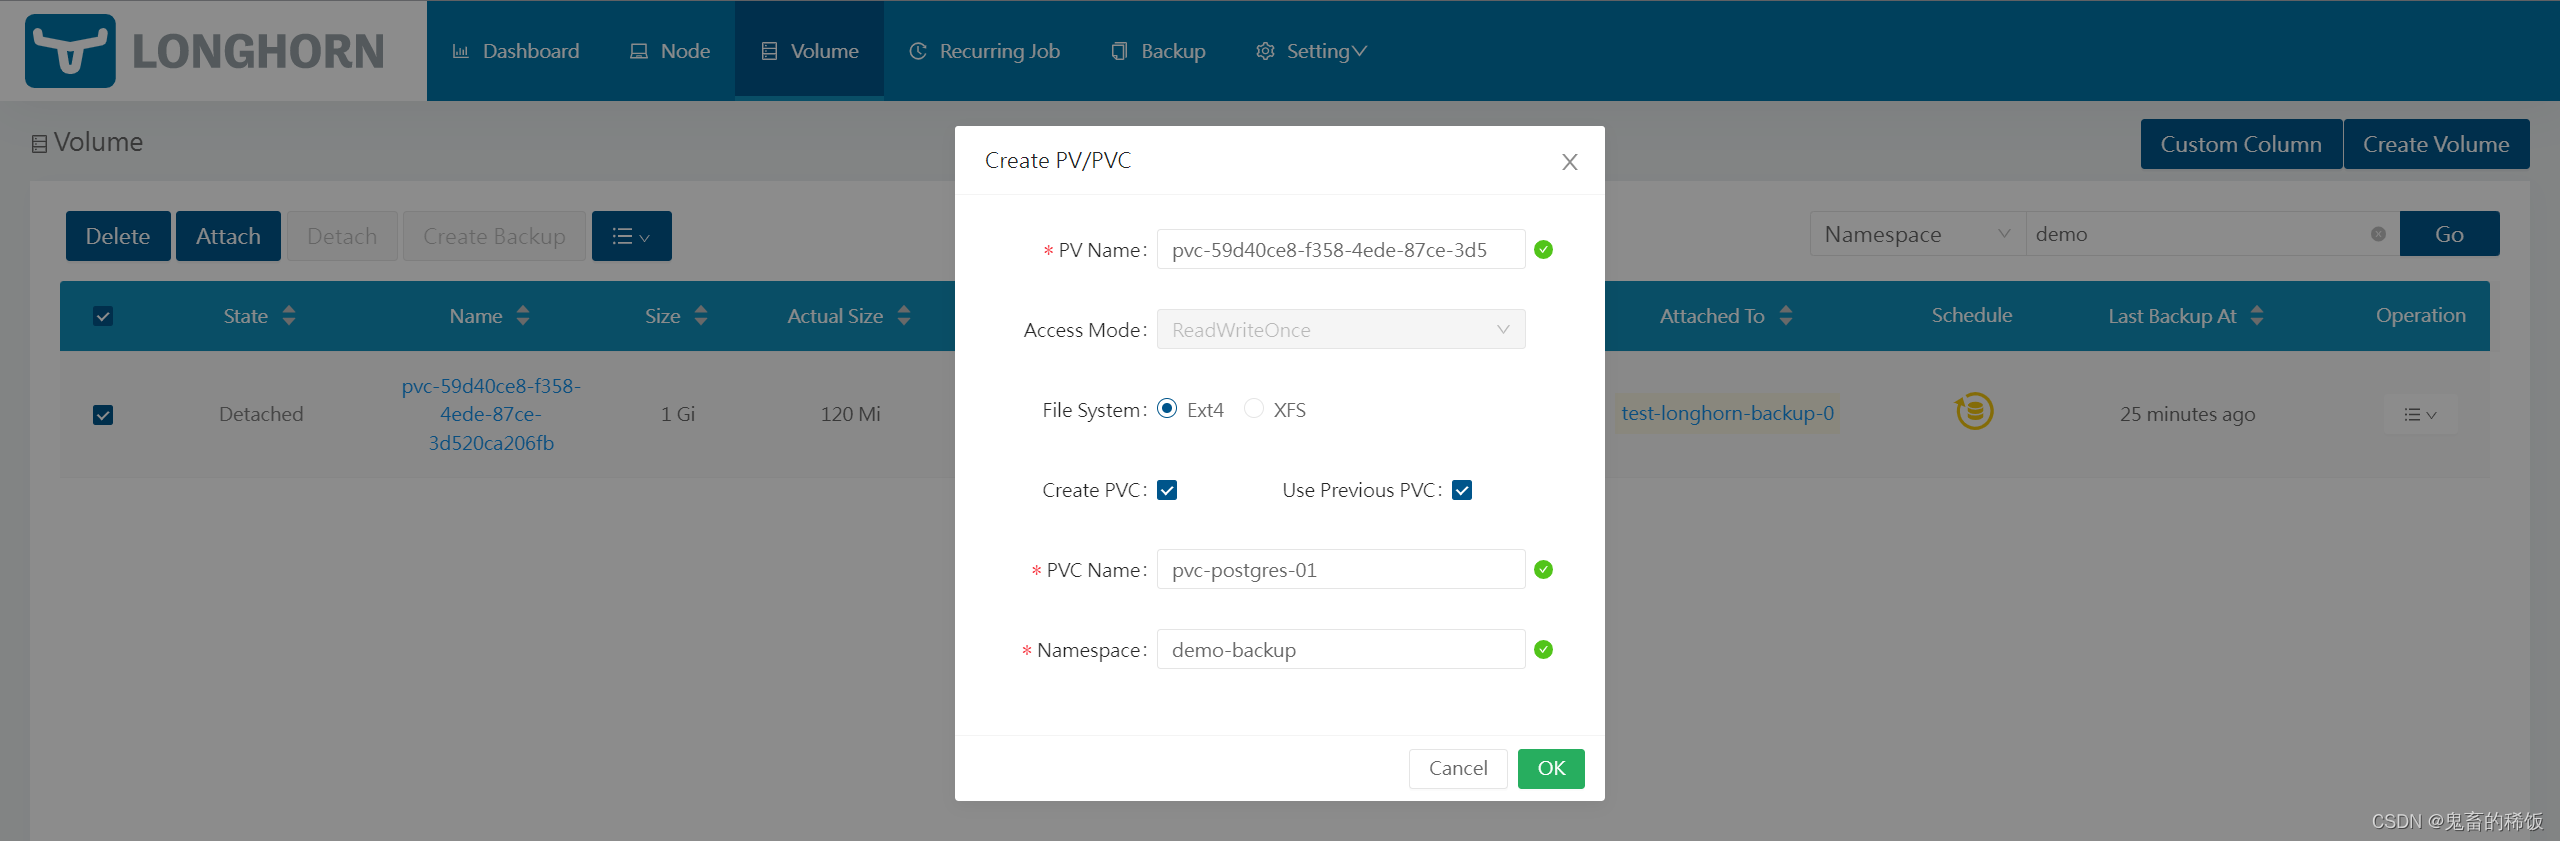
- Find the data volume you just backed up in the Backup list, and click Restore in the menu
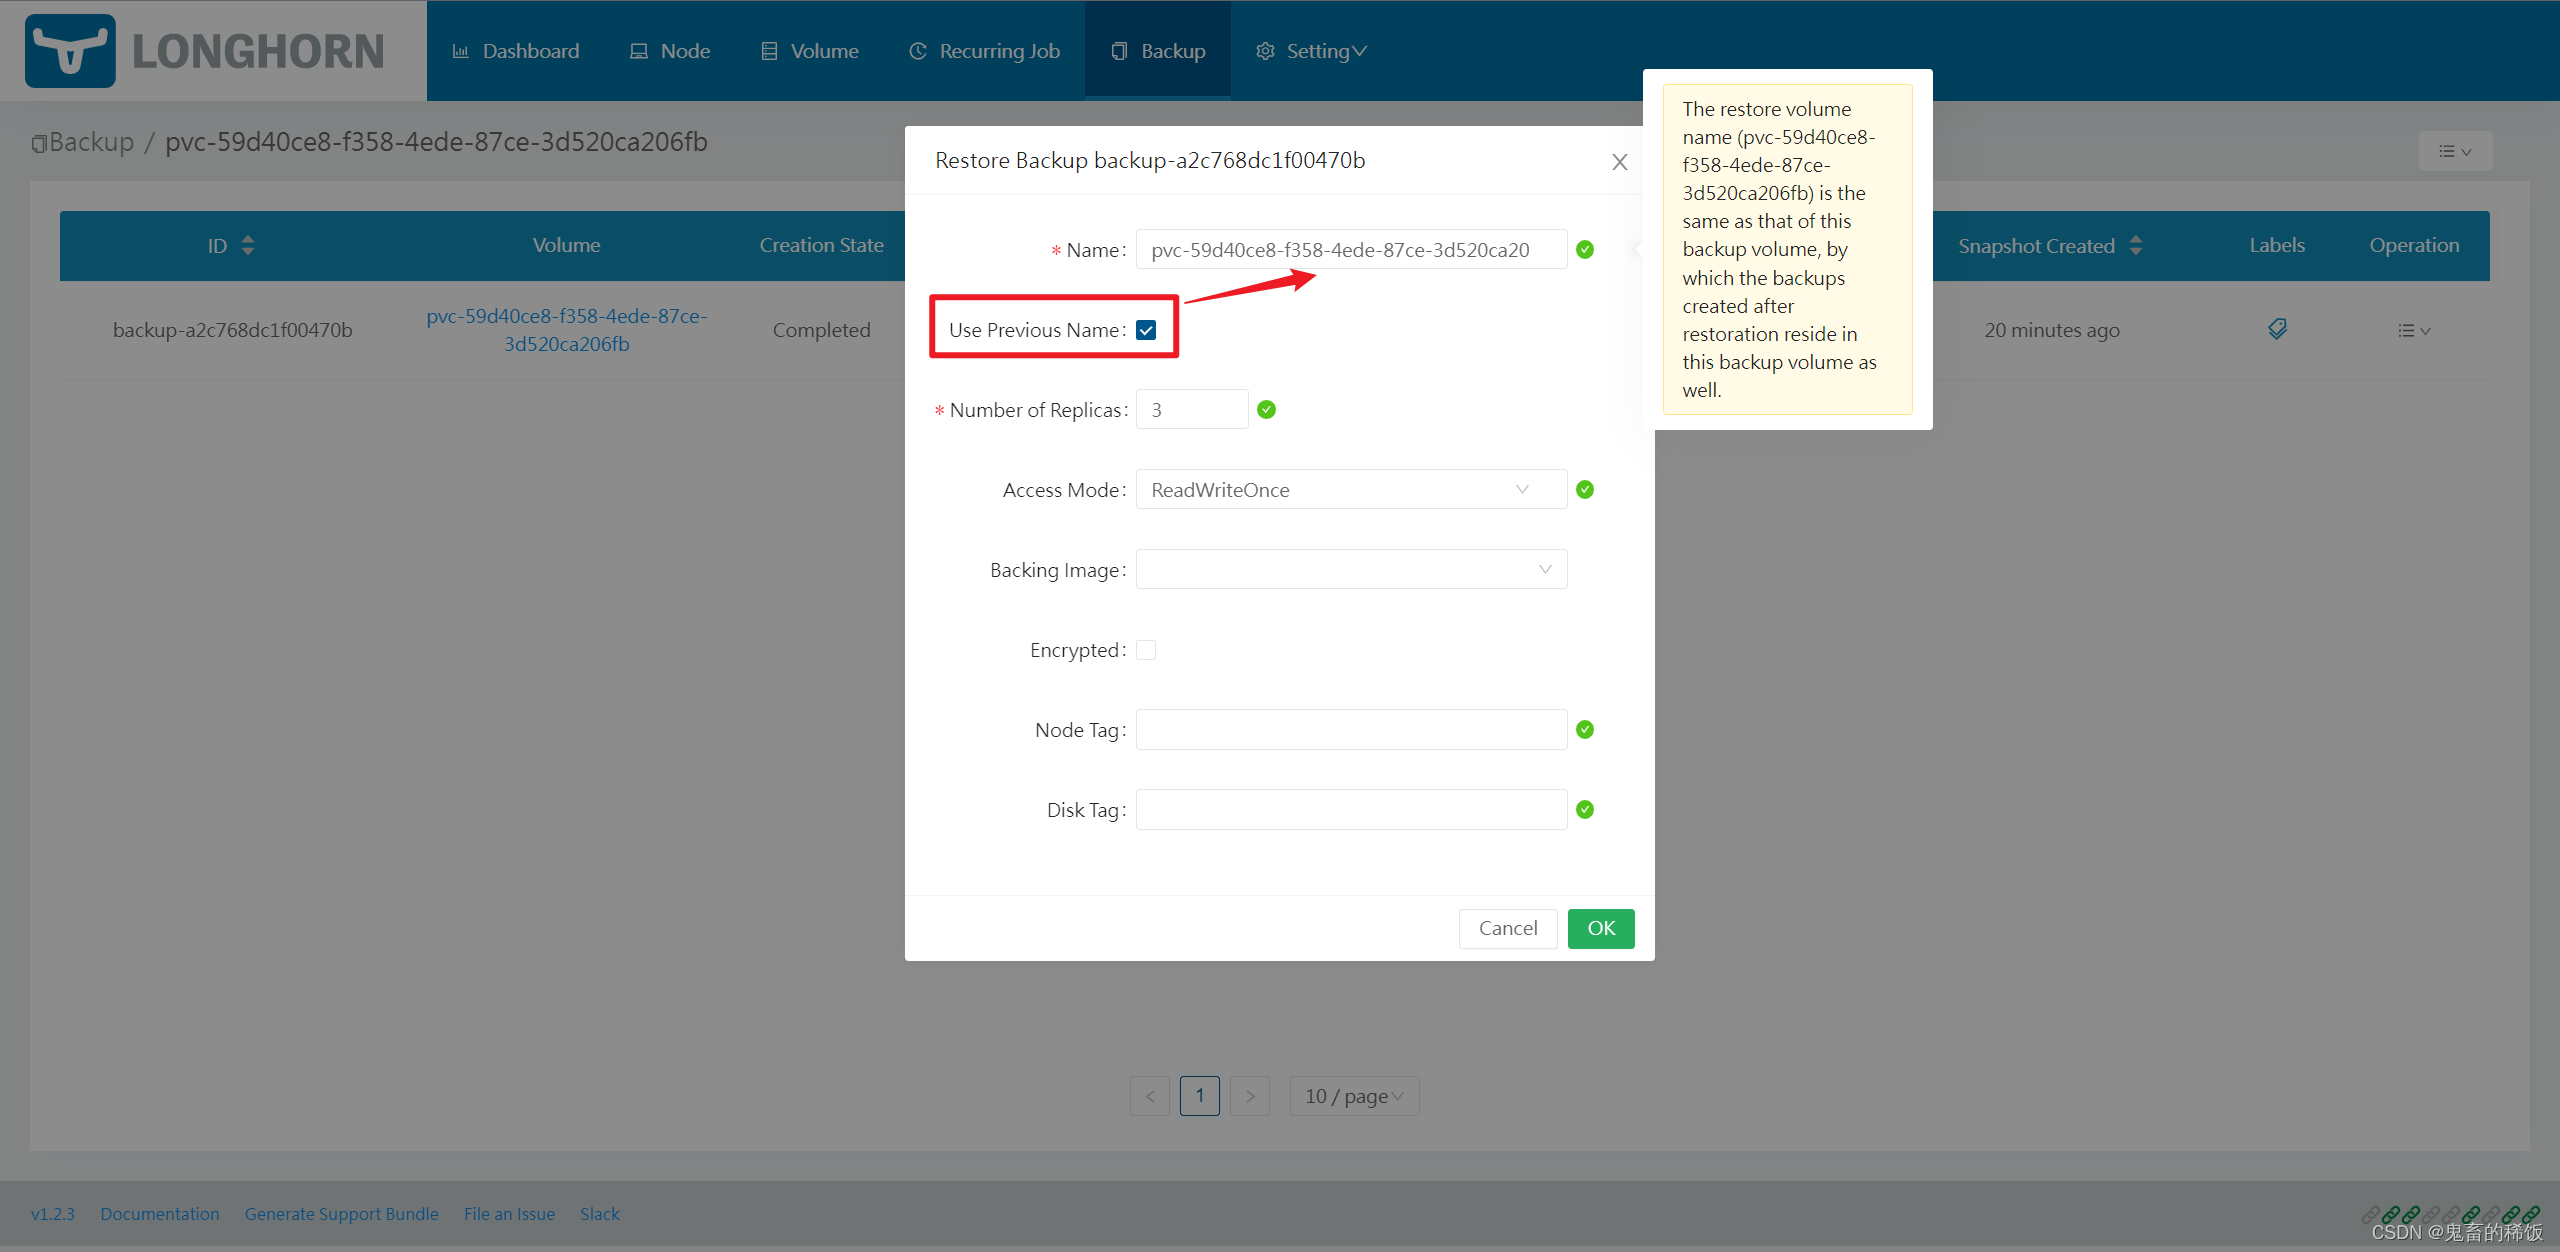
- Fill in the necessary information, check the use of the previous PVC name (Use Previous Name), other do not need to fill in
- Open the volume (Volume) list again, and find that the volume that was just deleted has returned, and the PVC needs to be recreated
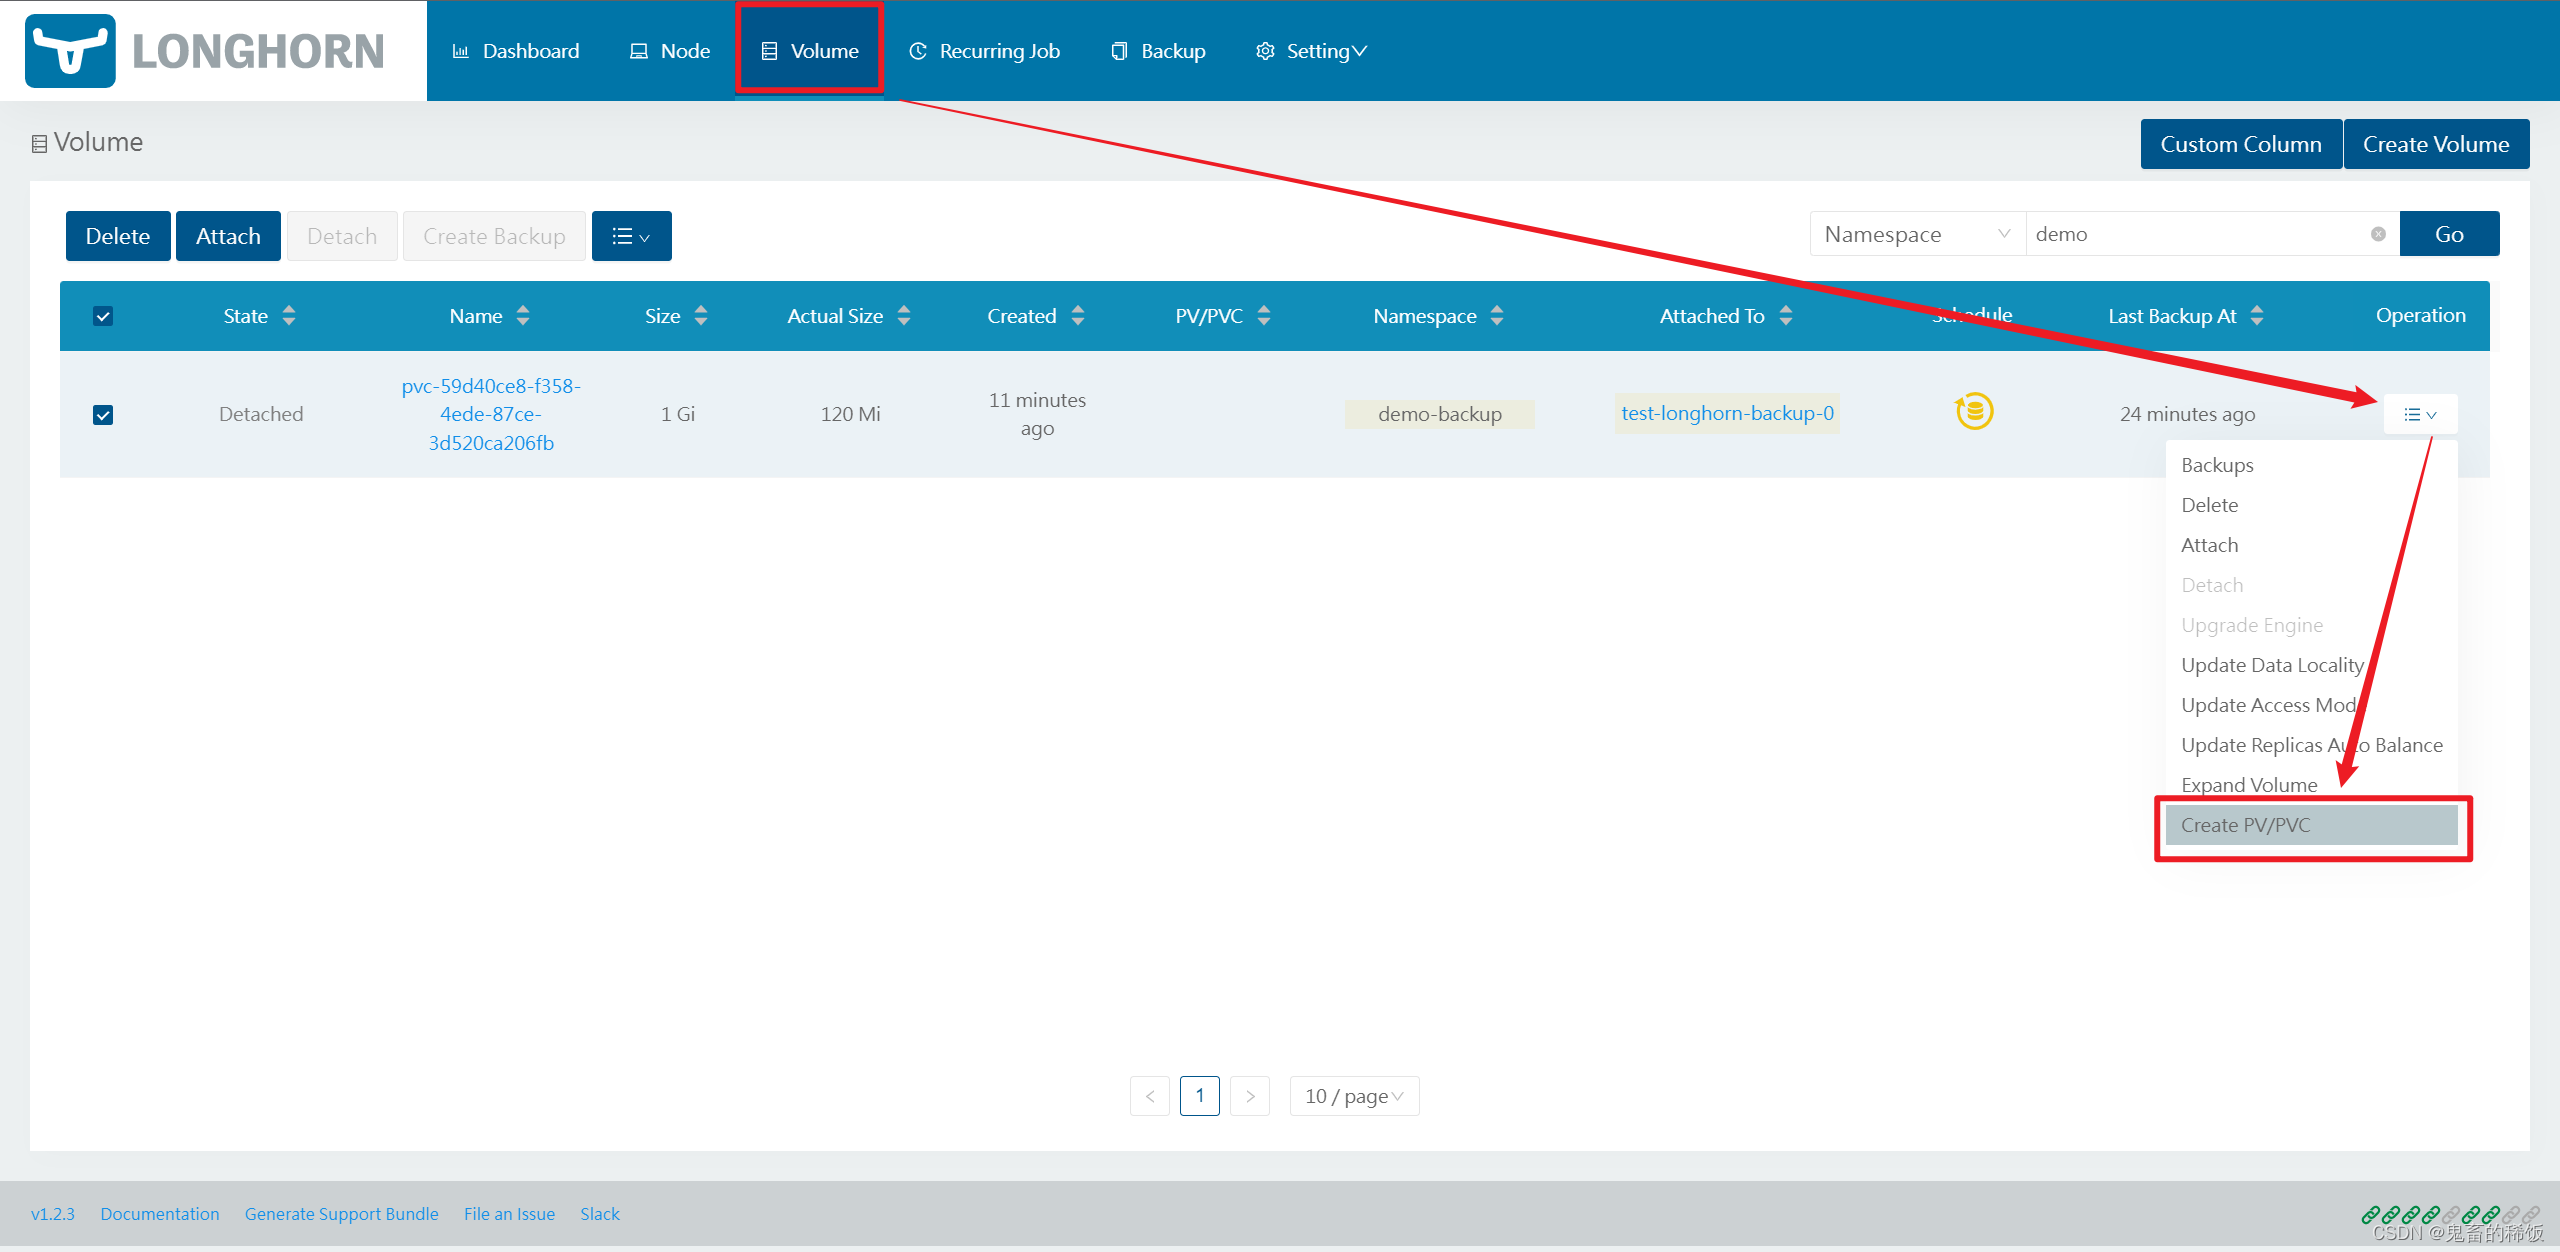
By default, use the previous PVC name, so there is no need to modify the configuration of the workload
After the creation is successful, start the database service again to check that the data has been restored
