log configuration
Logs are very important for system monitoring and fault location. For example, when a problem occurs in the production system, complete and clear log records help to quickly locate the problem. Next, introduce Spring Boot's support for logs.
1. Introduction to Spring Boot logging
Spring Boot comes with the spring-boot-starter-logging library to implement the system log function, and the spring-boot-starter-logging component uses the LogBack logging tool by default. The system operation log is output to the console by default, and can also be output to a file. The following example demonstrates the function of the Spring Boot project configuration log.
Modify the pom.xml file and add spring-boot-starter-logging dependency.
<groupId>org.springframework.boot</groupId>
<artifactId>spring-boot-starter-logging</artifactId>
Start the project and check the log output of the console, as shown in the figure.
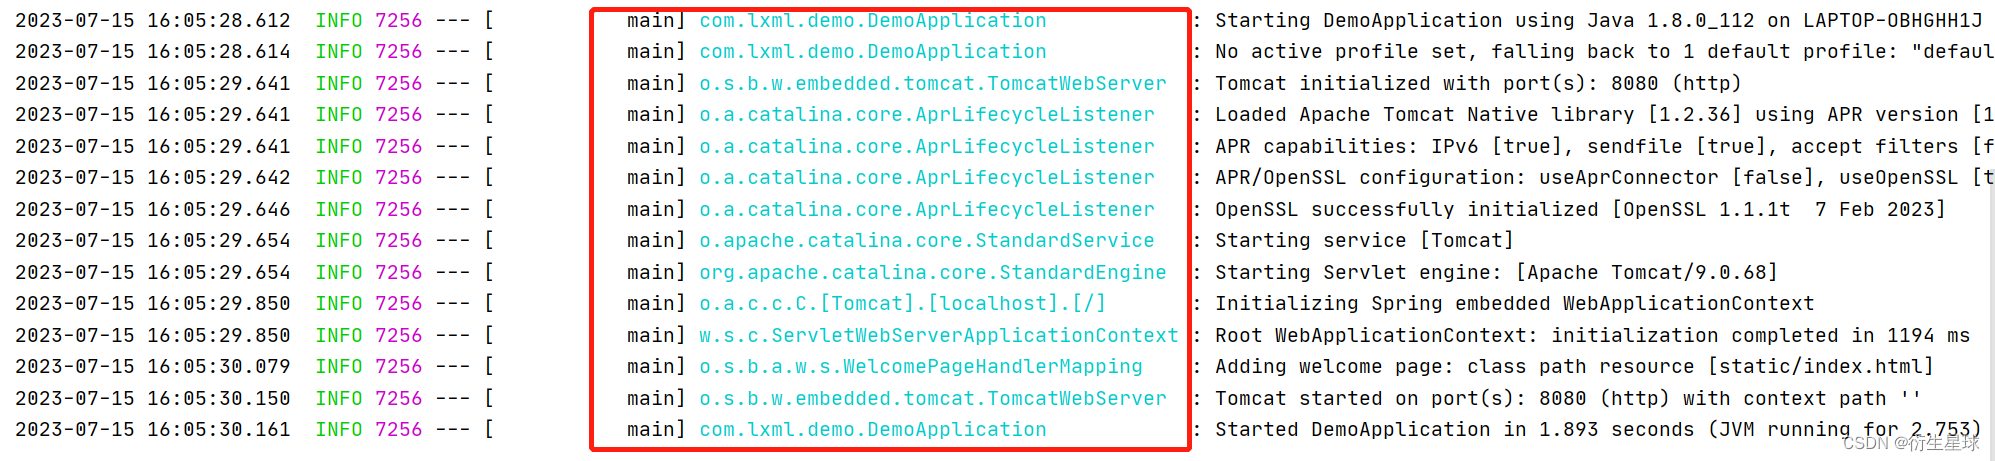
By default, Spring Boot will use LogBack to record logs and output to the console with INFO level. Running the application, you can see a lot of INFO level logs.
2. Configure the log format
After configuring the log function in the Spring Boot project, how to customize your own log format and custom recorded information? Spring Boot provides logging.pattern.console and logging.pattern.file configuration items to customize the log output format, just add the logging.pattern.console configuration item to the application.properties file:
logging.pattern.console=%d{

    yyyy-MM-dd-HH:mm:ss} [%thread] %-5level %logger- %msg%n
logging.pattern.file=%d{

    yyyy-MM-dd-HH:mm} [%thread] %-5level %logger- %msg%n
In the above configuration example, the meanings of the corresponding symbols are as follows:
- %d{HH:mm:ss.SSS}: log output time.
- %thread: The process name of the output log, which is useful in web applications and asynchronous task processing.
- %-5level: log level, use 5 characters to align to the left.
- %logger-: The name of the log outputter.
- %msg: Log message.
- %n: The newline character of the platform.
After modifying the configuration items, restart the project and check the log output of the console, as shown in the figure.
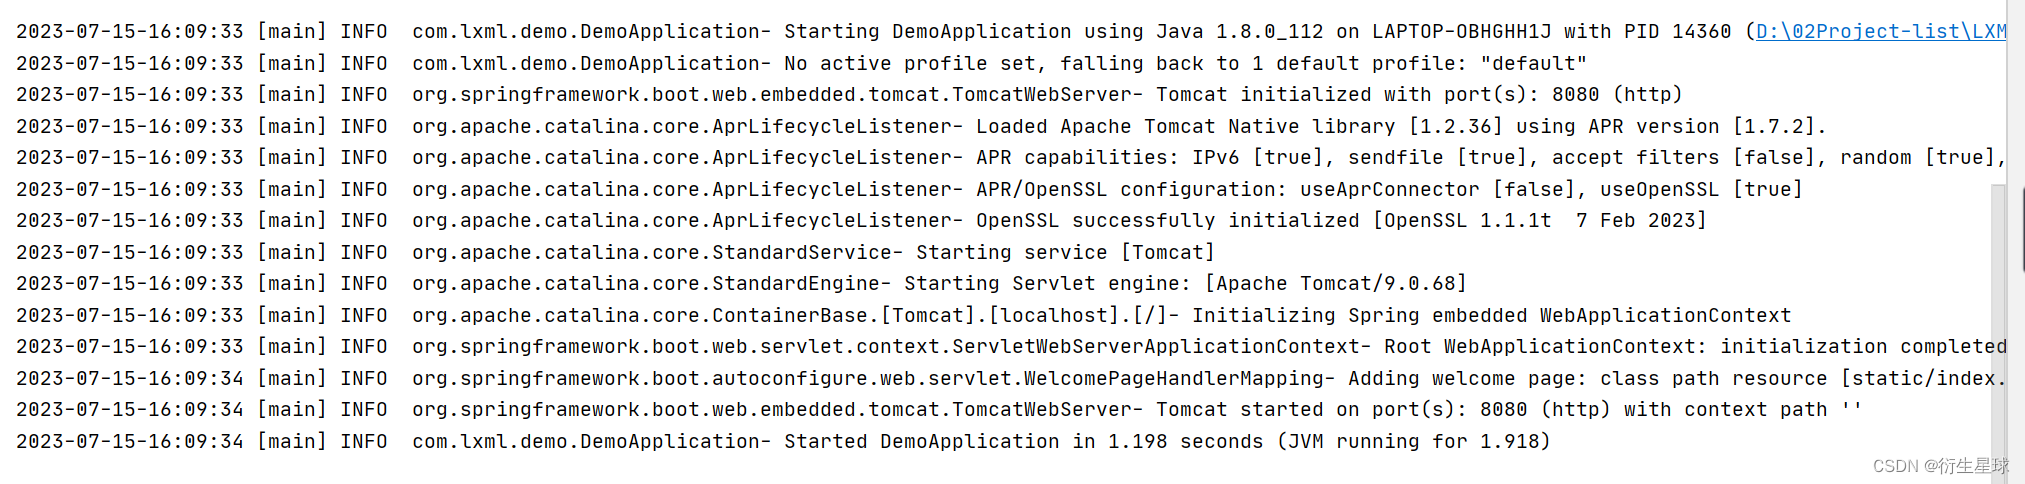
The format of the Spring Boot console startup log has been changed to the configured format.
3. Log output level
Generally speaking, the log level of the system is TRACE < DEBUG < INFO < WARN < ERROR < FATAL, and the level gradually increases. If the log level is set to INFO, it means that neither TRACE nor DEBUG level logs will be output.
Spring Boot sets the log output level through the logging.level configuration item. The following example demonstrates the Spring Boot log output level.
First, add the Log level test class LogDemo, the sample code is as follows:
@Configuration
public class LogDemo {


   Logger logger = LoggerFactory.getLogger(getClass());
   @Bean
    public String logMethod() {


       // 从trace到error日志级别由低到高
       // 可以调整输出的日志级别,日志就只会在这个级别后的高级别生效
       logger.trace("LogDemo trace日志...");
       logger.debug("LogDemo debug日志...");
       // Spring Boot默认使用的是info级别,没有指定级别就用Spring Boot默认规定的级别,即root级别
       logger.info("LogDemo info日志...");
       logger.warn("LogDemo warn日志...");
       logger.error("LogDemo error日志...");
       return "hello log";
   }
}
In the example above, one line is output for each log level. We can adjust the log level of the output so that it only takes effect at higher levels after this level.
Then, configure the log output level and add the following configuration in application.properties:
logging.level.root=warn
In the example above, logging.level.root is used to specify a logging level of WARN for the entire project. Of course, we can also specify a separate log level for a package, for example:
logging.level.root=INFO
logging.level.com.lxml.demo.log=WAEN
In the configuration example above, we set the log level of the entire project to INFO, and set the log level of the specified package com.lxml.demo to WARN.
The system startup log output by the Spring Boot console is INFO level, and the log level of LogDemo under com.lxml.demo.log is set to WARN, and the logs of WARN, INFO and ERROR are output.
4. Save the log file
In general, it is customary to view logs through the console in the development environment, but in the production environment, the log information needs to be saved to disk for future log query. How to configure to save the log information to the log file? The following demonstrates the process of saving a log file.
Add the following configuration items to the application.properties configuration file in the resources directory:
logging.file.name=D:/02Project-list/log/spring_log.log
Restart the project, and you can see that the spring_log.log file is generated in the D:/02Project-list/log/ directory. The content of this file is consistent with the content of the console printout, as shown in the figure.
