Refer to the official document sdk usage instructions JS_SDK usage instructions — QQ Internet WIKI

Step 1: Preparations:
- Need to register on the QQ Internet platform, need real-name identity authentication, and pass the review (7 working days).
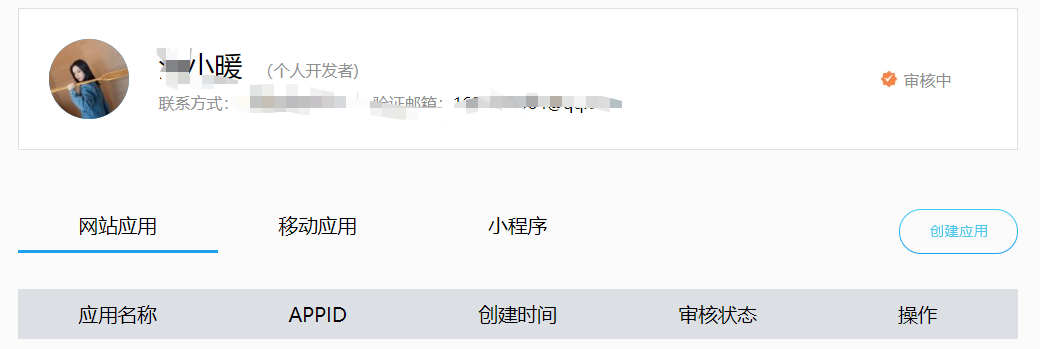
- Then create my web application, you need a website domain name, you need a domain name record number, set a successful login redirection address, and pass the review.
- Get appid and jump back address.
Step 2: Refer to the JS_SDK instructions on the official website to implement the QQ login function
-
JavaScript files referencing the JS SDK
1. First, you need to apply for access to QQ login. Refer to the first step, and successfully obtain the appid and appkey. Suppose we got the appid and the jumpback address
# 测试用 appid
# 146267546
# 测试用 redirect_uri
# http://meiliyisheng.ma.net/login/callback
2. Introduce the JS script package at an appropriate position on the html page (replace "APPID" in the following code with the appid obtained when applying for access to QQ login; replace "REDIRECTURI" with the callback address entered when applying for access to QQ login ) :
<script type="text/javascript"  charset="utf-8"
    src="http://connect.qq.com/qc_jssdk.js"
    data-appid="APPID"
    data-redirecturi="REDIRECTURI"
></script>
Note: The callback address must start with http or https.

-
Place QQ login button
On the html page where the QQ login button needs to be inserted , paste the following code:
<span id="qqLoginBtn"></span>
<script type="text/javascript">
    // QC here is the global variable
    QC.Login({
       btnId: "qqLoginBtn" //Insert the node id of the button
});
< /script>
An html element node is placed in the above code, and the unique id of the entire page is assigned to the node, such as <span id="qqLoginBtn"></span> in the above example. Developers can also change it to a custom element id. After the above steps are executed correctly, a QQ login button
will appear where the above code is pasted on the page :![]()
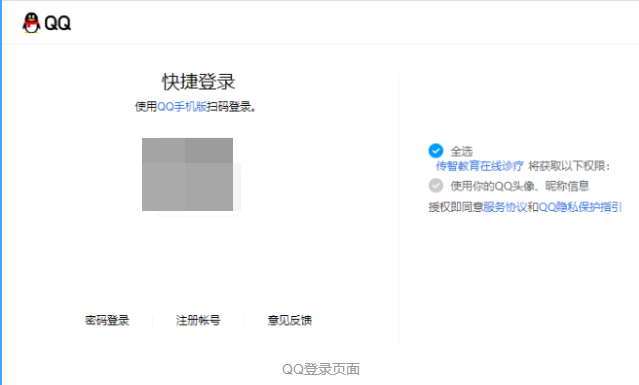
Click the QQ login button to jump to the following page to initiate a login request. Just scan the code on this page to log in. If the login is successful, it will jump back to your custom bounce address page. The function of this step is that the callback address will be obtained. The obtained Access Token and OpenID are returned to the calling page login/callback
At the same time, you can also customize the QQ login button , like this
At this time, you can use the QC login button QC.Login (the same as the jump address obtained by clicking qq login above) to get the login bounce address in the address bar, assign this custom button (it can be a link) and click Realize the jump to the above quick login page
Step 3: After the login is successful, the page will jump back
Because the callback address has been configured in advance, it will jump back to the front-end business page /login/callback after successful login by scanning the code
Get the openId returned by qq on this page, and use the openId to call the qq login interface on the backend (remember to save the user information returned after successful login)
To get the openId returned by qq, you need to use QC.Login.check (to check whether you have logged in) and QC.Login.getMe (to return the unique ID of the user's identity . It is recommended to save it locally so that the user can correspond to the previous one when logging in next time. For these two methods, please refer to JS_SDK Instructions — Other public methods of JS SDK
Code example:
const openId = ref('') const isNeedBind = ref(false) onMounted(() => { if (QC.Login.check()) { QC.Login.getMe((id: string) => { openId.value = id // 使用openId调用后端提供的qq登录接口进行登录: loginByQQ(id) .then((res) => { // 登录成功-已绑定手机号 loginSuccess(res) }) .catch((err) => { // 登录失败-未绑定手机号,展示手机绑定页面信息 isNeedBind.value = true }) }) } })给全局变量QC添加ts类型 interface Window { _AMapSecurityConfig: { securityJsCode: string } } type QCType = { Login: { check(): boolean getMe(cb: (id: string) => volid): void } } declare const QC: QCType
In the business of the above code example, after getting the openId, use the openId to call the QQ login interface loginByQQ. If the login is successful, it means that the user has bound the login mobile phone number. Next, the user information needs to be saved, and the home page or user page should be called back to prompt The login is successful, and the store information is cleared.
// 绑定成功的逻辑
const loginSuccess = (res: { data: User }) => {
  store.setUser(res.data)
  router.replace(store.returnUrl || '/user')
  showSuccessToast('登录成功')
  store.setReturnUrl('')
}
If the login is not successful, the user will be prompted to bind the mobile phone number, and the mobile phone binding page information will be displayed. After the user enters the personal information, click Bind to call the binding interface. If the binding is successful, the user will be prompted to log in successfully and save the interface. The user information returned and the source page redirected are basically the same as the logic of the successful binding above.
So far, a complete business of qq login has been completed.