background
Because of work needs, it is necessary to execute the sh script on the computer and start the docker service to execute specific logic. Because my computer is a windows system, it is more difficult to do this task, so I thought of using wsl to make windows computers have the capabilities of linux computers.
What is WSL 2
WSL 2 is a new version of the Windows Subsystem for Linux architecture that enables Windows Subsystem for Linux to run ELF64 Linux binaries on Windows. Its main goals are to improve file system performance, as well as add full system call compatibility.
This new architecture changes how these Linux binaries interact with Windows and computer hardware, but still provides the same user experience as in WSL 1 (the currently widely available version).
A single Linux distribution can run on either WSL 1 or WSL 2 architecture. Each distribution can be upgraded or downgraded at any time, and you can run WSL 1 and WSL 2 distributions side-by-side. WSL 2 uses a brand new architecture that benefits from running a real Linux kernel.
Steps:
1. Enable the wsl capability on windows
Command line mode:
Open PowerShell and run:
Enabling the Windows Subsystem for Linux optional feature
dism.exe /online /enable-feature /featurename:Microsoft-Windows-Subsystem-Linux /all /norestartEnable the "Virtual Machine Platform" optional feature.
dism.exe /online /enable-feature /featurename:VirtualMachinePlatform /all /norestartWindows interface form (win10 system)
Execute in sequence: Start>Settings>Applications>Optional Features>More Windows Features


I also turned on the following item, but I didn’t verify whether it will affect whether it is not turned on, because it is more laborious to install, so I didn’t verify it again

2. Microsoft store install wsl
The first attempt was to install from the Microsoft store, but because there was no way to switch from WSL1 to WSL2 after trying many times, so I installed it from the command line later. Looking back at the installation process at that time, it should be modified from the first It is caused by not restarting the computer after the step-by-step configuration.
(1) Check the wsl installed on the current computer
Command line execution:
wsl -l -v -- View the subsystems on the current computer

If the version is 2, it means WSL2, if it is 1, it means WSL1
(2) Open the Microsoft store
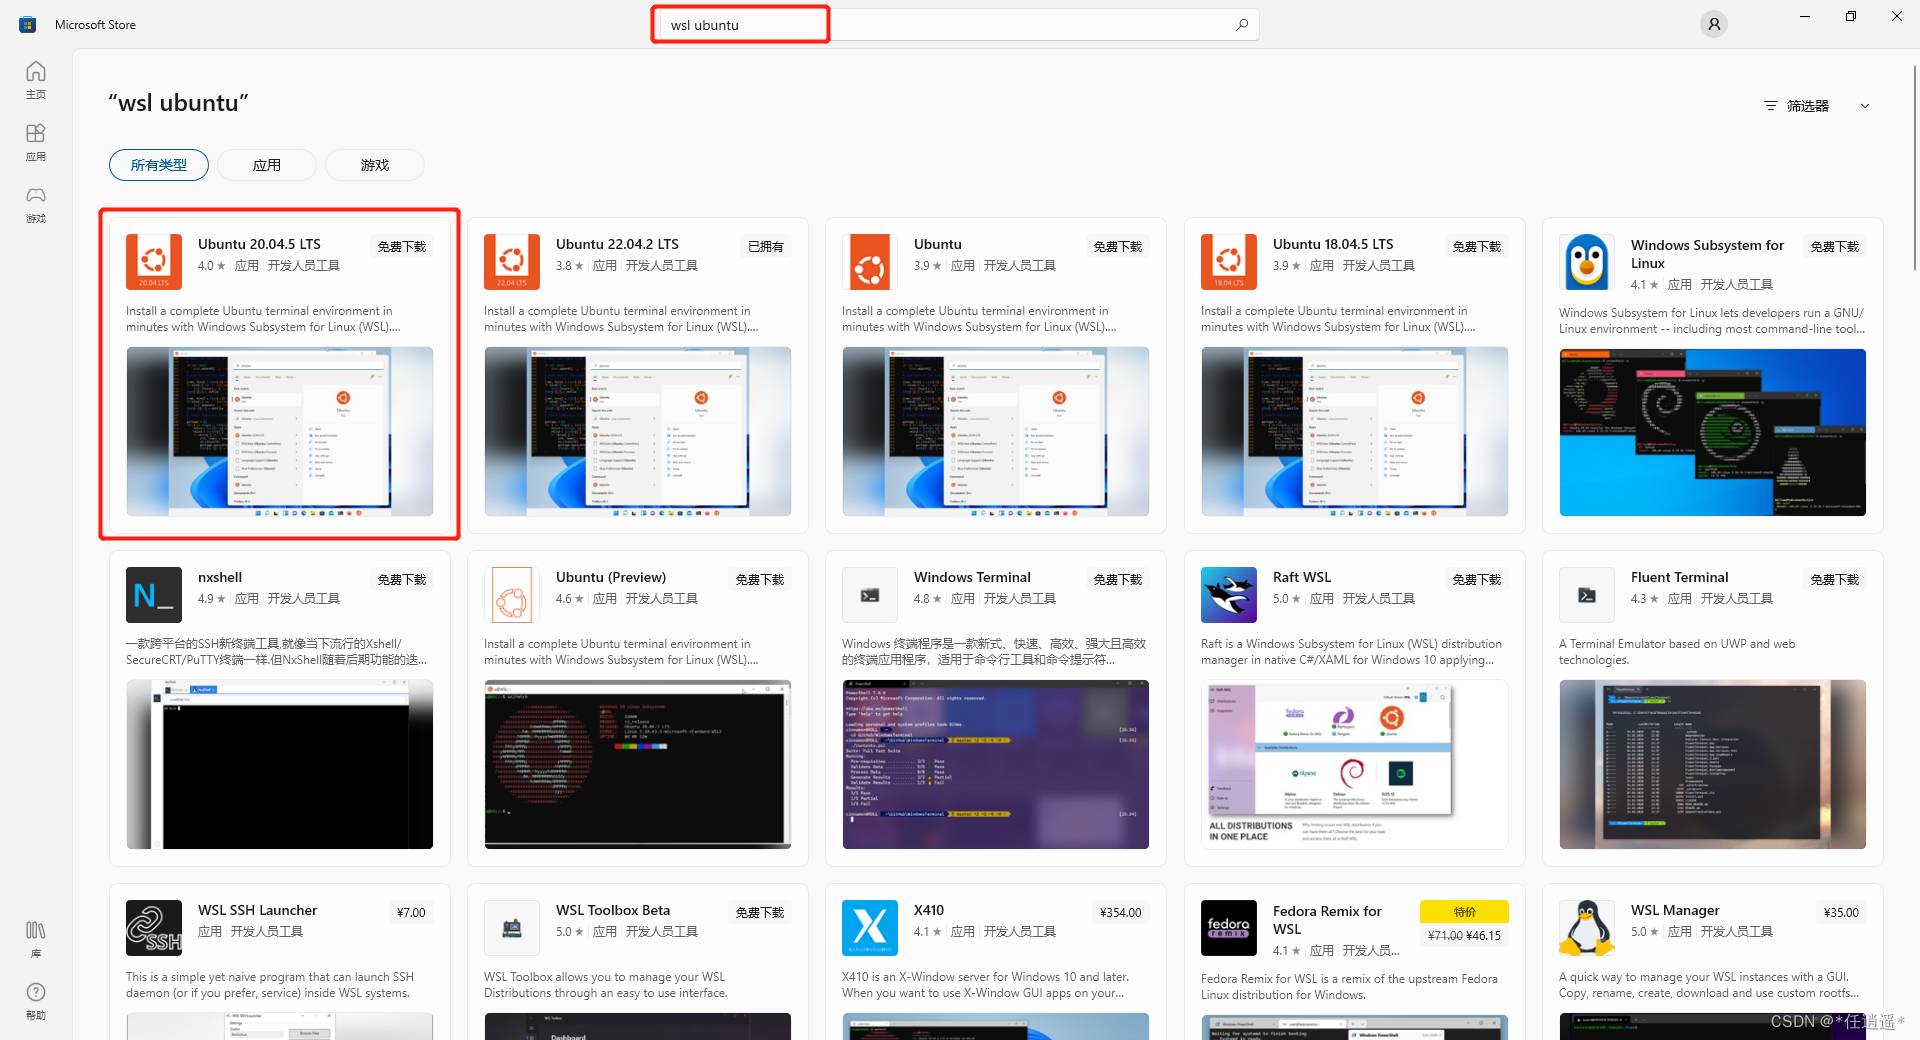
Because the ubuntu version is to be installed, the ubuntu20.04 version is selected here
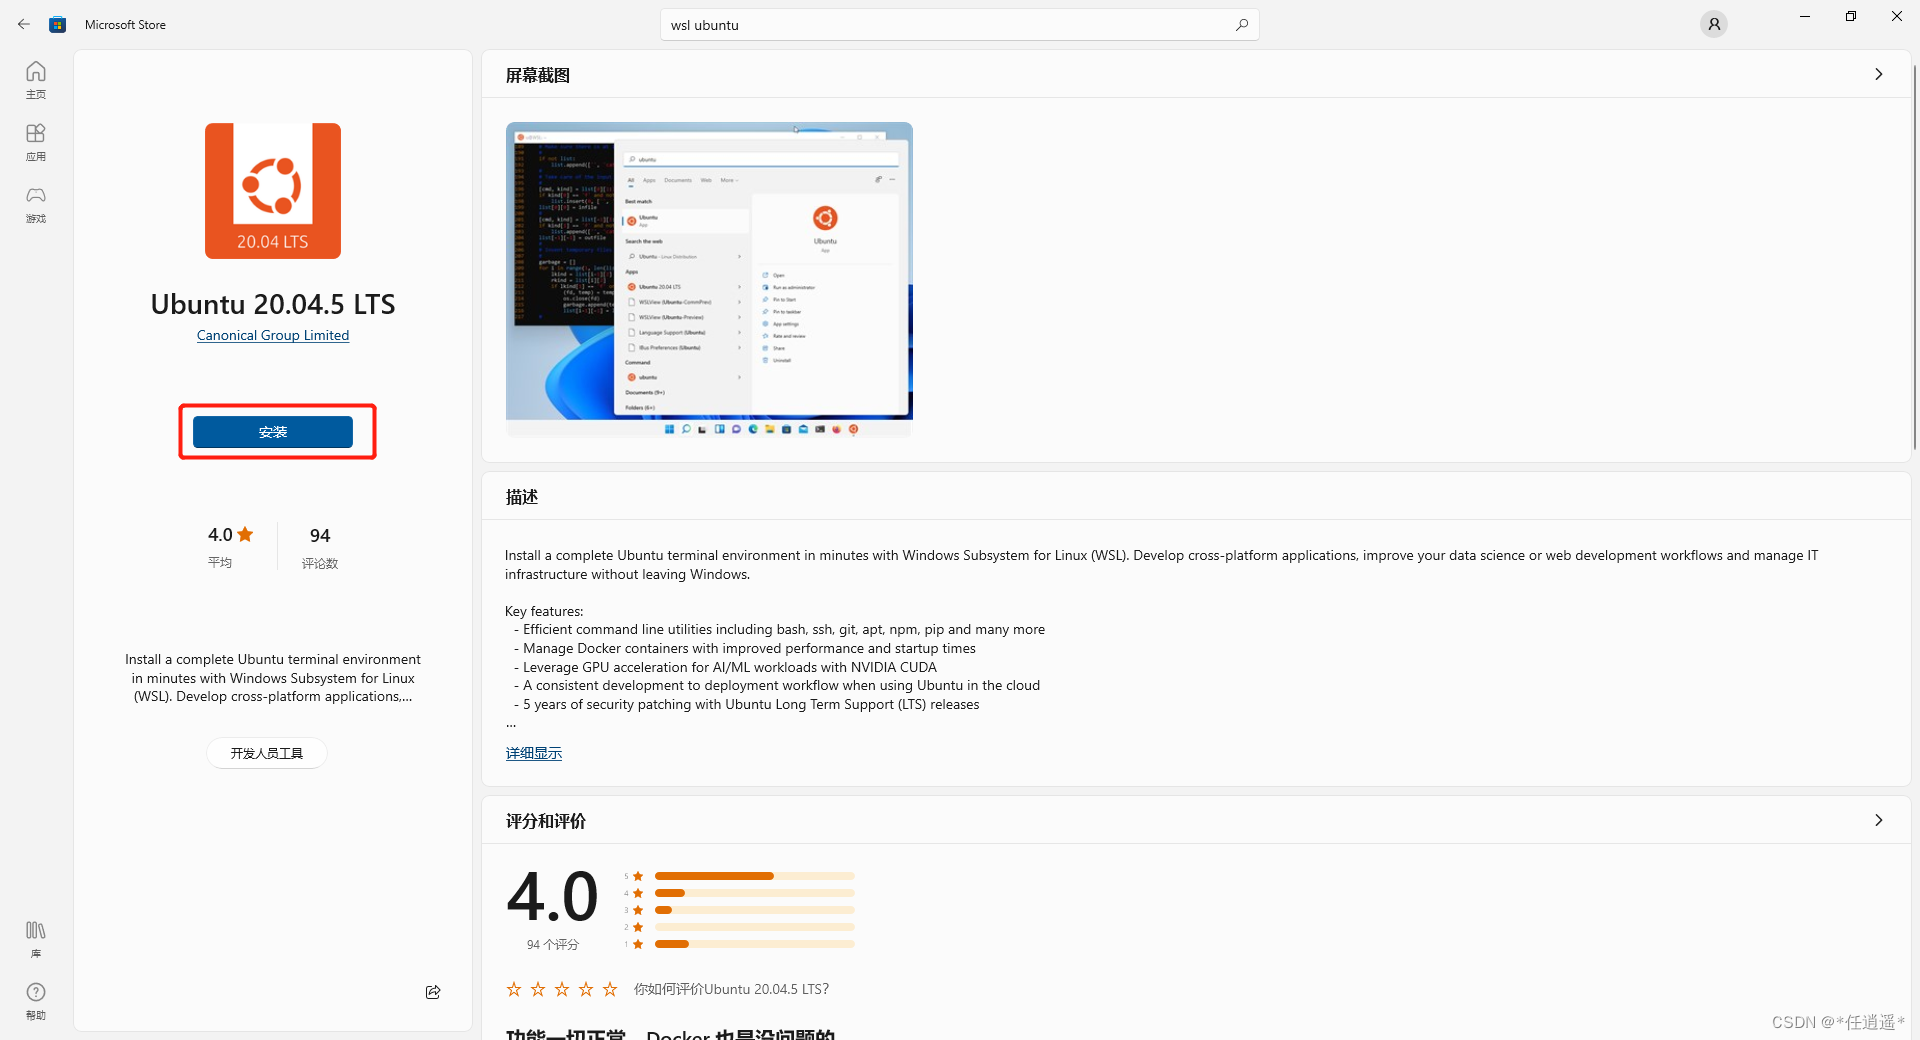
Click the install button to install
The installation interface is confusing and will always stay in the following interface

In fact, after a few minutes, just tap the keyboard a few times on this page, otherwise it will not continue to execute. I waited on this page for half an hour, thinking that the download is relatively slow, pit

Just enter your account and password
After entering, you can use the sudo su -command, enter the password of the current user, and switch to the root user
(3) Version check
At this time, go to the command line interface and type the wsl -l -v command again, and you will find that the current version is 1. Use the following command to switch:
wsl --set-version Ubuntu-20.04 2Among them, Ubuntu-20.04 is the name attribute found by using the wsl -l -v command
If the upgrade is unsuccessful, you can refer to the official documentation to upgrade the linux kernel first
Manual installation steps for older versions of WSL | Microsoft Learn
(4) Access the directory in windows
In WSL, you can use /mntdirectories to access the Windows file system. For example, to access the C drive in Windows, you can use /mnt/cthe path in WSL.
3. Install ubuntu through the wsl command
(1) Check the installable version
wsl --list --online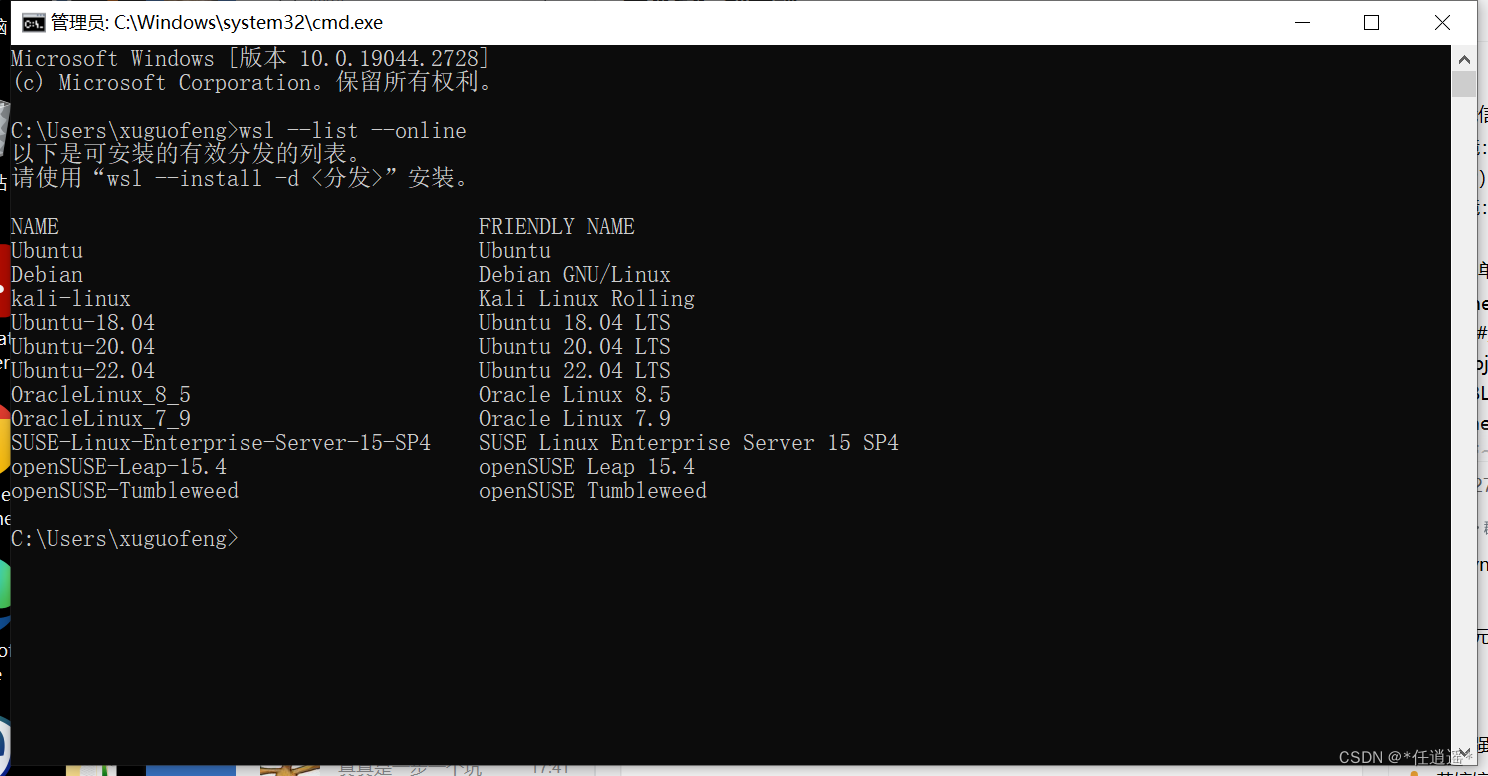
(2) Set the default installation version of wsl
wsl --set-default-version 2(3) Start the installation
wsl --install -d Ubuntu20.04(4) View version
wsl -l -vIf the version number is not 2, use the following command to switch the version
wsl --set-version Ubuntu-20.04 24. Install docker
After the wsl installation is complete, you can start to install docker. The following commands are all completed on the wls interface, not the windows command line interface.

(1) Add Docker repository
The Docker repository contains Docker packages that you need to add to your system. The following commands can be used:
sudo apt-get update
sudo apt-get install apt-transport-https ca-certificates curl gnupg-agent software-properties-common
curl -fsSL https://download.docker.com/linux/ubuntu/gpg | sudo apt-key add -
sudo add-apt-repository "deb [arch=amd64] https://download.docker.com/linux/ubuntu $(lsb_release -cs) stable"
(2) Install Docker
Install the latest version of Docker Engine and containerd. The following commands can be used:
sudo apt-get update
sudo apt-get install docker-ce docker-ce-cli containerd.io
(3) Verify that Docker is installed successfully
sudo docker run hello-world
Executing this command here will report an error, and the error message is as follows
docker: Cannot connect to the Docker daemon at unix:///var/run/docker.sock. Is the docker daemon running?.
See 'docker run --help'.
The reason is that wsl2 does not support the systemctl command, but supports the systemed command
So you need to execute the following command to start docker first
service docker start5. Download mirror
(1) Log in to the mirror library
First log in to the mirror library that needs to download the mirror
docker login -u username -p password 镜像库地址(2) Download mirror
Execute the docker pull command
6. Start and Uninstall
So far, wsl2 has been installed and docker has been installed. After restarting the computer, you can start wsl from the start menu

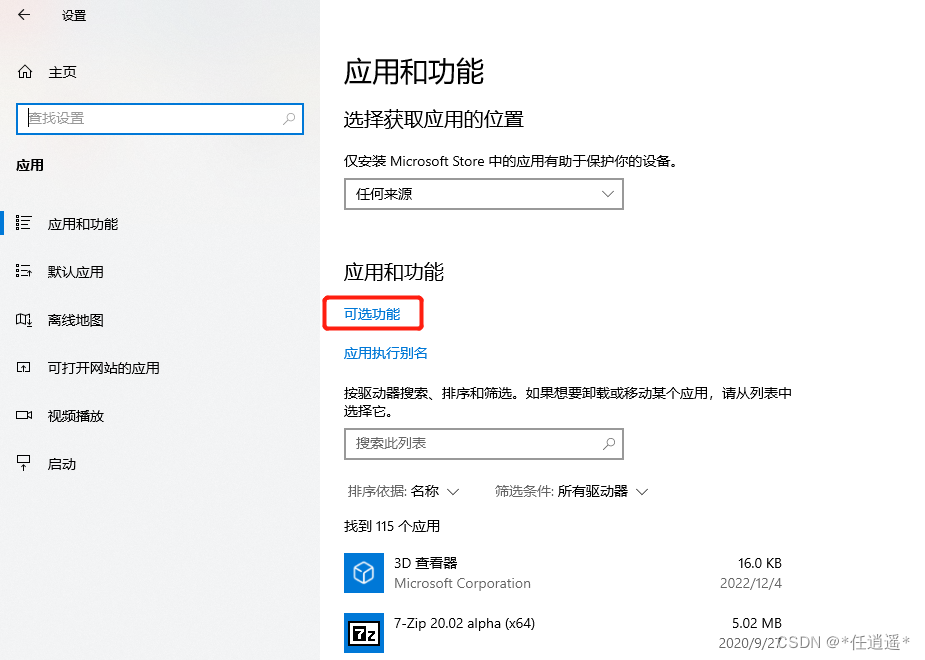
You can also uninstall wsl from the application and function page like uninstalling ordinary software
reference documents