Veeam Backup & Replication is one of the famous backup solutions with which you can manage data protection and disaster recovery tasks in VMware vSphere and Microsoft Hyper-V virtual environments.
Veeam Backup and Replication also has a free community edition that you can easily install and use. You can protect up to 10 VMs. It is useful for small environments or home labs.
This free learning material will help you understand important aspects of the Veeam Backup & Replication process.
- How to install Veeam Backup and Replication v9
- Add ESX/ESXi host or vCenter Server to Veeam Backup & Replication 9
- Adding HP StorageWorks MSL4048 Tape Library to Veeam Backup & Replication 9
- Create a backup job on Veeam Backup & Replication 9
- Perform full VM recovery on Veeam Backup & Replication 9
- Recover files from virtual machines on Veeam Backup & Replication 9
- Adding Microsoft Windows servers to Veeam Backup & Replication 9
- Microsoft Active Directory Object Restore on Veeam Backup & Replication 9
Hope this course helped you get most of the information and learn more about Veeam Backup & Replication 9.5.
1. How to install Veeam Backup and Replication v9
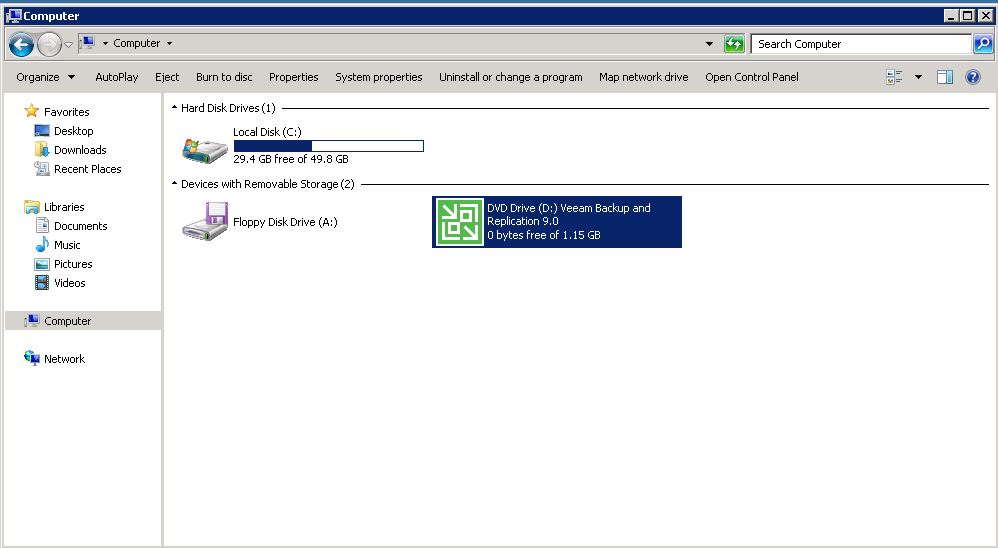
In this article, we will see how to install Veeam backup and replication software. So first we need to download the Veeam Backup and Replication v9 ISO file from the website.
I would like to inform you that Veeam Backup and Replication v9 also has a free community edition that you can easily install and use. You can protect up to 10 VMs. It is useful for small environments or home labs.
Double-click the ISO file, open windows and click the first "Veeam Backup & Replication" to install, accept the terms:

Then we need to import the license file from the "provide a license page":


Select All Program Features on the Program Features page:
Veeam 备份和复制
Veeam 备份目录
Veeam 备份和复制控制台
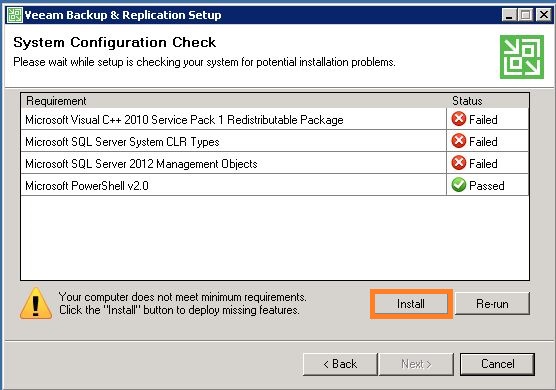
If your computer does not meet the minimum requirements for Veeam, click the Install button (if all requirements are ok, click Next to continue):
![]()
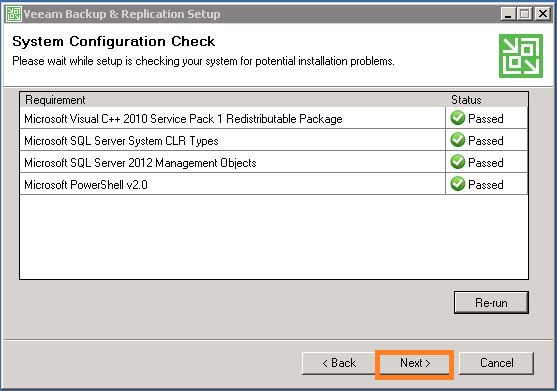
Click Next after installing all requirements:
You can set a different service account using the "Let me specify different settings" checkbox on the default configuration page:
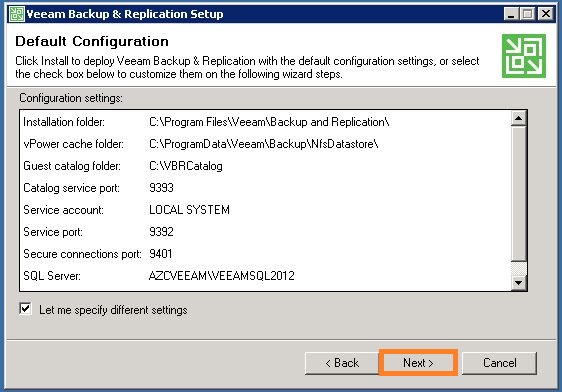
In this window you need to set up a user account for the Veeam service, you can use a local system account, or you can create a special new user for Veeam (for now I will use the administrator account):

We choose the Sql server instance to create the Veeam Backup and Replication database:

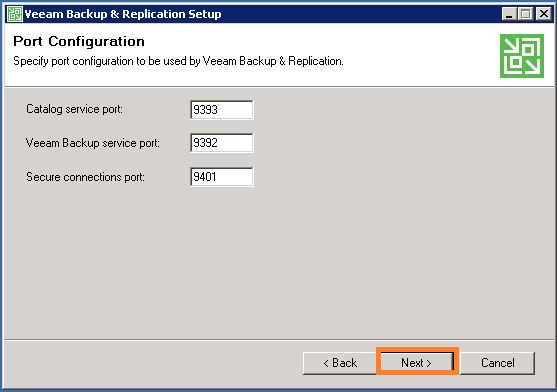
On this page specify the port configuration to be used by VMware Backup and Replication:
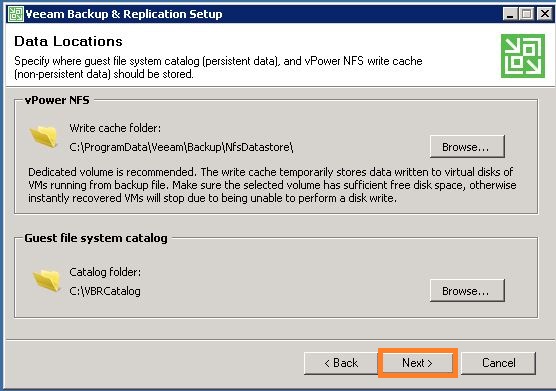
The Data Location page specifies the system directory and vPower NFS write cache path locations where:
Click Install to start the installation process and Finish to exit:

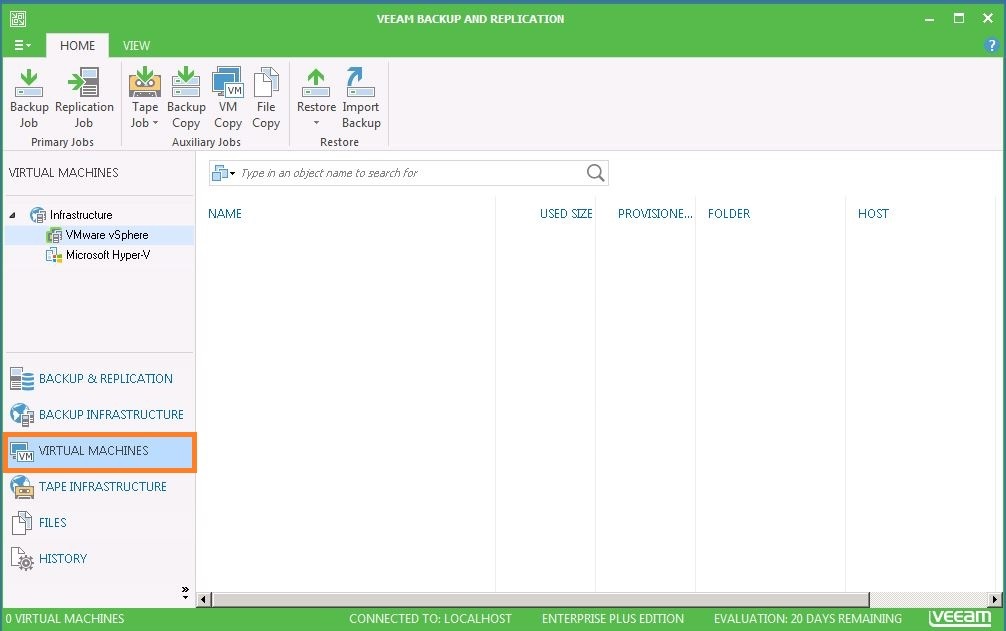
You can log into Veeam Backup & Recovery v9 with the provided credentials:


2. Add ESX/ESXi host or vCenter Server to Veeam Backup & Replication 9
In previous articles we discussed installing and configuring Veeam Backup and Replication. Now we are ready to add our host or vCenter server to Veeam Backup & Replication server.
To add an ESX/ESXi host or vCenter Server to Veeam Backup & Replication 9, follow the steps below. In this article, I will add the esxi host, you can also add the vCenter server in the same way:
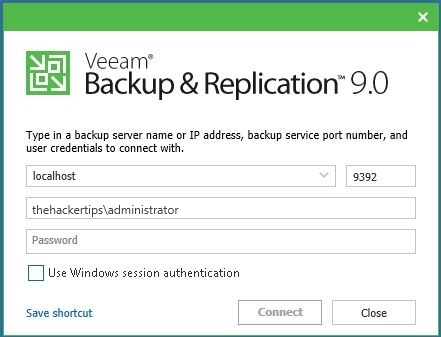
- Launching Veeam Backup & Replication Management Console:
 Uploading... Reupload Canceled
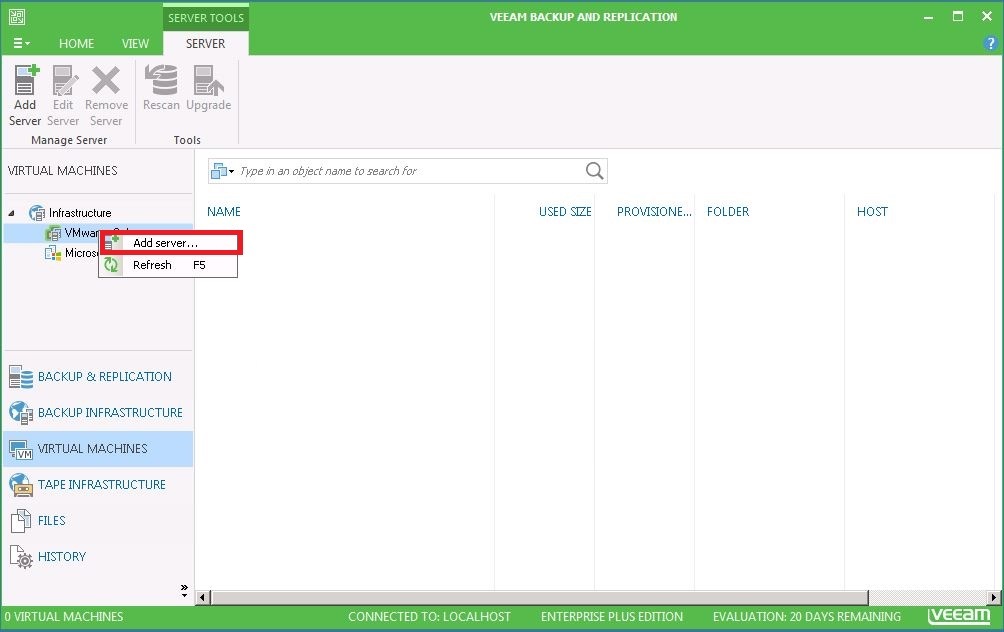
2. Right-click on VMware vSphere and click Add Server...:
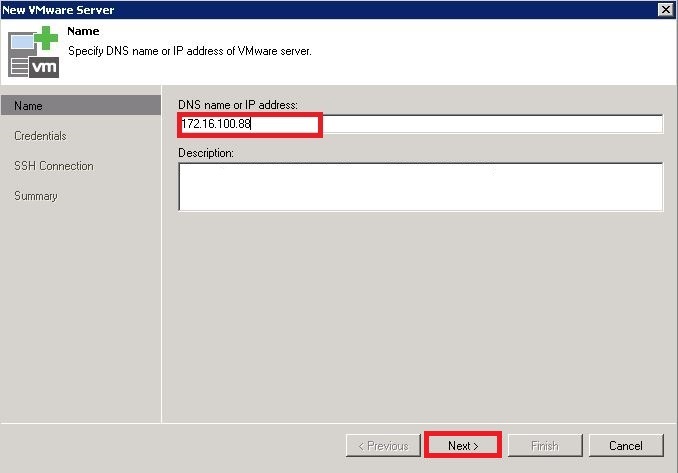
3. Enter the DNS name or IP address of your vCenter server or ESX/ESXi host and click Next:
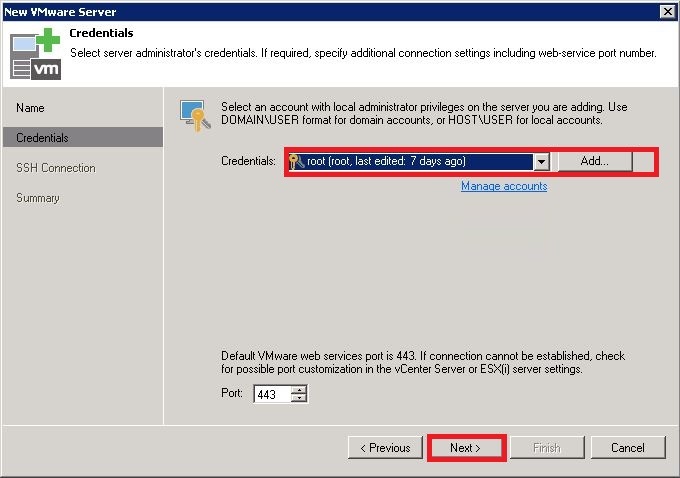
4. Enter the credentials to connect to the server using the Add button and click Next:
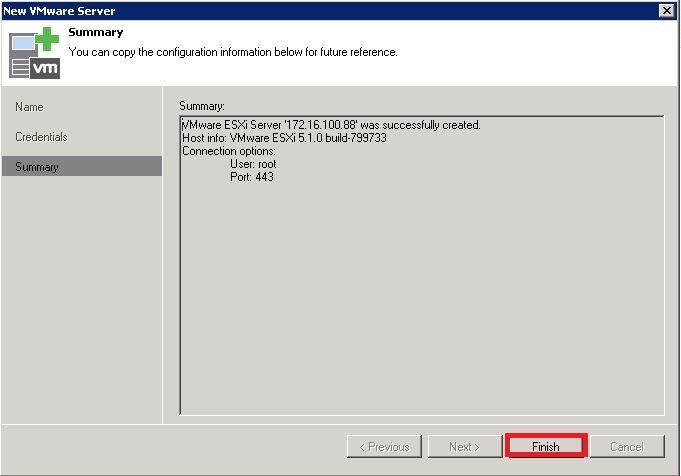
5. Click Finish to add the ESXi host to the Veeam Backup & Replication Management Console (if a security warning window appears about the certificate, click Connect to continue)
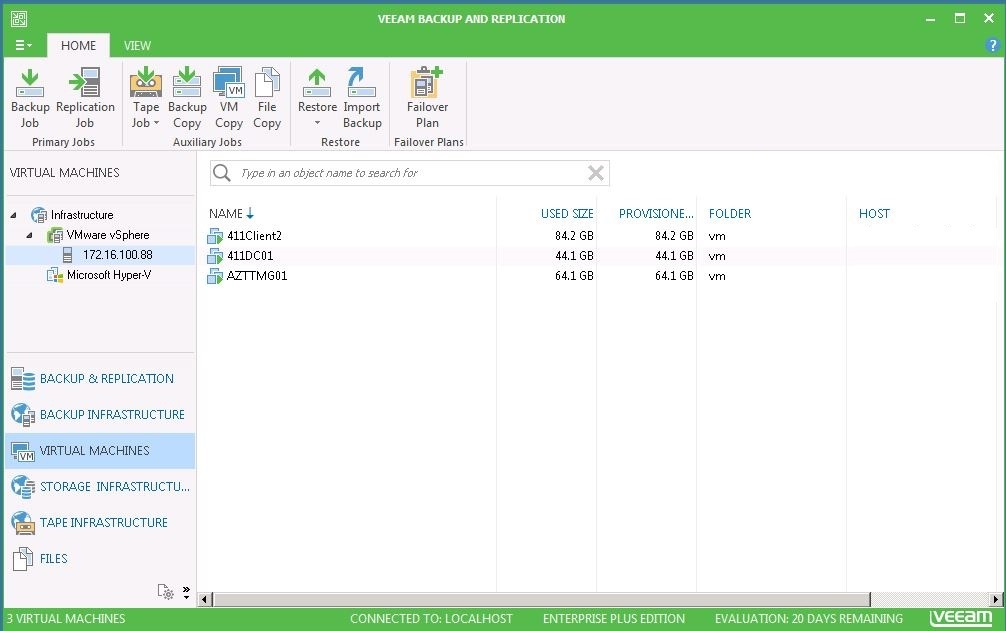
So now you can see all ESX/ESXi hosts and virtual machines managed under vCenter server or ESX/ESXi host in the management console. In our case, I just added the host, so you can see the virtual machines under ESX/ESXi hosts:
3. Add HP StorageWorks MSL4048 Tape Library to Veeam Backup & Replication 9
To add a tape server to Veeam Backup & Replication 9, we need to attach a tape device to the machine that will perform the tape server role. Install the appropriate device drivers on the tape server. You can find the driver from the Tape product website and download and unzip it. In that folder you will find install_readme.txt which explains how to proceed.
After attaching the tape device to the selected server, you need to add this server to Veeam Backup & Replication as a tape server. Veeam Backup & Replication will automatically scan for attached tape devices and display all discovered tape libraries and tape drives under the Libraries node in the Tape Infrastructure view. After that, the auto-discovery process will be performed periodically every 3 minutes.
We will be considering adding the HP StorageWorks MSL4048 Tape Library to Veeam.
To add a tape server to Veeam Backup & Replication 9, follow the steps below:
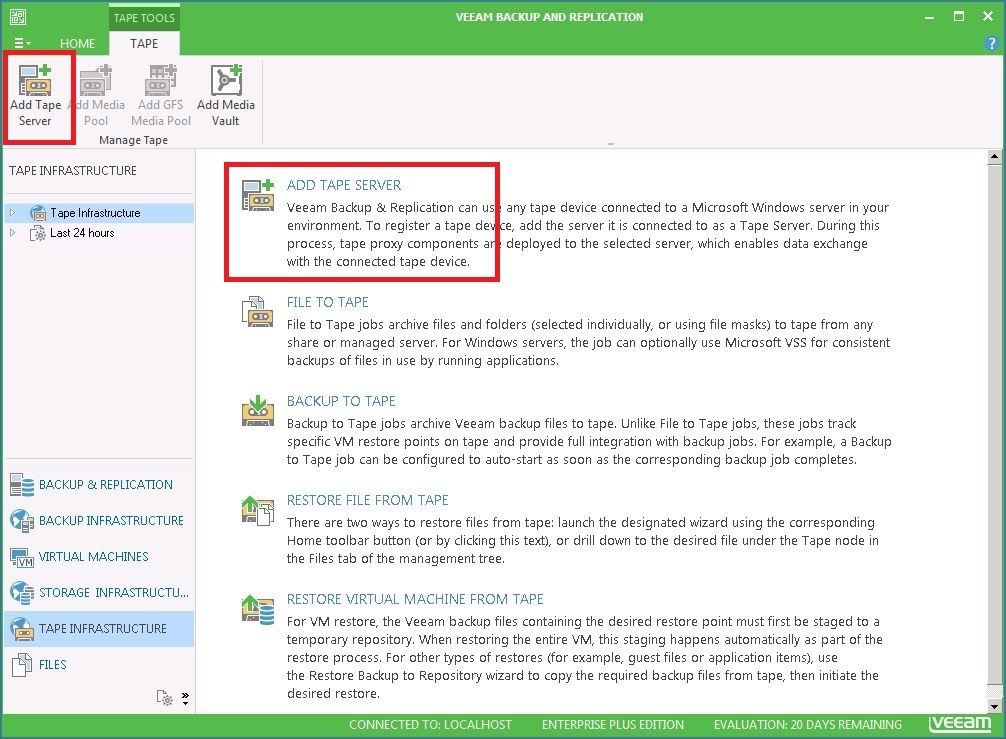
1. Go to Tape Infrastructure and click "Add Tape Server":
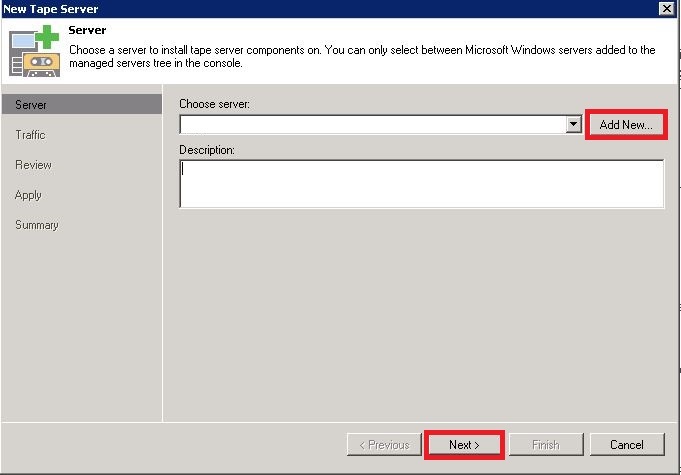
2. Specify the server that the tape is connected to. If the tape server is not added to Veeam, then you need to add "add new":
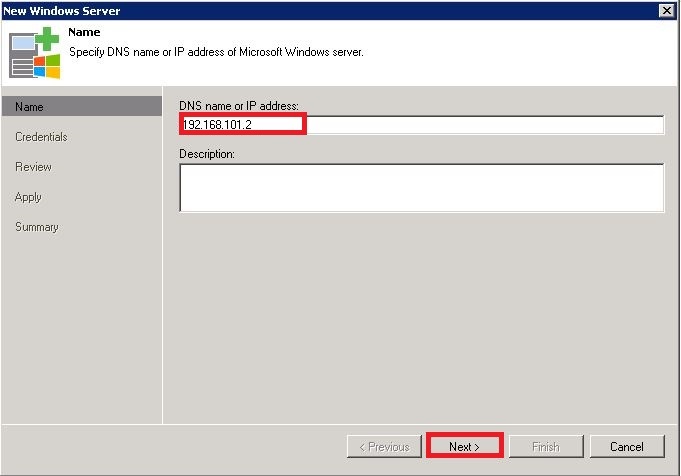
3. Type the server ip address or dns name in the "New Windows server" window to add the server to veeam:
4. Click "Add" to add server credentials, and click Next:
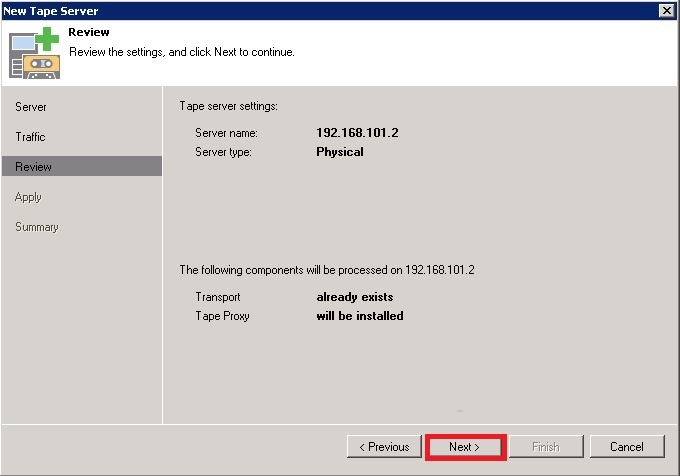
5. Review your settings and click Next to continue:

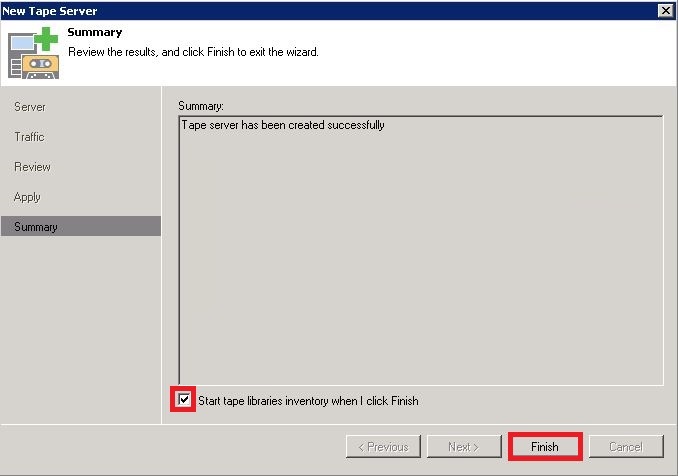
Click Next, then click Finish:

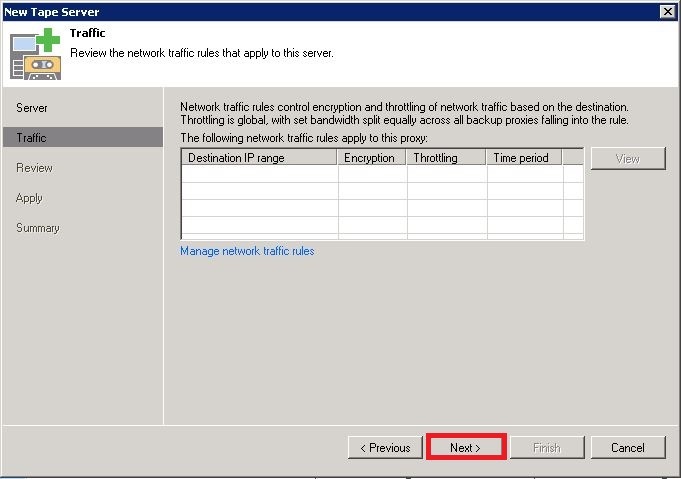
6. Once the server has been added to veaam, we go back to the New Tape Server window and follow these steps to complete:
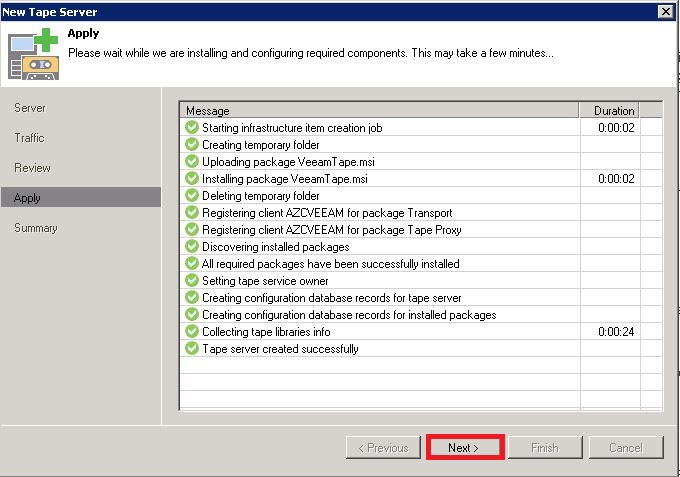
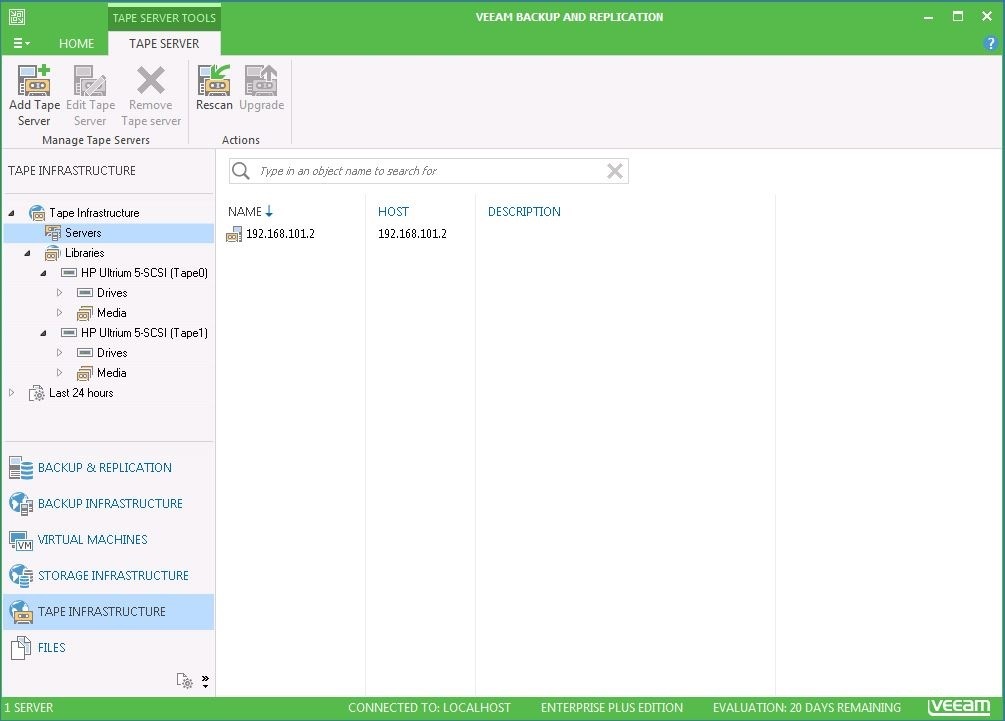
Once complete, you will see the tape server, all drivers and media on Veeam:
4. Create a backup job on Veeam Backup & Replication 9
To create a backup job, follow the steps below:
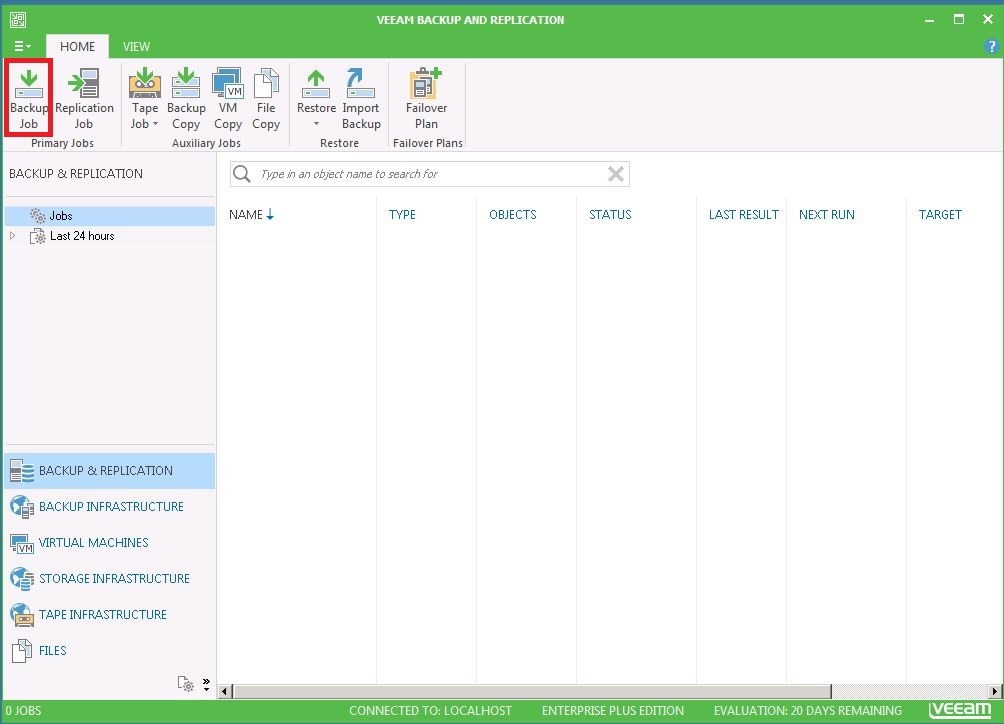
- Launch the New Backup Job wizard from Backup Jobs:
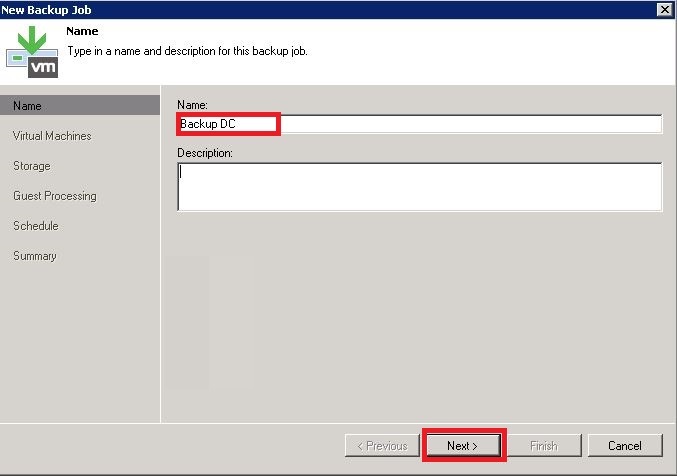
Specify a name and description for the backup job:
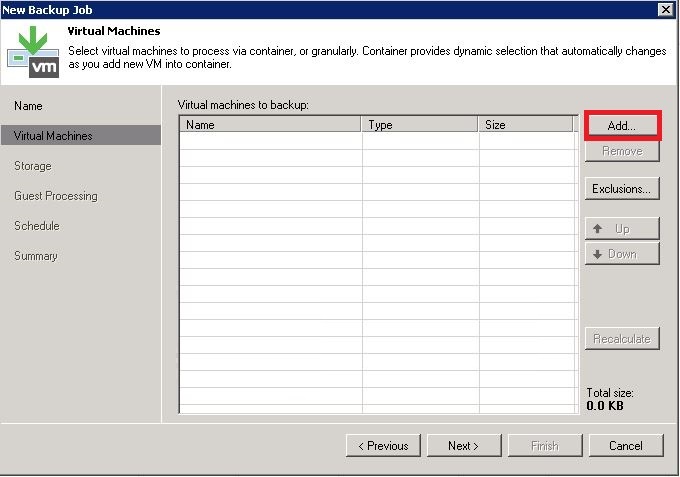
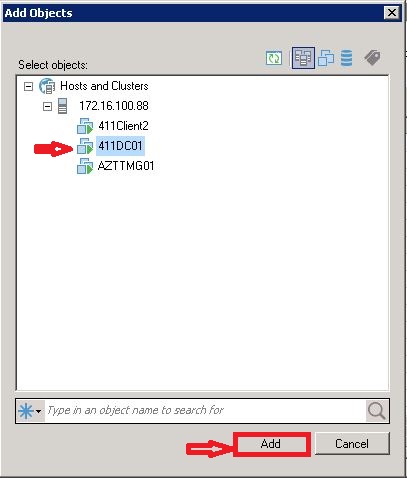
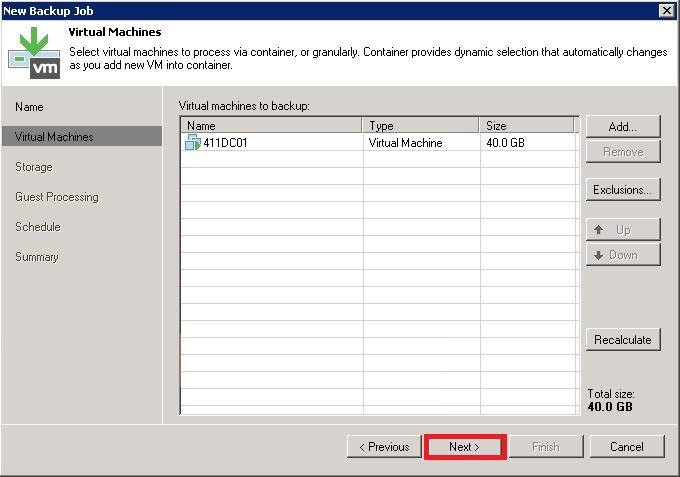
2. In the Virtual Machines step of the wizard, use the Add button to select the virtual machines and virtual machine containers to back up:
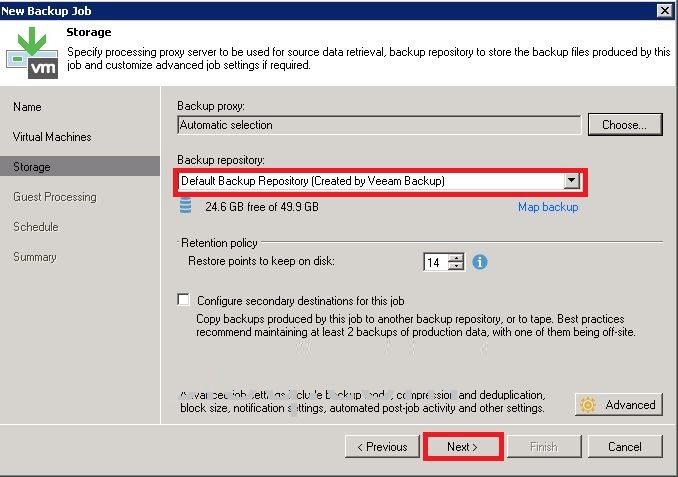
3. In the Storage step of the wizard, select the backup infrastructure components - backup proxy and backup repository - for the job, and specify the backup storage settings:
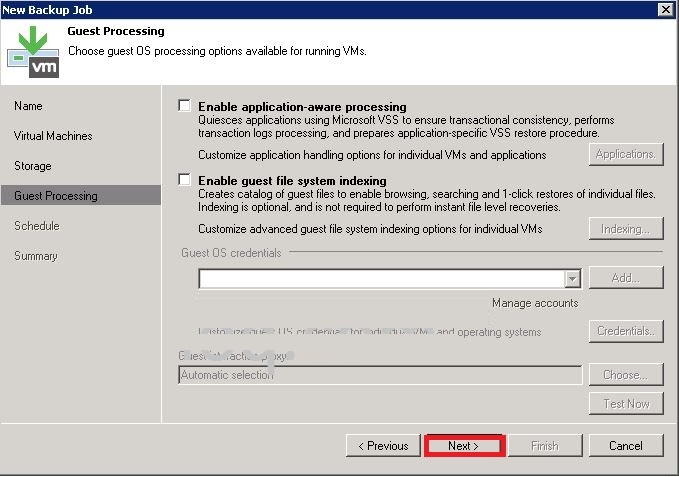
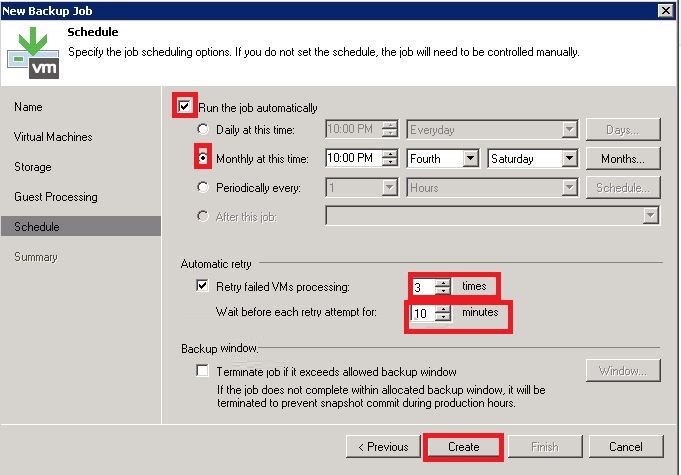
4. In the Schedule step of the wizard, choose to run the backup job manually or schedule the job to run periodically:
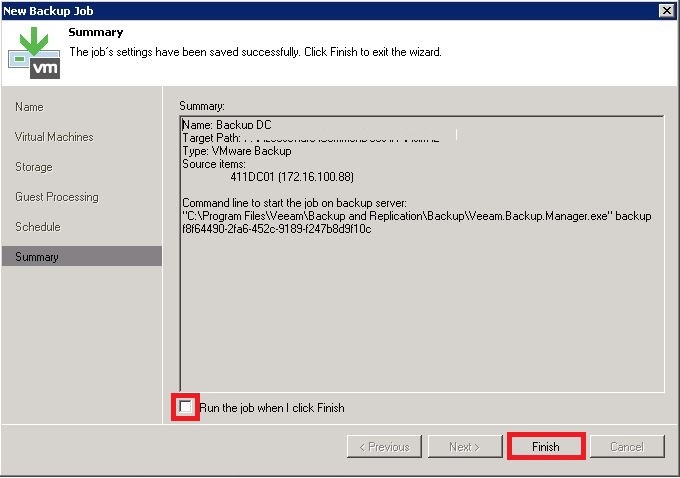
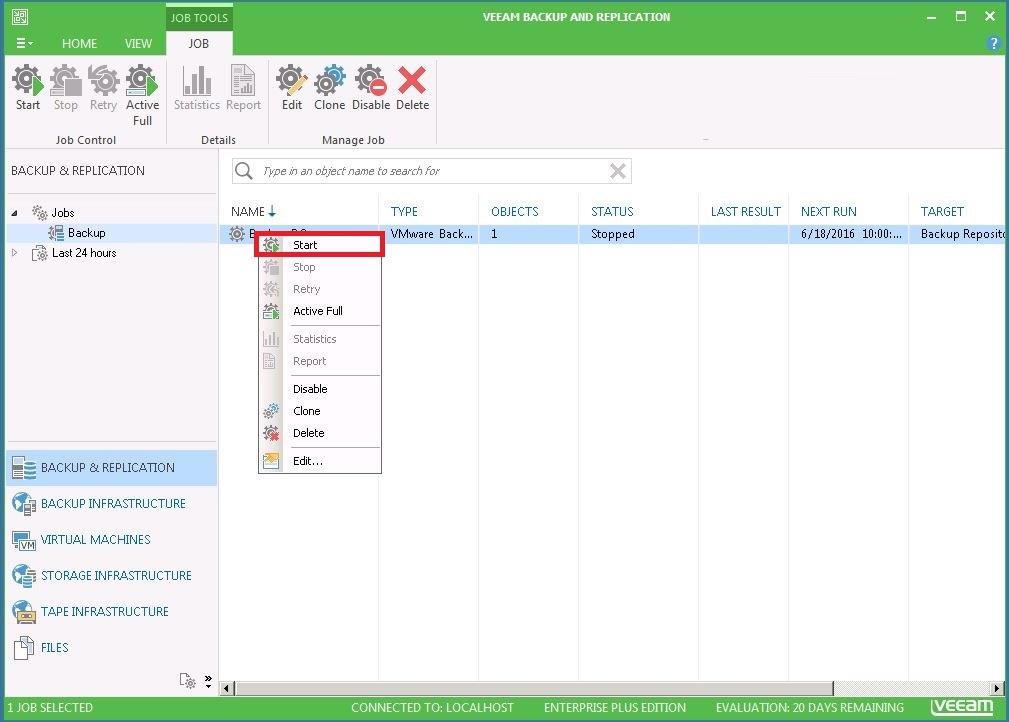
5. Then click Finish to complete the backup job, you will see the backup job under the Jobs section:
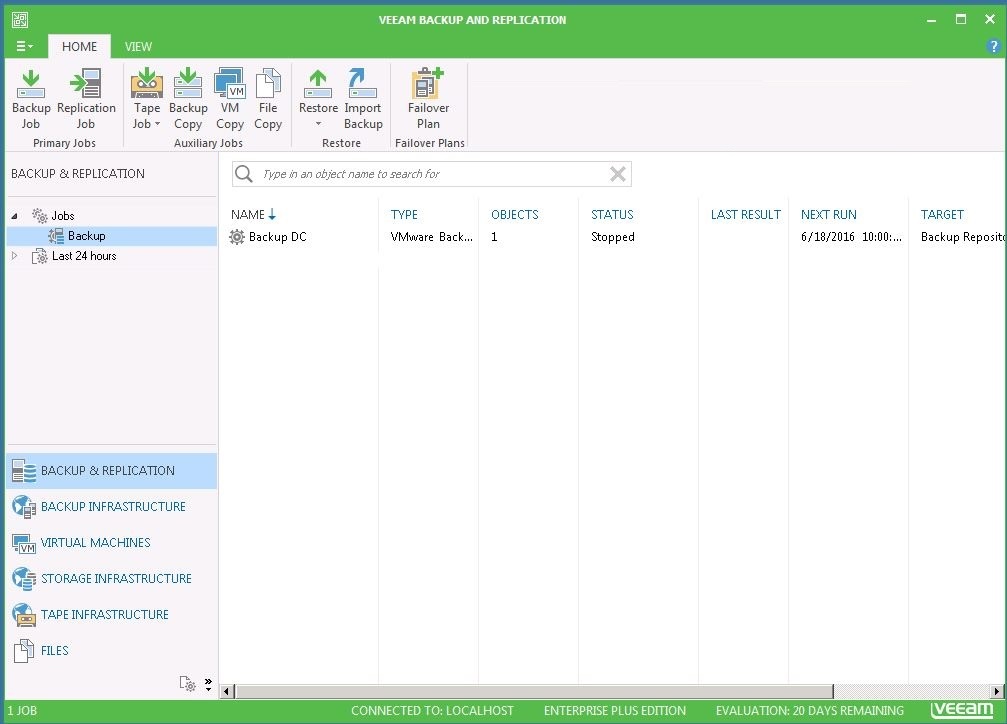
6. To start the backup job right-click it and select Start:

4 Perform a full VM recovery on Veeam Backup & Replication 9
If a VM fails, you can restore it from backup using a full VM restore. You can restore the virtual machine to its original location or to a new location;
Now we restore the DC from backup to its original location:
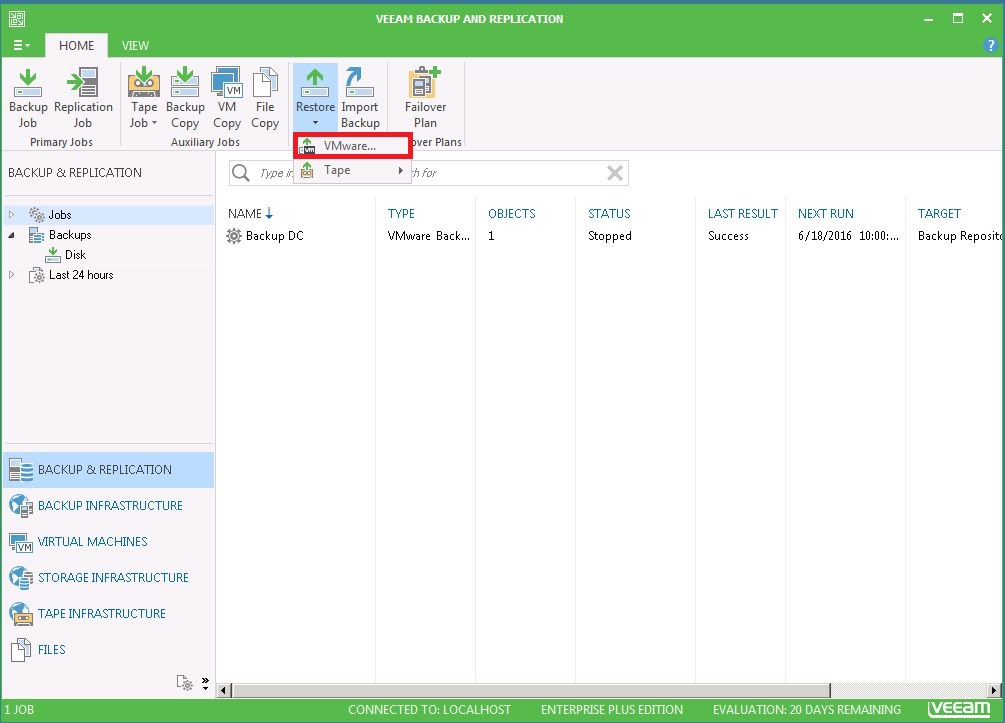
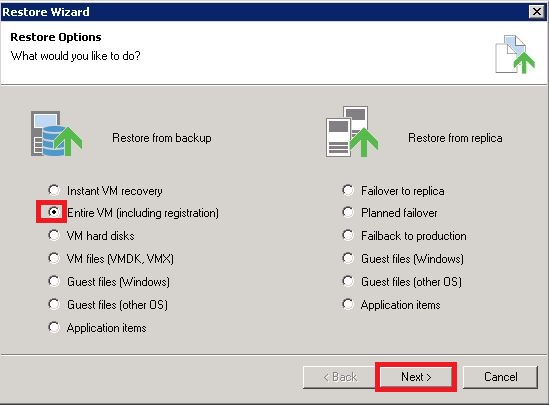
- On the Home tab, click Restore and select VMware. In the "Restore from backup" section, select "Entire VM (including registry)":


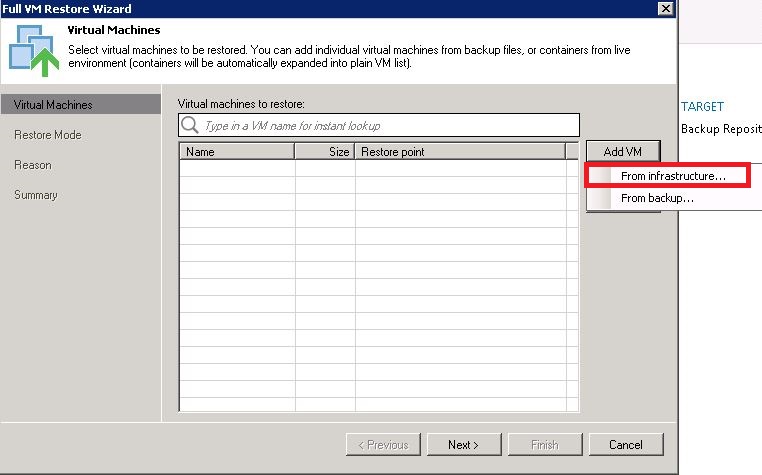
2. In the Virtual Machines step of the wizard, select one or more VMs to restore:

Select the dates to restore and click Add, then click Next:


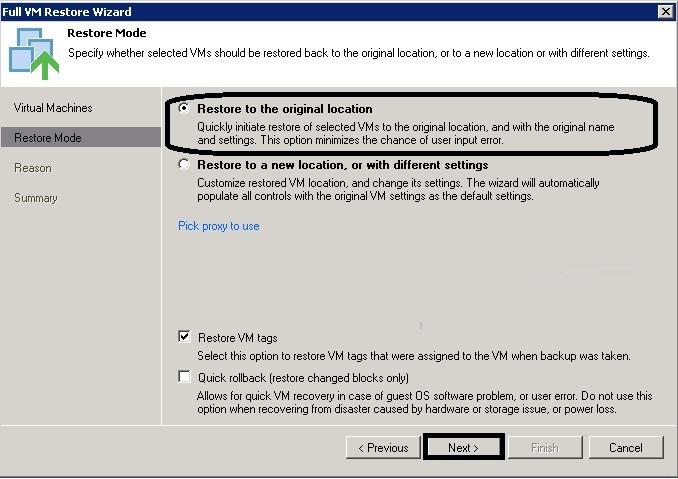
3. In the Restore Mode step of the wizard, select the desired restore mode and click Next:

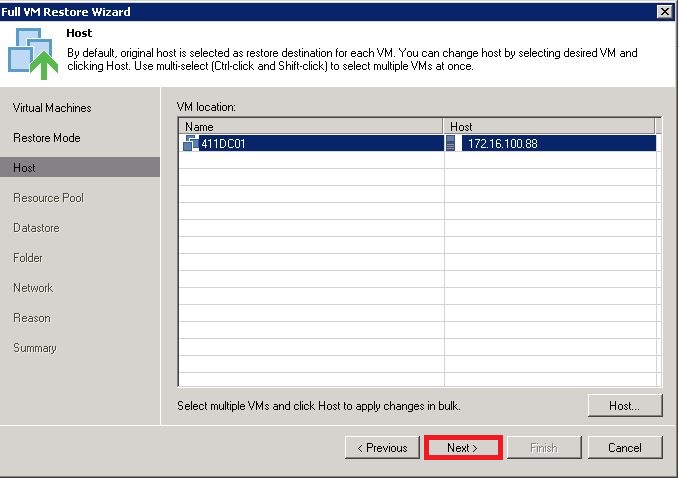
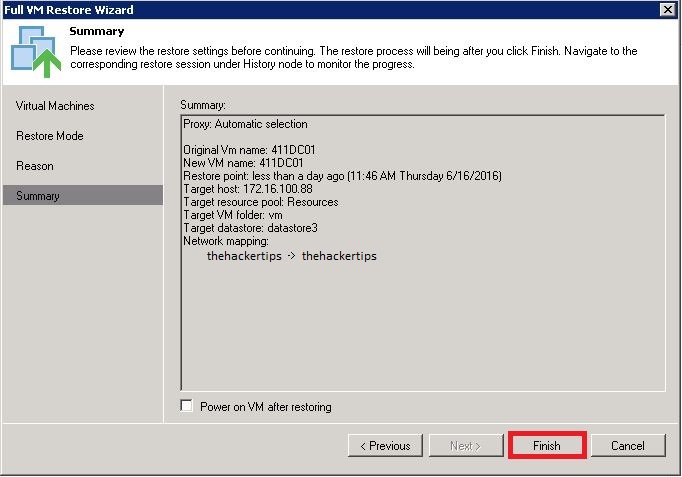
4. On the host step of the wizard, click Host to specify the host to restore. The original location will now be restored, so click Next:
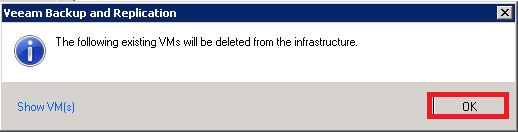
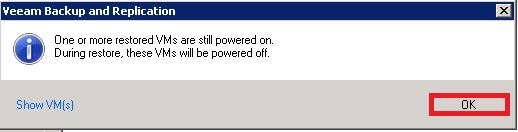
If you restore the original location, you can see the warning window, click OK, then Finish to finish starting the restore process:

5. Perform a full virtual machine recovery on Veeam Backup & Replication 9
If a VM fails, you can restore it from backup using a full VM restore. You can restore the virtual machine to its original location or to a new location;
Now we restore the DC from backup to its original location:
- On the Home tab, click Restore and select VMware. In the "Restore from backup" section, select "Entire VM (including registry)":
2. In the Virtual Machines step of the wizard, select one or more VMs to restore:
Select the dates to restore and click Add, then click Next:


3. In the Restore Mode step of the wizard, select the desired restore mode and click Next:

4. On the host step of the wizard, click Host to specify the host to restore. The original location will now be restored, so click Next:

If you restore the original location, you can see the warning window, click OK, then Finish to finish starting the restore process:


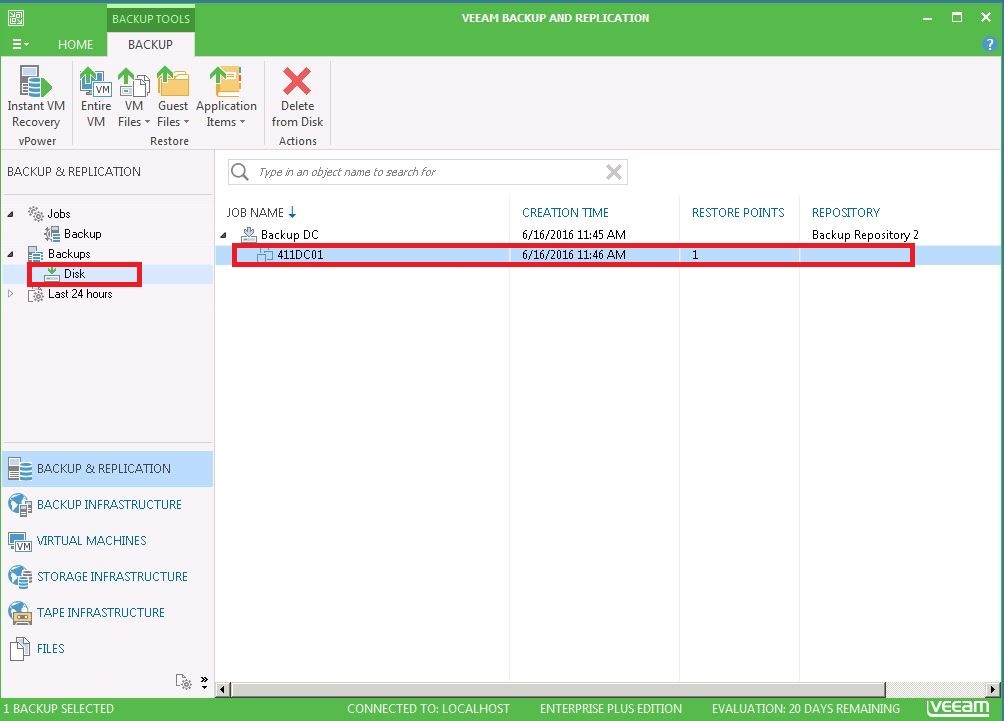
6. Recover files from virtual machines on Veeam Backup & Replication 9
You can restore individual Microsoft Windows guest operating system files from backups or copies of Microsoft Windows VMs.
Restoring VM guest OS files follows these steps:
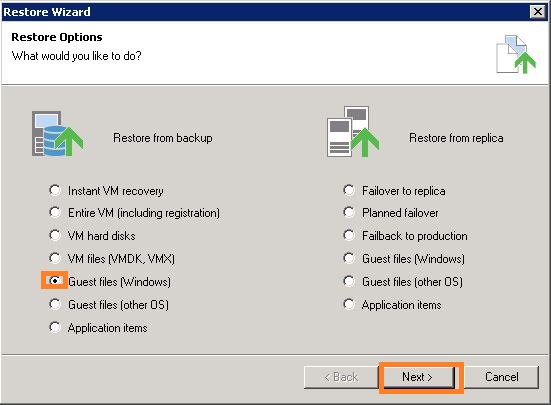
- On the Home tab, click Restore and select VMware. In the Restore from Backup or Restore from Copy section, select Guest Files (Windows) and click Next:

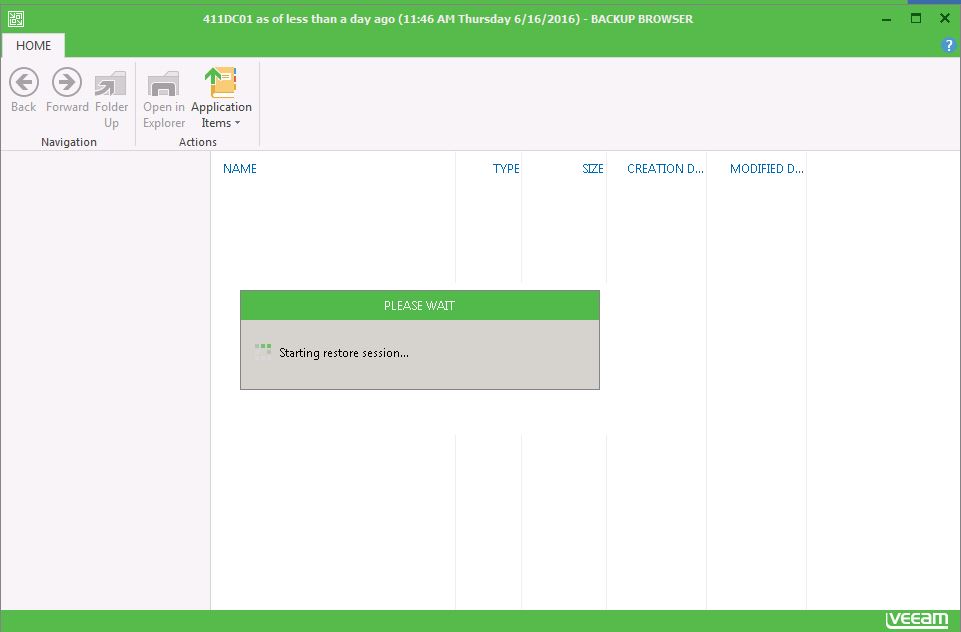
On the Virtual Machine step of the wizard, select the VM whose guest operating system files you want to restore, and click Finish when all steps are complete. You will see the backup browser window:

2. Right-click the folder or file to be restored and click "Restore-Overwrite":

3. Type the credentials using the Add button and click OK:
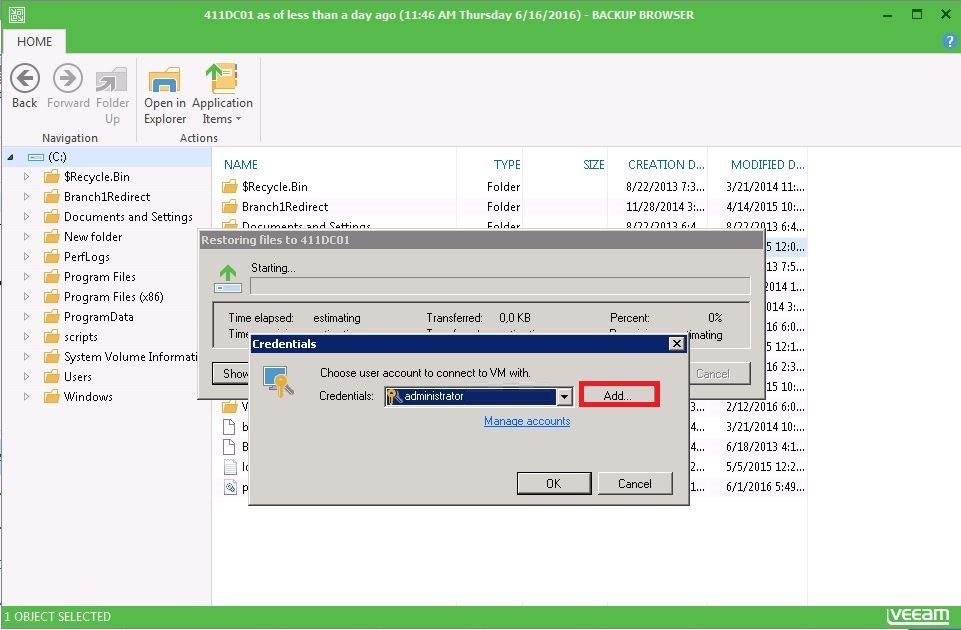
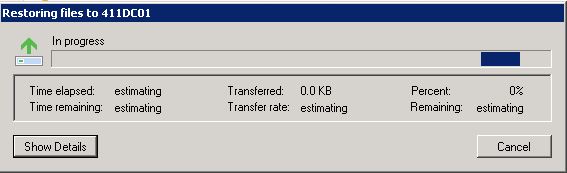
The restore process will now begin:


Seven, add Microsoft Windows server to Veeam Backup & Replication 9
Follow the steps below to add a Microsoft Windows server to Veeam Backup & Replication 9:
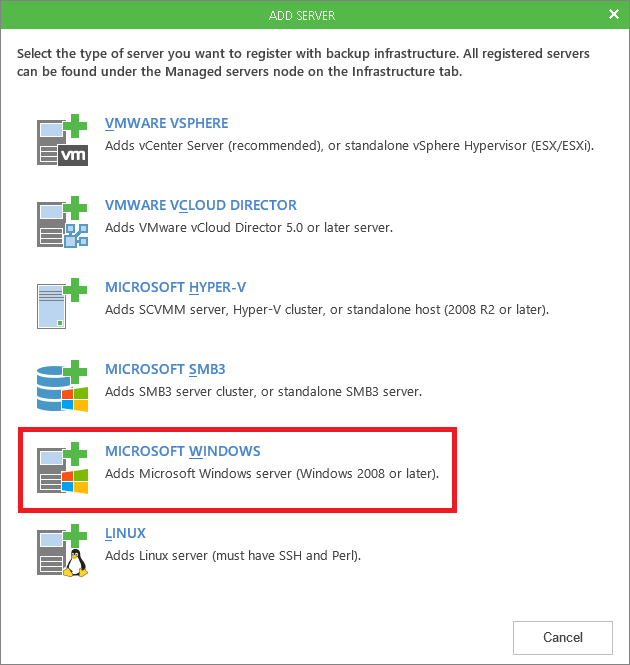
- With the Virtual Machines or Files view open, right-click anywhere in the inventory pane and select Add Server. In the Add Server window, select Microsoft Windows
2. In the Name step of the wizard, specify the IP address/DNS name and description for the Microsoft Windows server and click Next:

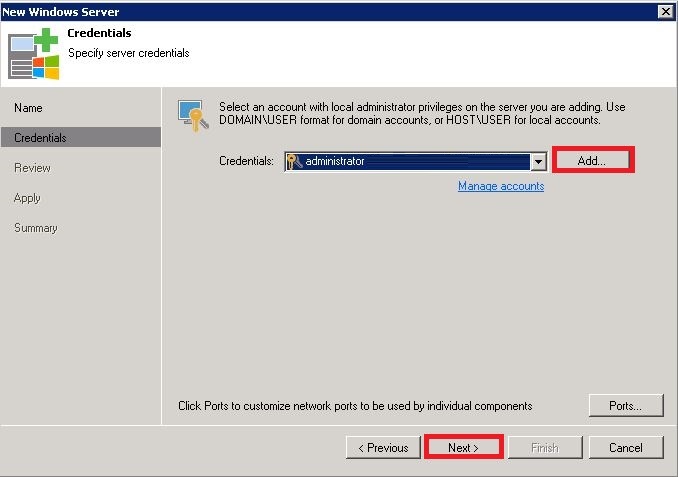
3. In the Credentials step of the wizard, use the Add button to specify the credentials for the Microsoft Windows server and click Next:

4. In the Review step of the wizard, review the Veeam Backup & Replication components installed on the server:
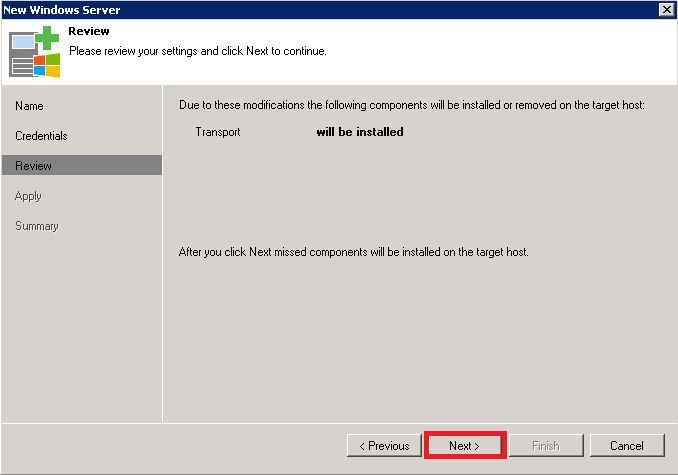
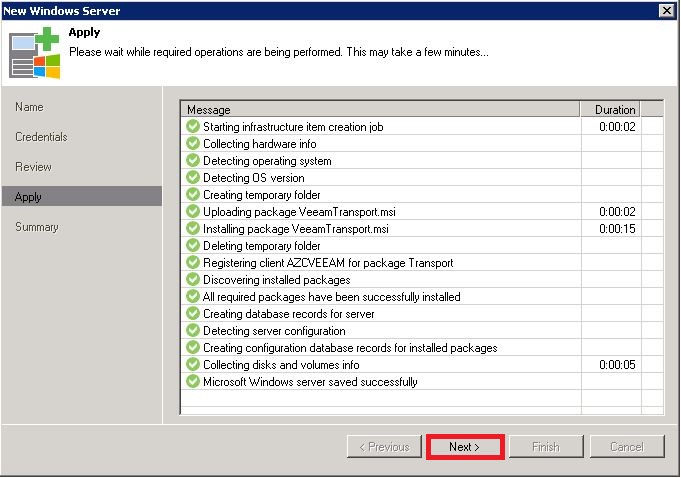
5. After performing the Microsoft Windows server addition process, click Next in the Apply step of the wizard, click Finish:

8. Microsoft Active Directory Object Restore on Veeam Backup & Replication 9
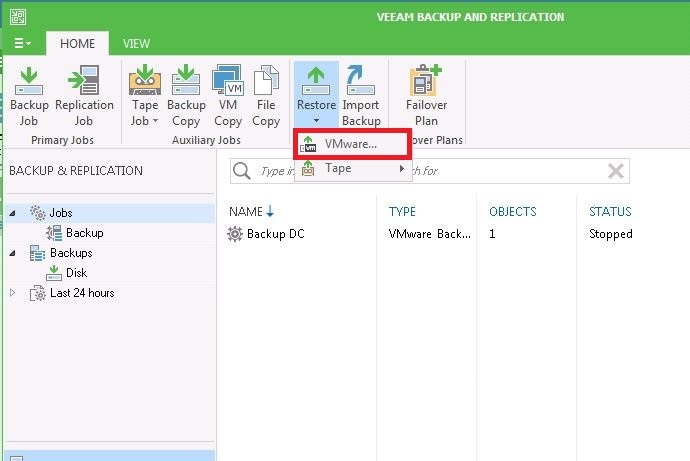
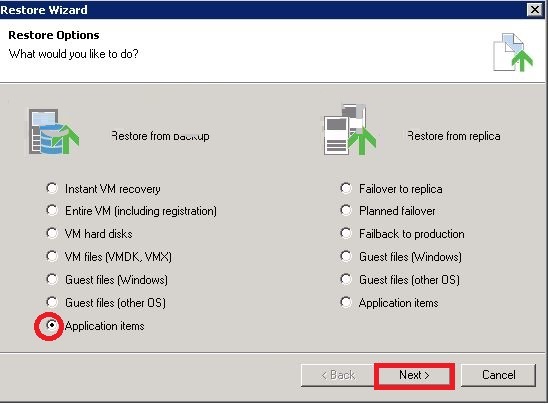
- In Veeam Backup & Replication, go to the Home tab of the ribbon menu and click Restore on the toolbar. In the Restore Wizard, select the Application item, then select Microsoft Active Directory and click Next:

2. In the list of available jobs, select a Microsoft Active Directory VM and click Next:

3. Select a necessary restore point for the Microsoft Active Directory VM and click Next:

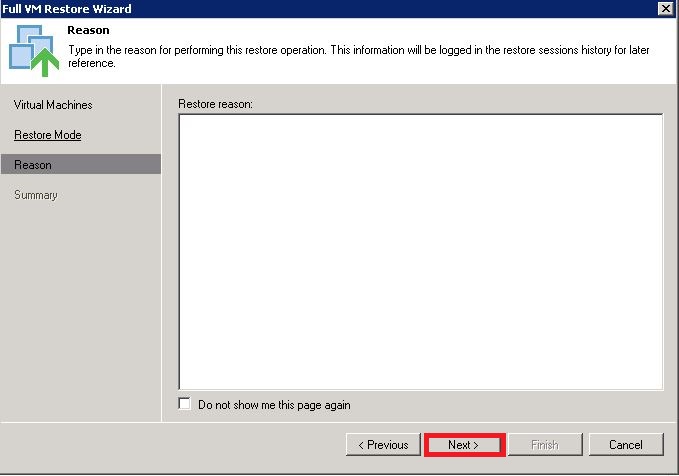
4. Enter the reason for performing VM guest file restoration, and click Next:

5. Click Finish to start the restore process:
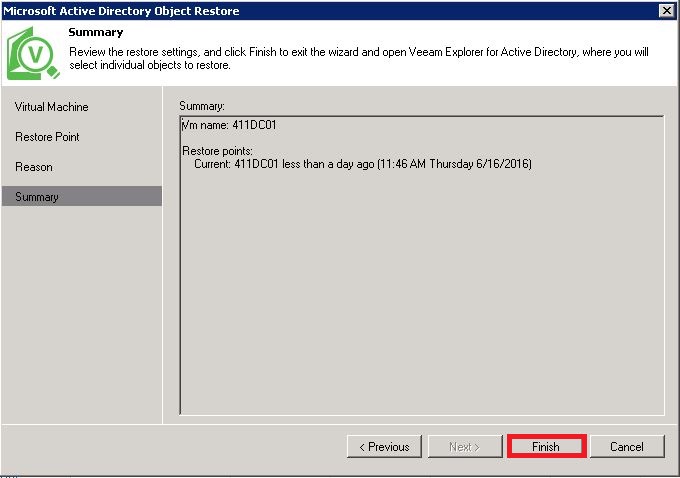
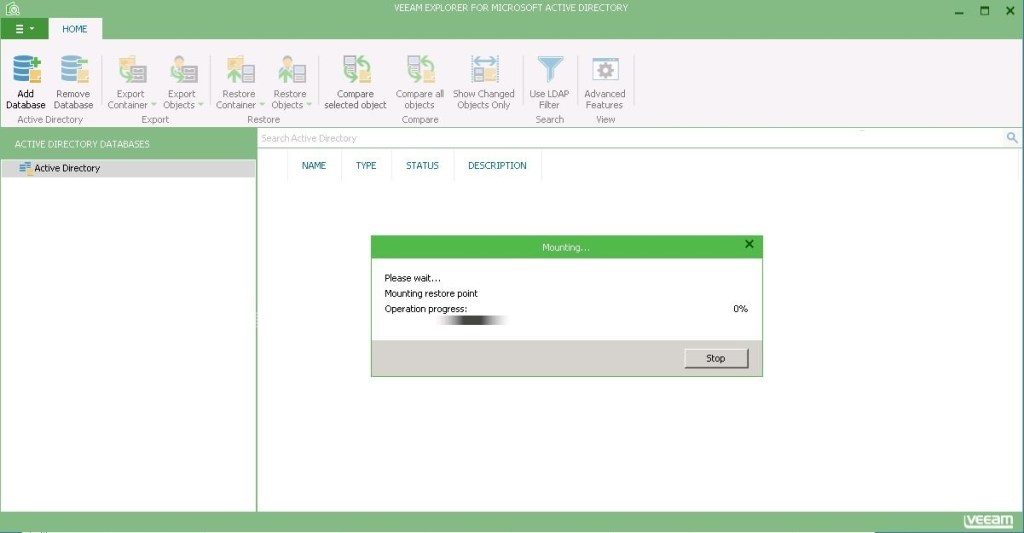
6. Automatically launch Veeam Explorer for Microsoft Active Directory after clicking Finish:
7. You will see the database hierarchy and objects displayed in the Veeam Explorer window. Right-click on the object to restore and click Restore to <your DC server>
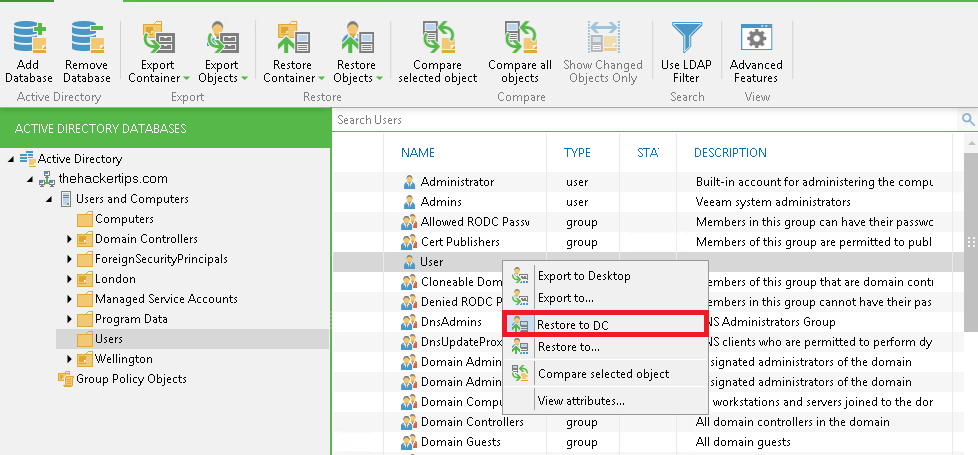
Then start and finish the recovery process.
In the same way you can backup and restore the following applications:
- Microsoft Active Directory
- microsoft exchange
- Microsoft SharePoint
- Microsoft SQL Server Oracle