Table of contents
2. Set the login pop-up window to appear and close
3. Set the movement of the pop-up window
1. HTML5 layout
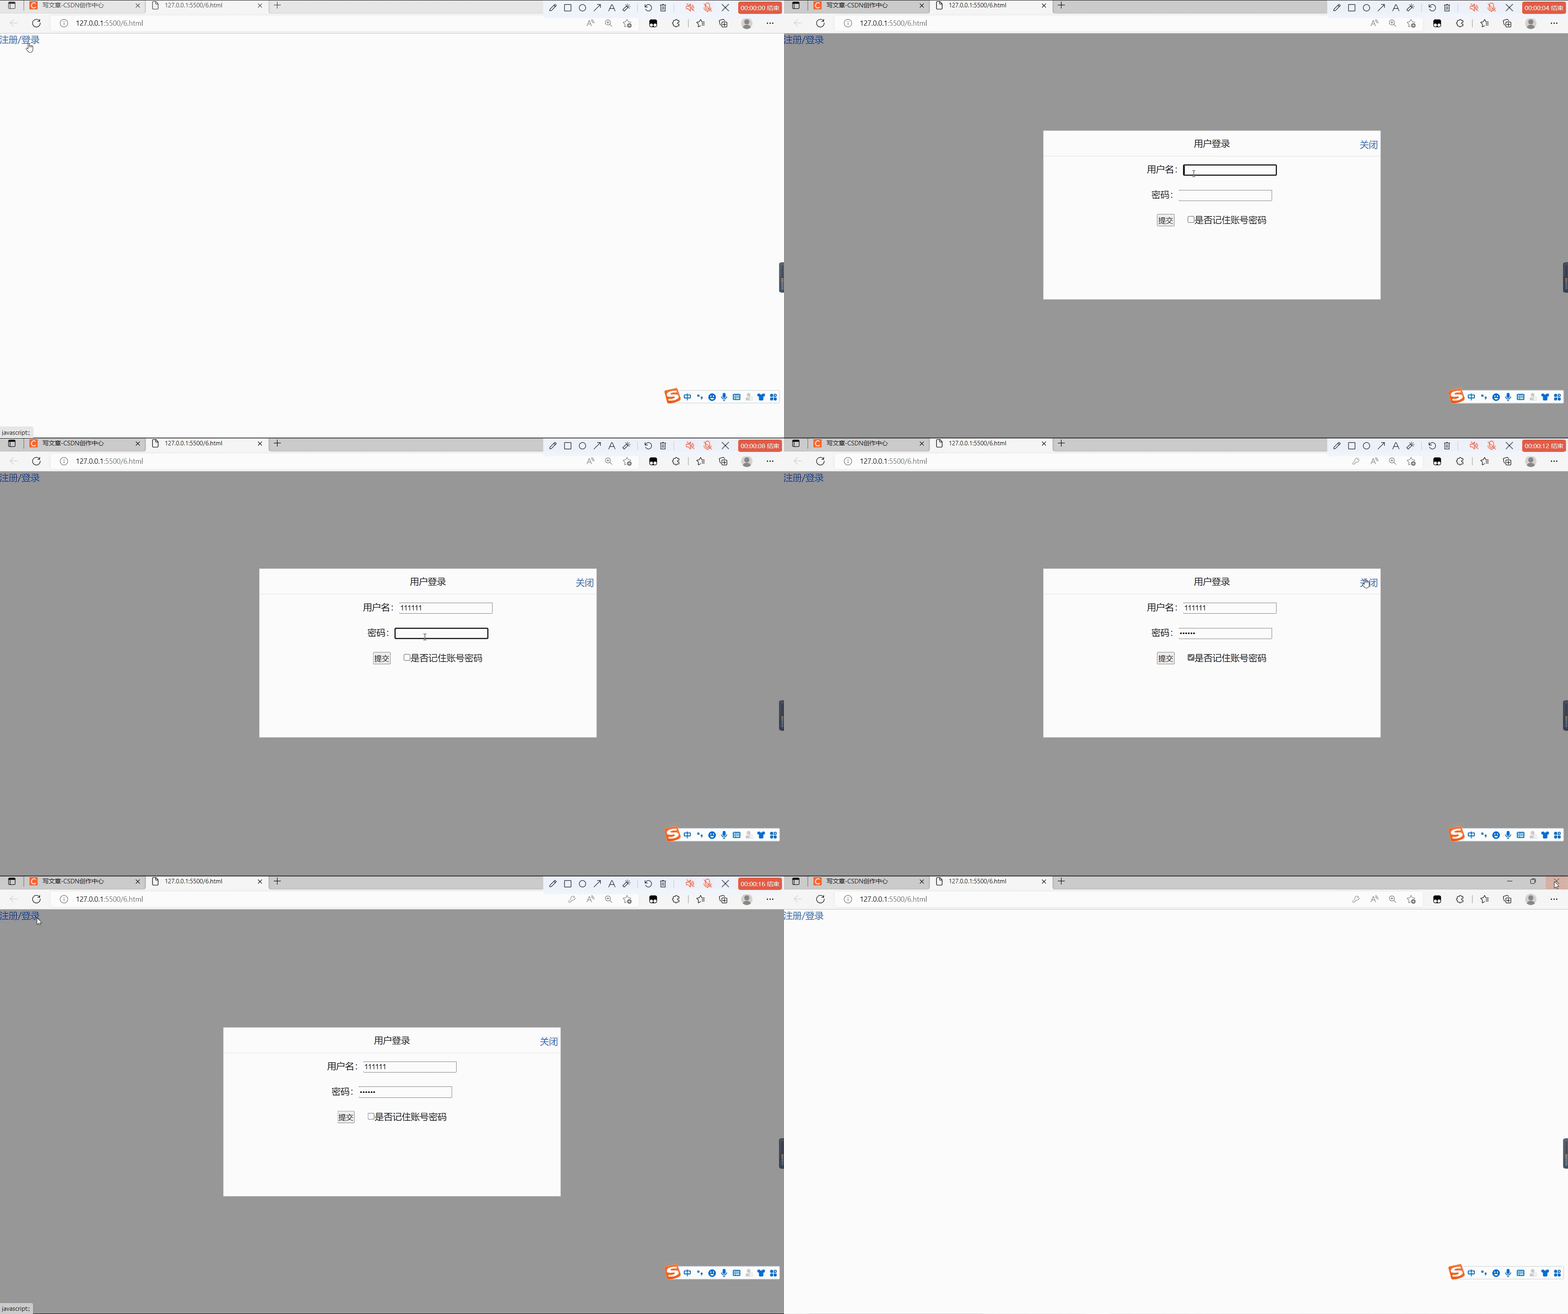
The web page structure is divided into three parts. The first part is to click the a tag to pop up the login box. The second part is to fill in the form in the login box. You need to pay attention to the use of javascript in the A tag. The third part is to set the prominent background.
<a href="javascript:;" id="loginA">注册/登录</a>//第一部分
<div class="login">//第二部分
<div class="title">
用户登录 <a href="javascript:;" id="close">关闭</a>
</div>
<div class="content">
<p> 用户名:<input type="text" value="" class="username"/> </p>
<p> 密码:<input type="password" value="" class="rusername"/> </p>
<p> <input type="button" value="提交" />
<input type="checkbox" id="iusername">是否记住账号密码</p>
</div>
</div>
<div class="bg"></div>//第三部分Two, CSS layout
Need to pay attention to the weight of the login pop-up window and the background board
	        *{
				padding: 0px;
				margin: 0px;
			}
			li{
				list-style: none;
			}
			a{
				text-decoration: none;
			}
            .title{
			height: 45px;
			 line-height: 45px;
			text-align: center;
			border-bottom: 1px solid #DCDCDC;
			position: relative;
			cursor: move;
			}
			.content p{
				 text-align: center;
				 line-height: 45px;
			}
			.title a{
				 display: block;
				 position: fixed;
				top:2px;
				 right: 5px;
				 z-index: 9999;
			}
When laying out, you need to use display: none; for the background board and pop-up window to achieve the effect of disappearing, and to achieve the effect of appearing and disappearing in the subsequent steps.
			.bg{
				width: 100%;
				height: 100%;
			   position: fixed;
				top: 0px;
				left:0px;
				 background: rgb(0,0,0,.4);
				 z-index: 9998;
				 display: none;
			}
			.login{
				 width: 600px;
				 height: 300px;
				 position: fixed;
				 top:50%;
				left:50%;
				transform: translate(-50%,-50%);
				z-index: 9999;
				background: #fff;
				display: none;

			}
3. JavaScript part
1. Get elements
All elements need to be obtained, pay attention to the way of class and Id selectors
            var a = document.querySelector('#loginA');
            var div = document.querySelector('.title');
            var close = document.querySelector('#close');
            var bg = document.querySelector('.bg');
            var login = document.querySelector('.login');
            var username = document.querySelector('.username');
            var rusername = document.querySelector('.rusername');
            var iusername = document.querySelector('#iusername');
2. Set the login pop-up window to appear and close
Set the click event to achieve display and disappear, pay attention to setting the click object
            a.onclick=function(){
                bg.style.display = 'block';
                login.style.display='block';
            }
            close.onclick=function(){
                bg.style.display = 'none';
                login.style.display='none';
            }
3. Set the movement of the pop-up window
First set the mouse down event, you need to get the mouse within a certain range to realize the mouse down event, then set the mouse movement event, and get the distance, and finally assign the distance to the left and right, and finally set the mouse up event, to end the mouse move event.
       div.addEventListener('mousedown',function(e){
                var x = e.pageX-login.offsetLeft;
                var y = e.pageY-login.offsetTop;
            document.addEventListener("mousemove",move)
            function move(e){
                var newx=e.pageX-x;
                var newy=e.pageY-y;
            login.style.left=newx+'px';
            login.style.top=newy+'px';
            }
            document.addEventListener('mouseup',function(e){
                document.removeEventListener("mousemove",move);
            })
            })
4. Set save information
In the form <input type="checkbox" id="iusername">, set a click event on 'iusername' to judge the changed value. In the function, you need to use if to judge whether it is selected and save the information. After saving, The page can display user information, you need to use if again to complete the judgment, and then give the obtained value to the value in the form. In this way, the user information can be saved, and the user's information will still be displayed after the next opening.
After saving, use iusername.checked=true, open it again, the save button will be in the selected state, if you want to cancel the save, you can directly cancel the selection of the save button, and the content will be deleted after closing.
        iusername.addEventListener('change',function(){
                if(iusername.checked){
                    localStorage.setItem('username',username.value)
                    localStorage.setItem('rusername',rusername.value)
                }else{
                    localStorage.removeItem('username');
                    localStorage.removeItem('rusername');
                }
            })
         if(localStorage.getItem('username')){
            username.value=localStorage.getItem('username');
            iusername.checked=true;
         }
         if(localStorage.getItem('rusername')){
            rusername.value=localStorage.getItem('rusername');
           iusername.checked=true;
         }