To use Ant Design Pro Layout and MSAL (Microsoft Authentication Library) in Umi 4 to log in and get a token to enter the home page, you need to follow the steps below:
- Install required dependencies:
Use npm or yarn to install required packages:
ornpm install @azure/msal-browser @azure/msal-react ant-design/pro-layoutyarn add @azure/msal-browser @azure/msal-react ant-design/pro-layout
2. Configure MSAL:
Create a new file in your project, eg src/msalConfig.js. In this file, configure the MSAL instance and export it:
import { PublicClientApplication } from "@azure/msal-browser";

const msalConfig = {
  auth: {
    clientId: "your-client-id",
    authority: "https://login.microsoftonline.com/your-tenant-id",
    redirectUri: "http://localhost:8000",
  },
};

const msalInstance = new PublicClientApplication(msalConfig);

export { msalInstance };
Please replace your-client-id and your-tenant-id with the corresponding value of the application registered in Azure Portal.
Note: In order to manage the user's authentication status in the entire application, the layout had the children attribute before umi4 and used it directly
MsalProvider标签包裹就可以. However, umi4 does not use the Outlet tag instead of children, how to realize it?
3. Updated src/app.tsx to include MsalProvider:
import React from 'react';
import { history } from 'umi';
import { msalInstance } from './msalConfig';
import { MsalProvider } from '@azure/msal-react';

export function render(oldRender) {
  oldRender();
}

export function rootContainer(container) {
  return React.createElement(
    MsalProvider,
    {
      instance: msalInstance,
    },
    container
  );
}
explain-app.tsx
This code is the entry file of a umi plugin, which contains two functions:
renderandrootContainer.
renderThe function is a function provided by the umi framework, which will be called before the application starts to perform some additional initialization operations. In this example,oldRenderthe parameter is a callback function that will berendercalled after the function finishes executing in order to continue rendering the application.
rootContainerThe function is the root component of the application, and it receives acontainerparameter named , which represents the hierarchy of all other components in the application. In this example,rootContainerthe function returns aMsalProvidercomponent, which is a React component in Azure Active Directory that manages the user's authentication state throughout the application.
MsalProviderThe component receives ainstanceproperty called , which is a MSAL instance that manages things like authentication and token acquisition. In this example, itmsalInstanceis@/layouts/msalConfigimported from, which is a configuration file of a MSAL instance, which contains information such as the client ID and tenant ID of the application.Finally,
rootContainerthe function usesReact.createElementthe function to passMsalProviderthe componentcontaineralong with the parameters so that it will be rendered into the application as the root component.
4. Create a login component, for example src/pages/login/index.js, and implement the MSAL loginRedirect method:
import React from "react";
import { useMsal } from "@azure/msal-react";

const Login = () => {
  const { instance } = useMsal();

  const handleLogin = () => {
    const loginRequest = {
      scopes: ["openid", "profile", "User.Read"],  // 换成自己的租户授权信息
    };
    instance.loginRedirect(loginRequest);
  };

  return (
    <div>
      <button onClick={handleLogin}>Login with Microsoft</button>
    </div>
  );
};

export default Login;
5. Use Ant Design Pro Layout and Outlet routing tags to realize login jump:
In src/layouts/index.js , use ProLayout and Outlet tags and perform a jump to the home page after successfully logging in and obtaining the token:
import React, { useEffect } from "react";
import ProLayout from "@ant-design/pro-layout";
import { Outlet } from "react-router-dom";
import { useMsal } from "@azure/msal-react";
import { useHistory } from "react-router-dom";

const Layout = () => {
  const { instance } = useMsal();
  const history = useHistory();

  useEffect(() => {
    const handleRedirect = async () => {
      const response = await instance.handleRedirectPromise();
      if (response) {
        // 登录成功,跳转到首页
        history.push("/");
      }
    };

    handleRedirect();
  }, [instance, history]);

  return (
    <ProLayout>
      <Outlet />
    </ProLayout>
  );
};

export default Layout;
With this code, when the user successfully logs in
Note that when we are doing a single page application in Azure, follow the steps below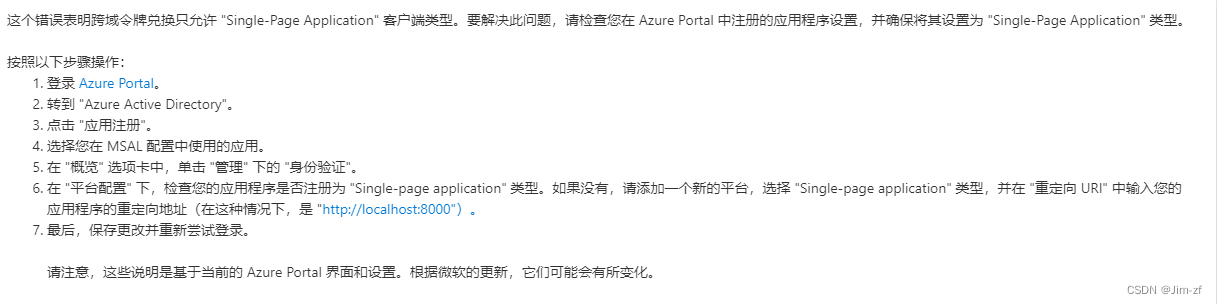
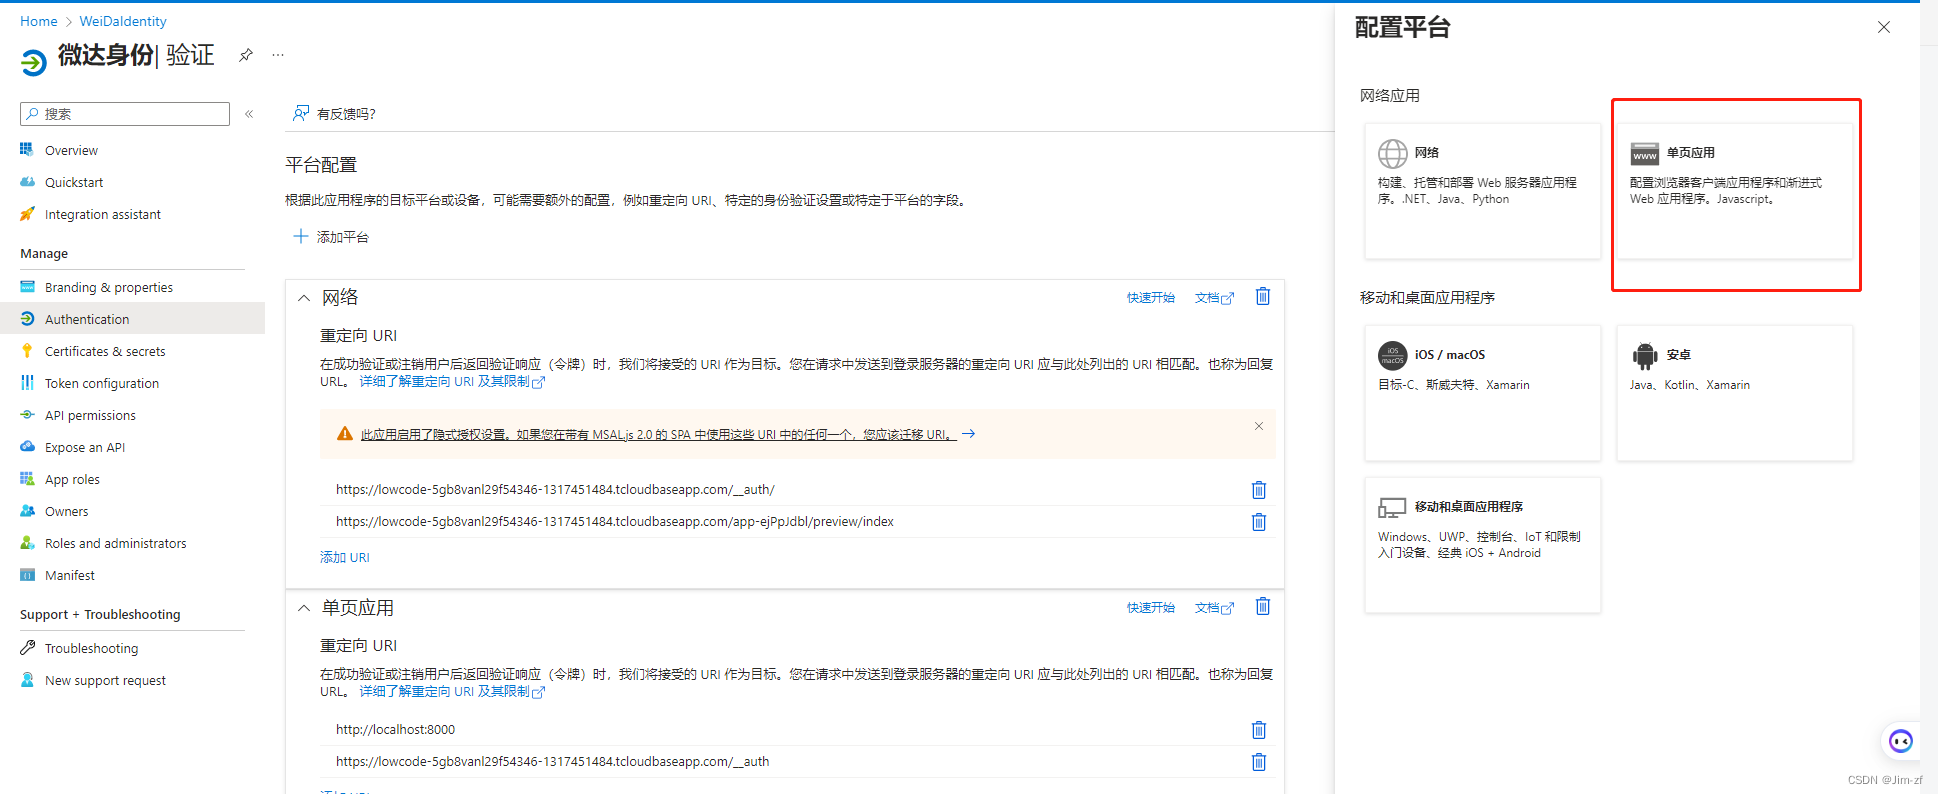
Set redirectUri to the callback address in your code
expand,
. After a successful login, you can use msal-browser the instance object to obtain an access token and use the Microsoft Graph API to obtain user information. Add the following code inside the function src/layouts/index.js in the file useEffect :
useEffect(() => {
  const handleRedirect = async () => {
    const response = await instance.handleRedirectPromise();
    if (response) {
      // 登录成功,跳转到首页
      history.push("/");

      // 获取访问令牌
      const accessTokenRequest = {
        scopes: ["User.Read"],
        account: instance.getAccountByUsername(response.account.username),
      };
      const accessTokenResponse = await instance.acquireTokenSilent(accessTokenRequest);
      const accessToken = accessTokenResponse.accessToken;

      // 使用访问令牌获取用户信息
      const userResponse = await fetch("https://graph.microsoft.com/v1.0/me", {
        headers: {
          Authorization: `Bearer ${accessToken}`,
        },
      });
      const userInfo = await userResponse.json();
      console.log(userInfo);
    }
  };

  handleRedirect();
}, [instance, history]);
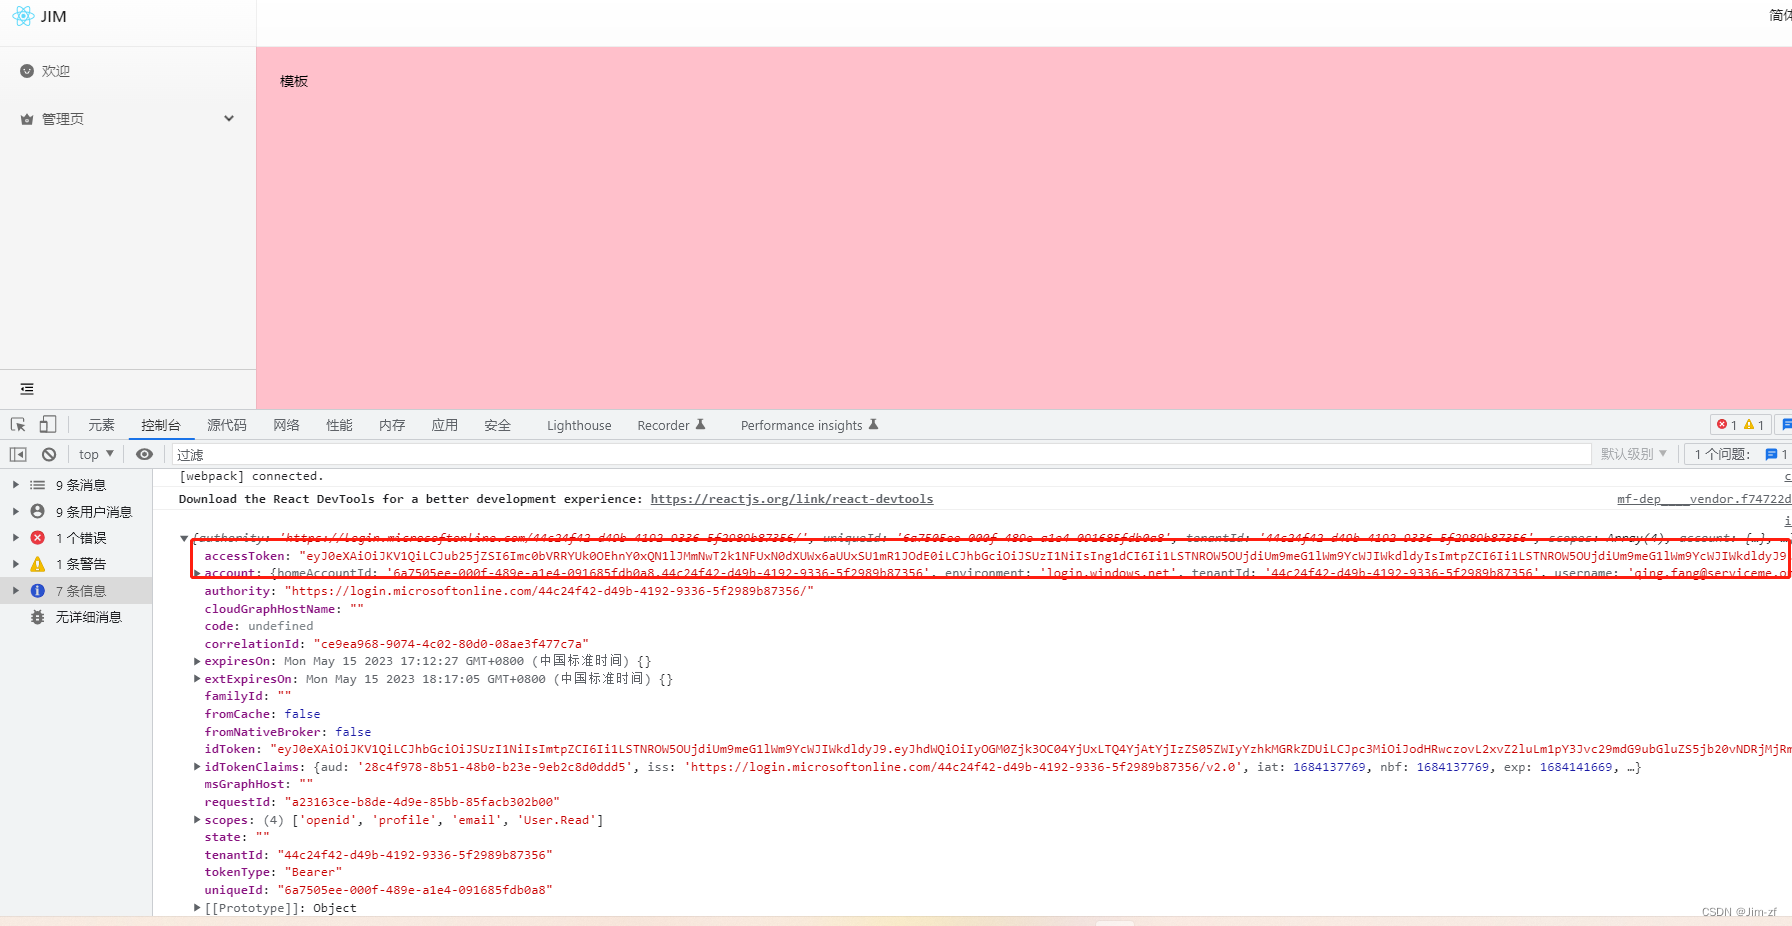
This code first uses acquireTokenSilent the method to get the access token, and then uses fetch the API to call the endpoint of the Microsoft Graph API /me to get the user information. The obtained user information will be output to the console.
Now, when a user successfully logs in and gets a token, the application will fetch the user information and output it to the console. You can customize this code to store user information in a state management library such as Redux or MobX or directly in the component state as needed.