The following commands come in order, and the front and back paths need to correspond. The commands must not be changed. After the deployment is successful, we will study the specific principles:
- Installation dependencies:
open the URL:https://registry.npmmirror.com/binary.html?path=node/v17.6.0/
selectnode-v17.6.0-linux-x64.tar.gzdownload, put it in the directory/usr/local, and use the following commands in sequence:
tar -xvzf node-v17.6.0-linux-x64.tar.gz
sudo ln -s /usr/local/node-v17.6.0-linux-x64/bin/node /usr/bin/node
sudo ln -s /usr/local/node-v17.6.0-linux-x64/bin/npm /usr/bin/npm
node -v
npm -v
apt install git
git --version
npm install -g hexo-cli
rm -rf /usr/bin/hexo
sudo ln -s /usr/local/node-v17.6.0-linux-x64/bin/hexo /usr/bin/hexo
hexo -v
cd /home
hexo init blog
cd /blog
npm install
hexo g
- Configure github:
Create a new warehouse:

Assuming my username is roomdestroyer and my mailbox is [email protected] Generate ssh with the following command:
git config --global user.name roomdestroyer
git config --global user.email [email protected]
git config user.name
git config user.email
ssh-keygen -t rsa -C [email protected]
# 连续摁 3 个回车
cd /root/.ssh
cat id_rsa.pub
Copy the output in the screen
Back to github, click on: 头像 -> Settings -> SSH and GPG keys -> New SSH key -> 把刚刚复制的内容粘贴到 Key 处 -> Add SSH key:

Go back to Shell and execute the command ssh -T [email protected]to see if it is successful.
Go back to the blog warehouse you just created on github and copy the SSH address:

Go back to Shell and execute the following command:
cd /home/blog
vim _config.yml
Press shift + Gto get to the end and configure as follows:
deploy:
  type: 'git'
  repository: 你刚刚复制的地址
  branch: main
Browse online, find URLthe configuration module, and configure it as follows:
url: https://github.com/你的用户名/
root: /blog.github.io
After the configuration is complete, click ESC, Execute :wq, Enterto come to the Shell interface, and execute the following commands in sequence:
cd /home/blog
hexo clean
hexo g
hexo d
At this time, you will be asked to enter the account number and credentials, write your own account number for the account number, and find the token in github for the password. After logging in to your github, visit the URL: , click on this interface, write a Note, choose one for the validity period, and type all the https://github.com/settings/tokensway Generate New Tokenbelow √, after confirming the generation, remember to copy, and you will not be able to find it later:

Then go back to your Shell, fill in your own number for the account, fill in the token for the password, and it will be deployed after a while.
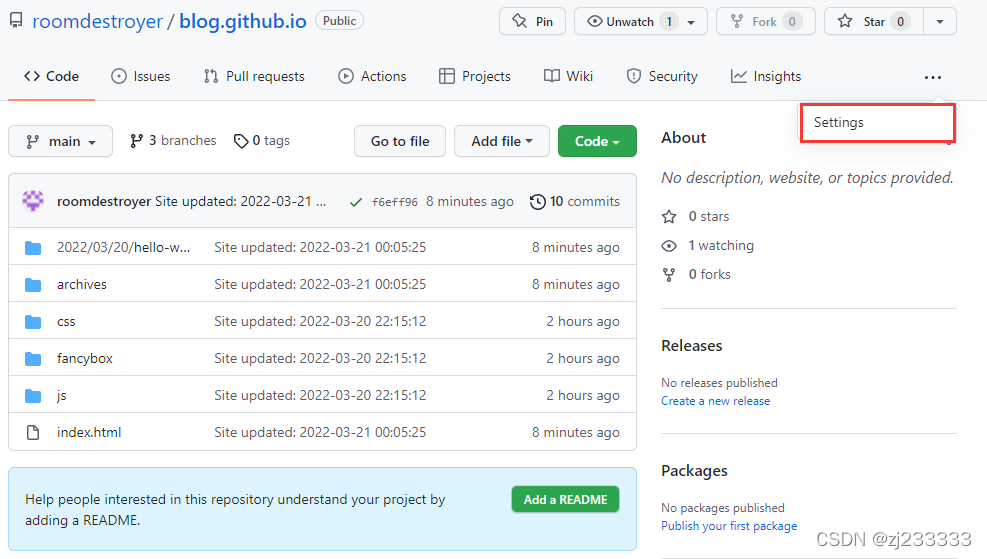
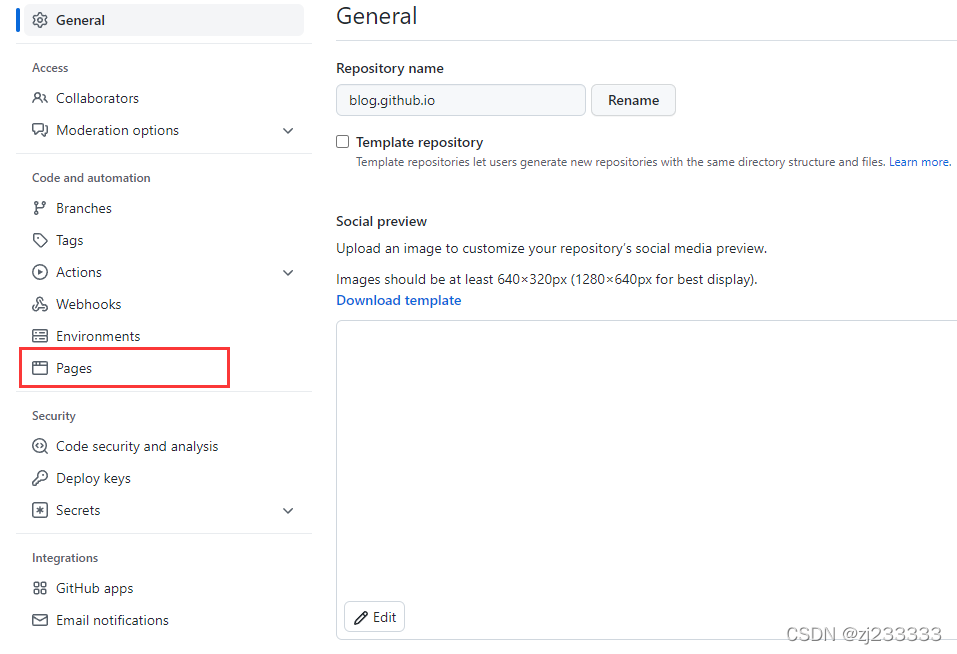
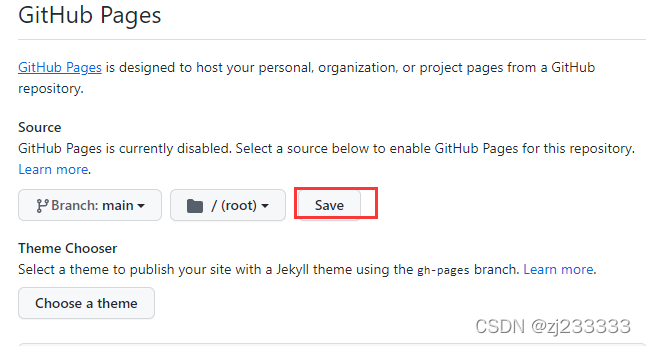
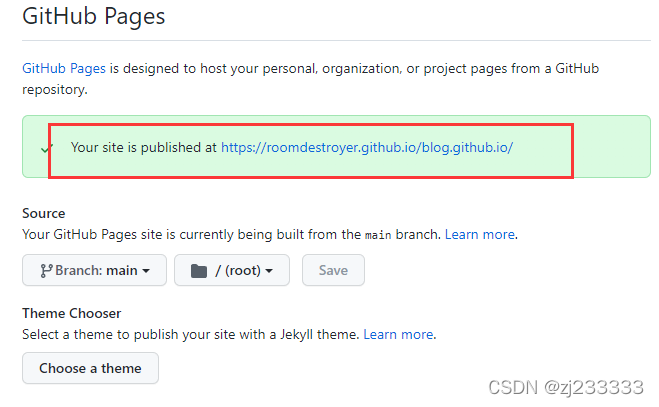
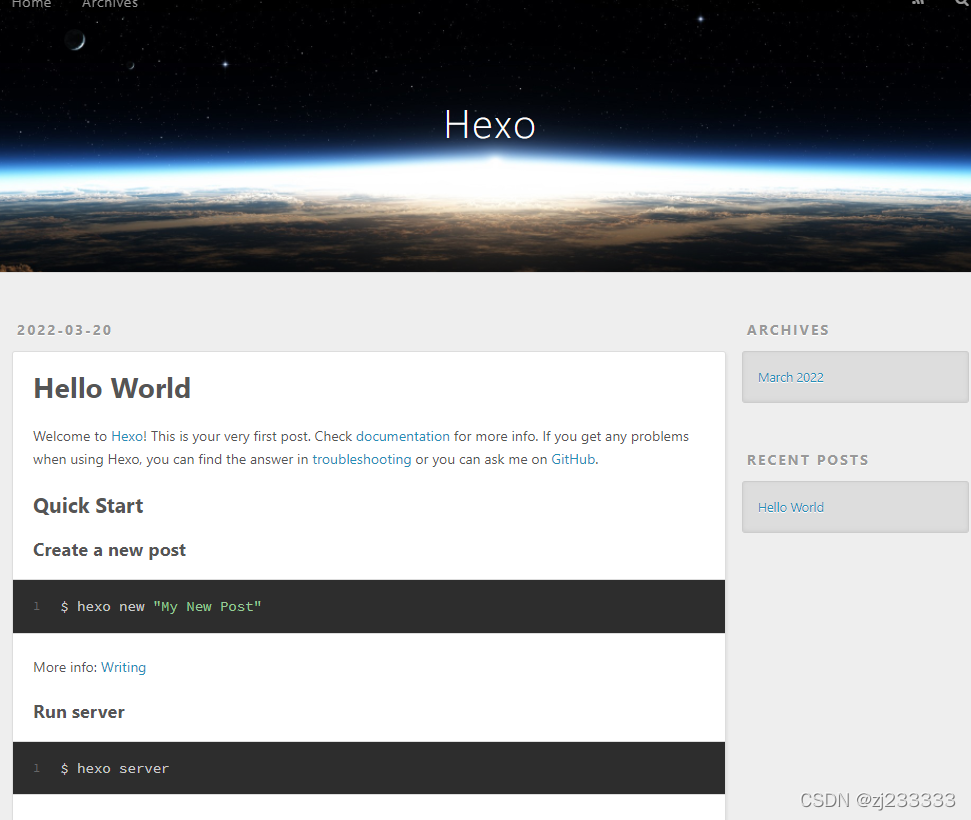
- Generate page:
After the deployment is successful, your interface should look like this, follow the steps below: