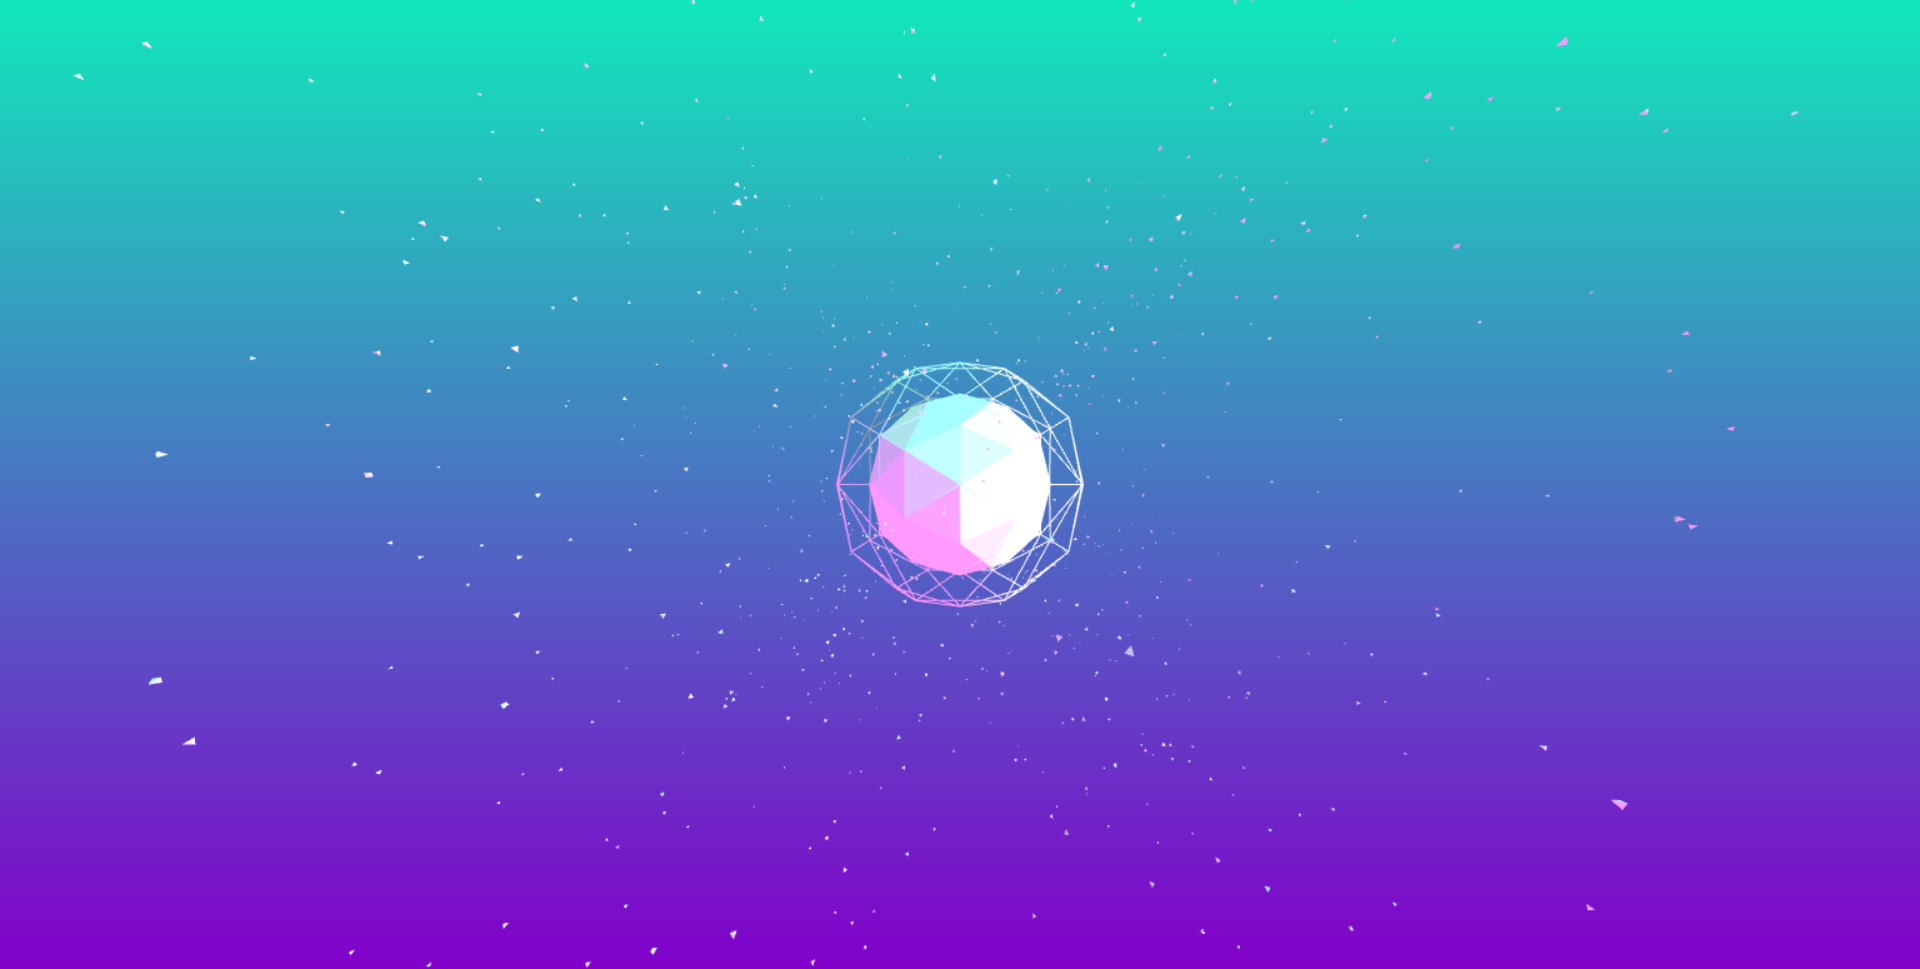
This case is a threejs special effect web page, the size of the sphere is wrapped, the outer sphere is a transparent material, but the wireframe rendering is performed, so that the inner sphere can be viewed through the outer ball.
Note: The case reference comes from the Internet, here is the code explanation, intrusion and deletion
This case does not apply to any third-party framework except ThreeJS, rest assured to eat
Lazy students can directly download the code and reward the author with a spiritual food: https:// download.csdn.net/download/A757291228/87871503

This is the code of inscode, but there is a problem with rendering, but you can also see the general effect:
1. Three elements of ThreeJS
Before writing ThreeJS, you need to understand the three elements of ThreeJS. Students who have an understanding of modeling and games will be more likely to understand the knowledge points when learning ThreeJS.
There are three key objects in ThreeJS, namely camera, scene and renderer:
- The scene is a "stage" that "builds" special effects through ThreeJS. After creating a scene, you can add various objects to the scene, such as polygons, particles, spheres, etc.;
- After creating the scene, we need to add a camera to the scene to present the visual effects in the scene. The camera plays the role of "visual collection" in ThreeJS, and can capture the visual presentation of the
scene by controlling the camera collection range (size); - Then after completing the above two steps, the scene needs to be rendered, and only after rendering can the visual effect be presented.
It can be imagined that the scene is a venue, the camera is a camera, and the renderer is a renderer, and then a video or photo is taken.
2. Create three elements in the code
2.1 create html
First create an html file and import CSS and JS files:
<!DOCTYPE html>
<html lang="en">

<head>
	<meta charset="UTF-8">
	<meta http-equiv="X-UA-Compatible" content="IE=edge">
	<meta name="viewport" content="width=device-width, initial-scale=1.0">
	<title>1_bit ThreeJS 炫酷旋转多面体Web页 Demo</title>
	<link rel="stylesheet" href="./style.css">
</head>

<body>
	<div id="canvas"></div>
	<script src='three.min.js'></script>
	<script src="./1bitDemo.js"></script>
</body>

</html>
It should be noted here that a div with an id of canvas is added to the body element. This div is to add rendered elements corresponding to this div in the js code later; in addition, the three.min.js dependency is also introduced. Another js named 1bitDemo.js is the js file code we will write later.
2.2 css writing
After writing the html code, create a style.css file to add some basic styles to the html, set the background color in html, and give a linear gradient with a downward direction, and then give a margin of 0 to make it fit the edge of the page , the code is too simple and will not be repeated here, the css is as follows:
html {


  width: 100%;
  height: 100%;
  background: linear-gradient(to bottom, #11e8bb 0%, #8200c9 100%);
  overflow: hidden;
}

body {


  margin: 0;
  padding: 0;
}
At this point the page is as follows:

2.3 Create three elements
After finishing the preparatory work, create a js file, here my js file name is 1bitDemo.js, in which we will create the scene, renderer, and camera.
Since we want to render as soon as the page is opened, we need to create an onload event here:
window.onload = function () {


}
Then create the corresponding object to store the three elements (renderer, scene, camera):
var renderer, scene, camera;
Renderer
We first create the renderer here, and create the camera by calling the WebGLRenderer of the THREE object. The WebGLRenderer method receives a configuration item object passed into a renderer. For example, the code is:
renderer = new THREE.WebGLRenderer({

     antialias: true, alpha: true });
The configuration items passed in at this time:
- antialias means that anti-aliasing is turned on to smooth the edges of the geometry;
- alpha indicates that the image rendered by the renderer has a transparent channel. If it is not enabled, there will be no transparent channel. For example, the difference between a png image and a jpg;
Then configure the rendering size of the renderer:
renderer.setSize(window.innerWidth, window.innerHeight);
setSizeThe method in the above code is used to set the rendering size of the renderer, and the rendering width and height are passed inwindow.innerWidth with and .window.innerHeight
At this point, the canvas element can be obtained through js, so as to add the renderer to the canvas window:
document.getElementById('canvas').appendChild(renderer.domElement);
In the above code, renderer.domElement is the canvas rendered by the renderer.
Scenes
Scene creation is very simple, THREEand Scenecan be created through the method of :
scene = new THREE.Scene();
Camera
Then create a camera, create a perspective camera using the PerspectiveCamera method, the code is as follows:
camera = new THREE.PerspectiveCamera(100, window.innerWidth / window.innerHeight, 1, 1000);
The PerspectiveCamera method receives 4 parameters, which are:
- The camera can see the vertical viewing angle (those who have played FPS should know that there is a viewing angle)
- Camera Viewable Aspect Ratio
- camera near distance
- Camera far distance
in:
- The camera near distance is the distance from the camera to the closest visible object in the scene
- The camera far distance is the distance from the camera to the farthest visible object in the scene
If the visible object is smaller than the near distance of the camera and greater than the far distance of the camera, it will not be visible.
Then we can move the z-axis of the camera at this time, the code is:
camera.position.z = 500;
The following is the coordinate system reference diagram in three:
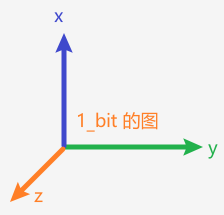
At this time, the z-axis is the camera, or the position of the human window from the center point. If you do not move this distance, you will not be able to see the geometry well when creating the geometry, because the default position is the center point of this coordinate system.
Finally, add this camera to the scene to complete the creation of the three elements:
scene.add(camera);
3. Geometry creation
3.1 Create twenty-sided buffer geometry
At this point we create two icosahedron geometries, which can be created directly through the IcosahedronGeometry method, the code is:
var geom = new THREE.IcosahedronGeometry(7, 1);
var geom2 = new THREE.IcosahedronGeometry(15, 1);
In the above code, IcosahedronGeometry accepts two parameters, which are:
- radius The radius of the icosahedron, the default is 1;
- detail Set the face angle, the default is 0, the value is more than 1, it is a sphere, and if it is more than 0 and less than 1, it will add vertices to convert it into a non-icosahedral geometry;
3.2 Create the display style of the icosahedron
To create a display style for the icosahedron in three, we need to create a material (Material). Here we need to create a material that can simulate the brightness and smoothness of the reflected light on the surface of the object. It needs to be created through MeshPhongMaterial, and then in Just pass in the corresponding configuration items in the MeshPhongMaterial method:
var mat = new THREE.MeshPhongMaterial({


	color: 0xffffff,
	shading: THREE.FlatShading
});
var mat2 = new THREE.MeshPhongMaterial({


	color: 0xffffff,
	wireframe: true,
	side: THREE.DoubleSide
});
The configuration item object value in the above code:
colorIndicates the color;shadingIndicates the rendering method of the grid (the grid to be used later), used here
FlatShading, means that the grid is rendered using flat shading, and the rendered grid will be flattened;wireframetrueIndicates that the rendered mesh will appear as wireframesideSetting it toTHREE.DoubleSide
means double-sided rendering, that is, when rendering, both sides of the object will be rendered instead of only one side (for performance considerations, if you want to set only one side to be renderedTHREE.FrontSide)
3.3 Create Mesh for assembling 3D objects
Mesh is necessary in ThreeJS 3D objects. By creating Mesh to combine 3D objects, creating Mesh requires specifying the corresponding geometry and material, as shown in the following code:
var planet = new THREE.Mesh(geom, mat);
Among them, geom is the previously created geometry, and mat is the previously created material.
Then we need to zoom in and out of this geometry planet, here it is magnified by 16 times:
planet.scale.x = planet.scale.y = planet.scale.z = 16;
Next, we need to create an Object3D to store this geometry. Through Object3D, we can easily scale and move the complete geometry.
var center = new THREE.Object3D();
center.add(planet);
scene.add(center);
In the above code, a centerObject3D object is created, and the created geometry planet is added to the center, and then the center is added to the scene scene.
rendering
At this time, if you want to see what the page looks like, you can call the render method directly through the renderer at the end to render. The render method needs to pass in the scene and the camera object. At this time, the code is:
renderer.render(scene, camera)
But the rendered picture is black at this time:
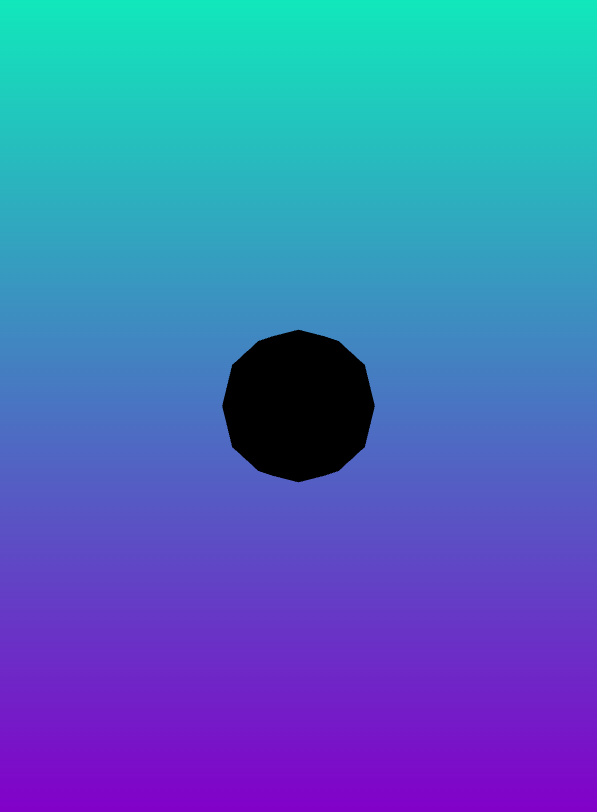
The reason is that there is no light source added to the scene, so it is dim. Next we create the light source, but before that, we just created two MeshPhongMaterial materials and IcosahedronGeometry icosahedron objects. We only implement the mesh of one object here. At this time, we will complete the creation of another IcosahedronGeometry mesh, and create an Object3D object for storage:
var planet2 = new THREE.Mesh(geom2, mat2);
planet2.scale.x = planet2.scale.y = planet2.scale.z = 10;
outside = new THREE.Object3D();
outside.add(planet2);
scene.add(outside);
3.4 Create a light source
Here we create ambient light, create ambient light through method AmbientLight, AmbientLight method to pass in ambient light color:
var ambientLight = new THREE.AmbientLight(0x999999);
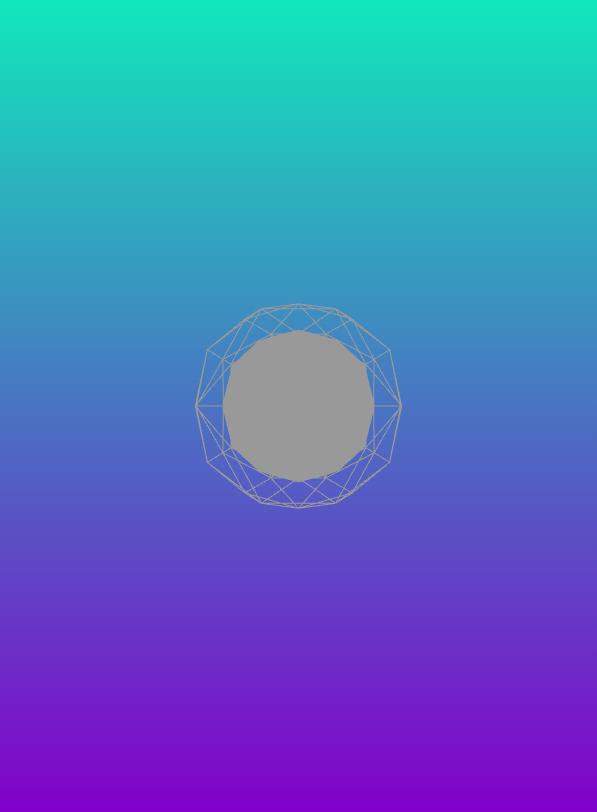
scene.add(ambientLight);
At this time, the refresh interface is as follows:
At this point we also need to create other sun lights. The sun light is created by DirectionalLight, which is a parallel light and does not attenuate with distance. DirectionalLight accepts two parameters, one is the light color and the other is the light intensity, and the light intensity defaults to 1:
var lights1 = new THREE.DirectionalLight(0xffffff, 1);
lights1.position.set(1, 0, 0);
var lights2 = new THREE.DirectionalLight(0x11E8BB, 1);
lights2.position.set(0.75, 1, 0.5);
var lights3 = new THREE.DirectionalLight(0x8200C9, 1);
lights3.position.set(-0.75, -1, 0.5);
scene.add(lights1);
scene.add(lights2);
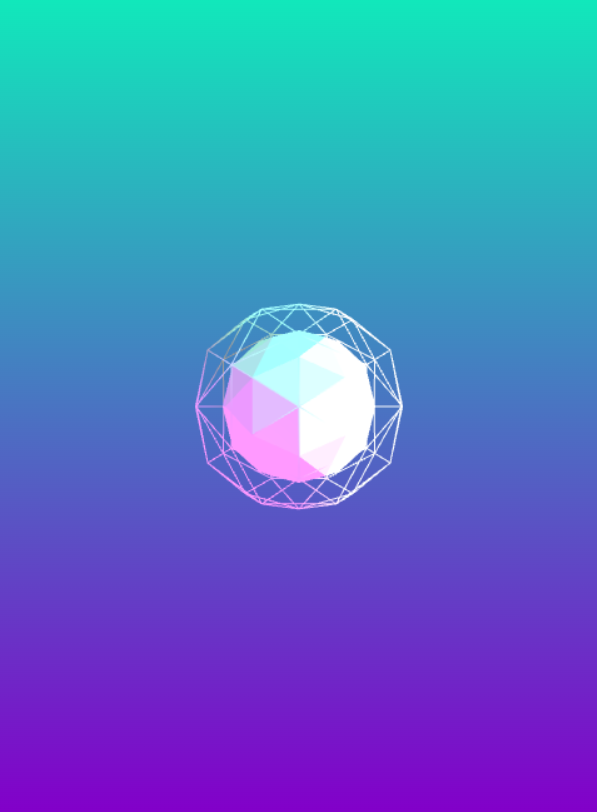
scene.add(lights3);
Refresh the interface and re-render the interface as follows:
3.5 Create environment objects
Then start to create environment objects, first create a 3D container according to the convention, and add this container to the scene:
particle = new THREE.Object3D();
scene.add(particle);
Then create a tetrahedron (the first parameter is already the radius, the second parameter is consistent with the icosahedron):
var geometry = new THREE.TetrahedronGeometry(2, 0);
Then create the material (the same as before and no more details):
var material = new THREE.MeshPhongMaterial({


	color: 0xffffff,
	shading: THREE.FlatShading
});
Since there are many environmental objects, here we directly use the for loop to create loops:
for (var i = 0; i < 1000; i++) {


	var mesh = new THREE.Mesh(geometry, material);
	mesh.position.set(Math.random() - 0.5, Math.random() - 0.5, Math.random() - 0.5).normalize();
	mesh.position.multiplyScalar(90 + (Math.random() * 700));
	mesh.rotation.set(Math.random() * 2, Math.random() * 2, Math.random() * 2);//旋转

	particle.add(mesh);
}
In the above code, a mesh is first created, and then its xyz coordinates are set through mesh.position.set, and then the coordinates are enlarged through the multiplyScalar method. At this time, the enlargement will enlarge the overall created mesh position, away from the center point, In this way, these created objects can be diverged to other positions, and finally set their rotation angle through mesh.rotation.set to change the rotation direction of the created objects, otherwise it is not very good-looking to reflect on one surface, it is too single , and finally add to the particle to complete.
At this time, the page effect is as follows:
Why does the ball look so small? In fact, you can adjust the size of the viewing angle and the distance at the far end to shorten the distance to the object. Here I set the camera’s visual orientation to 70:
camera = new THREE.PerspectiveCamera(70, window.innerWidth / window.innerHeight, 1, 1000);
This is where the rendering effect really gets bigger:

the last thing is to finish the animation and make it rotate.
3.6 animation animation
Students who have done unity should be very clear, just need to change its position every frame, then we create an animate method at this time, and set the rotation of its Object3D object:
function animate() {


	requestAnimationFrame(animate);

	particle.rotation.x += 0.0010;
	particle.rotation.y -= 0.0040;
	inside.rotation.x -= 0.0020;
	inside.rotation.y -= 0.0030;
	outside.rotation.x -= 0.0010;
	outside.rotation.y += 0.0020;
	renderer.clear();

	renderer.render(scene, camera)
};
In the above method, requestAnimationFrame is a loop function, which can be executed repeatedly by passing in the corresponding function name. Here we only need to put the animate function in the last line of code in the onload event, and delete the render method of the renderer in onload. Because it has been written here.
The renderer.clear() in the above code is to clear the cache of the renderer and prepare for the next rendering. Generally, it can be called before the scene is redrawn. Of course, clear can specify to clear different buffers. Students can learn about it later.
The above animate method has been written, but pay attention to renderer, scene, camera, inside, outside, particle These variables need to be set as global variables, otherwise they cannot be called.