foreword
This project is mainly an introductory teaching for Xiaobai, the project can be run directly, please private message if you need it! ! !
Image classification is the most fundamental recognition task in the field of deep learning image processing.
first on the results

1. Build a data set
Under the bird identification in the project directory, under the dataset folder, there are eight kinds of bird folders under the train and test folders, respectively named after the names of the categories.
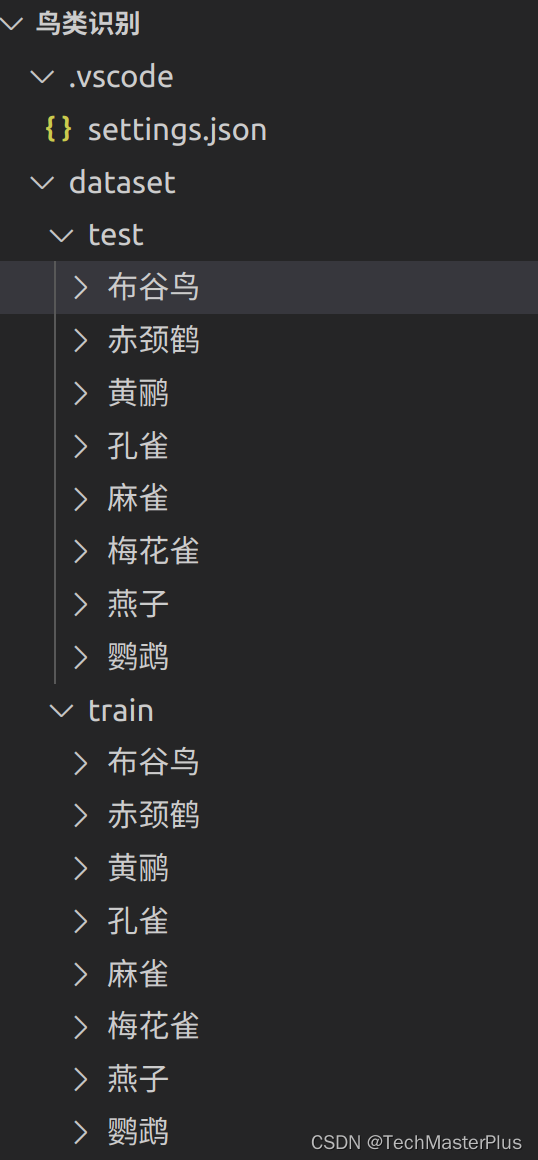
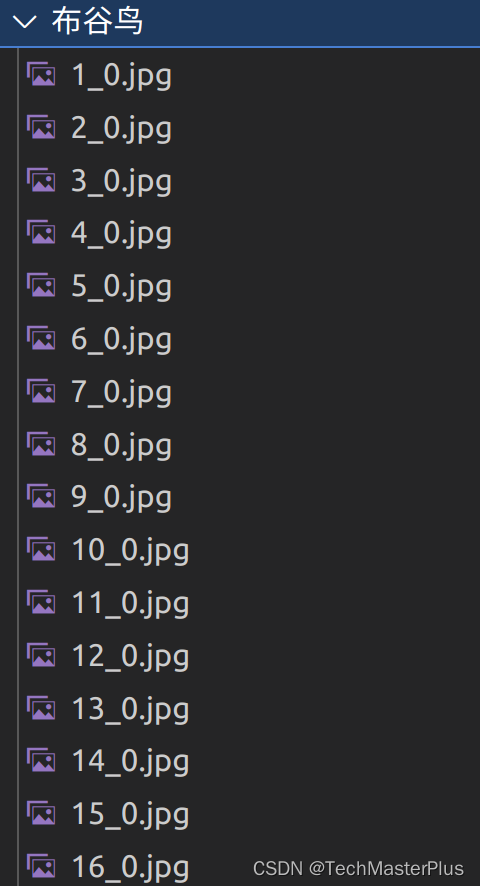
Under the cuckoo and other birds folders are several pictures of their own categories,
The following code is to load your own dataset, and the path uses a relative path
import torchvision.datasets as dsets
trainpath = './dataset/train/'
valpath = './dataset/test/'
trainData = dsets.ImageFolder (trainpath, transform =traintransform ) # 读取训练集,标签就是train⽬录下的⽂件夹的名字,图像保存在格⼦标签下的⽂件夹⾥
valData = dsets.ImageFolder (valpath, transform =valtransform )       #读取验证集
2. Data preprocessing, image enhancement and image standardization
Before the image is input into the network, image enhancement and image normalization are performed first, including random rotation, color change, uniform size, and conversion into tensor format. After preprocessing and normalization, the image can be input into the network normally.
The training set needs image enhancement, because the training set needs to update the model parameters during the training process, and the verification set does not need to update the model parameters in order to backpropagate the gradient. In order to enhance the generalization performance of the model, image enhancement is introduced.
import torchvision.transforms as transforms


#数据增强的方式
traintransform = transforms .Compose([
 transforms .RandomRotation (20),               #随机旋转角度
 transforms .ColorJitter(brightness=0.1),     #颜色亮度
 transforms .Resize([224, 224]),               #设置成224×224大小的张量
 transforms .ToTensor(),                        # 将图⽚数据变为tensor格式
# transforms.Normalize(mean=[0.485, 0.456, 0.406],
# std=[0.229, 0.224, 0.225]),
])


valtransform = transforms .Compose([
 transforms .Resize([224, 224]),
 transforms .ToTensor(), # 将图⽚数据变为tensor格式
])
3. Model Construction
Before image classification, a model needs to be built. In this article, in order to speed up convergence, the model resnet50 integrated in torchvision is used, and pre-trained weights are introduced:
The num_of_classes of the model here must be changed to the number you want to classify. Here there are eight folders for birds, and here it is set to 8
import torchvision.models as models
model = models.resnet50(pretrained=True) #pretrained表⽰是否加载已经与训练好的参数
model.fc = torch.nn.Linear(2048, num_of_classes) #将最后的fc层的输出改为标签数量(如3),512取决于原始⽹络fc层的输⼊通道
model = model.to(device) # 如果有GPU,⽽且确认使⽤则保留;如果没有GPU,请删除
4. Set hyperparameters such as optimizer, loss function, learning rate, etc.
criterion = torch.nn.CrossEntropyLoss() # 定义损失函数

optimizer = torch.optim.SGD(model.parameters(), lr=learning_rate) # 定义优化器

batch_size = 16 #设置批次大小 根据你电脑的显卡、显存 4/8 8/16/32/64

learning_rate = 1e-4 #设置学习率

epoches = 30 #设置训练的次数 //如果训练结束,精度不高 多训练几次 可以设置成8/9/10

num_of_classes=8 #要分的类别个数
5. Training and Validation
The general process is to pass the picture into the model, clear the gradient of the optimizer, calculate the loss, reverse the gradient, update the parameters, process the output, calculate the number of classified pictures, and finally calculate the training accuracy.
Pass the model, optimizer and loss function to the function train to start training:
#定义训练的函数
def train(model, optimizer, criterion):
    model.train()
    total_loss = 0
    train_corrects = 0
    for i, (image, label) in enumerate (tqdm(trainLoader)):
         image = Variable(image.to(device)) # 同理
         label = Variable(label.to(device)) # 同理
         #print(i,image,label)
         optimizer.zero_grad ()
         target = model(image)
         loss = criterion(target, label)
         loss.backward()
         optimizer.step()
         total_loss += loss.item()
         max_value , max_index = torch.max(target, 1)
         pred_label = max_index.cpu().numpy()
         true_label = label.cpu().numpy()
         train_corrects += np.sum(pred_label == true_label)
    return total_loss / float(len(trainLoader)), train_corrects / train_sum
The following is the verification function:
#定义测试的函数
def evaluate(model, criterion):
    model.eval()
    corrects = eval_loss = 0
    with torch.no_grad():
        for image, label in tqdm(testLoader):
            image = Variable(image.to(device)) # 如果不使⽤GPU,删除.cuda()
            label = Variable(label.to(device)) # 同理
            pred = model(image)
            loss = criterion(pred, label)
            eval_loss += loss.item()
            max_value, max_index = torch.max(pred, 1)
            pred_label = max_index.cpu().numpy()
            true_label = label.cpu().numpy()
            corrects += np.sum(pred_label == true_label)
    return eval_loss / float(len(testLoader)), corrects, corrects / test_sum
6. Forecast
First prepare the label
list=['孔雀', '布谷鸟', '梅花雀', '燕子', '赤颈鹤', '鹦鹉', '麻雀', '黄鹂']
set device
if(torch.cuda.is_available()):

    device=torch.device('cuda')

else:

    device=torch.device('cpu')
Load the trained model
model=torch.load("./resnet50_bird.pt",map_location=device)#加载模型Image normalization, passed to the trained model
model.eval()

transformer = transforms.Compose([

transforms.Resize((224,224)),

transforms.ToTensor(), # 把PIL核np.array格式的图像转化为Tensor

])

#预测图片的路径

filename="./3_0.jpg"

image=Image.open(filename)

img=transformer(image)

img= img.unsqueeze(0).to(device)

pred=model(img)
Handle the predicted results
max_value, max_index = torch.max(pred, 1)

# print(max_index,max_value)

print("结果是:"+list[int(max_index.cpu().numpy()[0])])

image.show()