foreword
Sometimes there are some public methods that need to be placed on the server and used on different computers. But do we have our own server, so we consider putting public methods on cloud platforms such as Tencent Cloud, Huawei Cloud, Alibaba Cloud, Baidu Cloud, etc., so that they can be reused on different computers.
We are using Tencent Cloud here, and the programming language of the function is python, and the calling language is also python. Here is a special explanation, no matter what language our function is written in, it can be called in python, and it has nothing to do with the language. Conversely, functions written in python can also be called in any language.
1. Activate the function of Tencent Cloud
1. First, enter the official website of Tencent Cloud, register an account of your own, and pass the real-name verification. The official website is as follows: https://cloud.tencent.com/
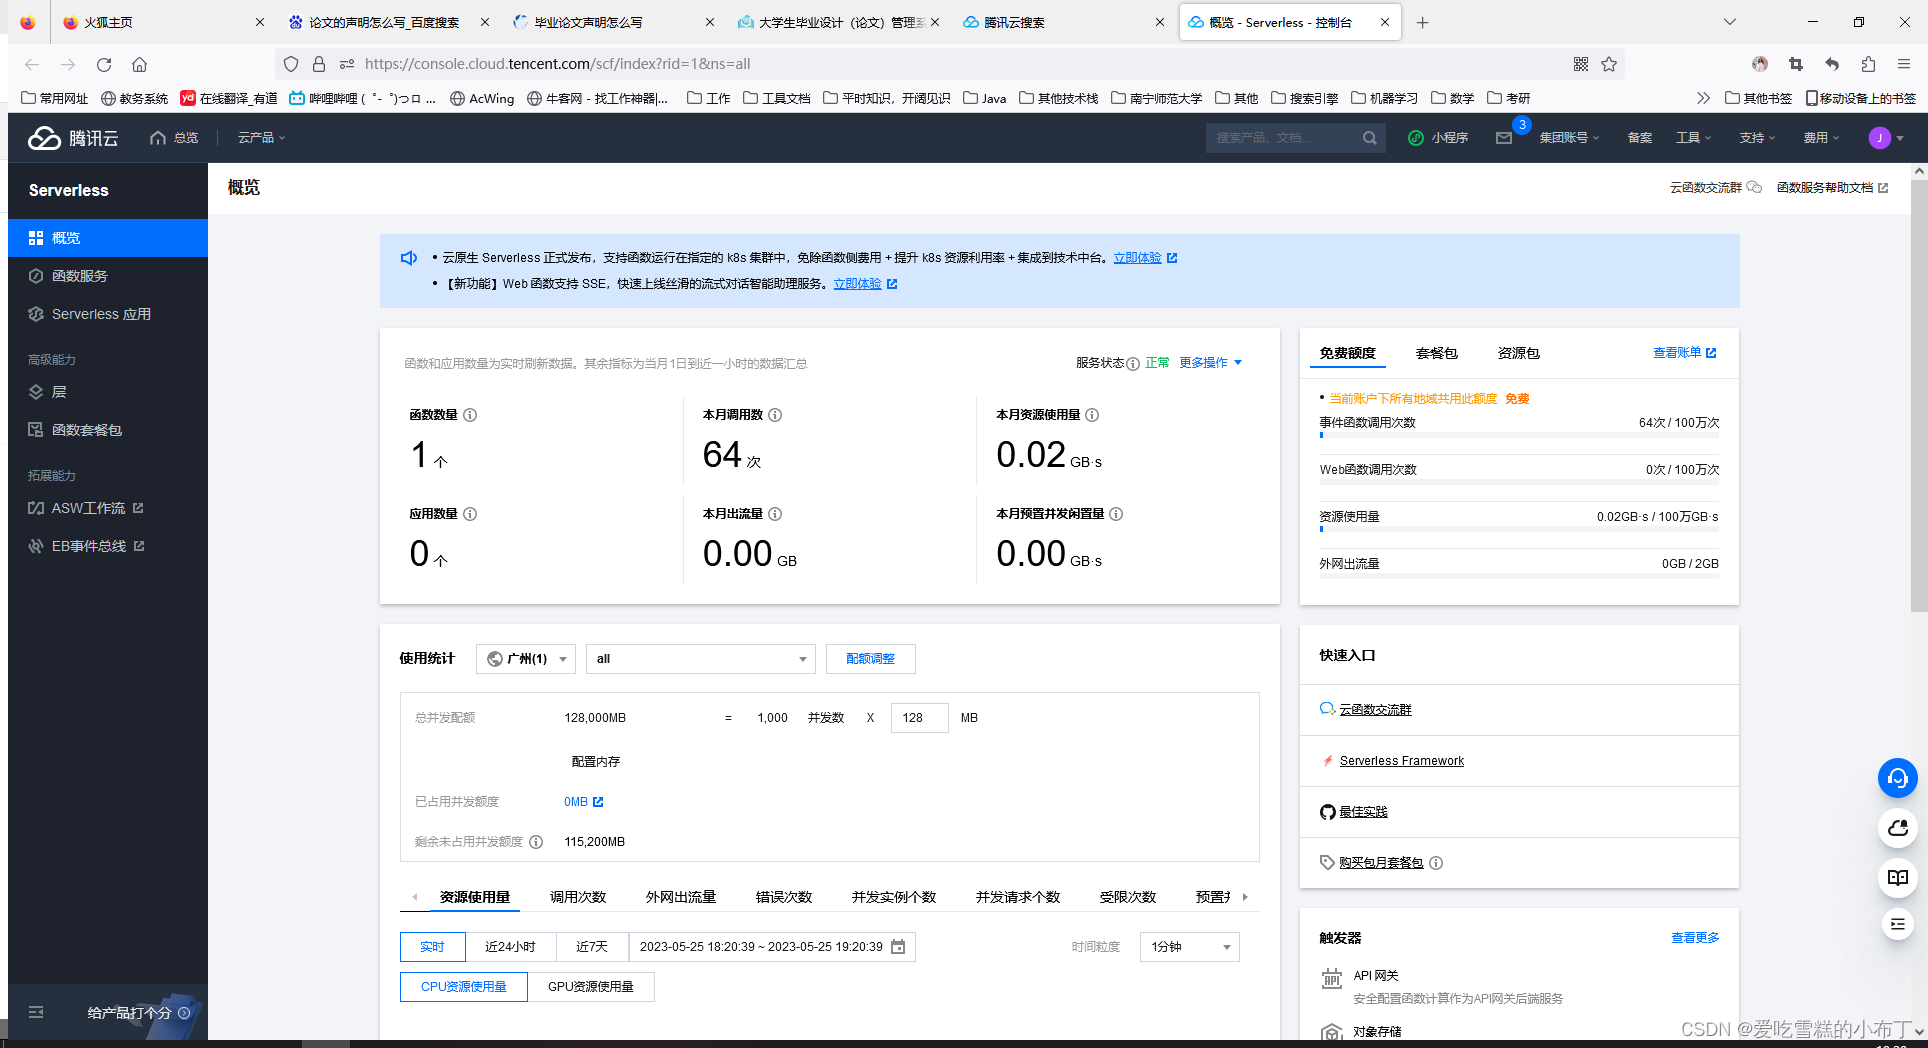
2. Enter cloud function in the search box to enter the cloud function console, as shown in the figure:
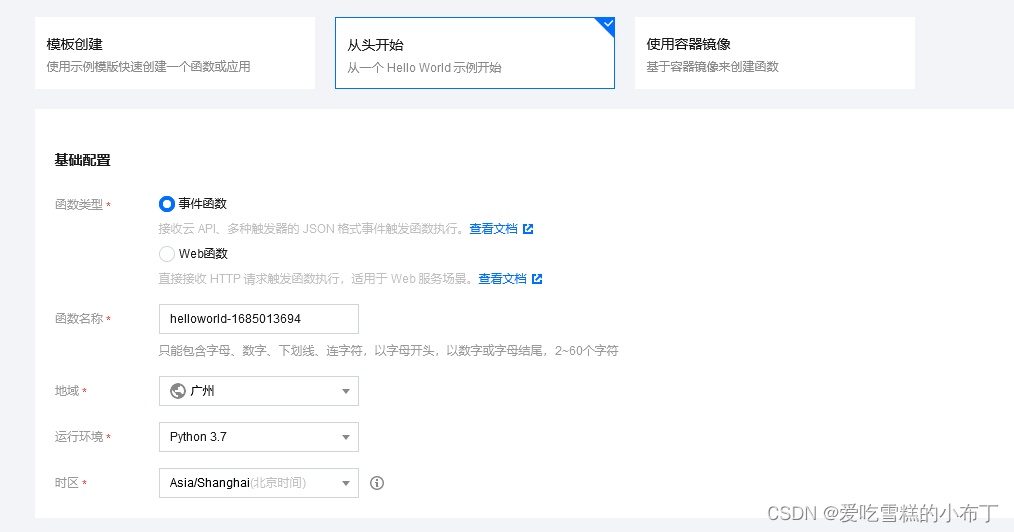
3. Click 函数服务and click New to enter the new cloud function page, as shown in the figure:
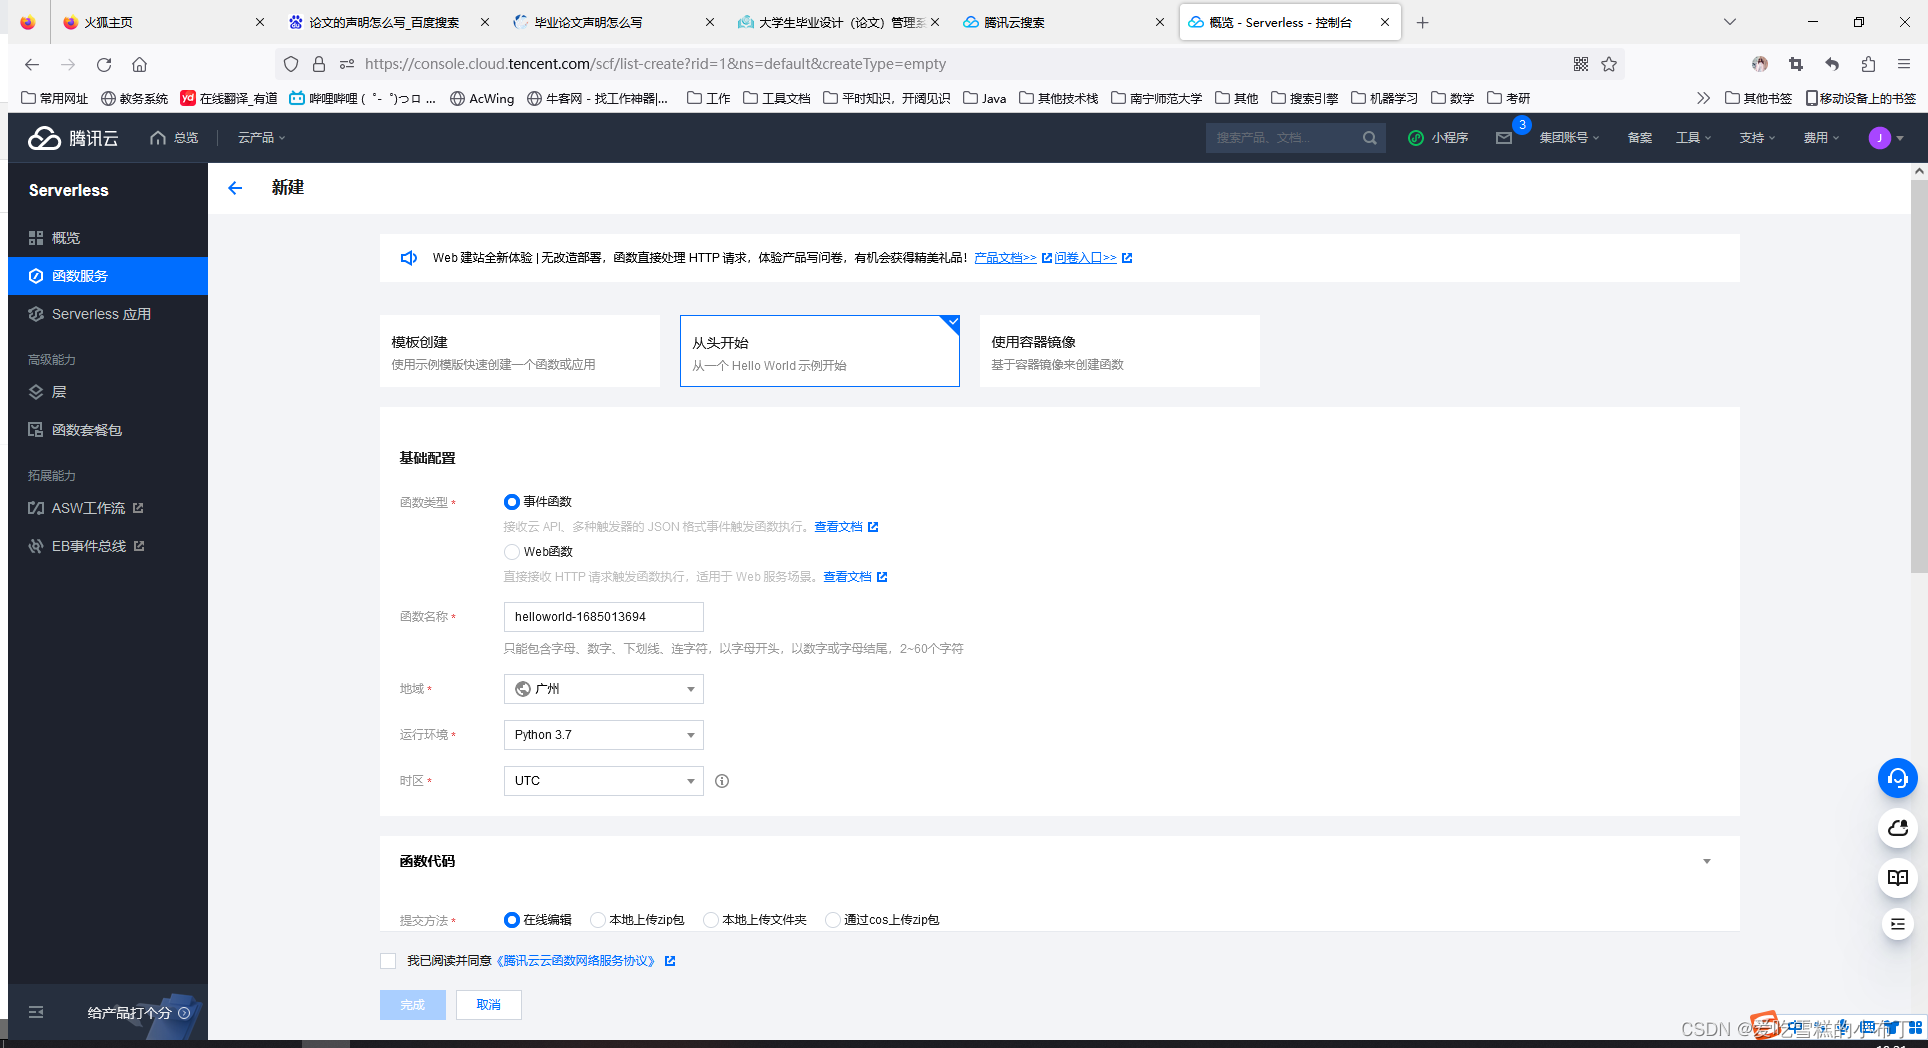
4. The first is the basic configuration . Enter some information about cloud functions, function type selection 事件函数, function name 自己填, and region. I choose here 广州, depending on your actual needs, operating environment selection python 3.7, and time zone selection 北京时间, as shown in the figure:
5. The function code is defaulted first, and will be changed later.
6. Check the log configuration to enable it, which is convenient to check the status of each call. If the user role does not have permission, you can click the shortcut link to configure the permission.
7. The advanced configuration can be set by default, or you can configure it yourself according to your needs.
8. The trigger configuration is not configured by default first, and then configured later.
9. Check Agree, click Finish, and the cloud function is created, as shown in the figure:

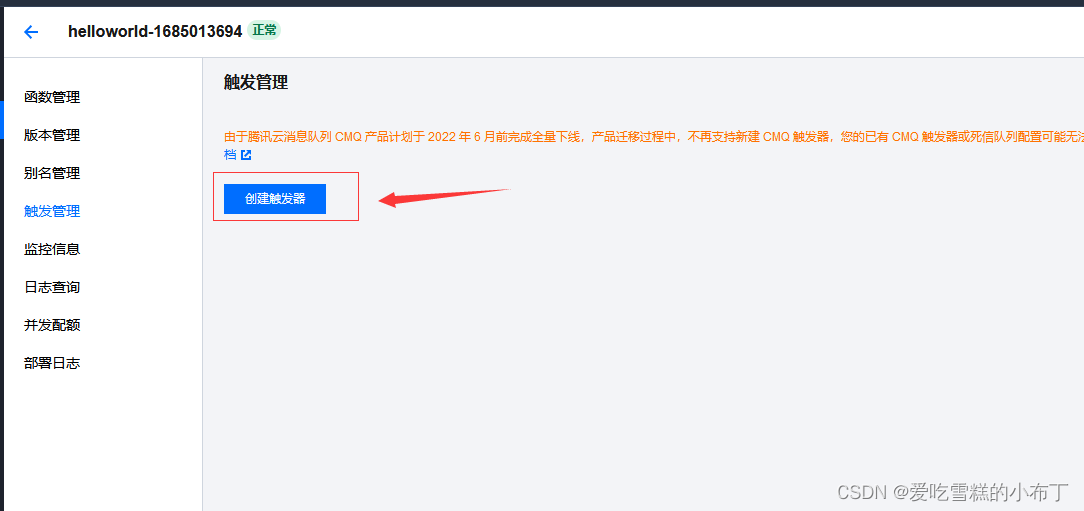
10. Double-click to enter the function configuration page, click on the trigger, we need to add a trigger, otherwise the cloud function cannot be called through the url, click to create a trigger, as shown in the figure:
The configuration is the same as mine here, here are two points to pay special attention to:
(1) Trigger method: choose the API gateway trigger, that is, call through the url (if there is no permission, just follow the link he gave to authorize)
( 2) Integrated response: This must be checked, otherwise the data in json format cannot be transmitted
. After configuration, click Submit.

Wait for more than ten seconds, the trigger is created, as shown in the figure:

The access path at the bottom is the url link that we call the cloud function. If we access it directly in the browser, an access error will be displayed, as shown in the figure:

Because what we set is to pass the data in json format, and our code returns a Hello Worldstring , so there will be an access error. If we uncheck it when creating the trigger 集成响应, the string will be returned normally without error.
At this point, the cloud function is created
2. Write cloud function code
Everyone's business logic is different. There is nothing to say here. I mainly talk about how to get the json data passed from the local and return the json data to the local.
Here we simulate receiving the user name and password passed by the user login to judge whether they are correct.
2.1 Get the json data from the local
We call Tencent Cloud functions through the requests library in the local python code, so the passed parameters must be placed in the body of the request header (you can find the key-value pairs corresponding to the data in the log), and we can get them through eventvariables The value of body eventis a request header dictionary, the code is as follows:
# -*- coding: utf8 -*-
import json
def main_handler(event, context):
    print("Received event: " + json.dumps(event, indent = 2))
    print("===============================")
    print("Received context: " + str(context))

    # 拿到本地python传来的参数,并装换为字典格式
    json_params = json.loads(event.get("body"))

    print("--------------------------")
    print(json_params)
If the json string we passed locally is:
{

    "user_name": "admin", "password": "123456"}
Then json_paramsthe variable is {"user_name": "admin", "password": "123456"}a dictionary variable whose value is , and we can easily get the value inside.
2.2 Encapsulate json data and return it to the local program
Encapsulate according to the format I gave me, just return it directly, the code is as follows:
# -*- coding: utf8 -*-
import json
def main_handler(event, context):
    # 封装为特定的数据给腾讯的统一出口
    ret = {


        "isBase64Encoded": False,
        "statusCode": 200,
        "headers": {

    "Content-Type": "application/json", "Access-Control-Allow-Origin": "*"},
        "body": json.dumps({

    "user_name": "admin", "password": "123456"})
        }

    return ret
In this way, json data can be returned to the local program.
2.3 Complete code
# -*- coding: utf8 -*-
import json
def main_handler(event, context):
    print("Received event: " + json.dumps(event, indent = 2))
    print("===============================")
    print("Received context: " + str(context))

    # 拿到qt传来的参数
    json_params = json.loads(event.get("body"))
    print("--------------------------")
    print(json_params)

    # 获取用户名和密码
    user_name = json_params.get("user_name")
    print("用户名为:", user_name)
    password = json_params.get("password")
    print("密码为:", password)

    # 模拟查询数据库
    if user_name == "admin" and password == "123456":
        login_ret = {

    "errno": 0, "errmsg": "登录成功"}
    else:
        login_ret = {

    "errno": 1001, "errmsg": "登录失败!您输入的用户名密码为%s:%s 正确的用户名密码为:admin:123456" %
        (user_name, password)}


    # 封装为特定的数据给腾讯的统一出口
    ret = {


        "isBase64Encoded": False,
        "statusCode": 200,
        "headers": {

    "Content-Type": "application/json", "Access-Control-Allow-Origin": "*"},
        "body": json.dumps(login_ret)
        }

    return ret
3. Local programs call cloud functions
Install requeststhe module :
pip install requests -i https://pypi.douban.com/simple
Use postthe request to call the cloud function, the code is as follows:
r = requests.post(url='https://service-q82pfbii-1318381894.gz.apigw.tencentcs.com/release/qt_login', json={

    "user_name": "admin", "password": "123456"})

ret = r.json() # 获取返回的json数据 ({"errno": 0, "errmsg": "登录成功"})
After obtaining the returned data, you can continue to execute the following logic. If it is helpful to you, I hope you can click three times! ! !