1. Download Openwrt firmware
Find the firmware by yourself, each has its own preferences, so I won’t recommend it blindly here
2. PVE upload firmware

Follow the steps in the above figure to select the upload file. Don’t rush to close the upload success interface. Because you need to copy the path
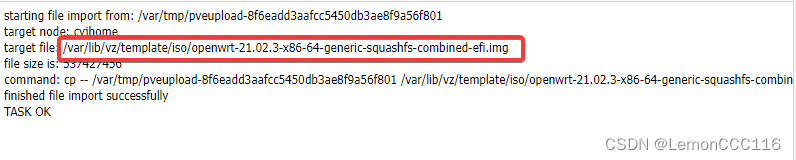
The steps after copying the address in the red box will be used
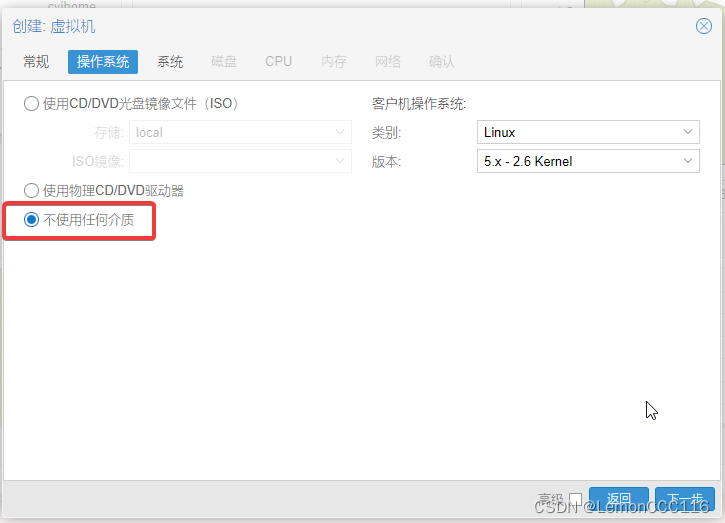
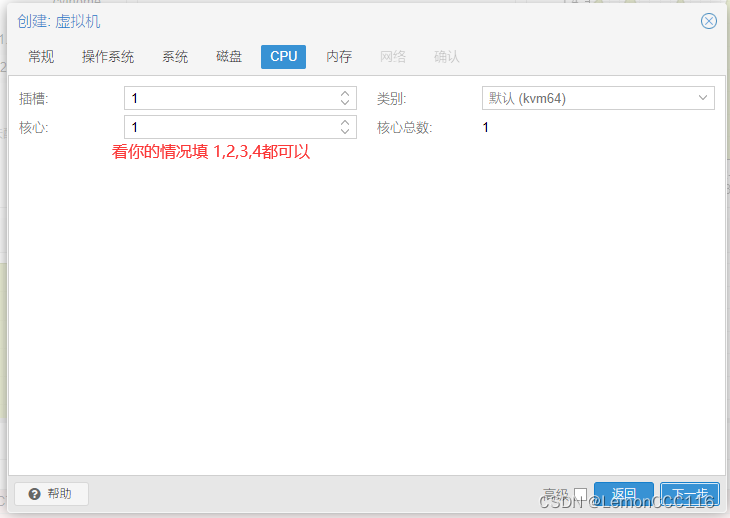
3. Create a virtual machine (the steps without textures can be kept as default)


Remember the id of the virtual machine, which will be used in the next steps
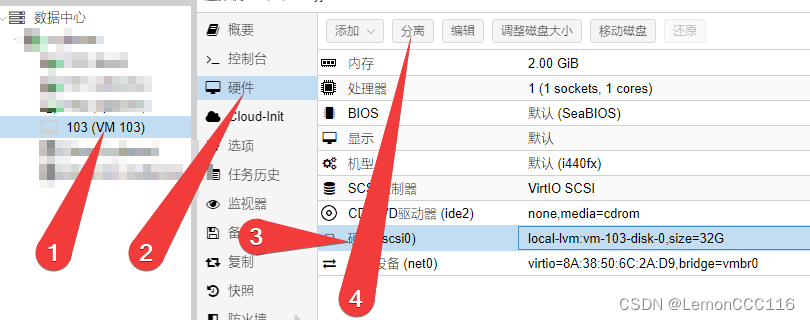
Separate this disk, because it is not needed, we install openwrt by flashing the disk, and there will be one more disk after flashing, so as to avoid confusing the boot items, so we are going to separate and delete
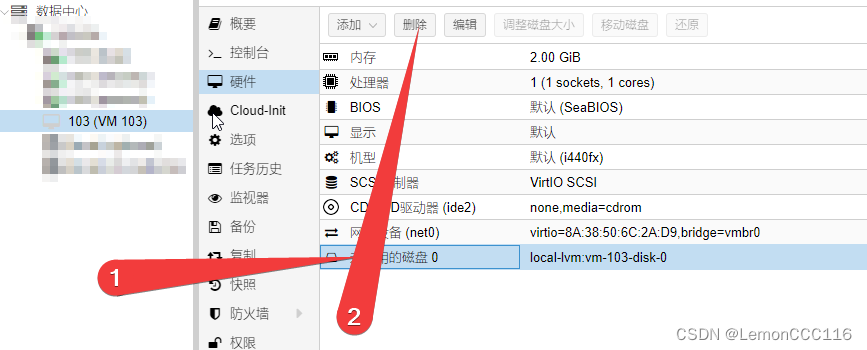
Delete to proceed to the next step
4. Brush into the openwrt firmware

Enter the shell of the root node first
Enter the command line
qm importdisk 你的vmid 你的固件位置 local-lvm
#下面是例子,不必照抄,照抄应该也不对,vmid以及固件位置都是之前步骤提到过的.
qm importdisk 102 /var/lib/vz/template/iso/openwrt-21.02.3-x86-64-generic-squashfs-combined-efi.img local-lvm
Enter to execute
![]()
The output is correct. For other outputs, please check the problem by yourself, or leave a message and private message me
 (3) It points to the disk generated by the command line just now, double-click it, and click Add. This becomes the "C drive" of openwrt
5. Modify the boot item and start Openwrt

Enter the option, you can tick it from the start, cancel other irrelevant ticks in the boot sequence, and only leave the tick of the hard disk you just added to start the virtual machine
6. Start openwrt and configure
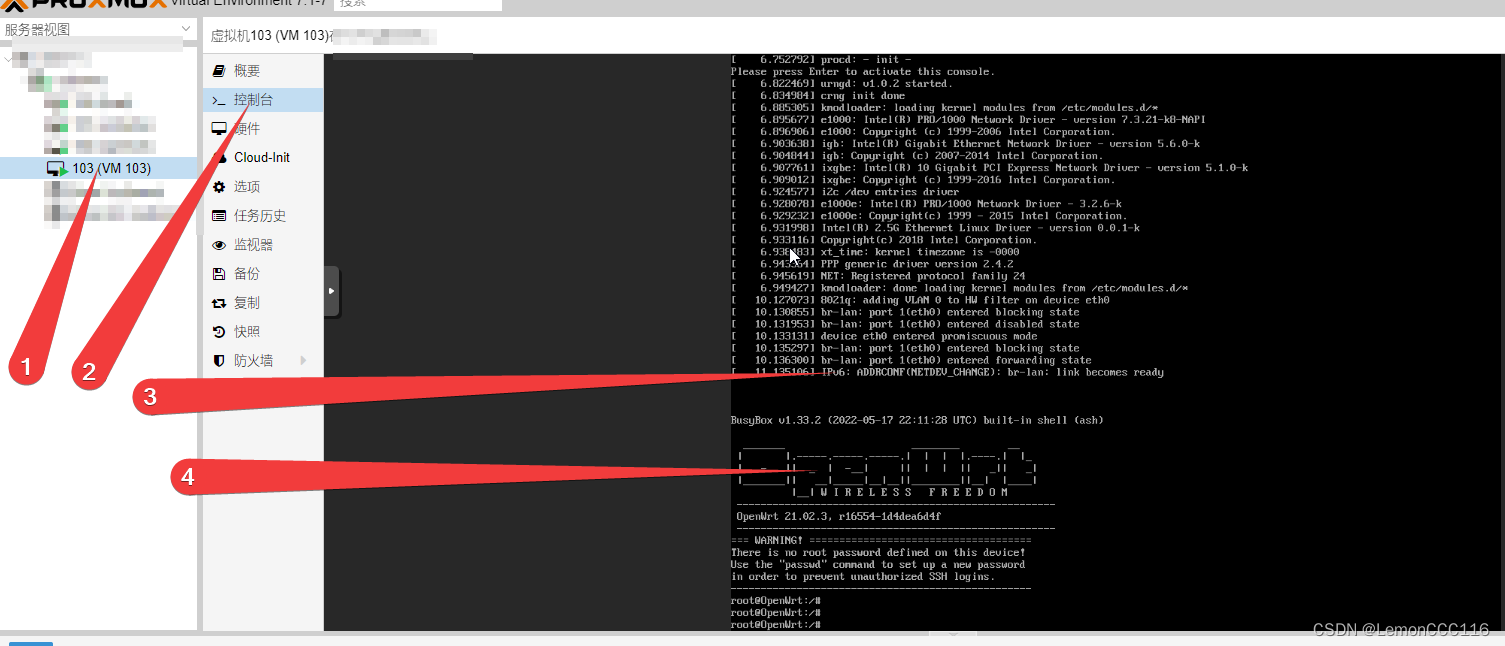
If you can see 4 directly, it means that the startup is successful. If you can’t see it, then press Enter at the place of 3. Then you can see 4, which means it is successful, and go to the next step
7. Modify the network segment and restart
Type the command line on the current page
vim /etc/config/network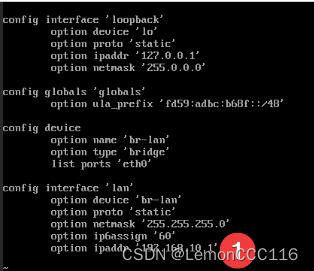
Use the arrow keys to control the cursor, press i to start editing, and change the IP address at position 1 to your favorite IP address
Then press Esc first, you can press it several times, and the input colon wq will be displayed as (:wq)

Press enter to save and exit
Then you need to restart the network service or restart openwrt, enter the command
rebootto restart
After restarting, you can enter the openwrt background through the ip address you just set, and then set the next step
8. Configure the bypass route
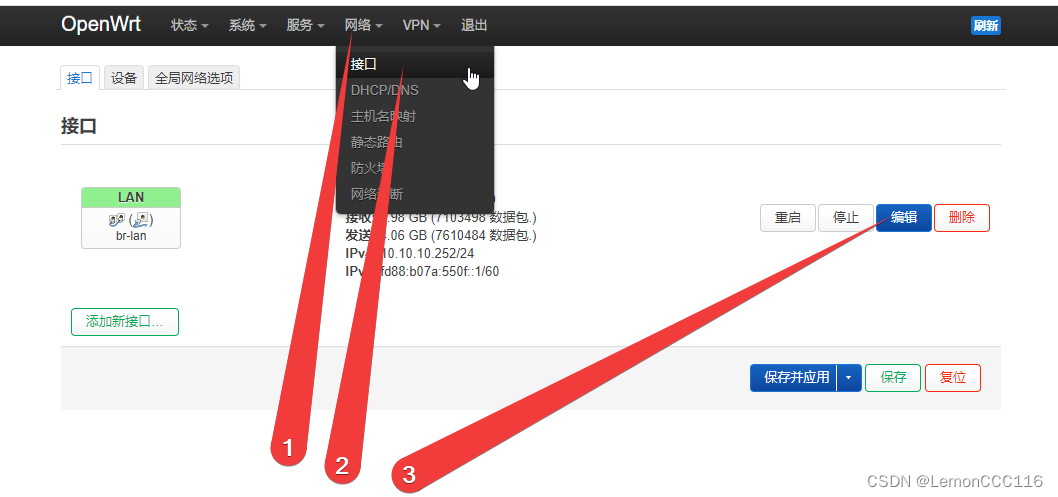
Delete redundant useless interfaces, leaving only Lan, because the bypass route only needs Lan, click edit


Tick ignore this interface
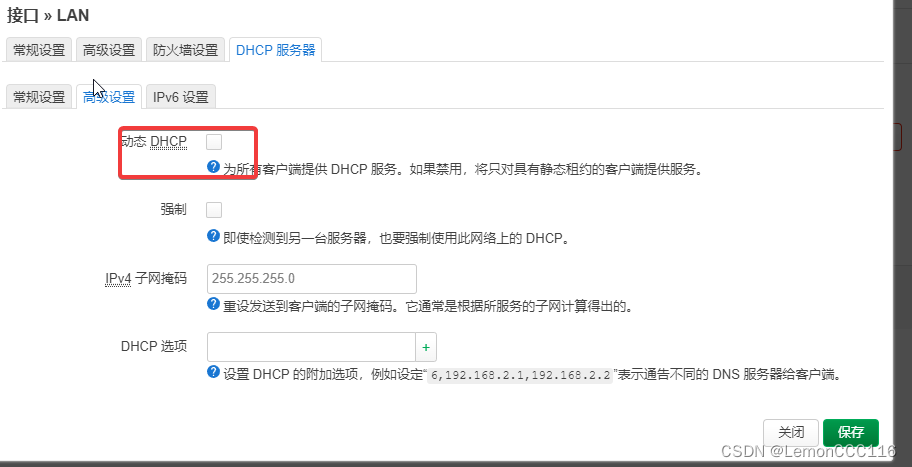
Uncheck Dynamic DHCP
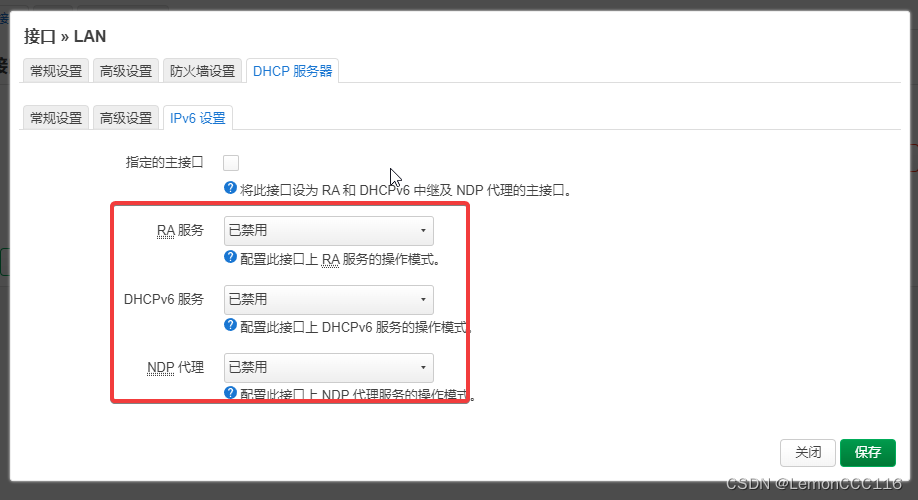
turn off ipv6

save and apply
The gateway of the main route is set to the ip address of openwrt to complete the configuration
9. So far, the bypass route setting of openwrt is over
You can start surfing the Internet happily and install various plug-ins