Article Directory
Preconditions
The K8S installation process has been completed Ten: Kubernetes CNI plug-in and CoreDNS service deployment
Two command-line tools, helm and kubectl, are used to deploy the istio service grid and Ingress service. This command-line tool relies on the ~/.kube/config configuration file. Currently, this file is only generated in the kubernetes master node.
The following operations are performed on the Kubernetes Master node.
1. Deploy the istiod service
1.1 Set up the helm warehouse
helm repo add istio https://istio-release.storage.googleapis.com/charts
helm repo update
1.2 install istio
- Create the istio namespace
kubectl create namespace istio-system
- Deploy the istio service
helm install istio-base istio/base -n istio-system
helm install istiod istio/istiod -n istio-system --wait
2. Deploy the Ingress service
2.1 install ingress
kubectl create namespace istio-ingress
kubectl label namespace istio-ingress istio-injection=enabled
helm install istio-ingress istio/gateway -n istio-ingress --wait
2.2 Modify ingress svc configuration
kubectl edit svc istio-ingress -n istio-ingress

As shown in the red box in the figure below, replace the value of type with NodePort. In addition, modify the port information in the ports configuration. Subsequent external services access services inside the Kubernetes cluster will be accessed through the above two ports, one for the http protocol and the other for the https protocol.
2.3 Restart the istio-ingress service
After saving the modified configuration file above, the service will restart automatically. If not, you can restart the ingress service manually.
kubectl rollout restart deployment istio-ingress -n istio-ingress
2.4 Modify HAProxy configuration
Modify /etc/haproxy/haproxy.cfgthe file and add the following content. (Note that appending is not overwriting, do not delete the previously configured kuber-apiserver load balancing configuration)
frontend http-web
        bind *:80
        mode tcp
        option tcplog
        default_backend http-web-backend

backend http-web-backend
        mode tcp
        option tcplog
        balance roundrobin
        default-server inter 10s downinter 5s rise 2 fall 2 slowstart 60s maxconn 250 maxqueue 256 weight 100
        server k8s-http-145 192.168.0.145:30080  check
        server k8s-http-200 192.168.0.200:30080  check

frontend https
        bind *:443
        mode tcp
        option tcplog
        default_backend https-backend

backend https-backend
        mode tcp
        option tcplog
        balance roundrobin
        default-server inter 10s downinter 5s rise 2 fall 2 slowstart 60s maxconn 250 maxqueue 256 weight 100
        server k8s-https-145 192.168.0.145:30443  check
        server k8s-https-200 192.168.0.200:30443  check
192.168.0.145 and 192.168.0.200 in the above configuration are the IP addresses of the Kubernetes Master nodes. Ports 30080 and 30443 are nodeport ports set in Section 2.2.
2.5 Restart the haproxy service
systemctl restart haproxy
Restart all HAProxy nodes. After the restart is complete, the traffic accessed on port 80 and port 443 can be forwarded to ports 30080 and 30443, thereby introducing external traffic to the Ingress service inside the Kubernetes container cluster. Ingress forwards the traffic to a specific container service according to the forwarding rules, realizing the process of external clients accessing the internal services of the container.
2.6 Create Ingress forwarding rules
- create
gateway.yamlfile
apiVersion: networking.istio.io/v1alpha3
kind: Gateway
metadata:
  name: admin-gateway
  namespace: istio-system
spec:
  selector:
    istio: ingress
  servers:
  - port:
      number: 1080
      name: http-gateway
      protocol: HTTP
    hosts:
    - "kiali.域名.com"
    - "grafana.域名.com"
    - "jaeger.域名.com"
    - "prometheus.域名.com"
  - port:
      number: 3443
      name: https-gateway
      protocol: HTTPS
    tls:
      mode: PASSTHROUGH
    hosts:
    - "harbor.域名.com"
    - "dashboard.域名.com"
In the above configuration *.域名.comis a subdomain name, you can apply for a domain name, and then use DNS to resolve the subdomain name to the Kubernetes Master node or the IP address of the load balancer.这一步需要在你的域名供应商管理后台设置域名解析规则。否则后续的操作无法进行。如果还没有域名的同学,则无法通过域名来设置 Ingress 转发规则。
- Create Gateway service
kubectl apply -f gateway.yaml
3. Deploy service mesh management tools
The management tools supporting the service grid istio include kiali, grafana, jaeger, prometheus, etc. The following uses the istio plug-in to deploy these management tools. The parameters of the management tools deployed in this way are relatively general and not suitable for large-scale production environments. If deploying these service mesh management tools in a production environment, parameters should be optimized.
3.1 Deploy the service grid management tool Kiali
- Deploy the Kiali service
yum install socat -y
kubectl apply -f https://raw.githubusercontent.com/istio/istio/release-1.16/samples/addons/kiali.yaml
- Create kiali-vs.yaml file
apiVersion: networking.istio.io/v1alpha3
kind: VirtualService
metadata:
  name: kiali-vs
  namespace: istio-system
spec:
  hosts:
  - kiali.域名.com
  gateways:
  - admin-gateway
  http:
  - route:
    - destination:
        host: kiali
        port:
          number: 20001
- Deploy Kiali Virtual Service
kubectl apply -f kiali-vs.yaml
3.2 Deploy the service grid visualization tool Grafana
- Deploy Grafana
kubectl apply -f https://raw.githubusercontent.com/istio/istio/release-1.16/samples/addons/grafana.yaml
- create
grafana-vs.yamlfile
apiVersion: networking.istio.io/v1alpha3
kind: VirtualService
metadata:
  name: grafana-vs
  namespace: istio-system
spec:
  hosts:
  - grafana.域名.com
  gateways:
  - admin-gateway
  http:
  - route:
    - destination:
        host: grafana
        port:
          number: 3000
- Create Grafana VirtualService
kubectl apply -f grafana-vs.yaml
3.3 Deploy the service grid call chain detection tool Jaeger
- Deploy the Jaeger service
kubectl apply -f https://raw.githubusercontent.com/istio/istio/release-1.16/samples/addons/jaeger.yaml
- create
jaeger-vs.yamlfile
apiVersion: networking.istio.io/v1alpha3
kind: VirtualService
metadata:
  name: jaeger-vs
  namespace: istio-system
spec:
  hosts:
  - jaeger.域名.com
  gateways:
  - admin-gateway
  http:
  - route:
    - destination:
        host: tracing
        port:
          number: 80
- Create a Jaeger VirtualService service
kubectl apply -f jaeger-vs.yaml
3.4 Deploy the service grid detection tool Prometheus
- Deploy Prometheus
kubectl apply -f https://raw.githubusercontent.com/istio/istio/release-1.16/samples/addons/prometheus.yaml
- create
prometheus-vs.yamlfile
apiVersion: networking.istio.io/v1alpha3
kind: VirtualService
metadata:
  name: prometheus-vs
  namespace: istio-system
spec:
  hosts:
  - prometheus.域名.com
  gateways:
  - admin-gateway
  http:
  - route:
    - destination:
        host: prometheus
        port:
          number: 9090
- Create a Prometheus VirtualService service
kubectl apply -f prometheus-vs.yaml
4. Check whether istiod and ingress are deployed successfully
kubectl get pods -A

5. Log in to Kiali to view the service mesh
Type in your browser http://kiali.域名.comto access the Kiali service. The effect diagram is as follows:
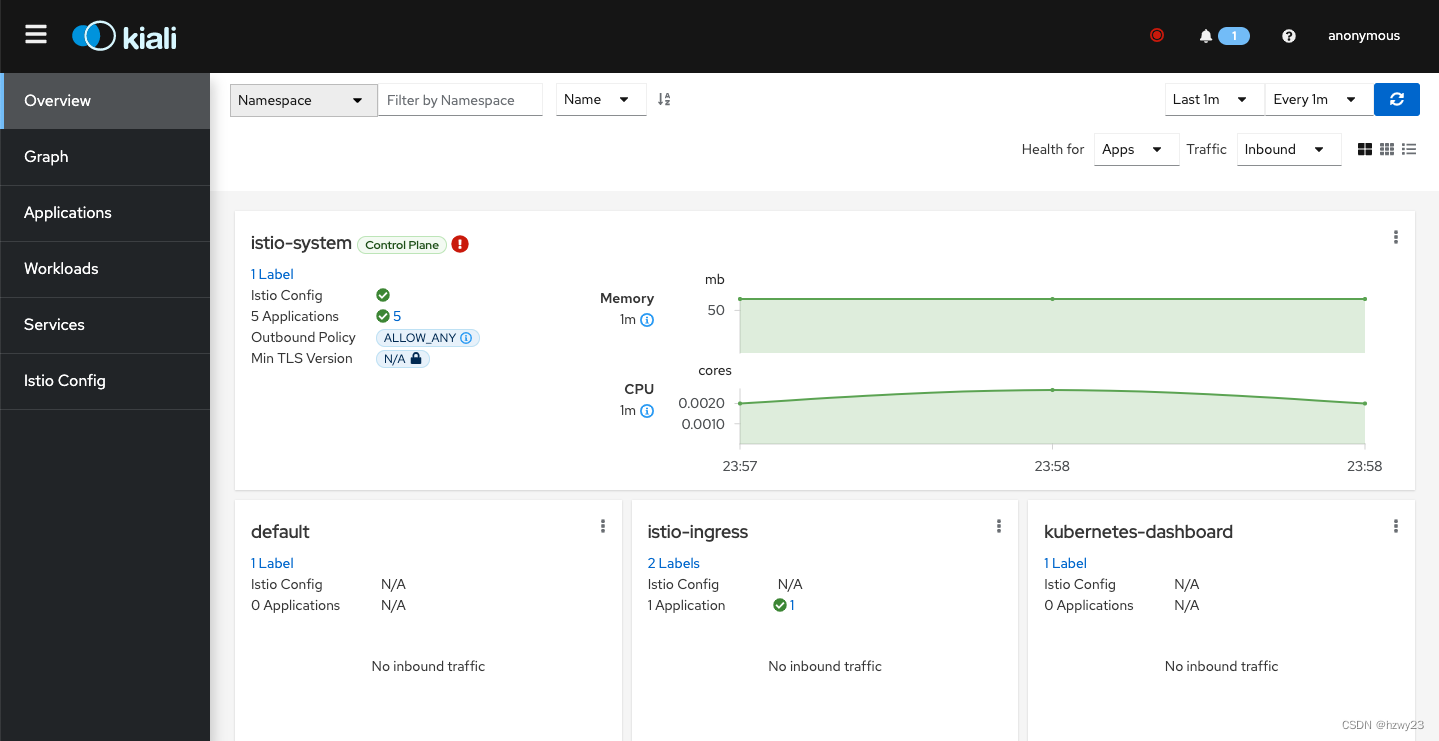
When installed by default, Kiali does not set an account password, and directly logs in and accesses anonymously. If you use Kiali to manage the service grid in a production environment or an organization with relatively standardized management, you can add authentication services by modifying the Kiali configuration. . Configuration information can be viewed in ConfigMap.

- jaeger address: http://jaeger.domain name.com
- prometheus address: http://prometheus.domain name.com
- grafana address: http://grafana.domain name.com
- dashboard address: https://dashboard.domainname.com
6. Deploy the kubernetes dashboard
- Deploy kubernetes service
kubectl apply -f https://raw.githubusercontent.com/kubernetes/dashboard/v2.7.0/aio/deploy/recommended.yaml
- Create user and authorize
kubectl create serviceaccount dashboard-admin -n kubernetes-dashboard
kubectl create clusterrolebinding dashboard-admin-rb --clusterrole=cluster-admin --serviceaccount=kubernetes-dashboard:dashboard-admin
- Obtain the token for logging in to the kubernetes dashboard
kubectl -n kubernetes-dashboard create token dashboard-admin
- Create the dashboard-vs.yaml file
apiVersion: networking.istio.io/v1alpha3
kind: VirtualService
metadata:
  name: dashboard-vs
  namespace: istio-system
spec:
  hosts:
  - "dashboard.域名.com"
  gateways:
  - admin-gateway
  tls:
  - match:
    - sniHosts:
      - "dashboard.域名.com"
    route:
    - destination:
        host: kubernetes-dashboard.kubernetes-dashboard.svc.cluster.local
        port:
          number: 443
      weight: 100
- Create dashboard VirtualService
kubectl apply -f dashboard-vs.yaml
- visit dashboard
https://dashboard.域名.com
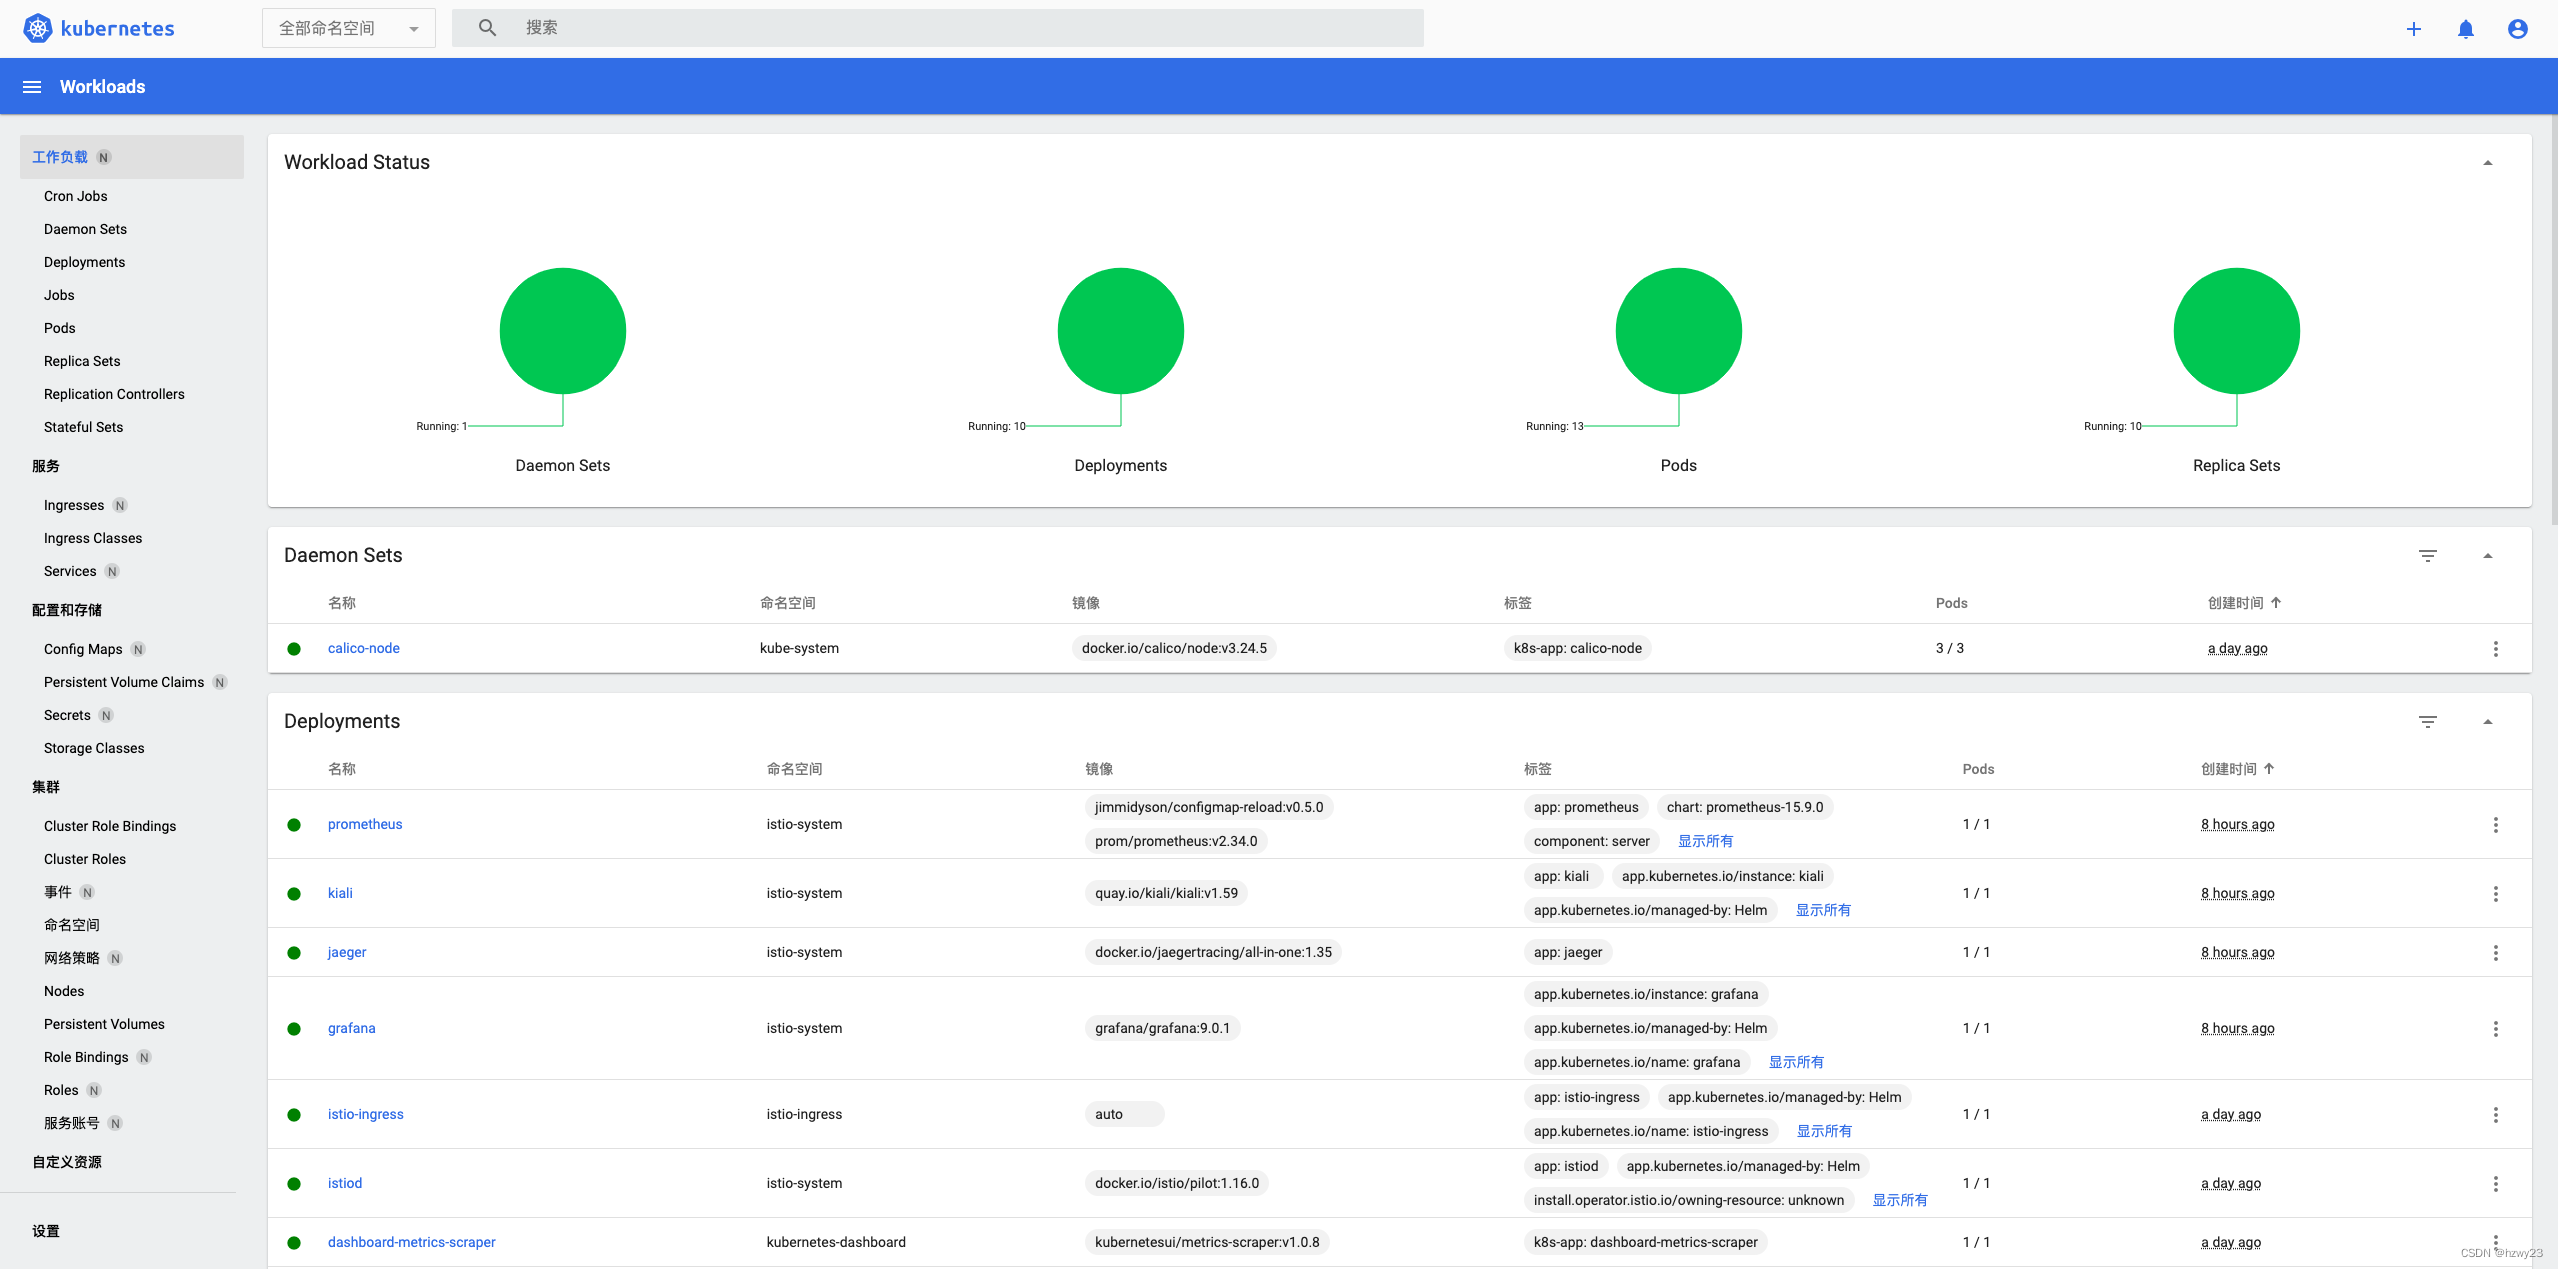
Note that the dashboard uses the https protocol. The effect diagram is as follows:

- Get dashboard login token
kubectl -n kubernetes-dashboard create token dashboard-admin
- Login system renderings
7. Abnormal problem handling
7.1 kiali cannot connect to kubernetes apiserver
- Problem Description
unable to proxy Istiod pods. Make sure your Kubernetes API server has access to the Istio control plane through 8080 port
- Solution:
yum install socat -y