Hadoop fully distributed cluster construction
The environment used to build a fully distributed cluster this time is:
jdk1.8.0
hadoop-2.7.7
The environment required to build a cluster this time is also prepared for you. The download link address: https://share.weiyun.com/dk7WgaVk
Password :553ubk
This fully distributed cluster construction needs to establish three virtual machines in advance, and I named their host names as: master, slave1, slave2
1. Configure password-free login
First, we need to realize mutual ssh password-free login between the three virtual machines and
operate on the master virtual machine:
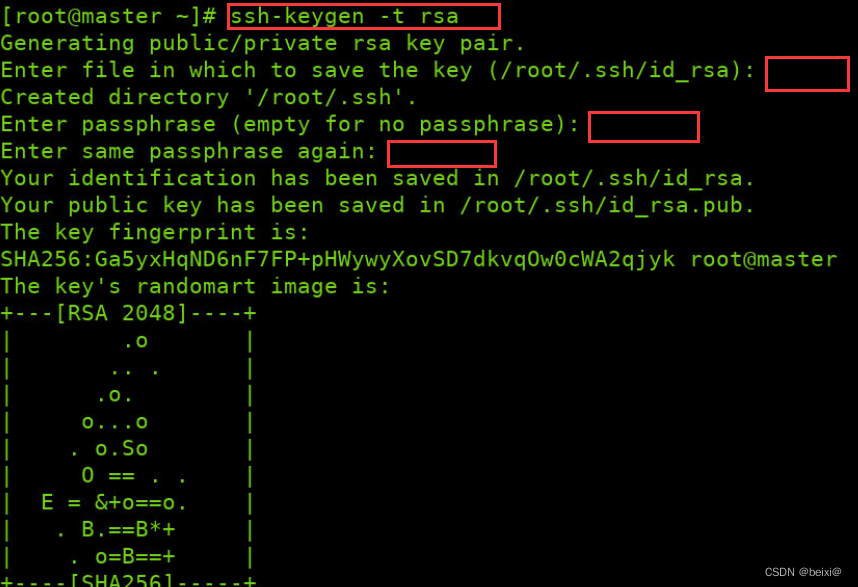
1. Create an ssh secret key, enter the following command to generate a public and private key, and press Enter in the three red boxes below
ssh-keygen -t rsa
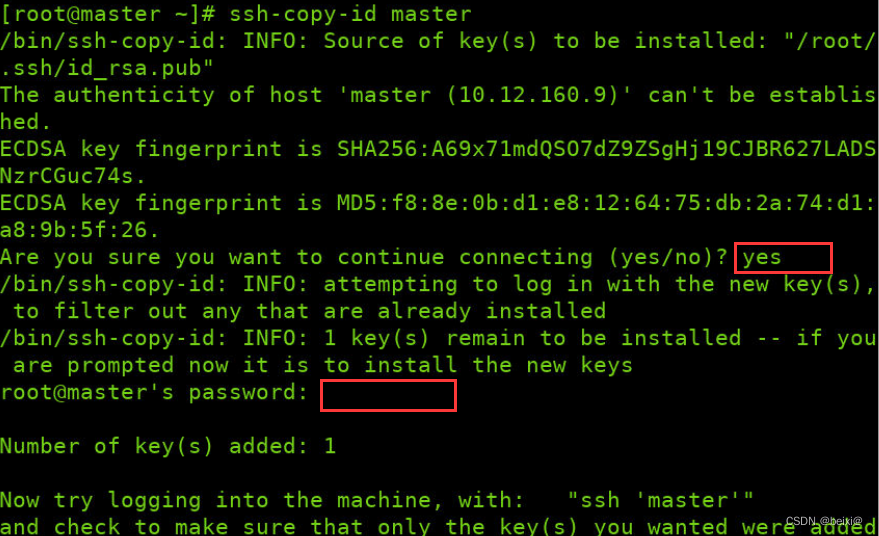
2. Copy the public key to this machine to realize password-free login, enter yes in the first red box position, and enter the login password of your own virtual machine in the second red input position
ssh-copy-id master
Same as the above operation, we implement the secret-free login of the master to slave1 and slave2 in the master
ssh-copy-id slave1
ssh-copy-id slave2
In the same way, we enter the slave1 and slave2 virtual machines respectively, and perform the same operations above
ssh-copy-id master
ssh-copy-id slave1
ssh-copy-id slave2
The three virtual machines need to perform 3*3=9 password-free login operations in total
Then we make changes to the /etc/hosts file on the master virtual machine and set up IP mapping
vi /etc/hosts
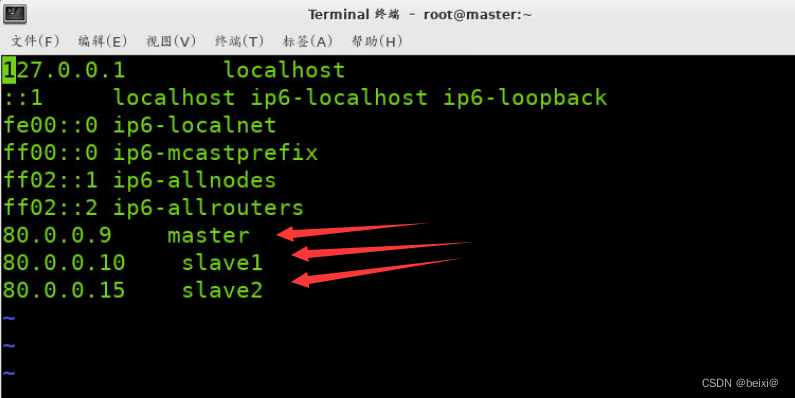
We add the ip addresses and host names of the three virtual machines as shown in the figure, and type: wq to save and exit ]
Similarly, we switch to the slave1 and slave2 virtual machines to make the same modification to the /etc/hosts file. save and exit
2. Configure the java environment
1. We configure the java environment on the master host.
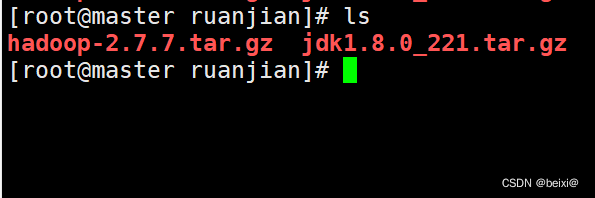
First, decompress the jdk compressed file in the virtual machine environment to the /opt directory.
tar -zxvf ~/ruanjian/jdk1.8.0_221.tar.gz -C /opt
Enter the /opt directory and rename the decompressed file to java
cd /opt
mv jdk1.8.0_221 java
Next modify the environment variable
vi /etc/profile
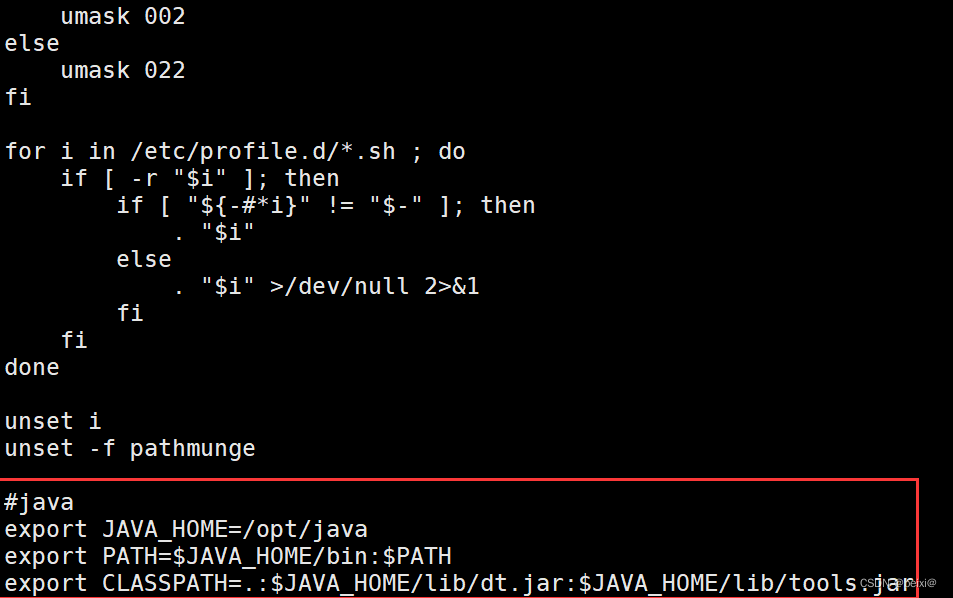
Enter the file Press GG to enter the last line of the configuration file, add the following information:
export JAVA_HOME=/opt/java  #你java路径是啥这里就填啥
export PATH=$JAVA_HOME/bin:$PATH
export CLASSPATH=.:$JAVA_HOME/lib/dt.jar:$JAVA_HOME/lib/tools.jar
:wq save configuration information
Then we take effect configuration information
source /etc/profile
Finally, verify whether the java environment is configured successfully
java -version
As shown in the figure, the java version number is correctly displayed, and the configuration is successful~

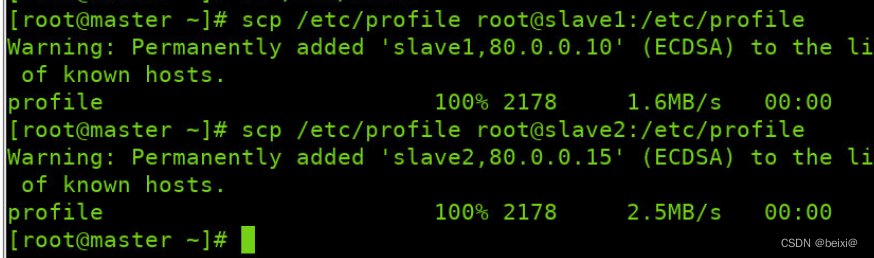
Then we distribute the java environment to slave1 and slave2 virtual machines through commands
scp /etc/profile root@slave1:/etc/profile
scp /etc/profile root@slave2:/etc/profile
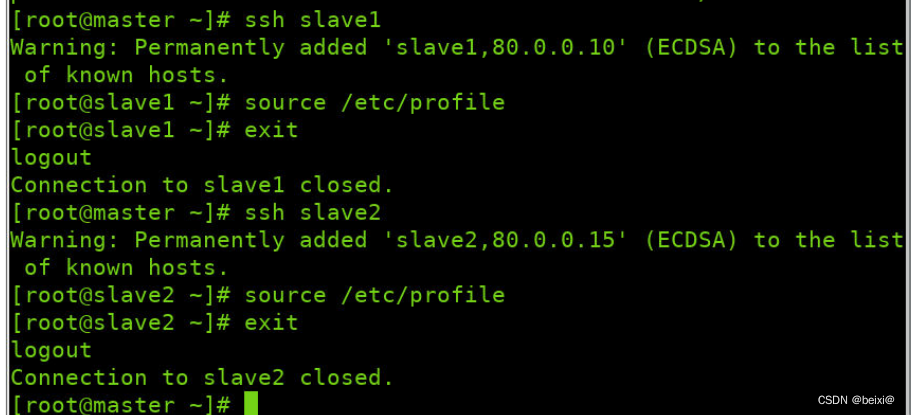
Make effective configurations in slave1 and slave2 virtual machines respectively
ssh slave1
source /etc/profile
exit
ssh slave2
source /etc/profile
exit

3. Hadoop installation
1. Decompress the hadoop-2.7.7.tar.gz compressed package under /root/runajian to the /opt directory, and rename the decompressed file to hadoop
tar -zvxf /root/ruanjian/hadoop-2.7.7.tar.gz -C /opt
mv hadoop-2.7.7 hadoop

2. Modify environment variables
vim /etc/profile
3. Press Shift+g to navigate to the last line, press i to switch to input mode, and add the following code:
export HADOOP_HOME=/opt/hadoop
export PATH=$PATH:$HADOOP_HOME/bin:$HADOOP_HOME/sbin

4. Press ESC, press :wq to save and exit
5. The configuration just now takes effect
source /etc/profile
6. Similarly, distribute the configuration file of the master to slave1 and slave2
ssh slave1
source /etc/profile
exit
ssh slave2
source /etc/profile
exit
4. Hadoop configuration
is in /opt/hadoop/etc/hadoop, there are six files that need to be configured, namely:
hadoop-env.sh
core-site.xml
yarn-site.xml
hdfs-site.xml
mapred-site .xml
slaves
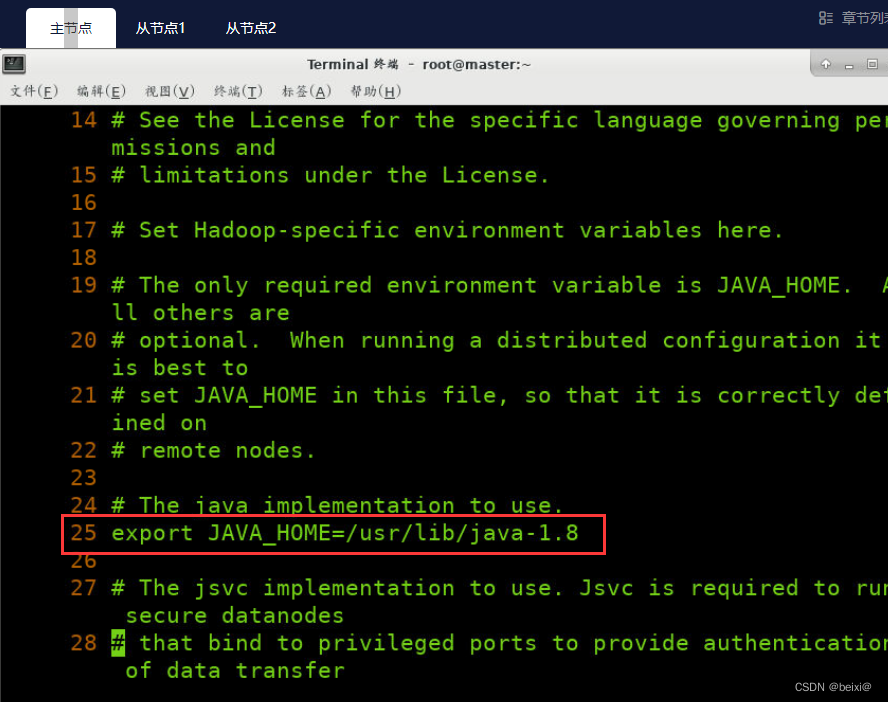
1. First, operate the hadoop-env.sh file in the master virtual machine
vi /opt/hadoop/etc/hadoop/hadoop-env.sh
In the configuration file, enter 25gg to locate line 25, modify the java environment path configured for yourself, type: wq to save and exit
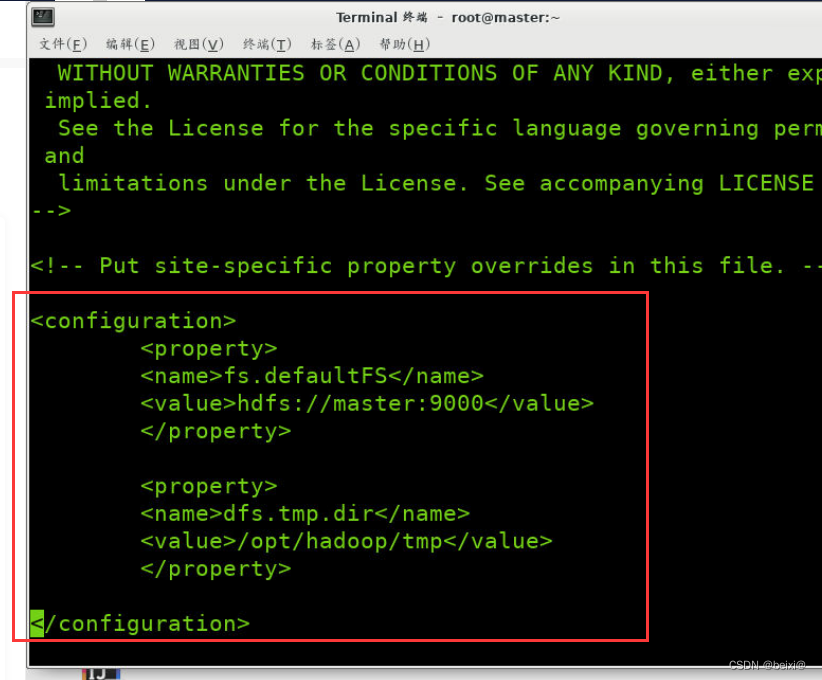
2. Modify the core-site.xml file
vi /opt/hadoop/etc/hadoop/core-site.xml
Enter the configuration file, type G to locate the last line, and enter the i command in the configuration tag to add the following code:
<configuration>
 <property>
     <name>fs.defaultFS</name>
     <value>hdfs://master:9000</value>
 </property>
 <property>
     <name>hadoop.tmp.dir</name>
     <value>/opt/hadoop/tmp</value>
 </property>
</configuration>
3. Modify the hdfs-site.xml file
vi /opt/hadoop/etc/hadoop/hdfs-site.xml
Enter the configuration file, type G to locate the last line, and enter the i command in the configuration tag to add the following code:
<configuration>
 <property>
      <name>dfs.namenode.http-address</name>
      <value>master:50070</value>
 </property>
 <property>
      <name>dfs.namenode.secondary.http-address</name>
      <value>master:50090</value>
 </property>
 <property>
      <name>dfs.replication</name>
      <value>3</value>
 </property>
 <property>
      <name>dfs.namenode.name.dir</name>
      <value>/opt/hadoop/tmp/dfs/name</value>
 </property>
 <property>
      <name>dfs.datanode.data.dir</name>
      <value>/opt/hadoop/tmp/dfs/data</value>
 </property>
</configuration>

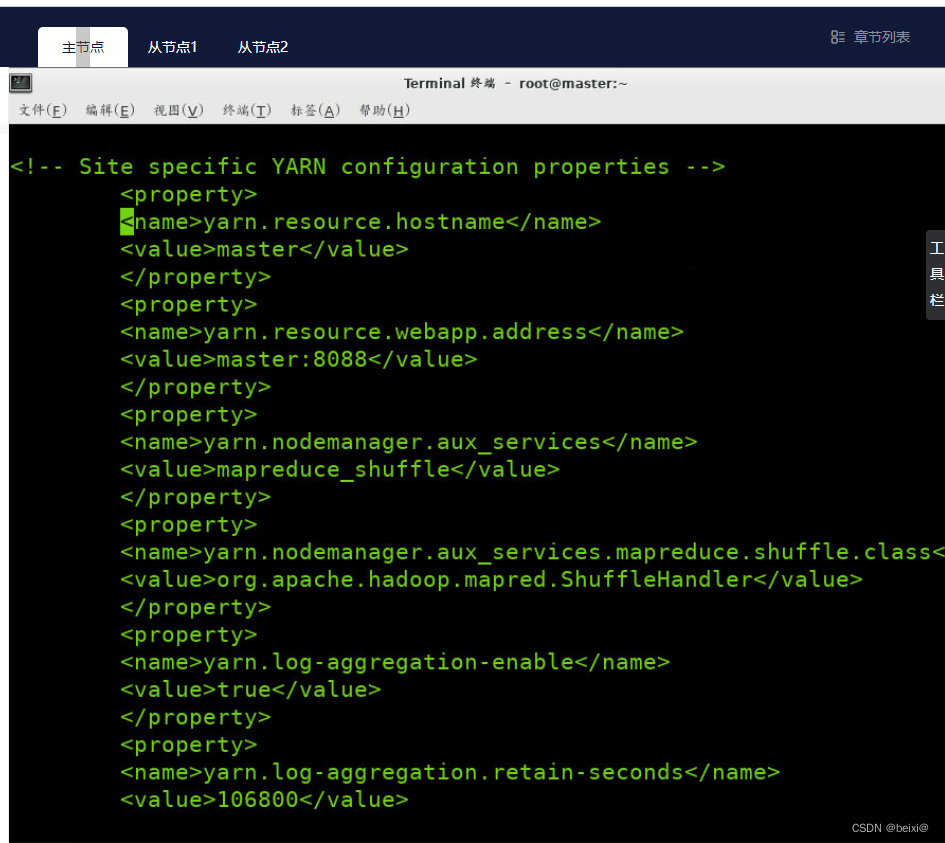
4. Modify the yarn-site.xml file
vi /opt/hadoop/etc/hadoop/yarn-site.xml
Enter the configuration file, type G to locate the last line, and enter the i command in the configuration tag to add the following code:
<configuration>
 <property>
    <name>yarn.resourcemanager.hostsname</name>
    <value>master</value>
 </property>
 <property>
    <name>yarn.resourcemanager.webapp.address</name>
    <value>master:8088</value>
 </property>
 <property>
    <name>yarn.nodemanager.aux-services</name>
    <value>mapreduce_shuffle</value>
 </property>
 <property>
    <name>yarn.nodemanager.aux-services.mapreduce.shuffle.class</name>
    <value>org.apache.hadoop.mapred.ShuffleHandler</value>
 </property>
 <property>
    <name>yarn.log-aggregation-enable</name>
    <value>true</value>
 </property>
 <property>
    <name>yarn.log-aggregation.retain-seconds</name>
    <value>106800</value>
 </property>
 <property>
    <name>yarn.nodemanager.remote-app-log-dir</name>
    <value>/user/container/logs</value>
 </property>
</configuration>
5. In the configuration folder, copy the template file mapred-site.xml.template as mapred-site.xml
cp /opt/haoop/etc/hadoop/mapred-site.xml.template /opt/haoop/etc/hadoop/mapred-site.xml
Modify the mapred-site.xml file
vi /opt/hadoop/etc/hadoop/mapred-site.xml
Enter the configuration file, type G to locate the last line, and enter the i command in the configuration tag to add the following code:
<configuration>
 <property>
     <name>mapreduce.framework.name</name>
     <value>yarn</value>
 </property>
 <property>
     <name>mapreduce.jobhistory.address</name>
     <value>master:10020</value>
 </property>
 <property>
     <name>mapreduce.jobhistory.webapp.address</name>
     <value>master:19888</value>
 </property>
</configuration>

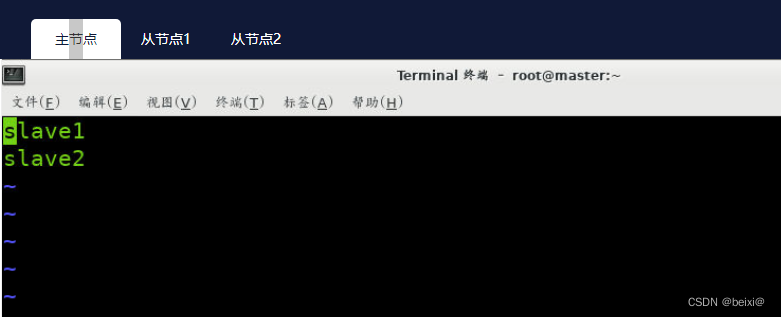
6. Modify the slaves file
vi /opt/hadoop/etc/hadoop/slaves
to enter the configuration file and press dd to delete the first line, then type i to enter the input mode, enter slave1, slave2
7. Distribute the configured hadoop file to slave1 , under the /opt folder in the slave2 virtual machine
scp /opt/hadoop root@slave1:/opt/
scp /opt/hadoop root@slave2:/opt/
8. Format the namenode in the master virtual machine
hdfs namenode -format
9. Open the cluster after formatting
start-all.sh
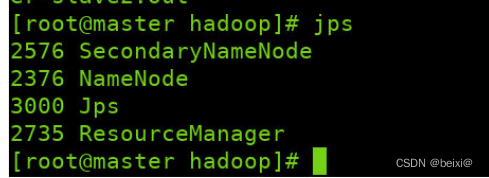
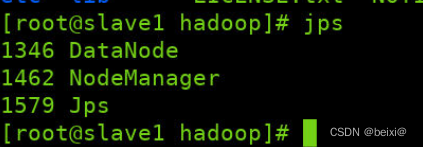
In the master, slave1, and slave2 virtual machines, we query whether the cluster is started successfully through the jps command
jps
Master interface:
slave1 interface:
slave2 interface:
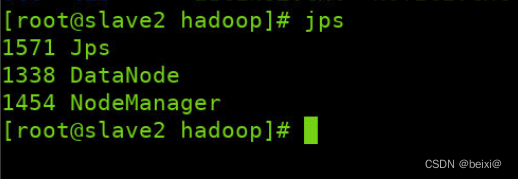
After the cluster is successfully started, the nodes will be displayed as shown in the figure:
Master: NameNode, ResourceManager, SecondaryNameNode
slave1: DataNode, NodeManager
slave2: DataNode, NodeManager
This is the end of the hadoop fully distributed cluster building. If this article is helpful or likes you, remember to like it and follow it~