Demonstration of tutorial effect

Recently, the game Moore Manor is very popular. It is good to grow vegetables in it and open up wasteland.
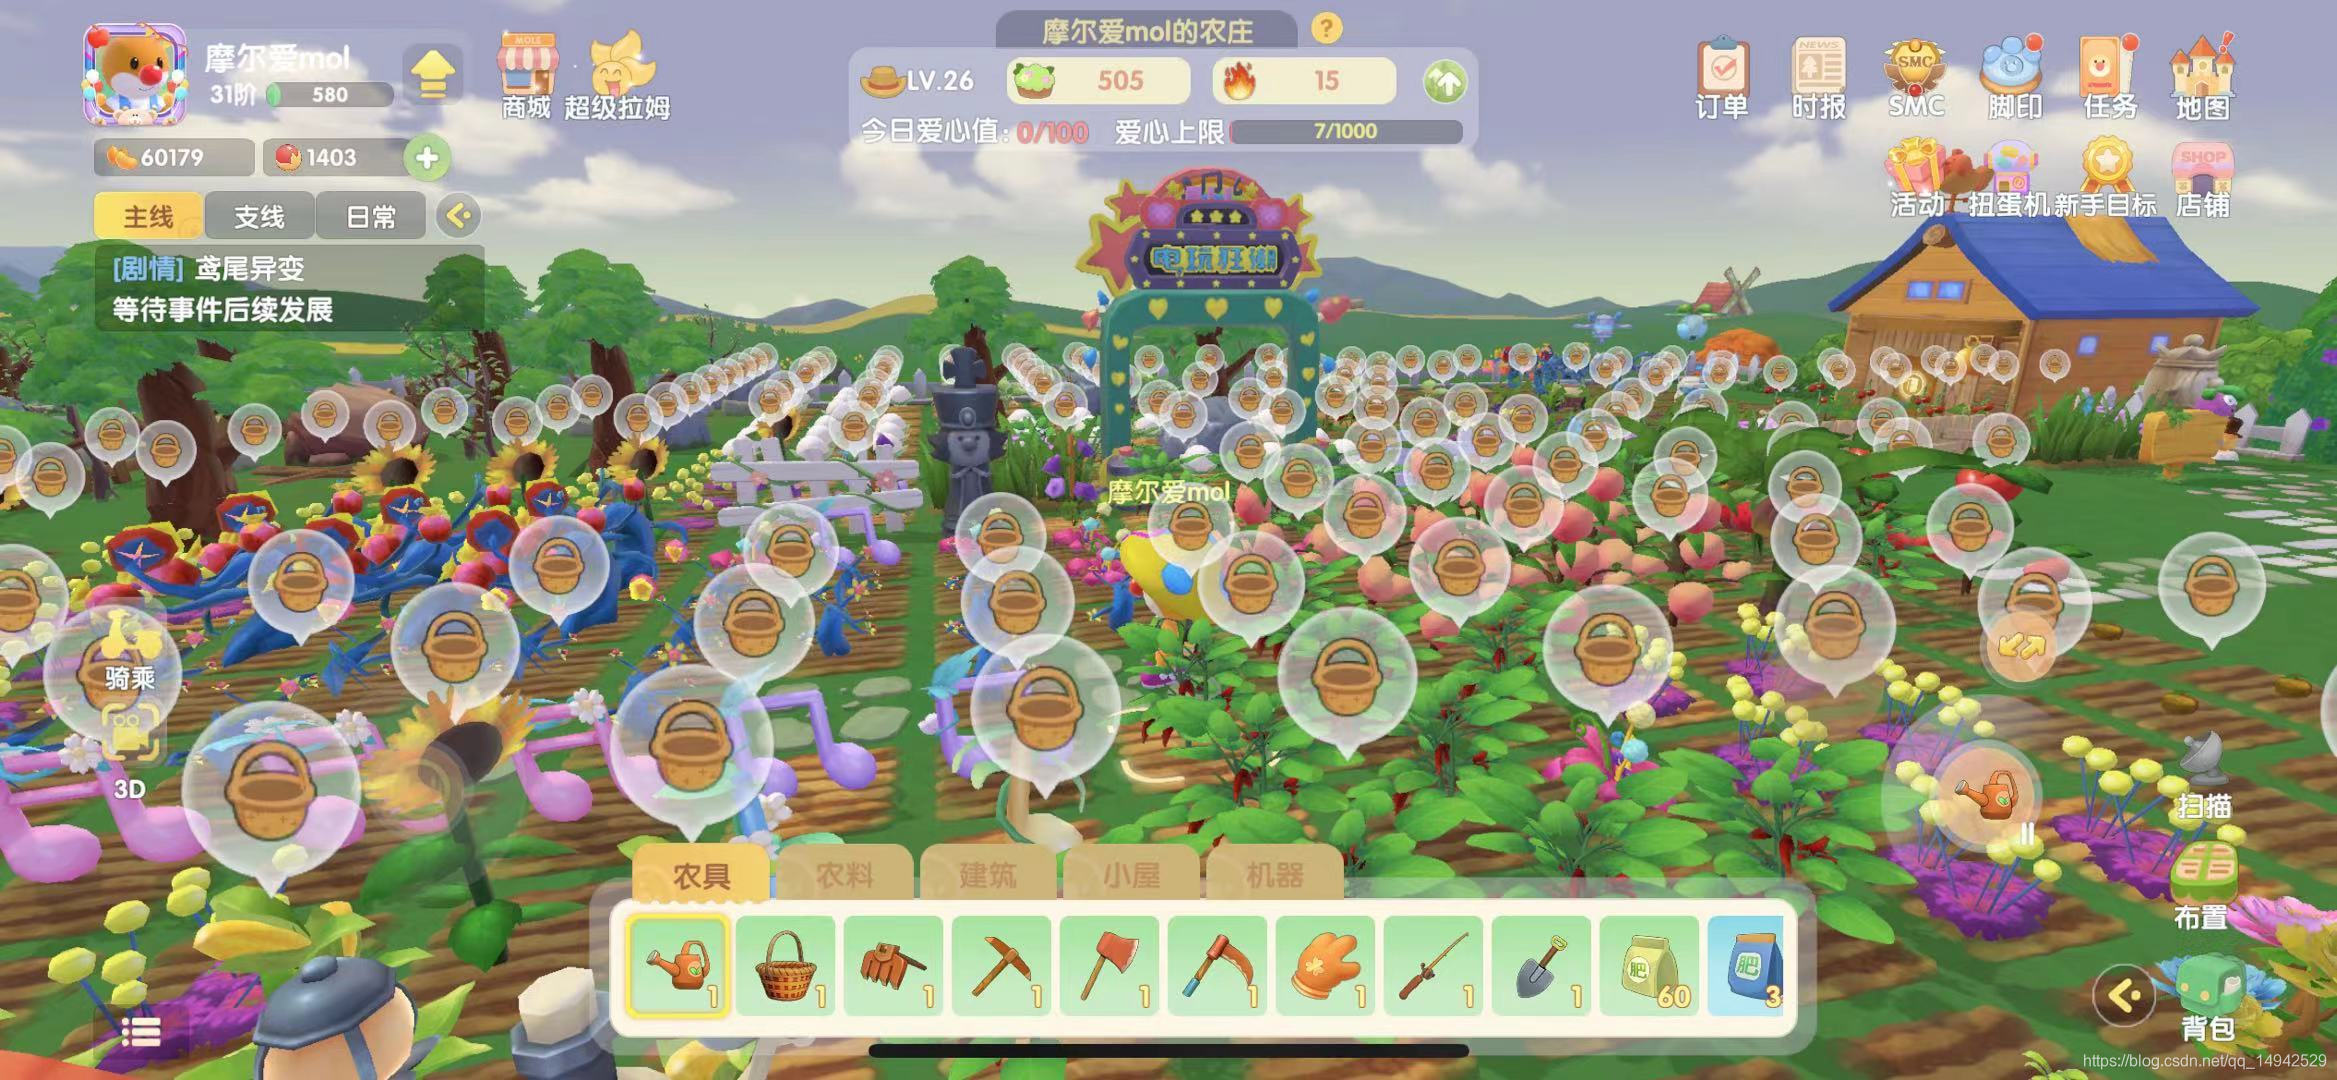

But although farming is cool, you still have to think about what would you do if you were asked to realize these functions? After thinking about it for a while, the functions inside are actually not that complicated. Today, we will aim at the four functions of reclamation, sowing, watering and harvesting, and carry out some simple realizations.
First, create a new unity project, write a random name

. Let’s take a look at the button layout in Moore Manor. Below is the tool or item option bar, and on the right is the option operation button. Select a certain tool or item, and then click the button to use the tool. .

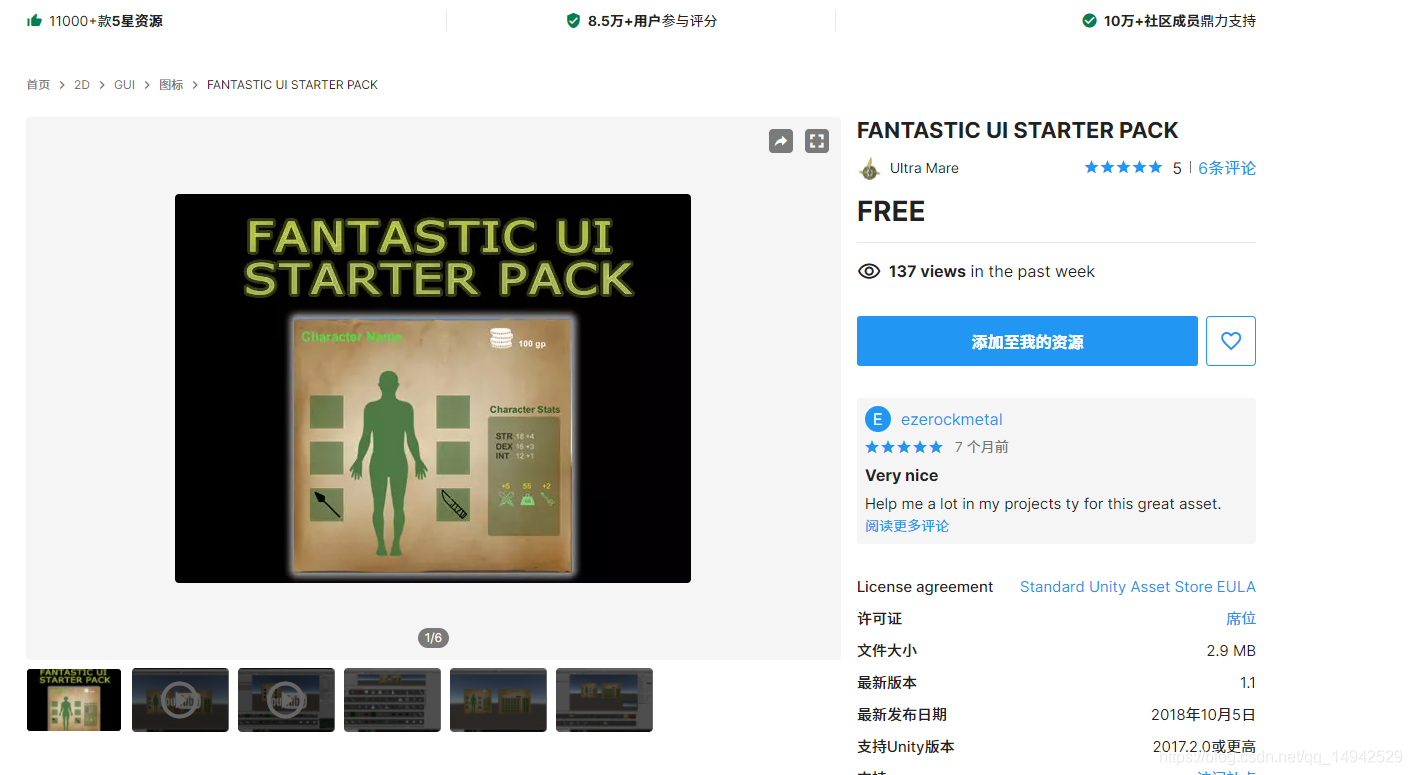
Before that, we first import four unity free resource packs, which can be found in the store


Create a new scene in unity, create a Plane ground, change the name to GroundPlane, delete the original Mesh Collider, and add Box Collider.

Find the imported MaleFreeSimpleMovement1 prefab, drag it into the scene, as the character we want to control, run it at this time, you can control the movement of the character, but the camera will not follow, so we need to design the camera and create a new script CameraFollow,

hang Is the script code on the camera

as follows (note that after the script is hung up, you need to add MaleFreeSimpleMovement1 as FollowTarget):
using System.Collections;
using System.Collections.Generic;
using UnityEngine;

public class CamFollow : MonoBehaviour
{


    //要跟随的目标
    public Transform FollowTarget;
    //相对位置
    private Vector3 relPos;
    void Start()
    {


        //初始化相对位置
        if (FollowTarget != null)
        {


            relPos = transform.position - FollowTarget.position;
        }
    }
    // Update is called once per frame
    void Update()
    {


        //根据相对位置赋值
        if (FollowTarget != null)
        {


            transform.position = relPos + FollowTarget.position;
        }
    }
}
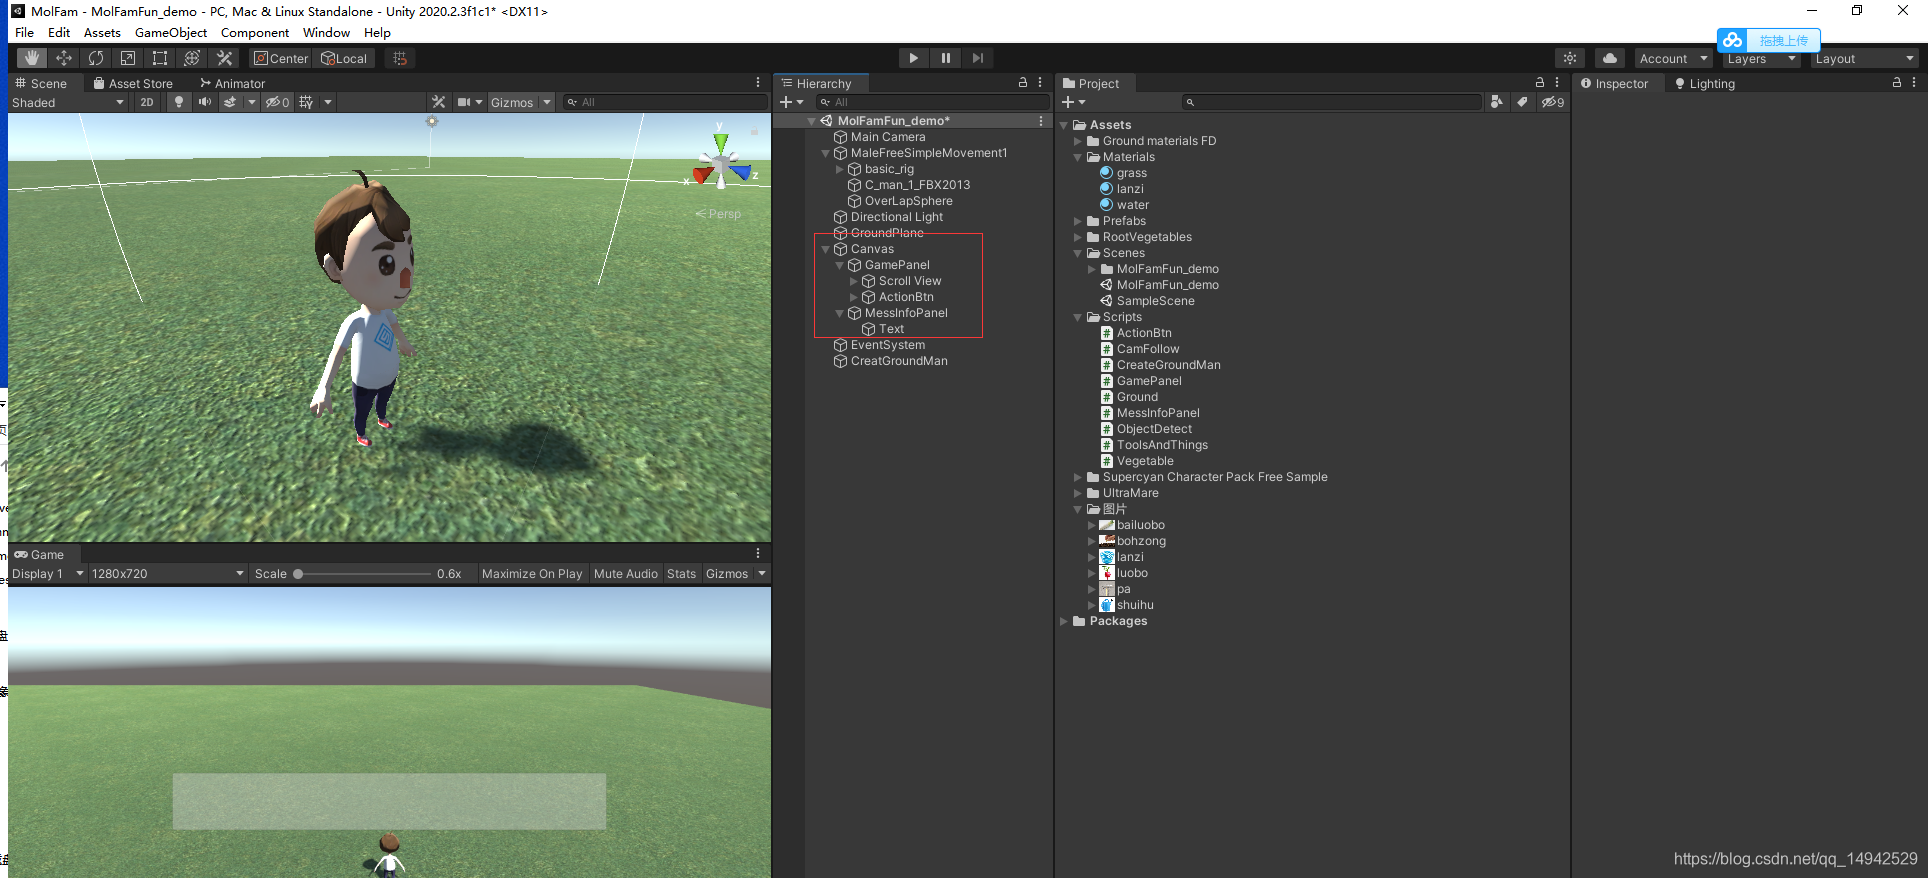
After completing the above step, we start to design the UI of the interface. As shown in the figure below, I have designed the whole. GamePanel is a Panel panel with two components, one is Scroll View and the other is ActionBtn. ScrollView is mainly responsible for the display of various tools and items below, and ActionBtn is a Button component, which is responsible for handling the click events of items or tools. And MessInfoPanel mainly prints some operation information.
Open ScrollView and set the anchor point of ScrollView at the bottom.

Add Horizontal Layout Group and Toggle Group components to Content, mainly to control the layout of the items inside. The settings are as follows and

then start to design the objects under Content. The objects inside are mainly using Toggle To achieve click switching, the specific structure is shown in the figure below, create a Toggle and then modify it, create a new Image under the Background, rename it toolsprite, and set the image of the toolsprite as the image of the tool or item.

Modify the Background image as the item background frame.

Modify the color and transparency of the Checkmark

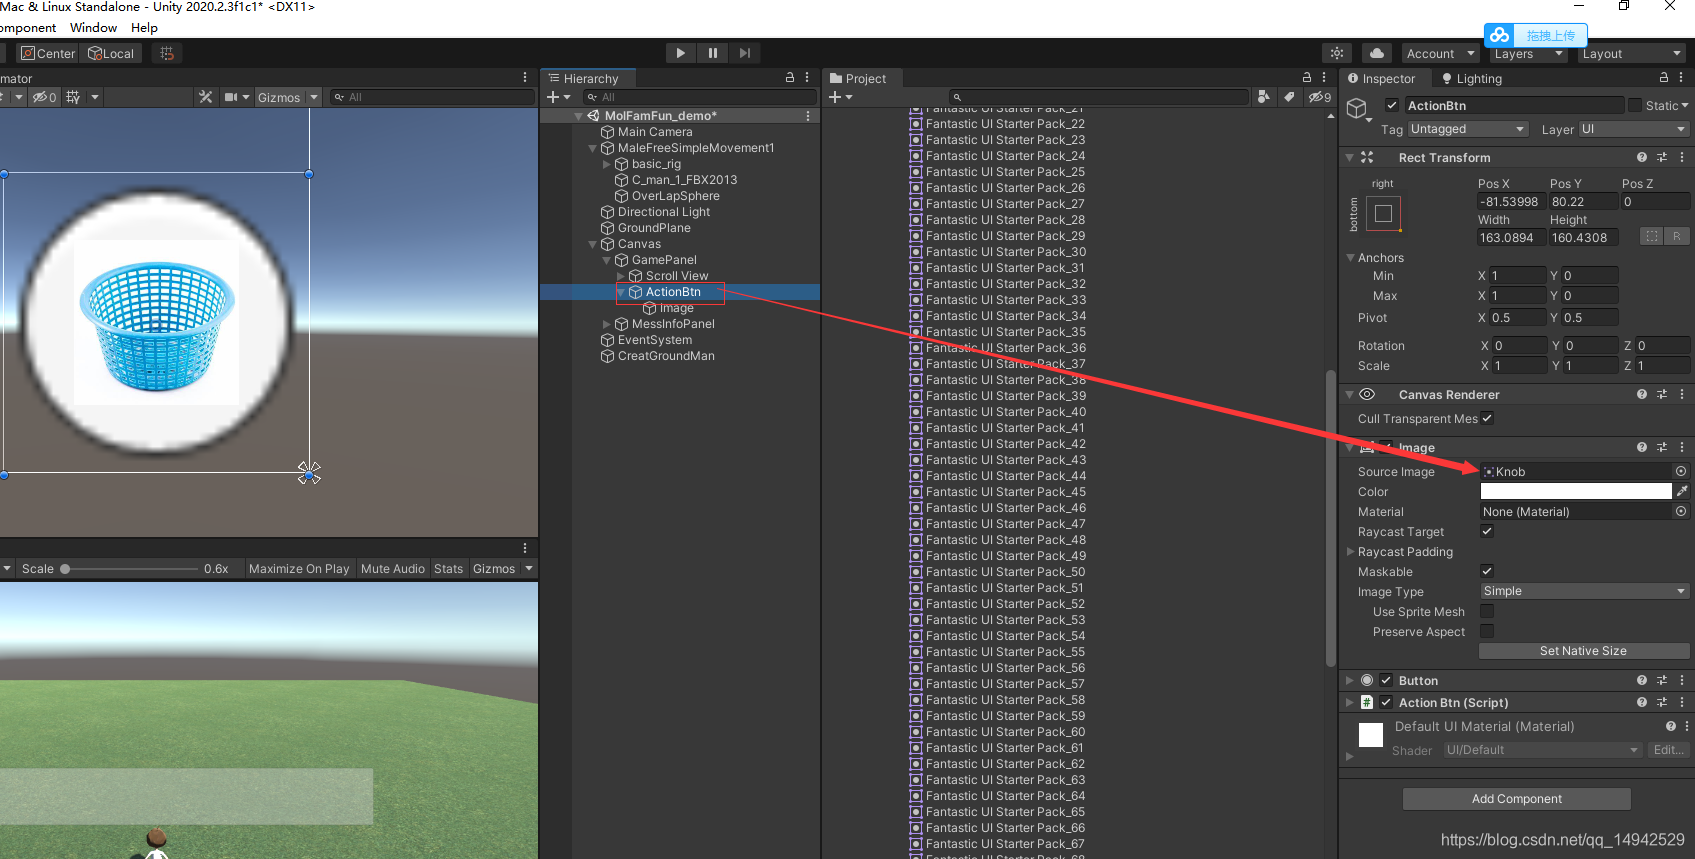
. After completing a modification, you can copy it with Ctrl+D. Do not make it one by one. ActionBtn only needs to modify the picture style, change it to a white circular pattern, and delete the Text, create a new Image below, set the image as a tool for the Image, and put a picture here first. That is, one is the background and the other is the tool map.
Next, we start to realize the function. First, in order to realize the function of opening up land one by one, we need to initialize the land block in advance. When opening up wasteland, just click on the land reclamation, and the land block will appear, so a large piece of land block needs to be generated. Create a new box, adjust the scaling of the y-axis, add a yellow land shader, and name it Ground. Add a script Ground to it, then drag back to the Assets folder as a prefab.

The code inside the Ground script:
using System.Collections;
using System.Collections.Generic;
using UnityEngine;
public enum FamVege
{


    None,
    白菜,
    胡萝卜
}
public class Ground : MonoBehaviour
{


    /// <summary>
    /// 是否已经开垦
    /// </summary>
    public bool HasOpened;
    /// <summary>
    /// 是否种植了作物
    /// </summary>
    public bool HasFamed;
    /// <summary>
    /// 当前这块地种植的作物
    /// </summary>
    public ToolAndThingsType CurrentFamVege;
    void Start()
    {


    }
    void Update()
    {


    }
    /// <summary>
    /// 开垦土地
    /// </summary>
    public void OpenGround()
    {


        GetComponent<MeshRenderer>().enabled = true;
        HasOpened = true;
    }
    /// <summary>
    /// 种植作物
    /// </summary>
    public void PlantVege(ToolAndThingsType toolAndThings)
    {


        CurrentFamVege = toolAndThings;
        HasFamed = true;
    }
}
Create a new empty object in the scene, name it CreatGroundMan, create a new CreatGroundMan script and add it, the script code is as follows:
using System.Collections;
using System.Collections.Generic;
using UnityEngine;

public class CreateGroundMan : MonoBehaviour
{


    public GameObject groundPrefab;
    public Transform groundplane;

    public List<Ground> grounds = new List<Ground>();
    void Start()
    {


        InitGround();
    }
    // Update is called once per frame
    void Update()
    {


    }
    /// <summary>
    /// 初始化土地
    /// </summary>
    private void InitGround()
    {


        //计算生成的高度,贴合地面即可
        float heightY = groundPrefab.transform.localScale.y / 2+groundplane.position.y;
        for (float i =0; i < 50; i+=1.2f)
        {


            for (float j = 0; j < 50; j+=1.2f)
            {


                Vector3 pos = new Vector3(i, heightY, j);
                GameObject groundObj = Instantiate(groundPrefab, pos, Quaternion.identity);
                groundObj.transform.SetParent(transform);
                grounds.Add(groundObj.GetComponent<Ground>());
            }
        }
    }
}
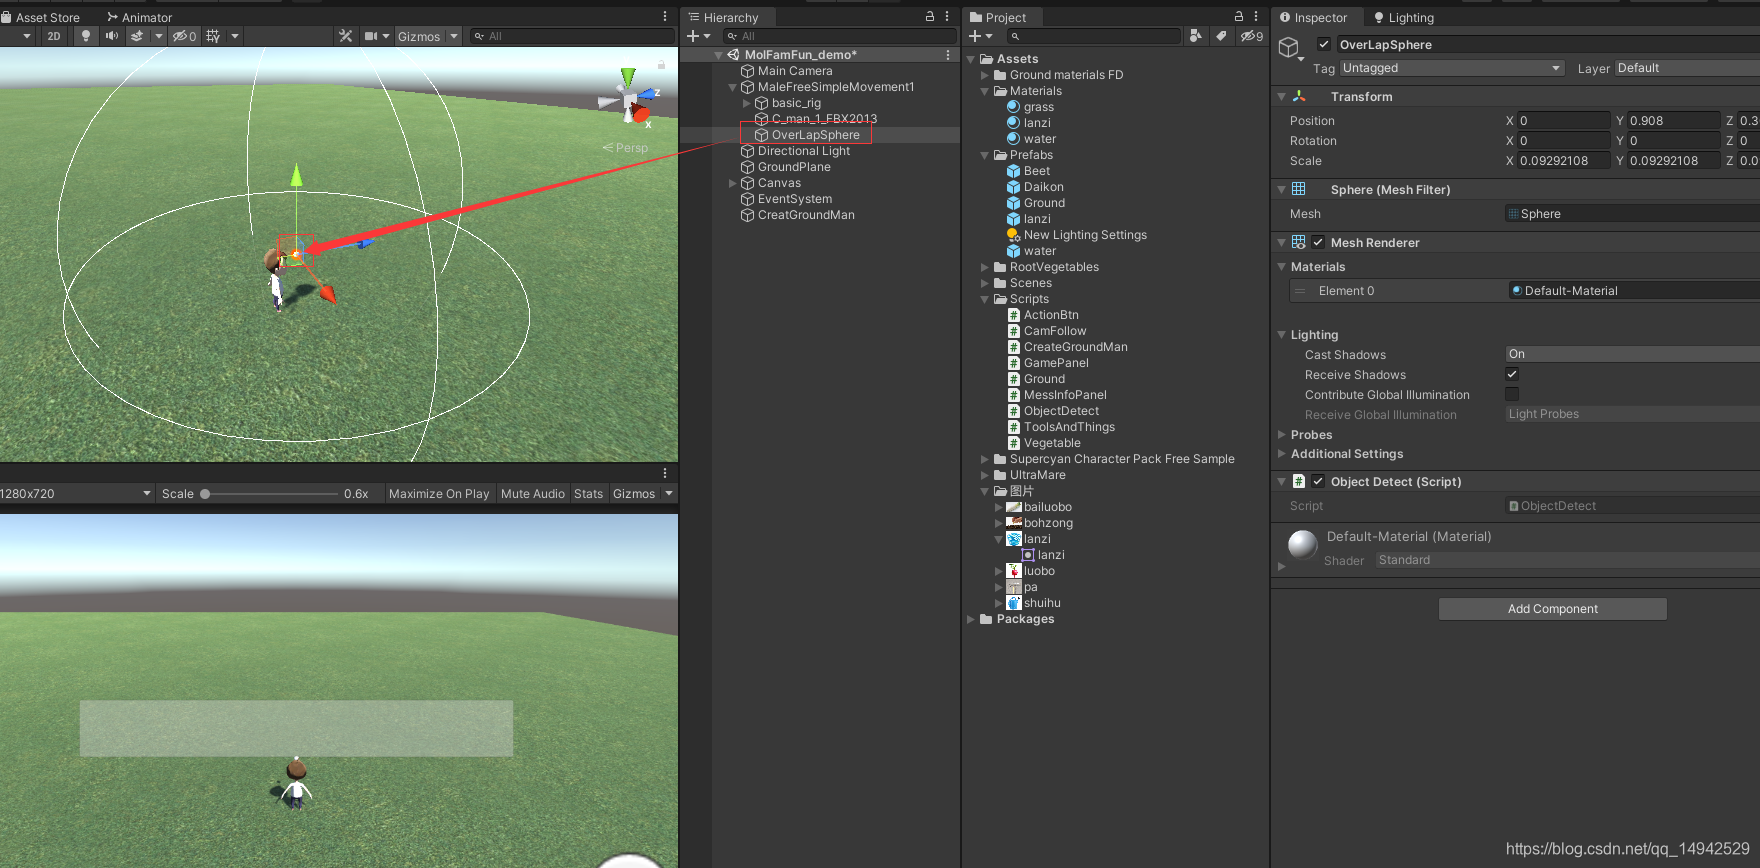
The generation is complete, and the next step is to realize the function of detecting nearby land blocks. To implement it, it will mainly use the Physics.OverlapSphere unity API, that is, the spherical ray detection function, which uses a position as the center point and a certain radius as the size to detect collisions. To the object, return a Collider array. Create a new sphere under MaleFreeSimpleMovement1, zoom out and adjust the position, delete the Sphere Collider component, change the name to OverLapSphere, and create a new script named ObjectDetect to add it. The complete content of the script is as follows:
using System.Collections;
using System.Collections.Generic;
using UnityEngine;

public class ObjectDetect : MonoBehaviour
{


    public static ObjectDetect _instance;
    private void Awake()
    {


        _instance = this;
    }
    void Start()
    {


    }

    // Update is called once per frame
    void Update()
    {


    }
    /// <summary>
    /// 获取到附近未开垦土地
    /// </summary>
    /// <returns></returns>
    public Ground GetNearByUnOpenGround()
    {


    //第一个参数是中心点,第二个参数是半径,第三个参数是层级
        Collider[] cols = Physics.OverlapSphere(transform.position, 3f, 1 << LayerMask.NameToLayer("ground"));
        if (cols.Length > 0)
        {


            foreach (Collider col in cols)
            {


                Ground g = col.transform.GetComponent<Ground>();
                if (g != null)
                {


                    if (!g.HasOpened)
                    {


                        MessInfoPanel._instance.ShowMess("获取到土地信息");
                        Debug.Log(col);
                        return g;
                    }
                }

            }
        }
        return null;
    }

    /// <summary>
    /// 获取到已开垦,但是未种植的土地信息
    /// </summary>
    /// <returns></returns>
    public Ground GetNearByUnPlantGround()
    {


        Collider[] cols = Physics.OverlapSphere(transform.position, 3f, 1 << LayerMask.NameToLayer("ground"));
        if (cols.Length > 0)
        {


            foreach (Collider col in cols)
            {


                Ground g = col.transform.GetComponent<Ground>();
                if (g != null)
                {


                    if (g.HasOpened&&(!g.HasFamed))
                    {


                        MessInfoPanel._instance.ShowMess("获取到土地信息");
                        Debug.Log(col);
                        return g;
                    }
                }

            }
        }
        return null;
    }

    /// <summary>
    /// 获取到需要浇水的作物
    /// </summary>
    /// <returns></returns>
    public Vegetable GetNearByNeedWaterVege()
    {


        Collider[] cols = Physics.OverlapSphere(transform.position, 3f, 1 << LayerMask.NameToLayer("vege"));
        if (cols.Length > 0)
        {


            foreach (Collider col in cols)
            {


                Vegetable g = col.transform.GetComponent<Vegetable>();
                if (g != null)
                {


                    if (g.needWater)
                    {


                        //MessInfoPanel._instance.ShowMess("获取到土地信息");
                        Debug.Log(col);
                        return g;
                    }
                }

            }
        }
        return null;
    }

    /// <summary>
    /// 获取到可以采摘的蔬菜信息
    /// </summary>
    /// <returns></returns>
    public Vegetable GetNearByMatureVege()
    {


        Collider[] cols = Physics.OverlapSphere(transform.position, 3f, 1 << LayerMask.NameToLayer("vege"));
        if (cols.Length > 0)
        {


            foreach (Collider col in cols)
            {


                Vegetable g = col.transform.GetComponent<Vegetable>();
                if (g != null)
                {


                    if (g.IsMatured)
                    {


                        Debug.Log(col);
                        return g;
                    }
                }

            }
        }
        return null;
    }
    private void OnDrawGizmos()
    {


        Gizmos.DrawWireSphere(this.transform.position, 3);
    }
}
In the previous step, we will use two levels, so we need to add two levels in Layers.

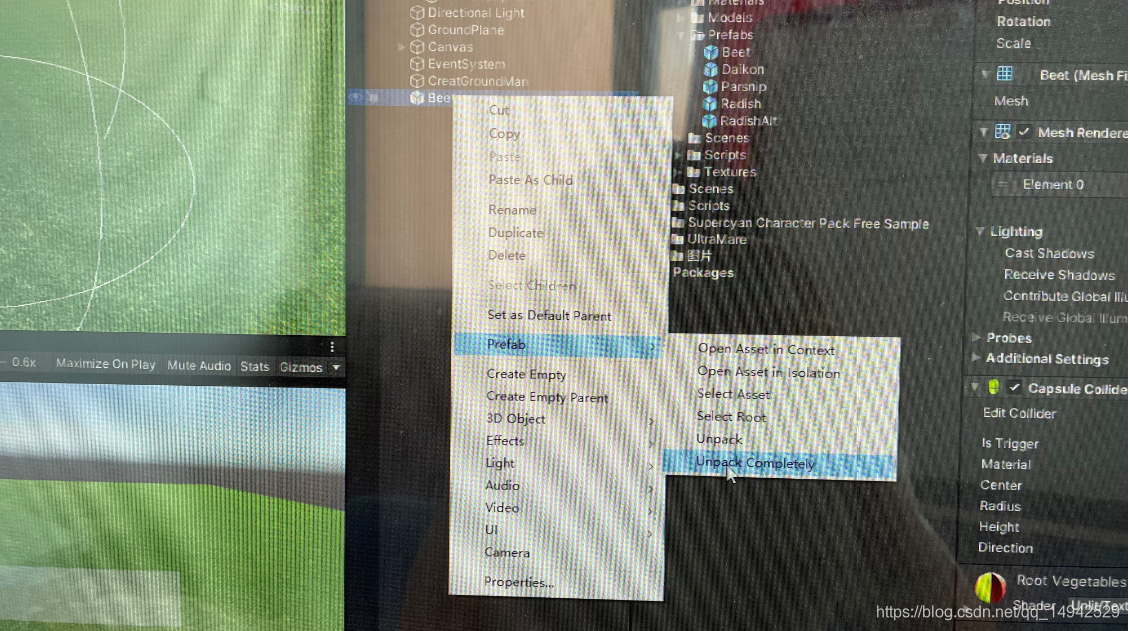
Next, we will make the prefabs of the crops. As shown in the figure below, find two prefabricated radishes and drag them into the scene. Cancel the prefab connection. Then drag into our own folder where the prefab is stored.

Create a new script as Vegetable, add it to the crop prefab in the previous step, and complete the code as follows:
using System.Collections;
using System.Collections.Generic;
using UnityEngine;

public class Vegetable : MonoBehaviour
{


    /// <summary>
    /// 是否需要洒水
    /// </summary>
    public bool needWater;
    /// <summary>
    /// 是否成熟
    /// </summary>
    public bool IsMatured;

    /// <summary>
    /// 需要的成熟时间
    /// </summary>
    public float NeedMatureTime;

    public GameObject waterPrefab;
    public GameObject lanziPrefab;


    private GameObject c_water;
    private GameObject c_lanzi;
    void Start()
    {


        ///随机一个成熟时间
        NeedMatureTime = Random.Range(10, 20);
        needWater = true;
        ///初始化水滴和篮子
        Vector3 pos = new Vector3(transform.position.x, transform.position.y + 0.9f, transform.position.z);
        c_water = GameObject.Instantiate(waterPrefab, pos, Quaternion.identity);
        c_lanzi = GameObject.Instantiate(lanziPrefab, pos, Quaternion.identity);
        c_water.transform.SetParent(transform);
        c_lanzi.transform.SetParent(transform);
    }
    /// <summary>
    /// 成熟的函数
    /// </summary>
    public void MatureEvent()
    {


        if (!needWater)
        {


            if (!IsMatured)
            {


                NeedMatureTime -= Time.deltaTime;
                if (NeedMatureTime <= 0)
                {


                    IsMatured = true;
                }
            }

        }
        if (needWater)
        {


            c_water.SetActive(true);
        }
        else
        {


            c_water.SetActive(false);
        }

        if (IsMatured)
        {


            c_lanzi.SetActive(true);
        }
        else
        {


            c_lanzi.SetActive(false);
        }

    }
    void Update()
    {


        MatureEvent();
    }

    /// <summary>
    /// 进行浇水
    /// </summary>
    public void WaterV()
    {


        needWater = false;
        MessInfoPanel._instance.ShowMess("浇水成功!!!");
    }

    public void PickVege()
    {


        MessInfoPanel._instance.ShowMess("采摘成功!!!");
      Ground g=transform.parent.GetComponent<Ground>();
        if (g != null)
        {


            g.HasFamed = false;
        }
        Destroy(gameObject, 1.0f);
    }
}
The script Vegetable on the crops is mainly responsible for controlling the ripening, watering and harvesting of the crops. In the mobile game of Moore Manor, we saw that when water needs to be sprinkled, there will be a water drop above the crops, and when they are ripe to be picked, there will be a basket or other signs above the crops, so we define waterPrefab and There are two prefabricated bodies in lanziPrefab. These two prefabricated bodies also need to be pre-designed, and then put into the Vegetable parameters of the vegetable prefabricated body.
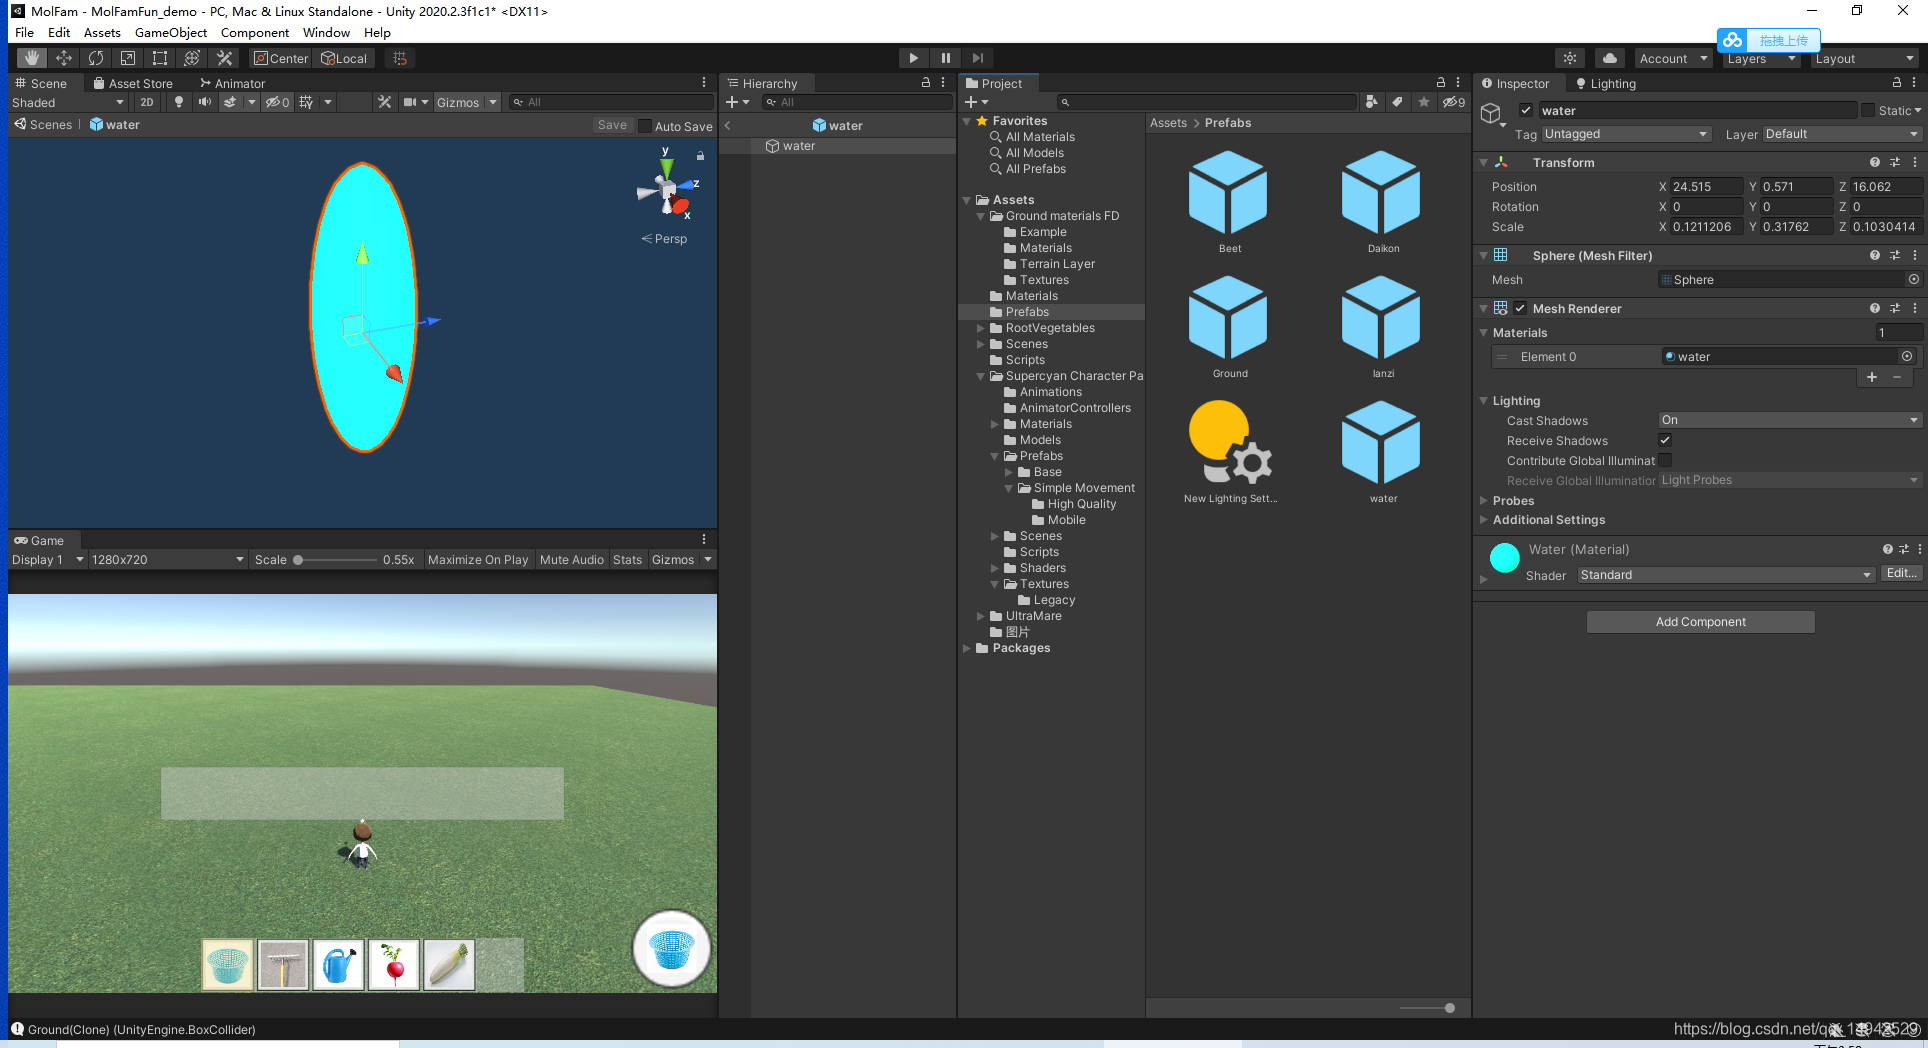
Water droplet prefab:
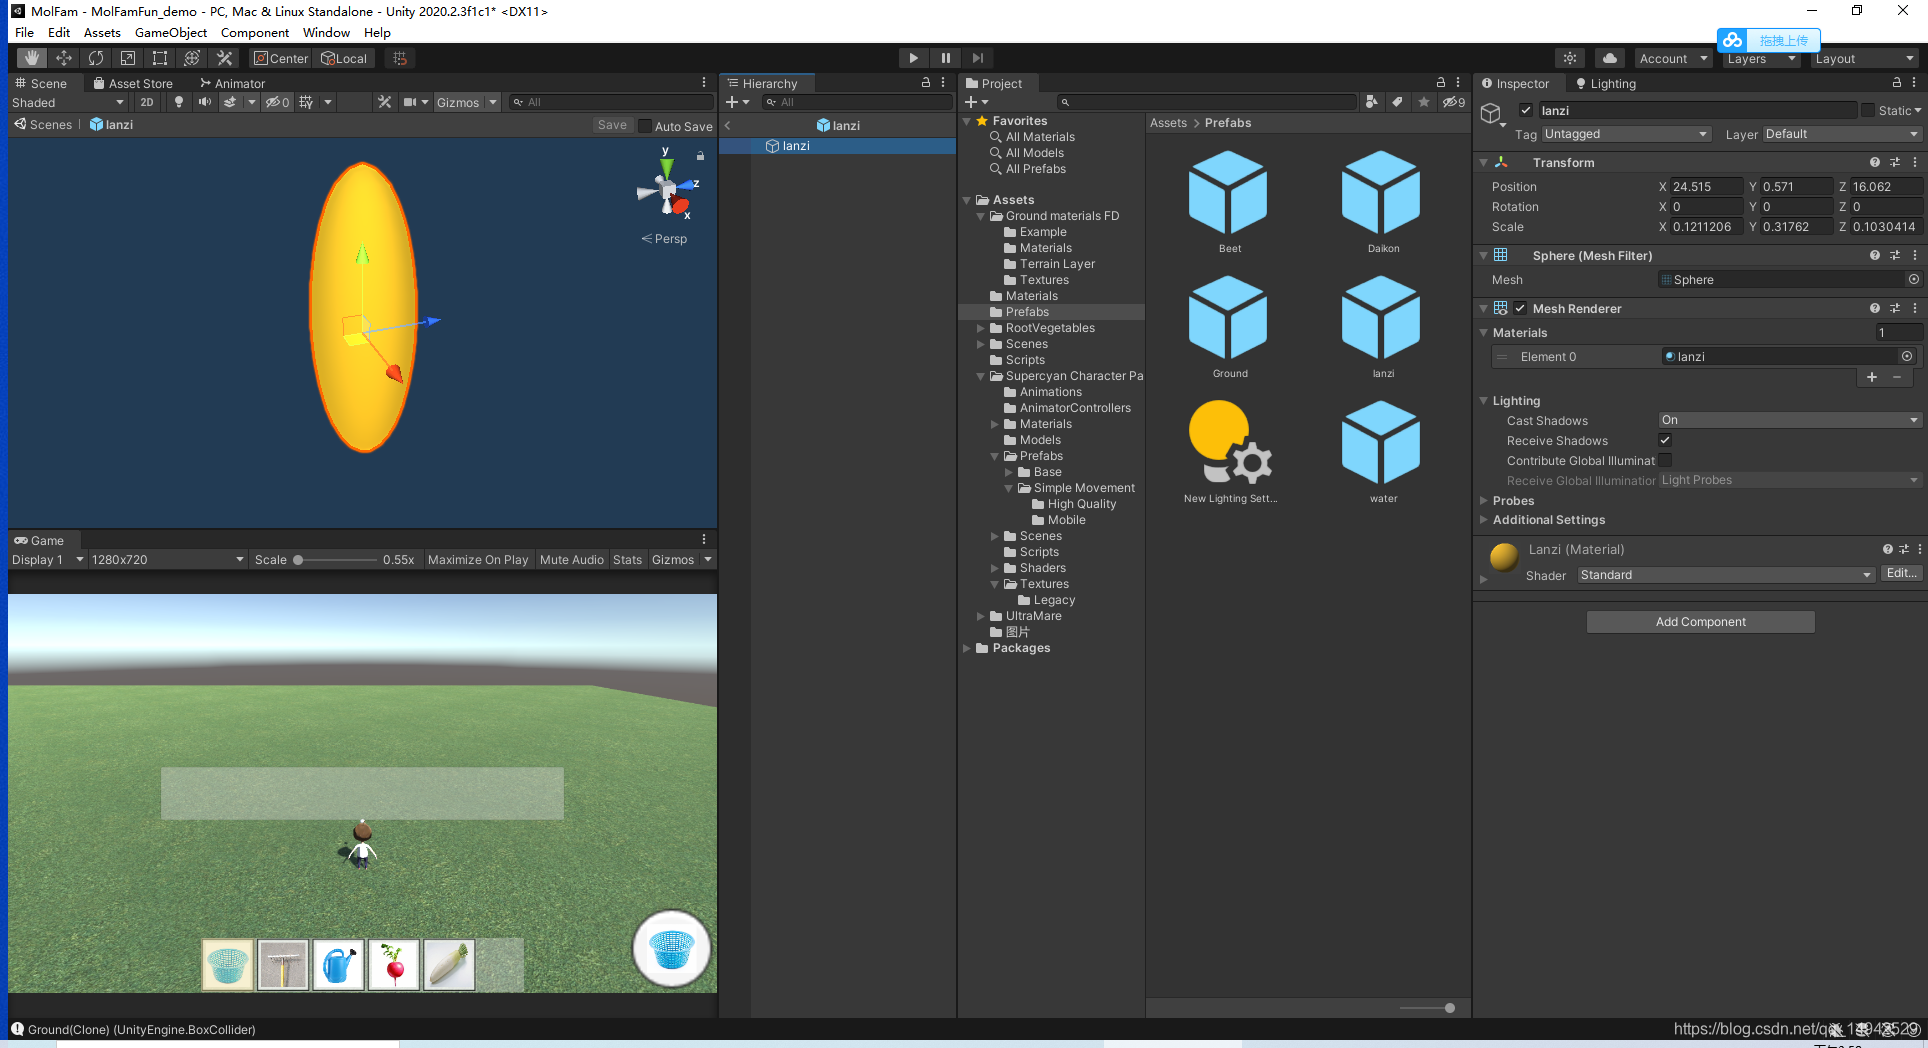
Basket prefab (replaced by random ellipse):
Set vegetable prefab parameters:

create a new script GamePanel, as a function of storing data and part of UI control, the following is the complete code:
using System.Collections;
using System.Collections.Generic;
using UnityEngine;
using UnityEngine.UI;
//工具物品类型枚举
public enum ToolAndThingsType
{


    None,
    PA,
    SHUIHU,
    LANZI,
    白萝卜,
    小萝卜

}

/// <summary>
/// 工具枚举类型对应的图片
/// </summary>
[System.Serializable]
public class ToolThingTexture
{


    public Sprite sprite;
    public ToolAndThingsType type;

}
public class GamePanel : MonoBehaviour
{


    /// <summary>
    /// 当前选中的是哪个
    /// </summary>
    public ToolAndThingsType currenttoolandthings;

    /// <summary>
    /// 按钮
    /// </summary>
    public ActionBtn actionBtn;

    /// <summary>
    /// 预先要设置的链表
    /// </summary>
    public List<ToolThingTexture> toolThingTextures = new List<ToolThingTexture>();
    /// <summary>
    /// 初始化成字典
    /// </summary>
    public Dictionary<ToolAndThingsType, Sprite> toolthingsSprite = new Dictionary<ToolAndThingsType, Sprite>();
    /// <summary>
    /// 单例模式
    /// </summary>
    public static GamePanel _instance;
    private void Awake()
    {


        _instance=this;
    }
    void Start()
    {


        InitGameData();
    }

    // Update is called once per frame
    void Update()
    {


    }
    /// <summary>
    /// 初始化参数
    /// </summary>
    public void InitGameData()
    {


        foreach (var ttt in toolThingTextures)
        {


            toolthingsSprite.Add(ttt.type, ttt.sprite);
        }
    }

    /// <summary>
    /// 根据选择的工具或者物品,更新操作按钮的行为
    /// </summary>
    public void UpdateActionBtn(ToolAndThingsType toolAndThingsType)
    {


        currenttoolandthings = toolAndThingsType;
        actionBtn.CurrenttoolthingsType = currenttoolandthings;
        transform.Find("ActionBtn/Image").GetComponent<Image>().sprite = toolthingsSprite[currenttoolandthings];

    }


}
After completing the above code, remember to set the parameters, especially the image corresponding to the type. Create

a new script named ToolsAndThings and place it in the following items to distinguish the tool or item you are currently selecting.
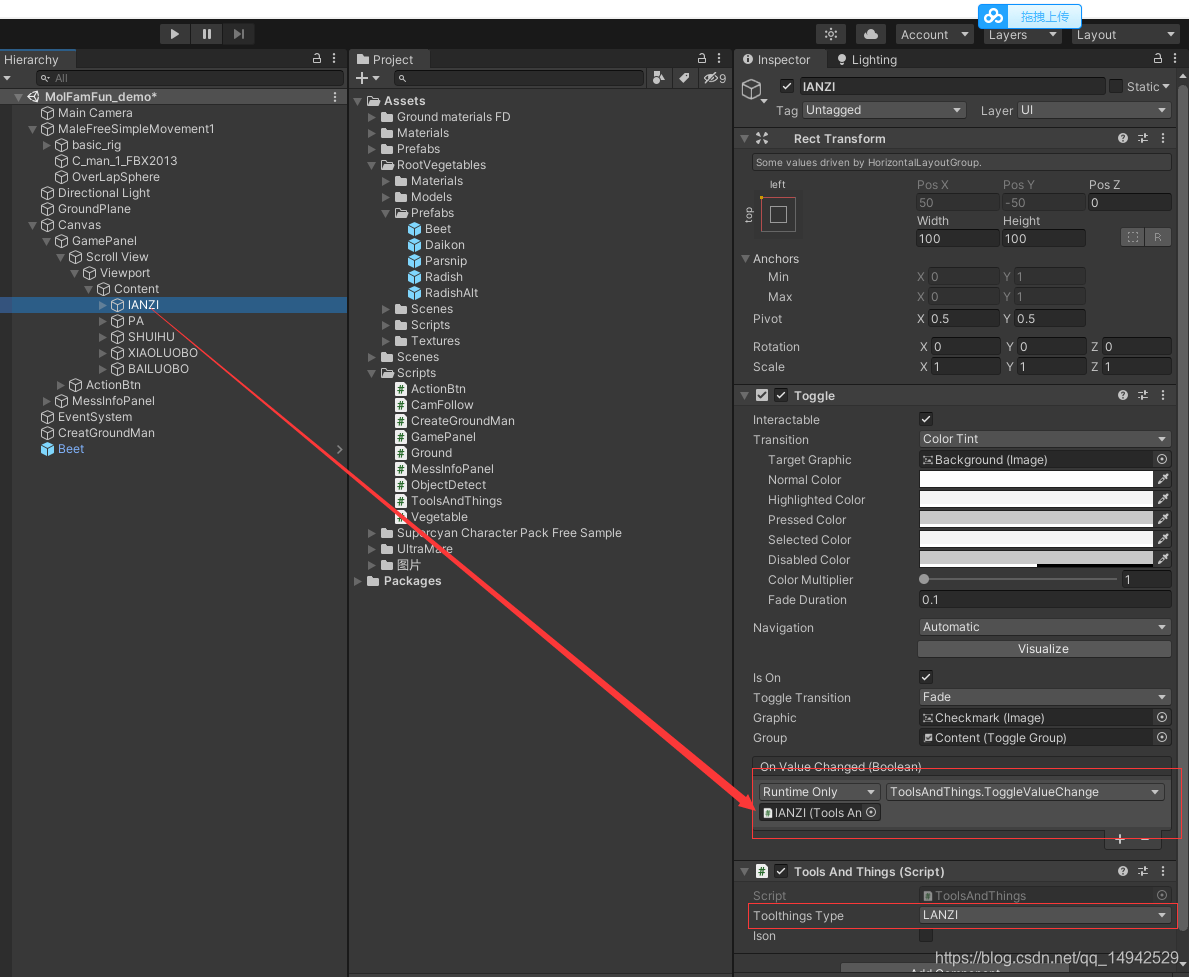
Several other similar settings, the complete code is as follows:
using System.Collections;
using System.Collections.Generic;
using UnityEngine;

public class ToolsAndThings : MonoBehaviour
{


    /// <summary>
    /// 当前的类型
    /// </summary>
    public ToolAndThingsType toolthingsType;
    /// <summary>
    /// 是否开启
    /// </summary>
    public bool Ison;
    void Start()
    {


    }

    // Update is called once per frame
    void Update()
    {


    }

    /// <summary>
    /// 绑定的动态函数
    /// </summary>
    /// <param name="ison"></param>
    public void ToggleValueChange(bool ison)
    {


        Ison = ison;
        GamePanel._instance.UpdateActionBtn(toolthingsType);
    }
}
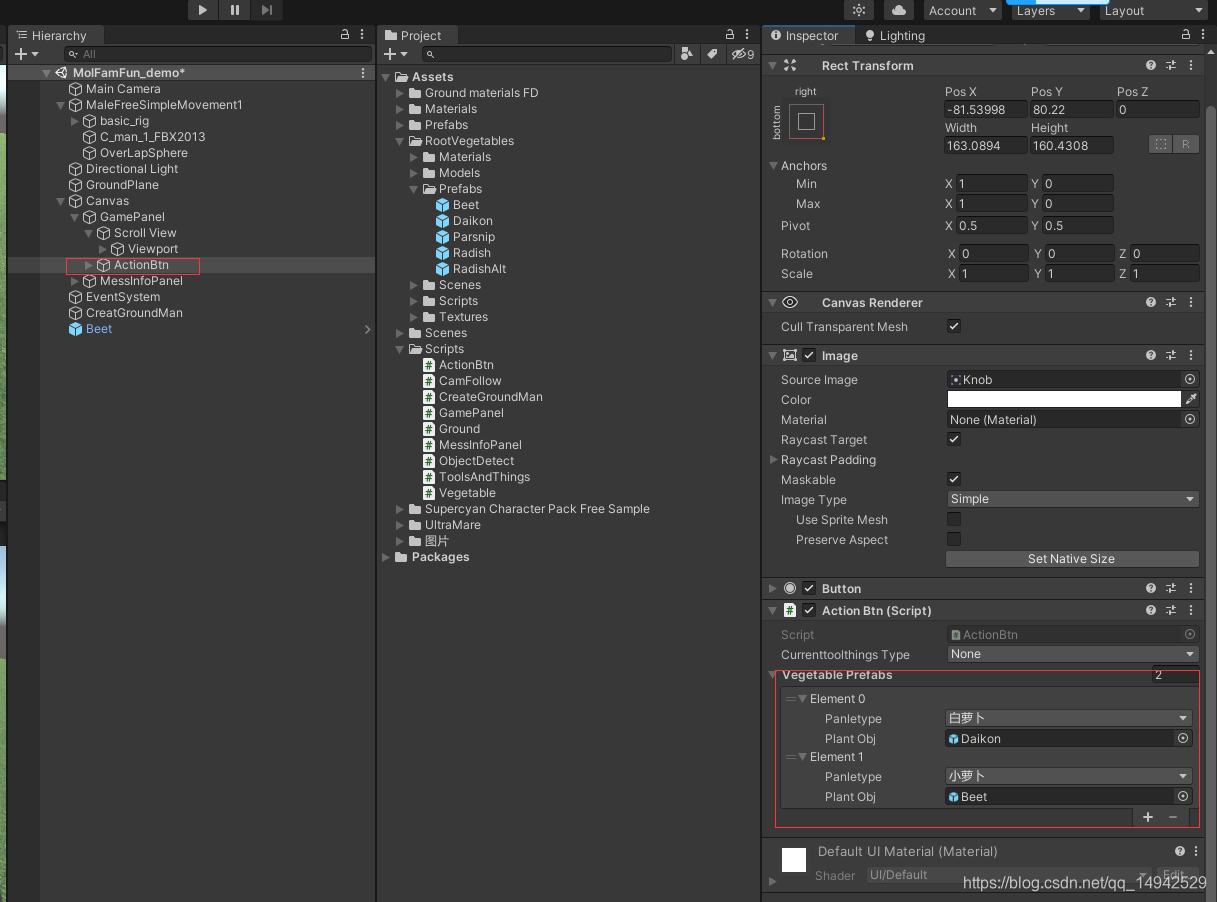
Then go back to ActionBtn and add a script to it, named ActionBtn, which is mainly responsible for handling events. The complete code is as follows:
using System.Collections;
using System.Collections.Generic;
using UnityEngine;
using UnityEngine.UI;

[System.Serializable]
/// <summary>
/// 蔬菜类型对应的游戏物体
/// </summary>
public struct VegetablePrefab
{


    public ToolAndThingsType panletype;
    public GameObject plantObj;
}

public class ActionBtn : MonoBehaviour
{


    /// <summary>
    /// 当前的工具或者选择类型
    /// </summary>
    public ToolAndThingsType CurrenttoolthingsType;
    public List<VegetablePrefab> vegetablePrefabs = new List<VegetablePrefab>();
    public Dictionary<ToolAndThingsType, GameObject> toolandObjects = new Dictionary<ToolAndThingsType, GameObject>();

    private Button actionBtn;
    void Start()
    {


        actionBtn = GetComponent<Button>();
        actionBtn.onClick.AddListener(ActionButtonClick);

        foreach (var vp in vegetablePrefabs)
        {


            toolandObjects.Add(vp.panletype, vp.plantObj);
        }

    }

    // Update is called once per frame
    void Update()
    {


    }


    /// <summary>
    /// 按钮事件
    /// </summary>
    private void ActionButtonClick()
    {


        switch (CurrenttoolthingsType)
        {


            case ToolAndThingsType.None:
                break;
            case ToolAndThingsType.PA:
                PA_ToolEvent();
                break;
            case ToolAndThingsType.SHUIHU:
                SHUIHU_ToolEvent();
                break;
            case ToolAndThingsType.LANZI:
                LANZI_ToolEvent();
                break;
            case ToolAndThingsType.小萝卜:
                XIAOLUOBO_PlantEvent();
                break;
            case ToolAndThingsType.白萝卜:
                BAILUOBO_PlantEvent();

                break;
            default:
                break;
        }
    }
    /// <summary>
    /// 篮子工具
    /// </summary>
    public void LANZI_ToolEvent()
    {


        Vegetable v = ObjectDetect._instance.GetNearByMatureVege();
        if (v != null)
        {


            v.PickVege();
        }
    }

    /// <summary>
    /// 水壶工具
    /// </summary>
   public void SHUIHU_ToolEvent()
    {


        Vegetable v = ObjectDetect._instance.GetNearByNeedWaterVege();
        if (v != null)
        {


            v.WaterV();
        }
    }

    /// <summary>
    /// 杷工具使用
    /// </summary>
    public void PA_ToolEvent()
    {


        Ground g =ObjectDetect._instance.GetNearByUnOpenGround();
        if (g != null)
        {


            g.OpenGround();
        }
    }
    /// <summary>
    /// 小萝卜种植
    /// </summary>
    public void XIAOLUOBO_PlantEvent()
    {


        Ground g = ObjectDetect._instance.GetNearByUnPlantGround();
        if (g != null)
        {


            ///设置基本信息
            Vector3 pos = g.transform.position;
            GameObject obj = Instantiate(toolandObjects[CurrenttoolthingsType], pos, Quaternion.identity);
            obj.transform.SetParent(g.transform);
            g.PlantVege(CurrenttoolthingsType);
            MessInfoPanel._instance.ShowMess("种植"+CurrenttoolthingsType+"成功");
        }
    }

    /// <summary>
    /// 白萝卜种植
    /// </summary>
    public void BAILUOBO_PlantEvent()
    {


        Ground g = ObjectDetect._instance.GetNearByUnPlantGround();
        if (g != null)
        {


            Vector3 pos = g.transform.position;
            GameObject obj = Instantiate(toolandObjects[CurrenttoolthingsType], pos, Quaternion.identity);
            obj.transform.SetParent(g.transform);
            g.PlantVege(CurrenttoolthingsType);
            MessInfoPanel._instance.ShowMess("种植" + CurrenttoolthingsType + "成功");
        }
    }


}
Finally, we need to go back to Unity to set the corresponding parameters.
Finally, add a script to the game item MessInfoPanel, named MessInfoPanel, mainly to display some information:
using System.Collections;
using System.Collections.Generic;
using UnityEngine;
using UnityEngine.UI;
public class MessInfoPanel : MonoBehaviour
{


    public static MessInfoPanel _instance;
    private void Awake()
    {


        _instance = this;
    }
    public Text messText;
    void Start()
    {


        messText = GetComponentInChildren<Text>();
        GetComponent<Image>().CrossFadeAlpha(0, 1,true);
        messText.gameObject.SetActive(false);
    }

    // Update is called once per frame
    void Update()
    {


    }

    IEnumerator showMessIE(string info)
    {


        GetComponent<Image>().CrossFadeAlpha(1, 1, true);
        messText.gameObject.SetActive(true);
        messText.text = info;
        yield return new WaitForSeconds(1f);
        GetComponent<Image>().CrossFadeAlpha(0, 1, true);
        messText.gameObject.SetActive(false);
    }
    public void ShowMess(string info)
    {


        StartCoroutine(showMessIE(info));
    }
}
The above is basically all the content of this tutorial.