foreword
Interactive live broadcast is the basis for realizing many popular scenarios, such as live delivery of goods, live broadcast of shows, and live PK similar to Douyin. This article is the second in the series of Flutter basic tutorials written by the developer " Little Ape " of the Shengwang community. He will take everyone to use the Shengwang Flutter SDK to realize the basics of live video, posting comments, and giving gifts for an hour. Function.
How long does it take to develop a cross-platform live broadcast function? What if the live broadcast also needs to support various interactive effects?
The answer I gave is less than an hour. With the support of Flutter + SoundNet SDK, you can complete the prototype of an interactive live broadcast within an hour .
As one of the earliest SDK manufacturers to support the Flutter platform, Acoustics' RTC SDK implementation mainly comes from packaged native code such as C/C++, which will be packaged as a dynamic link library for the corresponding platform, and finally passed through Dart's FFI ( ffigen) to encapsulate and call, reducing the performance overhead on the Channel when Flutter interacts with the native platform.
before the start
Next, let's get to the point. Since we have chosen the implementation route of Flutter + Acoustic Network, there must be some preconditions that need to be prepared before starting. First, in order to meet the conditions for using the Acoustic Network RTC SDK, the development environment must be:
- Flutter 2.0 or later
- Dart 2.14.0 or later
Judging from the current versions of Flutter and Dart, the above requirements are not too high, and then you need to register a voicenet developer account to obtain the configuration parameters such as App ID and Token required for subsequent configuration.
If you want to configure "door clear", you can skip this part and go to the next chapter directly.
create project
First, you can click Create Project on the project management page of the Agora console , then enter the project name in the pop-up box, and then select the " Interactive Live " scene and "Security Mode (APP ID + Token)" to complete the project creation.
According to the regulations, real-name authentication is required to create a project, which is essential. In addition, the usage scenarios do not need to be too entangled. After the project is created, you can modify it according to your needs.
Get App ID
Click the created project configuration in the project list, and after entering the project details page, you will see an App ID field in the basic information column. Click the icon as shown in the figure below to get the App ID of the project.
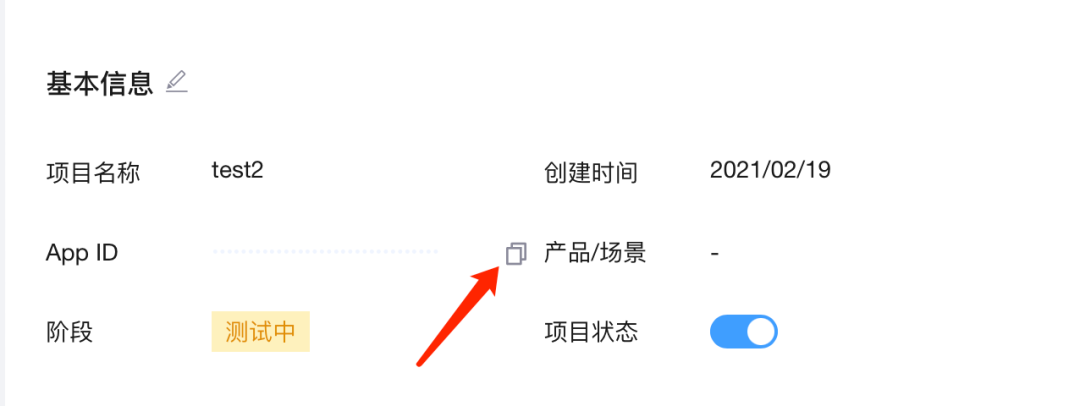
App ID is also one of sensitive information, so try to keep it properly to avoid leakage .
Get Token
In order to improve the security of the project, Acoustics recommends the use of Token to authenticate users who join the channel. In the production environment, generally to ensure security, users are required to issue Tokens through their own servers , and if it is required for testing, you can Obtain a temporary token from the "Temporary Token Generator" on the project details page:
Enter a temporary channel in the channel name, such as Test2, and then click the Generate Temporary Token button to obtain a temporary Token, which is valid for 24 hours.

The Token and channel name obtained here can be directly used for subsequent tests . If it is used in the production environment, it is recommended to issue the Token on the server side. In addition to the App ID, the App certificate will be used to issue the Token. App certificates can also be obtained in Obtained from the application configuration of the project details.

For more information about issuing Tokens on the server side, see the token server documentation .
start development
Through the previous configuration, we now have the App ID, channel name and a valid temporary Token. The next step is to introduce the RTC SDK of Agora: agora_rtc_engine in the Flutter project .
project configuration
First, add the following dependencies to the pubspec.yaml file of the Flutter project , where agora_rtc_engine is introduced here as version 6.1.0 .
In fact, permission_handler is not necessary, just because the video call project must apply for microphone and camera permissions, so it is recommended to use permission_handler to complete the dynamic application of permissions.
dependencies:
  flutter:
    sdk: flutter

  agora_rtc_engine: ^6.1.0
  permission_handler: ^10.2.0
It should be noted here that the Android platform does not need to add uses-permission to the AndroidManifest.xml file of the main project , because the AndroidManifest.xml of the SDK has already added the required permissions.
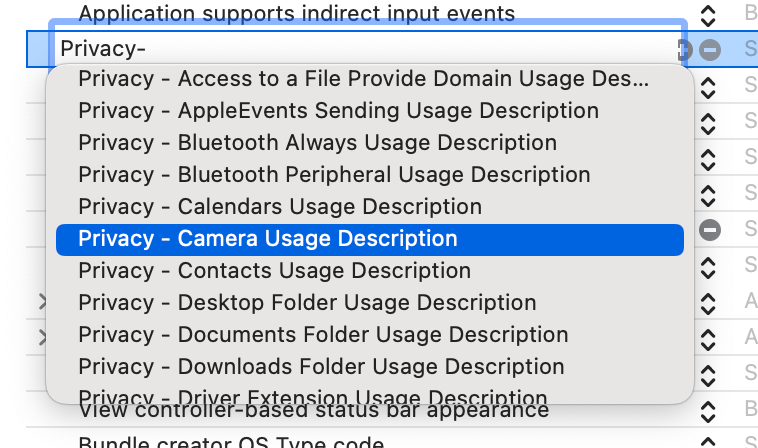
iOS and macOS can directly add NSCameraUsageDescription and NSCameraUsageDescription permission declarations in the Info.plist file, or add Privacy - Microphone Usage Description and Privacy - Camera Usage Description in the Info column of Xcode .
  <key>NSCameraUsageDescription</key>
  <string>*****</string>
  <key>NSMicrophoneUsageDescription</key>
  <string>*****</string>
Using the SoundNet SDK
get permission
Before officially calling the API of the SoundNet SDK, we first need to apply for permissions. As shown in the following code, you can use the request of permission_handler to obtain the required microphone and camera permissions in advance.
@override
void initState() {
  super.initState();

  _requestPermissionIfNeed();
}

Future<void> _requestPermissionIfNeed() async {
  await [Permission.microphone, Permission.camera].request();
}
Because it is a test project, we can apply for it on the home page of the application by default.
Initialize the engine
Next, start to configure the RTC engine, as shown in the following code, after importing the corresponding dart file, you can quickly create the engine through the createAgoraRtcEngine method that comes with the SDK, and then initialize the RTC engine through the initialize method, as you can see here will use Initialize the App ID obtained when creating the project earlier.
Note that the engine needs to be initialized after requesting permission.
import 'package:agora_rtc_engine/agora_rtc_engine.dart';

late final RtcEngine _engine;


Future<void> _initEngine() async {
   _engine = createAgoraRtcEngine();
  await _engine.initialize(const RtcEngineContext(
    appId: appId,
  ));
  ···
}
Then we need to register a series of callback methods through registerEventHandler . There are many callback notifications in RtcEngineEventHandler . In general, the following ones are commonly used:
- onError: determine the error type and error message
- onJoinChannelSuccess: join the channel successfully
- onUserJoined: A user has joined the channel
- onUserOffline: A user has left the channel
- onLeaveChannel: leave the channel
- onStreamMessage: Used to accept messages sent by remote users
    Future<void> _initEngine() async {
        ···
       _engine.registerEventHandler(RtcEngineEventHandler(
        onError: (ErrorCodeType err, String msg) {},
        onJoinChannelSuccess: (RtcConnection connection, int elapsed) {
          setState(() {
            isJoined = true;
          });
        },
        onUserJoined: (RtcConnection connection, int rUid, int elapsed) {
          remoteUid.add(rUid);
          setState(() {});
        },
        onUserOffline:
            (RtcConnection connection, int rUid, UserOfflineReasonType reason) {
          setState(() {
            remoteUid.removeWhere((element) => element == rUid);
          });
        },
        onLeaveChannel: (RtcConnection connection, RtcStats stats) {
          setState(() {
            isJoined = false;
            remoteUid.clear();
          });
        },
        onStreamMessage: (RtcConnection connection, int remoteUid, int streamId,
            Uint8List data, int length, int sentTs) {

        }));
The user can judge the UI state according to the callback above, for example, when the current user is in the channel, the other party's avatar and data are displayed, the user is prompted to enter the live broadcast room, and the message sent by the audience is received.
Next, because our requirement is " interactive live broadcast ", there will be the concept of viewers and hosts, so the following code shows:
- First, you need to call enableVideo to enable the video module support, and you can see the video screen
- At the same time, we can also perform some simple configurations on video encoding, such as configuring the resolution and frame rate through
VideoEncoderConfiguration - According to the different users, we assume that the type is " Create " is the anchor, **"Join"** is the audience
- Then during initialization, the anchor needs to start the preview through startPreview
- Viewers need to pass enableLocalAudio(false) ; and enableLocalVideo(false) ; turn off local audio and video effects
Future<void> _initEngine() async {
    ···
    _engine.enableVideo();
    await _engine.setVideoEncoderConfiguration(
      const VideoEncoderConfiguration(
        dimensions: VideoDimensions(width: 640, height: 360),
        frameRate: 15,
      ),
    );
    /// 自己直播才需要预览
    if (widget.type == "Create") {
      await _engine.startPreview();
    }

    if (widget.type != "Create") {
      _engine.enableLocalAudio(false);
      _engine.enableLocalVideo(false);
    }
More parameter configuration support for setVideoEncoderConfiguration is as follows:

Next, you need to initialize a VideoViewController , depending on the role:
- The host can directly build the controller through VideoViewController , because the screen is streamed locally through the host
- The viewer needs to build it through VideoViewController.remote , because what the viewer needs to obtain is the information flow of the host. The difference is that more connection parameters need to be written into the channelId , and at the same time, the VideoCanvas needs to be written into the uid of the host to get the screen
late VideoViewController rtcController;
Future<void> _initEngine() async {
   ···
   rtcController = widget.type == "Create"
       ? VideoViewController(
           rtcEngine: _engine,
           canvas: const VideoCanvas(uid: 0),
         )
       : VideoViewController.remote(
           rtcEngine: _engine,
           connection: const RtcConnection(channelId: cid),
           canvas: VideoCanvas(uid: widget.remoteUid),
         );
   setState(() {
     _isReadyPreview = true;
   });
Finally, just call joinChannel to join the live room, and these parameters are required:
- token is the Token temporarily generated earlier
- channelId is the previous channel name
- uid is the id of the current user, these ids are defined by ourselves
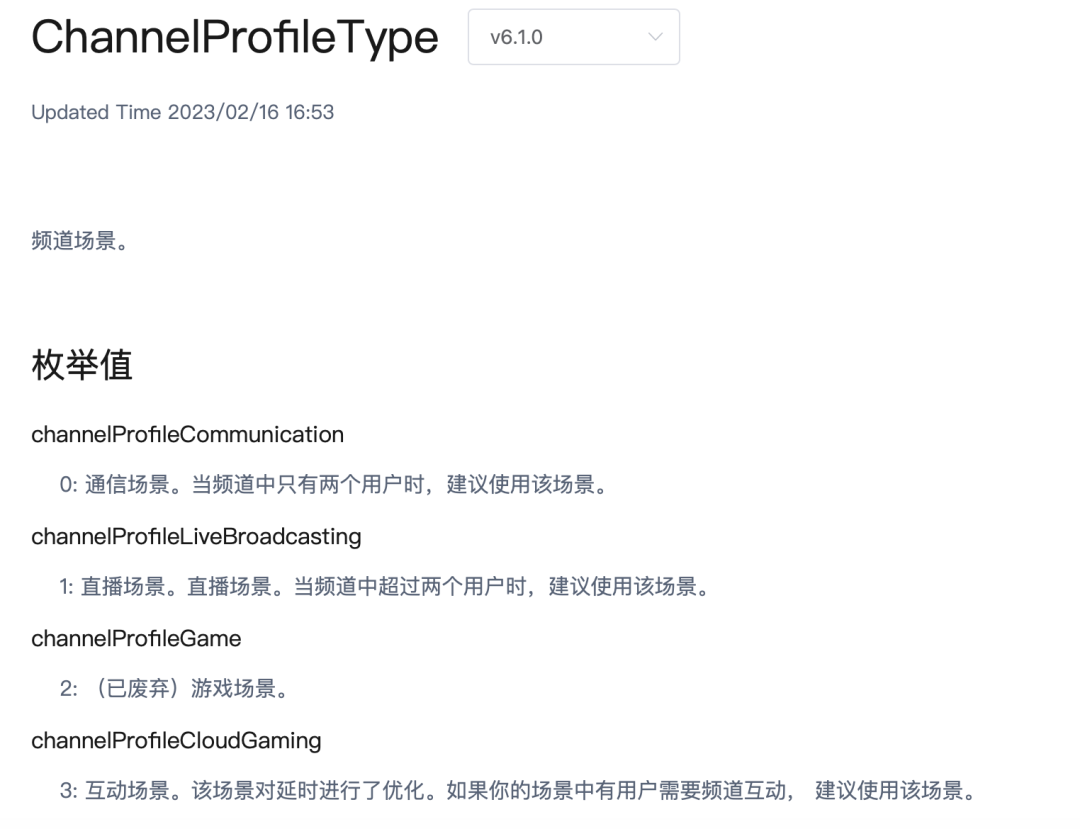
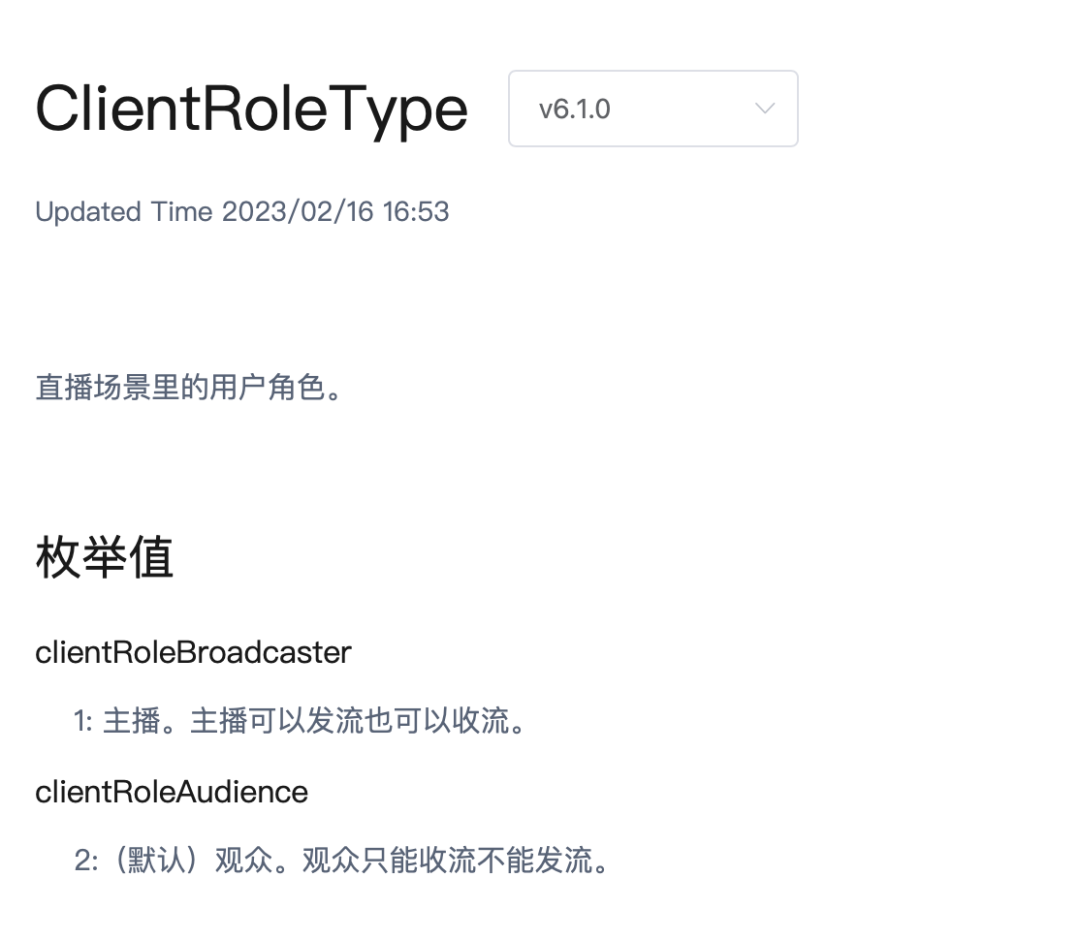
- channelProfile We can choose different categories according to the role. For example, because the anchor is the initiator, he can choose channelProfileLiveBroadcasting ; while the audience chooses channelProfileCommunication
- clientRoleType select clientRoleBroadcaster
Future<void> _initEngine() async {
   ···
   await _joinChannel();
}
Future<void> _joinChannel() async {
  await _engine.joinChannel(
    token: token,
    channelId: cid,
    uid: widget.uid,
    options: ChannelMediaOptions(
      channelProfile: widget.type == "Create"
          ? ChannelProfileType.channelProfileLiveBroadcasting
          : ChannelProfileType.channelProfileCommunication,
      clientRoleType: ClientRoleType.clientRoleBroadcaster,
      // clientRoleType: widget.type == "Create"
      //     ? ClientRoleType.clientRoleBroadcaster
      //     : ClientRoleType.clientRoleAudience,
    ),
  );
Before, I thought that the audience could choose the role of clientRoleAudience, but later found that if the user joins the live broadcast room through clientRoleAudience , callbacks such as onUserJoined will not be triggered, which will affect our subsequent development, so I finally chose clientRoleBroadcaster .
rendering screen
The next step is to render the screen. As shown in the following code, add the AgoraVideoView control to the UI, and configure the successfully initialized RtcEngine and VideoViewController above to AgoraVideoView to complete the screen preview.
Stack(
  children: [
    AgoraVideoView(
      controller: rtcController,
    ),
    Align(
      alignment: const Alignment(-.95, -.95),
      child: SingleChildScrollView(
        scrollDirection: Axis.horizontal,
        child: Row(
          children: List.of(remoteUid.map(
            (e) => Container(
              width: 40,
              height: 40,
              decoration: const BoxDecoration(
                  shape: BoxShape.circle, color: Colors.blueAccent),
              alignment: Alignment.center,
              child: Text(
                e.toString(),
                style: const TextStyle(
                    fontSize: 10, color: Colors.white),
              ),
            ),
          )),
        ),
      ),
    ),
Here, a SingleChildScrollView is added to the top of the page to draw the viewer id in the live broadcast room to show how many viewers are currently online.
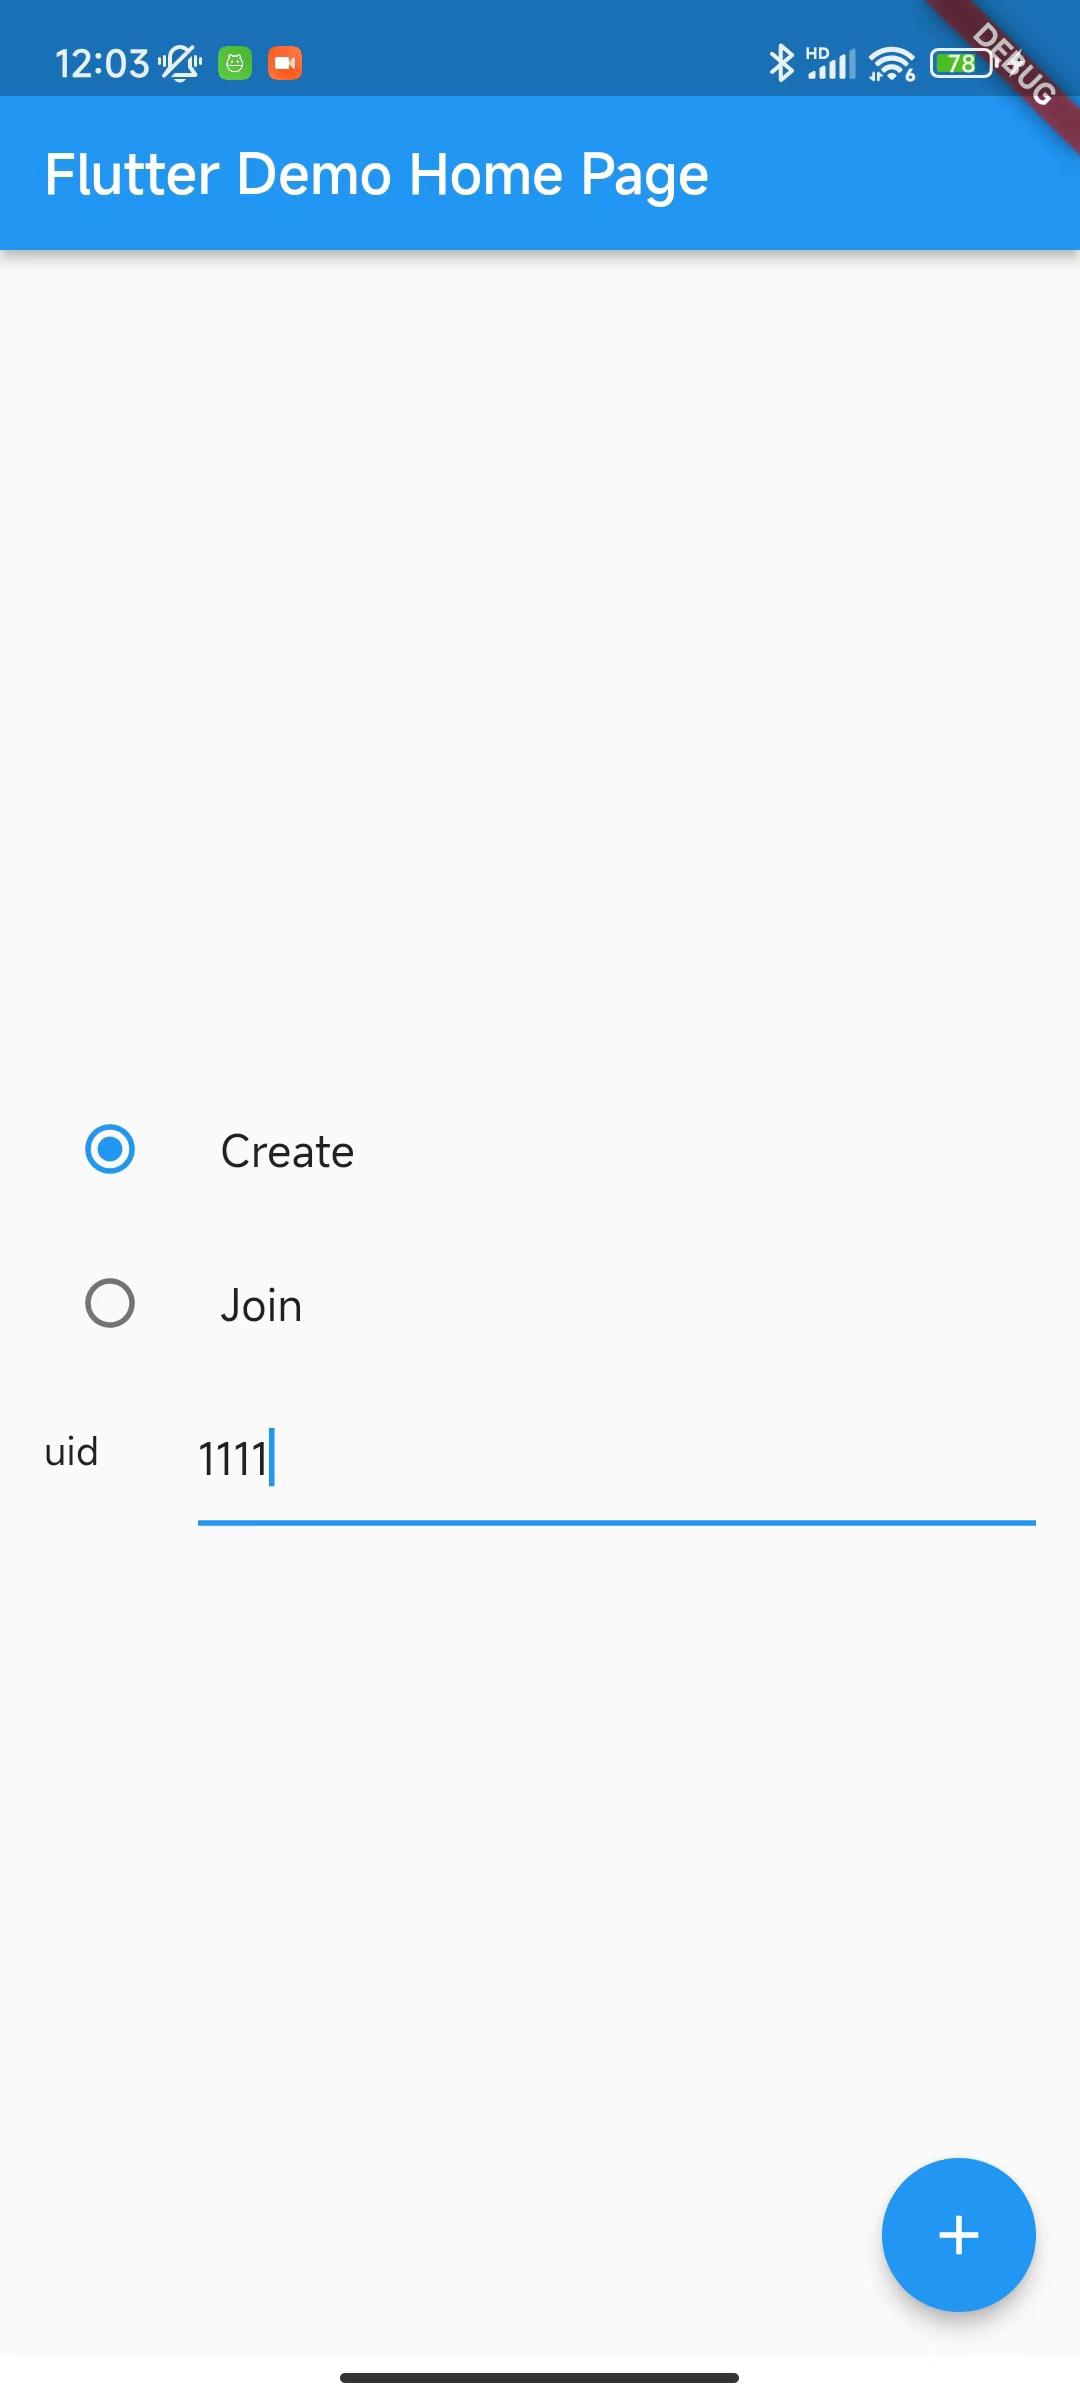
Then we only need to do some simple configuration to complete a simple live broadcast demo, as shown in the figure below, on the home page we provide two roles to choose from, Create and Join, and simulate the user's uid to enter the live broadcast room:
- The anchor only needs to enter his uid to start broadcasting
- Viewers need to enter their own uid and the anchor's uid at the same time, so as to get the anchor's screen


Then we only need to open the page through Navigator.push , and you can see the screen effect of the audience (right) entering the live broadcast room after the anchor (left) successfully starts broadcasting. At this time, if you look at the screenshot below, you may find the audience and the anchor. The picture is mirrored in reverse.

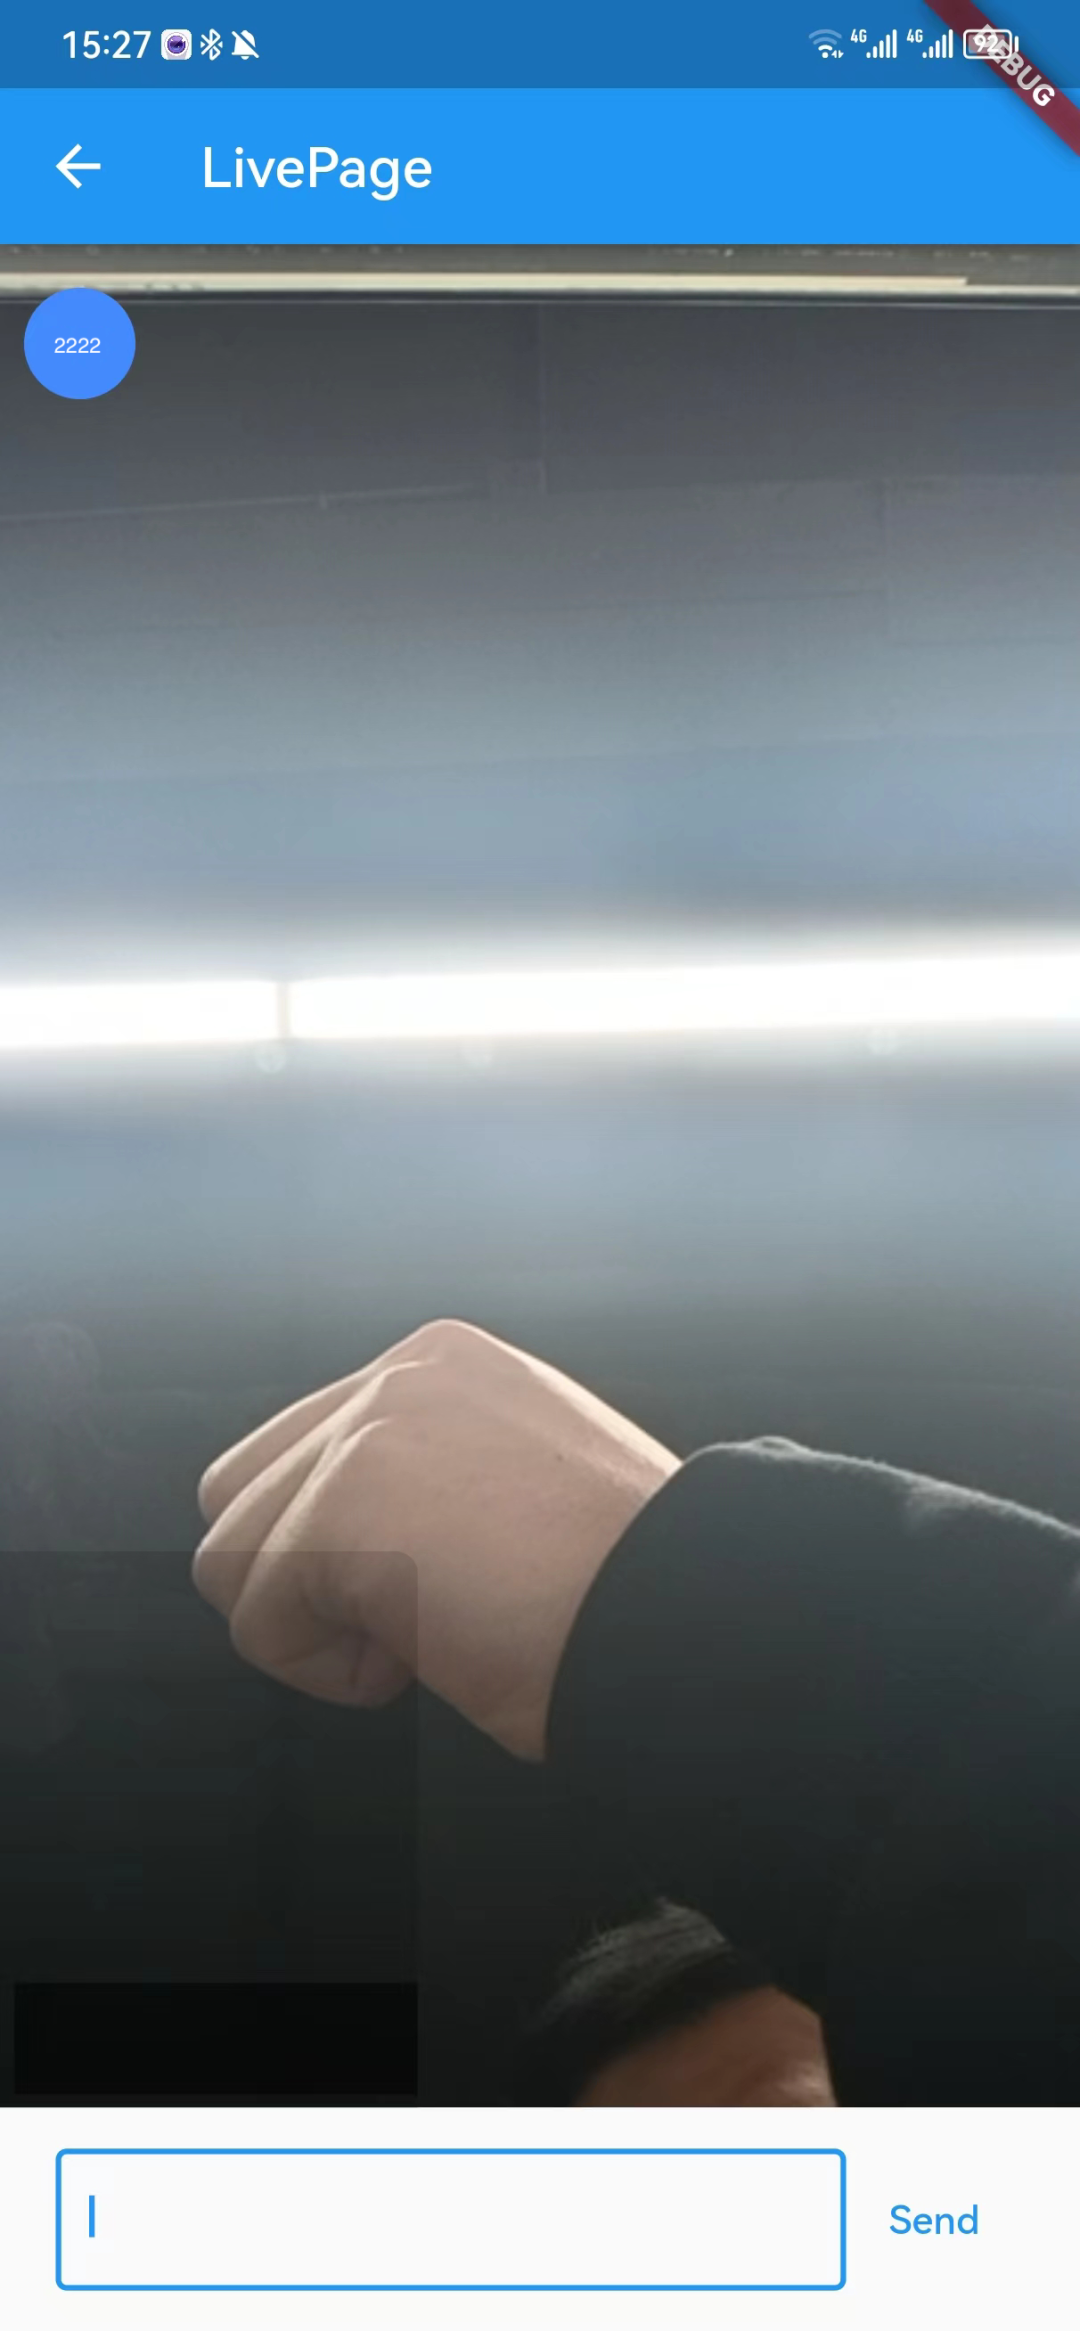
If you want the anchor and audience to see the same screen, you can configure the mirrorMode as videoMirrorModeEnabled in the VideoEncoderConfiguration of the previous initialization code , so that the anchor screen and the audience can be consistent.
  await _engine.setVideoEncoderConfiguration(
      const VideoEncoderConfiguration(
        dimensions: VideoDimensions(width: 640, height: 360),
        frameRate: 15,
        bitrate: 0,
        mirrorMode: VideoMirrorModeType.videoMirrorModeEnabled,
      ),
    );
The mirrorMode configuration here does not need to distinguish roles, because the mirrorMode parameter only affects the video effect seen by the remote user.


In the lower left corner of the animation above, there is also a prompt effect when the viewer enters the live broadcast room. This is realized according to the onUserJoined callback. After receiving the user entering the live broadcast room, the id is written into the array, and it is removed through PageView for round-robin display.
interactive development
We have completed the simple demo effect of the live broadcast before, and the next step is to realize the idea of "interaction".
Earlier, we registered an onStreamMessage callback during initialization, which can be used for message interaction between the anchor and the audience. Next, we mainly use two "interaction" effects to demonstrate the ability to use the Agora SDK to achieve interaction.
The first is "message interaction":
- We need to get a streamId through the SDK's createDataStream method
- Then convert the text content to be sent to Uint8List
- Finally, use sendStreamMessage to combine streamId to send the content to the live broadcast room
streamId = await _engine.createDataStream(
    const DataStreamConfig(syncWithAudio: false, ordered: false));

final data = Uint8List.fromList(
                          utf8.encode(messageController.text));

await _engine.sendStreamMessage(
                        streamId: streamId, data: data, length: data.length);
In onStreamMessage , we can get the text content sent by the user through utf8.decode(data) , combined with the received user id, according to the content, we can get the interactive message list as shown in the figure below.
onStreamMessage: (RtcConnection connection, int remoteUid, int streamId,
    Uint8List data, int length, int sentTs) {
  var message = utf8.decode(data);
  doMessage(remoteUid, message);
}));
The id displayed in the front corresponds to the text content sent by the user

Then let's take it a step further. After receiving some "special format messages" from users, we can display animation effects instead of text content, for example:
An animation pops up when receiving a message in [ *** ] format, similar to a fan gift.
To achieve this effect, we can introduce a third-party rive animation library, which can be loaded remotely as long as it passes through RiveAnimation.network . Here we directly refer to a free riv animation opened by the community, and close the animation 3 seconds after popping up.
  showAnima() {
    showDialog(
        context: context,
        builder: (context) {
          return const Center(
            child: SizedBox(
              height: 300,
              width: 300,
              child: RiveAnimation.network(
                'https://public.rive.app/community/runtime-files/4037-8438-first-animation.riv',
              ),
            ),
          );
        },
        barrierColor: Colors.black12);
    Future.delayed(const Duration(seconds: 3), () {
      Navigator.of(context).pop();
    });
  }
Finally, we judge through a simple rule. If we receive a message in [ *** ] format, an animation will pop up, and if it is other, we will display the text content. The final effect is shown in the animation below.
bool isSpecialMessage(message) {
  RegExp reg = RegExp(r"[*]$");
  return reg.hasMatch(message);
}

doMessage(int id, String message) {
  if (isSpecialMessage(message) == true) {
    showAnima();
  } else {
    normalMessage(id, message);
  }
}

Although the code is not very rigorous, he showed that if you use the SoundNet SDK to achieve the effect of "interaction", you can see that using the SoundNet SDK requires only simple configuration to complete the two requirements scenarios of "live broadcast" and "interaction".
The complete code is as follows. In addition to the SoundNet SDK, two other third-party packages are introduced:
- flutter_swiper_view realizes the loop playback prompt when the user enters
- rive is used for the animation effect we showed above
import 'dart:async';
import 'dart:convert';
import 'dart:typed_data';

import 'package:agora_rtc_engine/agora_rtc_engine.dart';
import 'package:flutter/material.dart';
import 'package:flutter_swiper_view/flutter_swiper_view.dart';
import 'package:rive/rive.dart';

const token = "xxxxxx";
const cid = "test";
const appId = "xxxxxx";

class LivePage extends StatefulWidget {
  final int uid;
  final int? remoteUid;
  final String type;

  const LivePage(
      {required this.uid, required this.type, this.remoteUid, Key? key})
      : super(key: key);

  @override
  State<StatefulWidget> createState() => _State();
}

class _State extends State<LivePage> {
  late final RtcEngine _engine;
  bool _isReadyPreview = false;

  bool isJoined = false;
  Set<int> remoteUid = {};
  final List<String> _joinTip = [];
  List<Map<int, String>> messageList = [];

  final messageController = TextEditingController();
  final messageListController = ScrollController();
  late VideoViewController rtcController;
  late int streamId;

  final animaStream = StreamController<String>();

  @override
  void initState() {
    super.initState();
    animaStream.stream.listen((event) {
      showAnima();
    });
    _initEngine();
  }

  @override
  void dispose() {
    super.dispose();
    animaStream.close();
    _dispose();
  }

  Future<void> _dispose() async {
    await _engine.leaveChannel();
    await _engine.release();
  }

  Future<void> _initEngine() async {
    _engine = createAgoraRtcEngine();
    await _engine.initialize(const RtcEngineContext(
      appId: appId,
    ));

    _engine.registerEventHandler(RtcEngineEventHandler(
        onError: (ErrorCodeType err, String msg) {},
        onJoinChannelSuccess: (RtcConnection connection, int elapsed) {
          setState(() {
            isJoined = true;
          });
        },
        onUserJoined: (RtcConnection connection, int rUid, int elapsed) {
          remoteUid.add(rUid);
          var tip = (widget.type == "Create")
              ? "$rUid 来了"
              : "${connection.localUid} 来了";
          _joinTip.add(tip);
          Future.delayed(const Duration(milliseconds: 1500), () {
            _joinTip.remove(tip);
            setState(() {});
          });
          setState(() {});
        },
        onUserOffline:
            (RtcConnection connection, int rUid, UserOfflineReasonType reason) {
          setState(() {
            remoteUid.removeWhere((element) => element == rUid);
          });
        },
        onLeaveChannel: (RtcConnection connection, RtcStats stats) {
          setState(() {
            isJoined = false;
            remoteUid.clear();
          });
        },
        onStreamMessage: (RtcConnection connection, int remoteUid, int streamId,
            Uint8List data, int length, int sentTs) {
          var message = utf8.decode(data);
          doMessage(remoteUid, message);
        }));

    _engine.enableVideo();
    await _engine.setVideoEncoderConfiguration(
      const VideoEncoderConfiguration(
        dimensions: VideoDimensions(width: 640, height: 360),
        frameRate: 15,
        bitrate: 0,
        mirrorMode: VideoMirrorModeType.videoMirrorModeEnabled,
      ),
    );

    /// 自己直播才需要预览
    if (widget.type == "Create") {
      await _engine.startPreview();
    }

    await _joinChannel();

    if (widget.type != "Create") {
      _engine.enableLocalAudio(false);
      _engine.enableLocalVideo(false);
    }

    rtcController = widget.type == "Create"
        ? VideoViewController(
            rtcEngine: _engine,
            canvas: const VideoCanvas(uid: 0),
          )
        : VideoViewController.remote(
            rtcEngine: _engine,
            connection: const RtcConnection(channelId: cid),
            canvas: VideoCanvas(uid: widget.remoteUid),
          );
    setState(() {
      _isReadyPreview = true;
    });
  }

  Future<void> _joinChannel() async {
    await _engine.joinChannel(
      token: token,
      channelId: cid,
      uid: widget.uid,
      options: ChannelMediaOptions(
        channelProfile: widget.type == "Create"
            ? ChannelProfileType.channelProfileLiveBroadcasting
            : ChannelProfileType.channelProfileCommunication,
        clientRoleType: ClientRoleType.clientRoleBroadcaster,
        // clientRoleType: widget.type == "Create"
        //     ? ClientRoleType.clientRoleBroadcaster
        //     : ClientRoleType.clientRoleAudience,
      ),
    );

    streamId = await _engine.createDataStream(
        const DataStreamConfig(syncWithAudio: false, ordered: false));
  }

  bool isSpecialMessage(message) {
    RegExp reg = RegExp(r"[*]$");
    return reg.hasMatch(message);
  }

  doMessage(int id, String message) {
    if (isSpecialMessage(message) == true) {
      animaStream.add(message);
    } else {
      normalMessage(id, message);
    }
  }

  normalMessage(int id, String message) {
    messageList.add({id: message});
    setState(() {});
    Future.delayed(const Duration(seconds: 1), () {
      messageListController
          .jumpTo(messageListController.position.maxScrollExtent + 2);
    });
  }

  showAnima() {
    showDialog(
        context: context,
        builder: (context) {
          return const Center(
            child: SizedBox(
              height: 300,
              width: 300,
              child: RiveAnimation.network(
                'https://public.rive.app/community/runtime-files/4037-8438-first-animation.riv',
              ),
            ),
          );
        },
        barrierColor: Colors.black12);
    Future.delayed(const Duration(seconds: 3), () {
      Navigator.of(context).pop();
    });
  }

  @override
  Widget build(BuildContext context) {
    if (!_isReadyPreview) return Container();
    return Scaffold(
      appBar: AppBar(
        title: const Text("LivePage"),
      ),
      body: Column(
        children: [
          Expanded(
            child: Stack(
              children: [
                AgoraVideoView(
                  controller: rtcController,
                ),
                Align(
                  alignment: const Alignment(-.95, -.95),
                  child: SingleChildScrollView(
                    scrollDirection: Axis.horizontal,
                    child: Row(
                      children: List.of(remoteUid.map(
                        (e) => Container(
                          width: 40,
                          height: 40,
                          decoration: const BoxDecoration(
                              shape: BoxShape.circle, color: Colors.blueAccent),
                          alignment: Alignment.center,
                          child: Text(
                            e.toString(),
                            style: const TextStyle(
                                fontSize: 10, color: Colors.white),
                          ),
                        ),
                      )),
                    ),
                  ),
                ),
                Align(
                  alignment: Alignment.bottomLeft,
                  child: Container(
                    height: 200,
                    width: 150,
                    decoration: const BoxDecoration(
                      borderRadius:
                          BorderRadius.only(topRight: Radius.circular(8)),
                      color: Colors.black12,
                    ),
                    padding: const EdgeInsets.only(left: 5, bottom: 5),
                    child: Column(
                      children: [
                        Expanded(
                          child: ListView.builder(
                            controller: messageListController,
                            itemBuilder: (context, index) {
                              var item = messageList[index];
                              return Padding(
                                padding: const EdgeInsets.symmetric(
                                    horizontal: 10, vertical: 10),
                                child: Row(
                                  crossAxisAlignment: CrossAxisAlignment.start,
                                  children: [
                                    Text(
                                      item.keys.toList().toString(),
                                      style: const TextStyle(
                                          fontSize: 12, color: Colors.white),
                                    ),
                                    const SizedBox(
                                      width: 10,
                                    ),
                                    Expanded(
                                      child: Text(
                                        item.values.toList()[0],
                                        style: const TextStyle(
                                            fontSize: 12, color: Colors.white),
                                      ),
                                    )
                                  ],
                                ),
                              );
                            },
                            itemCount: messageList.length,
                          ),
                        ),
                        Container(
                          height: 40,
                          color: Colors.black54,
                          padding: const EdgeInsets.only(left: 10),
                          child: Swiper(
                            itemBuilder: (context, index) {
                              return Container(
                                alignment: Alignment.centerLeft,
                                child: Text(
                                  _joinTip[index],
                                  style: const TextStyle(
                                      color: Colors.white, fontSize: 14),
                                ),
                              );
                            },
                            autoplayDelay: 1000,
                            physics: const NeverScrollableScrollPhysics(),
                            itemCount: _joinTip.length,
                            autoplay: true,
                            scrollDirection: Axis.vertical,
                          ),
                        ),
                      ],
                    ),
                  ),
                )
              ],
            ),
          ),
          Container(
            height: 80,
            padding: const EdgeInsets.symmetric(horizontal: 20, vertical: 10),
            child: Row(
              children: [
                Expanded(
                  child: TextField(
                      decoration: const InputDecoration(
                        border: OutlineInputBorder(),
                        isDense: true,
                      ),
                      controller: messageController,
                      keyboardType: TextInputType.number),
                ),
                TextButton(
                    onPressed: () async {
                      if (isSpecialMessage(messageController.text) != true) {
                        messageList.add({widget.uid: messageController.text});
                      }
                      final data = Uint8List.fromList(
                          utf8.encode(messageController.text));
                      await _engine.sendStreamMessage(
                          streamId: streamId, data: data, length: data.length);
                      messageController.clear();
                      setState(() {});
                      // ignore: use_build_context_synchronously
                      FocusScope.of(context).requestFocus(FocusNode());
                    },
                    child: const Text("Send"))
              ],
            ),
          ),
        ],
      ),
    );
  }
}
Summarize
As can be seen from the above, it is actually very simple to run through the basic process. Looking back at the previous content, the summary is:
- Apply for microphone and camera permissions
- Create and initialize the engine via App ID
- Register the RtcEngineEventHandler callback for judging the state and receiving interactive capabilities
- root role to open and configure video encoding support
- Call joinChannel to join the live room
- User interface through AgoraVideoView and VideoViewController
- Create and send stream messages through engine
From applying for an account to developing a demo, it took about an hour to develop an " interactive live broadcast " using SoundNet's SDK from demand to implementation. Although the functions and effects of the above implementation are still rough, the main process can run through quickly.
At the same time, with the blessing of Flutter, the code can be reused on the mobile terminal and the PC terminal, which is undoubtedly one of the best combinations for small and medium-sized teams with audio and video needs.
Developers are welcome to also try the SoundNet SDK to realize real-time audio and video interaction scenarios. Now register for a Shengwang account to download the SDK , and you can get a free 10,000-minute usage quota per month. If you have any questions during the development process, you can communicate with official engineers in the Shengwang developer community .