Table of contents
1.1 Introduction to Fully Connected Neural Networks
2.1 Get the parameters of the picture, weight and bias
2.2 Write a fully connected operator in C language
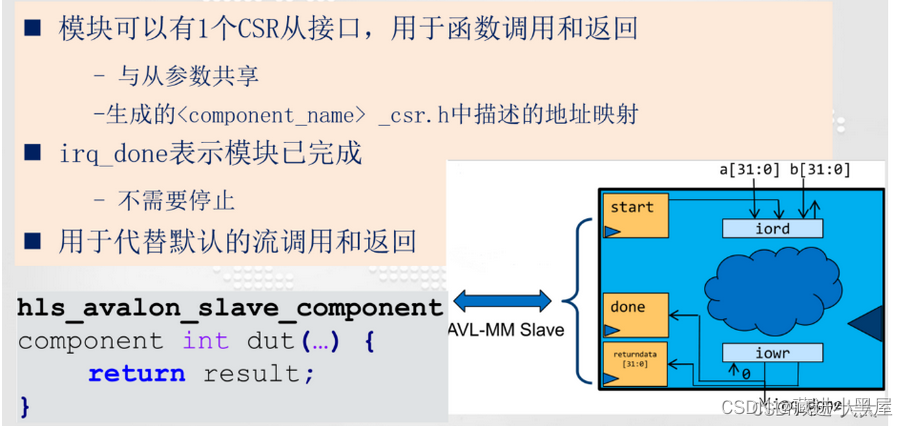
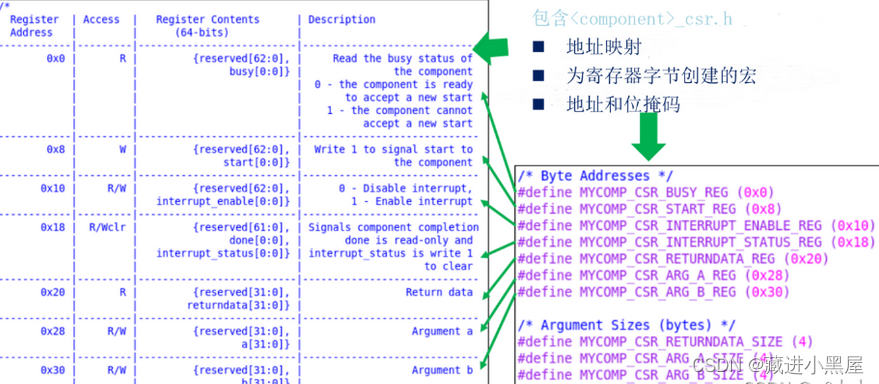
2.3.1 hls_avalon_slave_component
2.3.2 hls_avalon_slave_register_argument
Three input pictures to test and generate IP
3.1.1 Initialize the environment
3.2 Add IP into Quartus and add it to the SOC project to generate hardware
3.2.1 Copy the IP folder to the IP folder of the golden project
A system analysis
1. The handwriting input is a 28x28 black and white picture, so the input is 784.
2. The output is the probability of recognizing numbers from 0-9, so there are 10 outputs.
3. The input can only be a decimal of -1~1, mainly to prevent calculation overflow
1.1 Introduction to Fully Connected Neural Networks
The fully connected neural network model is a multi-layer perceptron (MLP). The principle of the perceptron is to find the most reasonable and robust hyperplane between categories. The most representative perceptron is the SVM support vector machine algorithm. The neural network draws on the perceptron and bionics at the same time. Generally speaking, after receiving a signal, the animal nerves will send each neuron. After receiving the input, each neuron will activate and generate an output signal according to its own judgment, and then summarize it to realize the identification of the information source. , classification, a typical neural network is shown in the figure below: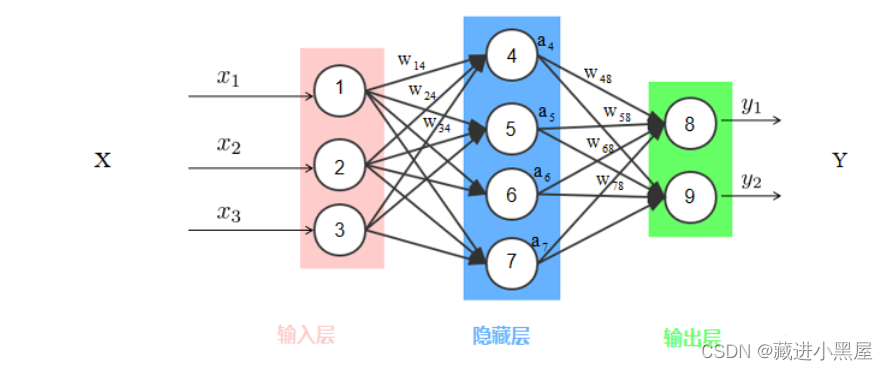
The picture above is a typical fully connected neural network model (DNN), which is sometimes called a deep neural network. Unlike traditional perceptrons, each node has an operational relationship with all nodes in the next layer. This is the name In the meaning of "full connection", the middle layer in the above figure also becomes the hidden layer. The fully connected neural network usually has multiple hidden layers. Increasing the hidden layer can better separate the characteristics of the data, but too many hidden layers will also increase the training. time and overfitting.
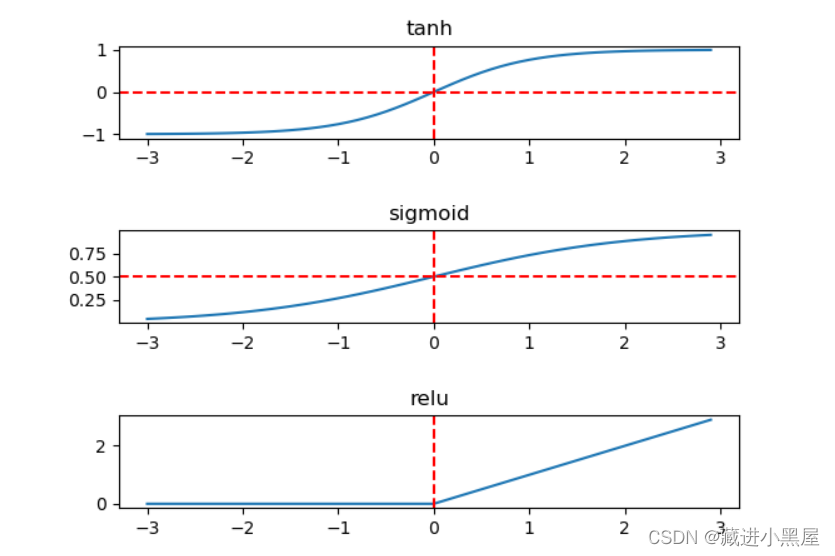
Looking at the figure above, the input data is a 3-dimensional vector, and the hidden layer has 5 nodes, which means that the 3-dimensional vector is mapped to a 5-dimensional vector through linear mapping, and finally becomes a 2-dimensional vector output. When the original input data is linear and inseparable, the fully connected neural network generates nonlinear output through the activation function. Common activation functions include Sigmoid, Tanh, and Relu, as shown in the following figure:
The fully connected neural network training is divided into two processes: forward propagation and backward propagation. The loss function value is calculated after the forward propagation data is input to the output, and the backward propagation is an optimization process. The gradient descent method is used to reduce the forward propagation. The generated loss function value is used to optimize and update parameters.
In short:
The input layer inputs data, calculates through the middle hidden layer, and finally outputs the data through the right output layer
The handwriting recognition done in this project is based on the fully connected neural network.
2. Write the weight parameter and bias parameter file of the fully connected neural network through HLS
2.1 Get the parameters of the picture, weight and bias
Python+ tensorflow neural network training and reasoning plus parameter extraction for mnist dataset
2.2 Write a fully connected operator in C language
Header file import:
#include <stdio.h>
#include "HLS/hls.h"

#include "input_0.h"//十幅图片
#include "input_1.h"
#include "input_2.h"
#include "input_3.h"
#include "input_4.h"
#include "input_5.h"
#include "input_6.h"
#include "input_7.h"
#include "input_8.h"
#include "input_9.h"

#include "layer1_bias.h"    //第一层偏置常数
#include "layer1_weight.h"  //第一层权重
#include "layer2_bias.h"    //第二层偏置常数
#include "layer2_weight.h"  //第二层权重值
Import ten images, and add the weight and bias parameter header files to it
2.3 Slave Interfaces
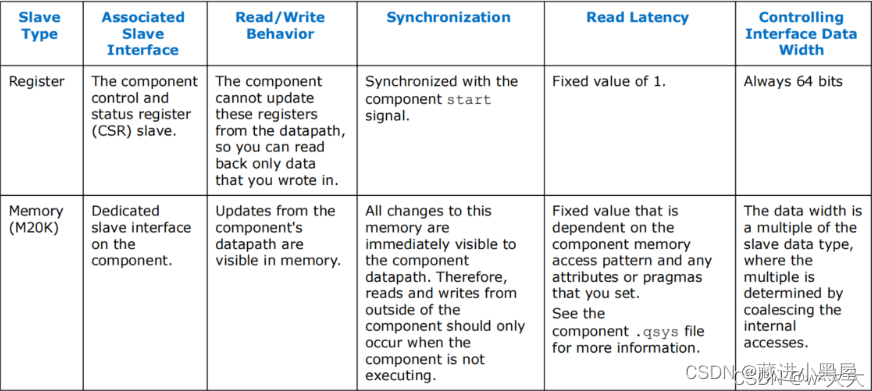
Intel HLS Compiler provides two different types of slave interfaces that you can use in your components. In general, smaller scalar inputs should use slave registers. If you plan to copy large arrays into and out of components, then you should use slave memory.

2.3.1 hls_avalon_slave_component
#include <HLS/hls.h>
#include <stdio.h>
hls_avalon_slave_component
component int dut(int a,int b)
{
    return a*b;
}
int main()
{
    int a=2;
    int b=3;
    int y;
    y = dut(a,b);
    printf("y=%d",y);
    return 0;
}
2.3.2 hls_avalon_slave_register_argument
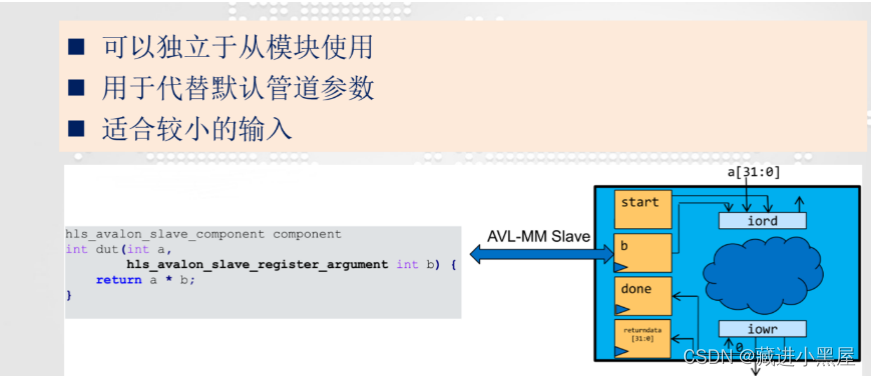
#include <HLS/hls.h>
#include <stdio.h>

hls_avalon_slave_component
component int dut(
                int a,
                hls_avalon_slave_register_argument int b)
{
    return a*b;
}
int main()
{
    int a=2;
    int b=3;
    int y;
    y = dut(a,b);
    printf("y=%d",y);
    return 0;
}
It can be seen that b has become a register
2.3.3 slave_memory_argument
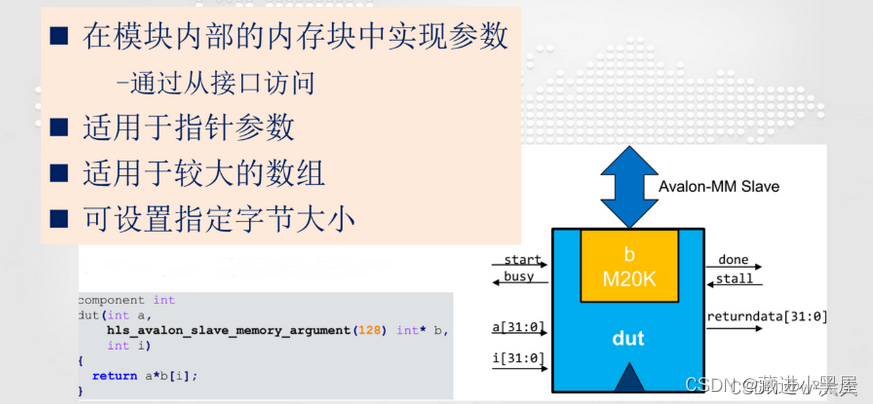
#include <HLS/hls.h>
#include <HLS/stdio.h>

hls_avalon_slave_component
component int dut(
    hls_avalon_slave_memory_argument(5*sizeof(int)) int *a,
    hls_avalon_slave_memory_argument(5*sizeof(int)) int *b
)
{
    int i;
    int sum=0;
    for(i=0;i<5;i++)
    {
        sum =  sum + a[i] * b[i];
        //printf("a[%d]%d",i,a[i]);
    }
    return sum;
}

int main()
{
    int a[5] = {1,2,3,4,5};
    int b[5] = {1,2,3,4,5};
    int sum;
    sum = dut(a,b);
    printf("sum=%d",sum);
    return 0;
}
In this way, both a and b have become memory types.
This experiment is to use HLS to generate input images, weights, and biases as circuit components of the slave memory type, so that the data can be stored in the slave memory and called on the software side later.
Full connection code:
#include <stdio.h>
#include "HLS/hls.h"

#include "input_0.h"//十幅图片
#include "input_1.h"
#include "input_2.h"
#include "input_3.h"
#include "input_4.h"
#include "input_5.h"
#include "input_6.h"
#include "input_7.h"
#include "input_8.h"
#include "input_9.h"

#include "layer1_bias.h"    //第一层偏置常数
#include "layer1_weight.h"  //第一层权重
#include "layer2_bias.h"    //第二层偏置常数
#include "layer2_weight.h"  //第二层权重值

hls_avalon_slave_component component
int my_predit(
    hls_avalon_slave_memory_argument(784*sizeof(float)) float *img,
    hls_avalon_slave_memory_argument(64*sizeof(float)) float *b1,
    hls_avalon_slave_memory_argument(784*64*sizeof(float)) float *w1,
    hls_avalon_slave_memory_argument(10*sizeof(float)) float *b2,
    hls_avalon_slave_memory_argument(64*10*sizeof(float)) float *w2){

    float res1[64]={0},res2[10]={0};    //创建两个浮点数数组 yongyu

//循环1
/*  w1权重在 layer1_weight.h 中按照一行64个,784列顺序排列,
     但实际上是一维数组,我们计算第一层64个神经元的输出*/
    for (int i = 0; i < 64; i++)
    {
        for (int j = 0; j < 784; j++)
        {
            res1[i] = res1[i]+ img[j] * w1[i+j*64];     //w1x1+w2x2 ... wnxn+b
        }
        res1[i] +=b1[i]; //得到第一层的输出
        //printf("%f \n",res1[i]);
    }
//循环2
    for (int i = 0; i < 10; i++)
    {
        for (int j = 0; j < 64; j++)
        {
           res2[i] = res2[i]+ res1[j] * w2[i+j*10]; //输入第一层的输出
        }
        res2[i] +=b2[i];
        //printf("%f \n",res2[i]);
    }
//输出
    float temp = 0; //用一个中间值来寄存特征值最大值
    int res3;
    for (int i = 0; i < 10; i++)
    {
        //printf("%f \n",res2[i]);
        if (res2[i] > temp) //比较10个特征值,找出最大值
        {
            temp = res2[i];
            res3 = i;       //res3的值即为输出层数组中特征值最大值对应的下标 ,也是我们想要的结果
        }
    }
    return res3;    //最后返回i,即是我们的预测结果
}

int main()
{
    //用指针数组来表示10幅图片
    float *a[10] = {input_0,input_1,input_2,input_3,input_4,input_5,input_6,input_7,input_8,input_9};

    for (int i = 0; i < 10; i++)    //循环输出训练结果
    {
        int res =  my_predit(a[i],layer1_bias,layer1_weight,layer2_bias,layer2_weight);//调用函数输出返回值
        printf("input_%d.h预测结果为:%d\n",i,res);
    }

    return 0;
}
Three input pictures to test and generate IP
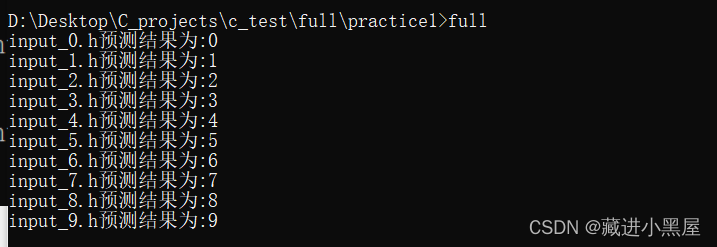
The function of the main function is only for testing and has no practical significance. The purpose is to input the pixels of ten images, get the returned results and output them.
3.1 Compile and test
3.1.1 Initialize the environment
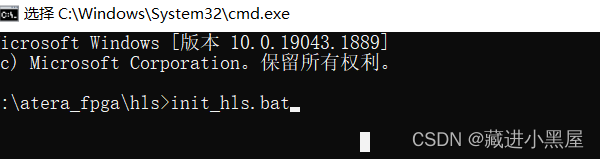
It is to enter the HLS path in your Quartus installation directory , run it with the terminal , and initialize the hls environment.
Let's take my installation directory as an example as a demonstration:
1: Find the path first
2: Hit cmd and press Enter

3: Enter the initialization command
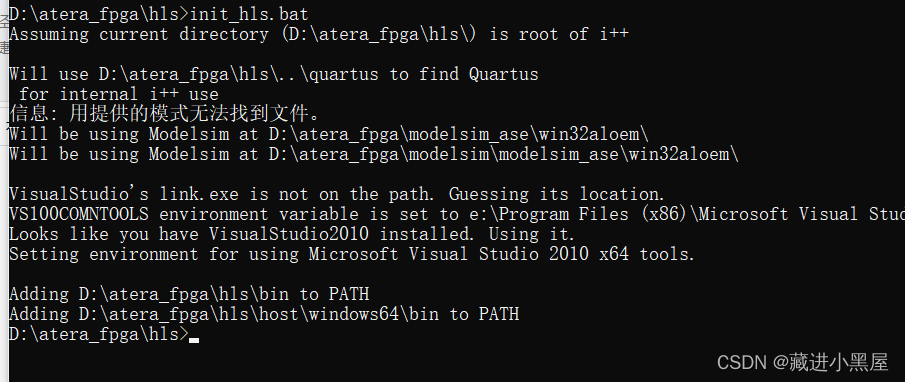
loading finished.
3.1.2 Compile
Do not close the terminal first, but also compile
Go back to the path where your code was written

-v : The function is to display information
-0 full : generate an executable named full
operation result:
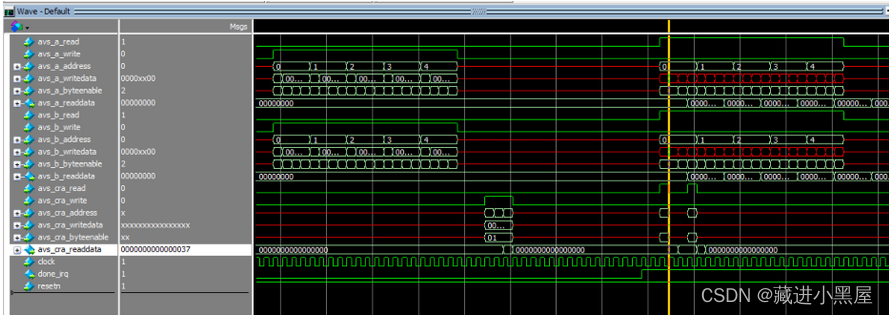
Compile the test on the FPGA platform:


Generate IP folder

At this point, the neural network IP is completed.
3.2 Add IP into Quartus and add it to the SOC project to generate hardware
3.2.1 Copy the IP folder to the IP folder of the golden project
3.2.2 Open Gold Project
1. Open platform designer
2 Add the neural network IP to the project and connect
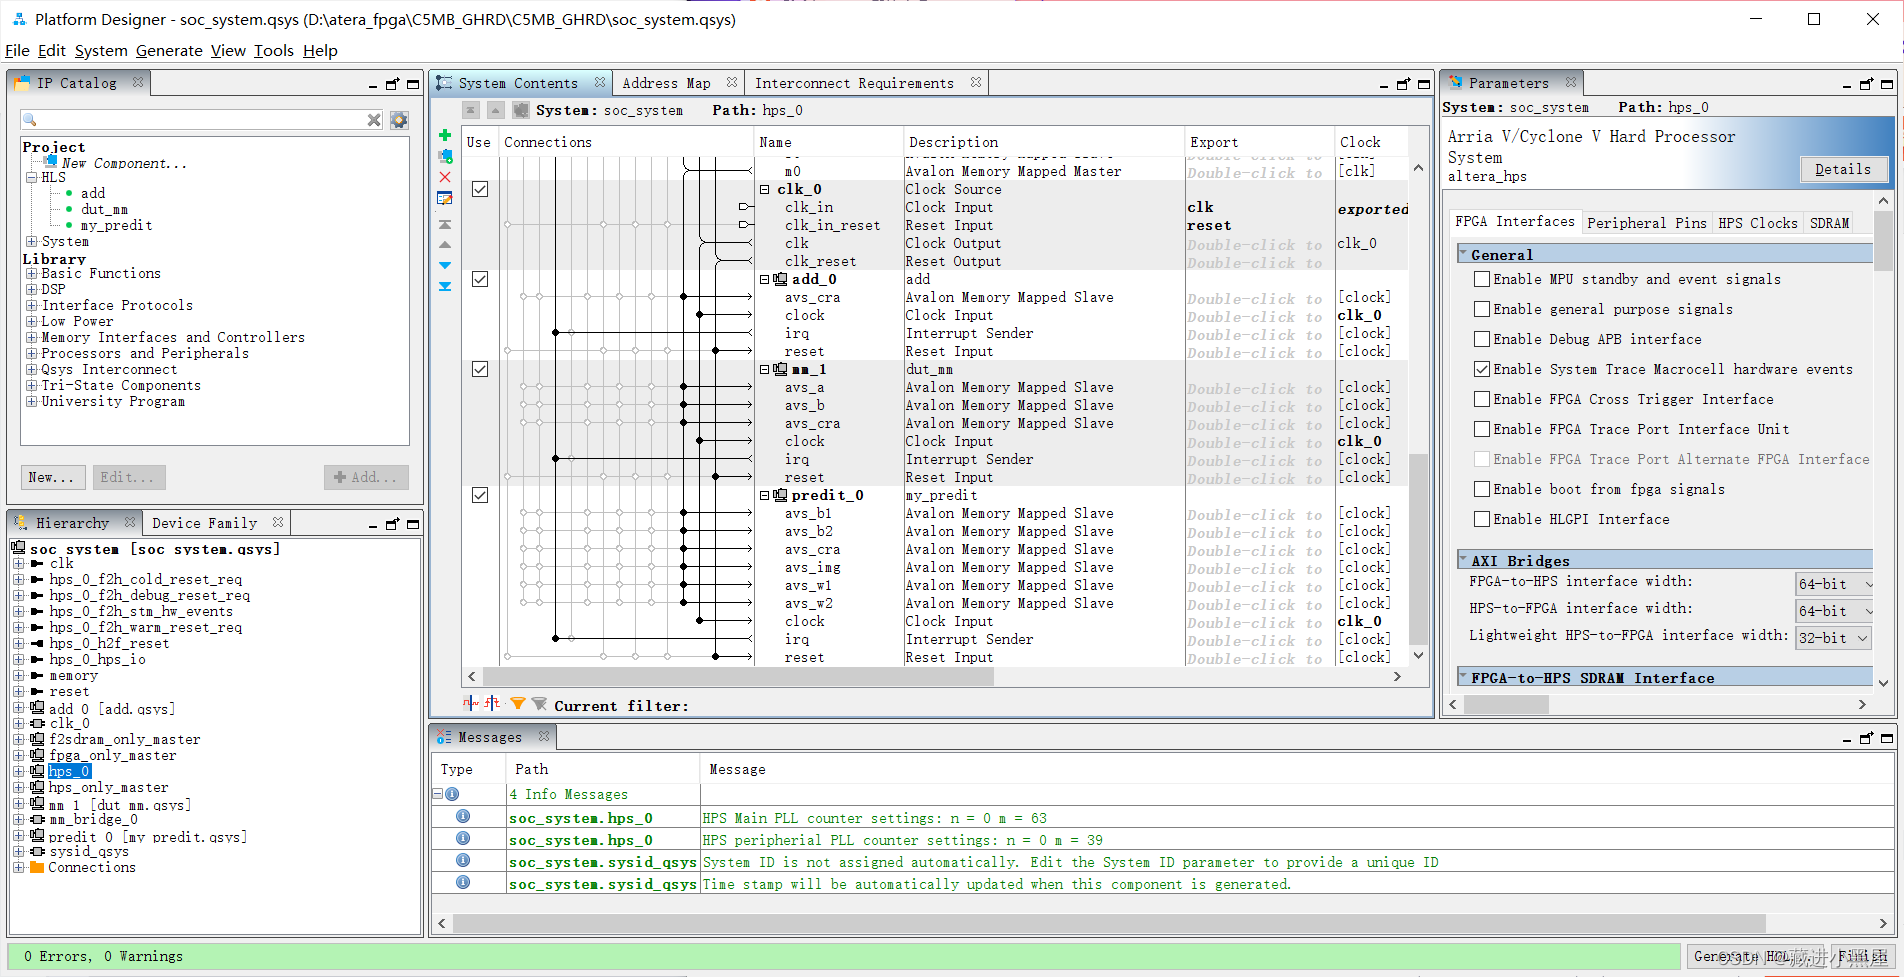
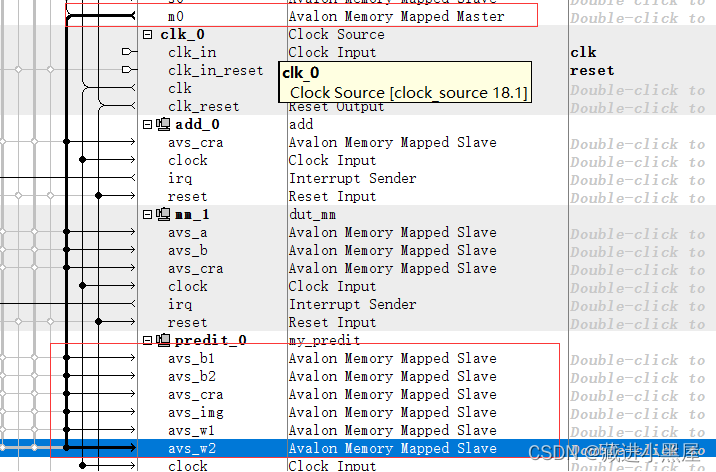
Connect the weight, bias, picture, and control state memory of the Avalon Memory Mapped Slave interface to m0 of the avalon Memory Mapped Master of mm_bridge , connect the clock and reset to mm_bridge, and connect irq to f2h_irq0.
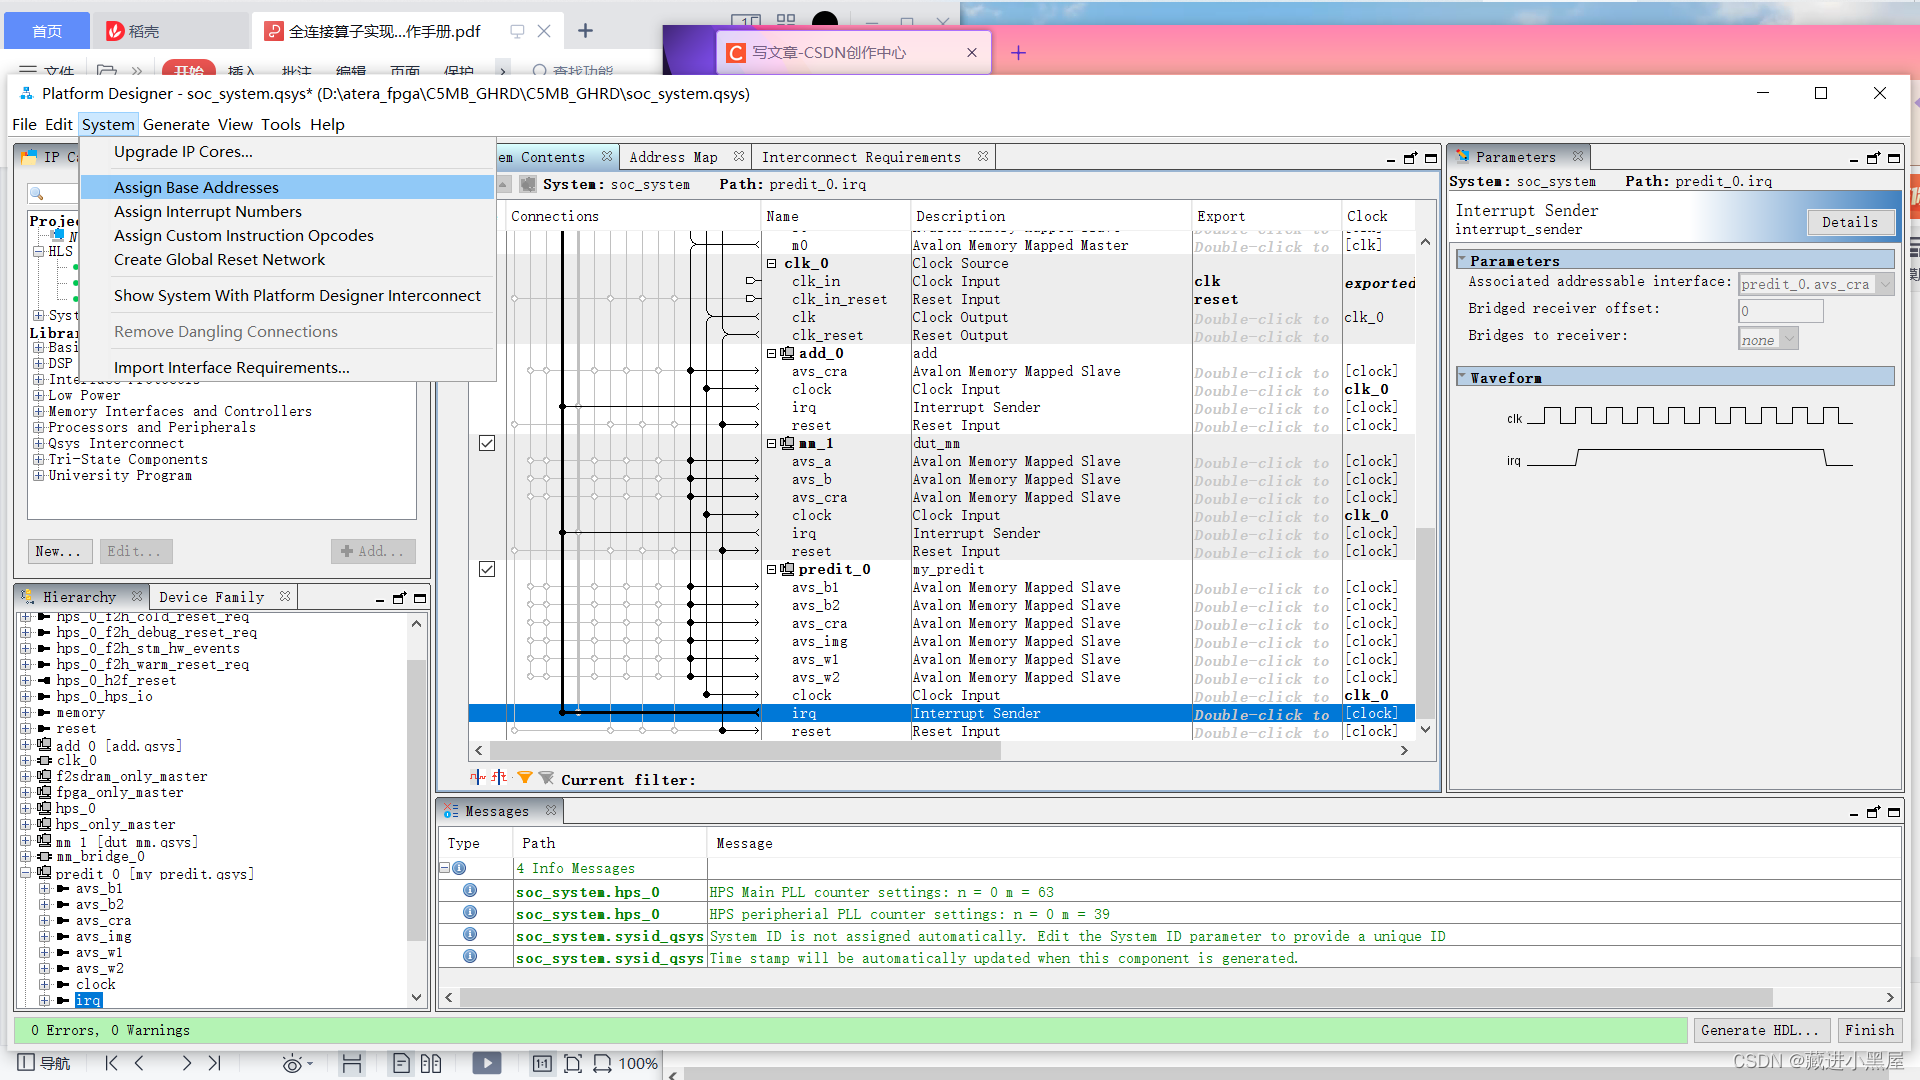
3. Then assign the base address
4. generate
Generally, it will compile for ten minutes, so wait slowly.
5. Full compilation
This step will take longer, half an hour plus, you can go directly to the design software side.
After compiling, a sof file will be generated
4. Update the SD card
4.1 Generate device tree
Open the EDS tool, which is a tool specially designed by Intel for SOC FPGA development, similar to a terminal. It contains many tools.
After entering the gold project directory,
Update the device tree file:
make dtb
Generate device tree file


4.2 Generate rbf file
Enter the output_files directory under the golden project directory, double-click sof_to_rbf.bat
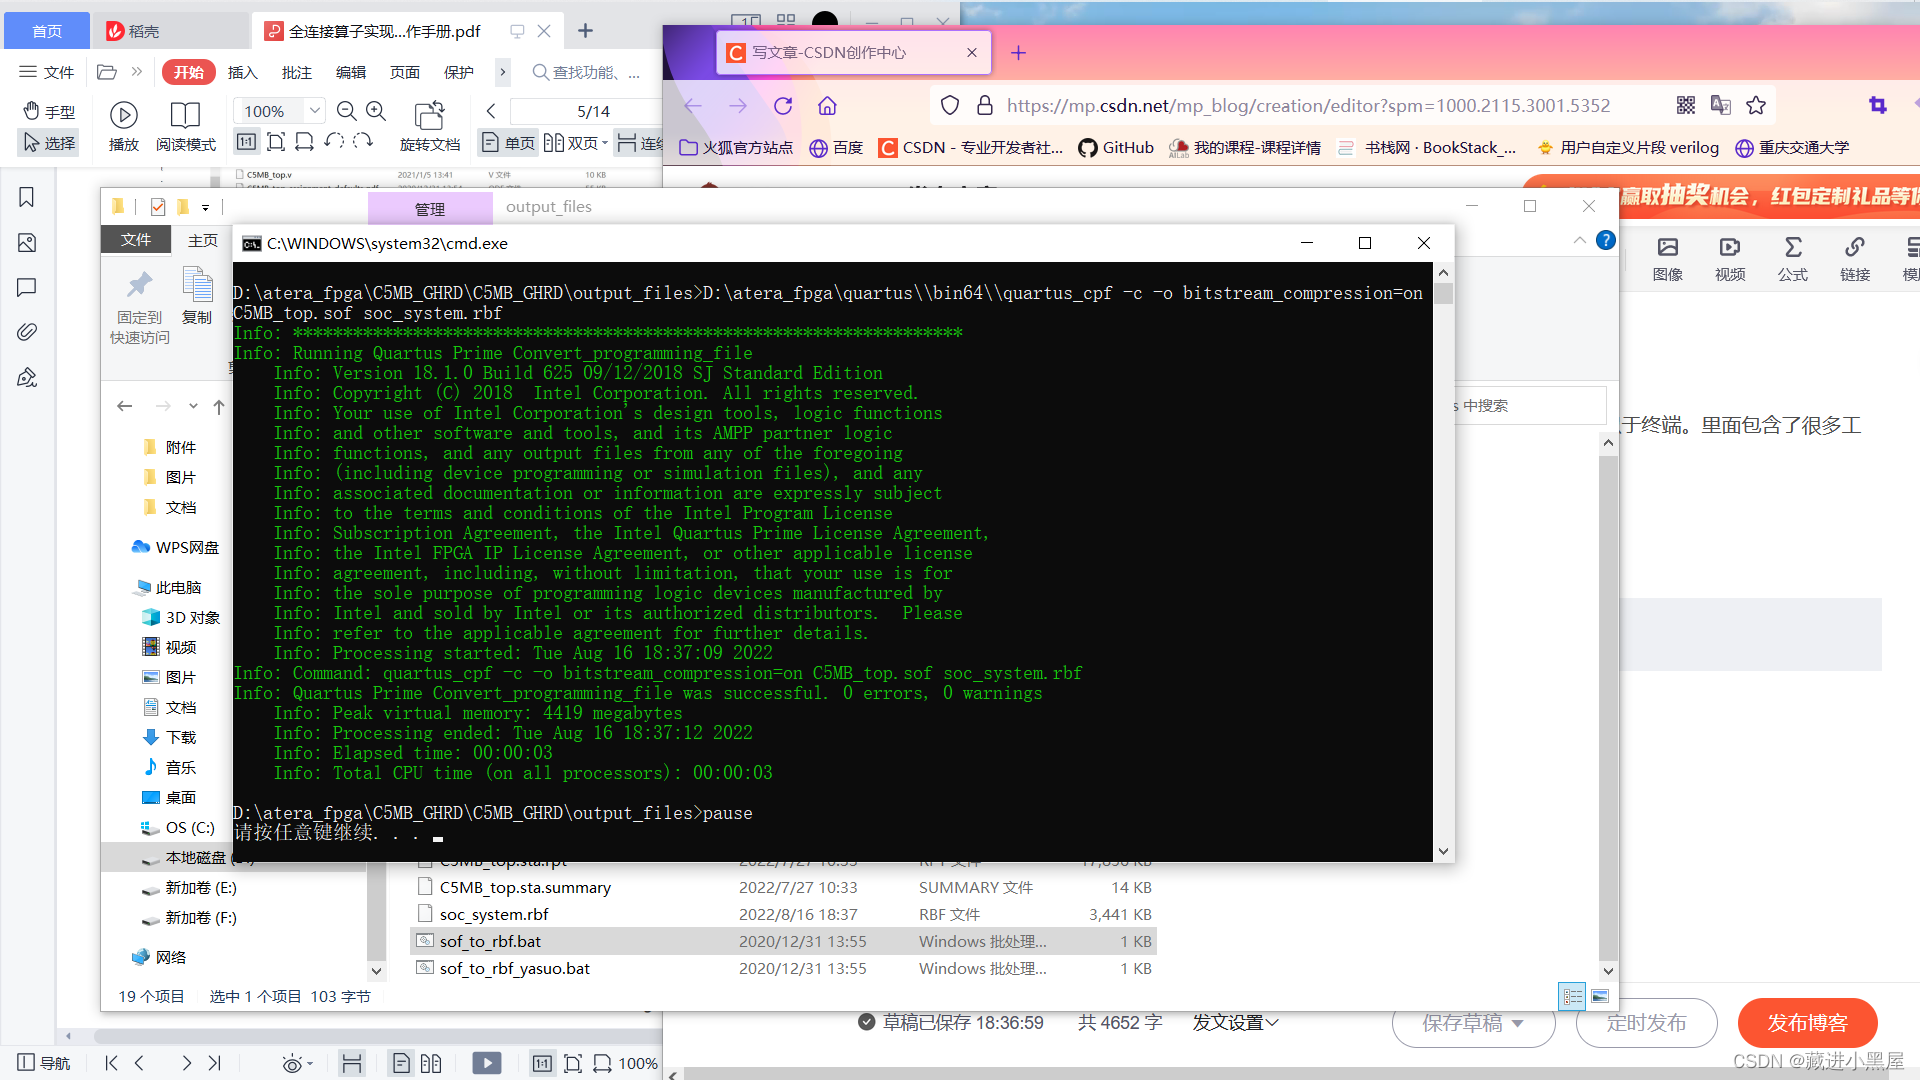

The binaries are updated.
4.3 Update header files
./generate_hps_qsys_header.sh

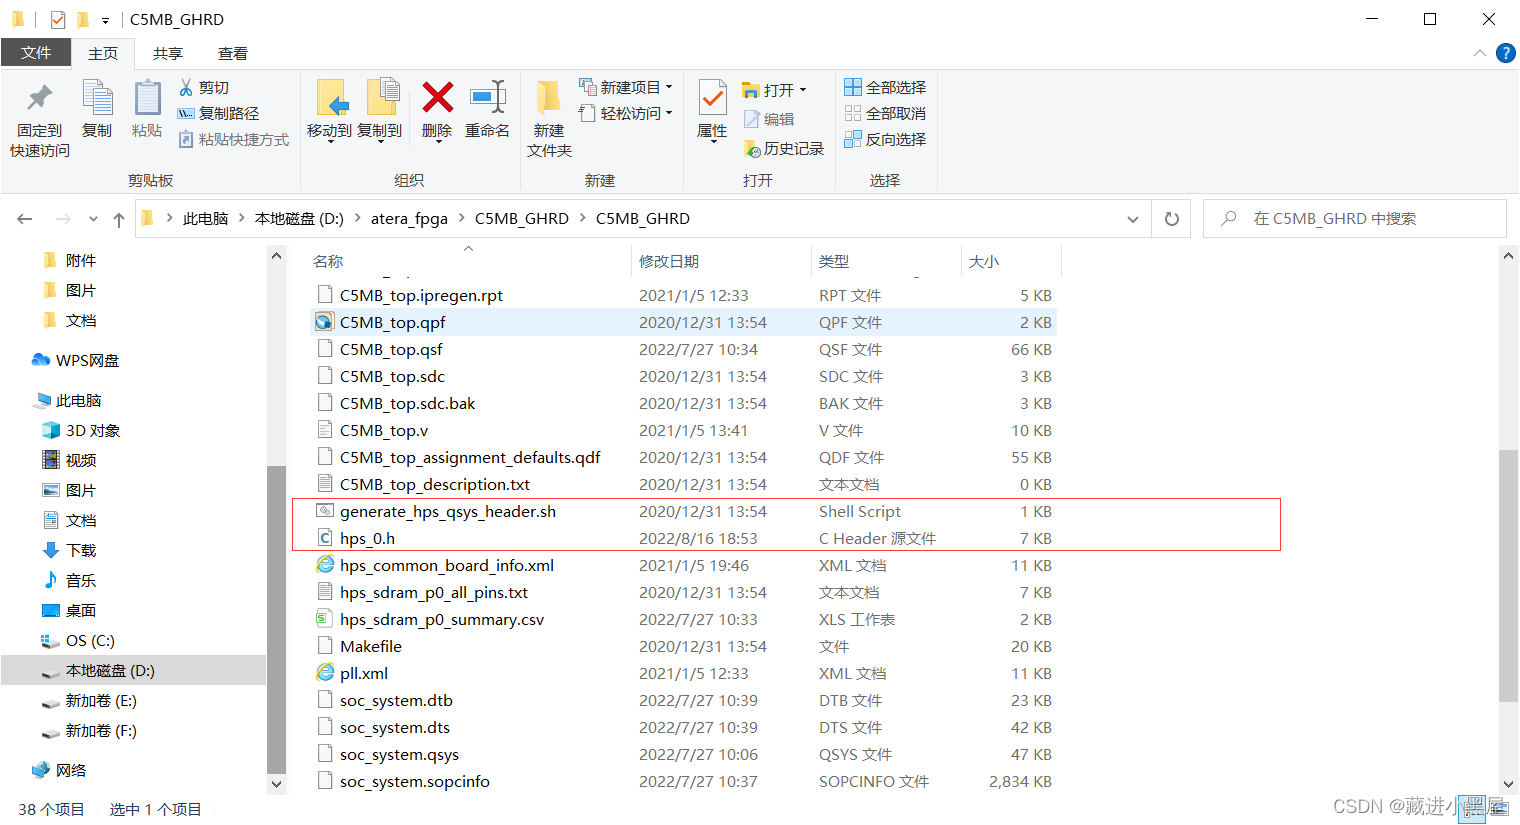
Replace the files in the SD card with the updated binary files and device tree files.
Five design software
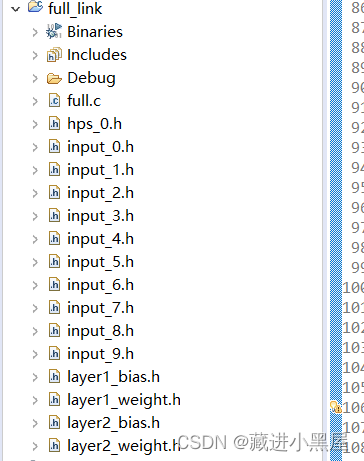
5.1 Create a new C project
After creating the project, create a c program,
Add library file path:

The path is searched according to your own installation directory.
Write source code, add weights, biases, test image files
Copy the weights, biases, test image header files and hps_0.h generated by the full connection to the project.
5.2 Code Design
/*
 * full.c
 *
 *  Created on: 2022年7月27日
 *      Author: 药石无医
 */


#include "layer1_bias.h"
#include "layer1_weight.h"
#include "layer2_bias.h"
#include "layer2_weight.h"

#include "input_0.h"//十幅图片
#include "input_1.h"
#include "input_2.h"
#include "input_3.h"
#include "input_4.h"
#include "input_5.h"
#include "input_6.h"
#include "input_7.h"
#include "input_8.h"
#include "input_9.h"

//gcc标准头文件
#include <stdio.h>
#include <unistd.h>
#include <fcntl.h>
#include <sys/mman.h>
#include <stdlib.h>

//HPS厂家提供的底层定义头文件
#define soc_cv_av //开发平台Cyclone V 系列

#include "hwlib.h"
#include "socal/socal.h"
#include "socal/hps.h"

//与用户具体的HPS 应用系统相关的硬件描述头文件
#include "hps_0.h"

#define HW_REGS_BASE (ALT_STM_OFST)     //HPS外设地址段基地址
#define HW_REGS_SPAN (0x04000000)		//HPS外设地址段地址空间 64MB大小
#define HW_REGS_MASK (HW_REGS_SPAN - 1) //HPS外设地址段地址掩码

static volatile unsigned long long *dout = NULL;

static  float *img_virtual_base = NULL;
static  float *b1_virtual_base = NULL;
static  float *b2_virtual_base = NULL;
static  float *w1_virtual_base = NULL;
static  float *w2_virtual_base = NULL;

int full_init(int *virtual_base){
	int fd;
	void *virtual_space;
//使能mmu
	if((fd = open("/dev/mem",(O_RDWR | O_SYNC))) == -1){
		printf("can't open the file");
		return fd;
	}

//映射用户空间
	virtual_space = mmap(NULL,HW_REGS_SPAN,(PROT_READ | PROT_WRITE),MAP_SHARED,fd,HW_REGS_BASE);

//得到偏移的外设地址
	dout    = virtual_space + ((unsigned)(ALT_LWFPGASLVS_OFST+PREDIT_0_MY_PREDIT_INTERNAL_INST_AVS_CRA_BASE)
			&(unsigned)(HW_REGS_MASK));
	b1_virtual_base      = virtual_space + ((unsigned)(ALT_LWFPGASLVS_OFST+PREDIT_0_MY_PREDIT_INTERNAL_INST_AVS_B1_BASE)
			&(unsigned)(HW_REGS_MASK));
	b2_virtual_base      = virtual_space + ((unsigned)(ALT_LWFPGASLVS_OFST+PREDIT_0_MY_PREDIT_INTERNAL_INST_AVS_B2_BASE)
			&(unsigned)(HW_REGS_MASK));
	w1_virtual_base      = virtual_space + ((unsigned)(ALT_LWFPGASLVS_OFST+PREDIT_0_MY_PREDIT_INTERNAL_INST_AVS_W1_BASE)
				&(unsigned)(HW_REGS_MASK));
	w2_virtual_base      = virtual_space + ((unsigned)(ALT_LWFPGASLVS_OFST+PREDIT_0_MY_PREDIT_INTERNAL_INST_AVS_W2_BASE)
				&(unsigned)(HW_REGS_MASK));
	img_virtual_base     = virtual_space + ((unsigned)(ALT_LWFPGASLVS_OFST+PREDIT_0_MY_PREDIT_INTERNAL_INST_AVS_IMG_BASE)
					&(unsigned)(HW_REGS_MASK));
	*virtual_base = virtual_space;
	return fd ;
}

int main(){
	int fd,virtual_base,i;
	fd = full_init(&virtual_base);
	float *image[10] = {input_0,input_1,input_2,input_3,input_4,input_5,input_6,input_7,input_8,input_9};

	//先将权重和偏置赋值
	memcpy(w1_virtual_base,layer1_weight,784*64*sizeof(float));
	memcpy(b1_virtual_base,layer1_bias,64*sizeof(float));
	memcpy(w2_virtual_base,layer2_weight,64*10*sizeof(float));
	memcpy(b2_virtual_base,layer2_bias,10*sizeof(float));

	//一层for循环输出十张图片的值

	for(i=0;i<10;i++)
	{
		memcpy(img_virtual_base,image[i],784*sizeof(float));
		while((*(dout + 0)&(unsigned)1) != 0);
		*(dout + 2) = 1;
		*(dout + 3) = 1;
		*(dout + 1) = 1;

		while((*(dout + 3) & 0x2) == 0 );
		printf("input:%d 预测结果:%d                                          \n",i,*(dout + 4));
		*(dout + 1) = 0;
	}


//取消映射
	//取消地址映射
		if(munmap(virtual_base,HW_REGS_SPAN)==-1){
			printf("取消映射失败..\n");
			close(fd);
		}
		//关闭mmu
		close(fd);
		return 0;

}
After saving, compile and generate a binary executable file.
Six debugging
Board verification, this step is lazy, that is, connect the development board and computer, copy the executable file to
/opt directory
Give permissions to executable files
chmod 777 full
After that it works.
Finally, the recognition of 28*28 handwritten pictures can be realized. and show the result