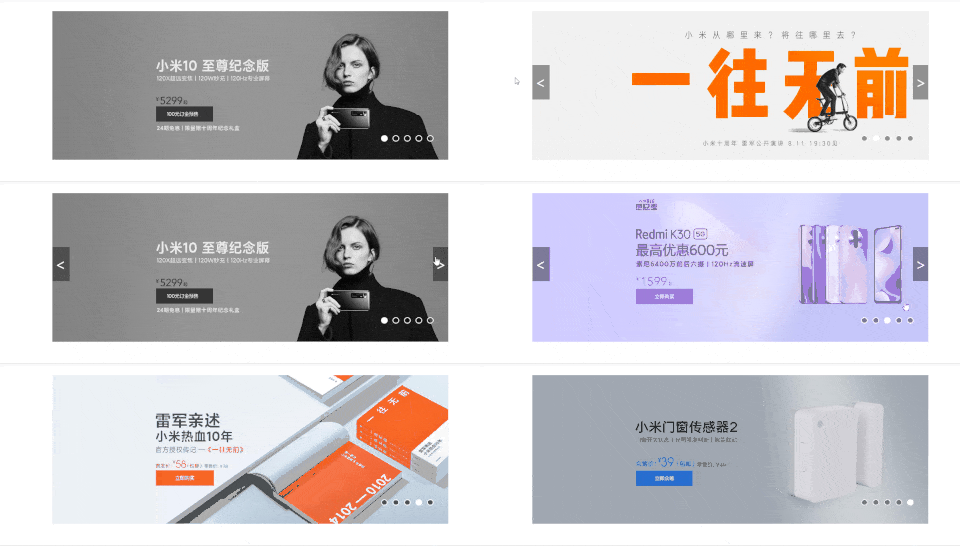
01. Implementation of JS carousel map 1
Implementation idea
This may be one of the simplest implementations of the carousel image. To achieve this effect, change the src of the image. First, you need to unify the image naming format, such as pic01.jpg, pic02.jpg..., and then use the timer through js to Change the name of the src image link in the img tag to achieve the switching effect. The code is as follows: to achieve the effect

<!DOCTYPE html>
<html>
    <head>
        <meta charset="utf-8">
        <title>轮播图实现01</title>
        <style type="text/css">
            .lunbo{
                width: 900px;
                height: 400px;
                margin:100px auto;
            }
            .lunbo img{
                width: 100%;
                height:100%;
            }
        </style>
    </head>
    <body>
        <!--轮播图模块 -->
        <div class="lunbo">
            <img id="lunbo_img" src="./pic/img3.jpeg" >
        </div>
        <!-- Js代码 -->
    <script>
      var index = 1;
        function lunbo(){
            index ++ ;
            //判断index是否大于3
            if(index > 3){
                index = 1;
            }
            //获取img对象
            var img = document.getElementById("lunbo_img");
            img.src = "./pic/img"+index+".jpeg";
        }
        //2.定义定时器
        setInterval(lunbo,2000);
        /*切记定时器里调用lunbo方法不能加(),setInterval(lunbo,2000);如果加()会执行lunbo()方法,而导致定时器没用。
    </script>
    </body>
</html>
02. Implementation of JS carousel image 2
Implementation ideas This may be one of the simplest realizations of the carousel image. To achieve this effect, change the image link of the background. First, you need to unify the image naming format, such as pic01.jpg, pic02.jpg..., and then use the timer through js To change the name of the url() picture link in the background property to achieve the switching effect. The code is as follows: Realize the effect

<!DOCTYPE html>
<html>
    <head>
        <meta charset="utf-8">
        <title>轮播图实现02</title>
        <style>
            body{
                margin: 0;
                padding: 0;
            }
            .lunbo{
                width:100%;
                height:720px;
                background-image: url(pic/img1.jpeg);/*背景图片*/
                background-size:100% 100%;
            }
        </style>
    </head>
    <body>
        <div class="lunbo">

        </div>
        <script type="text/javascript">
          var index = 1;
            function lunbo(){
                index ++ ;
                //判断number是否大于3
                if(index > 3){
                    index = 1;
                }
                //获取img对象
        var img = document.getElementsByClassName("lunbo")[0];
        img.style.background = "url(pic/img"+index+".jpeg)";
        img.style.backgroundSize="100% 100%";
            }
            //2.定义定时器
            setInterval(lunbo,3000);
        </script>
    </body>
</html>
03. Realization of JS carousel image 3
The implementation of this carousel map first uses the CSS code to hide all the li tags that store the pictures by setting the opacity attribute to 0 to hide them, and uses the js code to use the timer to continuously call the class active to highlight the li tags and hide the sibling li tags at the same time. Then use index++ to achieve the effect of switching cycle display. When the buttons on both sides are clicked, the method of index++ is called to achieve the switching effect. There is no complicated algorithm. You can learn the basics by looking at the code. Please refer to it. achieve effect

HTML code
<!DOCTYPE html>
<html>
    <head>
        <meta charset="utf-8">
        <meta name="viewport" content="width=device-width,initial-scale=1,
        minimum-scale=1,maximum-scale=1,user-scalable=no" />
        <!--引入CSS代码-->
        <link rel="stylesheet" type="text/css" href="./css/index.css"/>
        <!--引入Js代码-->
        <script src="./js/index.js"></script>
        <title>Js实现轮播图</title>
    </head>
    <body>
        <div class="lunbo">
            <div class="content">
            <ul id="item">
                <li class="item">
                    <a href="#"><img src="img/pic1.jpg" ></a>
                </li>
                <li class="item">
                    <a href="#"><img src="img/pic2.jpg" ></a>
                </li>
                <li class="item">
                    <a href="#"><img src="img/pic3.jpg" ></a>
                </li>
                <li class="item">
                    <a href="#"><img src="img/pic4.jpg" ></a>
                </li>
                <li class="item">
                    <a href="#"><img src="img/pic5.jpg" ></a>
                </li>
            </ul>
            <div id="btn-left"><</div>
            <div id="btn-right">></div>
            <ul id="circle">

                <li class="circle"></li>
                <li class="circle"></li>
                <li class="circle"></li>
                <li class="circle"></li>
                <li class="circle"></li>
            </ul>
            </div>
        </div>
    </body>
</html>
CSS code
*{
    margin: 0;
    padding: 0;
}
a{
    list-style: none;
}
li{
    list-style: none;
}
.lunbo{
    width: 100%;
}
.content{
    width: 800px;
    height: 300px;
    margin: 20px auto;
    position: relative;
}
#item{
    width: 100%;
    height: 100%;

}
.item{
    position: absolute;
    opacity: 0;
    transition: all 1s;

}
.item.active{
    opacity:1;
}
img{
    width: 100%;
}
#btn-left{
    width: 30px;
    height: 69px;
    font-size: 30px;
    color: white;
    background-color:rgba(0,0,0,0.4);
    line-height: 69px;
    padding-left:5px;
    z-index: 10;/*始终显示在图片的上层*/
    position: absolute;
    left: 0;
    top: 50%;
    transform: translateY(-60%);/*使按钮向上偏移居中对齐*/
    cursor: pointer;
    opacity: 0;/*平时隐藏*/
}
.lunbo:hover #btn-left{
    /*鼠标滑入,显示图标*/
    opacity: 1;
}

#btn-right{
    width: 26px;
    height: 69px;
    font-size: 30px;
    color: white;
    background-color:rgba(0,0,0,0.4);
    line-height: 69px;
    padding-left: 5px;
    z-index: 10;
    position: absolute;
    right: 0;
    top: 50%;
    cursor: pointer;
    opacity: 0;
    transform: translateY(-60%);
}
.lunbo:hover #btn-right{
    opacity: 1;
}
#circle{
    height: 20px;
    display: flex;
    position: absolute;
    bottom: 35px;
    right: 25px;
}
.circle{
    width: 10px;
    height: 10px;
    border-radius: 10px;
    border: 2px solid white;
    background: rgba(0,0,0,0.4);
    cursor: pointer;
    margin: 5px;
}
.white{
    background-color: #FFFFFF;
}
JavaScript code
window.onload=function(){
var items=document.getElementsByClassName("item");
var circles=document.getElementsByClassName("circle");
var leftBtn=document.getElementById("btn-left");
var rightBtn=document.getElementById("btn-right");
var content=document.querySelector('.content');
var index=0;
var timer=null;

//清除class
var clearclass=function(){
    for(let i=0;i<items.length;i++){
        items[i].className="item";
        circles[i].className="circle";
        circles[i].setAttribute("num",i);
    }
}
/*只显示一个class*/
function move(){
    clearclass();
    items[index].className="item active";
    circles[index].className="circle white";
}
//点击右边按钮切换下一张图片
rightBtn.onclick=function(){
    if(index<items.length-1){
        index++;
    }
    else{
        index=0;
    }
    move();
}
//点击左边按钮切换上一张图片
leftBtn.onclick=function(){
    if(index<items.length){
        index--;
    }
    else{
        index=items.length-1;
    }
    move();
}
//开始定时器,点击右边按钮,实现轮播
timer=setInterval(function(){
    rightBtn.onclick();
},1500)
//点击圆点时,跳转到对应图片
for(var i=0;i<circles.length;i++){
    circles[i].addEventListener("click",function(){
        var point_index=this.getAttribute("num");
        index=point_index;
        move();
    })

}
//鼠标移入清除定时器,并开启一个三秒的定时器,使慢慢转动
content.onmouseover=function(){
    clearInterval(timer);
        timer=setInterval(function(){
            rightBtn.onclick();
        },3000)
}
//鼠标移出又开启定时器
content.onmouseleave=function(){
    clearInterval(timer);
    timer=setInterval(function(){
        rightBtn.onclick();
    },1500)
}
}
Reference article: Three simple ways to implement carousels in JS. _Mind Your Smile Blog-CSDN Blog_js Carousel Map