Table of contents
1 Kali virtual machine creation
1 Kali virtual machine creation
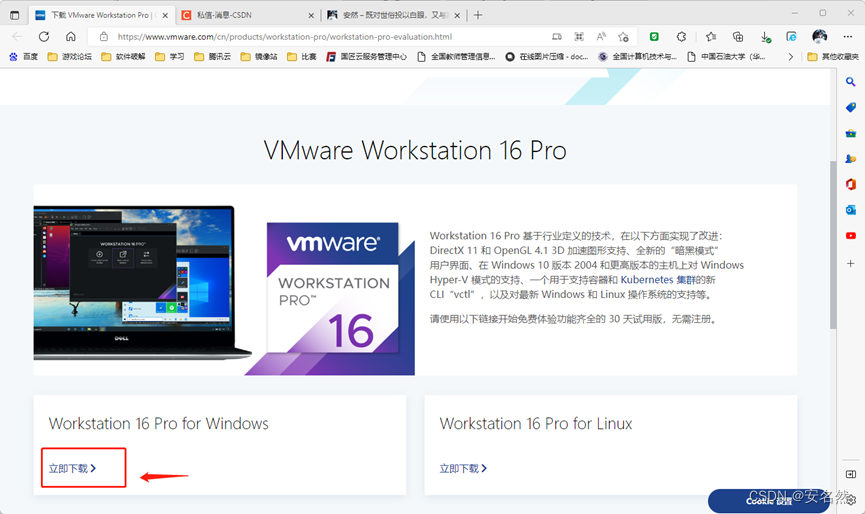
1. Download and install VM (VMware Workstation) software
Official website download link: Download VMware Workstation Pro | CN
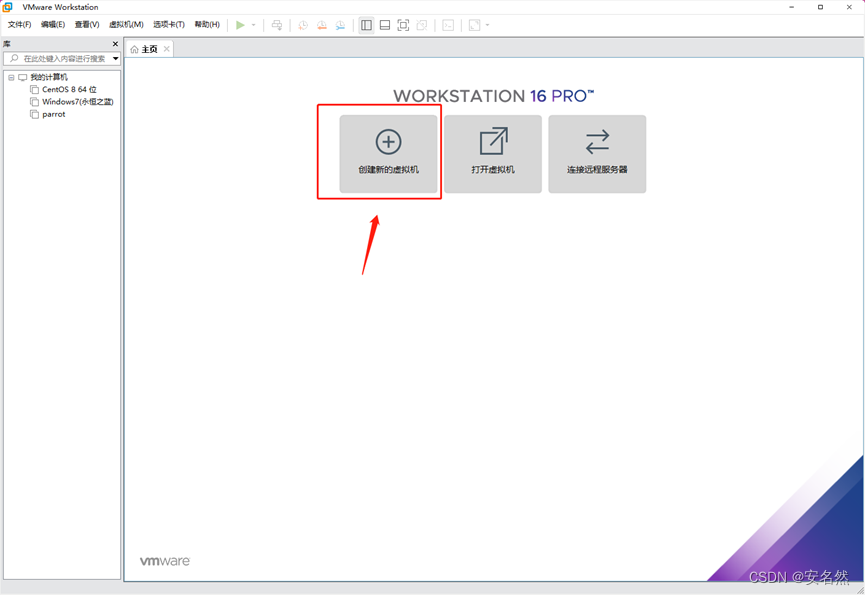
2. Open the VM software and select "Create a new virtual machine"
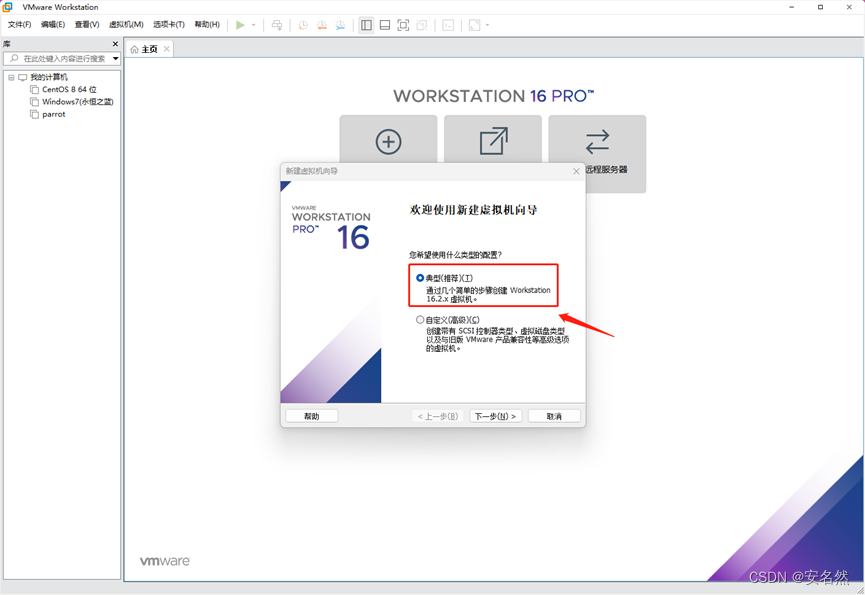
3. Select "Typical"
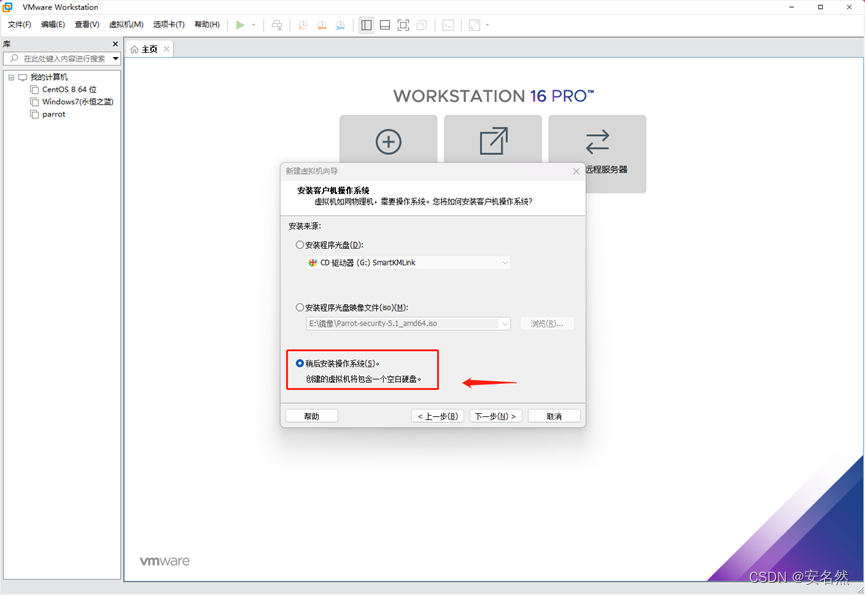
4. Select "Install the operating system later"
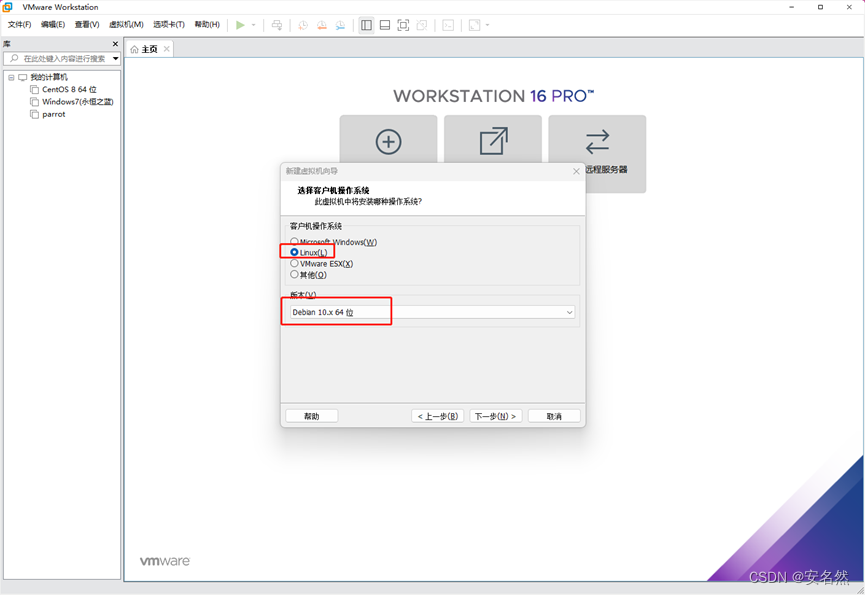
6. Select the client operating system as "Linux"
7. Customize the name of the virtual machine and select the storage location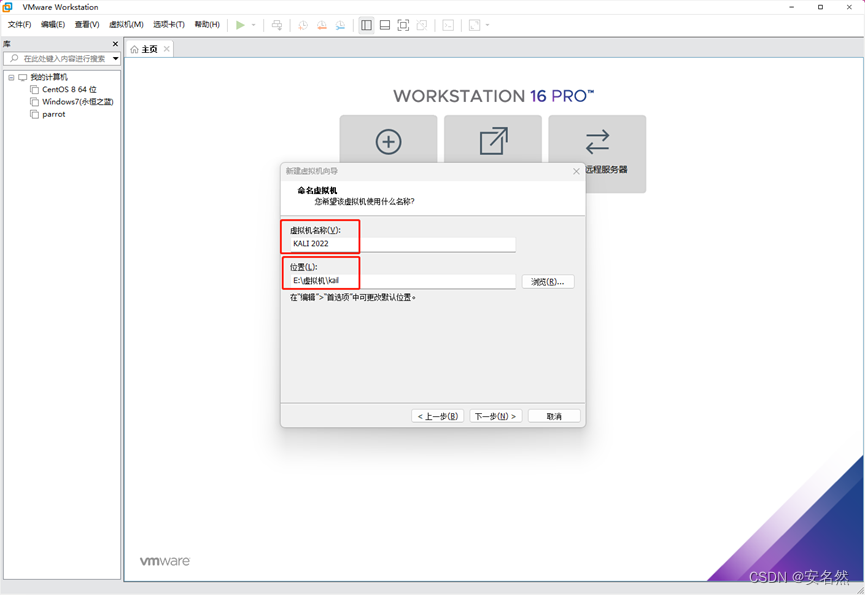
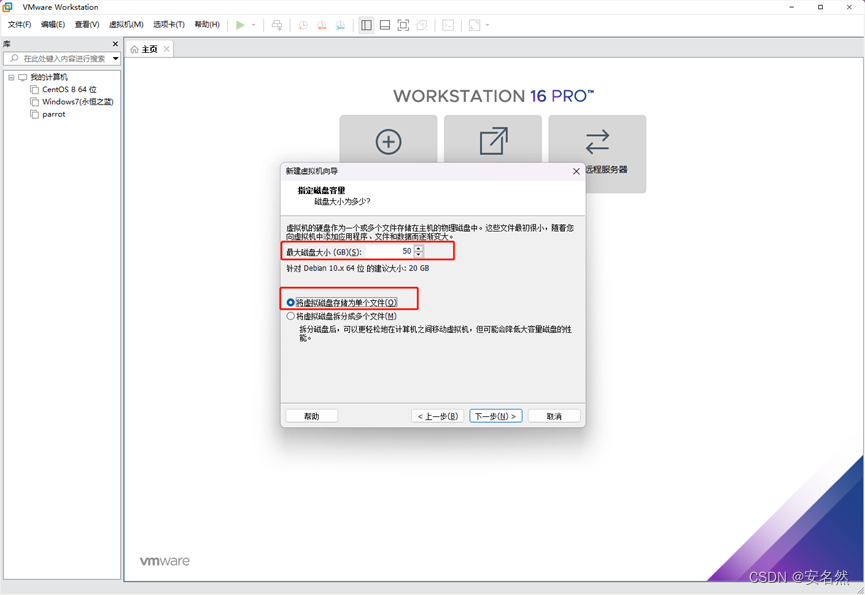
8. Set the disk capacity (40G or more is recommended)
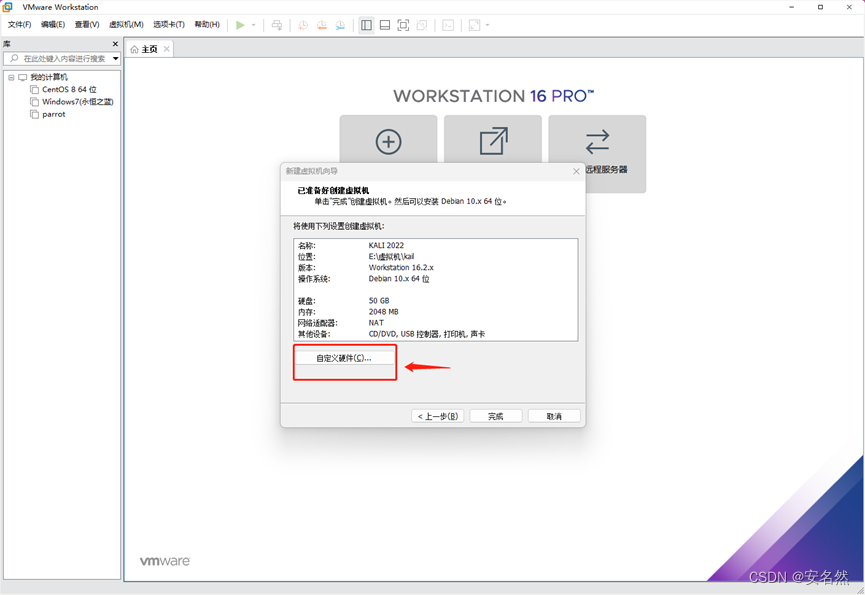
9. Set "Custom Hardware"
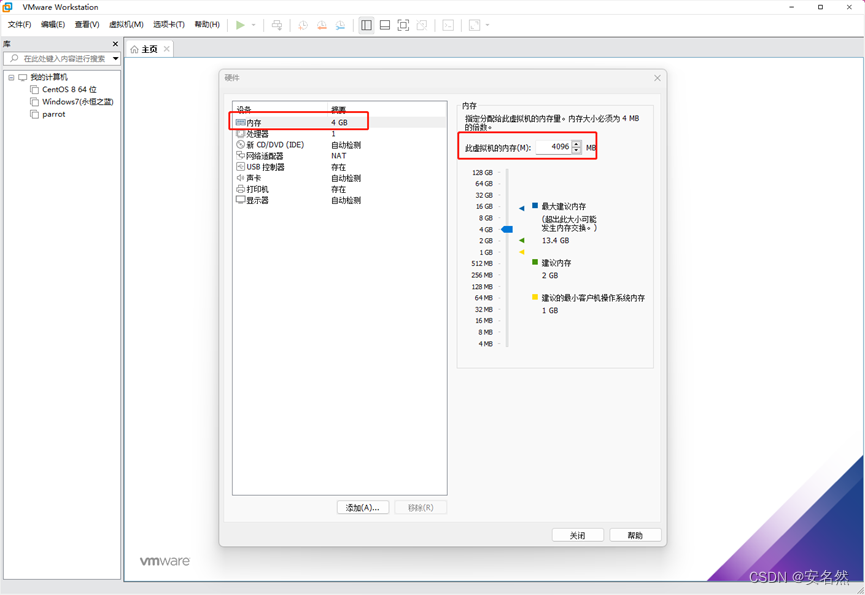
10. Memory settings (recommended to start with 4G)
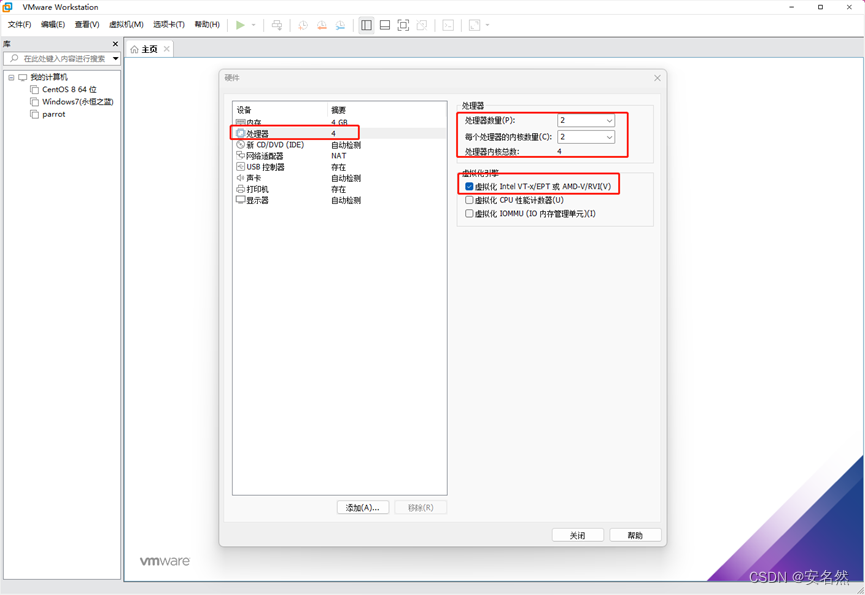
11. Processor settings (it is recommended to start with a minimum of 2 cores, and the virtualization engine can be customized according to your own situation)
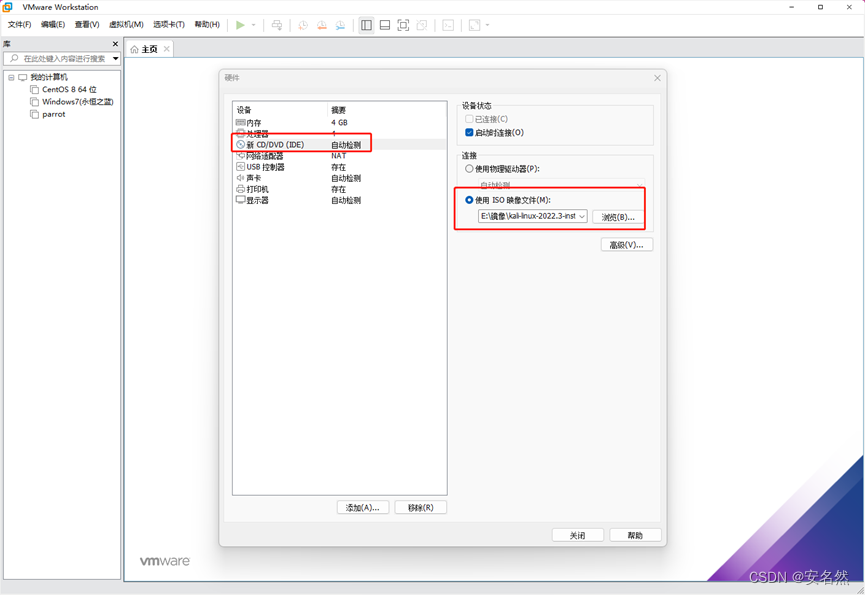
12. Mirror setting (select the downloaded mirror file)
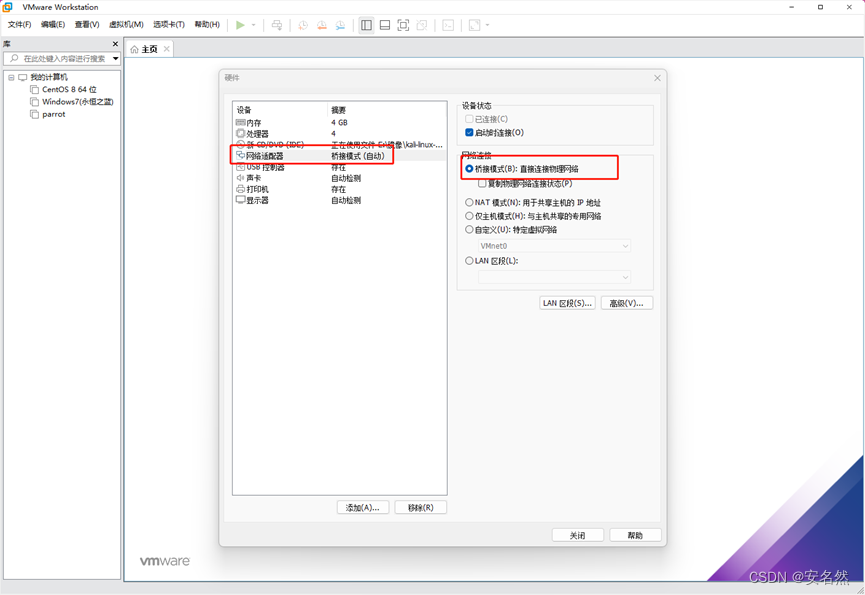
13. Network adapter settings (according to your own network environment settings, just bridge)
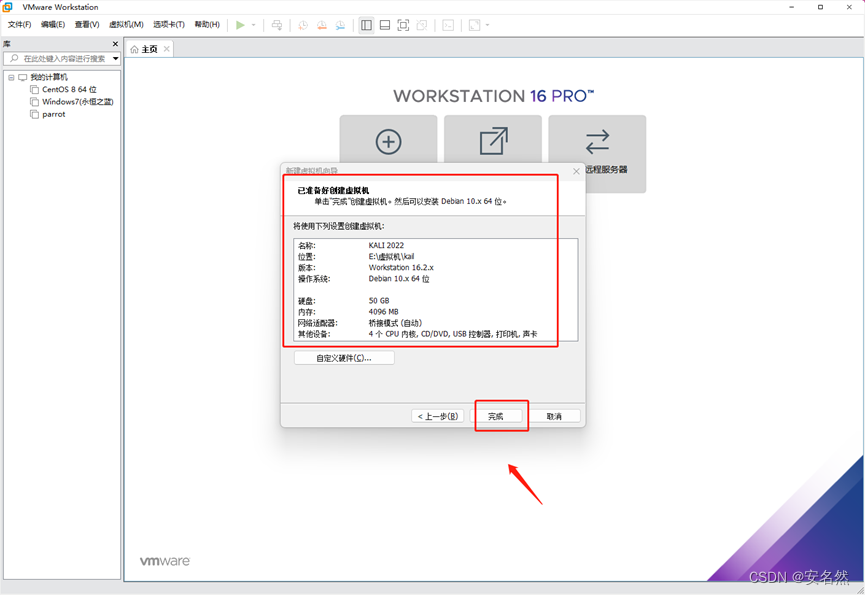
14. Complete the creation of the virtual machine
2 Kali system installation
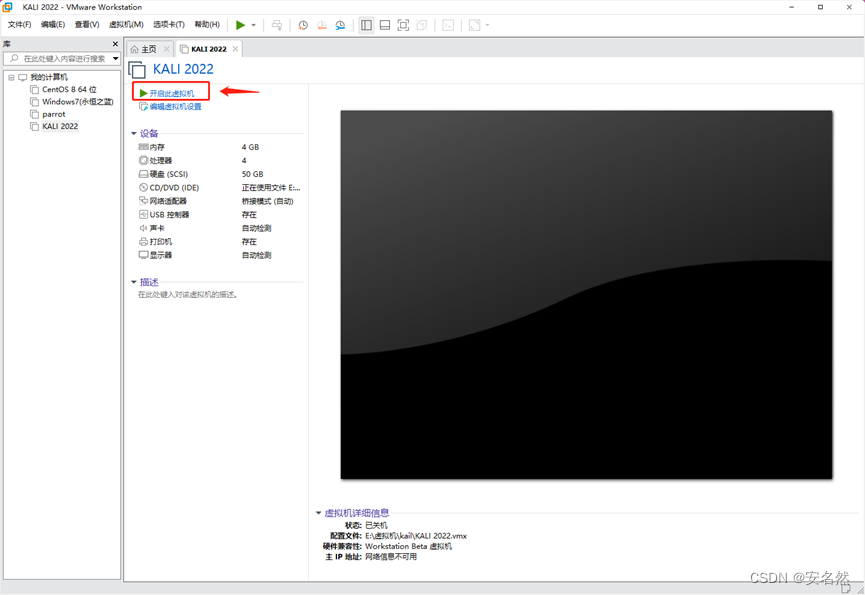
1. Select "Start this virtual machine"
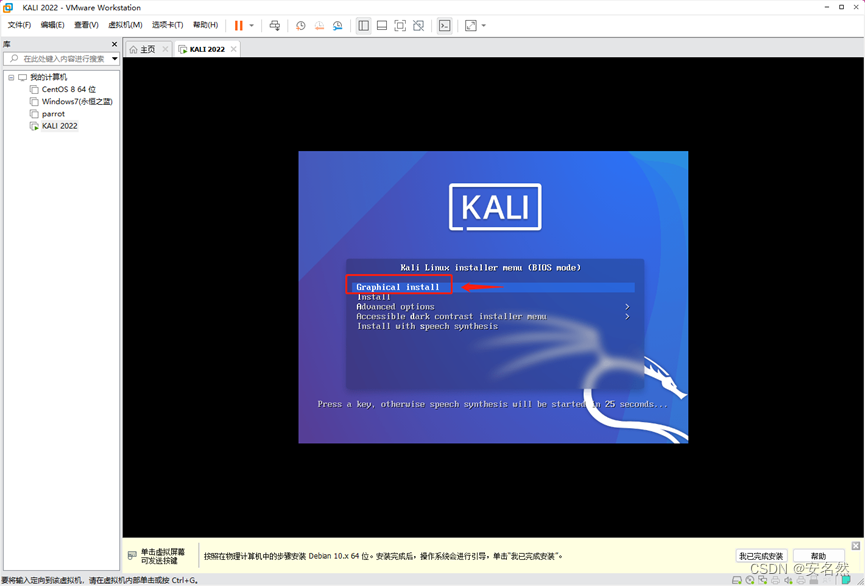
2. Select graphical installation
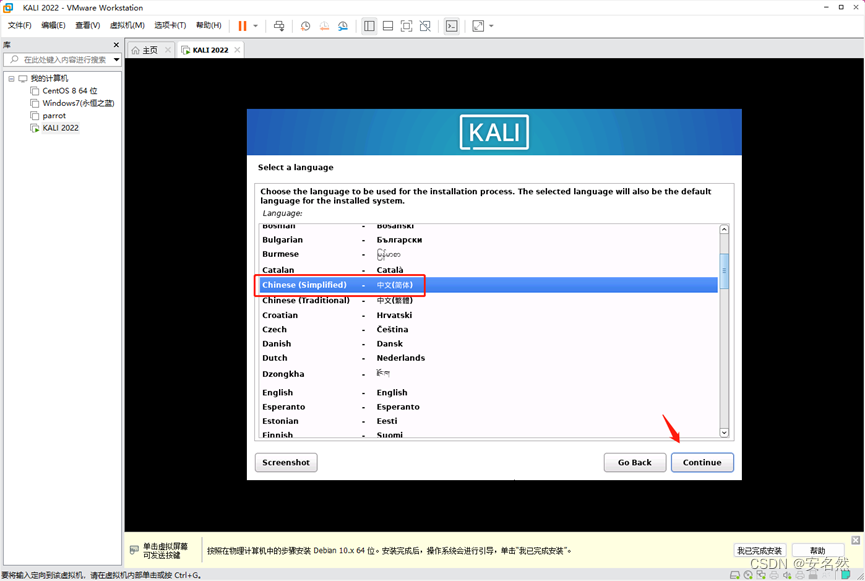
3. Generally, English is selected by default, and simplified Chinese is recommended for beginners
4. Select "China"

5. Select "Chinese"

6. Set "Host Name" (custom setting)

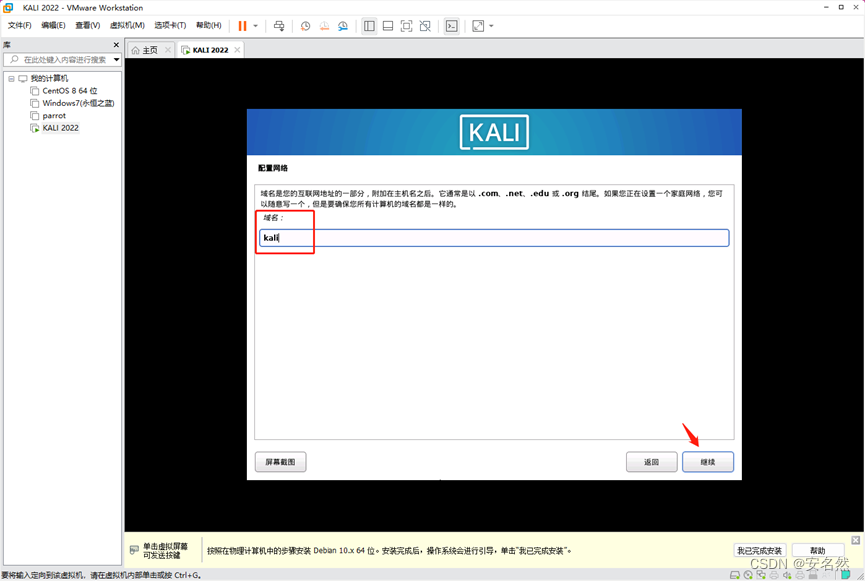
7. Set "domain name" (custom setting)
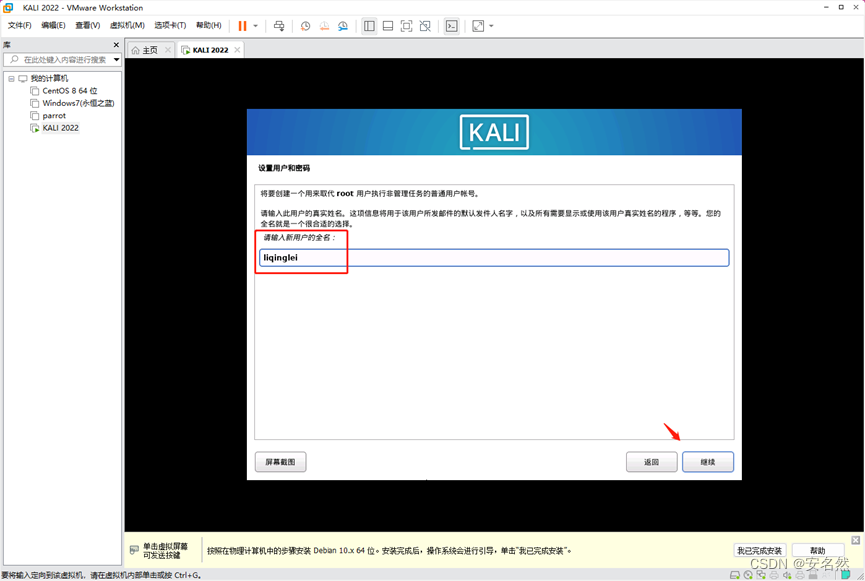
8. Set the user's full name (custom)
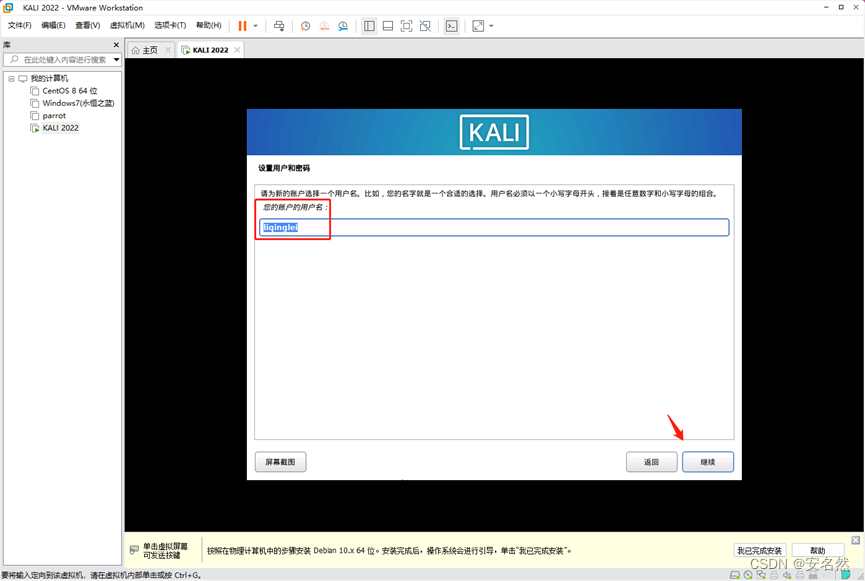
9. Set user name (custom)
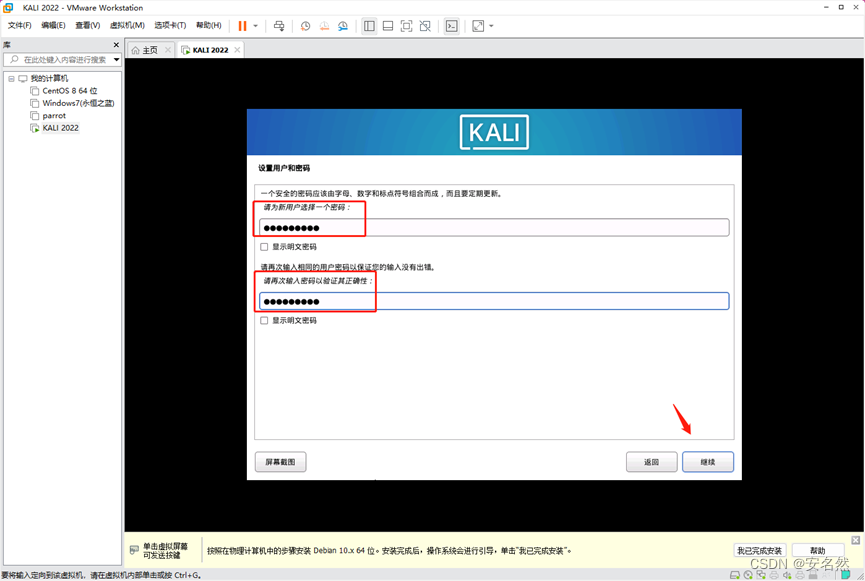
10. Set user password (custom)
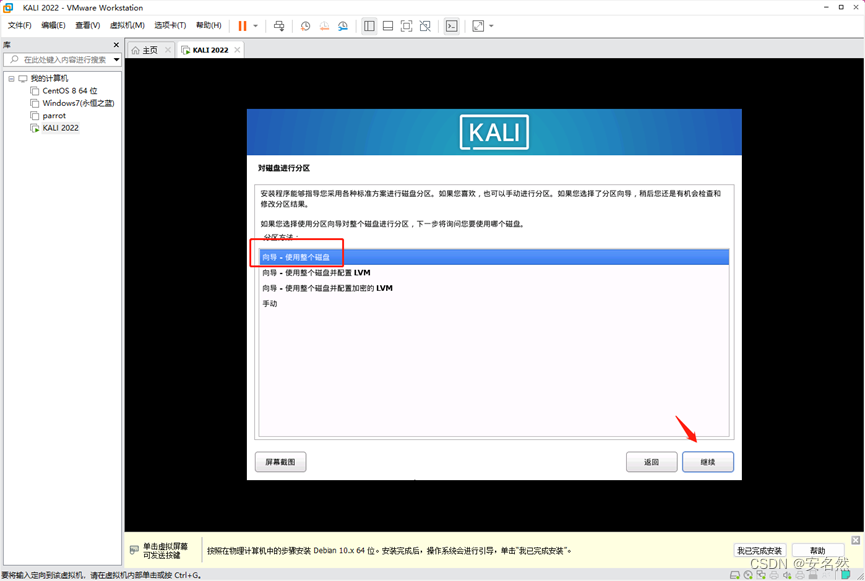
11. Set the disk partition (novice recommended to select the first "use the entire disk")
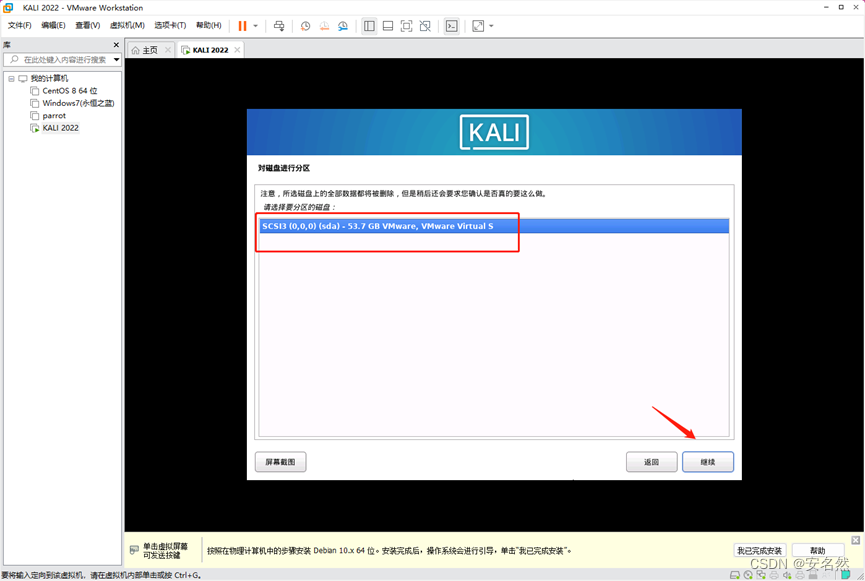
12. Select the partitioned disk (only one disk is added here, just select this disk)
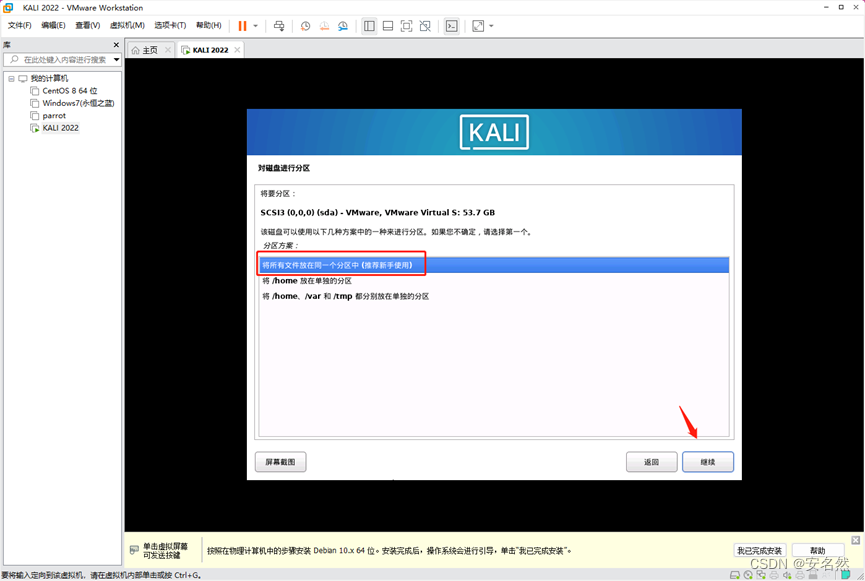
13. Select a partition scheme (novice recommends the first one, "put all files in the same partition")
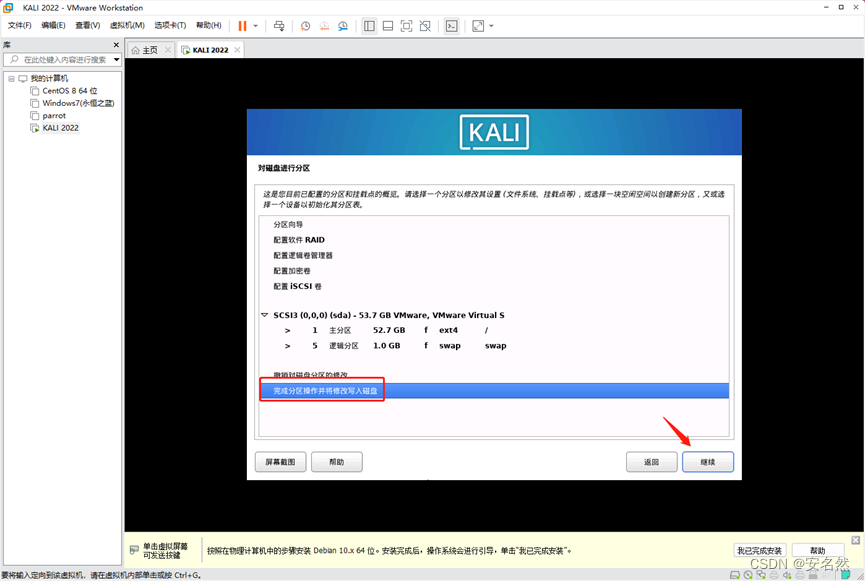
14. Select "Complete the partition operation and write the modification to disk"
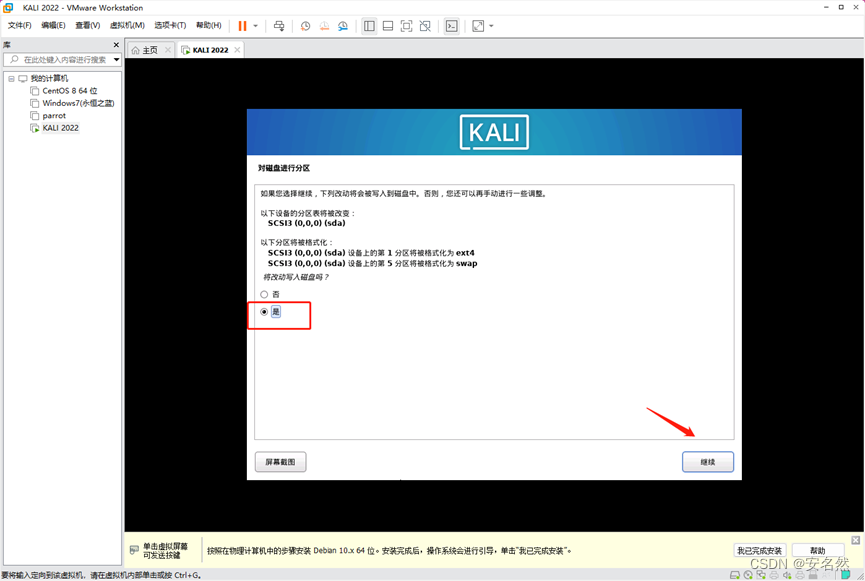
15. Select "Yes" to complete the disk modification
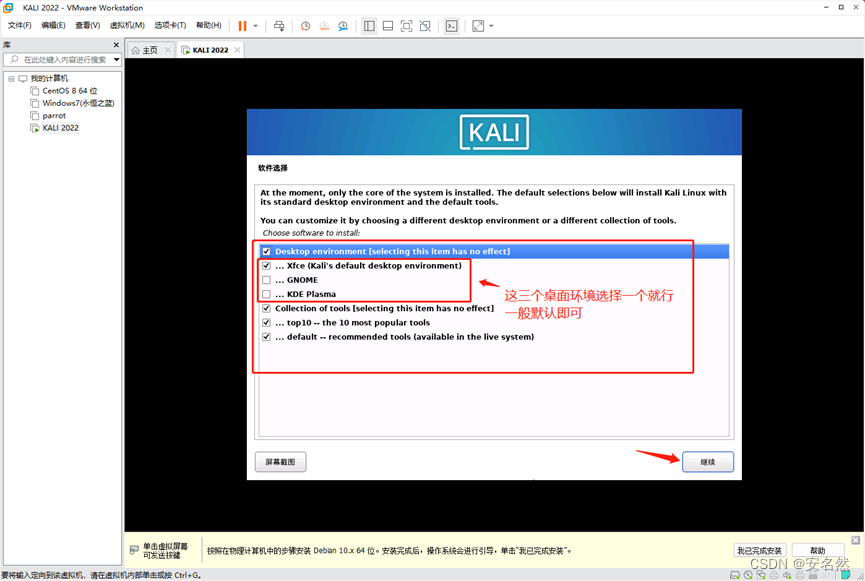
16. The Xfce desktop environment is preferred (you can choose one of Xface, GNOME, and KDE desktop environment). Without "..." means the main menu, and "..." means the corresponding submenu. other default
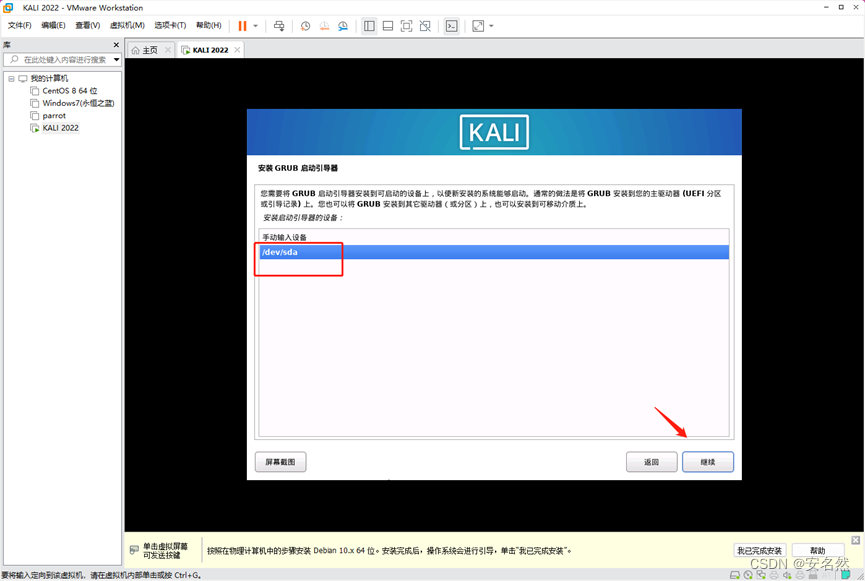
17. Install the GRUB bootloader

18. Select the installation location
19. After the installation is complete, click "Continue" to end the installation and start the system

20. After starting the system, select the first item to enter the desktop environment

21. Enter the account password to log in to the system

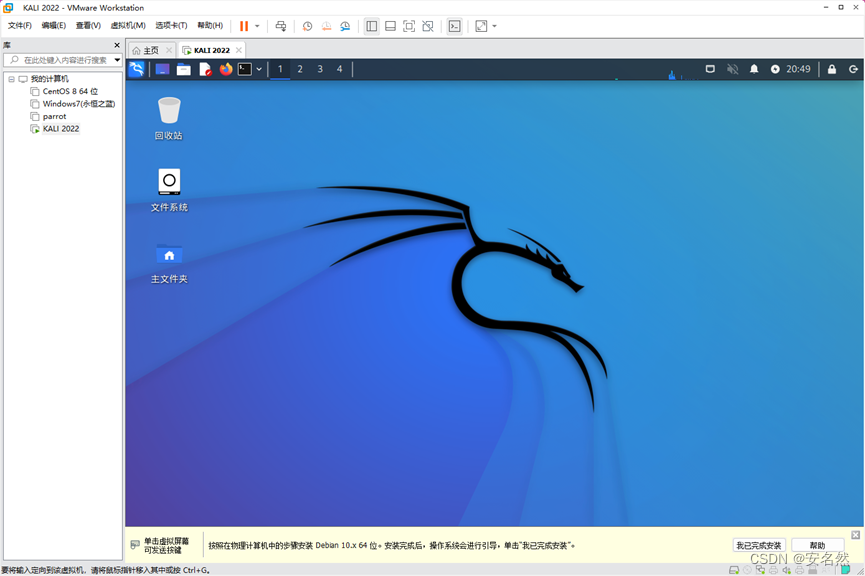
22. After successful login, the desktop is as follows (click "I have completed the installation" below to close the prompt)