1. Uninstall MariaDB
MariaDB is installed by default in CentOS, which is a branch of MySQL and is mainly maintained by the open source community.
CentOS 7 and above versions no longer use the MySQL database, but use the MariaDB database.
If you install MySQL directly, it will conflict with MariaDB files.
Therefore, you need to uninstall the built-in MariaDB first, and then install MySQL.
1.1 Check whether mariadb exists:
rpm -qa|grep mariadb
1.2 uninstall mariadb
rpm -e --nodeps 文件名
1.3 Check whether the uninstallation is clean:
rpm -qa|grep mariadb

2. Install MySQL
2.1 wget download
- If it is not installed, enter the command to install it:
yum install wget - First enter the path:
/usr/local, and then download
wget https://dev.mysql.com/get/Downloads/MySQL-8.0/mysql-8.0.20-linux-glibc2.12-x86_64.tar.xz
2.2 Decompression
.tar.gz后缀的文件使用:tar -zxvf 文件名
.tar.xz后缀的文件使用:tar -Jxvf 文件名

#示例
tar -Jxvf mysql-8.0.20-linux-glibc2.12-x86_64.tar.xz
2.3 Double Naming
Rename the decompressed folder (or create a soft link for the folder)
# 重命名
mv 原文件夹名 mysql8
# 软链接
ln -s 文件夹名 mysql8
2.4 Add PATH variable
After adding the PATH variable, MySQL can be used globally.
- There are two ways to add: the export command takes effect temporarily, and the modification of the configuration file takes effect permanently;
#临时环境变量,关闭shell后失效,通常用于测试环境
export PATH=$PATH:/usr/local/mysql8/bin
- Permanently add variable
vim /etc/profile

#加入到配置文件中:
export PATH=$PATH:/usr/local/mysql8/bin
3. Users and User Groups
3.1 Create user groups and users
# 创建一个用户组:mysql
groupadd mysql
# 创建一个系统用户:mysql,指定用户组为mysql
useradd -r -g mysql mysql
- Create a user group: groupadd
- Create user: useradd
-r: create system user
-g: specify user group
3.2 Data directory
1. Create a directory (that is, create a datas folder under the mysql8 folder)
mkdir /usr/local/mysql8/datas
2. Grant permissions
# 更改属主和数组
chown -R mysql:mysql /data/software/mysql8/datas
# 更改模式
chmod -R 750 /usr/local/mysql8/datas
4. Initialize MySQL
4.1 Configuration parameters
Below/data/software/mysql8/ , create my.cnfa configuration file for initializing the MySQL database
- Create file command:
touch my.cof
[mysql]
# 默认字符集
default-character-set=utf8mb4
[client]
port       = 3306
socket     = /tmp/mysql.sock

[mysqld]
port       = 3306
server-id  = 3306
user       = mysql
socket     = /tmp/mysql.sock
# 安装目录,改为自己的路径!!!
basedir    = /data/software/mysql8
# 数据存放目录,这里要改成自己的路径!!!
datadir    = /data/software/mysql8/datas/mysql
log-bin    = /data/software/mysql8/datas/mysql/mysql-bin
innodb_data_home_dir      =/data/software/mysql8/datas/mysql
innodb_log_group_home_dir =/data/software/mysql8/datas/mysql
#日志及进程数据的存放目录,改为自己的路径!!!
log-error =/data/software/mysql8/datas/mysql/mysql.log
pid-file  =/data/software/mysql8/datas/mysql/mysql.pid
# 服务端使用的字符集默认为8比特编码
character-set-server=utf8mb4
lower_case_table_names=1
autocommit =1

 ##################以上要修改的########################
skip-external-locking
key_buffer_size = 256M
max_allowed_packet = 1M
table_open_cache = 1024
sort_buffer_size = 4M
net_buffer_length = 8K
read_buffer_size = 4M
read_rnd_buffer_size = 512K
myisam_sort_buffer_size = 64M
thread_cache_size = 128

#query_cache_size = 128M
tmp_table_size = 128M
explicit_defaults_for_timestamp = true
max_connections = 500
max_connect_errors = 100
open_files_limit = 65535

binlog_format=mixed

binlog_expire_logs_seconds =864000

# 创建新表时将使用的默认存储引擎
default_storage_engine = InnoDB
innodb_data_file_path = ibdata1:10M:autoextend
innodb_buffer_pool_size = 1024M
innodb_log_file_size = 256M
innodb_log_buffer_size = 8M
innodb_flush_log_at_trx_commit = 1
innodb_lock_wait_timeout = 50
transaction-isolation=READ-COMMITTED

[mysqldump]
quick
max_allowed_packet = 16M

[myisamchk]
key_buffer_size = 256M
sort_buffer_size = 4M
read_buffer = 2M
write_buffer = 2M

[mysqlhotcopy]
interactive-timeout
4.2 Initialization
mysqld --defaults-file=/data/software/mysql8/my.cnf --basedir=/data/software/mysql8/ --datadir=/data/software/mysql8/datas/mysql --user=mysql --initialize-insecure
parameters (important)
- defaults-file: Specify the configuration file (to be placed before –initialize)
- user: specify the user
- basedir: specify the installation directory
- datadir: Specifies the initialization data directory
- intialize-insecure: initialize without a password
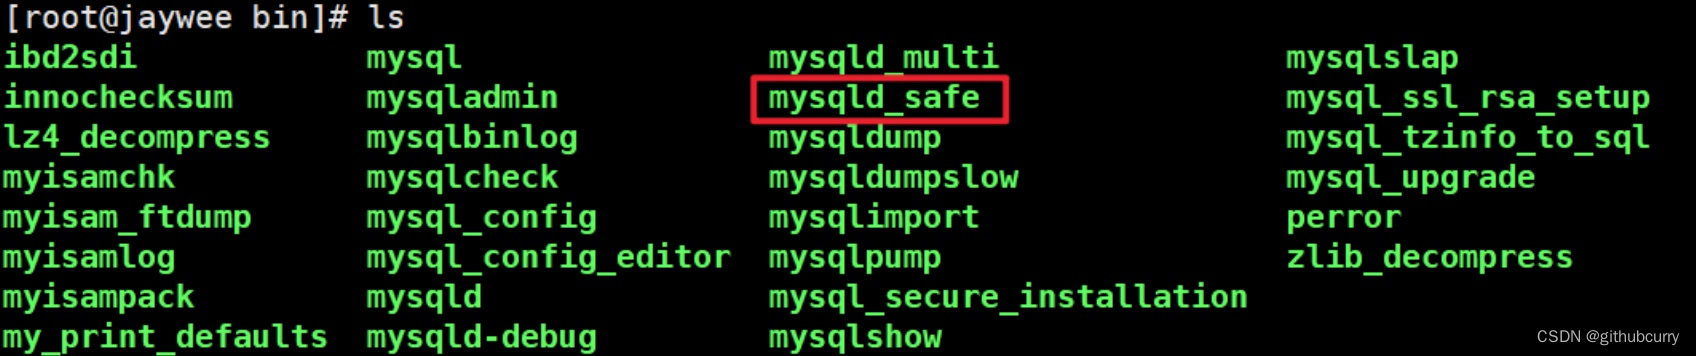
5. Start MySQL
Check whether the MySQL bin path contains mysqld_safe, which is used to safely start MySQL in the background.
5.1 Start the service
# 完整命令
/data/software/mysql8/bin/mysqld_safe --defaults-file=/data/software/mysql8/my.cnf &
# 添加PATH变量后的命令(省略bin目录的路径)
mysqld_safe --defaults-file=/data/software/mysql8/my.cnf &
Check if it is started
#两个都可以
ps -ef|grep mysql
lsof -i:3306

5.2 Login
# 无密码登录方式
/data/software/mysql8/bin/mysql -u root --skip-password
# 有密码登录方式(初始的随机密码在/data/mysql8_data/mysql/mysql.log下)
mysql -u root -p
password:随机密码
Enter the mysql interactive page
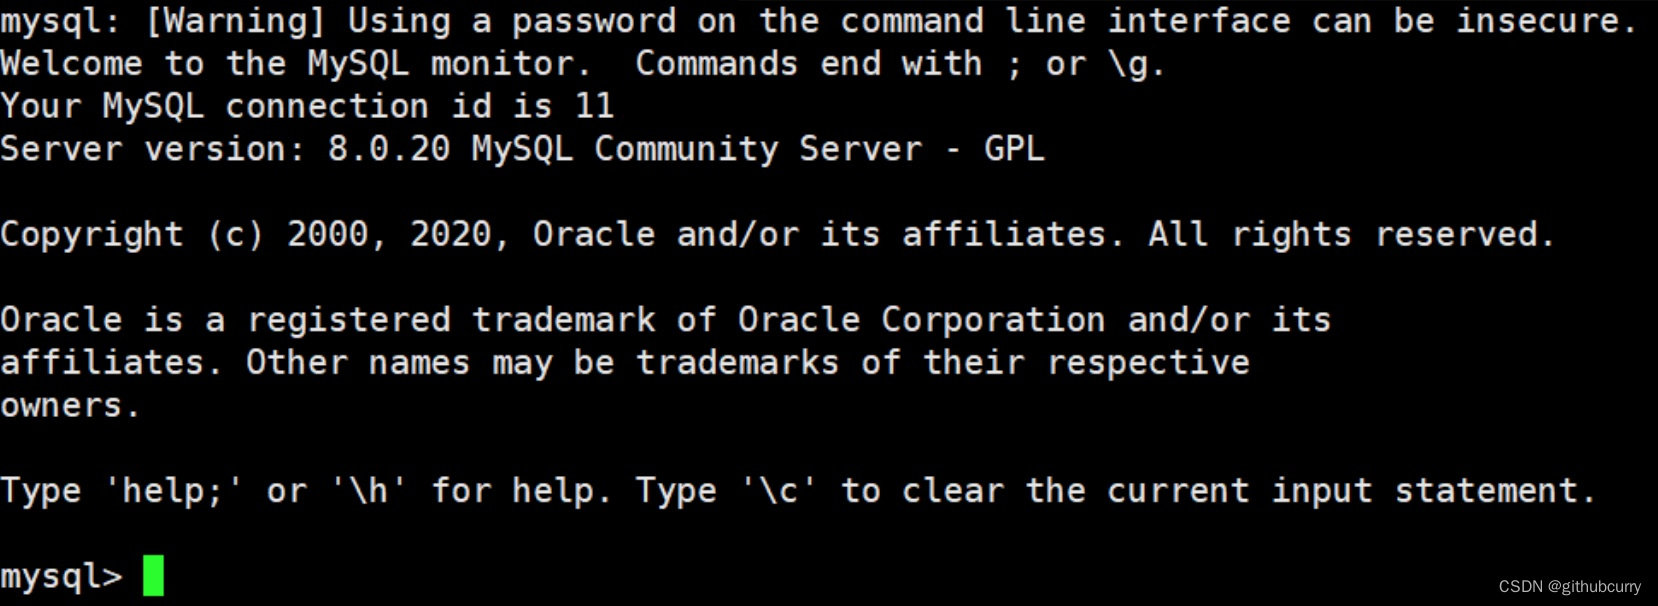
and exit the mysql command:
#两个都可以
exit
quit
5.3 Change password
# 修改密码
ALTER USER 'root'@'localhost' IDENTIFIED WITH mysql_native_password BY '123456';
# 刷新权限
FLUSH PRIVILEGES;

5.4 Set to allow remote login
Log in to mysql and execute
mysql> use mysql
mysql> update user set user.Host='%'where user.User='root';
mysql> flush privileges;
mysql> quit
5.5 Test connection on Navicat
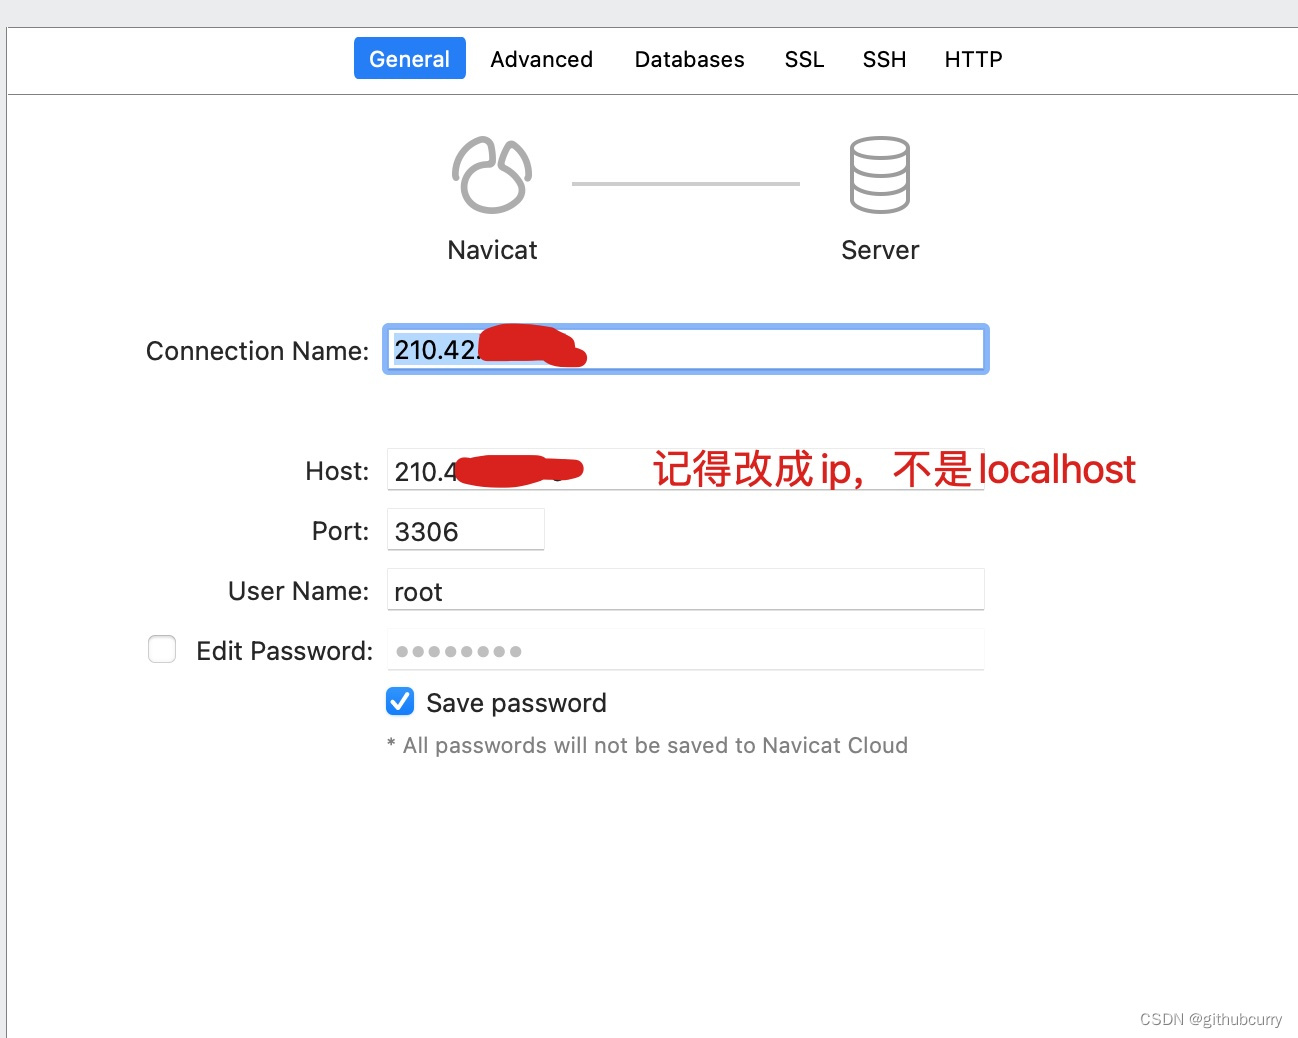
- User Name is root
- The password is the password set by yourself
Unable to connect to Navicat
If the connection cannot be made, it may be that the server has a firewall. The solution:
- turn off firewall
#查看防火墙是否开启(如果显示running,则防火墙为开启状态)
firewall-cmd --state

#关闭防火墙
systemctl stop firewalld.service

#开启防火墙
systemctl start firewalld.service
- Open port 3306
# 查询端口是否开放
firewall-cmd --query-port=8080/tcp
lsof -i:8080(如果没有lsof,可以使用  yum install lsof  下载)


# 开放80端口
firewall-cmd --permanent --add-port=80/tcp


#重启防火墙(修改配置后要重启防火墙)
firewall-cmd --reload