Shuttle between Activities using Intent
Any application will not have only one interface, but clicking the application icon will only enter the main activity of the application, so different activities need to be converted.
Use an explicit Intent
Create another Activity first, and name it SecondActivity, and check Generate Layout File, name the layout file second_layout, and uncheck the Launcher Activity option.
Modify the code of second_layout as:
<?xml version="1.0" encoding="utf-8"?>
<LinearLayout xmlns:android="http://schemas.android.com/apk/res/android"
    android:orientation="vertical"
    android:layout_width="match_parent"
    android:layout_height="match_parent">

    <Button
        android:id="@+id/button2"
        android:layout_width="match_parent"
        android:layout_height="wrap_content"
        android:text="Button 2"
        />

</LinearLayout>
The code above also defines a button and displays Button 2.
The code for SecondActivity is:
package com.example.activitytest

import androidx.appcompat.app.AppCompatActivity
import android.os.Bundle

class SecondActivity : AppCompatActivity() {
    override fun onCreate(savedInstanceState: Bundle?) {
        super.onCreate(savedInstanceState)
        setContentView(R.layout.second_layout)
    }
}
Similarly, the Activity is also automatically registered by Android Studio:
<?xml version="1.0" encoding="utf-8"?>
<manifest xmlns:android="http://schemas.android.com/apk/res/android"
    package="com.example.activitytest">

    <application
        android:allowBackup="true"
        android:icon="@mipmap/ic_launcher"
        android:label="@string/app_name"
        android:roundIcon="@mipmap/ic_launcher_round"
        android:supportsRtl="true"
        android:theme="@style/Theme.ActivityTest">
        <activity
            android:name=".SecondActivity"
            android:exported="true" />
        <activity
            android:name=".FirstActivity"
            android:exported="true"
            android:label="This is FirstActivity">
            <intent-filter>
                <action android:name="android.intent.action.MAIN" />

                <category android:name="android.intent.category.LAUNCHER" />
            </intent-filter>
        </activity>
    </application>

</manifest>
The Activity is not the main Activity, so no additional processing is required, and the rest is to consider the transition between the two Activities.
Intent is an important way to interact between various components in an Android program. It can not only indicate the action that the current component wants to perform, but also transfer data between different components. Intent can generally be used to start Activity, start Service, and send broadcasts and other scenarios.
Intent can be roughly divided into two types:
- Explicit Intent
- Implicit Intent
Intent has multiple overloaded constructors, one of which is in the form below, the first parameter Context of the function requires a context to start the Activity, and the second parameter is used to specify the target Activity to be started.
The startActivity method is provided in the Activity class, which is specially used to start the Activity. It receives an Intent parameter, and the constructed Intent is passed into this method to start the target Activity.
    /**
     * Create an intent for a specific component.  All other fields (action, data,
     * type, class) are null, though they can be modified later with explicit
     * calls.  This provides a convenient way to create an intent that is
     * intended to execute a hard-coded class name, rather than relying on the
     * system to find an appropriate class for you; see {@link #setComponent}
     * for more information on the repercussions of this.
     *
     * @param packageContext A Context of the application package implementing
     * this class.
     * @param cls The component class that is to be used for the intent.
     *
     * @see #setClass
     * @see #setComponent
     * @see #Intent(String, android.net.Uri , Context, Class)
     */
    public Intent(Context packageContext, Class<?> cls)
Here modify the click event of the button in FirstActivity:
        button1.setOnClickListener {
            val intent = Intent(this, SecondActivity::class.java)
            startActivity(intent)
        }
The above code first builds the Intent object, the first parameter this is FirstActivity as the context, and the second parameter passes in SecondActivity::class.java as the target Activity. Then pass in the Intent through the startActivity method.
The writing method of SecondActivity::class.java in Kotlin is equivalent to the writing method of SecondActivity.class in Java.
After the code runs, the result after clicking the button is:
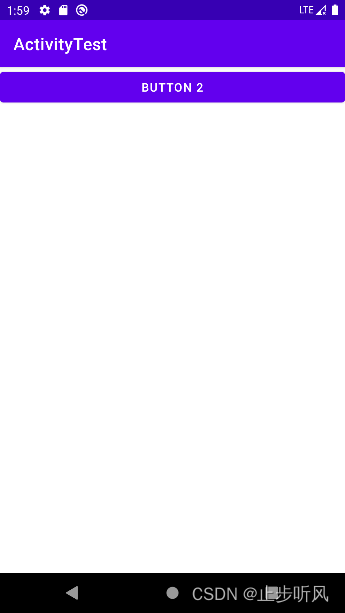
In this interface, press the back key to destroy the current Activity and return to the previous Activity.
Starting an Activity in this way is called an explicit Intent.
Use implicit intent
Implicit Intent does not clearly indicate which Activity to start, but specifies a series of more abstract information such as action and category, and then hand it over to the system to analyze the Intent and find a suitable Activity to start.
A suitable Activity is simply an Activity that can respond to an implicit Intent.
Here add content for SecondActivity in AndroidManifest.xml:
        <activity
            android:name=".SecondActivity"
            android:exported="true" >
            <intent-filter>
                <action android:name="com.example.activityTest.ACTION_START" />
                <category android:name="android.intent.category.DEFAULT" />
            </intent-filter>
        </activity>
The action tag indicates that the current Activity can respond to com.example.activityTest.ACTION_START, and the category tag contains some additional information, which more precisely indicates the category that may be included in the Intent that the current Activity can respond to. Only when the content in action and category match the action and category specified in Intent at the same time, the Activity can respond to the Intent.
Modify the click event of the button in FirstActivity, the code is:
        button1.setOnClickListener {
            val intent = Intent("com.example.activityTest.ACTION_START")
            startActivity(intent)
        }
Here you can see that another constructor using Intent directly passes in the action string, indicating that an Activity that can respond to the action com.example.activityTest.ACTION_START is to be started. It was mentioned before that the action and category must match at the same time to be able to respond, but the category is not specified here. This is because android.intent.category.DEFAULT is a default category, which is automatically added to the category when the startActivity method is called. Intent.
Re-run the program, the result is the same.
Only one action can be specified in each Intent, but multiple categories can be specified. Here, modify the click event of the button in FirstActivity:
        button1.setOnClickListener {
            val intent = Intent("com.example.activityTest.ACTION_START")
            intent.addCategory("com.example.activityTest.MY_CATEGORY")
            startActivity(intent)
        }
A category is added above using the addCategory method of Intent, and a custom category is specified here.
Re-run the program, click the button, the program will crash, the error log is:
2022-09-12 10:27:08.792 8588-8588/com.example.activitytest E/AndroidRuntime: FATAL EXCEPTION: main
    Process: com.example.activitytest, PID: 8588
    android.content.ActivityNotFoundException: No Activity found to handle Intent { act=com.example.activityTest.ACTION_START cat=[com.example.activityTest.MY_CATEGORY] }
It can be seen that no activity can respond to the Intent at this time. This is because a new category is added to the Intent, and the intent-filter tag of SecondActivity does not declare that it can respond to the category, so no Activity can respond to the Intent. , and add another statement to the intent-filter:
            <intent-filter>
                <action android:name="com.example.activityTest.ACTION_START" />
                <category android:name="android.intent.category.DEFAULT" />
                <category android:name="com.example.activityTest.MY_CATEGORY" />
            </intent-filter>
At this time, re-execute the code and it will be normal.
More implicit Intent usage
Using implicit Intent, you can not only start the Activity in your own program, but also start the Activity of other programs, which makes function sharing between multiple applications possible. For example, if a web page needs to be displayed in an application program, it only needs to call the browser of the system to open the web page.
Modify the code of the button click event in FirstActivity:
        button1.setOnClickListener {
            val intent = Intent(Intent.ACTION_VIEW)
            intent.data = Uri.parse("https://www.baidu.com")
            startActivity(intent)
        }
In the above code, the action of the Intent is first specified as Intent.ACTION_VIEW, which is a built-in action of the Android system. Its constant value is android.intent.action.VIEW, and then the address string is parsed into a Uri object by the Uri.parse method. Then call the setData method of the Intent to pass in the Uri object.
Run the program, the result after clicking the button is:

Here another Activity is built, named ThirdActivity, and a layout file is generated, named third_layout, and the content of the layout file is modified:
<?xml version="1.0" encoding="utf-8"?>
<LinearLayout xmlns:android="http://schemas.android.com/apk/res/android"
    android:orientation="vertical"
    android:layout_width="match_parent"
    android:layout_height="match_parent">

    <Button
        android:id="@+id/button3"
        android:layout_width="match_parent"
        android:layout_height="wrap_content"
        android:text="Button 3"
        />

</LinearLayout>
Modify the registration information of ThirdActivity in AndroidManifest.xml:
        <activity
            android:name=".ThirdActivity"
            android:exported="true">
            <intent-filter tools:ignore="AppLinkUrlError">
                <action android:name="android.intent.action.VIEW" />

                <category android:name="android.intent.category.DEFAULT" />
                <data android:scheme="https" />
            </intent-filter>
        </activity>
The above code configures the ACTION_VIEW that the current Activity can respond to in the intent-filter, and the category specifies the default category value, and the data specifies that the data protocol must be the https protocol through android:scheme, so ThirdActivity should be the same as the browser , can respond to an Intent that opens a web page.
However, because Android Studio thinks that all activities that can respond to ACTION_VIEW should add the BROWSABLE category, otherwise a warning will be given, and the BROWSABLE category is added to realize the deep link function, which is not currently available, so use tools: The ignore attribute ignores the warning.
Run the program, the result after clicking the button is:
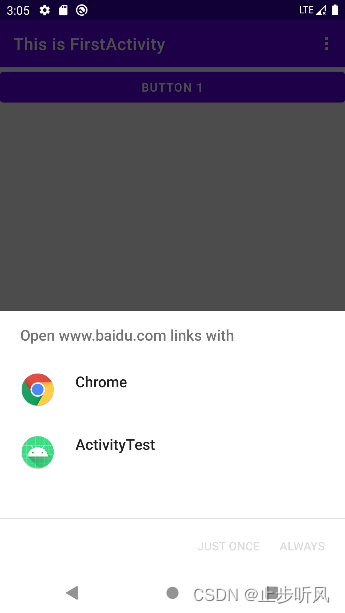
From the above, the system pops up a list showing all the programs currently able to respond to the Intent. Selecting Chrome will open the browser as before, and selecting ActivityTest will start ThirdActivity.
However, although it is declared that the ThirdActivity can respond to the Intent of opening the webpage, in fact, the Activity does not have the function of loading and displaying the webpage, and such problems should be avoided in actual development.
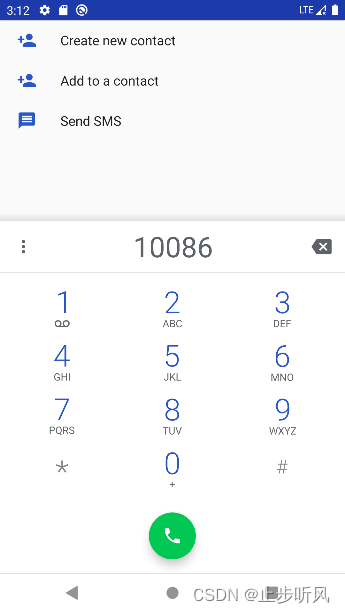
In addition to the https protocol, other protocols can also be specified, such as geo indicates an explicit geographic location, and tel indicates a phone call:
        button1.setOnClickListener {
            val intent = Intent(Intent.ACTION_DIAL)
            intent.data = Uri.parse("tel:10086")
            startActivity(intent)
        }
The above code specifies the action of the Intent as Intent.ACTION_DIAL, and then specifies the protocol as tel and the number as 10086 in the data section. Run the program, the result after clicking the button is:
Pass data to the next Activity
The idea of transferring data when starting an Activity is very simple. Intent provides a series of overloads of the putExtra method, which can temporarily store data in the Intent. After starting another Activity, you only need to take the data out of the Intent.
        button1.setOnClickListener {
            val data = "Hello SecondActivity"
            val intent = Intent(this, SecondActivity::class.java)
            intent.putExtra("extra_data", data)
            startActivity(intent)
        }
For example, the above code uses explicit Intent to start SecondActivity, and passes the string through the putExtra method. The first parameter of the putExtra method is the key, which is used to get the value from the Intent later, and the second parameter is the real one to be passed. data.
Then modify the code of SecondActivity to read the string:
package com.example.activitytest

import android.content.Intent
import androidx.appcompat.app.AppCompatActivity
import android.os.Bundle
import android.util.Log

class SecondActivity : AppCompatActivity() {
    override fun onCreate(savedInstanceState: Bundle?) {
        super.onCreate(savedInstanceState)
        setContentView(R.layout.second_layout)
        val extraData = intent.getStringExtra("extra_data")
        Log.d("SecondActivity", "extra data is $extraData")
    }
}
The intent in the above code actually calls the getIntent method of the parent class, which will get the Intent used to start the SecondActivity, and then call the getStringExtra method and pass in the corresponding key value to get the corresponding data. Since a string is passed, use the getStringExtra method.
After running the program, you can see the following print information:
2022-09-12 11:24:23.078 10125-10125/com.example.activitytest D/SecondActivity: extra data is Hello SecondActivity
Return data to the previous Activity
To return to the previous Activity, you only need to press the back keyboard, and there is no Intent for starting the Activity to pass data, but there is also a startActivityForResult method for starting the Activity in the Activity class, which expects to return a result when the Activity is destroyed to the previous Activity.
    /**
     * Modifies the standard behavior to allow results to be delivered to fragments.
     * This imposes a restriction that requestCode be <= 0xffff.
     */
    @Override
    public void startActivityForResult(@SuppressLint("UnknownNullness") Intent intent,
            int requestCode)
This method receives two parameters, the first parameter is the Intent, and the second parameter is the request code, which is used to determine the source of the data in subsequent callbacks.
        button1.setOnClickListener {
            val intent = Intent(this, SecondActivity::class.java)
            startActivityForResult(intent, 1)
        }
Here the startActivityForResult method is used to start SecondActivity, as long as the request code is a unique value, here is 1. The logic corresponding to SecondActivity is:
        button2.setOnClickListener {
            val intent = Intent()
            intent.putExtra("data_reurn", "Hello FirstActiviry")
            setResult(RESULT_OK, intent)
            finish()
        }
In the above code, an Intent is constructed to pass data, and then the setResult method is called, which is specially used to return data to the previous Activity. The setResult method receives two parameters. The first parameter is used to return the processing result to the previous Activity. Generally, only RESULT_OK or RESULT_CANCELED is used. The second parameter returns the Intent with data, and finally calls finish to destroy the current Activity.
Since SecondActivity is started using the startActivityForResult method, the onActivityResult method of the previous Activity will be called back after SecondActivity is destroyed, so this method must be rewritten:
    override fun onActivityResult(requestCode: Int, resultCode: Int, data: Intent?) {
        super.onActivityResult(requestCode, resultCode, data)
        when (requestCode) {
            1 -> if (resultCode == RESULT_OK) {
                val returnedData = data?.getStringExtra("data_return")
                Log.d("FirstActivity", "returned data is $returnedData")
            }
        }
    }
There are three parameters in the method onActivityResult, the first parameter requestCode is the request code passed in when starting the Activity, the second parameter is resultCode, which is the processing result passed in when returning data, and the third parameter data is carrying the returned data Intent. Since an Activity may call the startActivityForResult method to start different Activities, and the data returned by each Activity will be called back to onActivityResult, so it is necessary to check the requestCode to determine the data source, then determine whether the resultCode is successful, and finally perform data processing, thus completing the next Activity. return data.
After running the program, you may see the following print information:
2022-09-12 11:50:29.015 10658-10658/com.example.activitytest D/FirstActivity: returned data is Hello FirstActiviry
The above code destroys the current process through the finish method, and if the process is destroyed through the back key, the data cannot be returned at this time, and the onBackPressed method needs to be rewritten to solve this problem.
    override fun onBackPressed() {
        val intent = Intent()
        intent.putExtra("data_return", "Hello FirstActivity")
        setResult(RESULT_OK, intent)
        finish()
    }
It can be seen that the code is just rewritten.