What is xxl-job?
xxl-job is a distributed task scheduling platform. Its core design goals are: easy learning, fast development, lightweight, and easy expansion. Now it has open source code and connected to the online product lines of many companies. out of the box. xxl is the pinyin beginning of the name of Xu Xueli, the developer of xxl-job Dianping.
The xxl-job framework is mainly used to process distributed timing tasks, which mainly consists of a dispatch center and an executor.
Scheduling module (scheduling center):
Responsible for managing scheduling information, sending scheduling requests according to scheduling configuration, and not responsible for business codes. The scheduling system is decoupled from tasks, which improves system availability and stability, and at the same time, the performance of the scheduling system is no longer limited by task modules;
Support visual, simple and dynamic management scheduling information, including task creation, update, deletion, GLUE development and task alarm, etc. All the above operations will take effect in real time, and support monitoring scheduling results and execution logs, and support executor failover.
Execution module (executor):
Responsible for receiving scheduling requests and executing task logic. The task module focuses on operations such as task execution, making development and maintenance easier and more efficient;
Receive execution requests, termination requests, log requests, etc. from the "scheduling center".
Summarize:
Scheduling Center: Unified management of scheduling tasks on the task scheduling platform, responsible for triggering scheduling execution, and providing a task management platform.
Executor: Receive and execute the scheduling of the dispatch center, which can be executed directly or integrated into the project.
download link:
https://gitee.com/xuxueli0323/xxl-job
After the download is complete:
first step:
Execute sql to create the table into the database:

Step two:
Configure your own database address:
Configuration under the admin module:

third step:
Start the admin project:

Start the XxlJobAdminApplication class, visit http://localhost:8080/xxl-job-admin default account admn, password 123456
The page after entering:

If you want to complete the task of configuring xxl yourself, you need the following steps:
第一步配置:配置 application.properties
配置所需参数
# web port
server.port=8081
# no web
#spring.main.web-environment=false

# log config
logging.config=classpath:logback.xml


### xxl-job admin address list, such as "http://address" or "http://address01,http://address02"
#调度中心部署根地址 [选填]:如调度中心集群部署存在多个地址则用逗号分隔。执行器将会使用该地址进行"执行器心跳注册"和"任务结果回调";为空则关闭自动注册;
xxl.job.admin.addresses=http://127.0.0.1:8080/xxl-job-admin

### 执行器通讯TOKEN [选填]:非空时启用;
xxl.job.accessToken=default_token

### 执行器AppName [选填]:执行器心跳注册分组依据;为空则关闭自动注册
xxl.job.executor.appname=xxl-job-executor-sample
### xxl-job executor registry-address: default use address to registry , otherwise use ip:port if address is null
xxl.job.executor.address=
### 执行器IP [选填]:默认为空表示自动获取IP,多网卡时可手动设置指定IP,该IP不会绑定Host仅作为通讯实用;地址信息用于 "执行器注册" 和 "调度中心请求并触发任务";
xxl.job.executor.ip=
#端口号
xxl.job.executor.port=9999
### 执行器运行日志文件存储磁盘路径 [选填] :需要对该路径拥有读写权限;为空则使用默认路径;
xxl.job.executor.logpath=/data/applogs/xxl-job/jobhandler
### 执行器日志文件保存天数 [选填] : 过期日志自动清理, 限制值大于等于3时生效; 否则, 如-1, 关闭自动清理功能;
xxl.job.executor.logretentiondays=30
引入依赖:
        <dependency>
            <groupId>com.xuxueli</groupId>
            <artifactId>xxl-job-core</artifactId>
            <version>2.3.1</version>
        </dependency>
配置XxlJobConfig
package com.furnish.system.config;
import com.xxl.job.core.executor.impl.XxlJobSpringExecutor;
import org.slf4j.Logger;
import org.slf4j.LoggerFactory;
import org.springframework.beans.factory.annotation.Value;
import org.springframework.context.annotation.Bean;
import org.springframework.context.annotation.Configuration;
import org.springframework.context.annotation.PropertySource;
/**
* xxl-job config
*
*/
@Configuration
@PropertySource("classpath:application.properties")
public class XxlJobConfig {
private Logger logger = LoggerFactory.getLogger(XxlJobConfig.class);
@Value("${xxl.job.admin.addresses}")
private String adminAddresses;
@Value("${xxl.job.accessToken}")
private String accessToken;
@Value("${xxl.job.executor.appname}")
private String appname;
@Value("${xxl.job.executor.address}")
private String address;
@Value("${xxl.job.executor.ip}")
private String ip;
@Value("${xxl.job.executor.port}")
private int port;
@Value("${xxl.job.executor.logpath}")
private String logPath;
@Value("${xxl.job.executor.logretentiondays}")
private int logRetentionDays;
@Bean
public XxlJobSpringExecutor xxlJobExecutor() {
logger.info(">>>>>>>>>>> xxl-job config init.");
XxlJobSpringExecutor xxlJobSpringExecutor = new XxlJobSpringExecutor();
xxlJobSpringExecutor.setAdminAddresses(adminAddresses);
xxlJobSpringExecutor.setAppname(appname);
xxlJobSpringExecutor.setAddress(address);
xxlJobSpringExecutor.setIp(ip);
xxlJobSpringExecutor.setPort(port);
xxlJobSpringExecutor.setAccessToken(accessToken);
xxlJobSpringExecutor.setLogPath(logPath);
xxlJobSpringExecutor.setLogRetentionDays(logRetentionDays);
return xxlJobSpringExecutor;
}
/**
* 针对多网卡、容器内部署等情况,可借助 "spring-cloud-commons" 提供的 "InetUtils" 组件灵活定制注册IP;
*
* 1、引入依赖:
* <dependency>
* <groupId>org.springframework.cloud</groupId>
* <artifactId>spring-cloud-commons</artifactId>
* <version>${version}</version>
* </dependency>
*
* 2、配置文件,或者容器启动变量
* spring.cloud.inetutils.preferred-networks: 'xxx.xxx.xxx.'
*
* 3、获取IP
* String ip_ = inetUtils.findFirstNonLoopbackHostInfo().getIpAddress();
*/
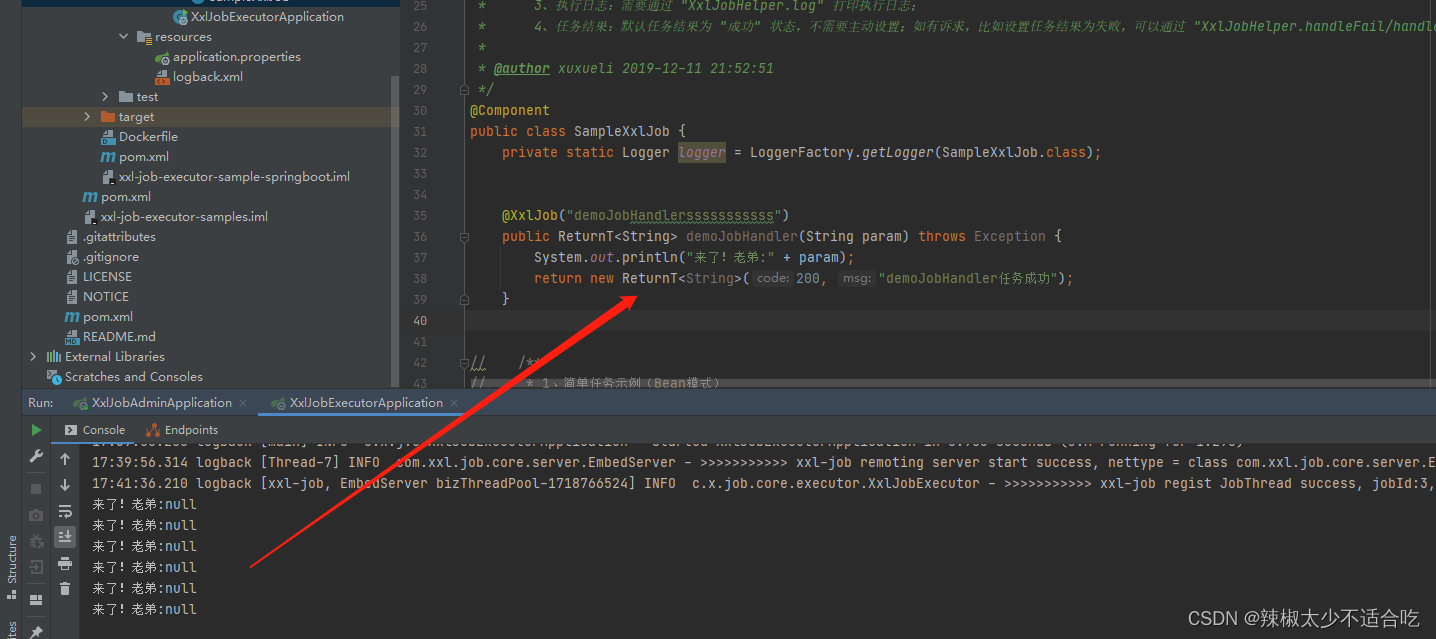
}第二步:编写xxl定时任务代码 @XxlJob("demoJobHandler")
/**
 * XxlJob开发示例(Bean模式)
 *
 * 开发步骤:
 *      1、任务开发:在Spring Bean实例中,开发Job方法;
 *      2、注解配置:为Job方法添加注解 "@XxlJob(value="自定义jobhandler名称", init = "JobHandler初始化方法", destroy = "JobHandler销毁方法")",注解value值对应的是调度中心新建任务的JobHandler属性的值。
 *      3、执行日志:需要通过 "XxlJobHelper.log" 打印执行日志;
 *      4、任务结果:默认任务结果为 "成功" 状态,不需要主动设置;如有诉求,比如设置任务结果为失败,可以通过 "XxlJobHelper.handleFail/handleSuccess" 自主设置任务结果;
 *
 * @author xuxueli 2019-12-11 21:52:51
 */
@Component
public class SampleXxlJob {
    private static Logger logger = LoggerFactory.getLogger(SampleXxlJob.class);


    @XxlJob("demoJobHandlersssssssssss")
    public ReturnT<String> demoJobHandler(String param) throws Exception {
        System.out.println("来了!老弟:" + param);
        return new ReturnT<String>(200, "demoJobHandler任务成功");
    }
}
第三步:配置执行器
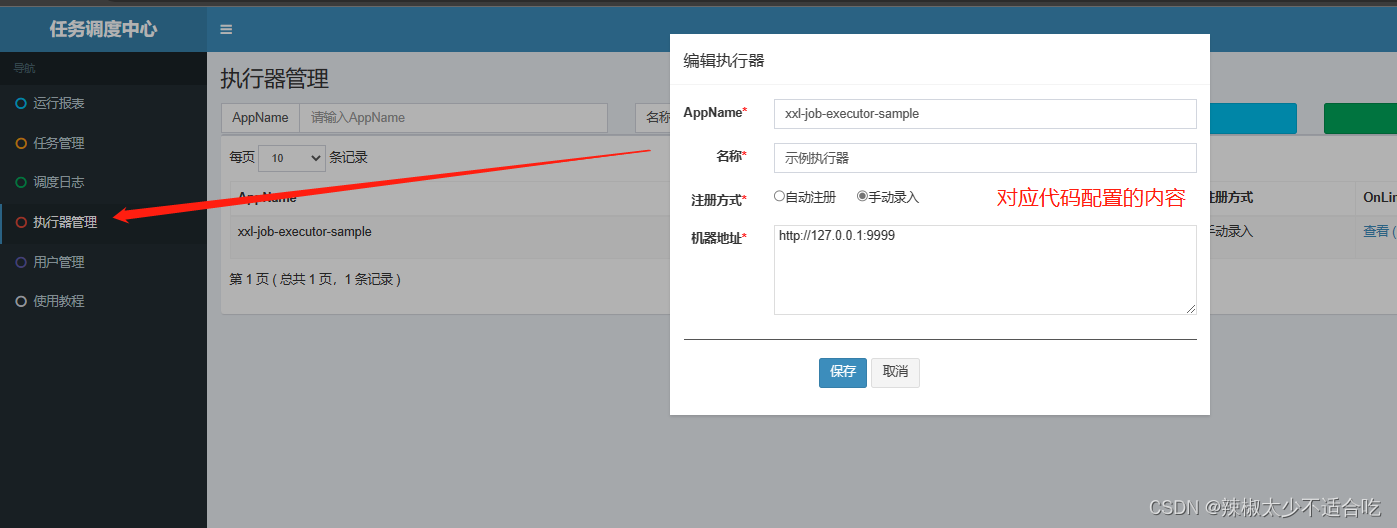
第四步:配置任务管理

最后执行测试: