Write custom directory title here
- My configuration MacBookPro 14 M1
- The installation video tutorial can refer to the following link: The anchor speaks very clearly
- installation steps:
-
- Step 1: Install homebrew
- Step 2: Install pytorch
- Step 3: Install stable diffusion webui
- Step 4: Run
-
- Question 1: The system is easy to get stuck in gfpgan and clip, so it is recommended to install these components in advance
- Question 2: pip3 installation is slow, change the source
- stable stiffness extension plugin directory
- Sinicization tutorial
- Controlnet installation tutorial
- enable dark theme
- Recommend a few URLs
My configuration MacBookPro 14 M1
Chip: Apple M1 Pro
Memory: 16G
The installation video tutorial can refer to the following link: The anchor speaks very clearly
How to deploy stable diffusion locally on mac (support replacement module, support M1, M2)
【How to deploy stable diffusion locally on mac (support replacement module, support M1, M2)】
installation steps:
Step 1: Install homebrew
https://brew.sh
It is recommended to modify the brew source, otherwise the download will be slower, or you can use a ladder
Then install the prerequisites:
brew install cmake protobuf rust [email protected] git wget
PS: The python 3.10.9 I installed supports the M1 chip (I installed it with annconda)
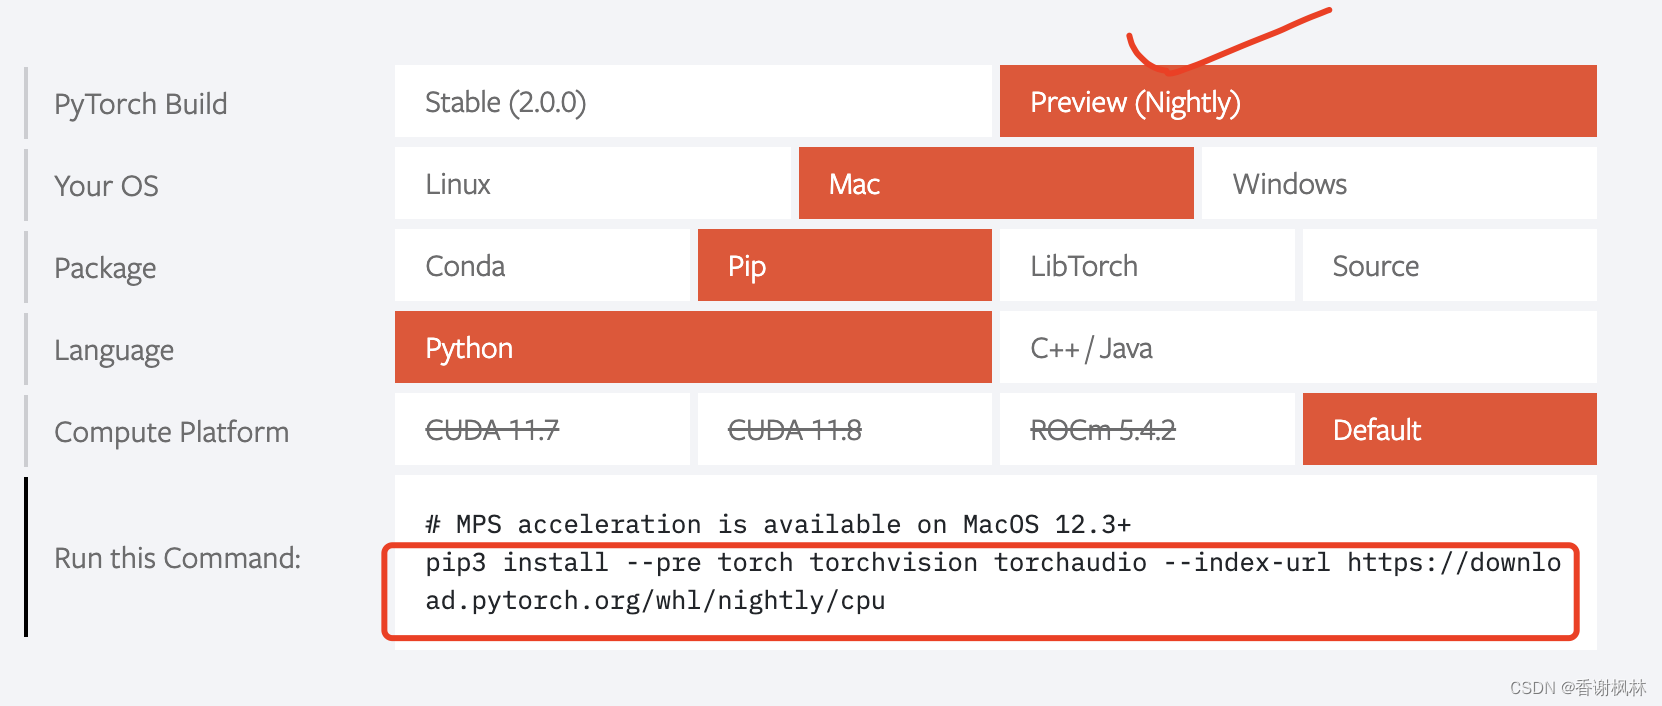
Step 2: Install pytorch
Open the pytorch official website: https://pytorch.org/
Select the version to install on the page, as follows, follow the prompts to install the command to execute:
pip3 install --pre torch torchvision torchaudio --index-url https://download.pytorch.org/whl/nightly/cpu
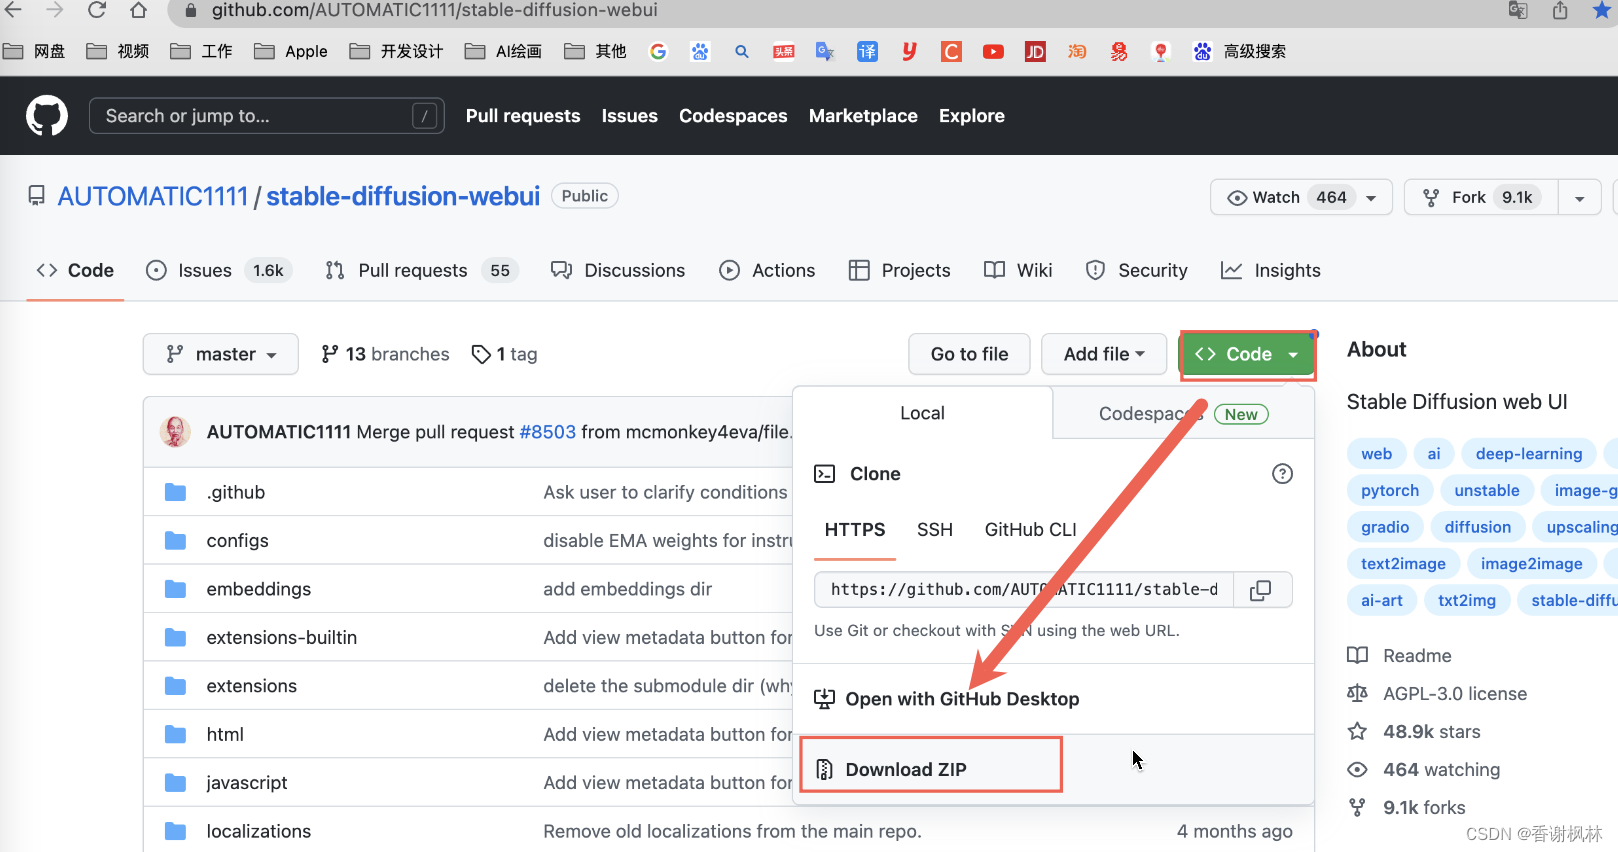
Step 3: Install stable diffusion webui
git clone https://github.com/AUTOMATIC1111/stable-diffusion-webui.git
A ladder is needed here, otherwise it will be very slow, or it will not be able to download. I went directly to github to download the source code: https://github.com/AUTOMATIC1111/stable-diffusion-webui
Step 4: Run
cd to the stable-diffusion-webui directory, run webui.sh
cd /Users/xxx/stable-diffusion-webui(这是我的目录)
./webui.sh
PS:运行前请先往下看
Question 1: The system is easy to get stuck in gfpgan and clip, so it is recommended to install these components in advance
pip3 install gfpgan
The installation of clip is quite special. Direct pip3 install clip can only install version 0.2.0, and the reverse push function of CLIP cannot be used normally (but the system can run normally). The installation method of version 1.0 clip is as follows (it is recommended to use a ladder):
pip install ftfy regex tqdm
pip install git+https://github.com/openai/CLIP.git
Question 2: pip3 installation is slow, change the source
Set Tsinghua source for pip3
pip3 config set global.index-url https://pypi.tuna.tsinghua.edu.cn/simple
stable stiffness extension plugin directory
The original one is not very easy to use, it is recommended to use this download extension plug-in

Extension list URL:
https://gitee.com/akegarasu/sd-webui-extensions/raw/master/index.md
Sinicization tutorial
The first step: Extensions–>install from URL, enter the Chinese plug-in address, click install
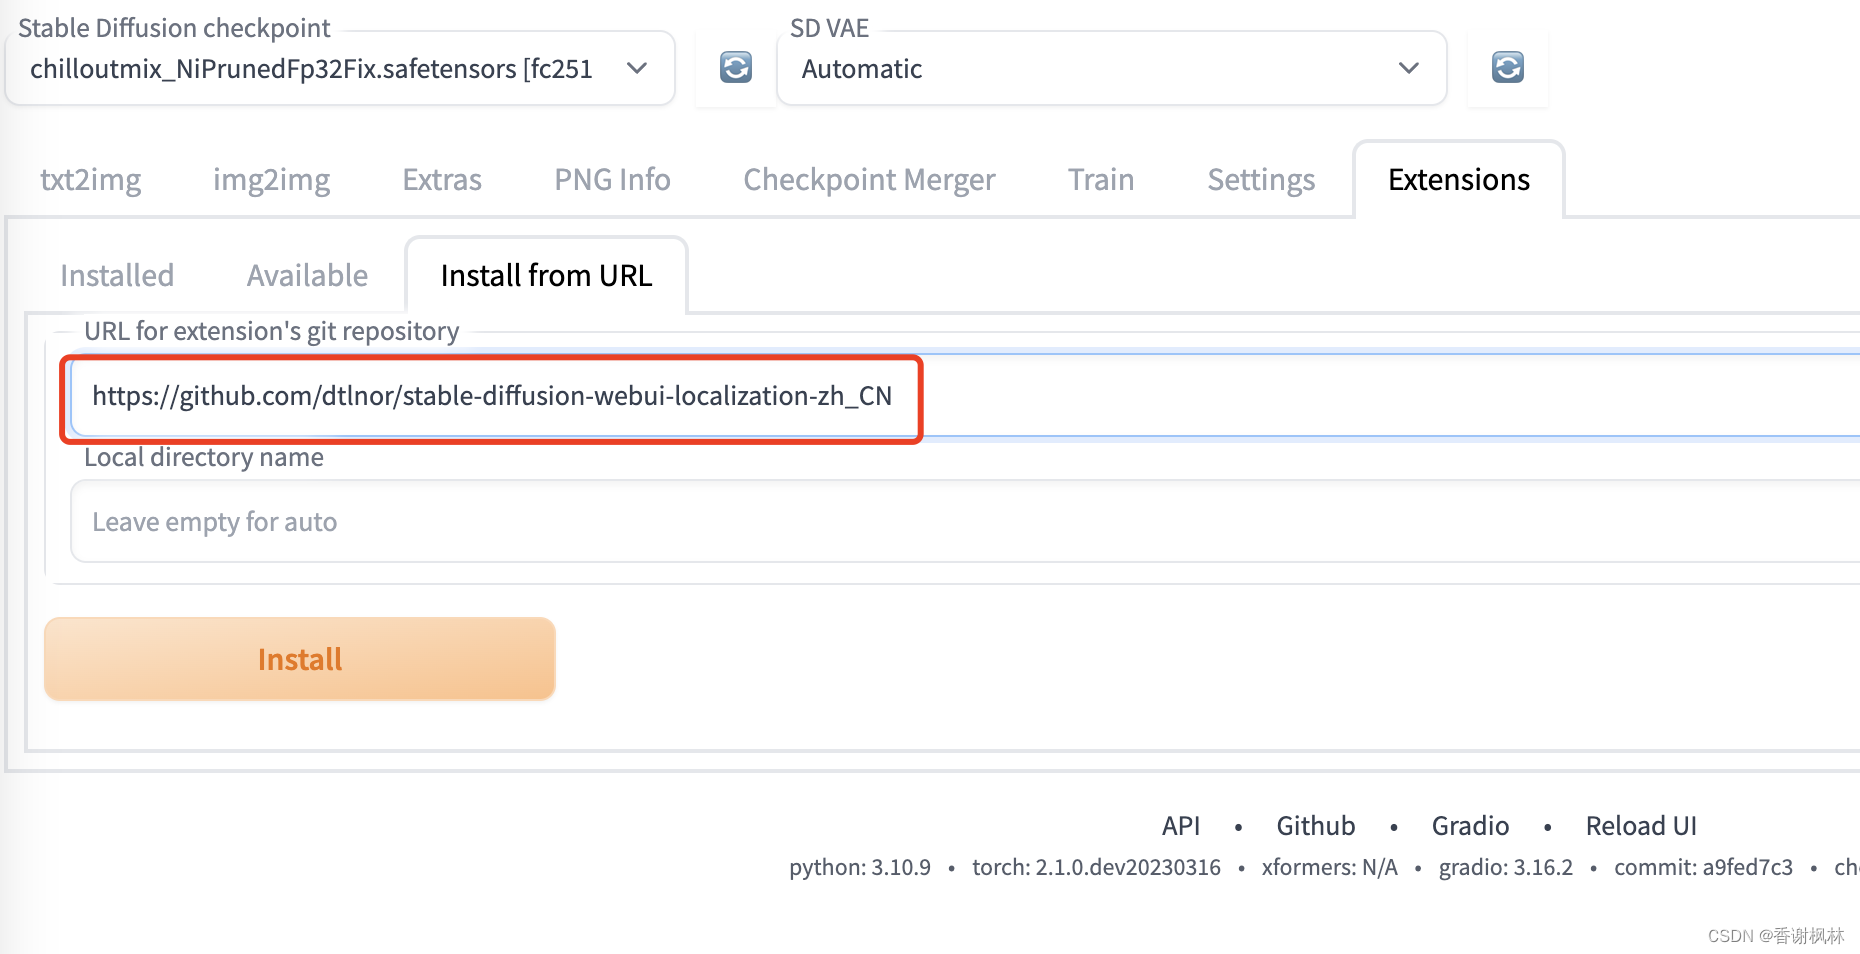
Chinese plugin: https://github.com/dtlnor/stable-diffusion-webui-localization-zh_CN
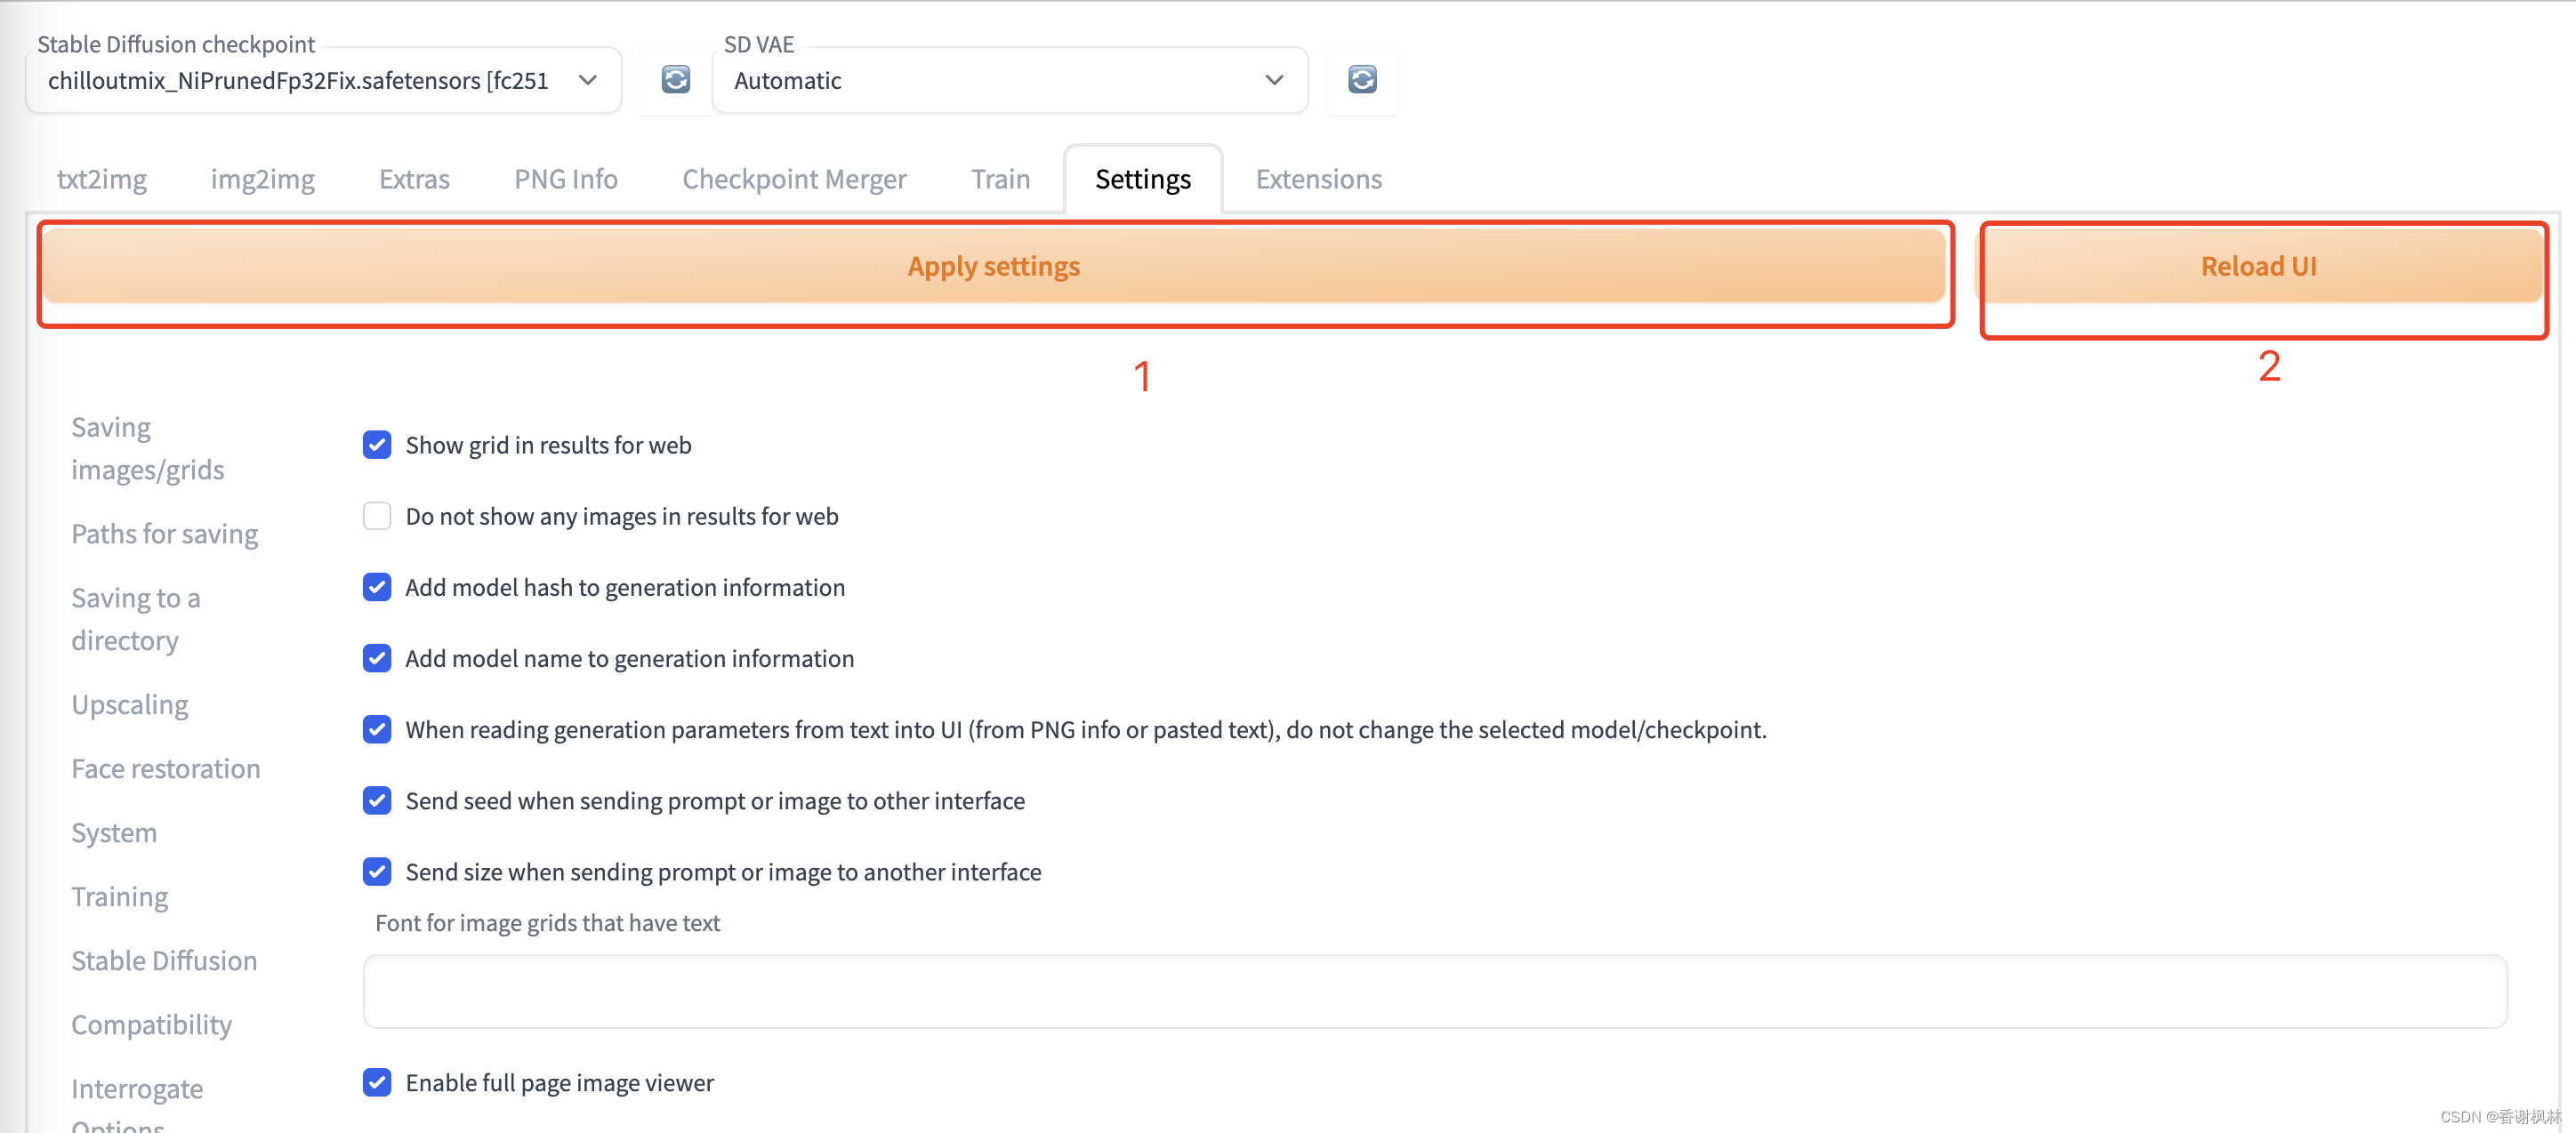
Step 2: settings–>User interface, click the refresh button, select the zh_CN language pack
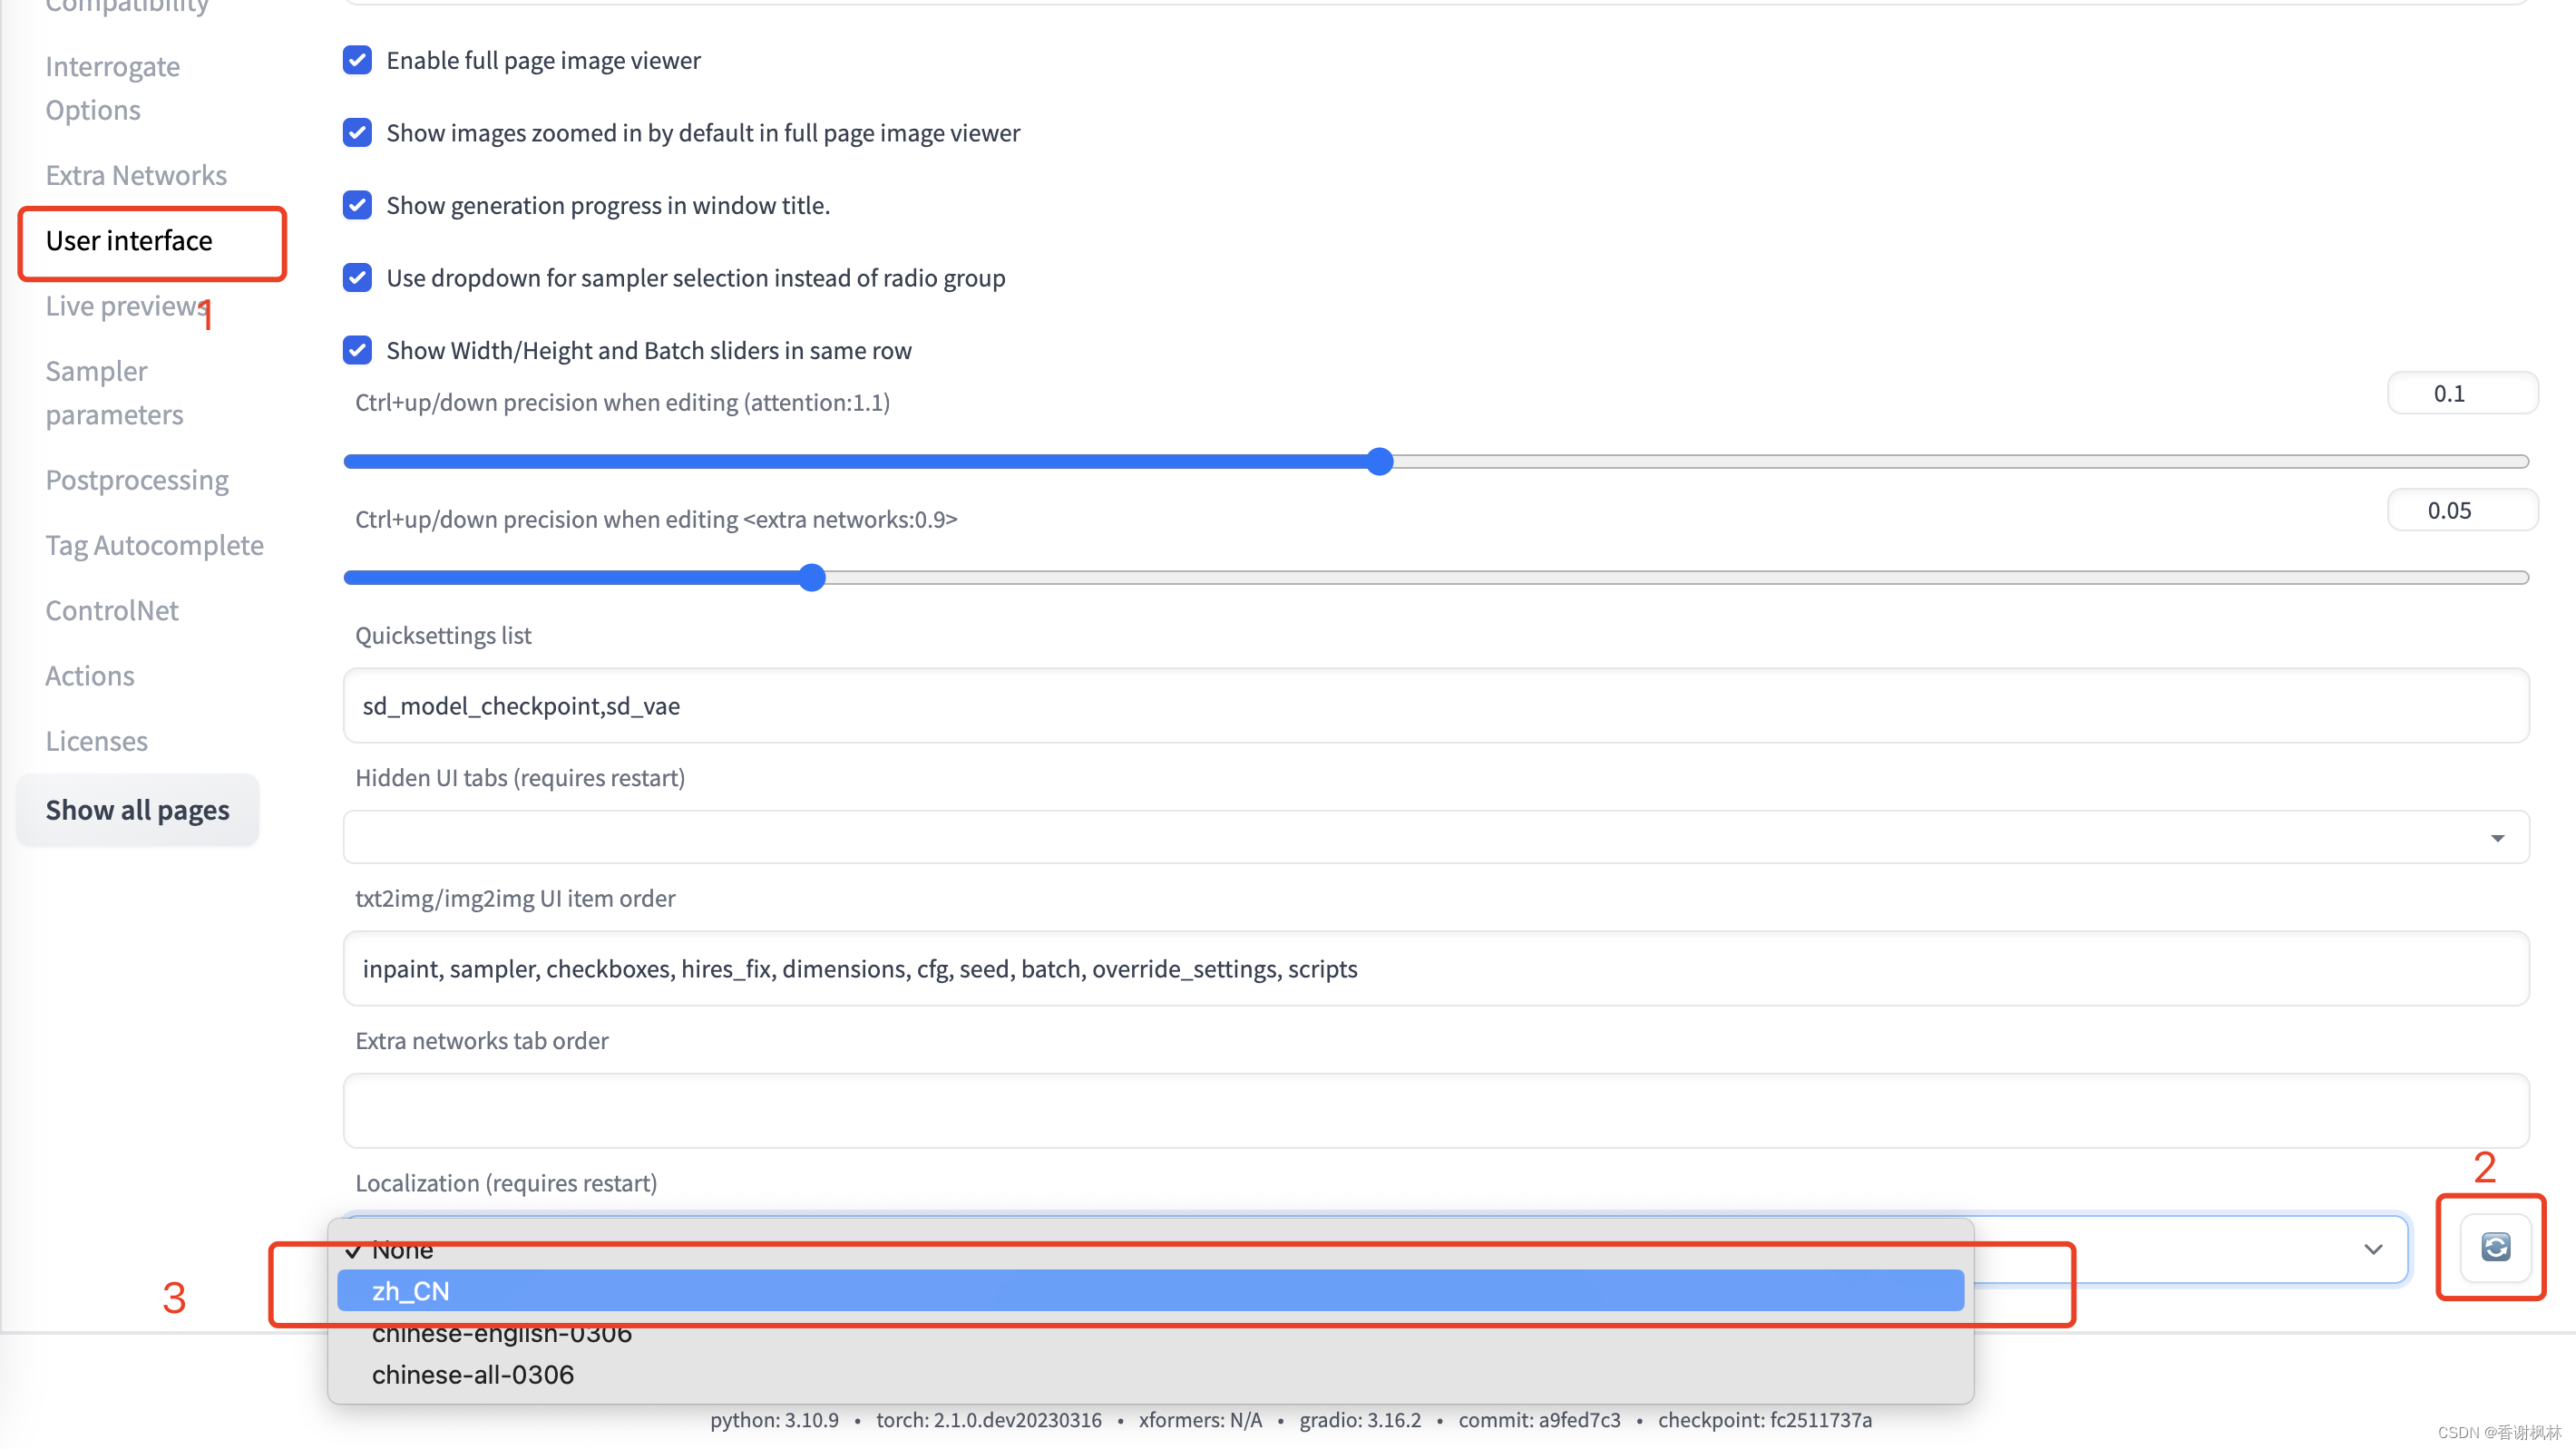
Step 3: Click Apply settings to submit the settings, and then click Reload UI to restart the interface.
Controlnet installation tutorial
Go directly to the Dashen video tutorial
【AI Painting】Perfectly control the picture! Say goodbye to the card-drawing era Character motion control/depth of field/line draft coloring Controlnet installation and use tutorial
【【AI Painting】Perfectly control the picture! Say goodbye to the card-drawing era of character action control/depth of field/line draft coloring Controlnet installation and use tutorial]
ControlNet plug-in: https://jihulab.com/hunter0725/sd-webui-controlnet
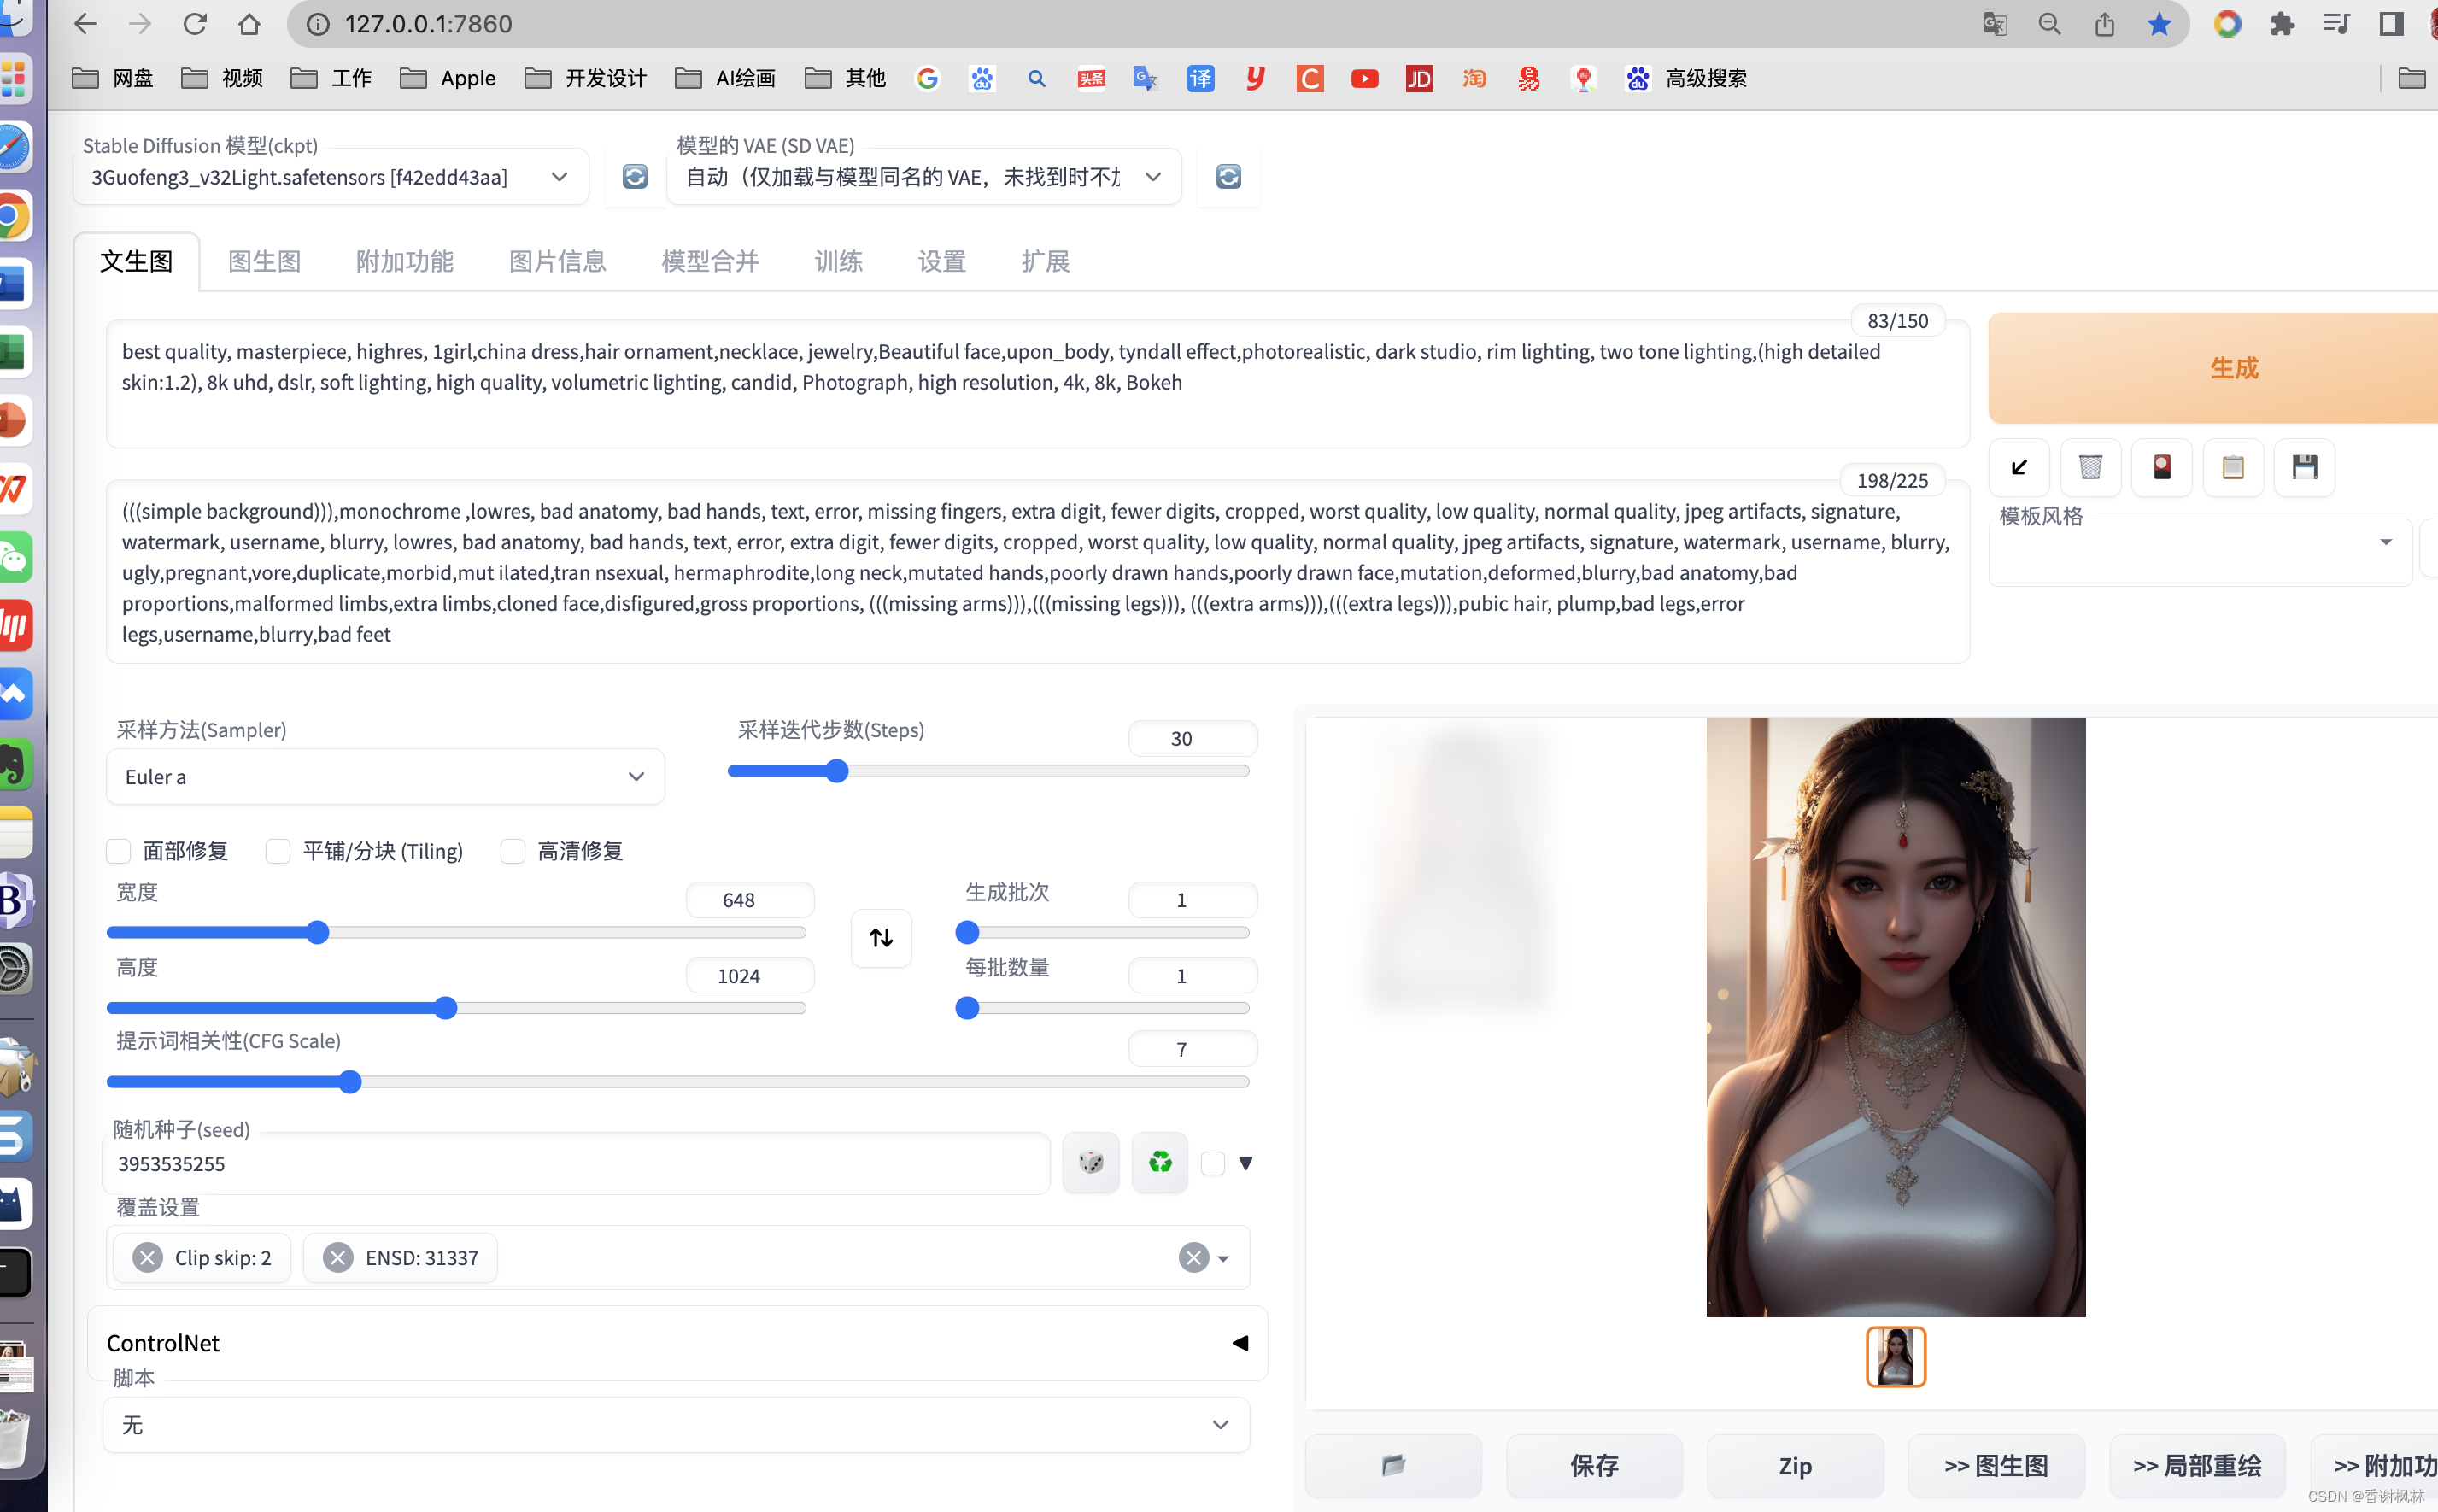
enable dark theme
Add after the URL:?__theme=dark
http://127.0.0.1:7860/?__theme=dark
Recommend a few URLs
Station C of the next model: https://civitai.com/
huggingface of the next model: https://huggingface.co/
tag supermarket: https://tags.novelai.dev/
Stable Diffusion spell analysis: https:// spell.novelai.dev/