3. Detailed step-by-step tutorial for developing Vue projects based on vscode - Programmer Sought
This article is to create a SpringBoot project based on vscode and connect to the postgresql database - Programmer Sought
On the basis of the same, the first and second sections start from the third section.
Table of contents
1. Create a SpringBoot project: create it through SpringInitializr of IDEA
2. Install and create a PostgreSQL database
1 Install and download PostgreSQL
2 Create a database, create a table, and insert data
3. Simpler SpringBoot connection to postgresql database
2 Modify application.properties
(1) Test the get request and query all users
(2) Test the post request and insert the user
1. Create a SpringBoot project: create it through SpringInitializr of IDEA
File-New-Project-Spring Initializr in the upper left corner, set the name yourself
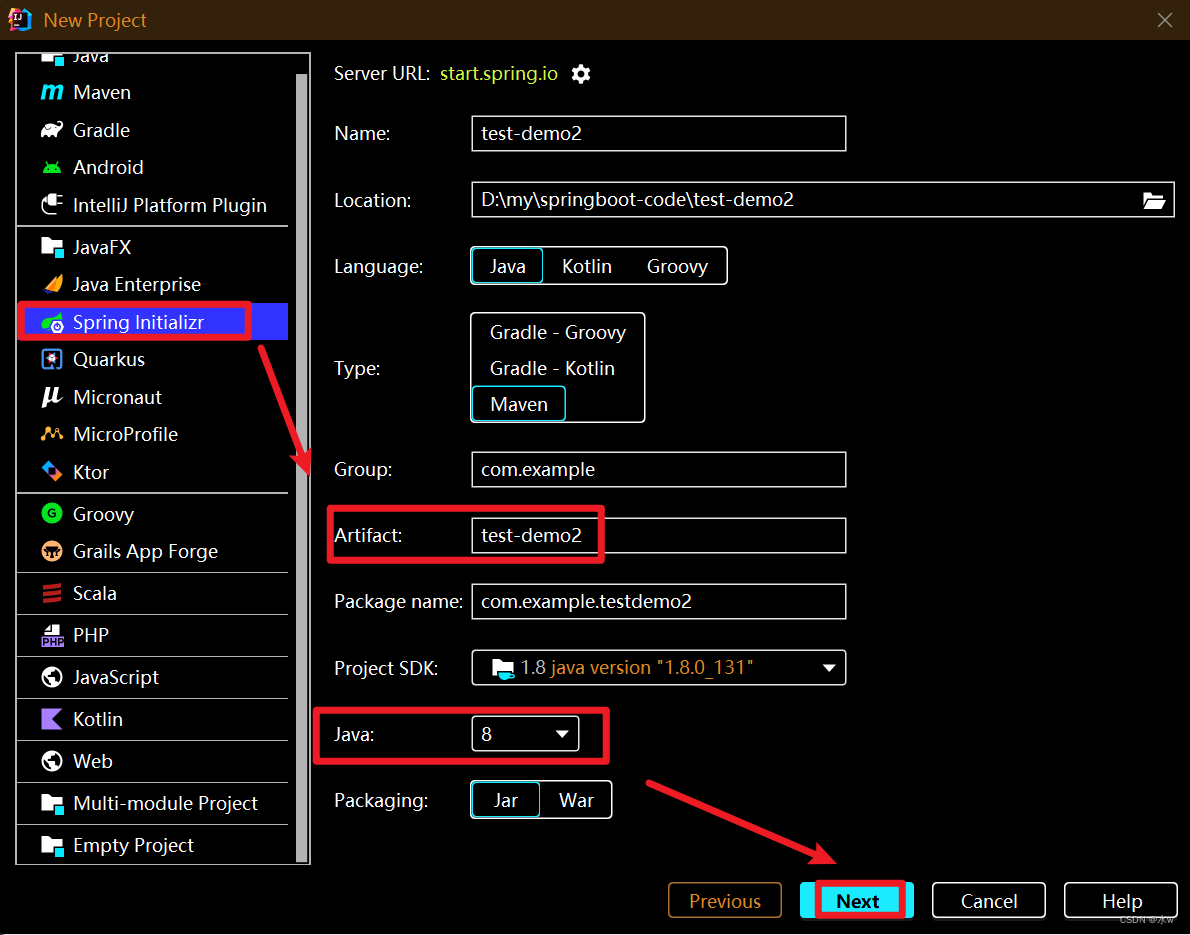
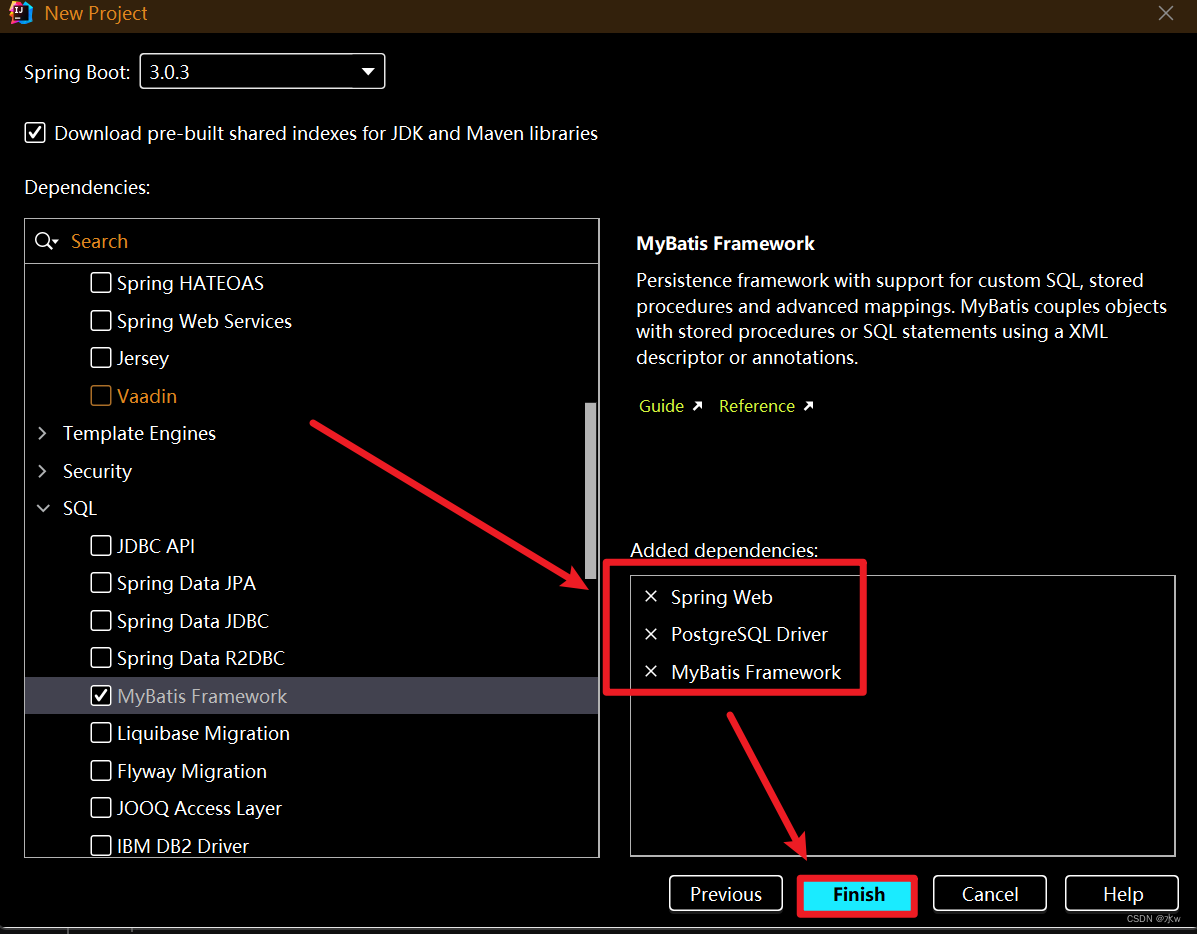
Next->Select the required dependent packages, here temporarily select the Spring Web related, mybatis related and postgresql related packages.
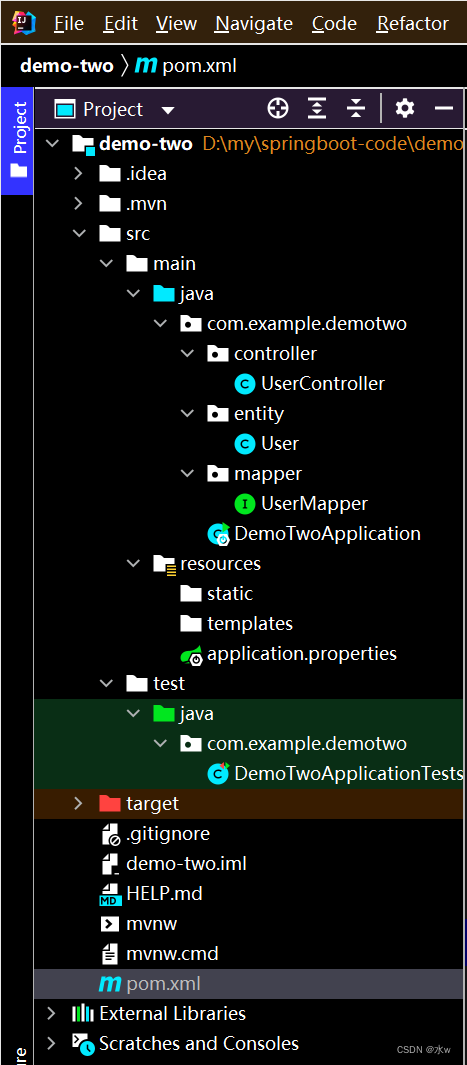
After creation, the directory structure after the project is built is as follows:
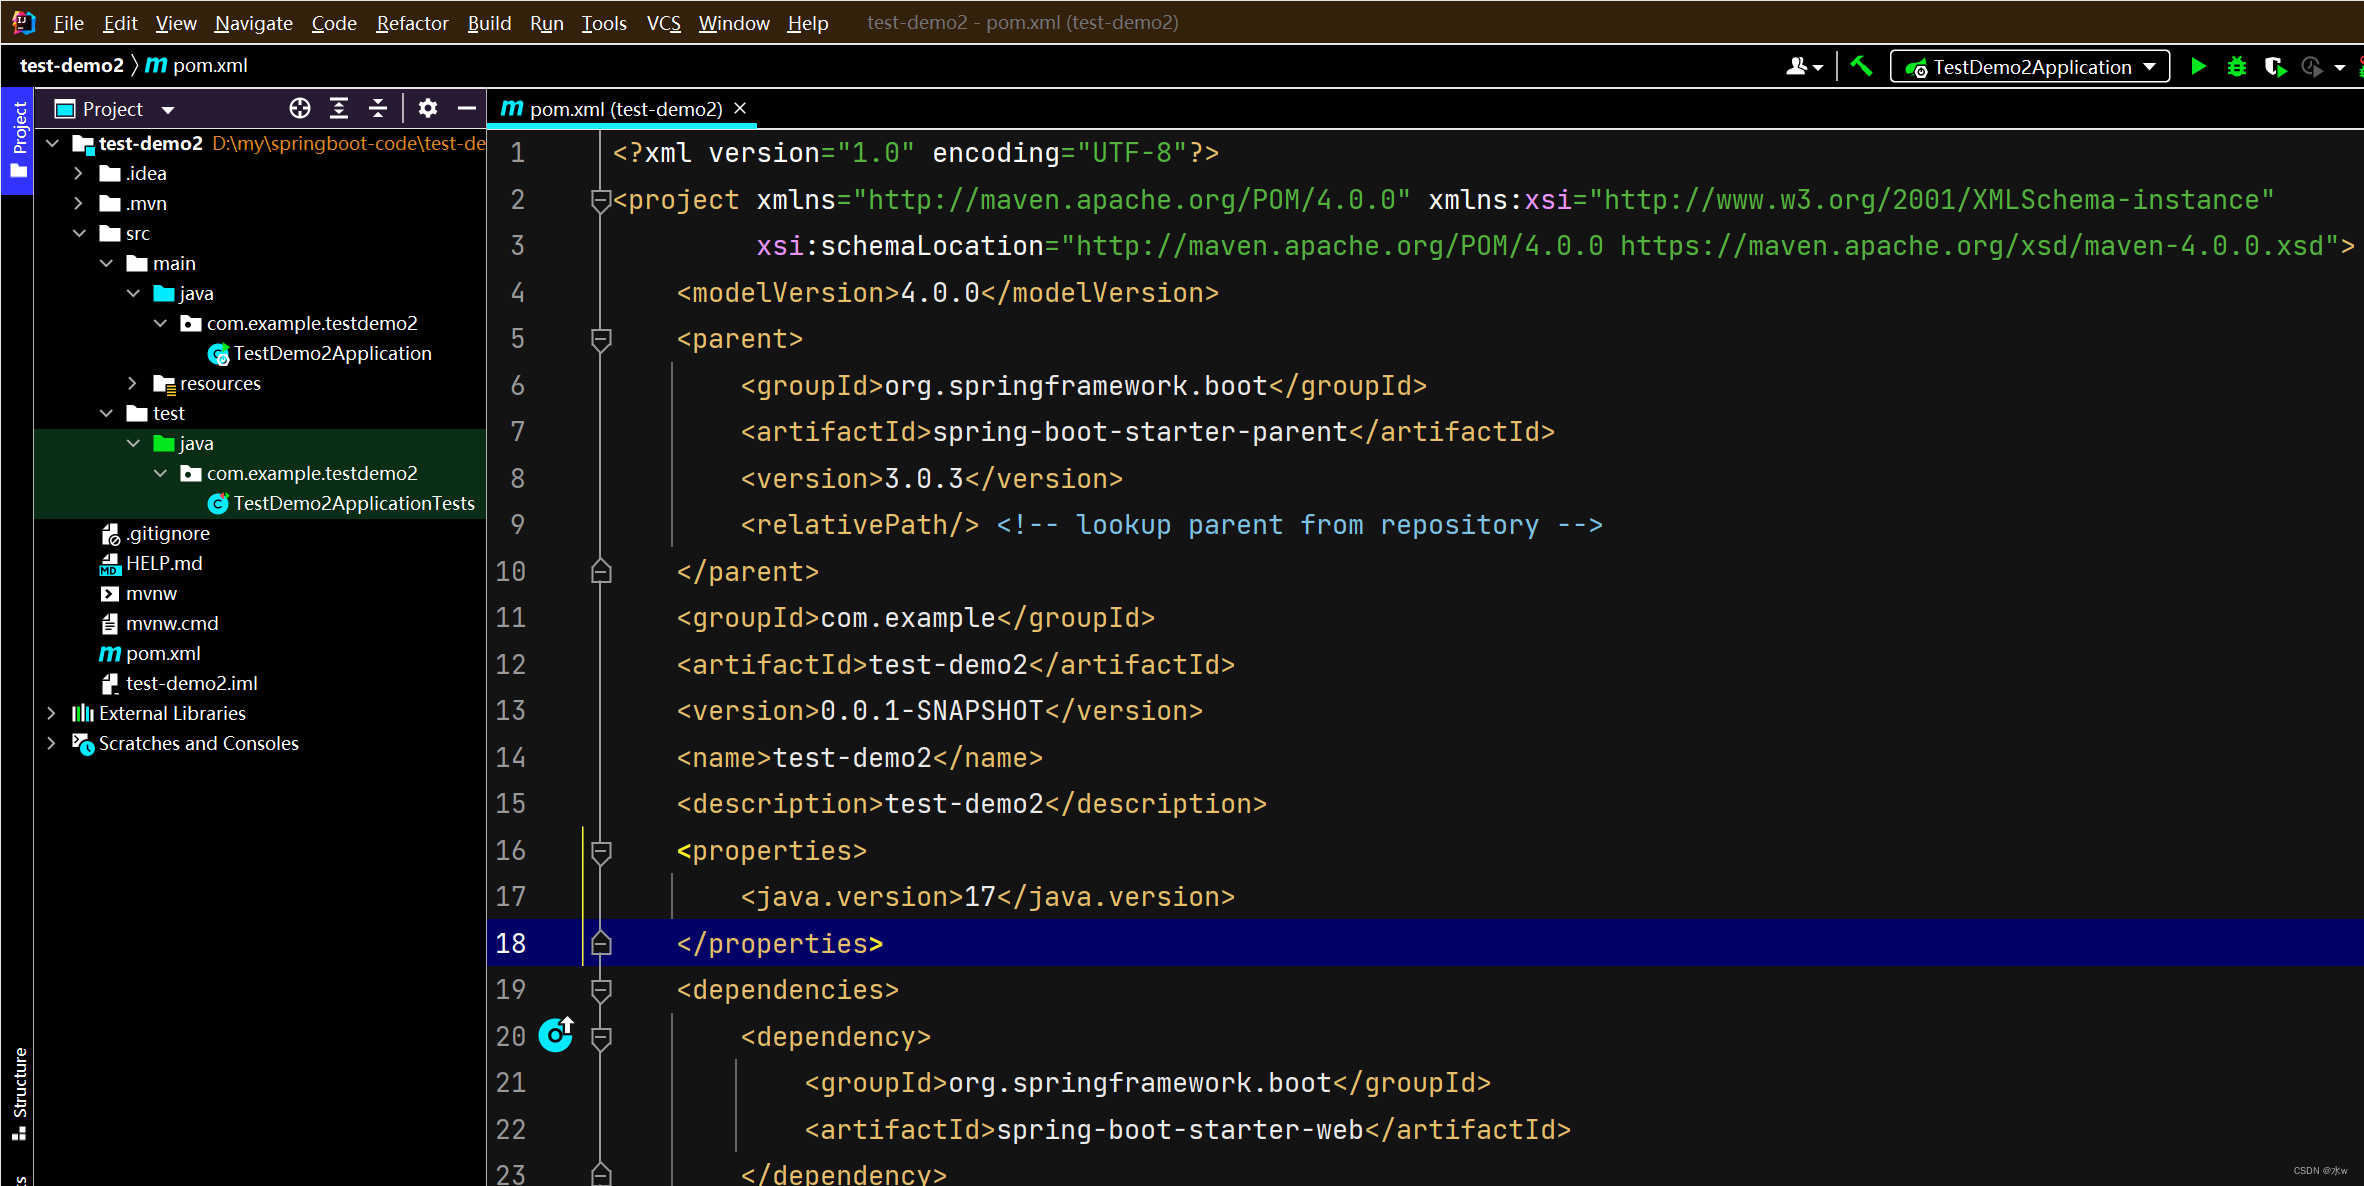
There will be a startup class called xxxApplication, and then there will be related dependency packages that have just been set in pom.xml, and you don’t need to import them yourself. At the same time, there will be an application.properties under resources, which is empty at this time.
So far, a SpringBoot project has been created so easily, which is very convenient.
Of course, it still cannot be started now, and I will talk about this later.
2. Install and create a PostgreSQL database
Since it is a relational database like MySQL, we need to know when to use MySQL and when to use PostgreSQL. So let me briefly introduce the advantages of PostgreSQL compared to MySQL. If you have these needs, then choosing PostgreSQL is better than MySQL, otherwise it is better to choose MySQL:
- Support for storing some special data types, such as: array, json, jsonb
- It has better support for the storage and processing of geographic information, so it can become a spatial database, better manage data measurement and geometric topology analysis
- REST API can be built quickly, and RESTful API service can be conveniently provided for any PostgreSQL database through PostgREST
- Support tree structure, which can handle data storage with such characteristics more conveniently
- External data source support, you can query MySQL, Oracle, CSV, Hadoop, etc. as tables in your own database
- Stronger support for indexes, PostgreSQL supports B-tree, hash, R-tree and Gist indexes. And MySQL depends on the storage engine. MyISAM: BTREE, InnoDB: BTREE.
- Transaction isolation is better. MySQL’s transaction isolation level repeatable read cannot prevent common concurrent updates, it needs to be locked, but pessimistic locking will affect performance, and manual implementation of optimistic locking is complicated. However, there is a hidden optimistic lock version field in the PostgreSQL column. The default repeatable read level can ensure the correctness of concurrent updates and have the performance of optimistic lock.
- The time precision is higher and can be accurate to below the second
- Character support is better, MySQL needs utf8mb4 to display emoji, PostgreSQL does not have this pit
- The storage method supports a larger amount of data. The PostgreSQL main table is stored in a heap table, and MySQL uses an index-organized table, which can support a larger amount of data than MySQL.
- Sequence support is better, MySQL does not support multiple tables to get id from the same sequence, and PostgreSQL can
- Adding columns is easier. Adding columns to a MySQL table is basically rebuilding the table and indexes, which will take a long time. Adding columns to a PostgreSQL table only adds table definitions to the data dictionary and does not rebuild the table.
1 Install and download PostgreSQL
If necessary, please jump to Windows to download and install PostgreSQL and PostGIS tools, and solve The pgAdmin 4 server could not be contacted:_postgis download and install_water w's blog-CSDN blog
After installing postgresql , use the built-in pgAdmin 4 to access the database.
2 Create a database, create a table, and insert data
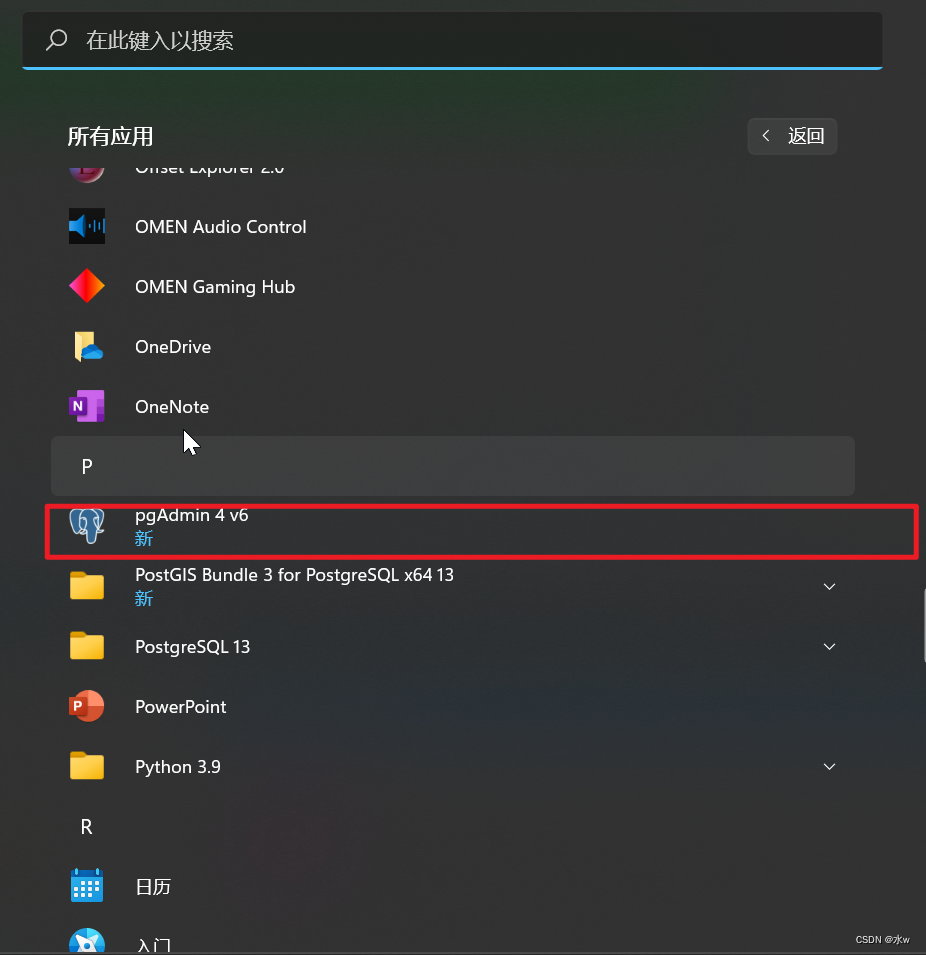
(1) Find pgAdmin 4 in the start menu, open pgAdmin, you need to enter the password [the password set during the previous installation],
Then, create a new database [test-demo], where test-demo is the database name, right click on Tables - create-table, fill in the table name in the pop-up box and add the column name and datatype.
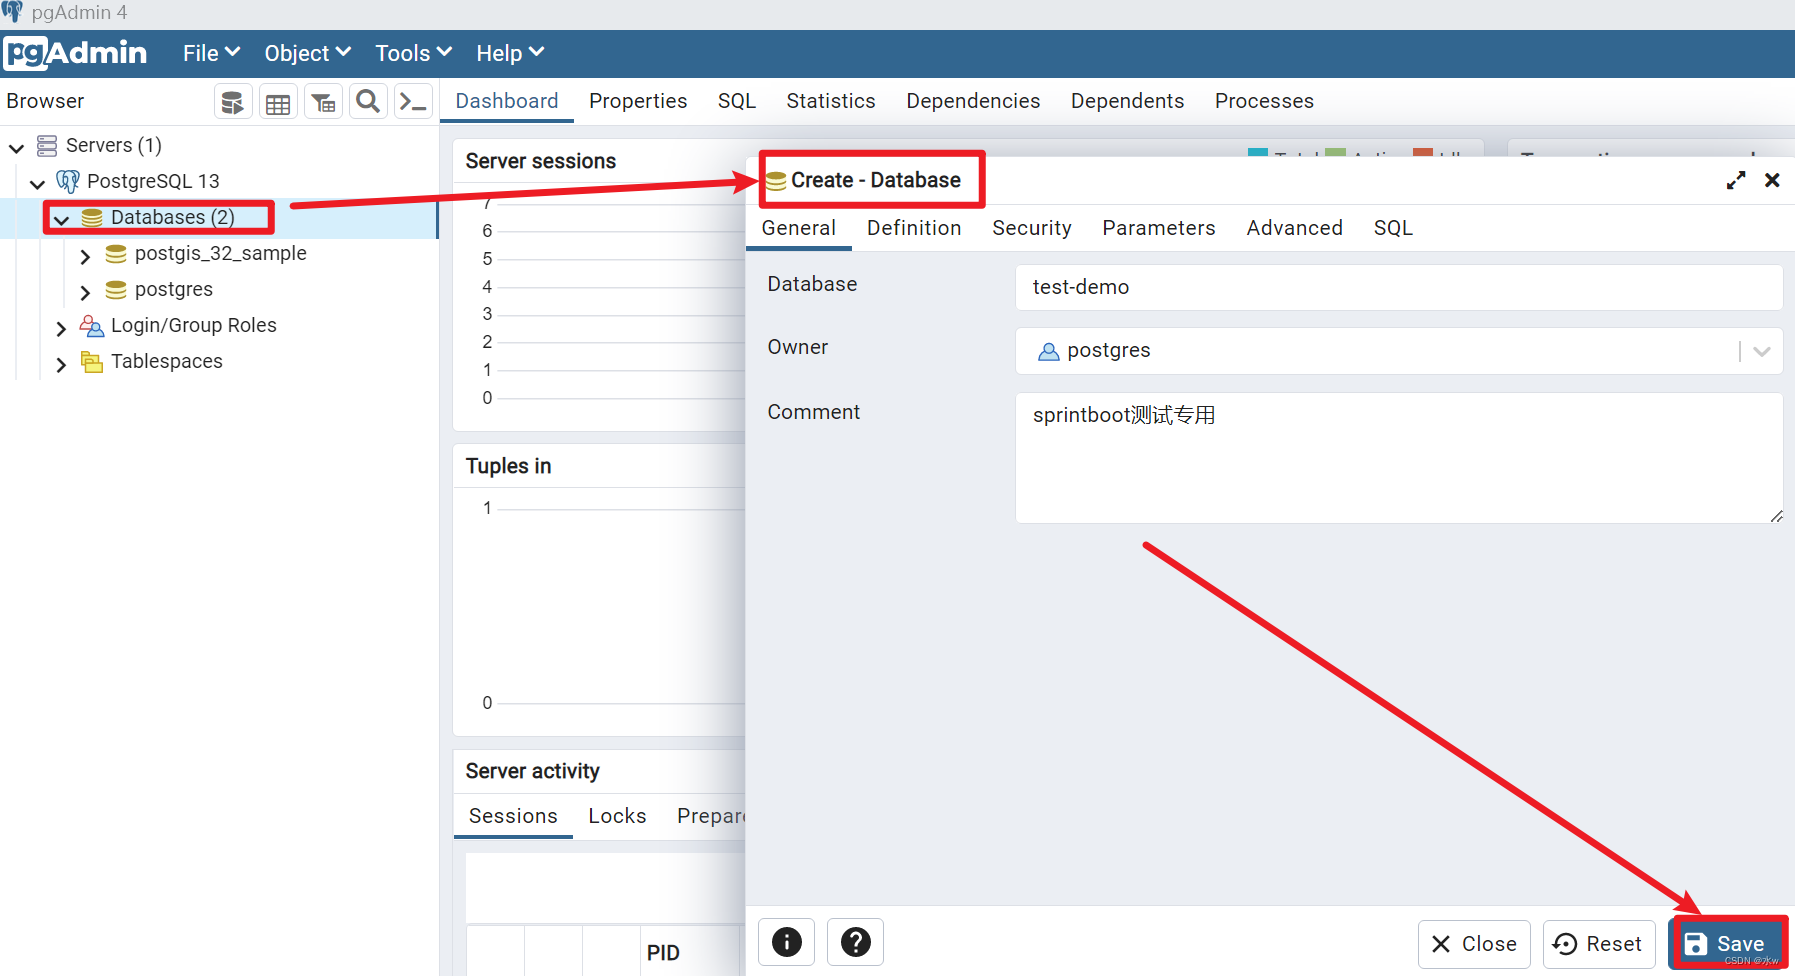
Note : PostgreSQL itself is case-insensitive, but [ very not recommended ] use uppercase letters here . First of all, when creating and querying a table with uppercase letters, the table name must be enclosed in double quotation marks, otherwise [error] postgresql relation does not exist will be reported.
- Yes
SELECT * FROM "MyUser", but noSELECT * FROM MyUser.- If it’s just this, there is still no problem, but if there are capital letters, an error will be reported when using Mybatis Generator to generate DO classes later: Table configuration with catalog null, schema public, and table xxx did not resolve to any tables. It is because Caused by capital letters.
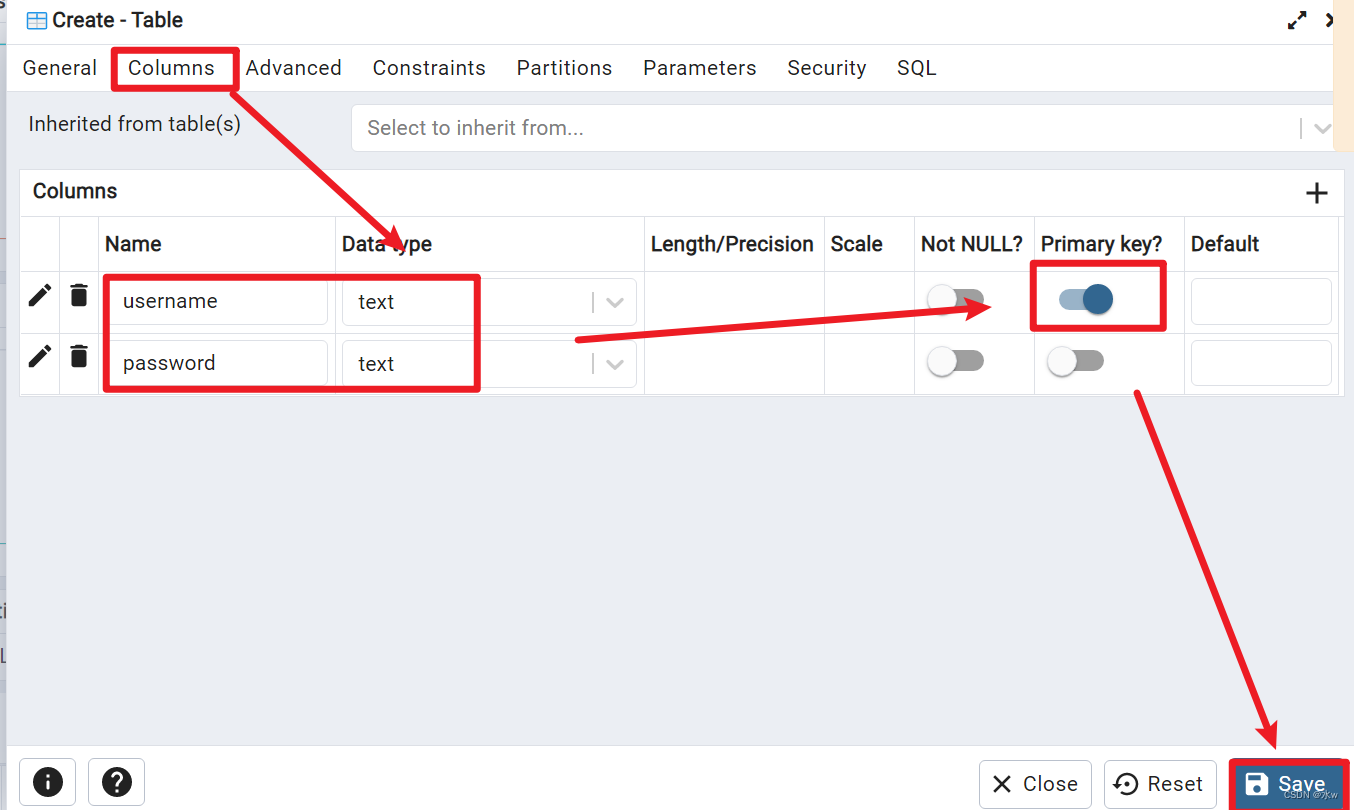
Here I created a new table called [my_user], the two columns are username and password, the data type is text, and username is set as the primary key.
(2) Here I am using Navicat to link to the postgresql database , enter the password to start the connection,
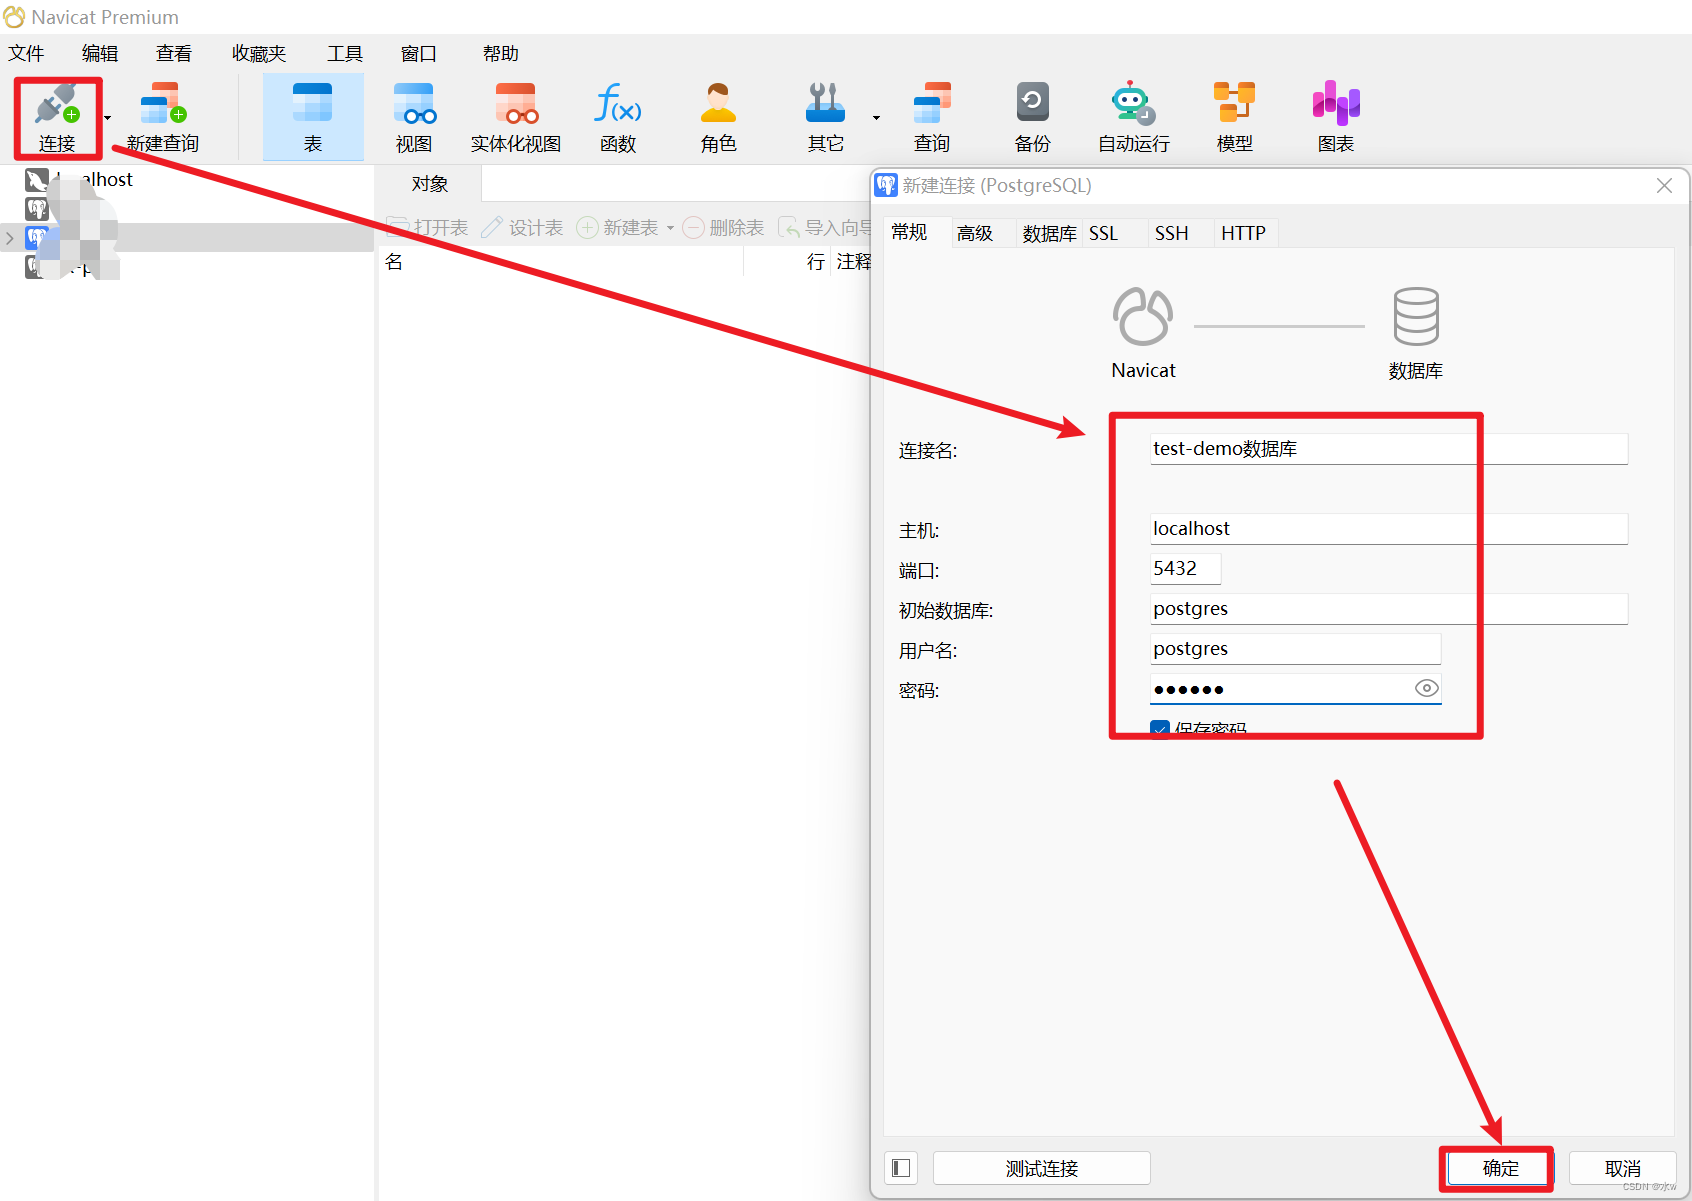
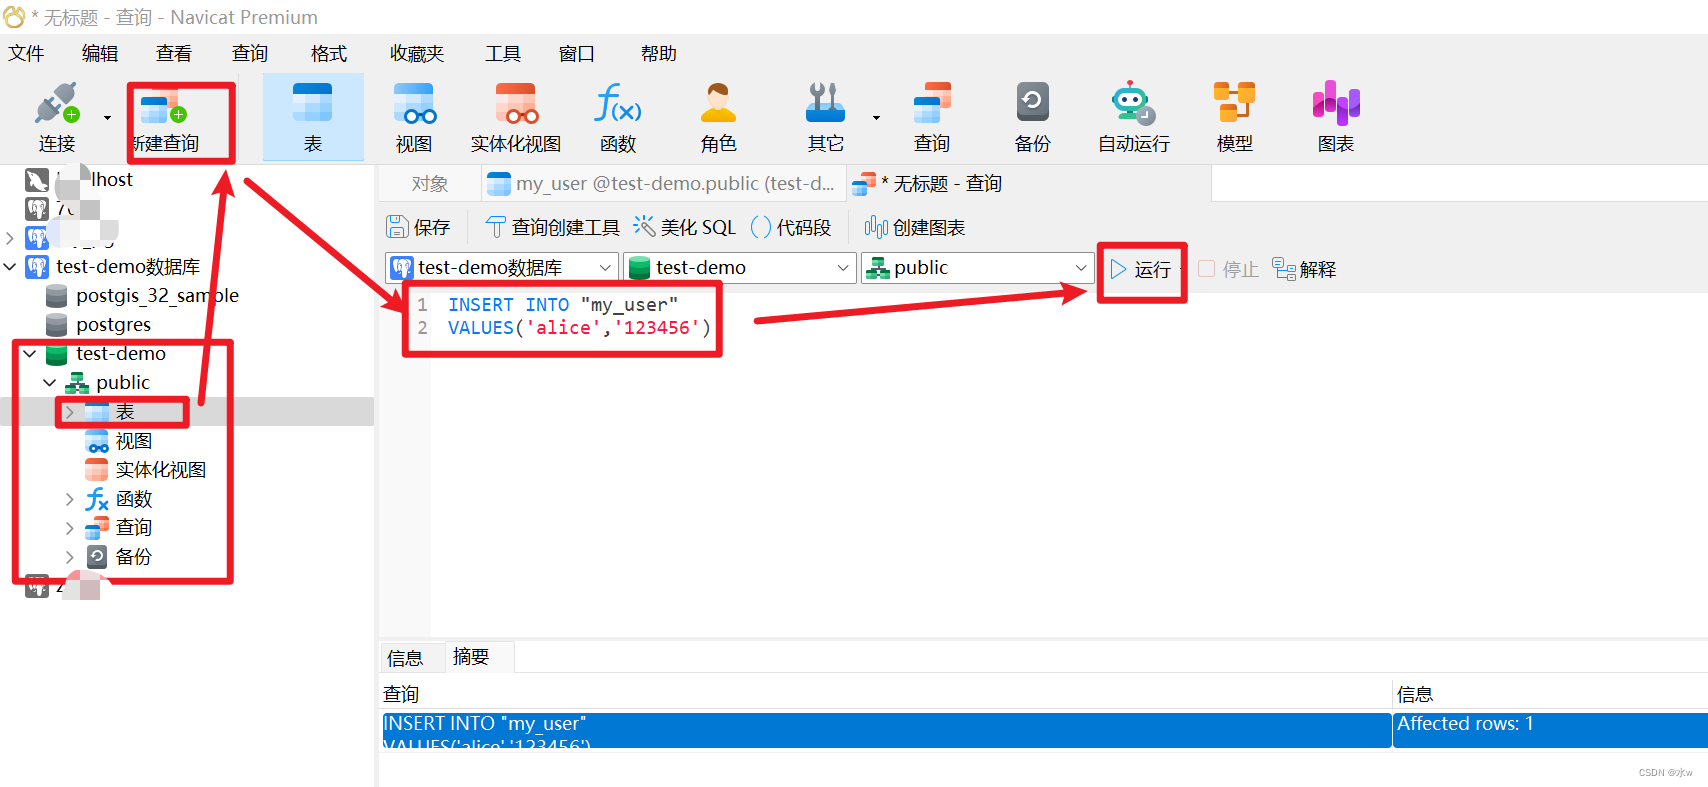
Then, click "New Query", enter the code, and insert a piece of data into the [my_user] table.
INSERT INTO "my_user"
VALUES('alice','123456')
![]()
By analogy, a total of 2 pieces of data are inserted.
3. Simpler SpringBoot connection to postgresql database
Prerequisite : Create a basic Spring Boot project
If necessary, please jump to create a SpringBoot project based on vscode and connect to the postgresql database_水w的博客-CSDN博客
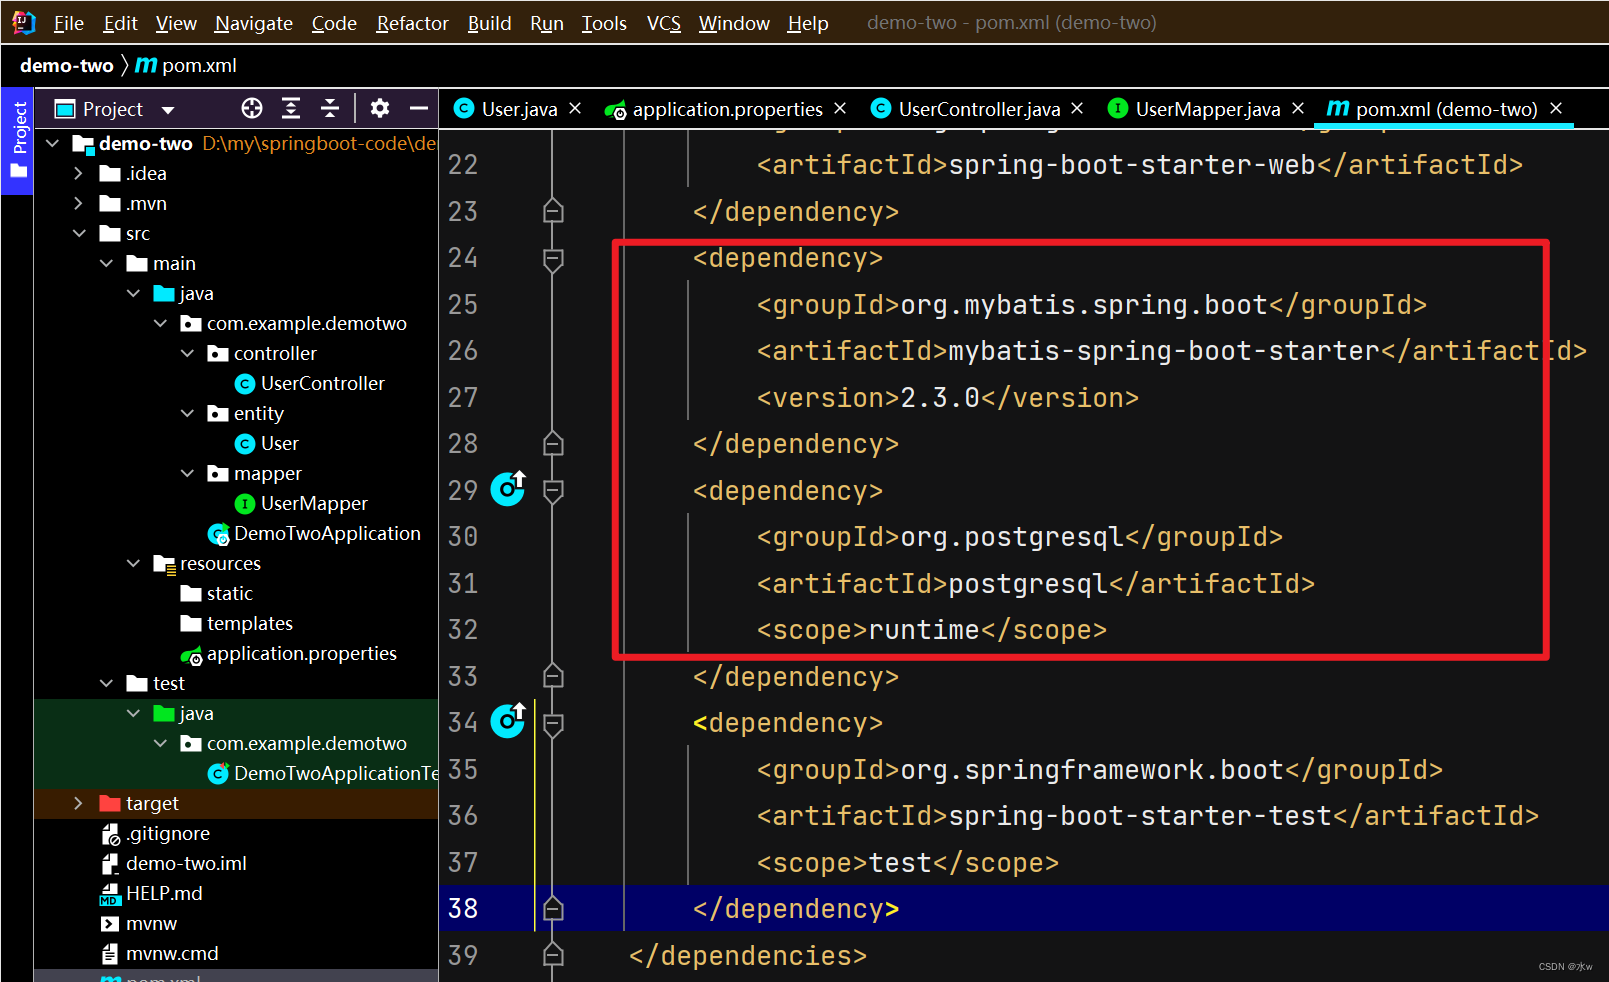
1 Add dependencies to pom
In pom.xml, introduce two important dependencies needed to access PostgreSQL,
2 Modify application.properties
In the application.properties configuration file, configure the data source and other information for the PostgreSQL database.
#??Tomcat??
server.port=8088
spring.datasource.url=jdbc:postgresql://localhost:5432/test-demo
spring.datasource.username=postgres
spring.datasource.password=123456
spring.datasource.driver-class-name=org.postgresql.Driver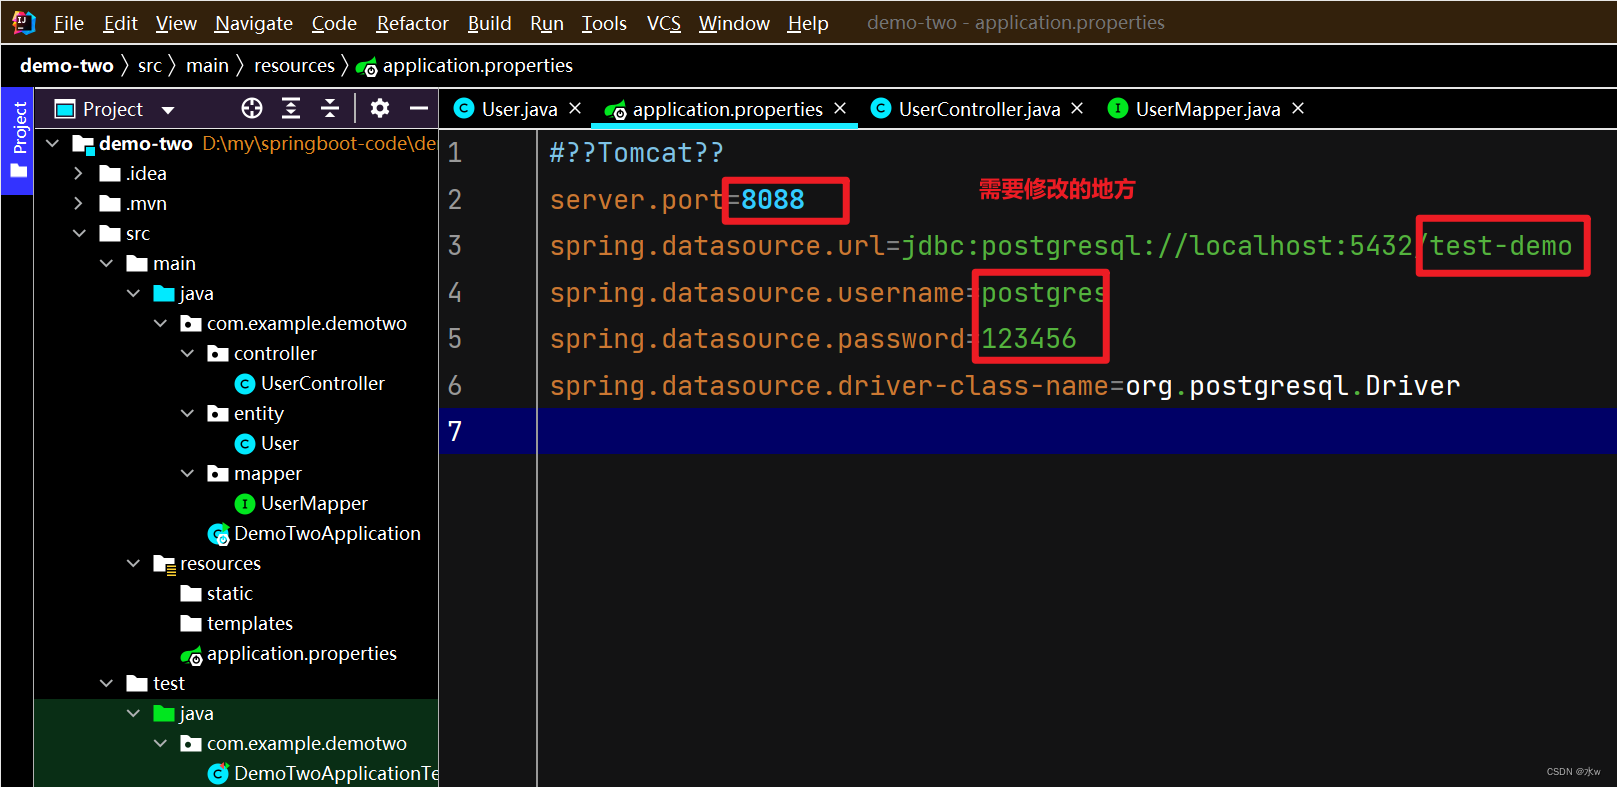
3 Create a new User class
Create a new entity folder under src/com.example.demotwo, and then create a new User.java under the entity folder,
Shortcut : press and hold "alt", right-click the mouse, you can choose the method of automatic generation,
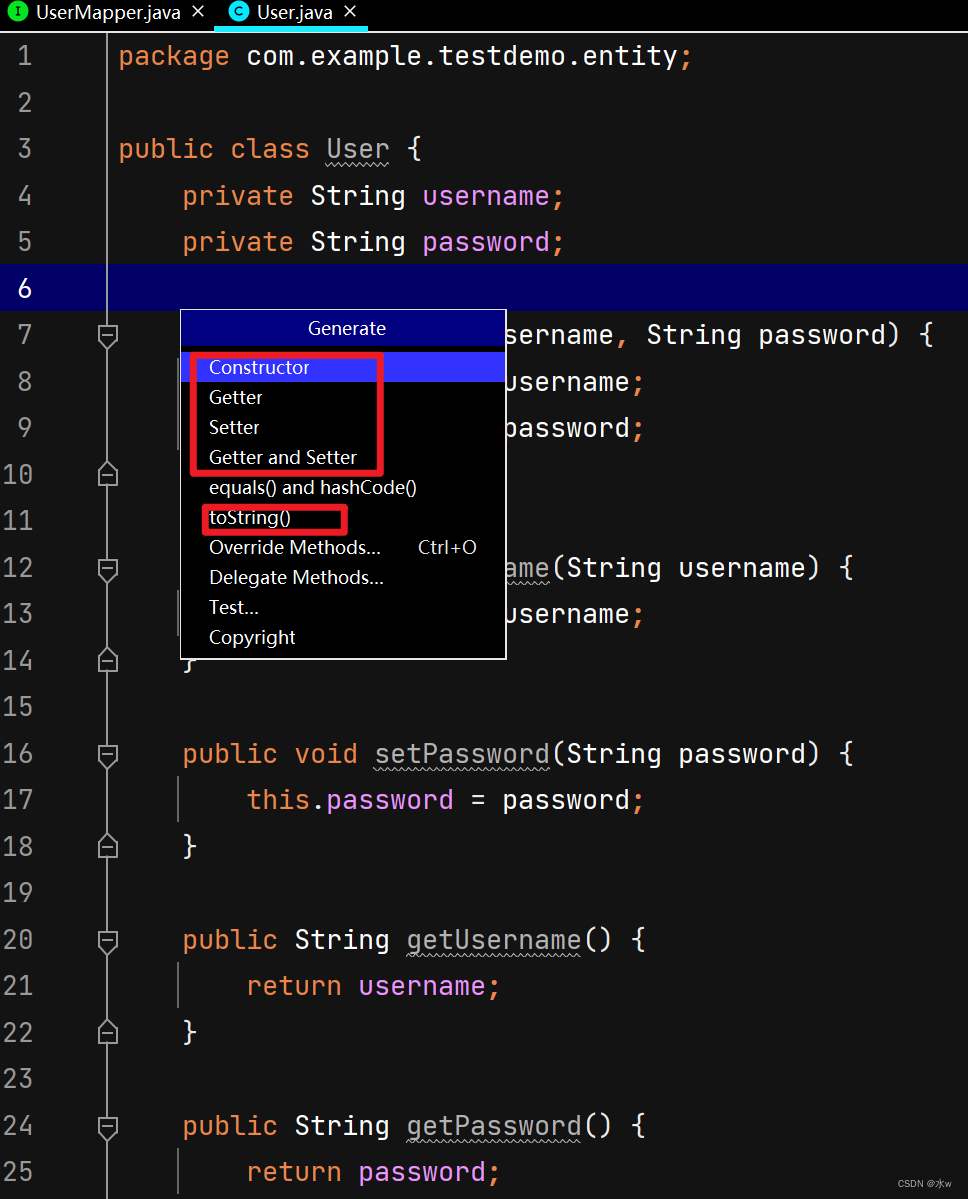
Corresponds to the structure of the table [my_user] in the database,
package com.example.demotwo.entity;

public class User {
    private String username;
    private String password;

    public void setUsername(String username) {
        this.username = username;
    }
    public void setPassword(String password) {
        this.password = password;
    }

    public String getUsername() {
        return username;
    }
    public String getPassword() {
        return password;
    }

    @Override
    public String toString() {
        return "User{" +
                "username='" + username + '\'' +
                ", password='" + password + '\'' +
                '}';
    }
}
4 Create a new UserMapper
Create a new com.example.demotwo.mapper.UserMapper file,
package com.example.demotwo.mapper;

import com.example.demotwo.entity.User;
import org.apache.ibatis.annotations.Insert;
import org.apache.ibatis.annotations.Mapper;
import org.apache.ibatis.annotations.Select;
import java.util.List;


@Mapper
public interface UserMapper {

    // 查询所有用户
    @Select("select * from my_user")
    public List<User> find();

    // 插入用户
    @Insert("insert into my_user values (#{username}, #{password})")
    public int save(User user);
}

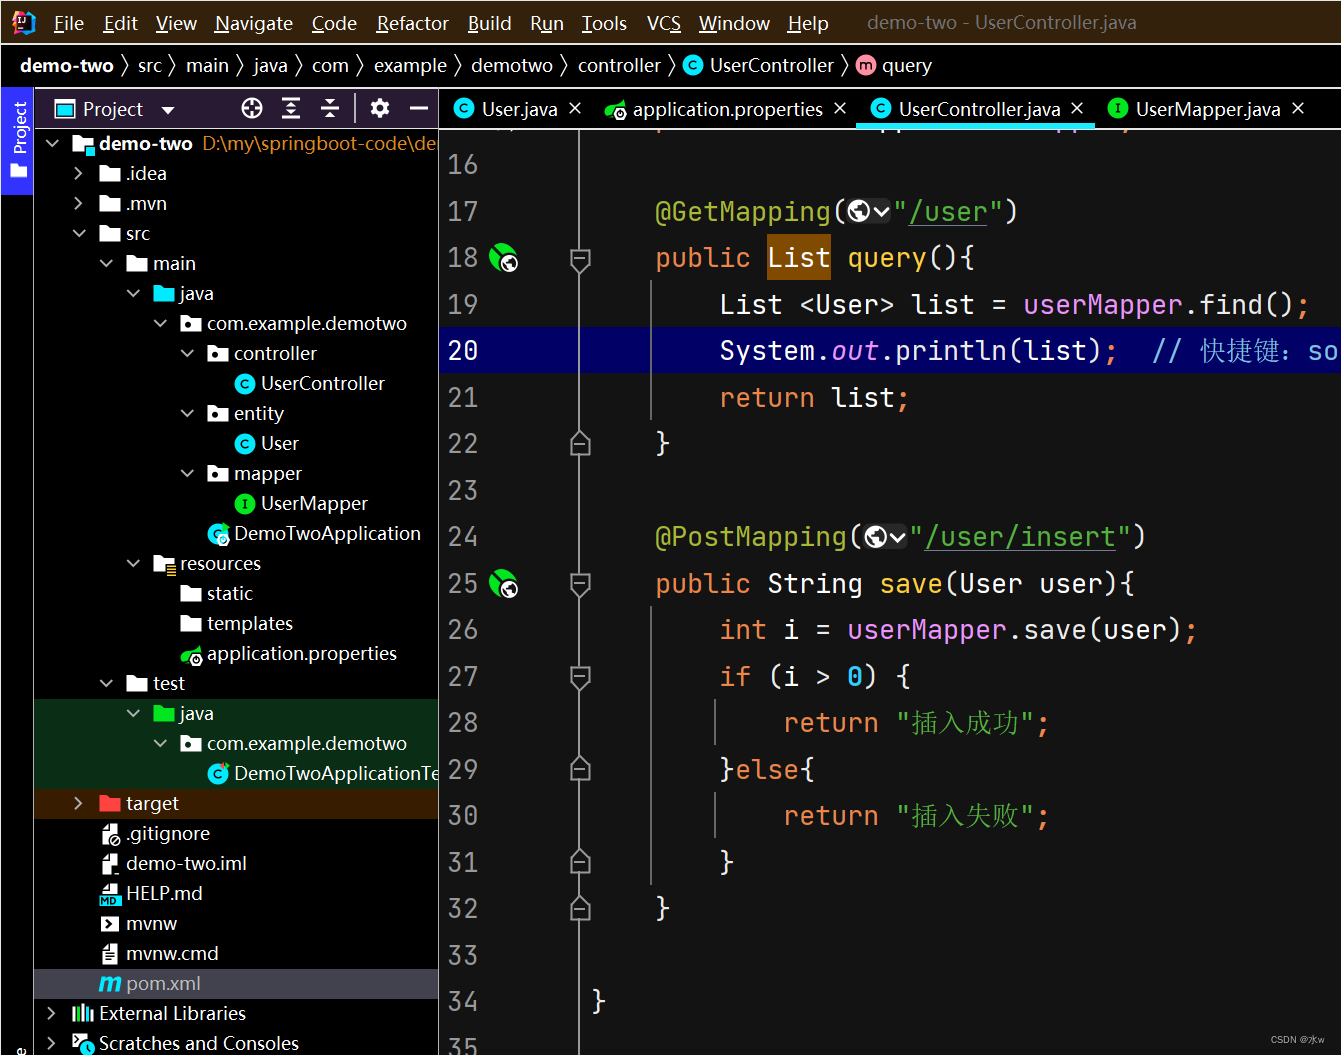
5 Create a new UserController
Create a new com.example.demotwo.mapper.UserController file,
package com.example.demotwo.controller;

import com.example.demotwo.entity.User;
import com.example.demotwo.mapper.UserMapper;
import org.apache.ibatis.annotations.Insert;
import org.springframework.beans.factory.annotation.Autowired;
import org.springframework.web.bind.annotation.GetMapping;
import org.springframework.web.bind.annotation.PostMapping;
import org.springframework.web.bind.annotation.RestController;
import java.util.List;

@RestController
public class UserController {
    @Autowired
    private UserMapper userMapper;

    @GetMapping("/user")
    public List query(){
        List <User> list = userMapper.find();
        System.out.println(list);  // 快捷键:so
        return list;
    }

    @PostMapping("/user/insert")
    public String save(User user){
        int i = userMapper.save(user);
        if (i > 0) {
            return "插入成功";
        }else{
            return "插入失败";
        }
    }
}
6 tests
The current directory structure is as follows:
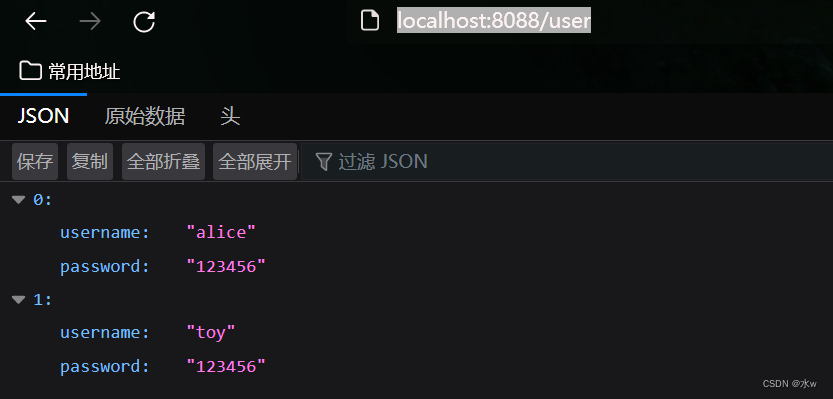
(1) Test the get request and query all users
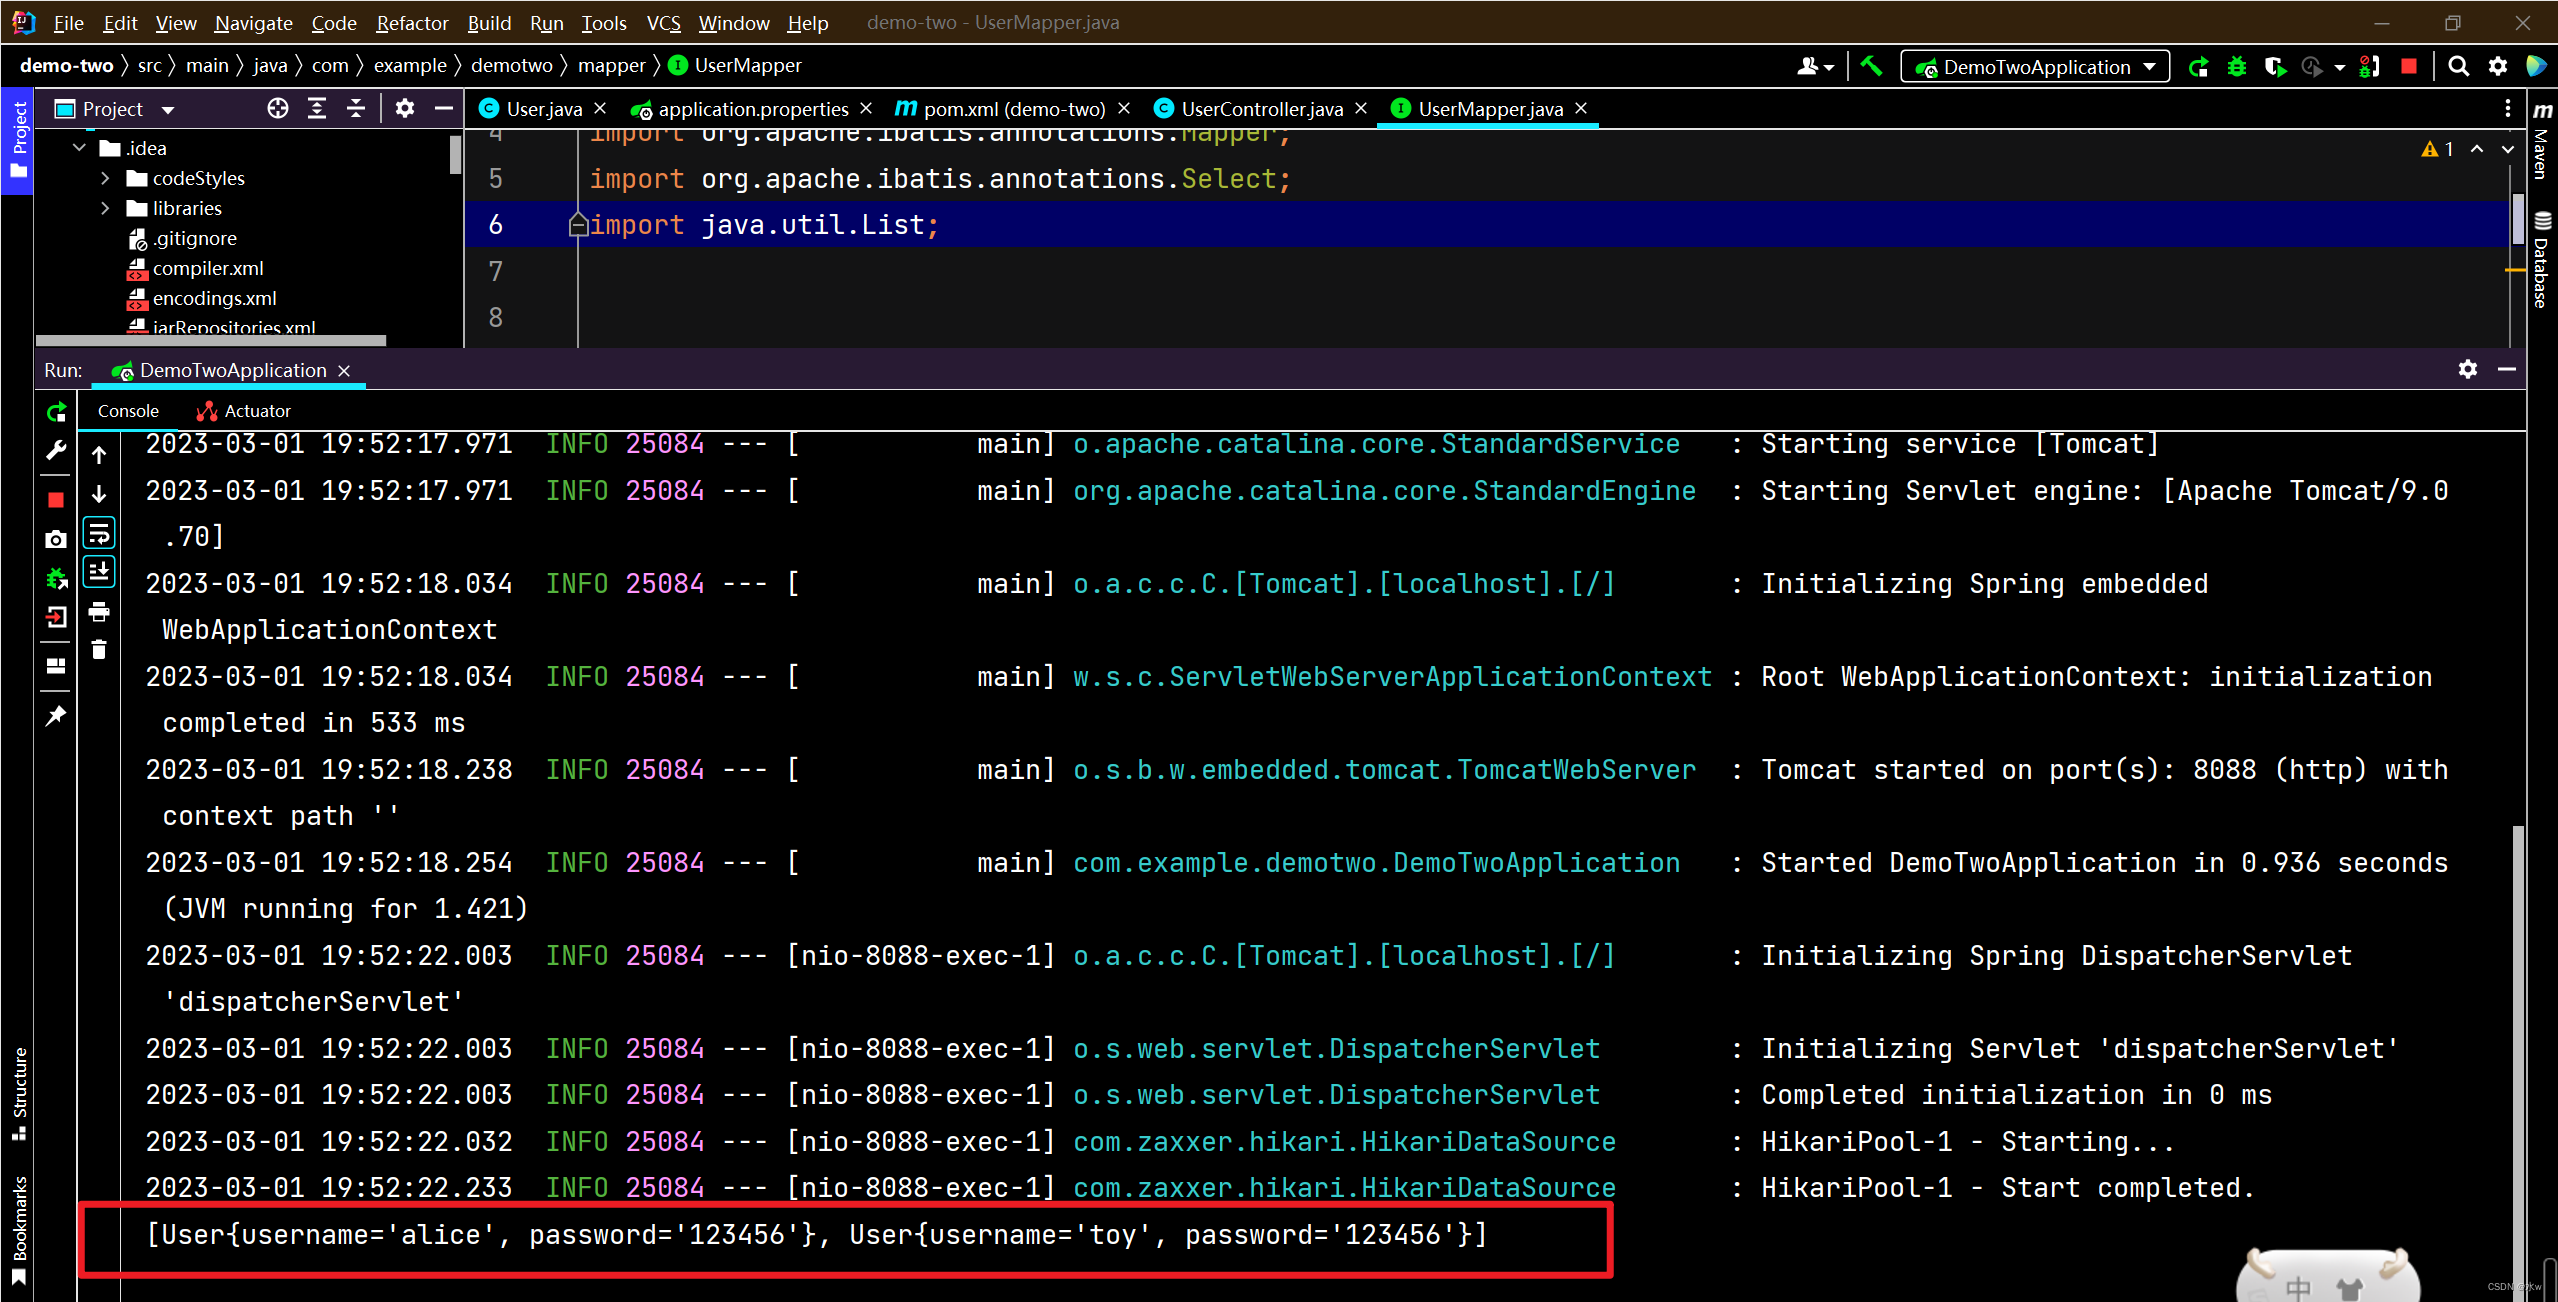
The browser accesses http://localhost:8087/, and returns the queried data in json format, indicating success.
Then, at the same time, the terminal of idea will also return all the data records we found from the [my_user] table in the database.
(2) Test the post request and insert the user
Here, I am using ApiPost7 to send post requests.
Open ApiPost7, and then send a post request,

Then, here I am using navicat to connect to the postgreSQL database, open the [my_user] table,
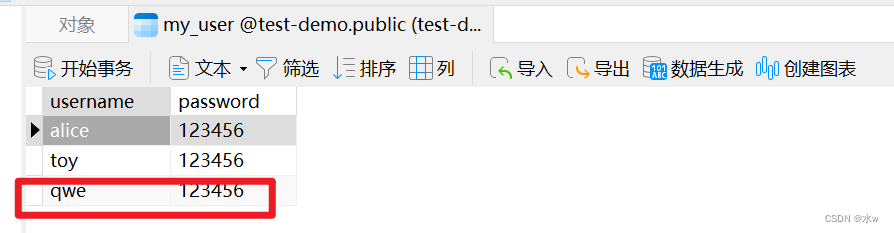
As you can see, the insertion was successful.