Author Homepage : Orange! Homepage
Series Column: JavaWeb Basic Tutorial Series
Wonderful Review: Detailed Explanation of HTTP Protocol
Article Purpose: Use and Configuration of Web Server TomCat
Article directory
foreword
This article explains in detail the knowledge of Tomcat and the detailed operation process, and quickly get started with the web server Tomcat through actual projects! !
1. Web server
web服务器是一个应用程序,用于对HTTP协议的操作进行封装, so that programmers do not have to operate the protocol directly, making Web development more convenient, the main function is to deploy the project to the server to provide external Web online information browsing services.
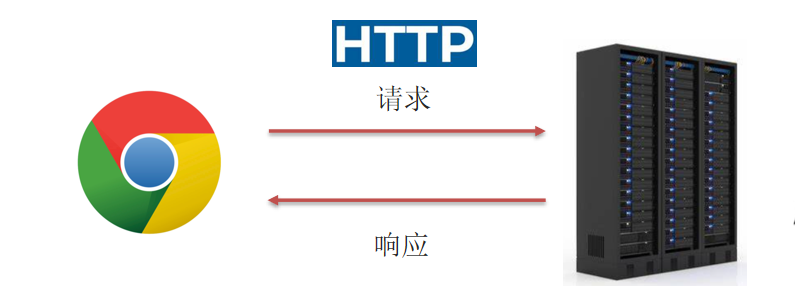
The web server we are going to cover next is Tomcat.
There are many web servers, why choose Tomcat?
Because Tomcat is an open source free lightweight Web server that supports a small number of JavaEE specifications for servlet/JSP.
2. Introduction to Tomcat
Tomcat是Apache软件基金会的一个核心项目, is an open source free lightweight web server that supports a small number of JavaEE specifications for servlet/JSP.
JavaEE: Java Enterprise Edition, Java Enterprise Edition. Refers to the sum of technical specifications for Java enterprise-level development. Contains 13 technical specifications: JDBC, JNDI, EJB, RMI, JSP, Servlet, XML, JMS, Java IDL, JTS, JTA, JavaMail, JAF.
Tomcat is also known as Web容器a servlet container. Servlets need to depend on Tomcat to run.
3. Tomcat basic use
The following describes the basic operations of Tomcat: download, installation, startup and shutdown operations.
3.1 Tomcat download
You can download it directly from the official website. Select the download file type according to your own computer, Windows operating system download .zipfiles, linux operating system download tar.gzfiles.
3.2 Tomcat installation
Tomcat is a green software that does not need to be installed, and can be used directly after decompression.

Some configuration files stored in the conf directory are some java bytecode
.classfiles. The log file stores some log information during the startup process of Tomcat. You can debug errors by viewing the log file.
Also when uninstalling, you only need to delete its folder to complete the uninstallation.
3.3 Tomcat startup
Find bin/startup.bat and double-click to start. A .bat file is an executable file under the Windows operating system.
注意: Before starting TomCat, you need to configure the Java environment variables correctly, otherwise the window will flash by. If the problem still occurs after configuring the Java environment variables, find the software that occupies the port and disable it.
Enter the corresponding URL in the browser: localhost:8080, and access the Web project that comes with TomCat installation. If the access is successful, it proves that the Web server Tomcat has been successfully started!
Solve the problem of Chinese garbled characters in console log information:
Modify in conf/logging.properties: java.util.logging.ConsoleHandler.encoding = GBK. Reason: The encoding format of the windows console is GBK, and the default character encoding format of the log information output by TomCat is UTF-8.
3.4 Tomcat shuts down
There are three ways to achieve Tomcat shutdown:
- Directly close the running window, this method is a forced closing method, and some problems may occur.
- Execute the bin/shutdown.bat file, this method is a normal shutdown.
- Directly use the shortcut key ctrl+c to close normally.
3.5 Tomcat configuration
Modify the startup port number:
Modify in the conf/server.xml file:
    <Connector port="8080" protocol="HTTP/1.1"
               connectionTimeout="20000"
               redirectPort="8443" />
注:The default port number of HTTP protocol is 80. If you change the port number of TOmCat to 80, you will not need to enter the port number when accessing TomCat in the future.
4. Detailed explanation of actual projects
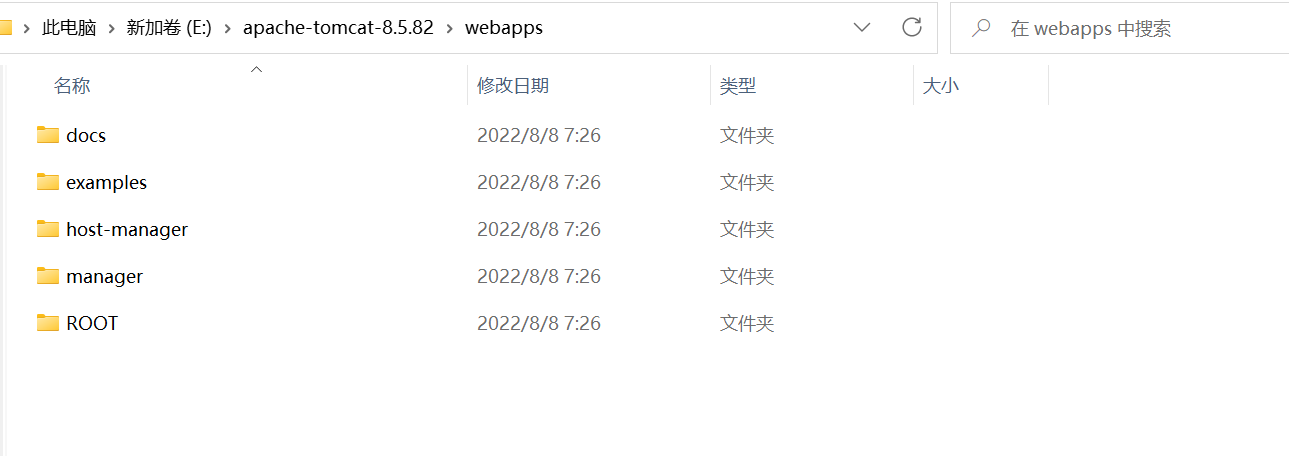
4.1 Tomcat deployment project
Method: We only need to place the project in the webapps directory to complete the deployment of the project.
In order to improve the efficiency of project deployment, you can package the project into a war package, and then place the war package in the webapps directory. At this time, TomCat will automatically decompress the war file, that is, the deployment of the project is completed.
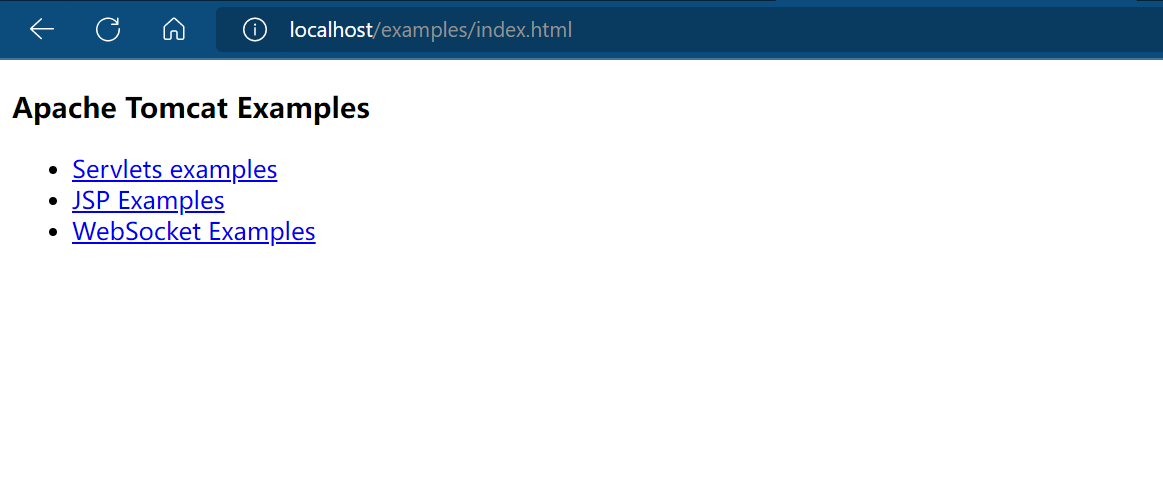
例:Modify the port number of TomCat to 80, and access the Web project in the browser: localhost/examples/index.html. The effect is as follows:
4.2 Creating a Maven Web Project in IDEA
Most of the projects running in Tomcat are JavaWeb projects, and we use Maven to build JavaWeb projects, so we have to learn to create Maven Web projects in idea.
The first thing to understand is the structure of a web project. The structure of a web project can be divided into two categories:
- Maven Project Structure: Projects in Development
- Deployed JavaWeb project: The development is complete and the project can be deployed
其中,只要把开发中的项目打包,便有了部署的JavaWeb项目结构。The project is automatically typed into a war package, which stores the files in the webapp directory of the previously developed project. At the same time, the compiled bytecode files of the Java code in the project and the jar package corresponding to the dependency coordinates are also placed in this package. , specifically stored in the WEB-INF directory.
Next, we create a Maven Web project in the idea: New / New Module / Maven Archetype, enter the project name, select the project location, we choose in Archetype, and we maven-archetype-webappcan also set the group ID, artifact ID, version and other content.
The project is created, keep the configuration we need in the pom.xml configuration file:
<?xml version="1.0" encoding="UTF-8"?>

<project xmlns="http://maven.apache.org/POM/4.0.0" xmlns:xsi="http://www.w3.org/2001/XMLSchema-instance"
  xsi:schemaLocation="http://maven.apache.org/POM/4.0.0 http://maven.apache.org/xsd/maven-4.0.0.xsd">
  <modelVersion>4.0.0</modelVersion>

  <groupId>org.example</groupId>
  <artifactId>tomcat-demo</artifactId>
  <version>1.0-SNAPSHOT</version>
  <packaging>war</packaging>

</project>
Create two new directories, java and resources, in the main directory:
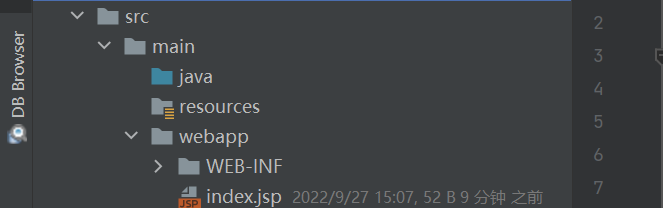
The Maven Web project is created!
Similarly, we can also create a project without using the maven skeleton. At this time, we need to modify the packaging method in the configuration file to war package, and complete the web project file directory.
<packaging>war</packaging>
4.3 Using Tomcat in IDEA
As we said earlier, when Tomcat deploys a project, we only need to place the project in the webapps directory to complete the deployment of the project, but when we develop the project, in order to facilitate the deployment of the project, we only need to use Tomcat in the idea, so that You can avoid placing the war package in the corresponding file directory every time.
The pom.xml configuration file code display in the project:
<?xml version="1.0" encoding="UTF-8"?>

<project xmlns="http://maven.apache.org/POM/4.0.0" xmlns:xsi="http://www.w3.org/2001/XMLSchema-instance"
  xsi:schemaLocation="http://maven.apache.org/POM/4.0.0 http://maven.apache.org/xsd/maven-4.0.0.xsd">
  <modelVersion>4.0.0</modelVersion>

  <groupId>org.example</groupId>
  <artifactId>tomcat-demo</artifactId>
  <version>1.0-SNAPSHOT</version>

  <build>
    <plugins>
      <plugin>
        <!--Tomcat插件-->
        <groupId>org.apache.tomcat.maven</groupId>
        <artifactId>tomcat7-maven-plugin</artifactId>
        <version>2.2</version>
      </plugin>
    </plugins>
  </build>
  <packaging>war</packaging>

</project>
There are two ways to use Tomcat in idea:
Method 1: Integrate the local Tomcat into the idea, and then deploy the project
After the community version idea downloads smart tomcatthe plug-in, you can run/Edit Configurationsintegrate tomcat in it.
Method 2: Use the maven plugin in Tomcat
First, add the dependency coordinates of the Tomcat plugin in the pom.xml configuration file, which is equivalent to integrating the built-in Tomcat in the maven project.
  <build>
    <plugins>
      <plugin>
        <!--Tomcat插件-->
        <groupId>org.apache.tomcat.maven</groupId>
        <artifactId>tomcat7-maven-plugin</artifactId>
        <version>2.2</version>
      </plugin>
    </plugins>
  </build>
At this point, you can use the Maven Helperplugin to quickly start the project, select the project, right-click, run mavenand select tomcat7:run.