Event address: CSDN 21-day Learning Challenge
Table of contents
foreword
After some time ago research, from the introduction of LeNet-5 handwritten digits to a recent study of weather recognition. I want to make a big vote, because I am engaged in C++/Qt development and am familiar with Qt, so I want to implement a face recognition based on Qt interface.
If you are unfamiliar with the concept of convolutional neural networks, you can take a look at this article: What does convolution actually do?
If you want to understand the training process of neural networks, or how to build an environment, you can read this article: Environment Construction and Training Process
If you want to learn this project, please read the first article : Face Recognition Project Based on Convolutional Neural Network (tensorflow) (1) The
second article : Face Recognition Project Based on Convolutional Neural Network (tensorflow) (2)
The basic idea
Specific steps are as follows:
- First need to collect data, my idea is to call the camera through OpenCV to collect face photos.
- Then perform preprocessing, mainly to classify the data set, training set, validation set, and test set.
- To start training the model, create label key-value pairs in advance.
- Test the face recognition effect, capture the face photo through OpenCV, then preprocess the image and finally pass it into the model, and then print the recognition result on the screen in the form of text, and cycle until you enter q to exit.
This article mainly implements the third step in the above steps.
activation function
Since the I/O of each layer of the neural network is the whole process of linear summation, as long as we perform a series of linear transformations on its previous layer, we can successfully obtain the output of the next layer. If there is no activation function, no matter how complex the neural network you build, no matter how many layers, the final output is all a linear combination of keys, so a simple linear combination cannot handle more complicated problems. After the activation function is introduced, you will find that the general activation function is all nonlinear. Therefore, according to the introduction of nonlinearity into the nerve cells, the neural network can be close to the nonlinear elements, and the neural network can be applied to a large number of nonlinear models.
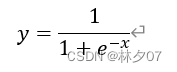
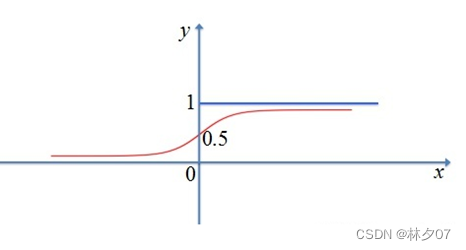
Sigmoid function
The sigmoid function is smooth and easy to derive; its value range is [0, 1]. Solve trigonometric function calculation problems in a circular system, and solve multiplication and division problems in a linear system. The formula is as follows:
As shown in Fig. It can be applied to circular systems, linear systems and hyperbolic systems, etc., to solve different complex computing problems in different systems.
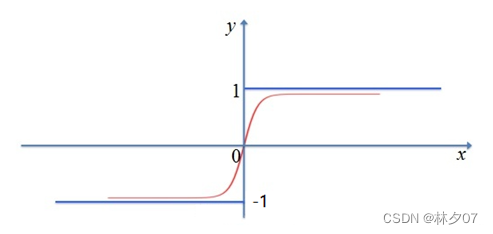
Tanh/Hyperbolic Tangent Activation Function
It is a kind of hyperbolic activation function, which is generally written as tanh in mathematical language. Although it can make the 0-centered output of the Sigmoid function, the problem of gradient disappearance still exists. Because its essence is that many layers are passed again and again, if the data is too small and there are many layers, it may eventually become zero. So after we controlled the derivative of the function, this problem was solved to a certain extent.
ReLU activation function
Its full name is linear rectification function, which is very common in artificial neural networks. It is a nonlinear function, usually a ramp function and a series of variants derived from it.
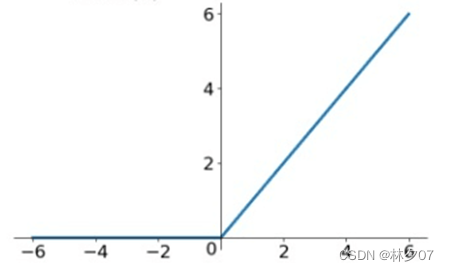
It has many advantages, such as: as long as your input value is a positive number, it will not enter the saturation region, and it will be much faster to calculate compared to other activation functions. But it has a problem that has not been successfully solved, that is, when it enters a negative value, the function will completely fail, and the gradient will be zero at this time. Of course, the aforementioned sigmoid and tanh functions have the same problem. And it is not a 0-centered function, which means that it is very difficult to derive and requires a large number of functions to support it. formula: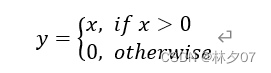
loss function
The loss function is an operation function used to measure the difference between the predicted value f(x) of the model and the real value Y. It is a non-negative real-valued function, usually using L(Y, f(x)) to Indicates that the smaller the loss function, the better the robustness of the model.
effect
The loss function is mainly used in the training phase of the model. After each batch of training data is sent to the model, the predicted value is output through forward propagation, and then the loss function calculates the difference between the predicted value and the real value, that is, the loss. value. After the loss value is obtained, the model updates each parameter through backpropagation to reduce the loss between the real value and the predicted value, so that the predicted value generated by the model moves closer to the real value, so as to achieve the purpose of learning.
Build a neural network model
Parameter Description
There will be a bunch of parameters each time, here I will give an introduction to the parameters.
batch_size : Specify the number of training samples captured in each iteration
nb_epoch : The number of training rotations
border_mode : The parameter of the convolution layer is selected as the same, then the input and output sizes of the convolution operation will remain the same. If valid is selected, the size will become smaller after convolution.
verbose : log display 0 means not outputting log information on the standard output stream 1 means outputting progress bar records 2 outputting one line record for each epoch
CNN model
There are 18 layers in total, including 4 convolution layers, 6 activation layers, 2 pooling layers, 3 dropout layers, 2 Dense layers, and one Flatten layer.
    def build_model(self, dataset, nb_classes=9):
        # 构建一个空的网络模型,它是一个线性堆叠模型,各神经网络层会被顺序添加,专业名称为序贯模型或线性堆叠模型
        self.model = Sequential()

        # 以下代码将顺序添加CNN网络需要的各层,一个add就是一个网络层
        self.model.add(Convolution2D(32, 3, 3, border_mode='same',
                                     input_shape=dataset.input_shape))  # 1 2维卷积层
        self.model.add(Activation('relu'))  # 2 激活函数层

        self.model.add(Convolution2D(32, 3, 3))  # 3 2维卷积层
        self.model.add(Activation('relu'))  # 4 激活函数层

        self.model.add(MaxPooling2D(pool_size=(2, 2)))  # 5 池化层
        self.model.add(Dropout(0.25))  # 6 Dropout层

        self.model.add(Convolution2D(64, 3, 3, border_mode='same'))  # 7  2维卷积层
        self.model.add(Activation('relu'))  # 8  激活函数层

        self.model.add(Convolution2D(64, 3, 3))  # 9  2维卷积层
        self.model.add(Activation('relu'))  # 10 激活函数层

        self.model.add(MaxPooling2D(pool_size=(2, 2)))  # 11 池化层
        self.model.add(Dropout(0.25))  # 12 Dropout层

        self.model.add(Flatten())  # 13 Flatten层
        self.model.add(Dense(512))  # 14 Dense层,又被称作全连接层
        self.model.add(Activation('relu'))  # 15 激活函数层
        self.model.add(Dropout(0.5))  # 16 Dropout层
        self.model.add(Dense(nb_classes))  # 17 Dense层
        self.model.add(Activation('softmax'))  # 18 分类层,输出最终结果

        # 输出网络结构
        self.model.summary()
network structure
The following is the structure of the neural network, and the total number of parameters is 6M.
Model: "sequential_1"
_________________________________________________________________
Layer (type)                 Output Shape              Param #
=================================================================
conv2d_1 (Conv2D)            (None, 64, 64, 32)        896
_________________________________________________________________
activation_1 (Activation)    (None, 64, 64, 32)        0
_________________________________________________________________
conv2d_2 (Conv2D)            (None, 62, 62, 32)        9248
_________________________________________________________________
activation_2 (Activation)    (None, 62, 62, 32)        0
_________________________________________________________________
max_pooling2d_1 (MaxPooling2 (None, 31, 31, 32)        0
_________________________________________________________________
dropout_1 (Dropout)          (None, 31, 31, 32)        0
_________________________________________________________________
conv2d_3 (Conv2D)            (None, 31, 31, 64)        18496
_________________________________________________________________
activation_3 (Activation)    (None, 31, 31, 64)        0
_________________________________________________________________
conv2d_4 (Conv2D)            (None, 29, 29, 64)        36928
_________________________________________________________________
activation_4 (Activation)    (None, 29, 29, 64)        0
_________________________________________________________________
max_pooling2d_2 (MaxPooling2 (None, 14, 14, 64)        0
_________________________________________________________________
dropout_2 (Dropout)          (None, 14, 14, 64)        0
_________________________________________________________________
flatten_1 (Flatten)          (None, 12544)             0
_________________________________________________________________
dense_1 (Dense)              (None, 512)               6423040
_________________________________________________________________
activation_5 (Activation)    (None, 512)               0
_________________________________________________________________
dropout_3 (Dropout)          (None, 512)               0
_________________________________________________________________
dense_2 (Dense)              (None, 10)                5130
_________________________________________________________________
activation_6 (Activation)    (None, 10)                0
=================================================================
Total params: 6,493,738
Trainable params: 6,493,738
Non-trainable params: 0
Train the model
If you don't understand, look at the comments in the code.
    def train(self, dataset, batch_size=20, nb_epoch=10, data_augmentation=True):
        # 参数batch_size的作用即在于此,其指定每次迭代训练样本的数量
        # nb_epoch 训练轮换次数
        sgd = SGD(lr=0.01, decay=1e-6,
                  momentum=0.9, nesterov=True)  # 采用SGD+momentum的优化器进行训练,首先生成一个优化器对象
        self.model.compile(loss='categorical_crossentropy',
                           optimizer=sgd,
                           metrics=['accuracy'])  # 完成实际的模型配置工作

        # 不使用数据提升,所谓的提升就是从我们提供的训练数据中利用旋转、翻转、加噪声等方法创造新的
        # 训练数据,有意识的提升训练数据规模,增加模型训练量
        if not data_augmentation:
            self.model.fit(dataset.train_images,
                           dataset.train_labels,
                           batch_size=batch_size,
                           nb_epoch=nb_epoch,
                           validation_data=(dataset.valid_images, dataset.valid_labels),
                           shuffle=True,
                           verbose = 1)
        # 使用实时数据提升
        else:
            # 定义数据生成器用于数据提升,其返回一个生成器对象datagen,datagen每被调用一
            # 次其生成一组数据(顺序生成),节省内存,其实就是python的数据生成器
            datagen = ImageDataGenerator(
                featurewise_center=False,  # 是否使输入数据去中心化(均值为0),
                samplewise_center=False,  # 是否使输入数据的每个样本均值为0
                featurewise_std_normalization=False,  # 是否数据标准化(输入数据除以数据集的标准差)
                samplewise_std_normalization=False,  # 是否将每个样本数据除以自身的标准差
                zca_whitening=False,  # 是否对输入数据施以ZCA白化
                rotation_range=20,  # 数据提升时图片随机转动的角度(范围为0~180)
                width_shift_range=0.2,  # 数据提升时图片水平偏移的幅度(单位为图片宽度的占比,0~1之间的浮点数)
                height_shift_range=0.2,  # 同上,只不过这里是垂直
                horizontal_flip=True,  # 是否进行随机水平翻转
                vertical_flip=False)  # 是否进行随机垂直翻转

            # 计算整个训练样本集的数量以用于特征值归一化、ZCA白化等处理
            datagen.fit(dataset.train_images)

            # 利用生成器开始训练模型
            self.model.fit_generator(datagen.flow(dataset.train_images, dataset.train_labels,
                                                  batch_size=batch_size),
                                     samples_per_epoch=dataset.train_images.shape[0],
                                     nb_epoch=nb_epoch,
                                     validation_data=(dataset.valid_images, dataset.valid_labels),
                                     verbose = 1)
training results
The final recognition effect also reached 99.28%.
Epoch 1/10
 - 45s - loss: 1.5003 - accuracy: 0.4488 - val_loss: 0.2484 - val_accuracy: 0.9661
Epoch 2/10
 - 45s - loss: 0.5669 - accuracy: 0.8032 - val_loss: 0.1429 - val_accuracy: 0.9331
Epoch 3/10
 - 46s - loss: 0.3572 - accuracy: 0.8778 - val_loss: 0.3107 - val_accuracy: 0.8703
Epoch 4/10
 - 45s - loss: 0.2577 - accuracy: 0.9139 - val_loss: 0.0277 - val_accuracy: 0.9940
Epoch 5/10
 - 46s - loss: 0.2046 - accuracy: 0.9350 - val_loss: 0.0275 - val_accuracy: 0.9940
Epoch 6/10
 - 45s - loss: 0.1824 - accuracy: 0.9400 - val_loss: 0.0242 - val_accuracy: 0.9930
Epoch 7/10
 - 46s - loss: 0.1512 - accuracy: 0.9473 - val_loss: 0.1970 - val_accuracy: 0.9341
Epoch 8/10
 - 46s - loss: 0.1426 - accuracy: 0.9541 - val_loss: 0.0149 - val_accuracy: 0.9960
Epoch 9/10
 - 46s - loss: 0.1474 - accuracy: 0.9541 - val_loss: 0.0391 - val_accuracy: 0.9930
Epoch 10/10
 - 45s - loss: 0.1103 - accuracy: 0.9666 - val_loss: 0.0133 - val_accuracy: 0.9928
Evaluation model
Used to confirm whether the accuracy of the model can meet the requirements.
load model
    def load_model(self, file_path=MODEL_PATH):
        self.model = load_model(file_path)
assessment test
    def evaluate(self, dataset):
        score = self.model.evaluate(dataset.test_images, dataset.test_labels, verbose=1)
        print("%s: %.2f%%" % (self.model.metrics_names[1], score[1] * 100))
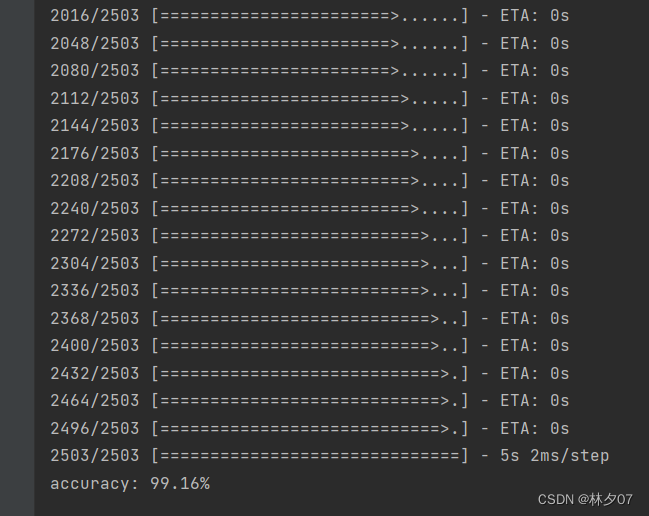
Test Results
The correct rate is 99.16%.
Summarize
The main difficulty of this chapter lies in the design of the model, which always needs to be fine-tuned. Then you need to understand some conceptual things such as loss function, activation function and so on.