This example will demonstrate the process of developing a WeChat application account from scratch, page rotation and jumping to pass values, and realizing a custom cell layout. All the source code can be downloaded from github.
Download the latest version of WeChat applet development tools, currently v0.9.092300
download address: https://mp.weixin.qq.com/debug/wxadoc/dev/devtools/download.html
Official documentation: https://mp.weixin.qq.com/debug/wxadoc/dev/index.html
git download address: http://git.oschina.net/dotton/news
First look at the effect diagram:

1. New application
1. In the internal testing phase, for developers without internal testing numbers, please click No AppId.
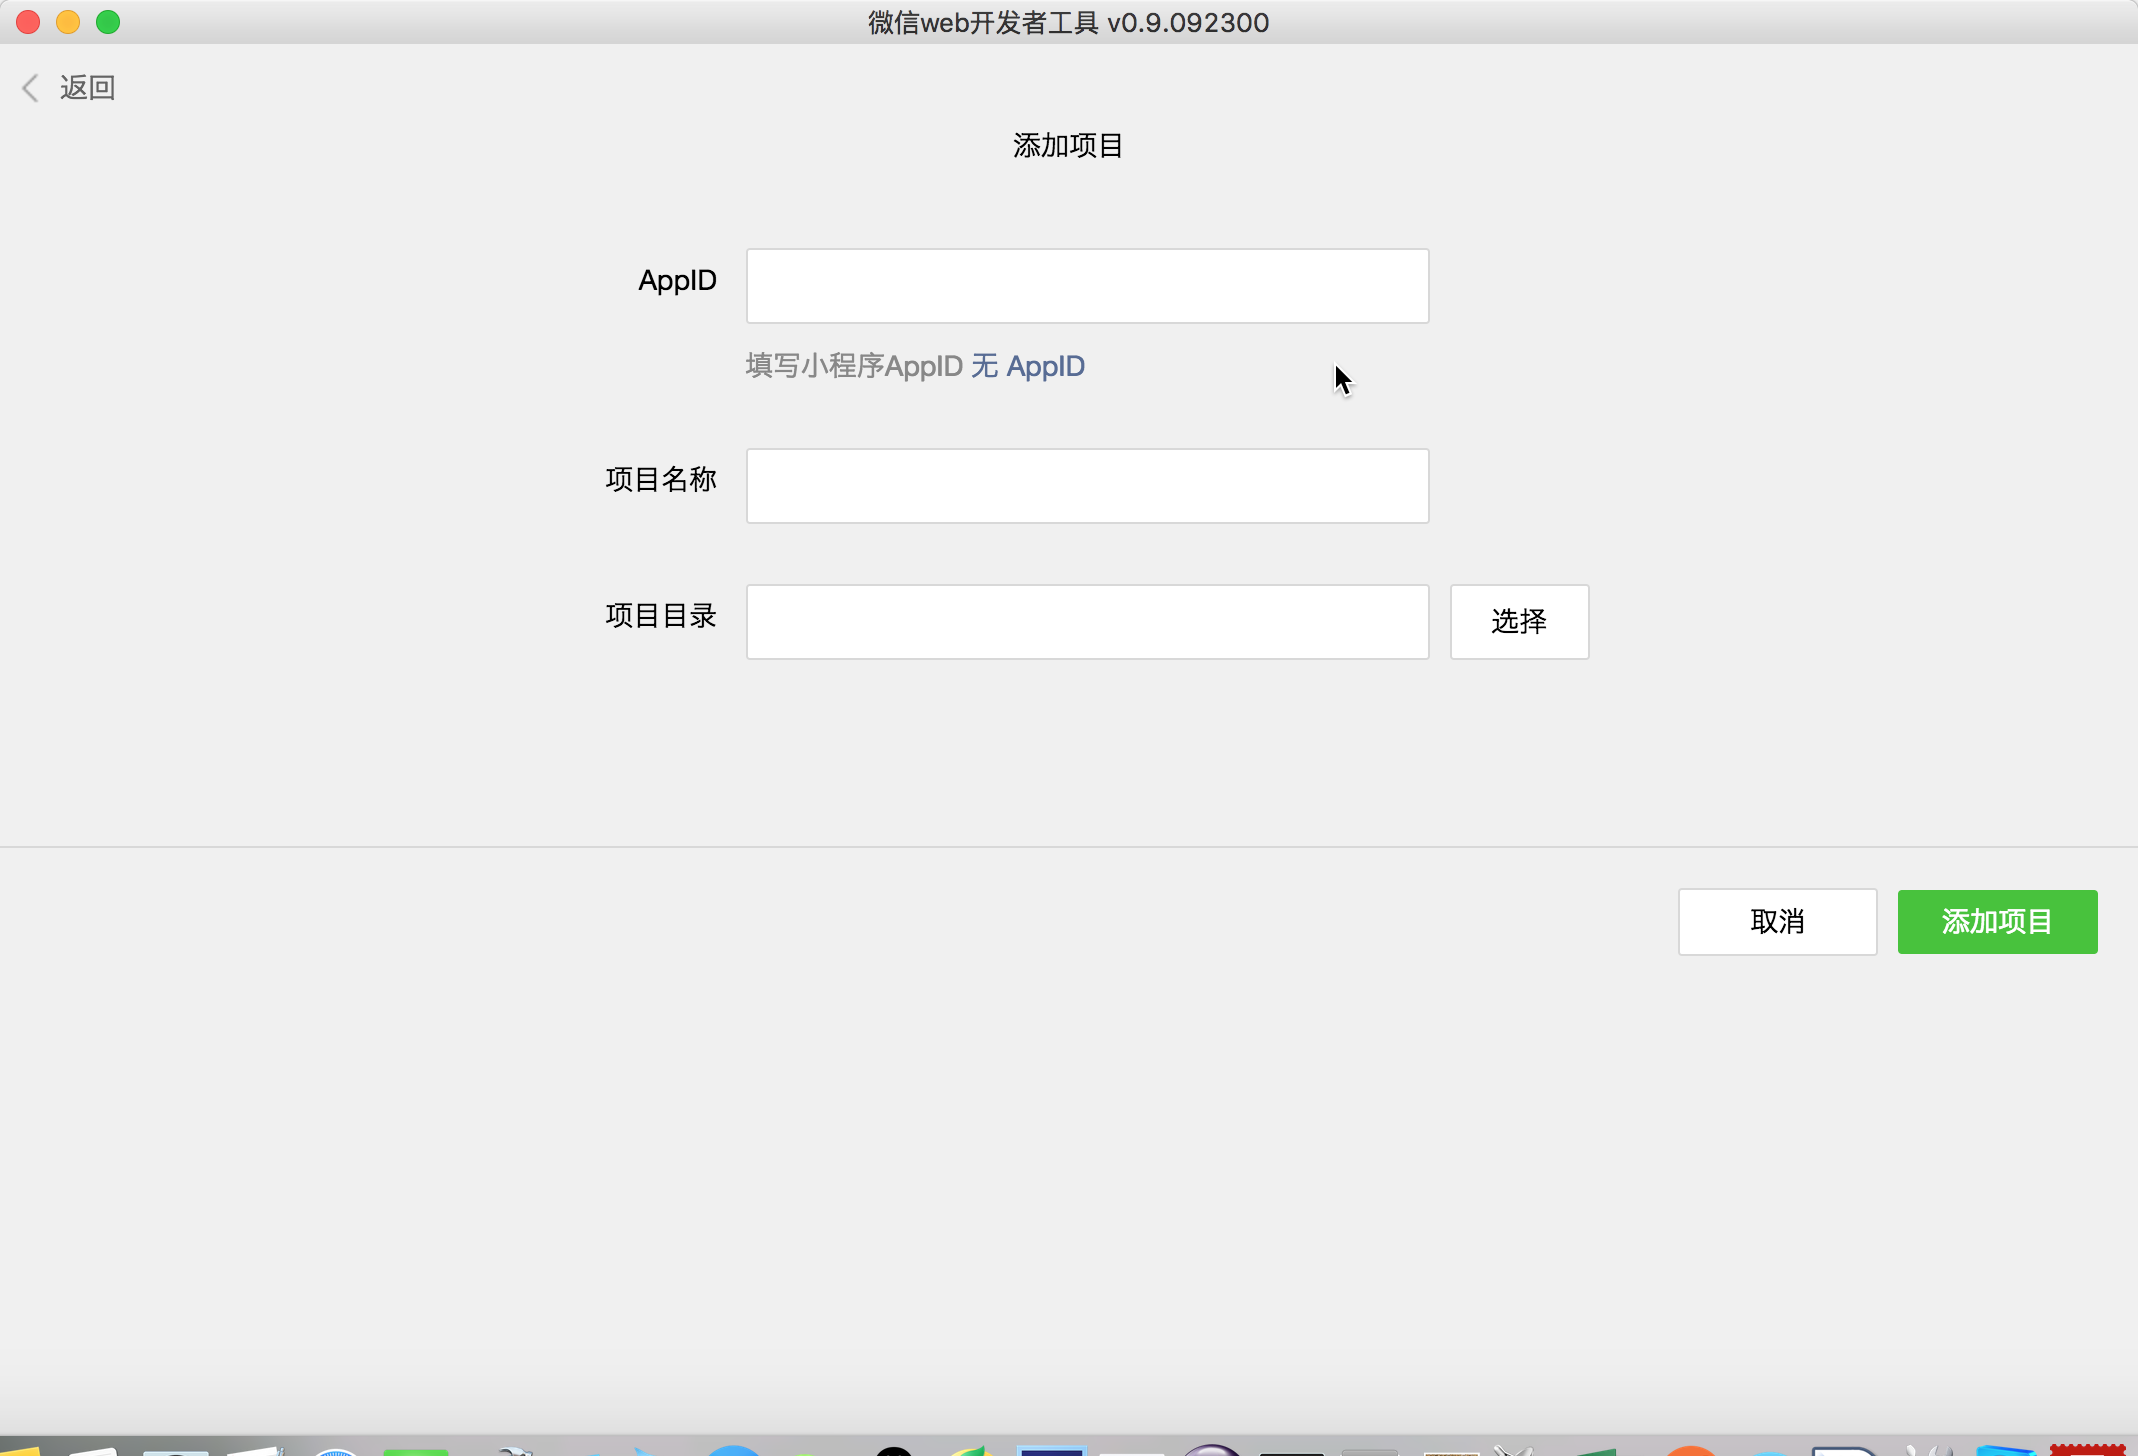
2. Then select a local directory as the project directory.

3. The project name is arbitrary, set the directory, and check the current directory to create a quick start project. As shown in the figure:

4. Click Add Item, then you can run the effect. It is your WeChat personal information and a HelloWorld text box.
5. On the right is the debug window. There are 2 warnings, which are caused by the lack of AppID, and can be ignored temporarily without affecting development.

6. As a reminder, set debug: true in app.json, so that the console can see real-time interactive information, and set breakpoints in js files in the future, similar to Chrome's debugging tools and Firefox's Firebug.
About homepage configuration:
{
  "pages":[
    "pages/index/index",
    "pages/logs/logs"
  ],
  "window":{
    "backgroundTextStyle":"light",
    "navigationBarBackgroundColor": "#fff",
    "navigationBarTitleText": "WeChat",
    "navigationBarTextStyle":"black"
  },
  "debug":true
}
其中pages属性表明每一个页面的存在,其中第一条为首页,即pages/index/index
二、请求网络API接口
1.前提条件:
这里需要用到聚合数据的新闻接口,前往:https://www.juhe.cn/docs/api/id/235 注册、申请接口,拿到key,我这里已经申请到一个key:482e213ca7520ff1a8ccbb262c90320a,可以直接拿它做测试,然后就可以将它集成到自己的应用了。
2.使用微信小程序接口来访问网络:
改写index.js文件:
//index.js
//获取应用实例
var app = getApp()
Page({
  data: {
    motto: 'Hello World',
    userInfo: {}
  },
  //事件处理函数
  bindViewTap: function() {
    wx.navigateTo({
      url: '../logs/logs'
    })
  },
  onLoad: function () {
  // 访问聚合数据的网络接口
  wx.request({
    url: 'http://v.juhe.cn/toutiao/index',
    data: {
     type: '' ,
     key: '482e213ca7520ff1a8ccbb262c90320a'
    },
    header: {
        'Content-Type': 'application/json'
    },
    success: function(res) {
      console.log(res.data)
    }
  })

    console.log('onLoad')
    var that = this
    //调用应用实例的方法获取全局数据
    app.getUserInfo(function(userInfo){
      //更新数据
      that.setData({
        userInfo:userInfo
      })
    })
  }
})
3.查看效果,检查Console控制台,得到以下信息:

说明已经成功取得到了数据。
三、将json格式的数据渲染到视图
这里要用到swipe组件实现大图轮播,文档见:https://mp.weixin.qq.com/debug/wxadoc/dev/component/swiper.html
1.清空原index.wxml内容,加入如下代码:
<swiper indicator-dots="true"
  autoplay="true" interval="5000" duration="1000">
  <block wx:for="{{topNews}}">
    <swiper-item>
      <image src="{{item.thumbnail_pic_s02}}" class="slide-image" width="355" height="150"/>
    </swiper-item>
  </block>
</swiper>
2.相应地在index.js文件的onLoad方法中加入如下代码来获取网络数据
//index.js
//获取应用实例
var app = getApp()
Page({
  data: {
    topNews:[],
    techNews:[]
  },
  onLoad: function () {
    var that = this
  // 访问聚合数据的网络接口-头条新闻
  wx.request({
    url: 'http://v.juhe.cn/toutiao/index',
    data: {
     type: 'topNews' ,
     key: '482e213ca7520ff1a8ccbb262c90320a'
    },
    header: {
        'Content-Type': 'application/json'
    },
    success: function(res) {
      if (res.data.error_code == 0) {
        that.setData({
        topNews:res.data.result.data
        })
      } else {
        console.log('获取失败');
      }
    }
  })

  }
})
3.看到轮播已经成功的展示出来了

4.依样画葫芦,同样操作读取列表新闻:
<view class="news-list">
  <block wx:for="{{techNews}}">
    <text class="news-item">{{index + 1}}. {{item.title}}</text>
  </block>
</view>
配合样式表,不然列表文字排版是横向的,将以下css加到index.wxss中:
.news-list {
  display: flex;
  flex-direction: column;
  padding: 40rpx;
}
.news-item {
  margin: 10rpx;
}

- 继续美化,文字列表也采用缩略图+大标题+出处+日期的形式

样式表与布局文件
index.wxss
/**index.wxss**/
.news-list {
  display: flex;
  flex-direction: column;
  padding: 40rpx;
}

.news-item {
  display: flex;
  flex-direction: row;
  height:200rpx;
}

.news-text {
  display: flex;
  flex-direction: column;
}

.news-stamp {
    font-size: 25rpx;
    color:darkgray;
    padding: 0 20rpx;
    display: flex;
    flex-direction: row;
    justify-content:space-between;
}

.news-title {
  margin: 10rpx;
  font-size: 30rpx;
}

.container {
  height: 5000rpx;
  display: flex;
  flex-direction: column;
  align-items: center;
  justify-content: space-between;
  /*padding: 200rpx 0;*/
  box-sizing: border-box;
}

.list-image {
  width:150rpx;
  height:100rpx;
}
index.wxml
<!--index.wxml-->
<swiper indicator-dots="true"
  autoplay="true" interval="5000" duration="1000">
  <block wx:for="{{topNews}}">
    <swiper-item>
      <image src="{{item.thumbnail_pic_s02}}" mode="aspectFill" class="slide-image" width="375" height="250"/>
    </swiper-item>
  </block>
</swiper>
<view class="container news-list">
  <block wx:for="{{techNews}}">
    <view class="news-item">
      <image src="{{item.thumbnail_pic_s}}" mode="aspectFill" class="list-image"/>
      <view class="news-text">
        <text class="news-title">{{item.title}}</text>
        <view class="news-stamp">
          <text>{{item.author_name}}</text>
          <text>{{item.date}}</text>
        </view>
      </view>
    </view>
  </block>
</view>
四、跳转详情页与传值
保存当前点击的新闻条目信息中的title,参见官方文档:https://mp.weixin.qq.com/debug/wxadoc/dev/framework/view/wxml/event.html
传值到详情页
<!--logs.wxml-->
<view class="container">
  <text class="news-title">{{title}}</text>
  <text class="news-info">暂时找不到WebView的组件接口,于是不能加载网页数据</text>
</view>
  //事件处理函数
  bindViewTap: function(event) {
    wx.navigateTo({
      url: '../detail/detail?title='+event.currentTarget.dataset.newsTitle
    })
  }

//index.js
   //事件处理函数
  bindViewTap: function(event) {
    wx.navigateTo({
      url: '../detail/detail?title='+event.currentTarget.dataset.newsTitle
    })
  }
<!--index.wxml-->
//加入data-xxx元素来传值
<view class="container news-list">
  <block wx:for="{{techNews}}">
    <view class="news-item" data-news-title="{{item.title}}" bindtap="bindViewTap">
      <image src="{{item.thumbnail_pic_s}}" mode="aspectFill" class="list-image"/>
      <view class="news-text">
        <text class="news-title">{{item.title}}</text>
        <view class="news-stamp">
          <text>{{item.author_name}}</text>
          <text>{{item.date}}</text>
        </view>
      </view>
    </view>
  </block>
</view>
Of course, you can also pass values by obtaining global variables. In this scenario, there is a one-to-one value-passing relationship between a page and a sub-page, so it is not recommended. You can refer to the WeChat personal information pass-by-value method in the quickStart project.
Add at the end of app.js
globalData:{
    userInfo:null,
    newsItem:null
  }
})

Since the WebView component was not found in the official documentation, the detailed web page body cannot be implemented for the time being.
Epilogue
The overall development process is relatively comfortable, and it is not difficult to get started. Certain CSS syntax is used in the process, which essentially reflects an H5 development mode, and WXML is essentially a template tag language.