[Raspberry Pi] Raspberry Pi 3Pi4 Painless Installation System (Novice NOOBS)
foreword
This article is object-oriented: Xiaobai who has just come into contact with the Raspberry Pi, the recommended system for beginners, is simple and easy to understand, can be done in 10 minutes , fast and high-end, so that you who have just got the Raspberry Pi can quickly start you The learning ( suffering ) journey of
1. Preparation
Raspberry Pi 3 ( slightly worn )
Raspberry Pi 4 ( factory new ) ( choose one )
Display ( Raspberry Pi 3HDIM ) ( Raspberry Pi 4Mico HDIM )
at least 16GBTF card ( recommended 32GB or higher )
TF card reader device
Desktop software
SDFormatter (TF card format)
2. System download
This article is for the installation of the NOOBS system.
Here we recommend downloading NOOBS, which is relatively rich in functions compared to the Lite version.
Raspberry Pi NOOBS system official download address: NOOBS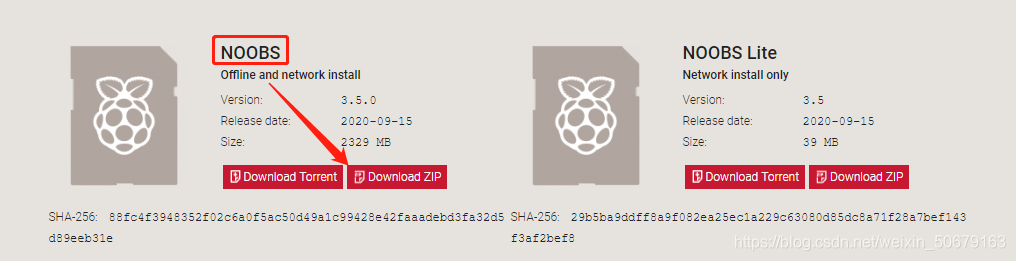
select NOOBS, Download ZIP
after the download is complete:

PS: According to the release time of the article, the latest official NOOBS system version is 3.5.0 (2.27GB), we use the latest version 3.5.0 Install for example
TF card preparation
Open SDFormatter and confirm
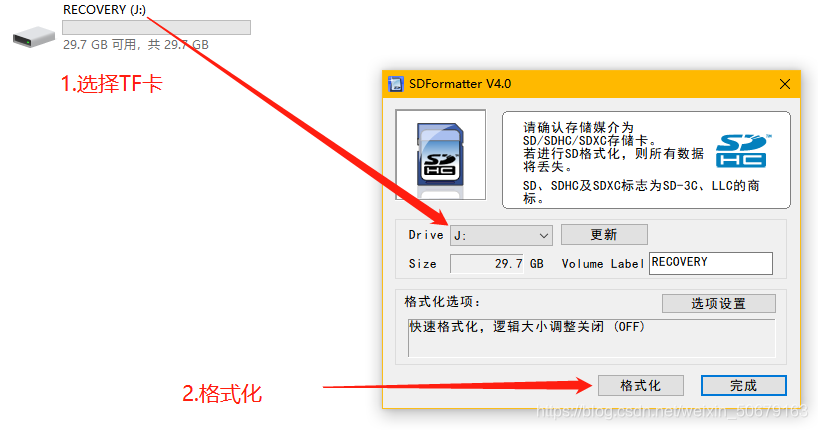
all the way .
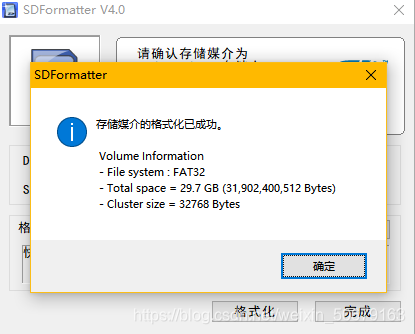
Format successfully
. Unzip NOOBS.
Unzip the NOOBS_v3_5_0.zip file to
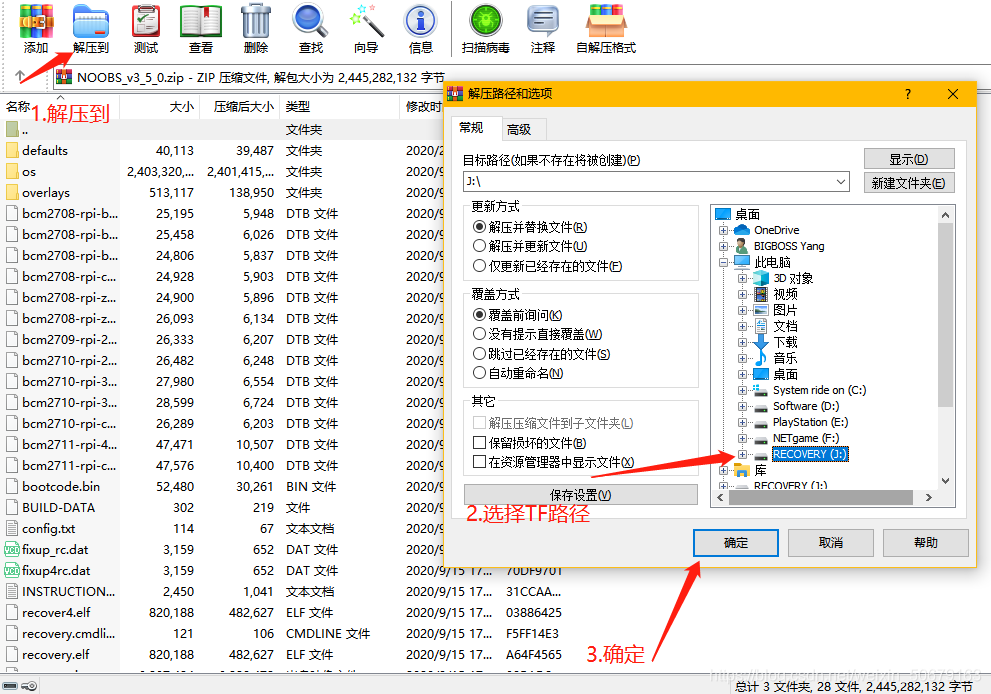
the TF root directory after decompression is completed in the TF card.
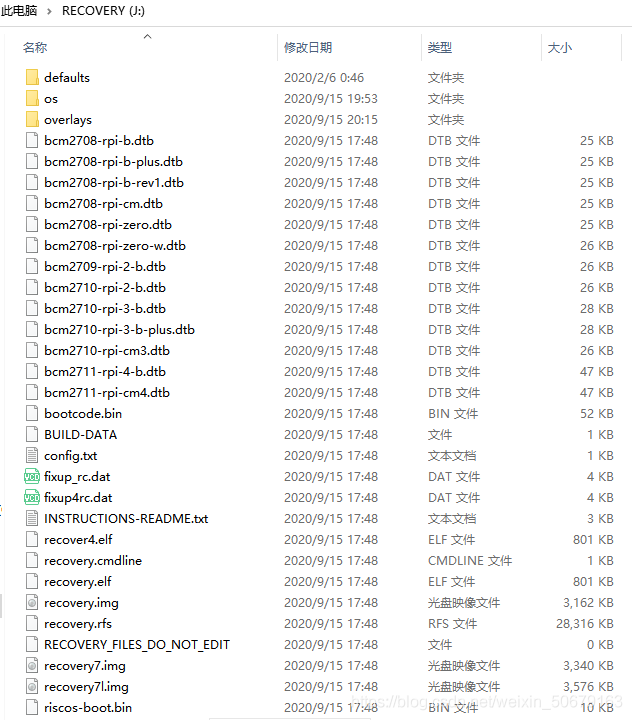
OK, then we insert the TF card into the Raspberry Pi and
light it up to start
4. Raspberry Pi part
After the Raspberry Pi is loaded, it will enter the following screen:
select the system in turn, install the language, install Instal~~~
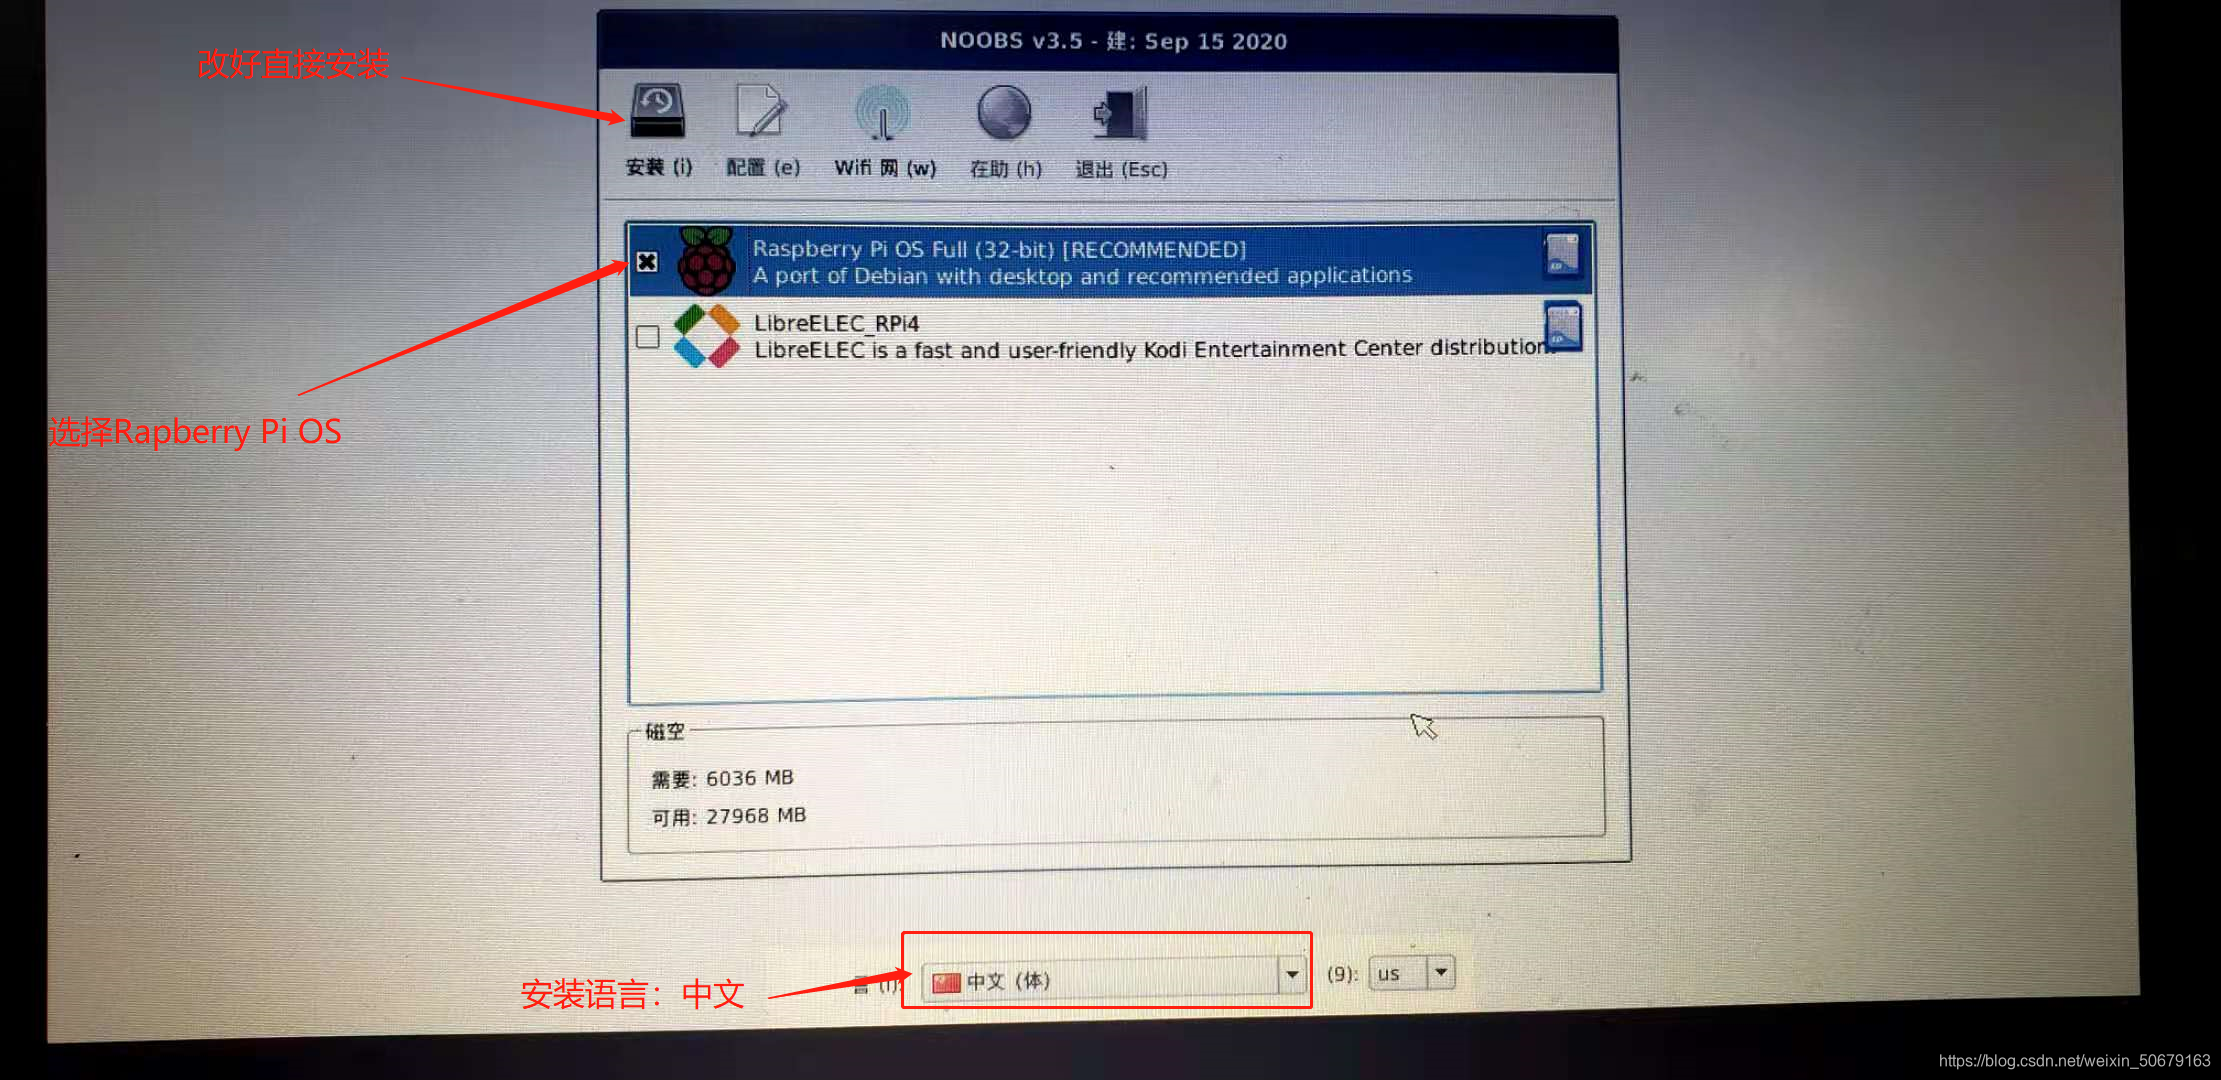
and then wait...and...loading... So
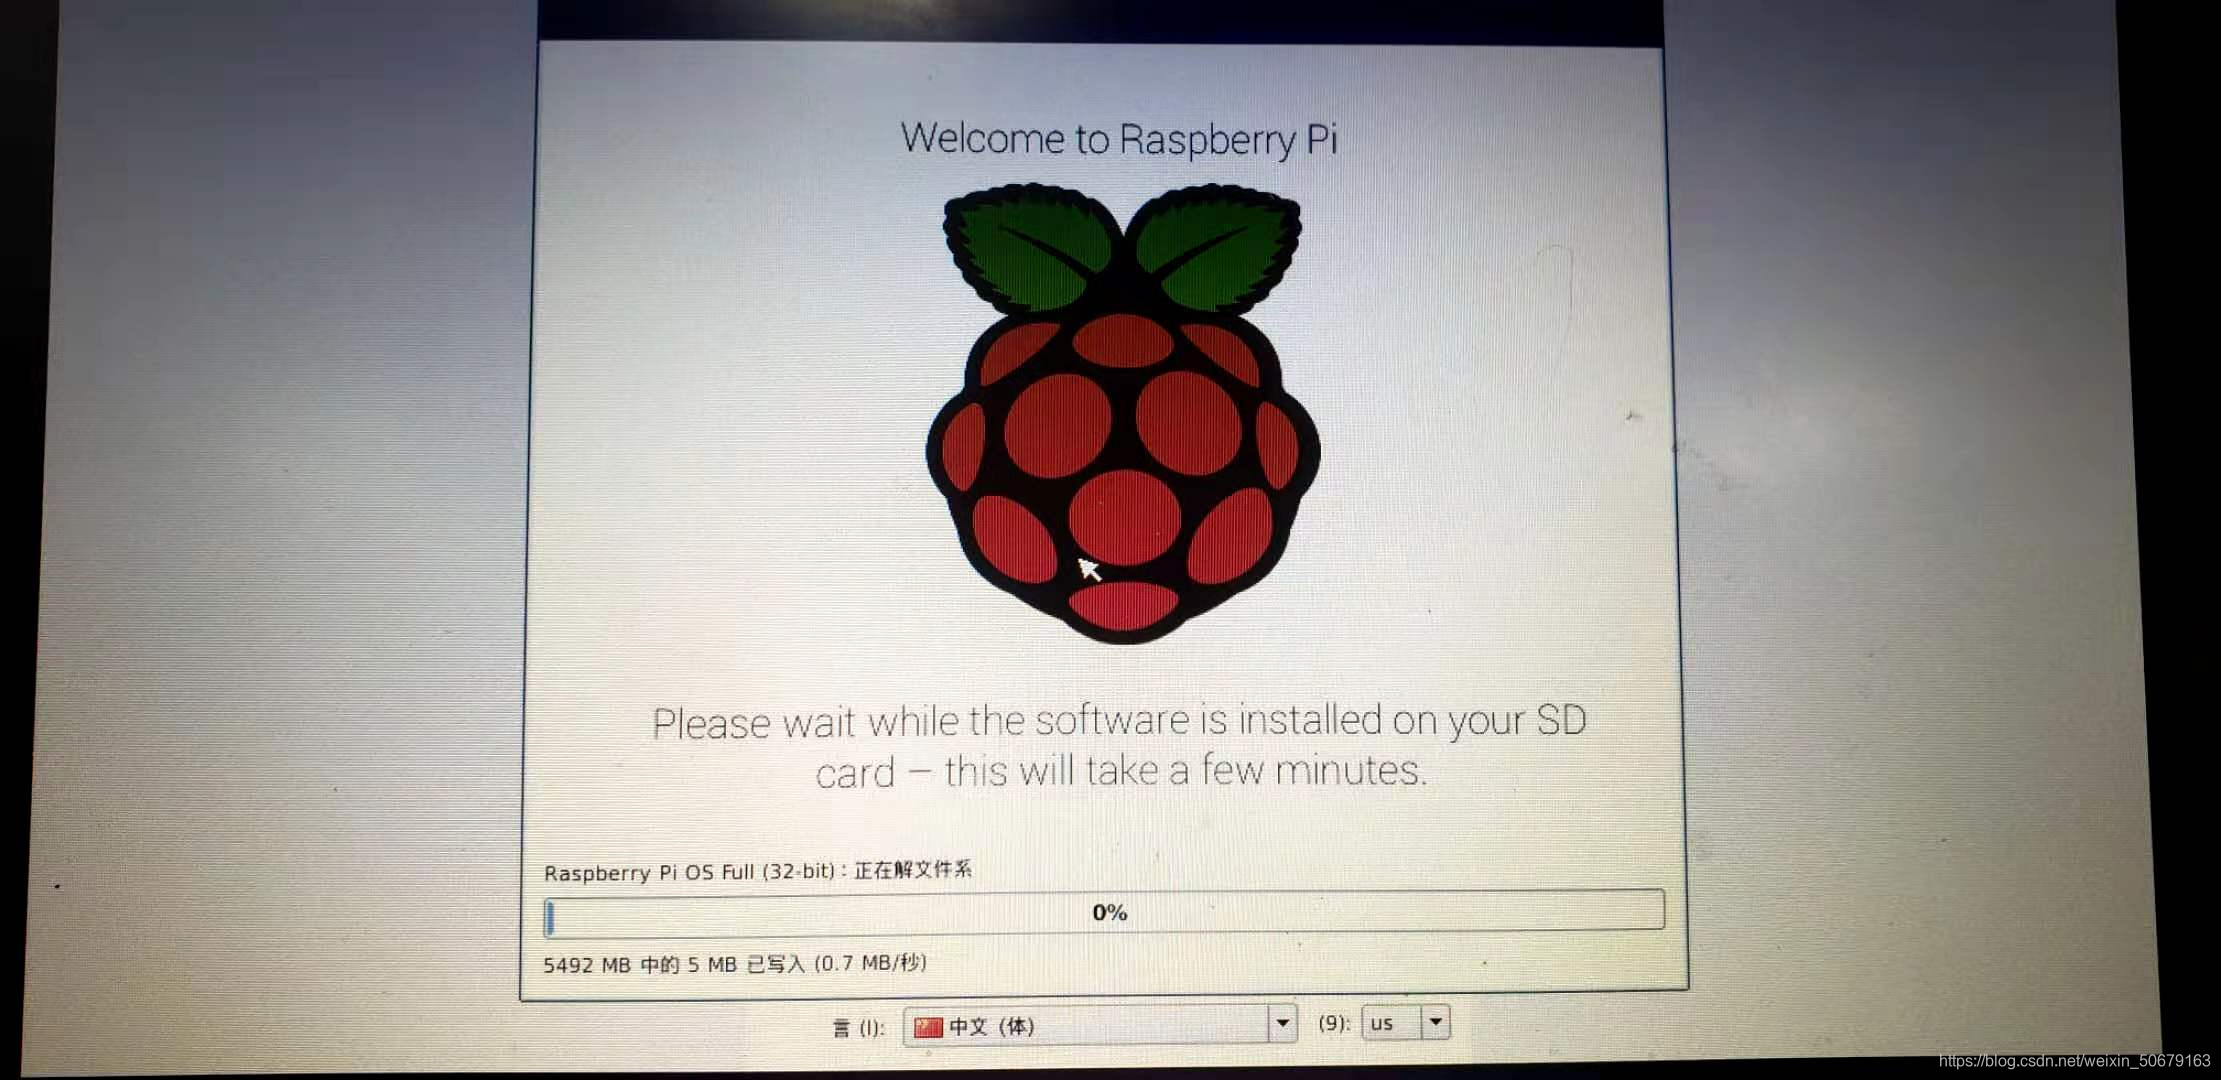
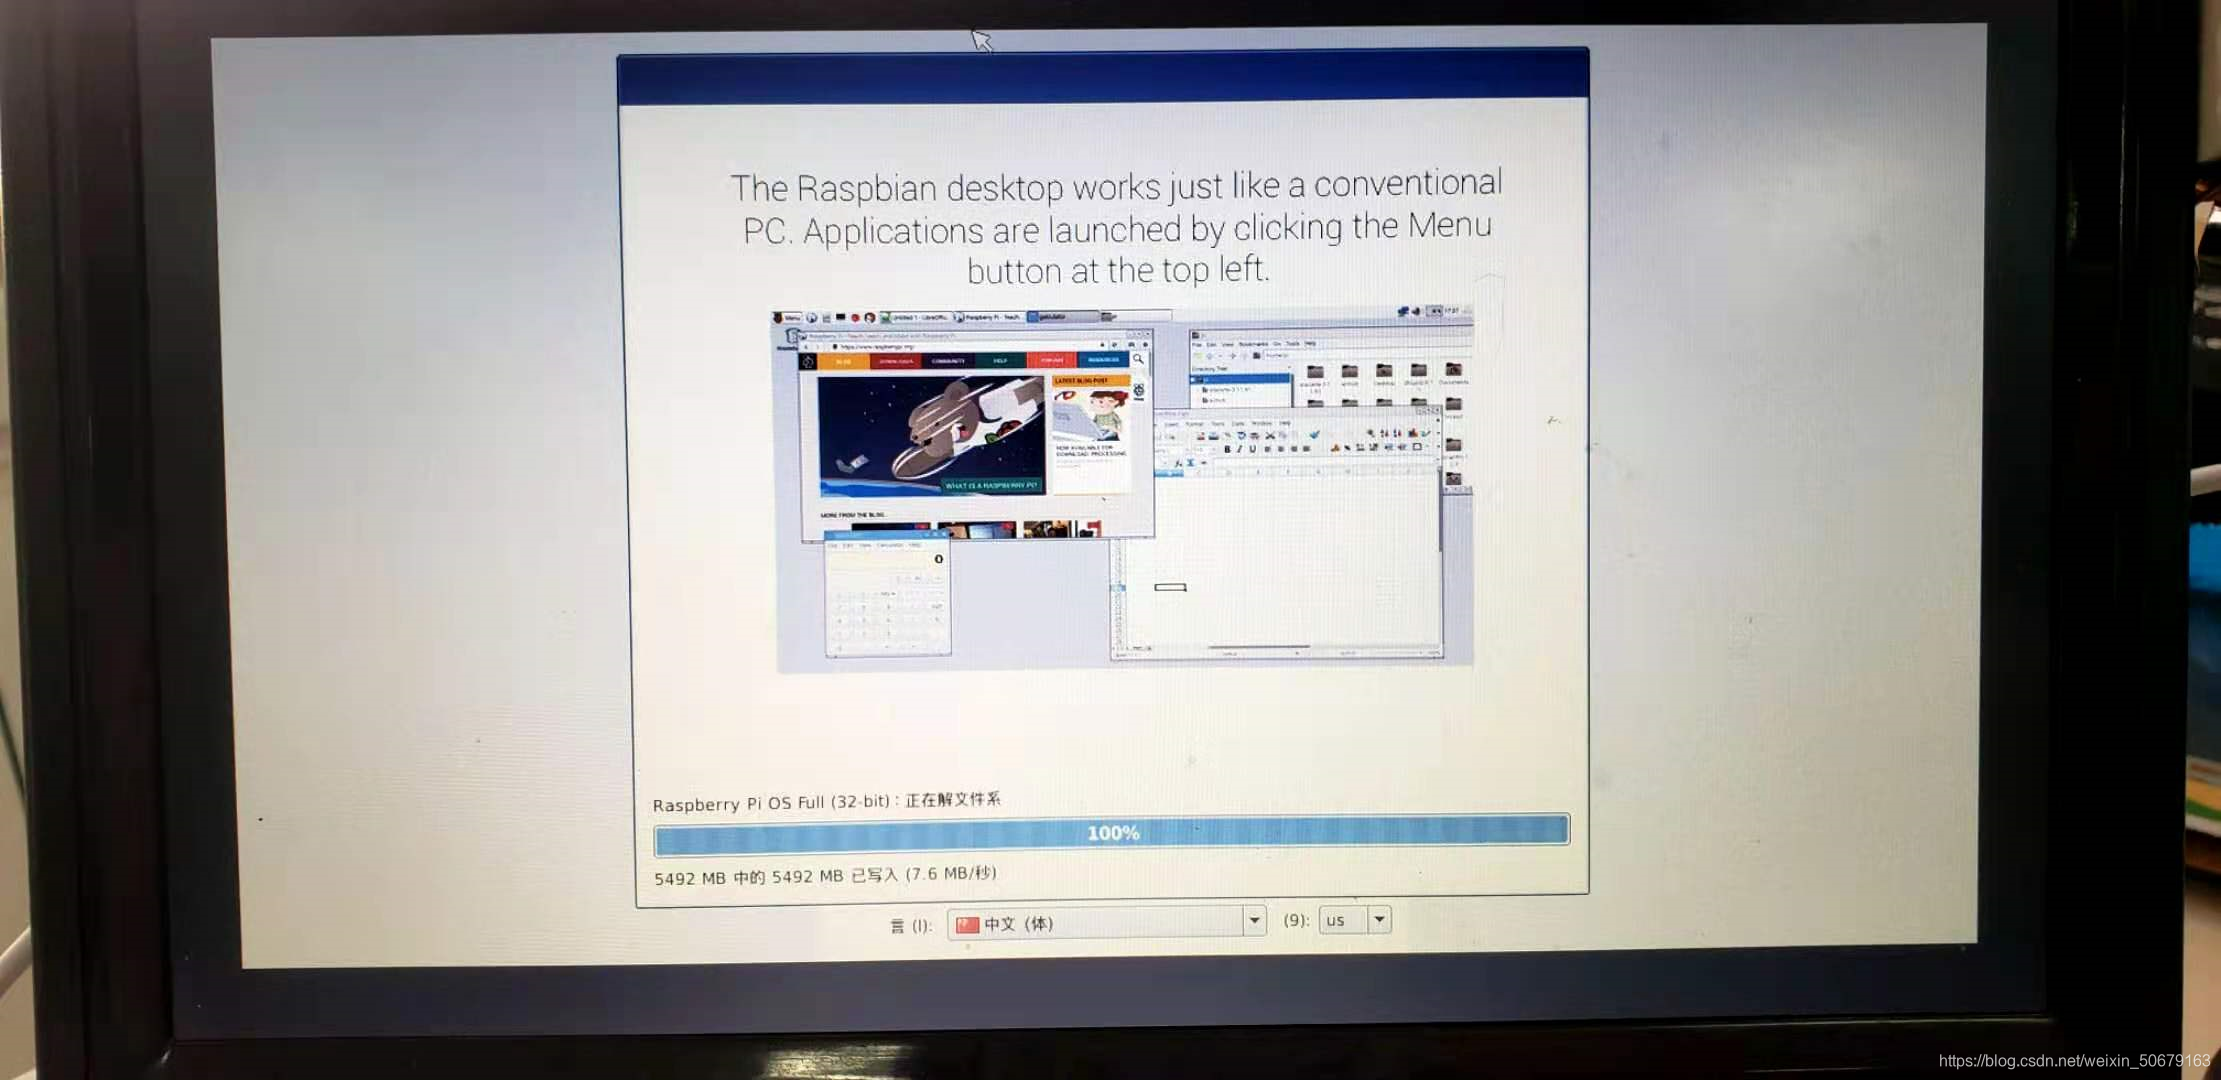
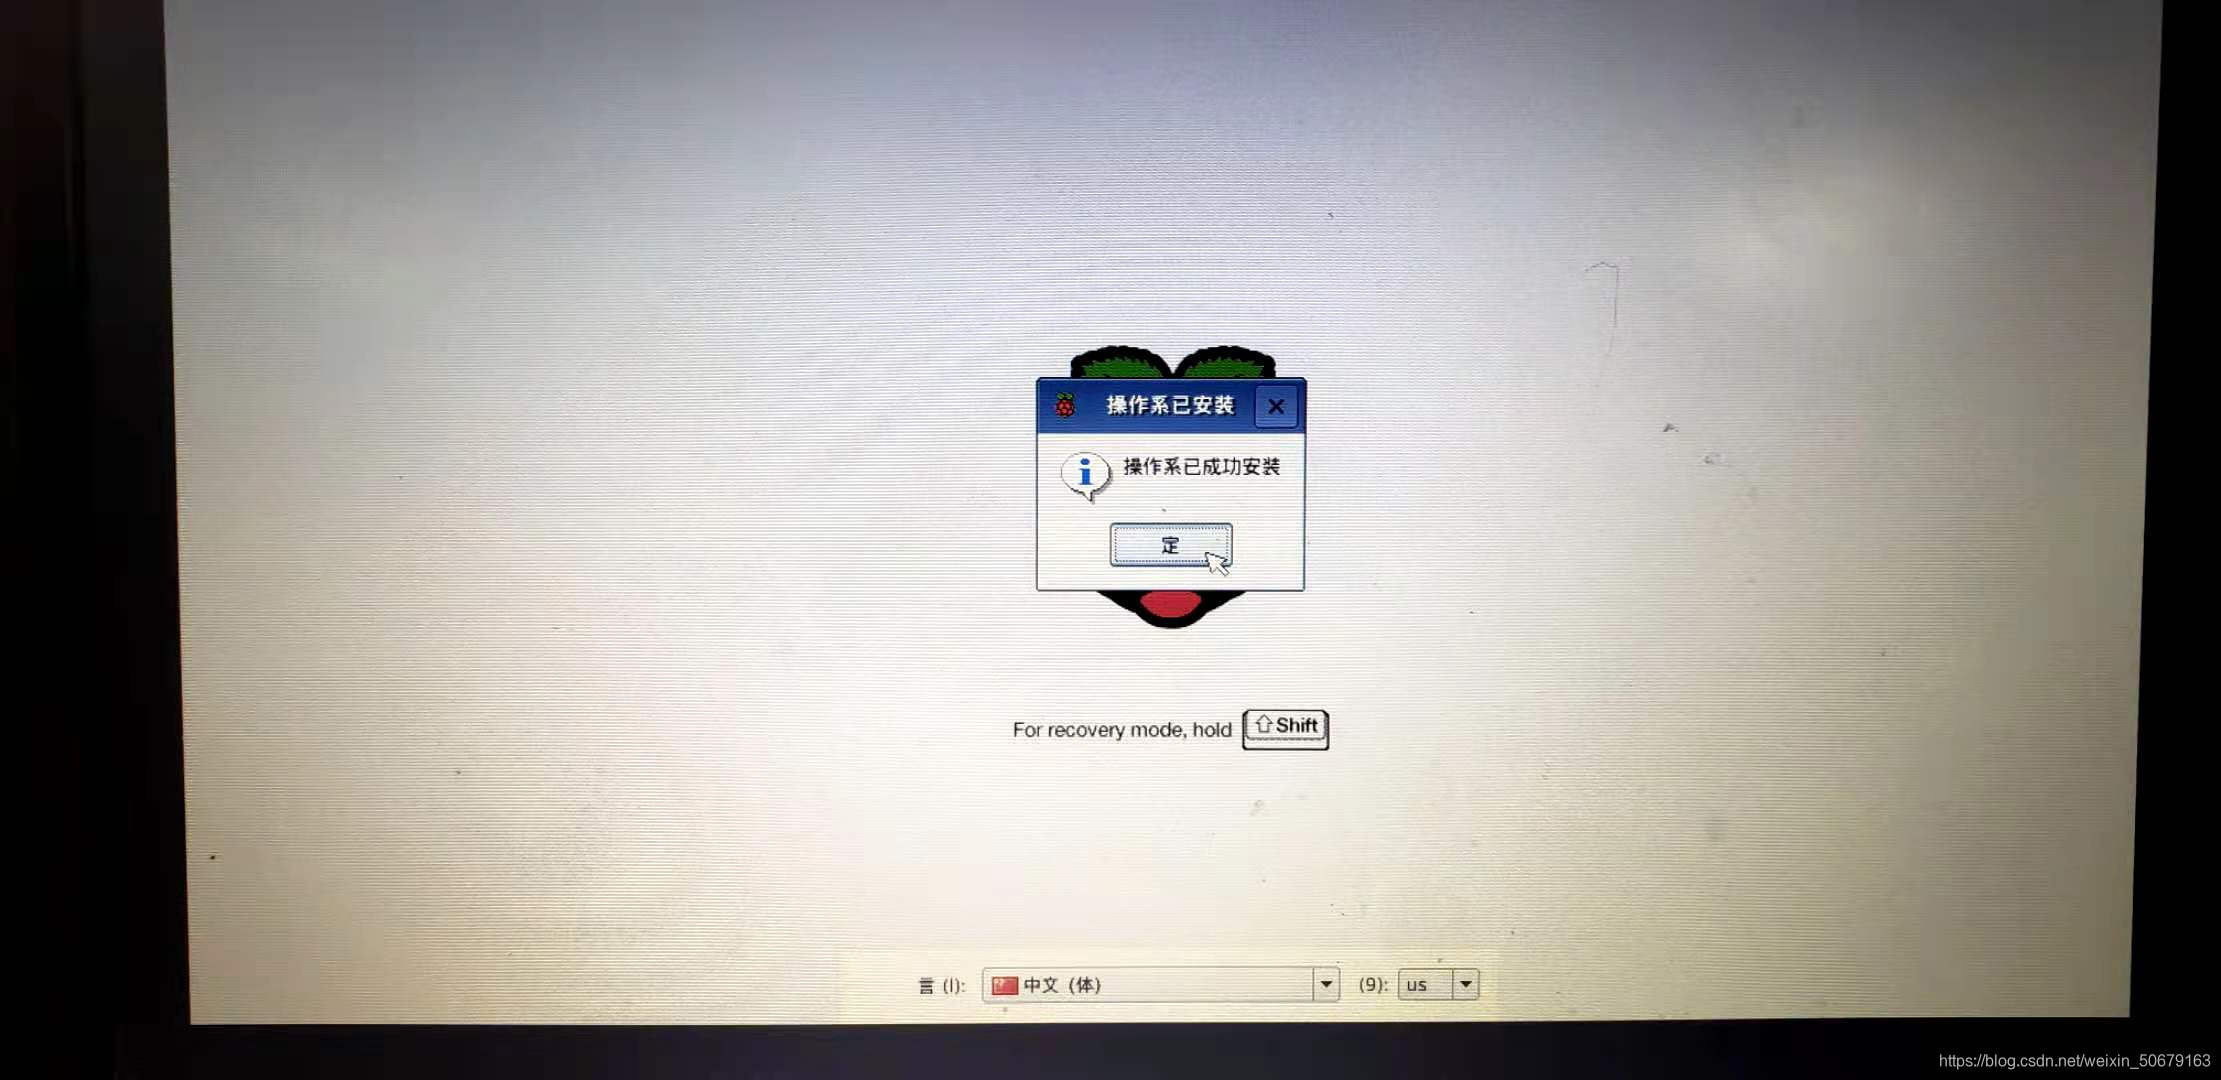
far, the NOOBS system has been successfully burned to the TF card
and the Raspberry Pi will restart and enter the boot screen : 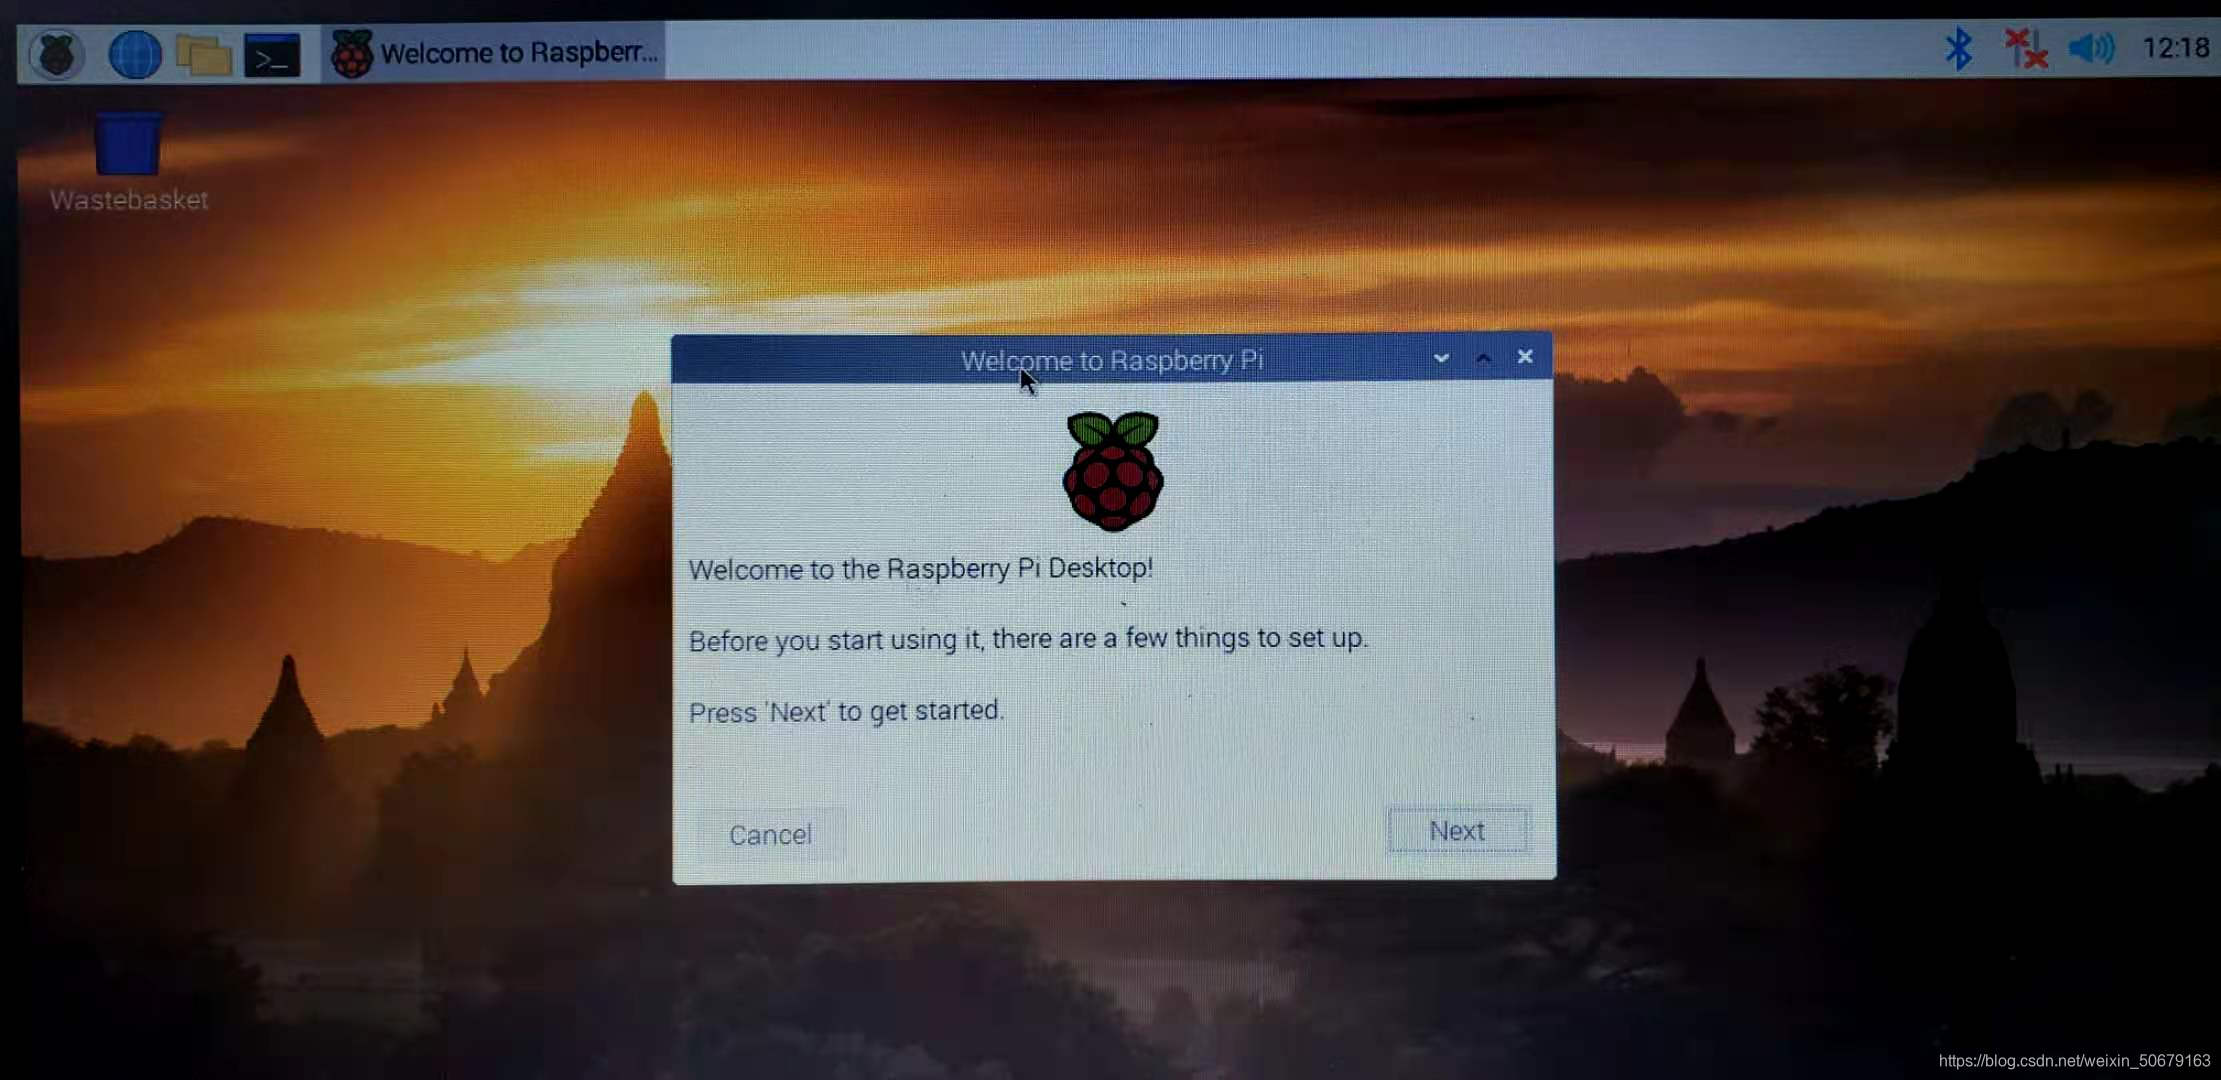
Complete the boot settings 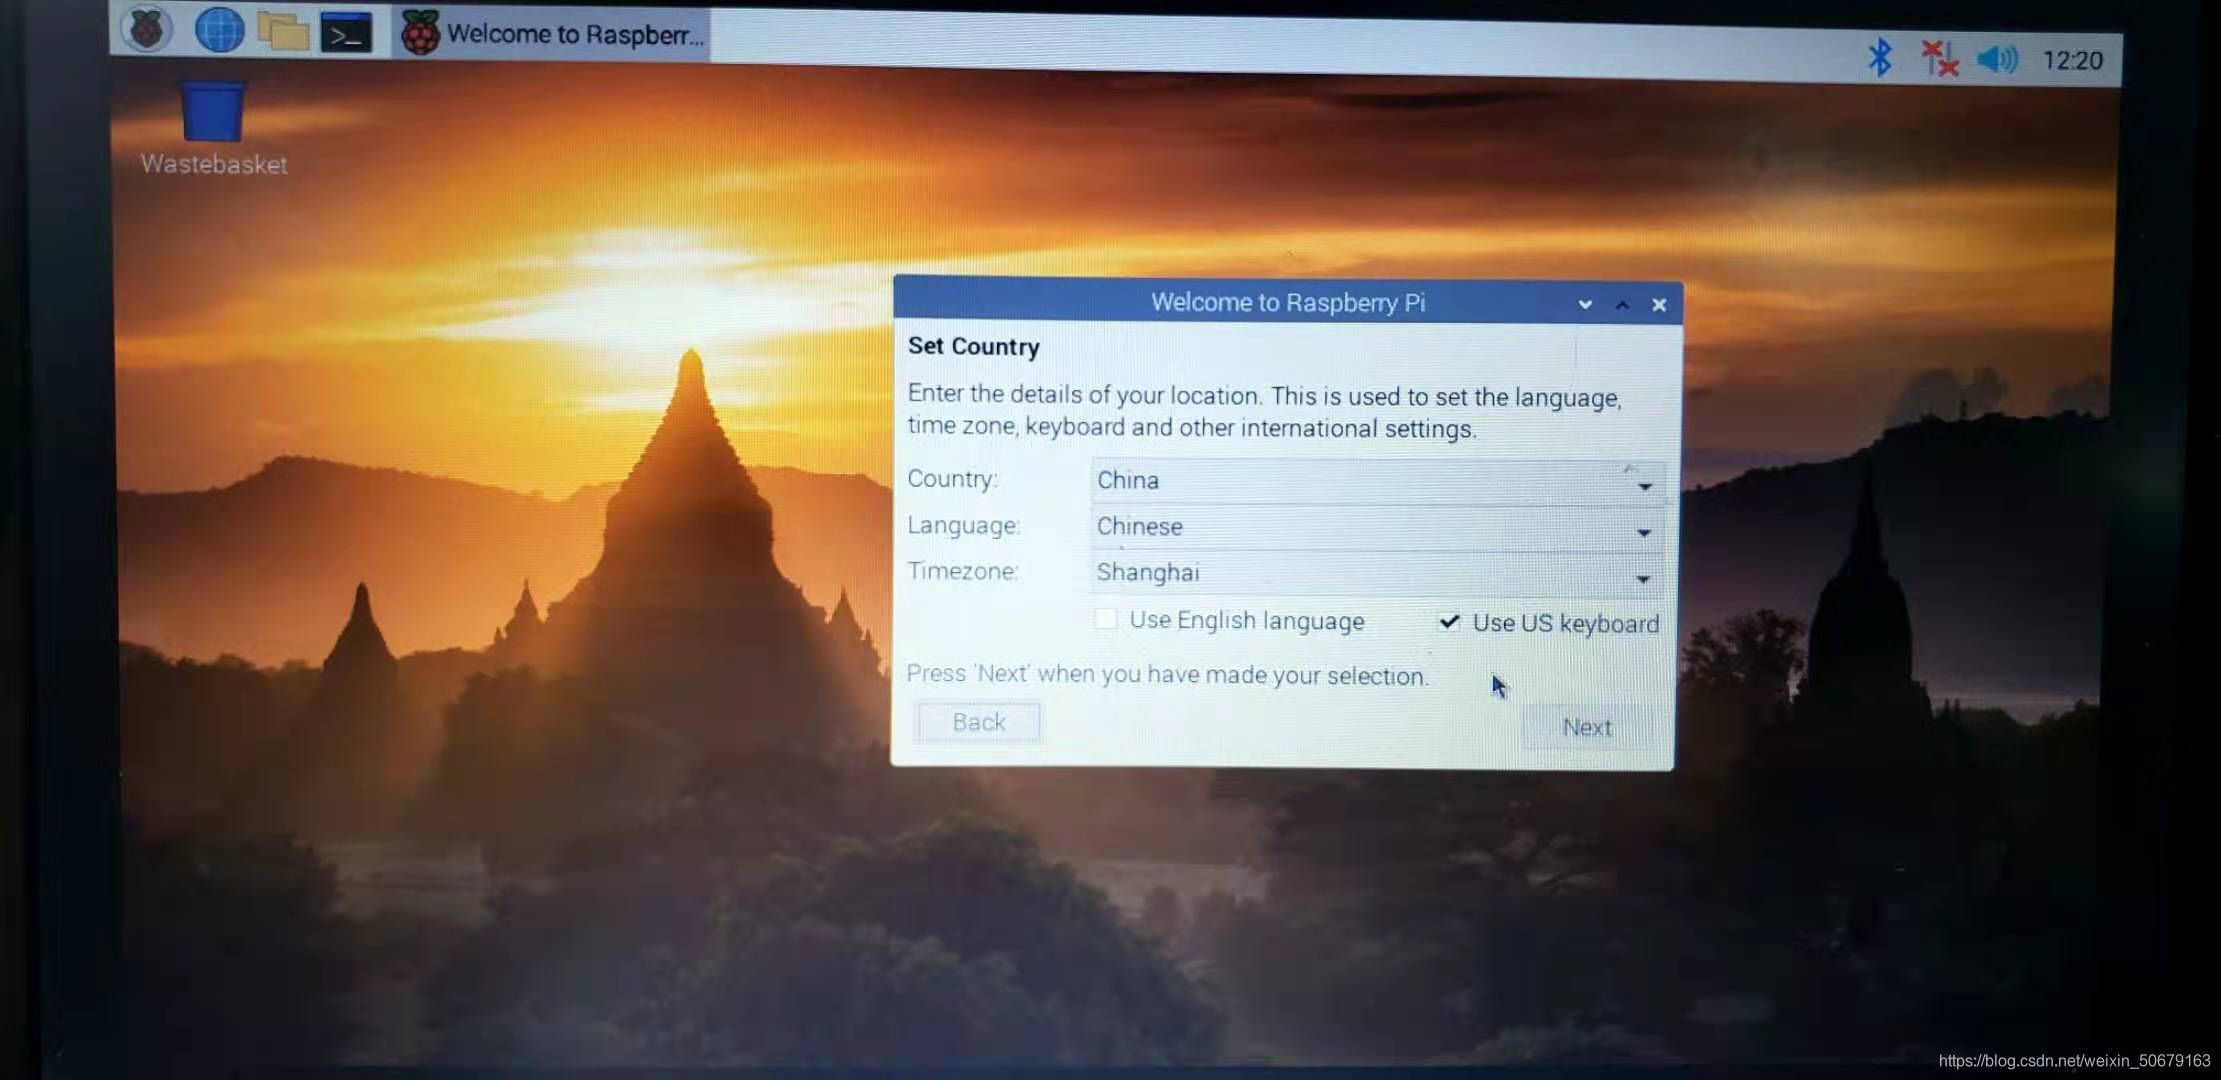
Select CHINA-Chinese-Shanghai
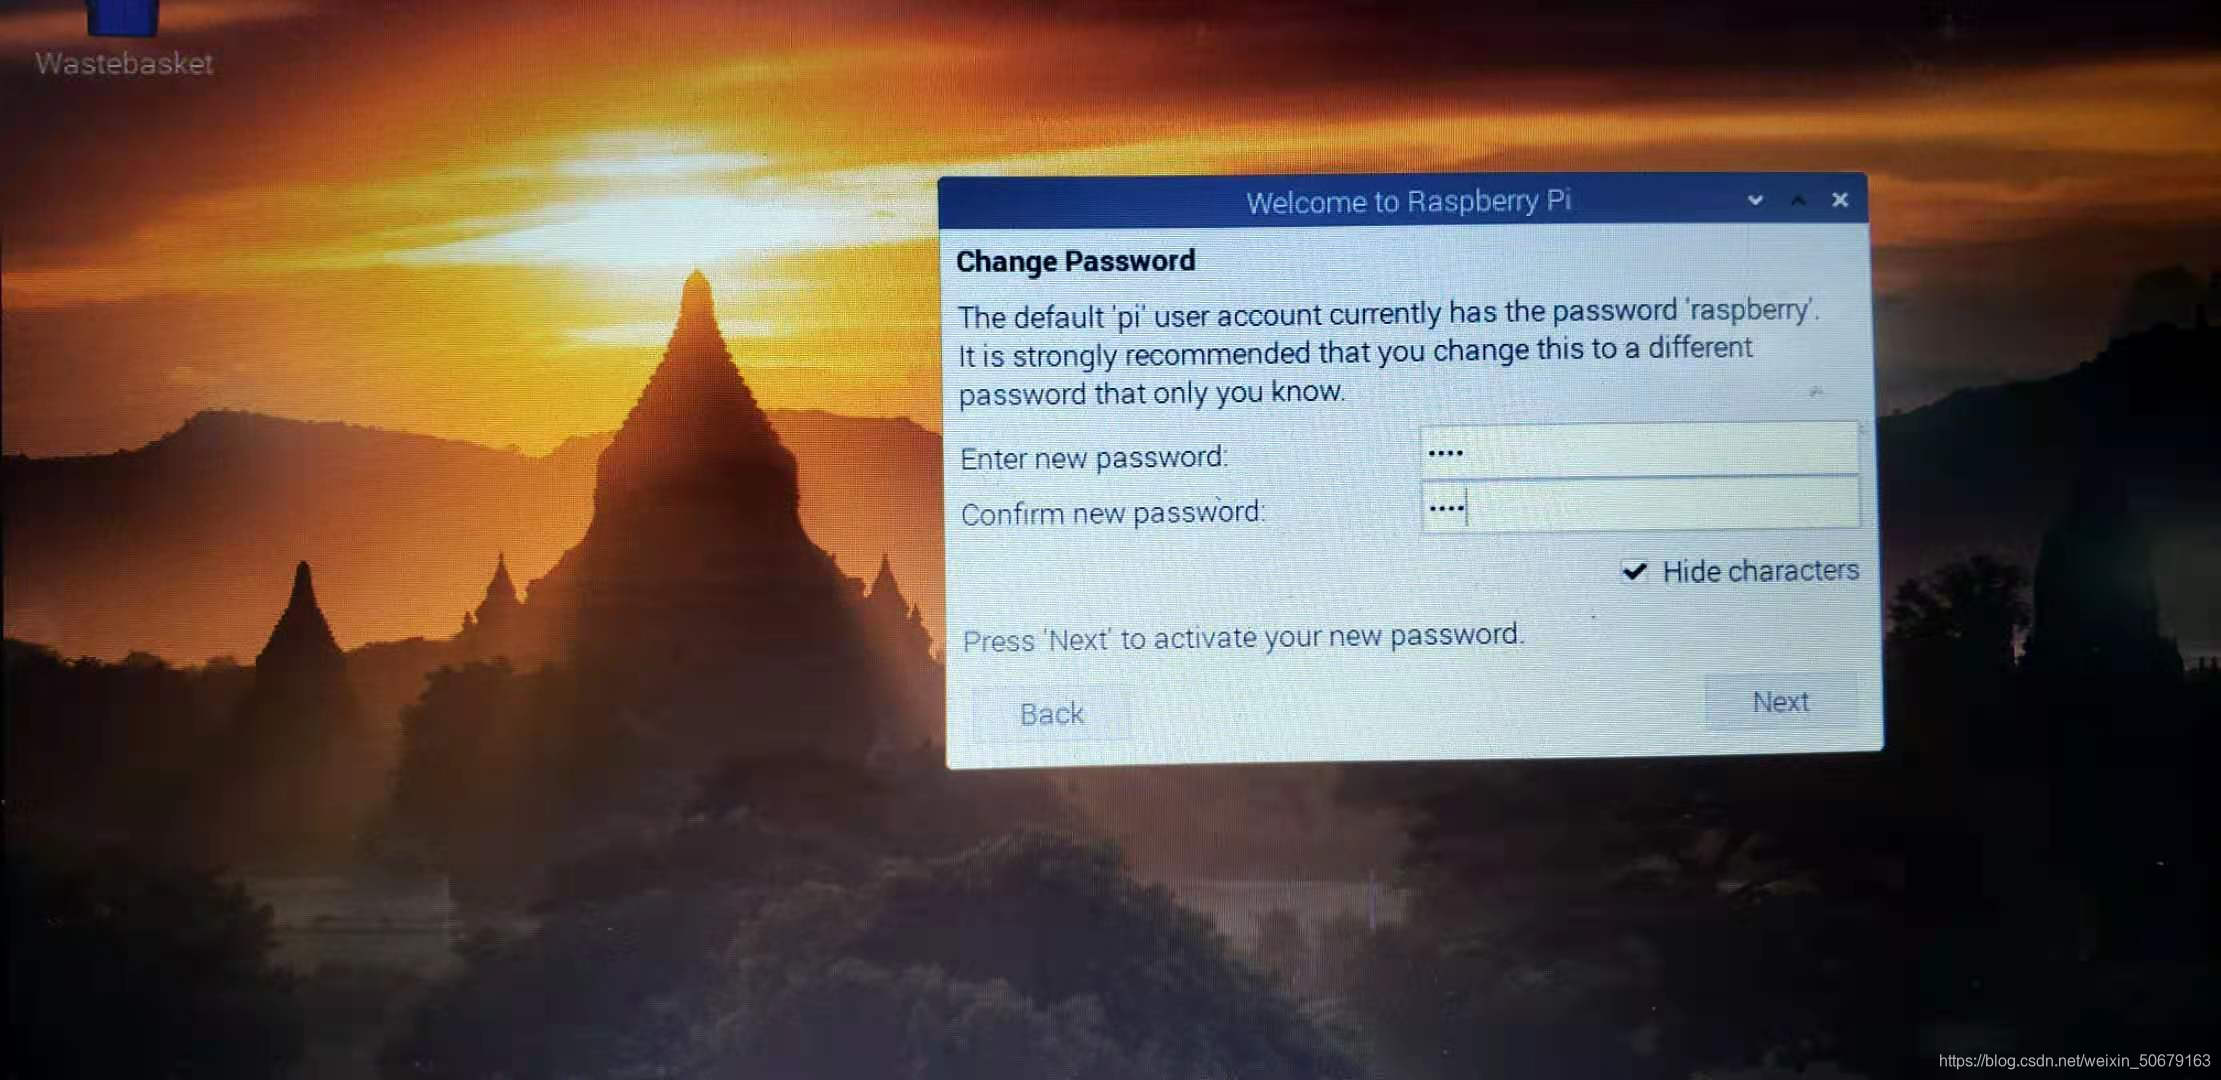
to set your Raspberry Pi password:
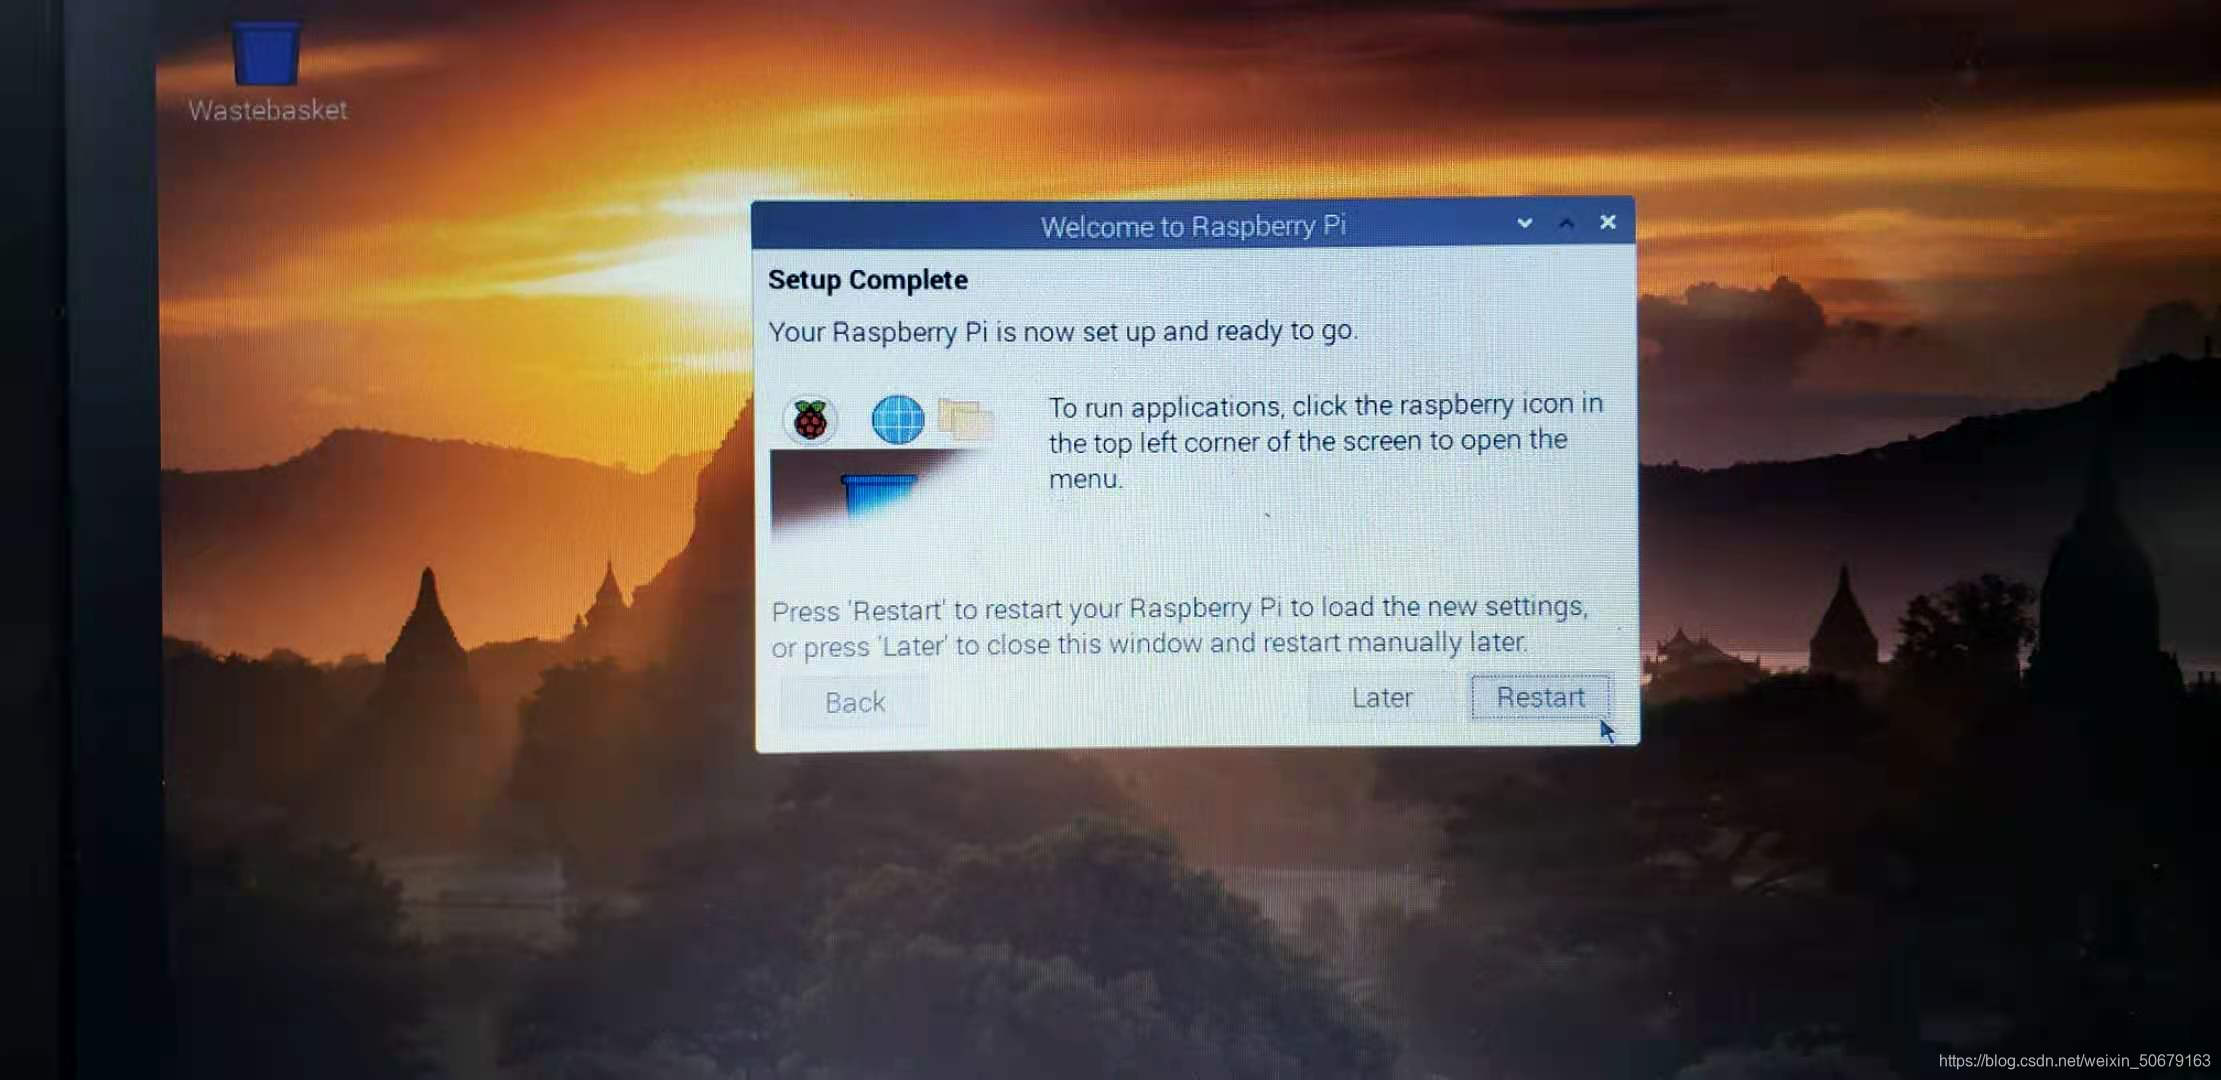
PS: (The default username of your Raspberry Pi here is: Pi ) After configuring your wifi connection, when you select the system update ( according to your own Select the wifi network i situation, because it is the system that has just been configured, we have not changed the source yet, it will be slower when updating the configuration, it is recommended to skip this item and configure it after changing the source ) Finally , Restart and restart Congratulations, you have successfully burned
5. VNC & SSH (Remote Desktop)
In daily use, we choose remote desktop more ( more convenient to operate with one monitor and have Ctrl+C&V operations for changing sources, configuring codes, etc. )
SSH
SSH can be remotely connected to the terminal of Raspberry Pi , which is convenient for terminal operation .
There are two ways to open
SSH
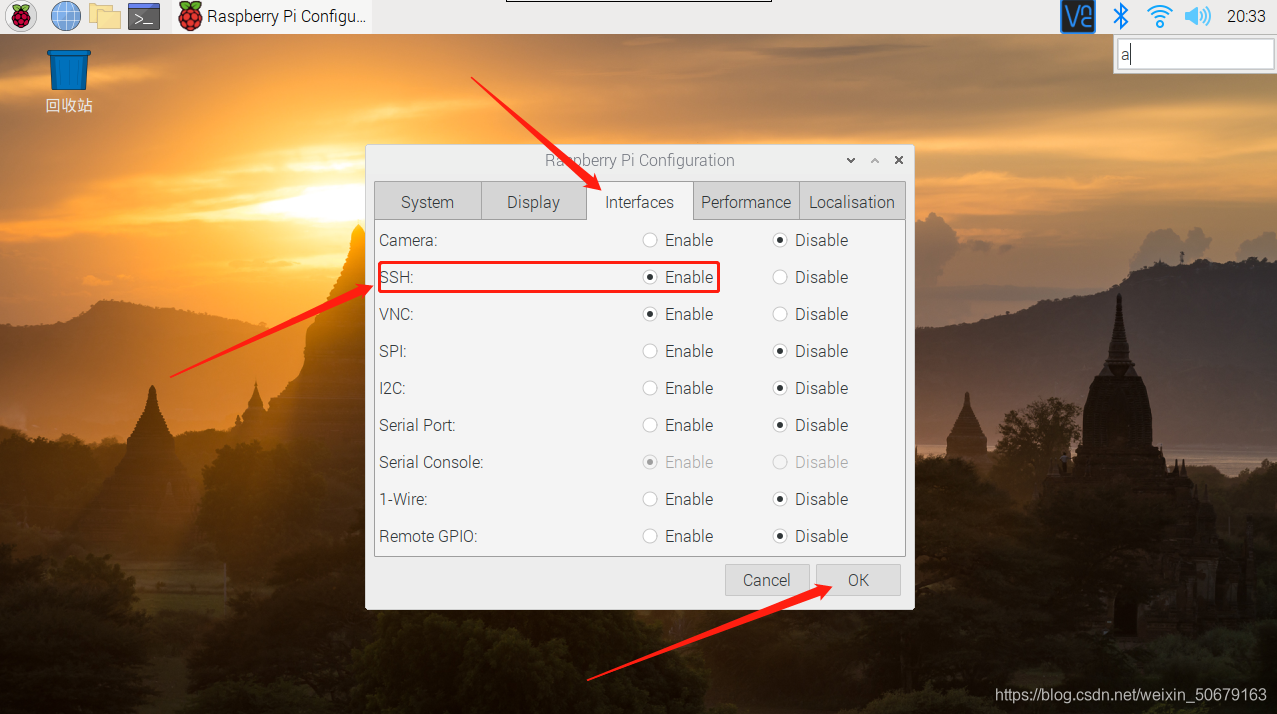
. Pie, SSH is successfully enabled 2. Enable SSH on the desktop Select interfaces - SSH ( Enable ) - OK on the desktop to save the SSH service is successfully enabled


Simple test SSH service
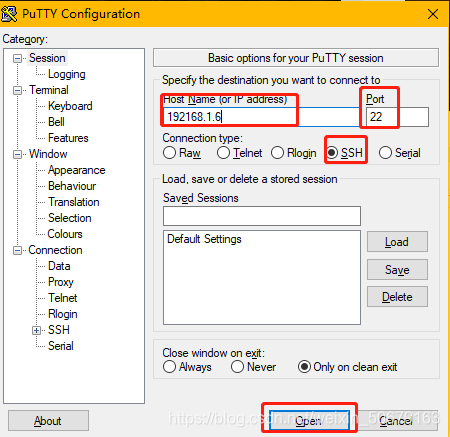
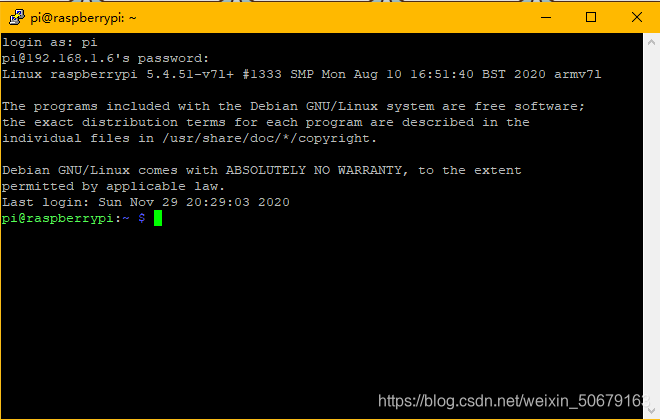
Successfully connected to the Raspberry Pi terminal
VNC ( strongly recommended )
VNC can be remotely connected to the Raspberry Pi desktop, which is more convenient for visual operation
eg: when compiling a large project, it takes a long time, and when operating the SSH terminal , it encounters network errors or Connection timeout, etc. will be given instantly
Download and prepare the VNC Viewer on the PC desktop for the

Raspberry Pi VNC service
. Enable the VNC service on the Raspberry Pi.
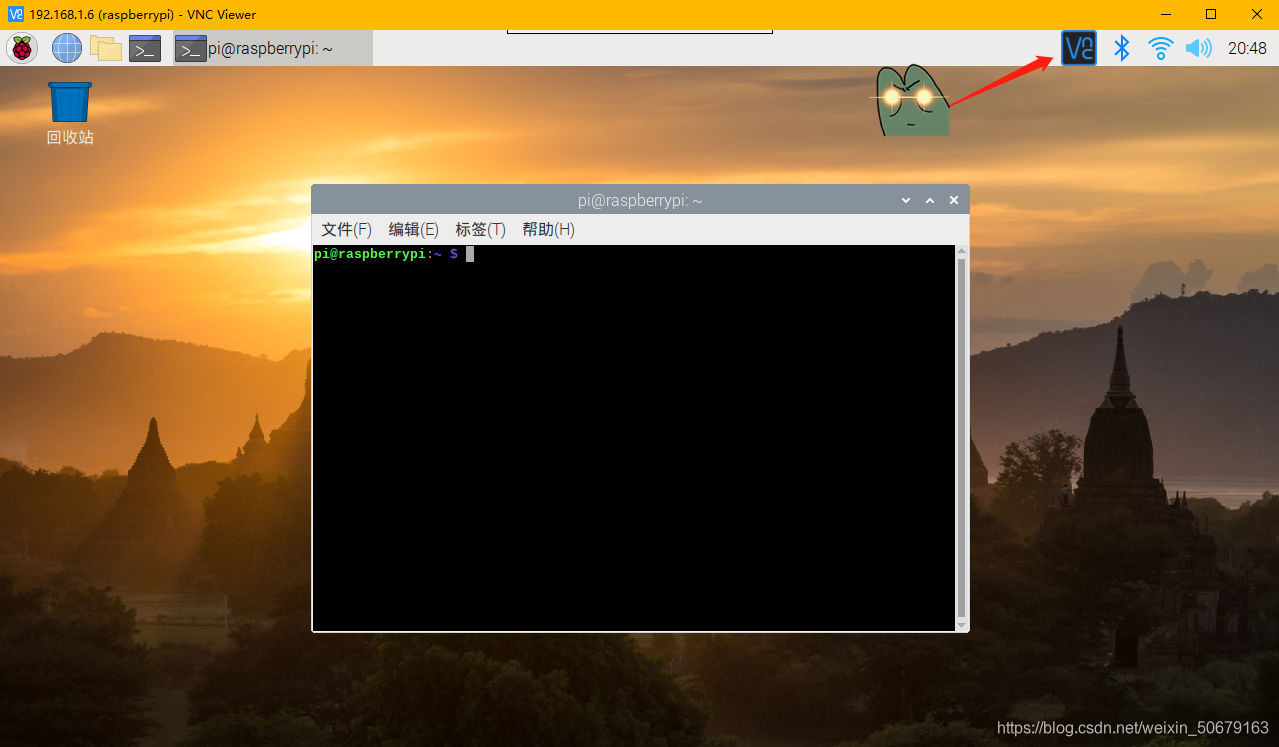
Similarly, after the SSH service
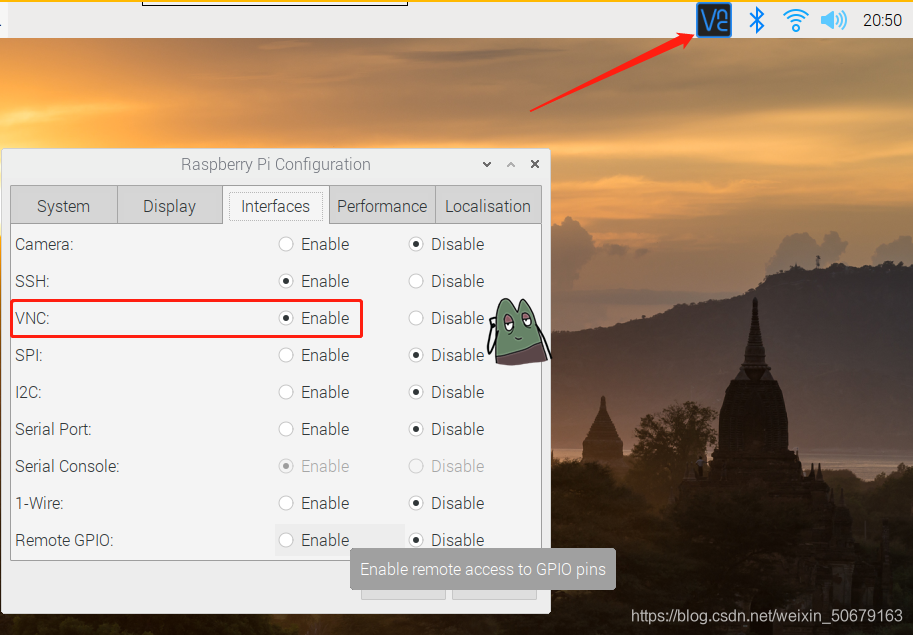
is turned on, there will be an icon for enabling VNC in the upper right corner, which means the activation is successful.
Now start VNC your Raspberry Pi
PS: the Raspberry Pi needs to be connected to the same network as the computer
Open VNC - File - New connection
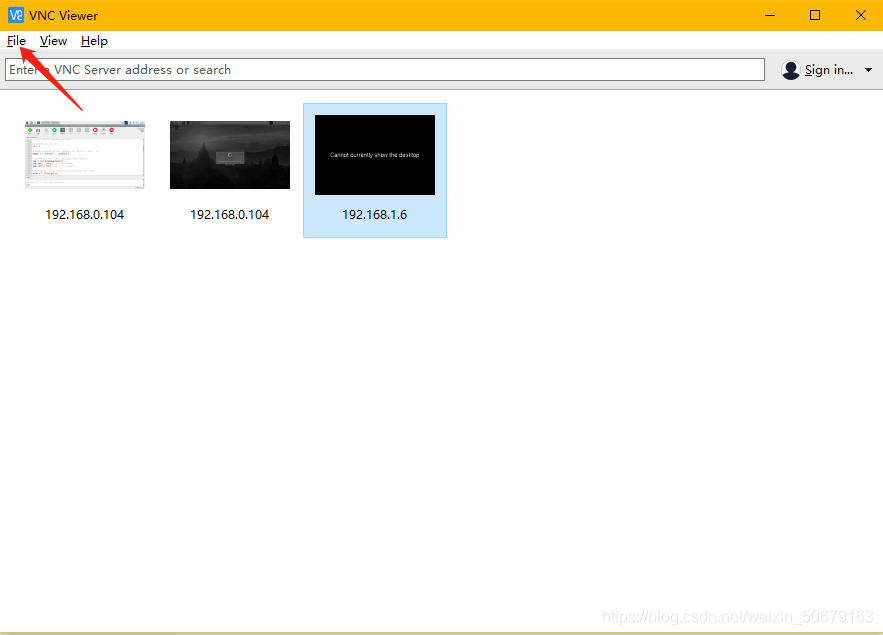
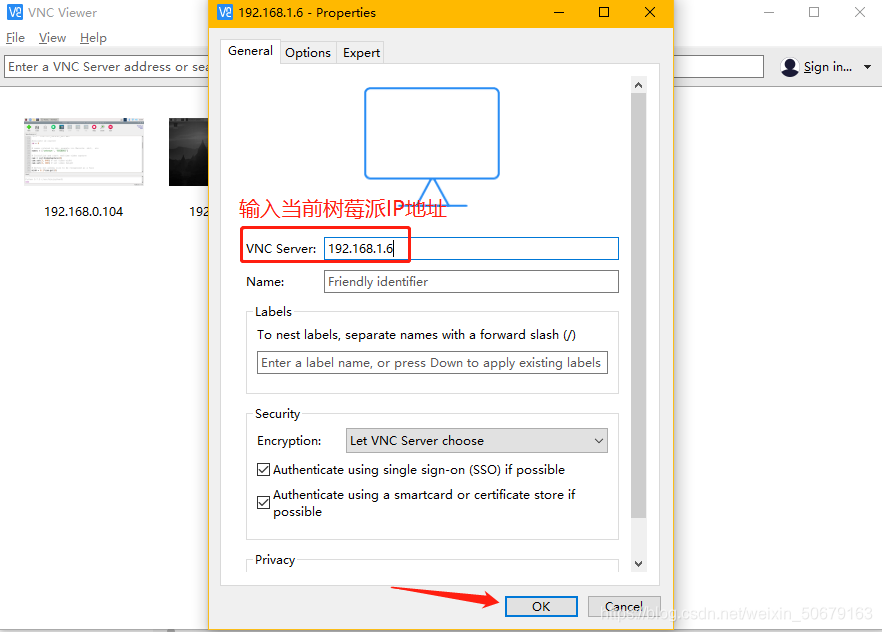
OK Enter
OK, your Raspberry Pi remote connection is successful
change source
The Raspberry Pi software source is based on the Debian Raspberry Pi software source . The server is located in Europe, and domestic access is extremely friendly . Therefore, it is necessary to change the source to a domestic website to facilitate the installation of updated systems and software in the future
. At present, there are many Raspberry Pi software source networks, and I recommend Tsinghua University here.
Before changing the source of the open source software mirror station
, you need to pay attention: first, check your own Raspberry Pi version , Raspberry Pi version , and Raspberry Pi version .
The important things are said three times! ! !
Type in the terminal
lsb_release -a
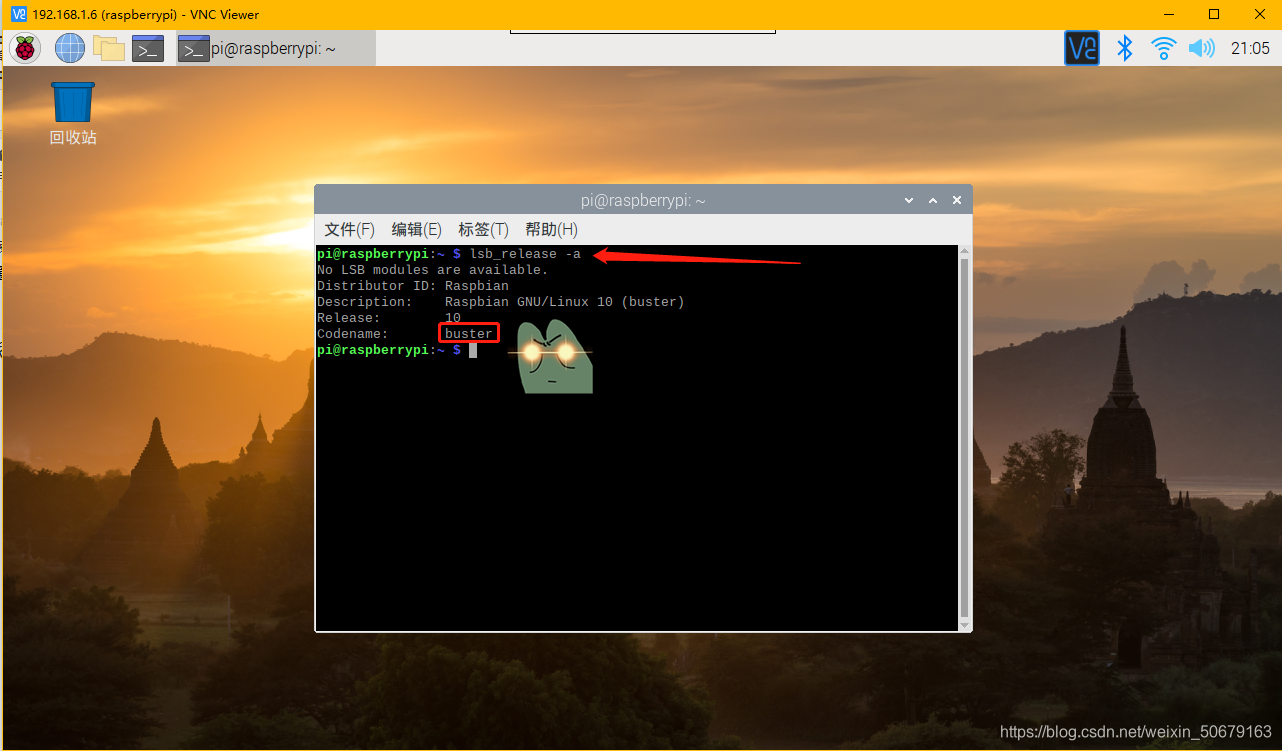
The NOOBS system this time is the Buster version
PS: after confirming the system version, select the corresponding source network, otherwise, an error will be prompted if the installation cannot be updated after the replacement
(the car was overturned here when the novice was a novice)
After determining the version,
open the configuration sources.list file ( you can back up the original sources.list file first ) and
enter in the terminal
sudo nano /etc/apt/sources.list
Use # to comment out the content of the original file, and replace Ctrl + O with the following content Save Ctrl + X to exit
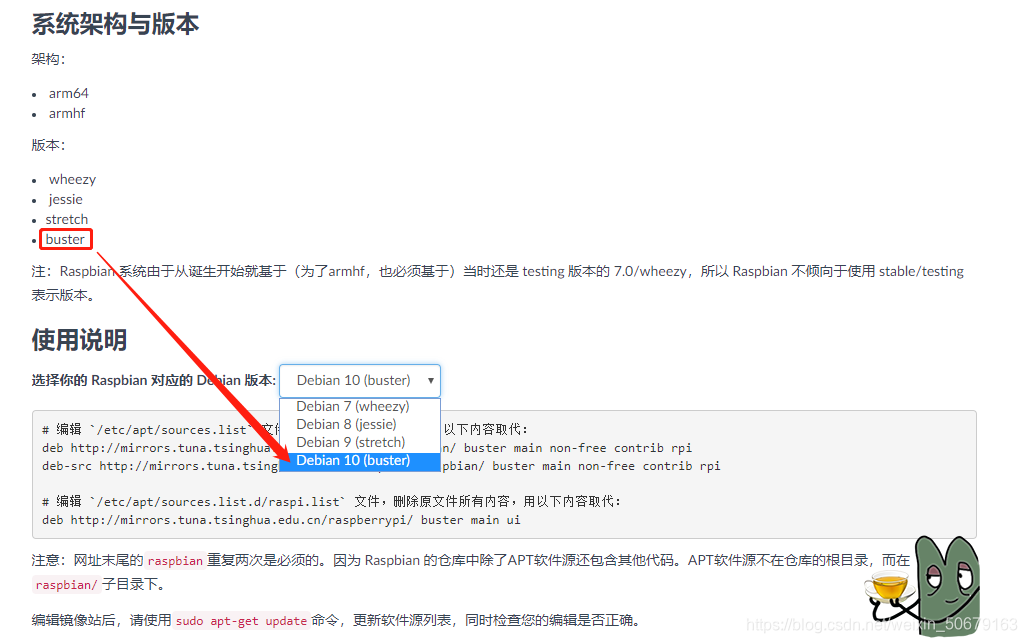
Take the software source cited by Tsinghua University as an example: (buster version)
Ps: Ctrl+Shift+V can be pasted in the terminal
# 编辑 sudo nano /etc/apt/sources.list 文件,删除或注释原文件所有内容,用以下内容取代:
deb http://mirrors.tuna.tsinghua.edu.cn/raspbian/raspbian/ buster main non-free contrib rpi
deb-src http://mirrors.tuna.tsinghua.edu.cn/raspbian/raspbian/ buster main non-free contrib rpi

# 编辑 sudo nano /etc/apt/sources.list.d/raspi.list 文件,删除或注释原文件所有内容,用以下内容取代:
deb http://mirrors.tuna.tsinghua.edu.cn/raspberrypi/ buster main ui

PS: Other version system:
wheezy version
# 编辑 `sudo nano /etc/apt/sources.list` 文件,删除或注释原文件所有内容,用以下内容取代:
deb http://mirrors.tuna.tsinghua.edu.cn/raspbian/raspbian/ wheezy main non-free contrib rpi
deb-src http://mirrors.tuna.tsinghua.edu.cn/raspbian/raspbian/ wheezy main non-free contrib rpi

# 编辑 `sudo nano /etc/apt/sources.list.d/raspi.list` 文件,删除或注释原文件所有内容,用以下内容取代:
deb http://mirrors.tuna.tsinghua.edu.cn/raspberrypi/ wheezy main ui
jessie version:
# 编辑 `sudo nano /etc/apt/sources.list` 文件,删除或注释原文件所有内容,用以下内容取代:
deb http://mirrors.tuna.tsinghua.edu.cn/raspbian/raspbian/ jessie main non-free contrib rpi
deb-src http://mirrors.tuna.tsinghua.edu.cn/raspbian/raspbian/ jessie main non-free contrib rpi

# 编辑 `sudo nano /etc/apt/sources.list.d/raspi.list` 文件,删除或注释原文件所有内容,用以下内容取代:
deb http://mirrors.tuna.tsinghua.edu.cn/raspberrypi/ jessie main ui
stretch version:
# 编辑 `sudo nano /etc/apt/sources.list` 文件,删除或注释原文件所有内容,用以下内容取代:
deb http://mirrors.tuna.tsinghua.edu.cn/raspbian/raspbian/ stretch main non-free contrib rpi
deb-src http://mirrors.tuna.tsinghua.edu.cn/raspbian/raspbian/ stretch main non-free contrib rpi

# 编辑 `suao nano /etc/apt/sources.list.d/raspi.list` 文件,删除或注释原文件所有内容,用以下内容取代:
deb http://mirrors.tuna.tsinghua.edu.cn/raspberrypi/ stretch main ui
Update the software source list when finished
sudo apt-get update
sudo apt-get upgrade #此项更新安装包

Tips Supplement
To transfer files on the Raspberry Pi, it is not enough to drag and drop VNC directly, so we use this software FileZila

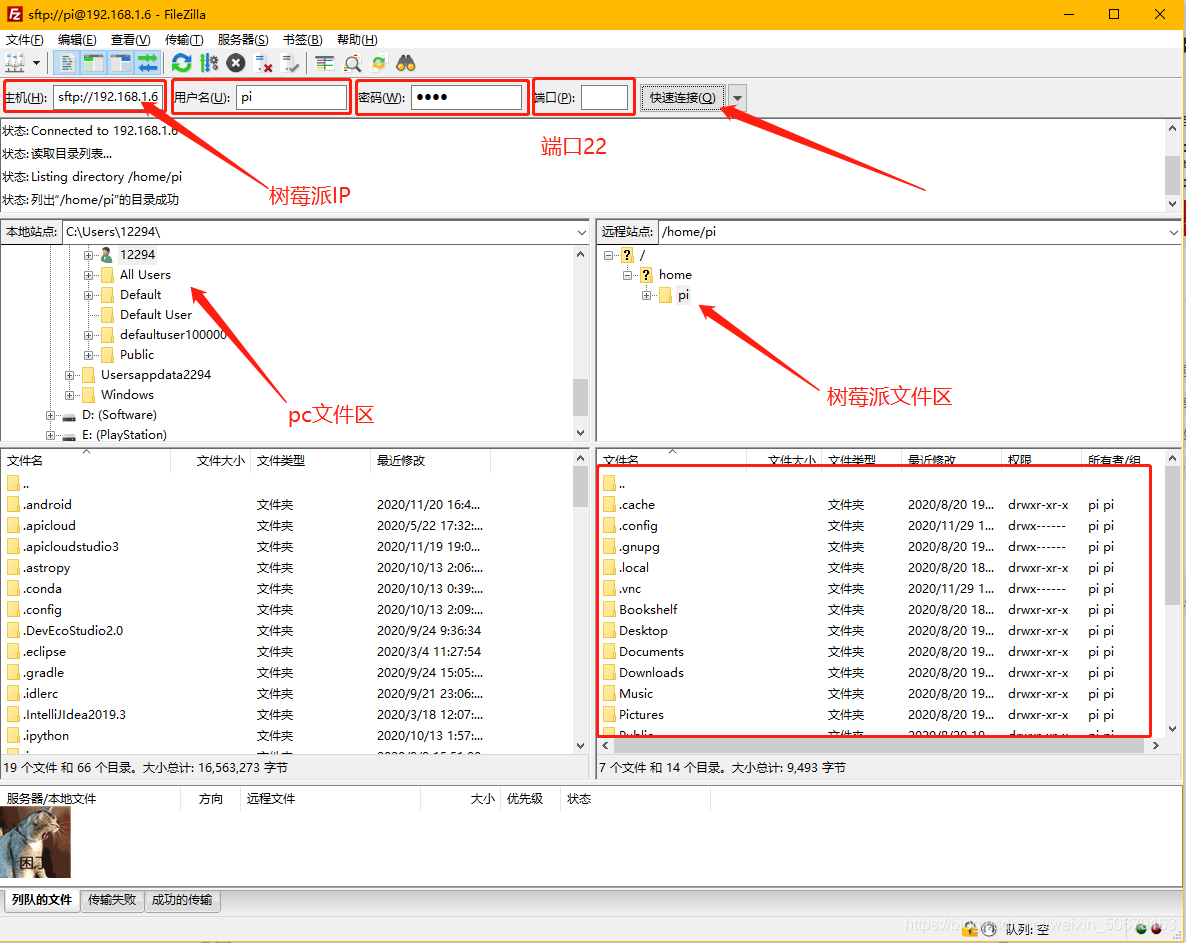

, which can transfer large files and change the wallpaper .
So far, the Raspberry Pi 4 Painless Installation System (NOOBS) ends here. , If you need help or resources, you can comment and send a private message. I wish everyone a happy study! ! !
