WSL: It is the Windows Subsystem for Linux, which is the Linux subsystem under Windows. Newer versions of Win10 can be installed. Moreover, WSL shares a file system with the main Windows system, which makes it very convenient to copy files.
1 Linux subsystem WSL under Windows
1.1 Install WSL
(1) Enabling or disabling Windows functions
First search for and open "Enable or Disable Windows Functions" in the search bar, and check the "Windows Subsystem for Linux" item. Only when this setting is enabled can WSL be installed normally.
(2) Install WSL
下载地址列表【https://www.jianshu.com/p/8a62c020a553】。
如下下载ubuntu18.04。
https://wslstorestorage.blob.core.windows.net/wslblob/Ubuntu_1804.2019.522.0_x64.appx
如下下载ubuntu18.04 arm。
https://wsldownload.azureedge.net/Ubuntu_1804.2018.726.0_ARM.appx
Or search and install through the microsoft store

(3) After the download is complete, you can directly double-click to
install it. After the installation is complete, you can find the Linux distribution you installed in the start menu. Here, every Linux distribution is a windows application.
Set the user name and password phone/bigdata.
$ sudo passwd root to change the password bigdata.
$ lsb_release -c【Codename:       focal】
$ uname -a
Linux 2SBT3Z2 4.4.0-18362-Microsoft #1049-Microsoft Thu Aug 14 12:01:00 PST 2020 x86_64 x86_64 x86_64 GNU/Linux
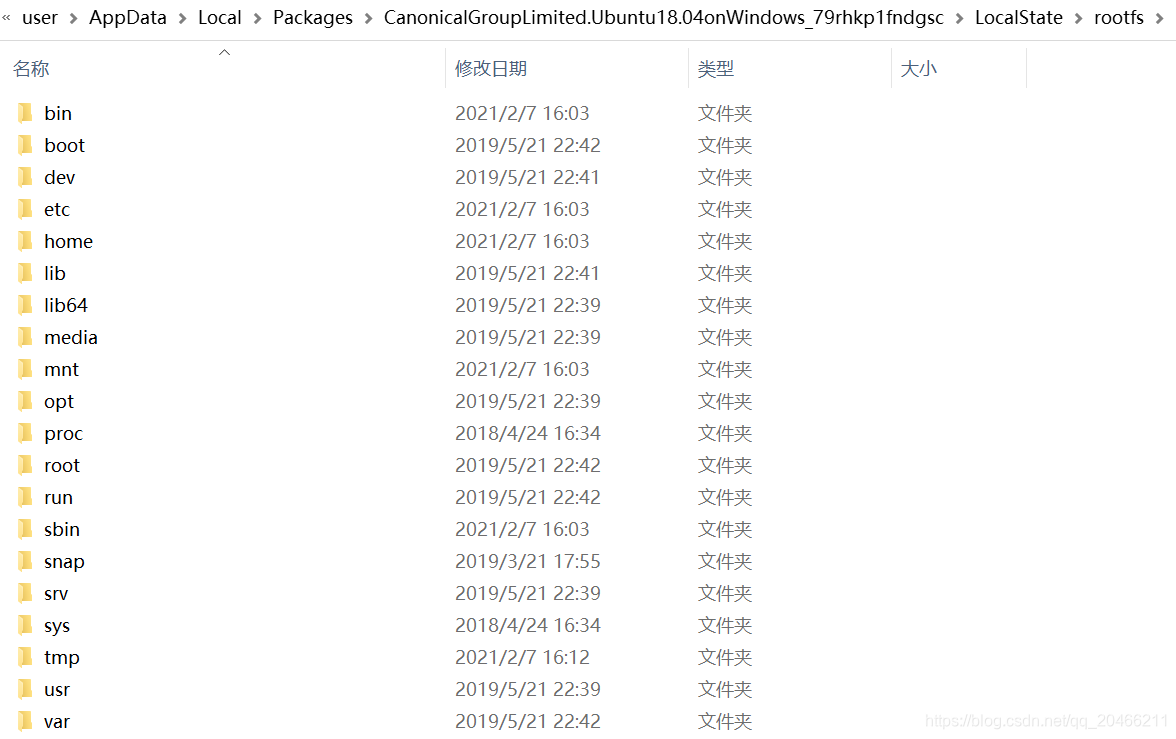
View the WSL file location under Windows
C:\Users\user\AppData\Local\Packages\CanonicalGroupLimited.Ubuntu20.04onWindows_79rhkp1fndgsc\LocalState\rootfs
 If you want to view other partitions on Linux, WSL will mount other drive letters under /mnt.
1.2 Update source
(4) Update source
$sudo vim /etc/apt/sources.list
deb http://mirrors.aliyun.com/ubuntu/ focal main restricted universe multiverse
deb-src http://mirrors.aliyun.com/ubuntu/ focal main restricted universe multiverse
deb http://mirrors.aliyun.com/ubuntu/ focal-security main restricted universe multiverse
deb-src http://mirrors.aliyun.com/ubuntu/ focal-security main restricted universe multiverse
deb http://mirrors.aliyun.com/ubuntu/ focal-updates main restricted universe multiverse
deb-src http://mirrors.aliyun.com/ubuntu/ focal-updates main restricted universe multiverse
deb http://mirrors.aliyun.com/ubuntu/ focal-proposed main restricted universe multiverse
deb-src http://mirrors.aliyun.com/ubuntu/ focal-proposed main restricted universe multiverse
deb http://mirrors.aliyun.com/ubuntu/ focal-backports main restricted universe multiverse
deb-src http://mirrors.aliyun.com/ubuntu/ focal-backports main restricted universe multiverse
18.04 bionic
deb http://mirrors.aliyun.com/ubuntu/ bionic main restricted universe multiverse
deb-src http://mirrors.aliyun.com/ubuntu/ bionic main restricted universe multiverse
deb http://mirrors.aliyun.com/ubuntu/ bionic-security main restricted universe multiverse
deb-src http://mirrors.aliyun.com/ubuntu/ bionic-security main restricted universe multiverse
deb http://mirrors.aliyun.com/ubuntu/ bionic-updates main restricted universe multiverse
deb-src http://mirrors.aliyun.com/ubuntu/ bionic-updates main restricted universe multiverse
deb http://mirrors.aliyun.com/ubuntu/ bionic-proposed main restricted universe multiverse
deb-src http://mirrors.aliyun.com/ubuntu/ bionic-proposed main restricted universe multiverse
deb http://mirrors.aliyun.com/ubuntu/ bionic-backports main restricted universe multiverse
deb-src http://mirrors.aliyun.com/ubuntu/ bionic-backports main restricted universe multiverse
python3【3.6.7】
Update and upgrade
$ sudo apt-get update
$ sudo apt-get upgrade
2 Open the root user login box
$ Sudo passwd root to change the root user password for BigData
#gedit /usr/share/lightdm/lightdm.conf.d/50-ubuntu.conf
the User-the session = Ubuntu
the Greeter-Show-Manual-the Login = to true
the allow-the Guest = false
written off Then you can see that the login box has been displayed, you can enter the user name
and close the guest user.

Now log in with the root user on the graphical interface will display the above error, make the following changes:
#gedit /root/.profile
Find mesg n and replace it with tty -s && mesg n and restart