Article Directory
- Preface
- 1. The basic concepts of image brightness and contrast:
- 2. Image transformation in RGB three-channel color space:
- Three, get the image brightness value
- to sum up
Preface
Image brightness and contrast adjustment
1. The basic concepts of image brightness and contrast:
1. Image brightness:
Image brightness is the brightness of the picture (gray-scale image, it is related to the gray value, the higher the gray value, the brighter the image), the unit is candela per square meter (cd/m2) or nits.
The image brightness is a continuum of perception from the white surface to the black surface, which is determined by the reflection coefficient. The brightness focuses on the object and focuses on the "reflection".
For example: the grayscale image is single-channel, the grayscale value is between [0, 255], the closer to '0', the darker the brightness, and the closer to '255', the brighter the brightness.
2. Image contrast:
Image contrast is the measurement of the different brightness levels between the brightest white and the darkest black in the bright and dark areas of an image , that is , the size of the grayscale contrast of an image .
Analysis: The larger the difference range, the greater the contrast, and the smaller the difference range, the smaller the contrast. A good contrast ratio of 120:1 can easily display vivid and rich colors. When the contrast ratio is as high as 300:1, it can support The color of each level.
2. Image transformation in RGB three-channel color space:
1. The linear transformation formula is as follows:

Formula analysis: the
coefficient α is used to adjust the contrast of the dot; the coefficient β is used to adjust the brightness of the dot;
1) When α=1 and β=0, there is no change in the image;
2) When α<1 and β=0, the contrast of the image decreases and the image becomes darker;
3) When α>1, β=0, the contrast of the image increases, and the image becomes vivid and rich;
4) β floats up and down, the brightness of the image changes without changing the contrast of the image;
5) The value of α>0, because opencv is for BGR images, there is no negative;

2. Introduction to operation:
Introduction to field operation: Calculate new pixel values from the neighboring pixels at the current position. When the neighborhood contains the upper and lower rows of the image, it is necessary to scan several rows of the image at the same time.
Point operation introduction: Operate each pixel of the image.
3. Image brightness adjustment:
Code block:
#include <opencv2/opencv.hpp>
#include <iostream>
using namespace std;
using namespace cv;
int main() {
Mat src, dst;
src = imread("D:\\Myfile\\素材照片\\opencv素材照片\\8.jpg");
if (!src.data) {
cout << "could not load image..." << endl;
return 0;
}
char input_win[] = "input_image";
//用来命名显示窗口的名称
namedWindow(input_win, WINDOW_AUTOSIZE);
imshow(input_win, src);
//用at函数对像素点进行操作,改变亮度
int height = src.rows;
int width = src.cols;
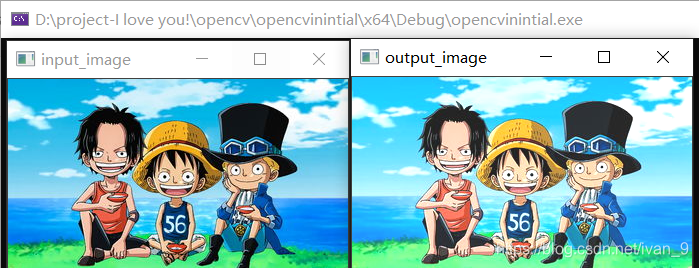
float beta = 30;
dst = Mat::zeros(src.size(), src.type());
for (int row = 0; row < height; row++) {
for (int col = 0; col < width; col++) {
if (src.channels() == 3) {
float b = src.at<Vec3b>(row, col)[0];
float g = src.at<Vec3b>(row, col)[1];
float r = src.at<Vec3b>(row, col)[2];
dst.at<Vec3b>(row, col)[0] = saturate_cast<uchar>(b + beta);
dst.at<Vec3b>(row, col)[1] = saturate_cast<uchar>(g + beta);
dst.at<Vec3b>(row, col)[2] = saturate_cast<uchar>(r + beta);
}
else if (src.channels() == 1) {
float v_gray = src.at<uchar>(row, col);
dst.at<uchar>(row, col) = saturate_cast<uchar>(v_gray + beta);
}
}
}
namedWindow(input_win, WINDOW_AUTOSIZE);
imshow("output_image", dst);
waitKey(0);
return 0;
}
operation result:
4. Image contrast adjustment:
Code block:
#include <opencv2/opencv.hpp>
#include <iostream>
using namespace std;
using namespace cv;
int main() {
Mat src, dst;
src = imread("D:\\Myfile\\素材照片\\opencv素材照片\\8.jpg");
if (!src.data) {
cout << "could not load image..." << endl;
return 0;
}
char input_win[] = "input_image";
//用来命名显示窗口的名称
namedWindow(input_win, WINDOW_AUTOSIZE);
imshow(input_win, src);
//用at函数对像素点进行操作,改变对比度
int height = src.rows;
int width = src.cols;
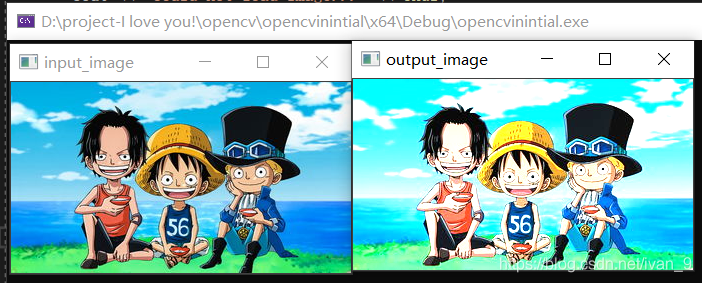
float alpha = 1.5;
dst = Mat::zeros(src.size(), src.type());
for (int row = 0; row < height; row++) {
for (int col = 0; col < width; col++) {
if (src.channels() == 3) {
float b = src.at<Vec3b>(row, col)[0];
float g = src.at<Vec3b>(row, col)[1];
float r = src.at<Vec3b>(row, col)[2];
dst.at<Vec3b>(row, col)[0] = saturate_cast<uchar>(b * alpha);
dst.at<Vec3b>(row, col)[1] = saturate_cast<uchar>(g * alpha);
dst.at<Vec3b>(row, col)[2] = saturate_cast<uchar>(r * alpha);
}
else if (src.channels() == 1) {
float v_gray = src.at<uchar>(row, col);
dst.at<uchar>(row, col) = saturate_cast<uchar>(v_gray * alpha);
}
}
}
namedWindow(input_win, WINDOW_AUTOSIZE);
imshow("output_image", dst);
waitKey(0);
return 0;
}
operation result:
5. The method of converting a three-channel image into a single-channel image:
1) Through the imread method, add the parameter IMREAD_GRAYSCALE at the back
src = imread("D:\\Myfile\\素材照片\\opencv素材照片\\8.jpg", IMREAD_GRAYSCALE);
2) Through the cvtColor method, directly convert the color space to a grayscale image, similar to creating a new image
cvtColor(src, src, COLOR_BGR2GRAY);
6. Simultaneous adjustment of image brightness and contrast:
Code block (three-channel and single-channel test codes are as follows):
#include <opencv2/opencv.hpp>
#include <iostream>
using namespace std;
using namespace cv;
int main() {
Mat src, dst;
src = imread("D:\\Myfile\\素材照片\\opencv素材照片\\8.jpg");
//src = imread("D:\\Myfile\\素材照片\\opencv素材照片\\8.jpg", IMREAD_GRAYSCALE);
//通过imread的读取方式,直接读取单通道的图像
if (!src.data) {
cout << "could not load image..." << endl;
return 0;
}
//调整为灰度图像进行测试
//cvtColor(src, src, COLOR_BGR2GRAY);
char input_win[] = "input_image";
//用来命名显示窗口的名称
namedWindow(input_win, WINDOW_AUTOSIZE);
imshow(input_win, src);
//用at函数对像素点进行操作,改变对比度和亮度
int height = src.rows;
int width = src.cols;
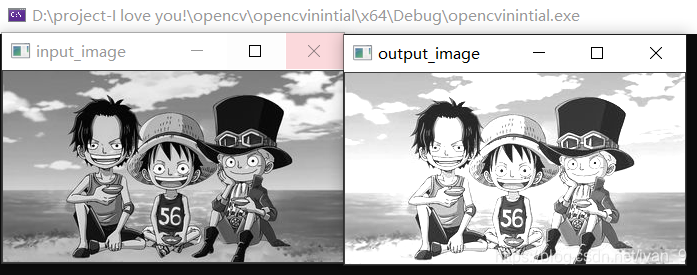
float alpha = 1.3;
float beta = 30;
dst = Mat::zeros(src.size(), src.type());
for (int row = 0; row < height; row++) {
for (int col = 0; col < width; col++) {
if (src.channels() == 3) {
float b = src.at<Vec3b>(row, col)[0];
float g = src.at<Vec3b>(row, col)[1];
float r = src.at<Vec3b>(row, col)[2];
dst.at<Vec3b>(row, col)[0] = saturate_cast<uchar>(b * alpha + beta);
dst.at<Vec3b>(row, col)[1] = saturate_cast<uchar>(g * alpha + beta);
dst.at<Vec3b>(row, col)[2] = saturate_cast<uchar>(r * alpha + beta);
}
else if (src.channels() == 1) {
float v_gray = src.at<uchar>(row, col);
dst.at<uchar>(row, col) = saturate_cast<uchar>(v_gray * alpha + beta);
}
}
}
//转化为32f的,让调整的精度更高!!!!!!!!!!!!!!!!!!!
//int height = src.rows;
//int width = src.cols;
//float alpha = 1.3;
//float beta = 30;
//Mat src_converto_32f; //转化32f
//src.convertTo(src_converto_32f, CV_32F);
//dst = Mat::zeros(src.size(), src.type());
//for (int row = 0; row < height; row++) {
// for (int col = 0; col < width; col++) {
// if (src.channels() == 3) {
// float b = src_converto_32f.at<Vec3f>(row, col)[0];
// float g = src_converto_32f.at<Vec3f>(row, col)[1];
// float r = src_converto_32f.at<Vec3f>(row, col)[2];
// //增加了精度
// dst.at<Vec3b>(row, col)[0] = saturate_cast<uchar>(b * alpha + beta);
// dst.at<Vec3b>(row, col)[1] = saturate_cast<uchar>(g * alpha + beta);
// dst.at<Vec3b>(row, col)[2] = saturate_cast<uchar>(r * alpha + beta);
// }
// else if (src.channels() == 1) {
// float v_gray = src.at<uchar>(row, col);
// dst.at<uchar>(row, col) = saturate_cast<uchar>(v_gray * alpha + beta);
// }
// }
//}
namedWindow(input_win, WINDOW_AUTOSIZE);
imshow("output_image", dst);
waitKey(0);
return 0;
}
operation result:

Three, get the image brightness value
Three-channel brightness calculation formula:
brightness=R*0.299+G*0.587+B*0.114
Code block:
//计算图像亮度
#include <opencv2/opencv.hpp>
#include <iostream>
using namespace std;
using namespace cv;
int main() {
Mat src;
src = imread("D:\\Myfile\\素材照片\\opencv素材照片\\8.jpg", IMREAD_GRAYSCALE);
//src
if (!src.data) {
cout << "could not load image..." << endl;
return 0;
}
namedWindow("input_image", WINDOW_AUTOSIZE);
imshow("input_image", src);
int height = src.rows;
int channel = src.channels();
int width = src.cols;
if (channel == 3) {
int length = height * width * channel;
int sumb = 0, sumg = 0, sumr = 0;
for (int row = 0; row < height ; row++) {
for (int col = 0; col < width; col++) {
int b = src.at<Vec3b>(row, col)[0];
int g = src.at<Vec3b>(row, col)[1];
int r = src.at<Vec3b>(row, col)[2];
sumb += b;
sumg += g;
sumr += r;
}
}
//三通道计算公式:Y = 0.299 * R + 0.587 * G + 0.114 * B
cout << "三通道图像的平均亮度是:" << sumr * 0.299 + 0.587 * sumg + 0.114 * sumb << endl;
}
else {
int length = height * width;
int sum = 0;
for (int row = 0; row < height; row++) {
for (int col = 0; col < width; col++) {
int v_gray = src.at<uchar>(row, col);
sum += v_gray;
}
}
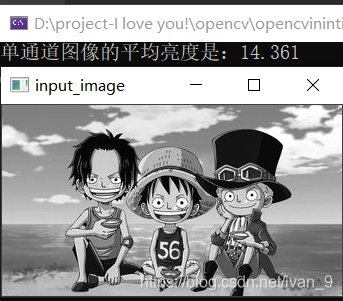
cout << "单通道图像的平均亮度是:" << sum * 0.1 / length << endl;
}
waitKey(0);
return 0;
}
operation result:

to sum up
The brightness and contrast of the image are adjusted. The brightness and contrast of the image are not independent individuals. They influence and depend on each other.
Please correct me if there are any errors!