Prepare in advance
Environment: Linux system
Version: V1.6.2
Download: https://www.consul.io/downloads.html
Configuration file: config-acl.json
{
    "datacenter":"tencent-datacenter",
    "data_dir":"/usr/local/consul-1.6.2/data",
    "log_file":"/usr/local/consul-1.6.2/log/",
    "log_level":"INFO",
    "bind_addr":"0.0.0.0",
    "client_addr":"0.0.0.0",
    "node_name":"tencent-node",
    "ui":true,
    "bootstrap_expect":1,
    "server":true,
    "acl":{
        "enabled":true,
        "default_policy":"deny",
        "enable_token_persistence":true,
        "enable_key_list_policy":true
    }
}
- acl.enabled: enable acl
- acl.default_policy: policy, deny-deny by default; allow-allow by default
- acl.enable_token_persistence: Allow persistent token
- acl. enable_key_list_policy: allow recursive operation of KV
Start Consul:./consul agent -config-file=config-acl.json
ACL usage scenarios
- Agent's access control
- Service registration/discovery access control
- KV access control
ACL use steps
One, initialize Consul ACL
bash: The consul acl bootstrap
generated information is as follows (save the information):
AccessorID:       xxxx-xxxx-xxxx-xxxx-xxxx
SecretID:         xxxx-xxxx-xxxx-xxxx-xxxx
Description:      Bootstrap Token (Global Management)
Local:            false
Create Time:      2019-12-23 12:06:53.799083966 +0800 CST
Policies:
   00000000-0000-0000-0000-000000000001 - global-management
The AccessorID and SecretID generated by executing this command have the highest authority.
Two, configuration rules
Browser access: localhost:8500Enter the SecretID above in the ACL tab, and then you will see the following page.
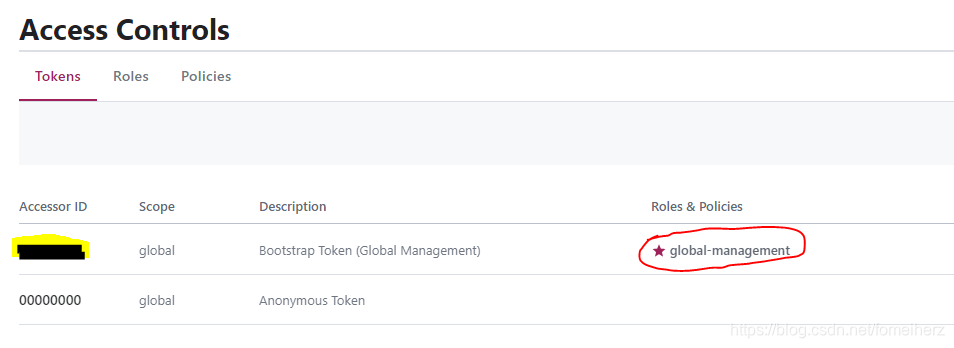
Default Policy: global-management, this is the SecretID with the highest authority, equal to the super administrator.
AccessorID: Access ID. There is only one token. Click on the record to enter and you will see
Scope:
Roles & Policies: Have permissions or policies, AccessorID controls access permissions by associating different roles and policies
Here are a few policy cases:
1) Service policy
service_prefix "" {


  policy = "write"
}
The above strategy means that all services can be written.
Specific strategy reference: service-rules
2) KV strategy
key_prefix "" {


 policy = "list"
}
key_prefix "" {


 policy = "write"
}
key_prefix "config/" {


 policy = "read"
}
The first one: indicates that all KVs can perform recursive list operations. This option "enable_key_list_policy":truecan only take effect after the configuration file is specified .
The second one: all KVs can perform write operations.
The third: the key starting with config/ can be read.
Specific strategy reference: key-value-rules