This is an article introducing the ideas and source code of the license plate extraction project based on OpenCV and Python. This article involves some artificial intelligence and image recognition technologies. Specifically, it involves the research on license plate number recognition (license plate extraction and character segmentation), online The solutions found are tensorflow and opencv. Opencv is also a relatively mature solution. Let's start with the simple ones. The following is the part about using opencv to extract license plate numbers.
1 License plate extraction
1.1 Implementation ideas
- Read color pictures
- Convert to grayscale
- Gaussian Blur
- Sobel operator for edge detection
- Binary image
- Close operation (corrosion and expansion)
- Loop to find all contours
- Determine the license plate area
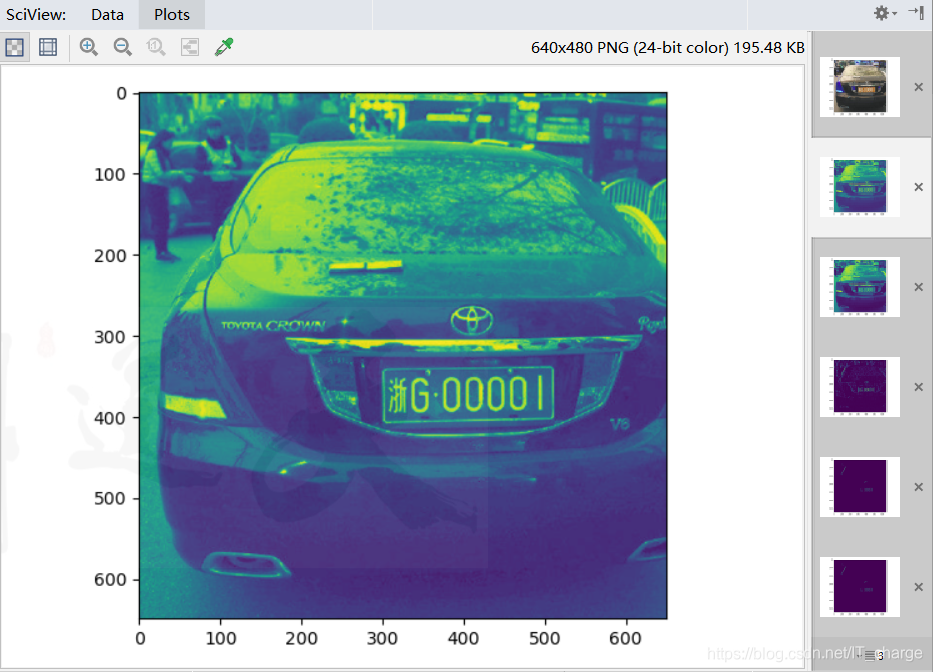
1.2 Original image

1.3 Detailed code
1.3.1 Import package library
import cv2 as cv
import matplotlib.pyplot as plt
1.3.2 Read color pictures
cv.imread("E:/car.png")

1.3.3 Convert to grayscale
cv.cvtColor(img, cv.COLOR_BGR2GRAY)
1.3.4 Gaussian Blur
Through Gaussian blur, part of the interference can be removed, making the recognition more accurate.
cv.GaussianBlur(img1,(5,5),10)

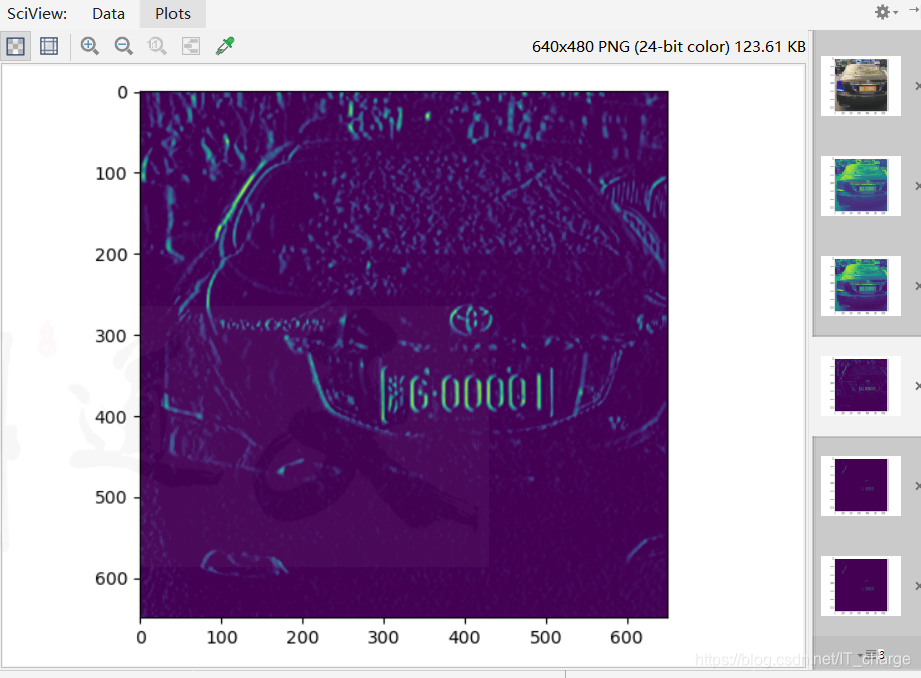
1.3.5 Edge detection with Sobel operator
Facilitate the extraction of contours
cv.Sobel(img2,cv.CV_8U,1,0,ksize=1)
cv.Canny(img3,250,100)
1.3.6 Perform binarization processing
Set the gray value of the pixels on the image to 0 or 255, and the image appears only black and white.
cv.threshold(img4,0,255,cv.THRESH_BINARY)
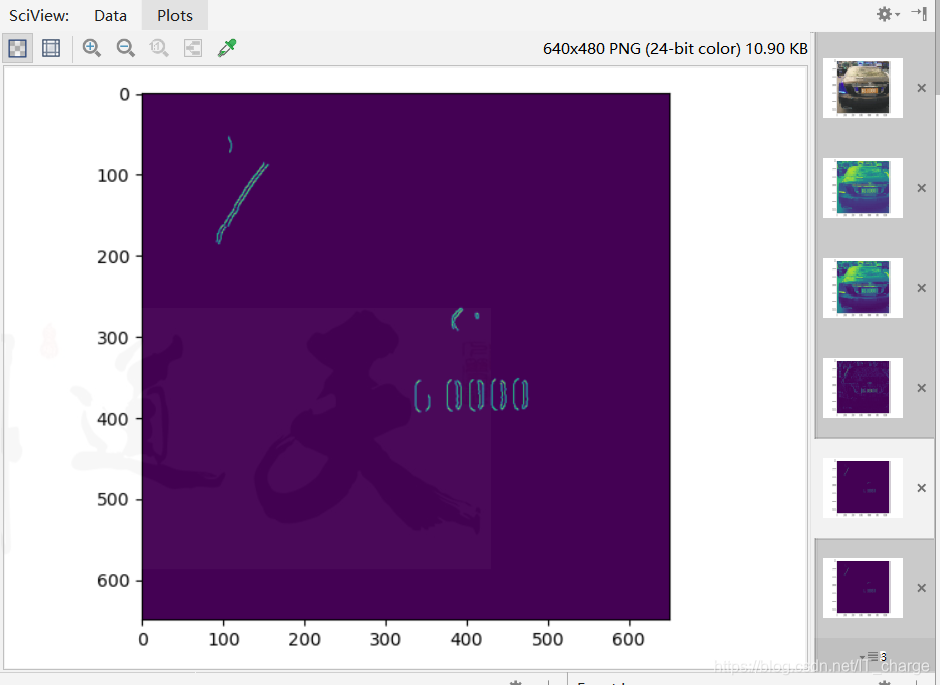
1.3.7 Close operation
Corrosion and expansion are carried out in sequence, this step can connect the target area into a whole, which is convenient for subsequent contour extraction.
cv.getStructuringElement(cv.MORPH_RECT,(43,33))
cv.dilate(img5,kernel)

1.3.8 Find contour
i,j = cv.findContours(img6,cv.RETR_TREE,cv.CHAIN_APPROX_SIMPLE)
1.3.9 Determine the license plate area
result = None
for i1 in i:
    x,y,w,h = cv.boundingRect(i1)
    if w>2*h:
        print(1)
        plt.imshow(img[y:y+h,x:x+w])
        plt.show()
        result = img[y:y+h,x:x+w]

1.4 Overview code
import cv2 as cv
import matplotlib.pyplot as plt

# 读取彩色的图片
img = cv.imread("E:/car.png")
plt.imshow(img)
plt.show()
# 转换为灰度图
img1 = cv.cvtColor(img, cv.COLOR_BGR2GRAY)
plt.imshow(img1)
plt.show()
# 用Sobel进行边缘检测
# # 高斯模糊
img2 = cv.GaussianBlur(img1,(5,5),10)
plt.imshow(img2)
plt.show()
# Laplacian进行边缘检测
img3 = cv.Sobel(img2,cv.CV_8U,1,0,ksize=1)
plt.imshow(img3)
plt.show()
img4 = cv.Canny(img3,250,100)
plt.imshow(img4)
plt.show()
# 进行二值化处理
i,img5 = cv.threshold(img4,0,255,cv.THRESH_BINARY)
plt.imshow(img5)
plt.show()
# 可以侵蚀和扩张
kernel = cv.getStructuringElement(cv.MORPH_RECT,(43,33))
img6 = cv.dilate(img5,kernel)
plt.imshow(img6)
plt.show()
# # 循环找到所有的轮廓
i,j = cv.findContours(img6,cv.RETR_TREE,cv.CHAIN_APPROX_SIMPLE)
result = None
for i1 in i:
    x,y,w,h = cv.boundingRect(i1)
    if w>2*h:
        print(1)
        plt.imshow(img[y:y+h,x:x+w])
        plt.show()
        result = img[y:y+h,x:x+w]
1.5 The final effect
2 Character segmentation for license plate recognition
I have made a detailed description of the extraction of the license plate. Similar to this, the character segmentation of the license plate is also a very important part, and the idea of character segmentation also plays an important role in other projects. Therefore, it is necessary to make a record of the idea and implementation process of character segmentation.
2.1 Implementation ideas
Generally speaking, it is realized by character segmentation based on pixel histogram: firstly, the image is binarized, the number of black pixels in each row and column in the horizontal and vertical directions is counted, and the segmentation position is determined according to the characteristics of the pixels , And then complete character segmentation.
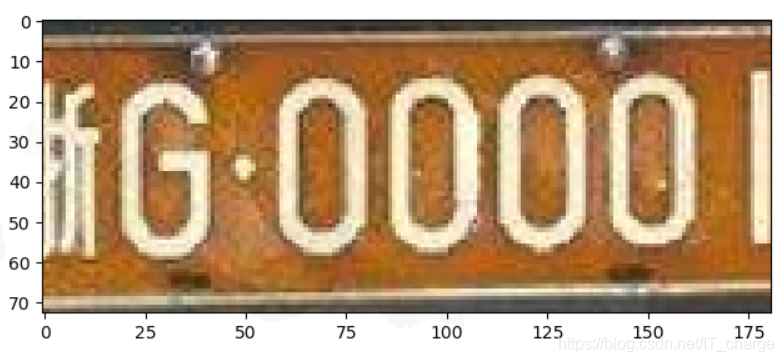
2.2 Original image

2.3 Code details
2.3.1 Import package library
import cv2
from matplotlib import pyplot as plt
2.3.2 Read the image, and convert the image to grayscale image and display
cv2.imread('E:/3.png')  # 读取图片
cv2.cvtColor(img_, cv2.COLOR_BGR2GRAY)  # 转换了灰度化

2.3.3 Binarize the grayscale image, set the threshold to 100
cv2.threshold(img_gray, 100, 255, cv2.THRESH_BINARY_INV)

2.3.4 Split characters
Horizontal direction : count the number of black pixels n in each row and record. The start and end of the segmentation can be determined according to the number of black pixels in each row; it can be seen from the figure that when n is reduced to a certain threshold, it is the edge of the character; the
vertical direction : similarly, count the number of black pixels in each column v , And record. The start and end of the segmentation can be determined according to the change in the number of black pixels in each column.
white = []  # 记录每一列的白色像素总和
black = []  # ..........黑色.......
height = img_thre.shape[0]
width = img_thre.shape[1]
white_max = 0
black_max = 0
# 计算每一列的黑白色像素总和
for i in range(width):
    s = 0  # 这一列白色总数
    t = 0  # 这一列黑色总数
    for j in range(height):
        if img_thre[j][i] == 255:
            s += 1
        if img_thre[j][i] == 0:
            t += 1
    white_max = max(white_max, s)
    black_max = max(black_max, t)
    white.append(s)
    black.append(t)
2.3.5 Split image
def find_end(start_):
    end_ = start_ + 1
    for m in range(start_ + 1, width - 1):
        if (black[m] if arg else white[m]) > (0.95 * black_max if arg else 0.95 * white_max):  # 0.95这个参数请多调整,对应下面的0.05(针对像素分布调节)
            end_ = m
            break
    return end_
2.4 Overview code
import cv2
from matplotlib import pyplot as plt
## 根据每行和每列的黑色和白色像素数进行图片分割。

# 1、读取图像,并把图像转换为灰度图像并显示
img_ = cv2.imread('E:/3.png')  # 读取图片
img_gray = cv2.cvtColor(img_, cv2.COLOR_BGR2GRAY)  # 转换了灰度化
# cv2.imshow('gray', img_gray)  # 显示图片
# cv2.waitKey(0)

# 2、将灰度图像二值化,设定阈值是100
ret, img_thre = cv2.threshold(img_gray, 100, 255, cv2.THRESH_BINARY_INV)
# cv2.imshow('white_black image', img_thre)  # 显示图片
# cv2.waitKey(0)

# 4、分割字符
white = []  # 记录每一列的白色像素总和
black = []  # ..........黑色.......
height = img_thre.shape[0]
width = img_thre.shape[1]
white_max = 0
black_max = 0
# 计算每一列的黑白色像素总和
for i in range(width):
    s = 0  # 这一列白色总数
    t = 0  # 这一列黑色总数
    for j in range(height):
        if img_thre[j][i] == 255:
            s += 1
        if img_thre[j][i] == 0:
            t += 1
    white_max = max(white_max, s)
    black_max = max(black_max, t)
    white.append(s)
    black.append(t)
    # print(s)
    # print(t)

arg = False  # False表示白底黑字;True表示黑底白字
if black_max > white_max:
    arg = True

# 分割图像
def find_end(start_):
    end_ = start_ + 1
    for m in range(start_ + 1, width - 1):
        if (black[m] if arg else white[m]) > (0.95 * black_max if arg else 0.95 * white_max):  # 0.95这个参数请多调整,对应下面的0.05(针对像素分布调节)
            end_ = m
            break
    return end_

n = 1
start = 1
end = 2
word = []
while n < width - 2:
    n += 1
    if (white[n] if arg else black[n]) > (0.05 * white_max if arg else 0.05 * black_max):
        # 上面这些判断用来辨别是白底黑字还是黑底白字
        # 0.05这个参数请多调整,对应上面的0.95
        start = n
        end = find_end(start)
        n = end
        if end - start > 5:
            cj = img_[1:height, start:end]
            cj = cv2.resize(cj, (15, 30))
            word.append(cj)

print(len(word))
for i,j in enumerate(word):
    plt.subplot(1,8,i+1)
    plt.imshow(word[i],cmap='gray')
plt.show()
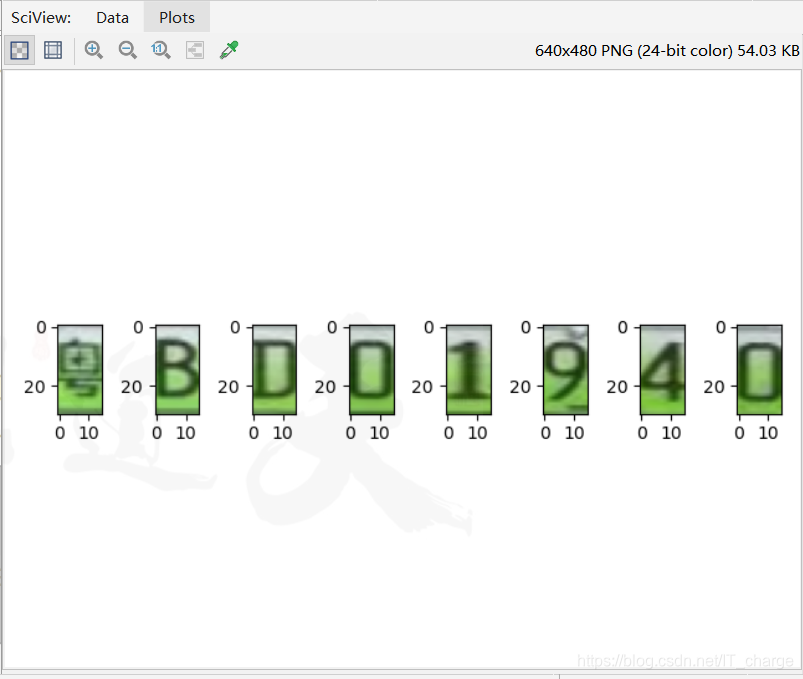
2.5 The final effect