First, let's
upload the renderings: (The pictures were searched by Baidu casually, and they were simply blurred)
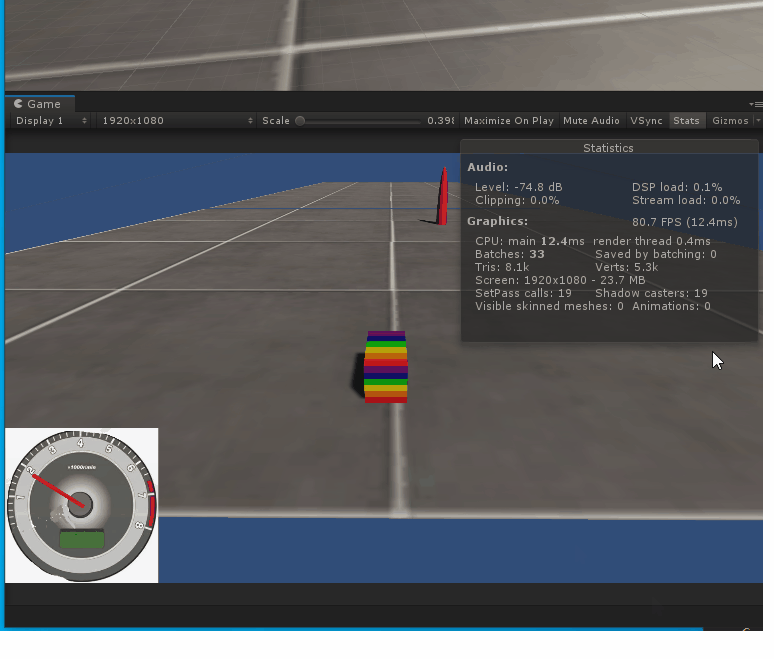
- Place the Plane plane in the scene, you can place it casually, change the color, or add a texture as the floor;
- Create a new Cube, you can also change the color at will, to be more eye-catching, I saw a nice rainbow bar and posted it, remember to add the Rigibody component;
- Adjust the camera angle and position, it is best to be behind the object, and add the following code:
camera interpolation follow you can refer to my previous post: "Camera interpolation follow" - Adjust the 2D display of the window, and create a new UI→Canvas component in the Hierarchy, and adjust it to the appropriate position:

right-click the new Panel component in Canvas, and then select the tachometer image we downloaded in Source Image in the Image component in the panel property , Adjust the position, size, etc. according to your needs;
(note that the picture here is best changed to JPG format, that is, you will see a drop-down arrow in the Project, so that it can be used by the panel)


5. Create an empty GameObject component under the Panel, and create an Image component below, adjust the color and shape to roughly make a pointer, adjust the position of the parent-child relationship, so that the GameObject can rotate around the center of the dial;
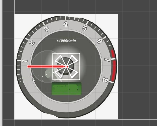
6. Add GameObject Code: ShowSpeed() must be public, so that we can call it in the motion code;
using System.Collections;
using System.Collections.Generic;
using UnityEngine;

public class Rotate : MonoBehaviour
{


    static float minAngle = 0.0f;
    static float maxAngle = -180f;   //0-180代表表盘旋转的角度
   static Rotate thisSpeed0;
    // Start is called before the first frame update
    void Start()
    {


        thisSpeed0 = this;
    }
    // Update is called once per frame
    public static void ShowSpeed(float speed, float min, float max)
    {


        //将速度与指针转动角度对应起来
        float ang = Mathf.Lerp(minAngle, maxAngle, Mathf.InverseLerp(min, max, speed));
        //添加旋转   可以在ang后乘以个常数用来调节转动效果
        thisSpeed0.transform.eulerAngles = new Vector3(0, 0, ang*10f);
    }
}
- Add motion code to Cube (you need to call the ShowSpeed() function at the top):
using System.Collections;
using System.Collections.Generic;
using UnityEngine;

public class move : MonoBehaviour
{


   public float speed=0;
    float h = 0;
    Rigidbody rg;

    // Start is called before the first frame update
    void Start()
    {


        rg = this.GetComponent<Rigidbody>();
    }

    // Update is called once per frame
    void Update()
    {


        float v = Input.GetAxis("Vertical")*0.3f;//垂直轴
        h = Input.GetAxis("Horizontal");//水平轴
        for (int i = 0 ; i < 10; i++)
        {


            speed *= v;
            movetion();
            speed++;
        }
        movetion();
        Rotate.ShowSpeed(rg.velocity.magnitude, 0, 100);
    }
   private void movetion ()
    {


       rg.AddForce(h, 0, 2* speed);
    }
}
Because "Vertical and Horizontal" is used in the control code, you can use up, down, left, right, or W, S, A, D to control;
Note: For
the Rigibody component in the Cube, it is best to limit the vertical movement of the Y-axis, otherwise it will not be under your control.