Principle overview
The dynamic admission controller Webhook can change the request object or reject the request completely during the access authentication process. Its method of invoking the Webhook service makes it independent of the cluster components. It has great flexibility and can be easily customized. Access control, the following figure shows the position of dynamic access control in the API request call chain (from the official Kubernetes website ):
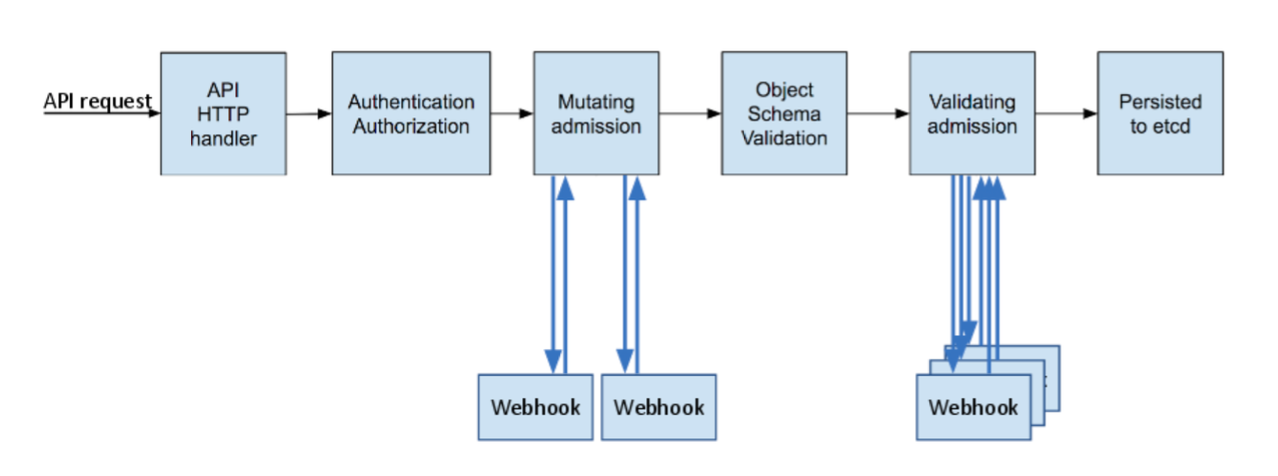
As can be seen from the above figure, the dynamic admission control process is divided into two stages: first execute the Mutating stage, which can modify the arrival request, and then execute the Validating stage to verify whether the arriving request is allowed. The two stages can be used separately or Can be used in combination, this article will implement a simple dynamic admission control call example in TKE.
View verification plugin
In TKE existing cluster version (1.10.5 and above) has been enabled by default validating admission webhook and mutating admission Number WebHook API, if it is an earlier version of the cluster and can be performed in Apiserver Pod kube-apiserver -h | grep enable-admission-pluginsverify the current cluster is turned on, the output plug-in list If there MutatingAdmissionWebhookand ValidatingAdmissionWebhookit shows a dynamic controller of the current cluster open access plug, as shown below:

Issue a certificate
In order to ensure dynamic call admission controller is trusted Webhook server, must be called Webhook Services (TLS authentication) through HTTPS, you need to issue certificates for Webhook server, and dynamic access control Webhook registered for the caBundlefield ( ValidatingWebhookConfigurationand a MutatingAdmissionWebhookresource list of caBundleauthority certificates (CA) field) binding trusted to verify Webhook server certificate is trusted, here introduced two recommended methods of certificates:
Note: When
ValidatingWebhookConfigurationandMutatingAdmissionWebhookuseclientConfig.servicewhen configuring (Webhook service within the cluster), issued by the domain name for the server certificate must be<svc_name>.<svc_namespace>.svc.
Method 1: Make a self-signed certificate
The method of making a self-signed certificate is relatively independent and does not depend on the K8s cluster. It is similar to making a self-signed certificate for a website. There are many tools to make a self-signed certificate. This example uses Openssl to make a self-signed certificate. The steps are as follows:
-
Generate ca.key with 2048 key bits:
openssl genrsa -out ca.key 2048 -
Based ca.key generate ca.crt, "webserver.default.svc" as Webhook domain name server in the cluster, using the
-daysparameter to set the time the certificate is valid:openssl req -x509 -new -nodes -key ca.key -subj "/CN=webserver.default.svc" -days 10000 -out ca.crt -
Generate server.key with 2048 key bits:
openssl genrsa -out server.key 2048i. An example of creating a configuration file csr.conf for generating a certificate signing request (CSR) is as follows:
[ req ] default_bits = 2048 prompt = no default_md = sha256 distinguished_name = dn [ dn ] C = cn ST = shaanxi L = xi'an O = default OU = websever CN = webserver.default.svc [ v3_ext ] authorityKeyIdentifier=keyid,issuer:always basicConstraints=CA:FALSE keyUsage=keyEncipherment,dataEncipherment extendedKeyUsage=serverAuth,clientAuth -
Generate a certificate signing request based on the configuration file csr.conf:
openssl req -new -key server.key -out server.csr -config csr.conf -
Use ca.key, ca.crt and server.csr to issue and generate a server certificate (x509 signature):
openssl x509 -req -in server.csr -CA ca.crt -CAkey ca.key \ -CAcreateserial -out server.crt -days 10000 \ -extensions v3_ext -extfile csr.conf -
View the Webhook server certificate:
openssl x509 -noout -text -in ./server.crt
Among them, the generated certificate and key file are described as follows:
ca.crt is the issuing authority certificate, and ca.key is the issuing authority certificate key, which is used for server-side certificate issuance.
server.crt is the issued server certificate, and server.key is the issued server certificate key.
Method 2: Use K8S CSR API to issue
In addition to using an encryption tool to make a self-signed certificate, you can also use k8s's certificate authority system to issue a certificate. Executing the following script can use the K8s cluster root certificate and root key to sign a trusted certificate user. Note that The user name should be the domain name of the Webhook service in the cluster:
USERNAME='webserver.default.svc' # 设置需要创建的用户名为 Webhook 服务在集群中的域名
# 使用 Openssl 生成自签证书 key
openssl genrsa -out ${USERNAME}.key 2048
# 使用 Openssl 生成自签证书 CSR 文件, CN 代表用户名,O 代表组名
openssl req -new -key ${USERNAME}.key -out ${USERNAME}.csr -subj "/CN=${USERNAME}/O=${USERNAME}"
# 创建 Kubernetes 证书签名请求(CSR)
cat <<EOF | kubectl apply -f -
apiVersion: certificates.k8s.io/v1beta1
kind: CertificateSigningRequest
metadata:
  name: ${USERNAME}
spec:
  request: $(cat ${USERNAME}.csr | base64 | tr -d '\n')
  usages:
  - digital signature
  - key encipherment
  - server auth
EOF
# 证书审批允许信任
kubectl certificate approve ${USERNAME}
# 获取自签证书 CRT
kubectl get csr ${USERNAME} -o jsonpath={.status.certificate} > ${USERNAME}.crt
Among them, ${USERNAME}.crt is the server certificate, and ${USERNAME}.key is the Webhook server certificate key.
Operation example
The following will use ValidatingWebhookConfigurationresources to achieve a dynamic call admission Webhook in TKE example, the sample code in the sample code get in (to ensure accessibility, Fork sample code from source code library , the author implements a simple dynamic access Webhook The request and response interface, please refer to Webhook request and response for the specific interface format . For convenience, I will use it as our Webhook server code.
-
Ready
caBundlecontent-
If the certificate is issued by a program, using the
base64encoding ca.crt generatedcaBundlefield contents:cat ca.crt | base64 --wrap=0 - If Option II is to issue a certificate, the root certificate cluster is the
caBundlecontent of the field, can console TKE cluster [Basic information] -> [information] cluster APIServer Kubeconfig contentclusters.cluster[].certificate-authority-datafields taken, the field has beenbase64encoded, and no longer Do processing.
-
-
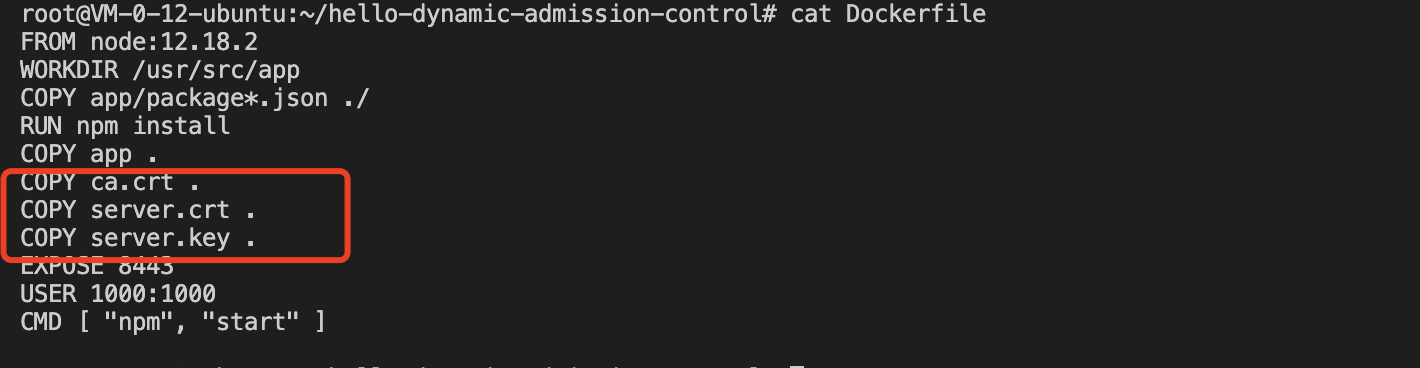
Copy the generated ca.crt (issuer certificate), server.crt (HTTPS certificate)), server.key (HTTPS key) to the project main directory:

-
Modify the Dockerfile in the project and add three certificate files to the container working directory:
Then use the docker command to build the Webhook server image:
docker build -t webserver . -
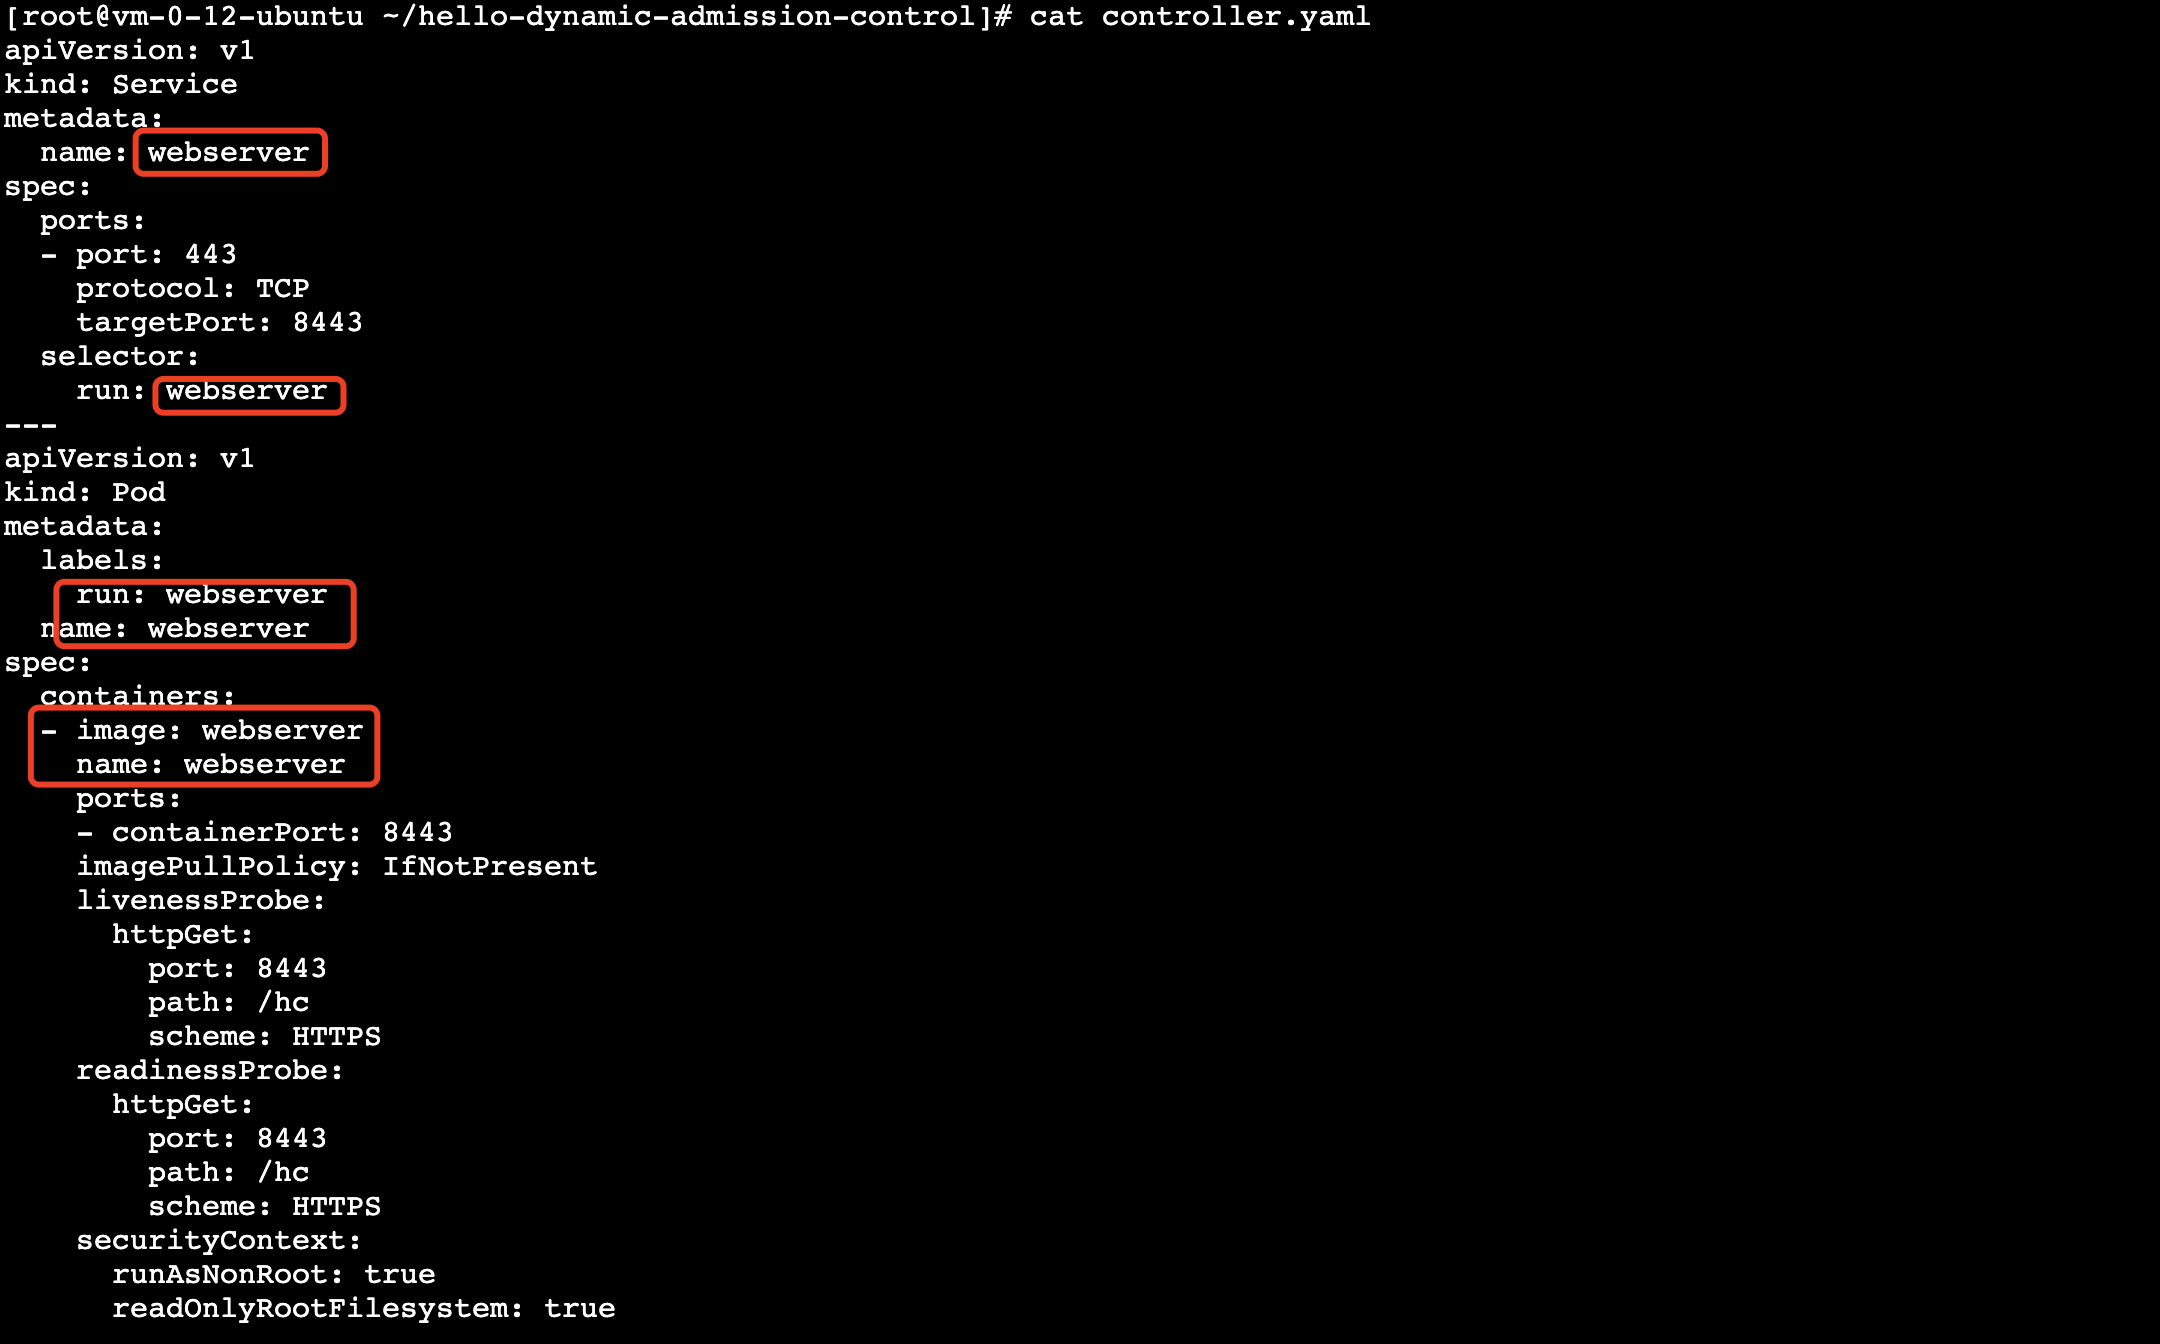
Deploy a Webhook backend service with the domain name "weserver.default.svc", modify the adapted controller.yaml as follows:
-
Sign up to create the type
ValidatingWebhookConfigurationof resource, in this example configuration Webhook rule is triggered when you createpodstime type, API version "v1" trigger calls,clientConfigconfigure Webhook back-end services corresponding to the above-created in a cluster,caBundlethe field content is a method for obtaining a certificate The content of ca.crt, modify the admission.yaml file in the adaptation project as shown below: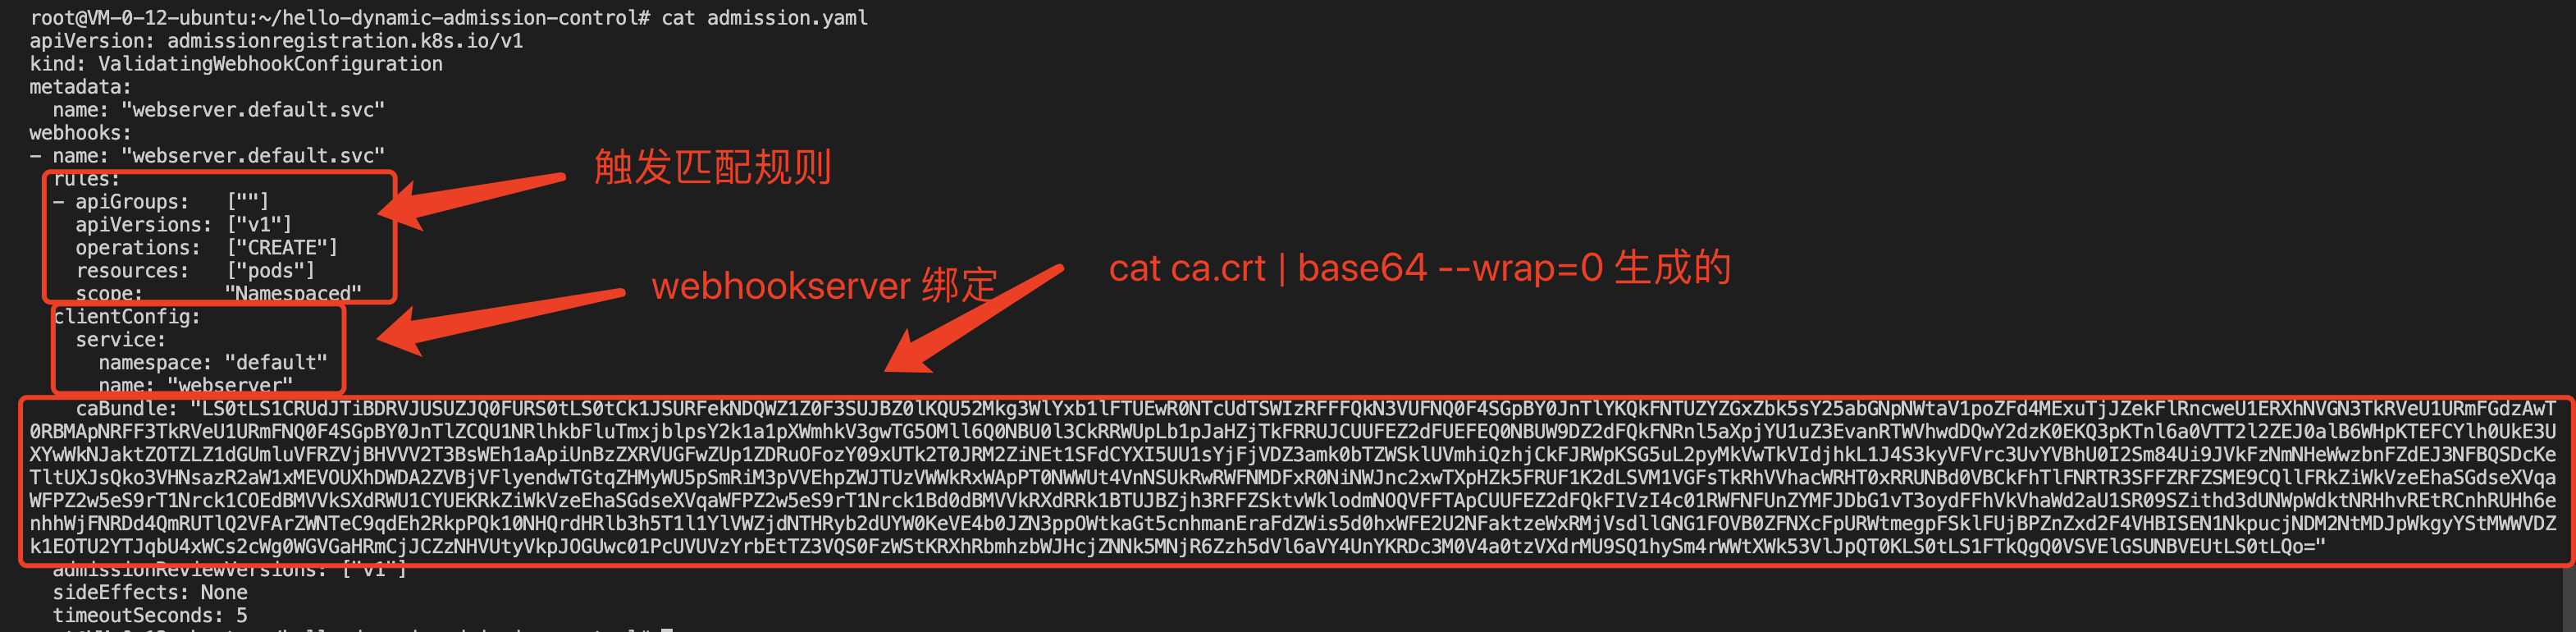
-
Create a Pod type after registration, the test resources with API version "v1" are as follows:
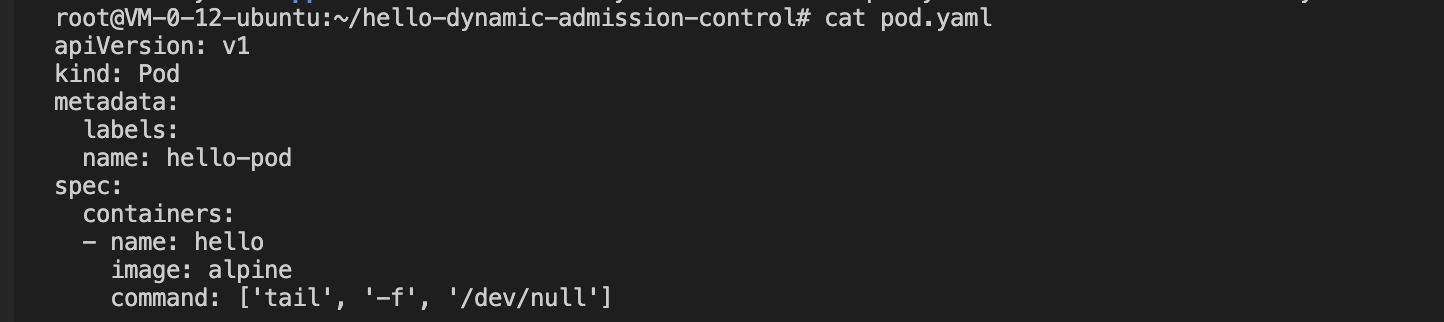
-
The test code has a print request log. Checking the Webhook server log, you can see that the dynamic admission controller triggered the webhook call, as shown in the following figure:
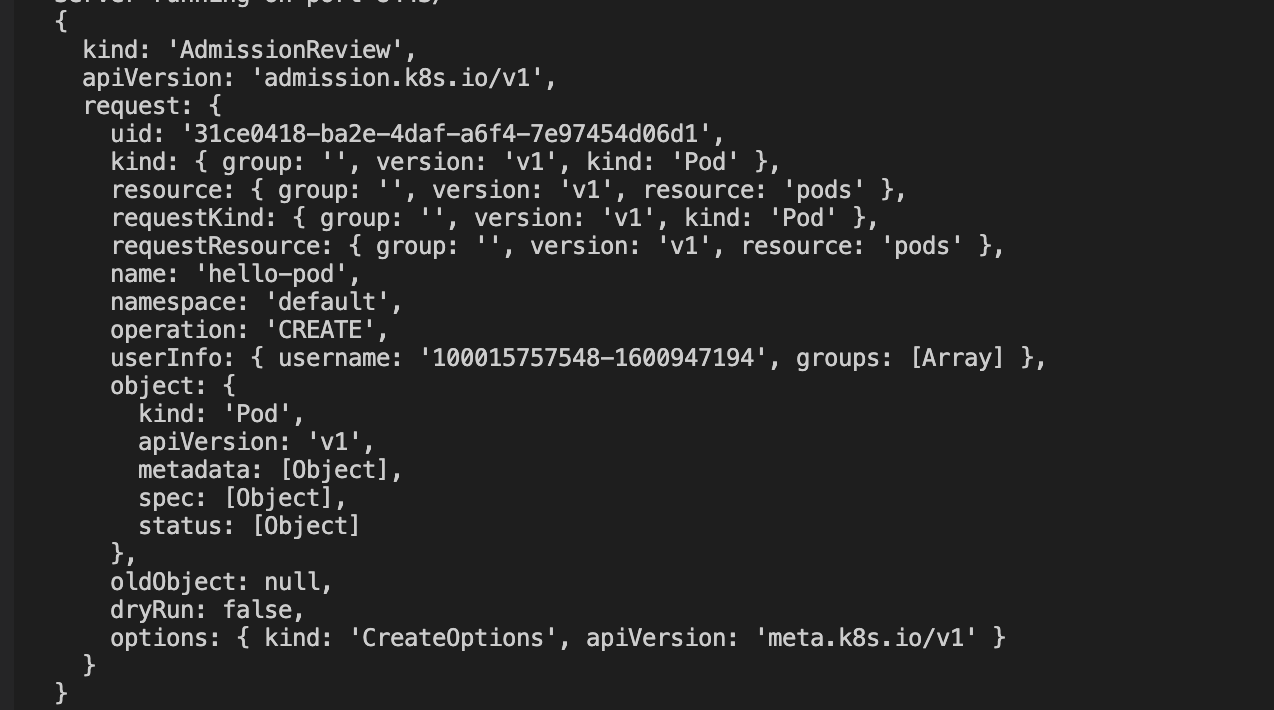
-
At this point, check that the created test pod is successfully created, because the test Webhook server code is hard to write
allowed: true, so it can be created successfully, as shown in the following figure: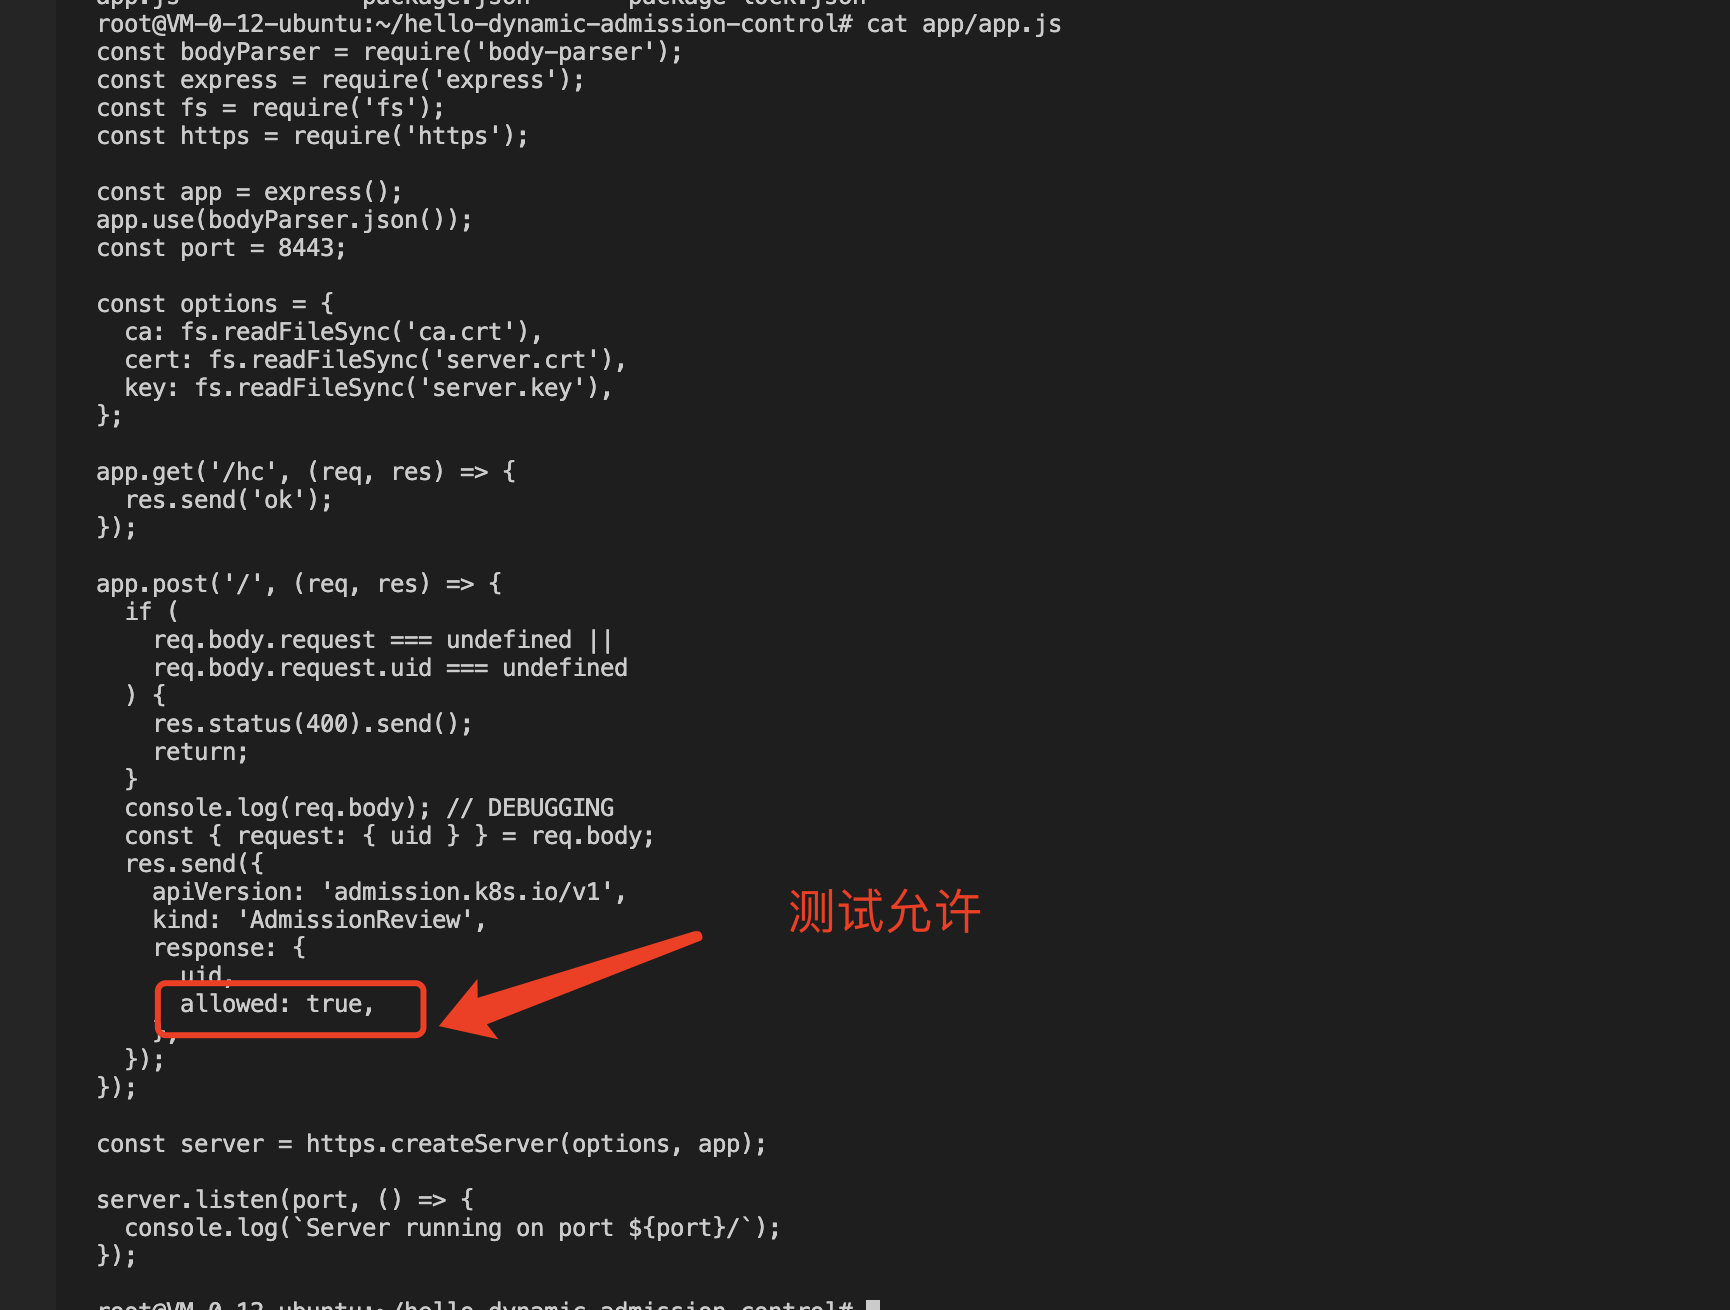
-
For further verification, we change "allowed" to "false", and then repeat the above steps to re-image the Webserver server and redeploy the controller.yaml and admission.yaml resources. When we try to create the "pods" resource again, the request is dynamic Admission interception indicates that the configured dynamic admission policy is effective, as shown in the following figure:

to sum up
This article mainly introduces the concept and function of the dynamic admission controller Webhook, how to issue the certificate required by the dynamic admission controller in the TKE cluster, and uses a simple example to demonstrate how to configure and use the dynamic admission webhook function.