Step by step to manually build zabbix5.0-01, the pro-test is effective
One, zabbix introduction
-
zabbix ([`zæbiks]) is an enterprise-level open source solution based on WEB interface that provides distributed system monitoring and network monitoring functions.
-
Zabbix can monitor various network parameters to ensure the safe operation of the server system; and provide a flexible notification mechanism to allow system administrators to quickly locate/solve various problems.
-
Zabbix consists of 2 parts, zabbix server and optional component zabbix agent. Zabbix server can provide remote server/network status monitoring, data collection and other functions through SNMP, zabbixagent, ping, port monitoring and other methods. It can run on Linux, Solaris, HP-UX, AIX, FreeBSD, Open BSD, OS X Wait on the platform.
In general, it is a solution to monitor your server, network equipment and other resources to facilitate your management.
So how to build it? I will write down each step in detail for your reference.
Two, zabbix platform construction
- Turn off the firewall and restart selinux
sed -i 's/SELINUX=enforcing/SELINUX=disabled/' /etc/selinux/config

systemctl disable --now firewalld
- Install zabbix rpm source (Huawei Cloud and Alibaba Cloud choose one , I will post both below)
用华为云zabbix源
rpm -Uvh https://mirrors.huaweicloud.com/zabbix/zabbix/5.0/rhel/7/x86_64/zabbix-release-5.0-1.el7.noarch.rpm

sed -i 's#http://repo.zabbix.com#https://mirrors.huaweicloud.com/zabbix#' /etc/yum.repos.d/zabbix.repo

yum clean all
阿里云zabbix 源

rpm -Uvh https://mirrors.aliyun.com/zabbix/zabbix/5.0/rhel/7/x86_64/zabbix-release-5.0-1.el7.noarch.rpm


sed -i 's#http://repo.zabbix.com#https://mirrors.aliyun.com/zabbix#' /etc/yum.repos.d/zabbix.repo
yum clean all
- Install zabbix server and agent
yum install zabbix-server-mysql zabbix-agent -y
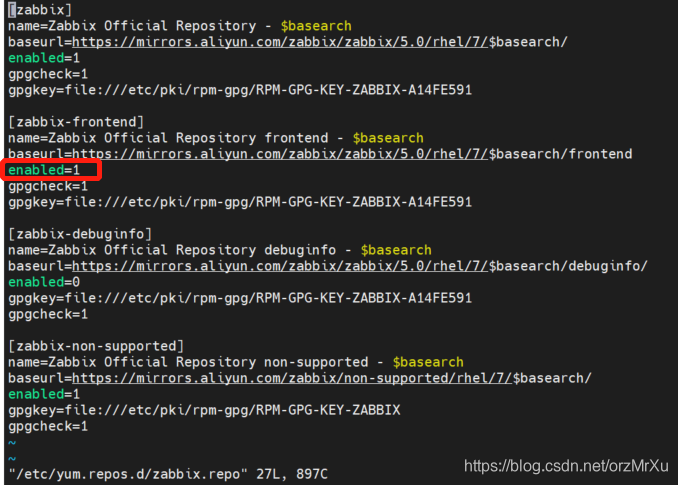
- Install zabbix front-end source
yum install centos-release-scl -y
- Before starting the front-end source, change the settings and set the enabled of zabbix-frontend to 1
vi /etc/yum.repos.d/zabbix.repo
- Install zabbix front end and related environment
yum install zabbix-web-mysql-scl zabbix-apache-conf-scl -y
- Use yum to install centos7 default mariadb database
yum install mariadb mariadb-server mariadb-devel -y
 #启动数据库,并配置开机自动启动
systemctl enable --now mariadb
#初始化 mariadb 并配置 root 密码
mysql_secure_installation
When the password is displayed here, the default is blank, just press Enter, and then pay special attention

to it except for the above, which is N, all others are Y.
- Create the original database
mysql -uroot -p
The password is the Mysql password you set in the previous step
- Database settings
#查看默认数据库
mysql> show databases;
#创建zabbix数据库
mysql> create database zabbix character set utf8 collate utf8_bin;
#创建zabbix用户并设置密码,这里是设置为password,自己手动更改即可
mysql> create user zabbix@localhost identified by 'password';
#分配zabbix用户权限
mysql> grant all privileges on zabbix.* to zabbix@localhost;
#刷新,然后退出
mysql>flush privileges;
mysql> quit;
- After the above settings, the zabbix database user is zabbix and the password is password (if there is a change, the password you set yourself)
#导入zabbix数据库信息
zcat /usr/share/doc/zabbix-server-mysql*/create.sql.gz | mysql -uzabbix -p zabbix
- Configure database for Zabbix server
vi /etc/zabbix/zabbix_server.conf
After entering the zabbix_server.conf file, find DBPassword and
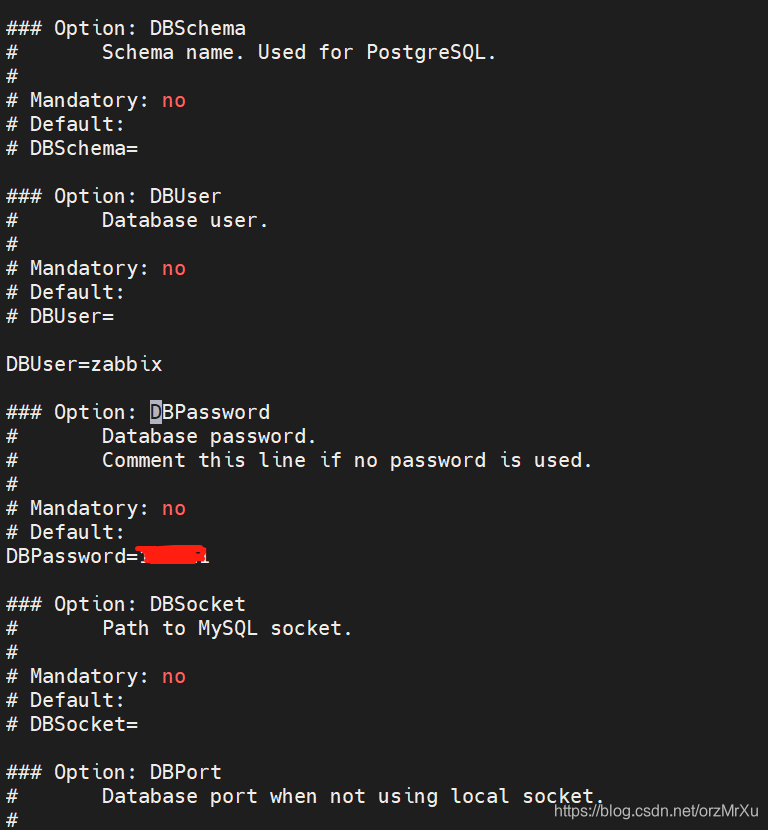
remember to remove the # in front, otherwise you will doubt yourself like me.
#设置完成后,检查一下

grep '^DBPa' /etc/zabbix/zabbix_server.conf

- Configure the time zone in the PHP file for the Zabbix front end
vi /etc/opt/rh/rh-php72/php-fpm.d/zabbix.conf
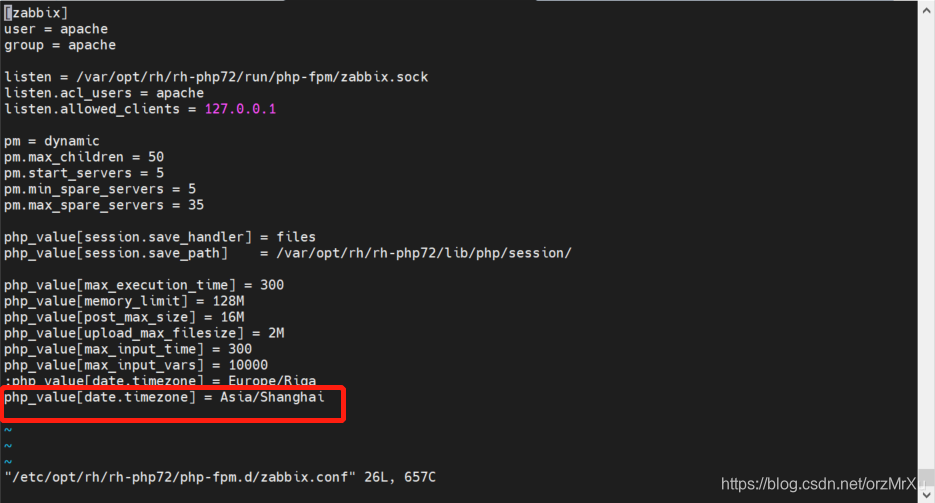
Remember to remove the semicolon in front.
- The last step is to start related services and configure automatic startup
systemctl restart zabbix-server zabbix-agent httpd rh-php72-php-fpm
systemctl enable zabbix-server zabbix-agent httpd rh-php72-php-fpm
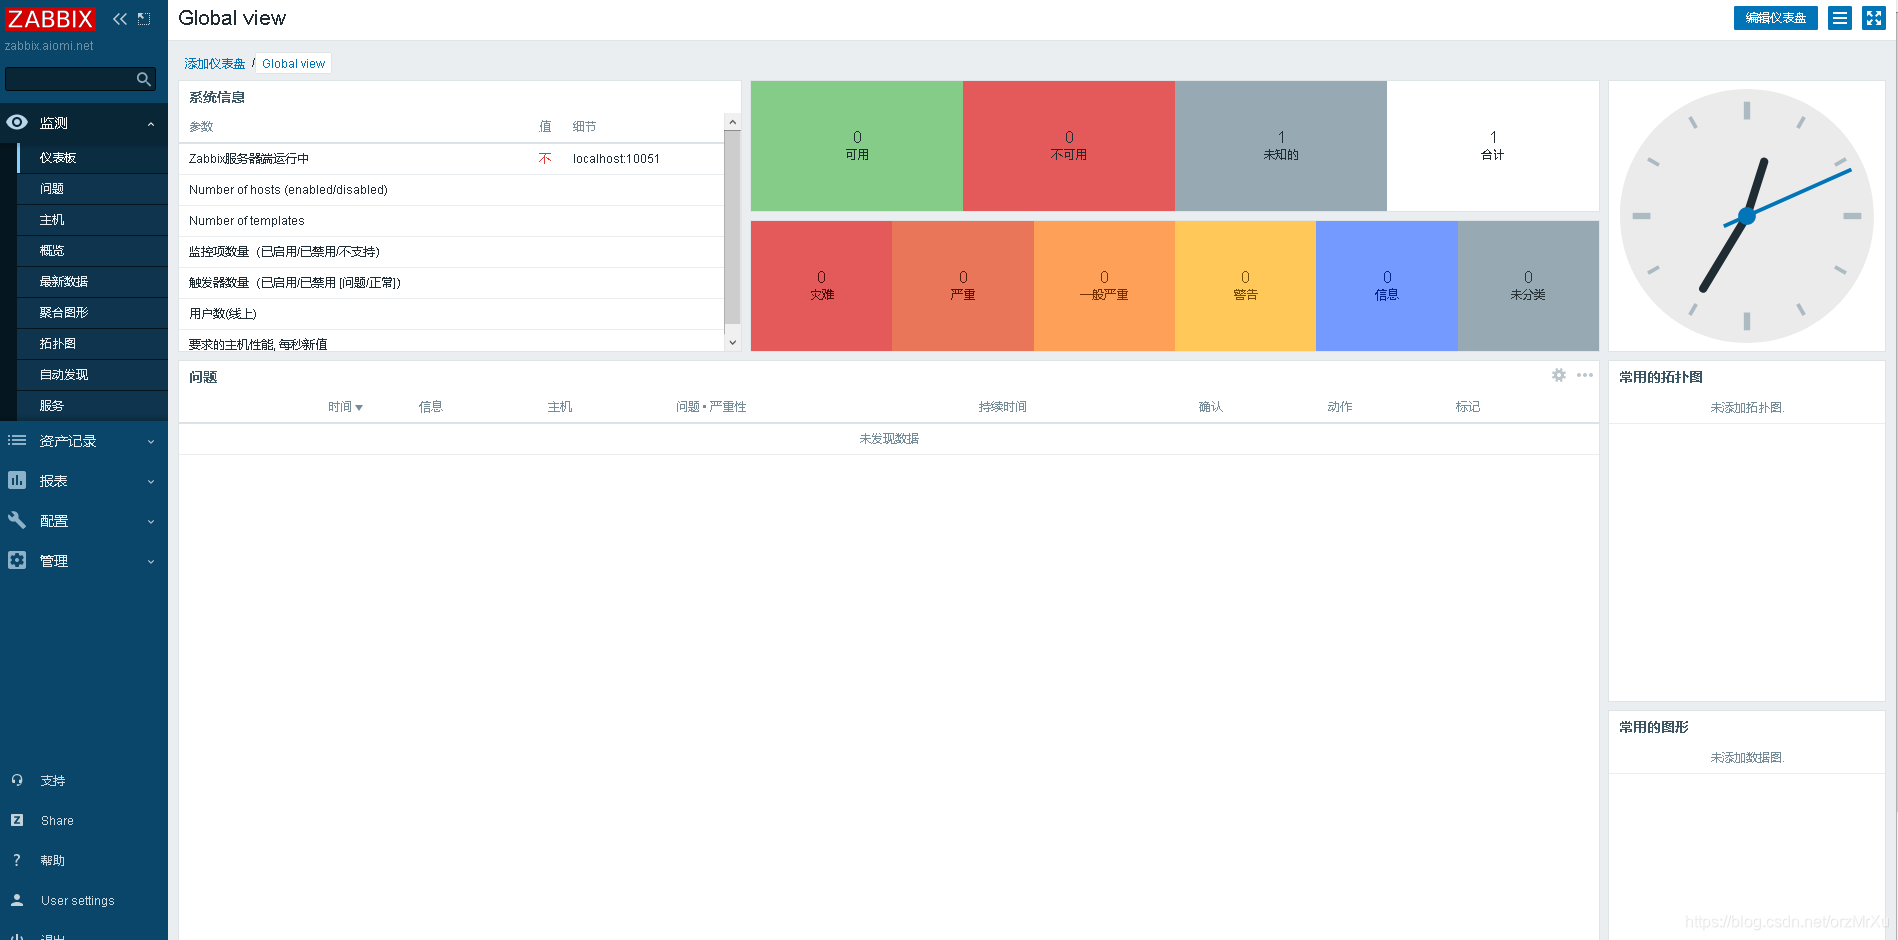
- Enter http://EIP/zabbix/zabbix.php?action=dashboard.view
EIP to change to your computer's IP
! [insert picture description here](https://img-blog.csdnimg.cn/20210207202254771. png? x-oss-process = image / watermark, type_ZmFuZ3poZW5naGVpdGk, shadow_10, text_aHR0cHM6Ly9ibG9nLmNzZG4ubmV0L29yek1yWHU =, size_16, color_FFFFFF, t_70
if the front goes well, you will be able to see this page, and completing the first step.
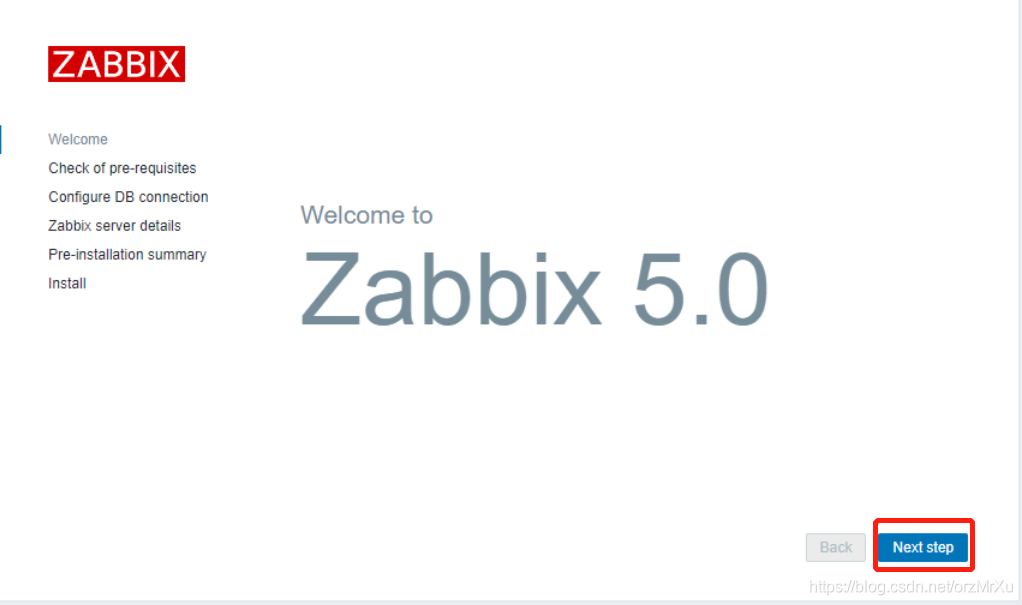
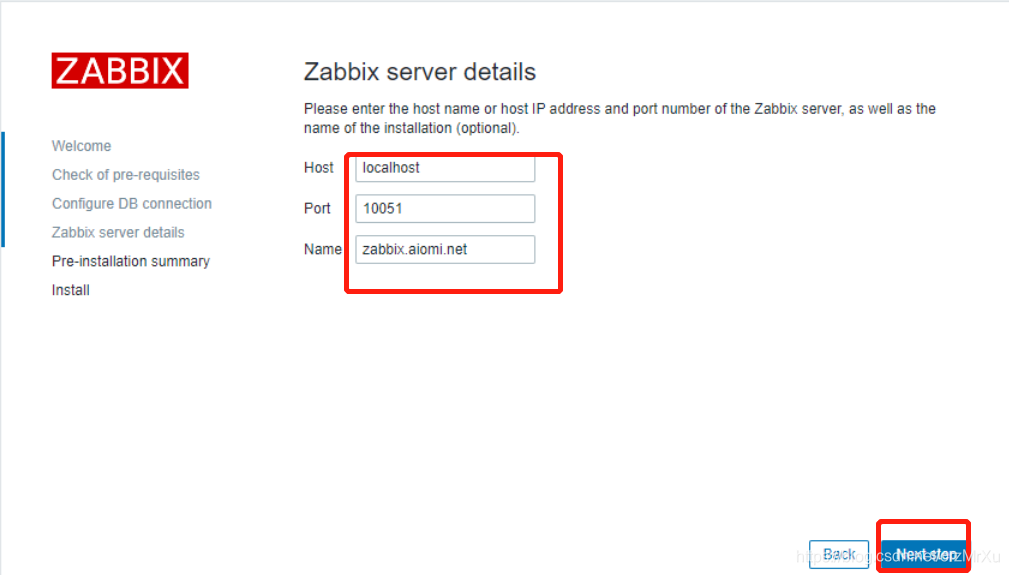
the next step is constantly point next step Except for one of the following, you need to set the following.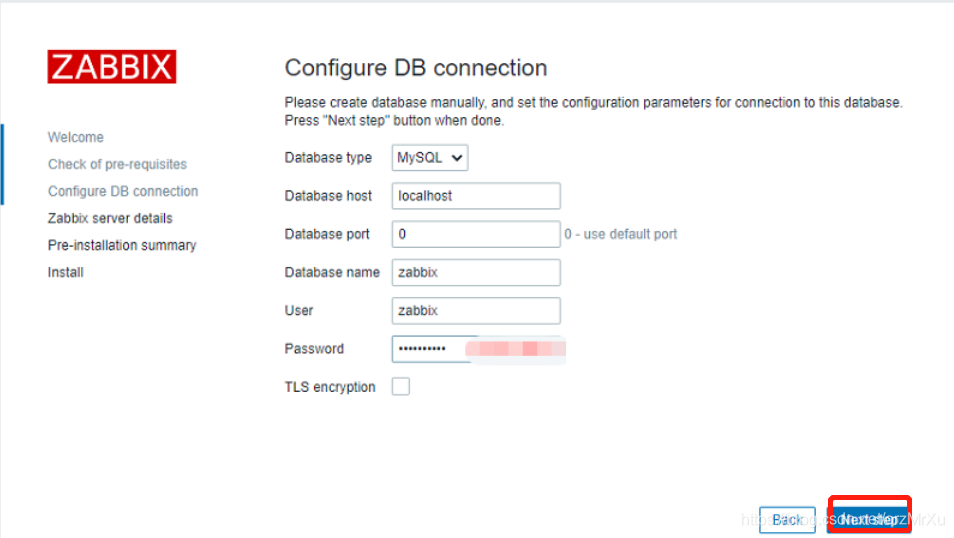
Password is the DBPassword you set before. The
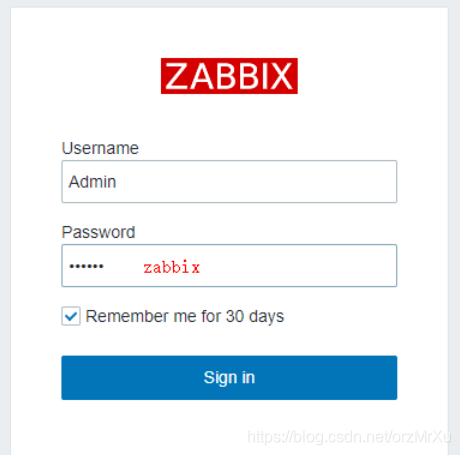
user name is Admin, the password is zabbix, and login.

Successfully built!
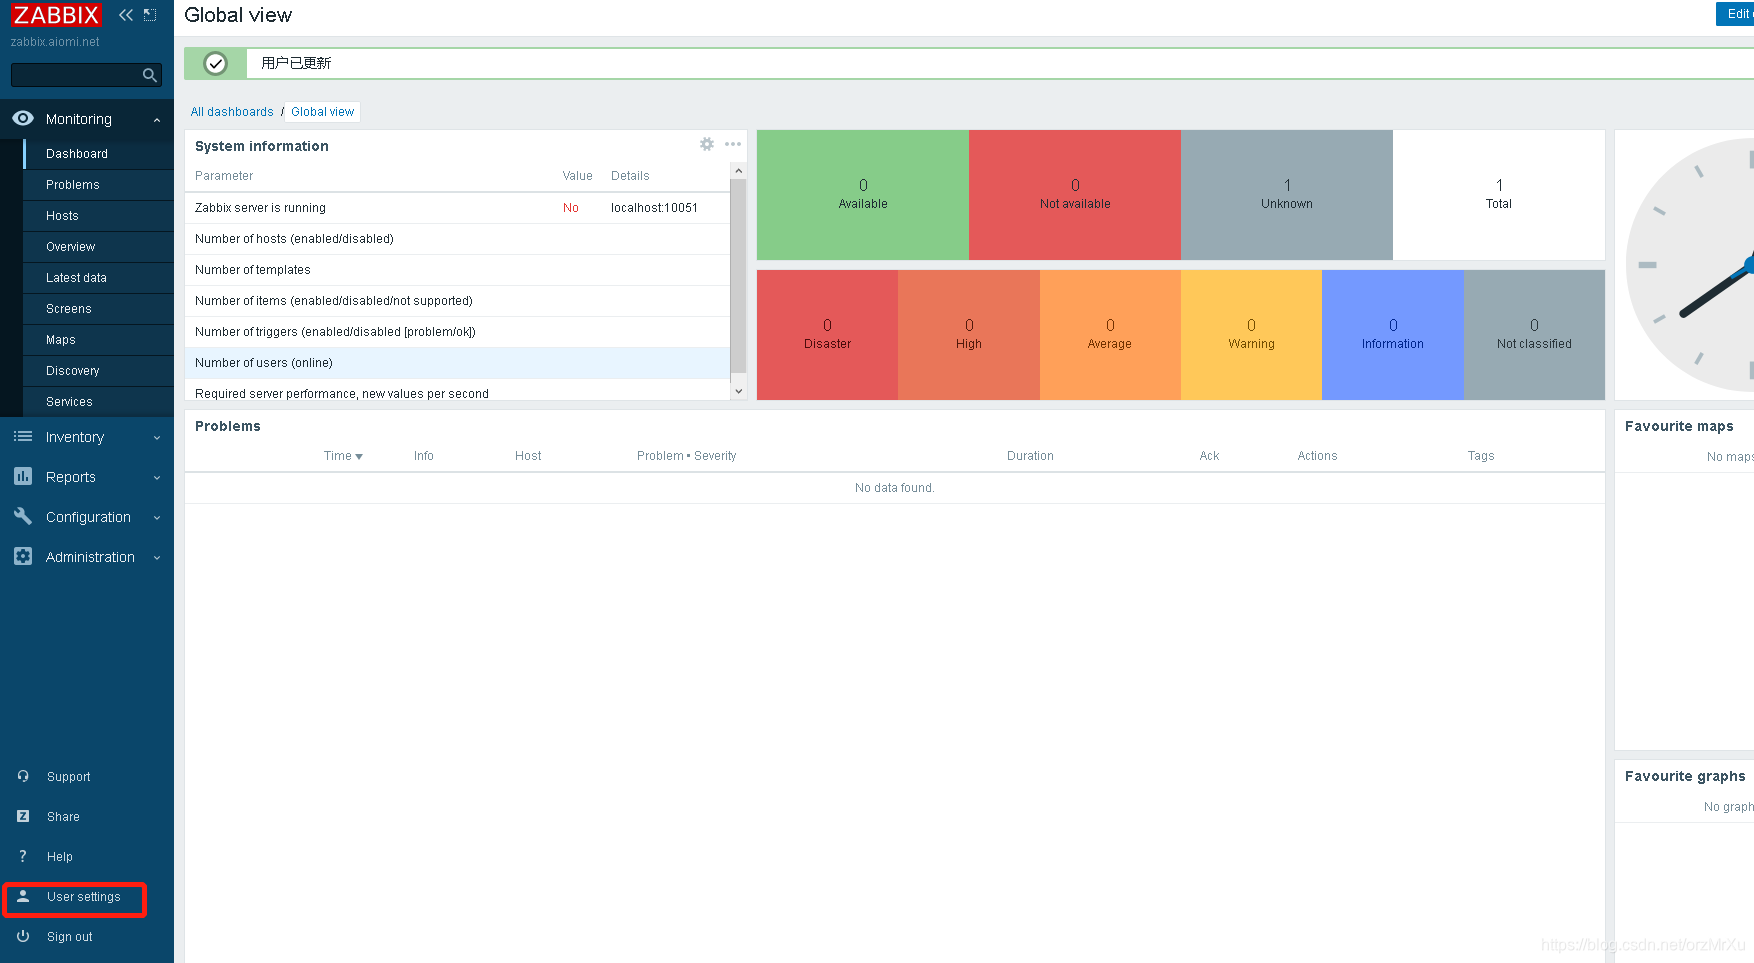
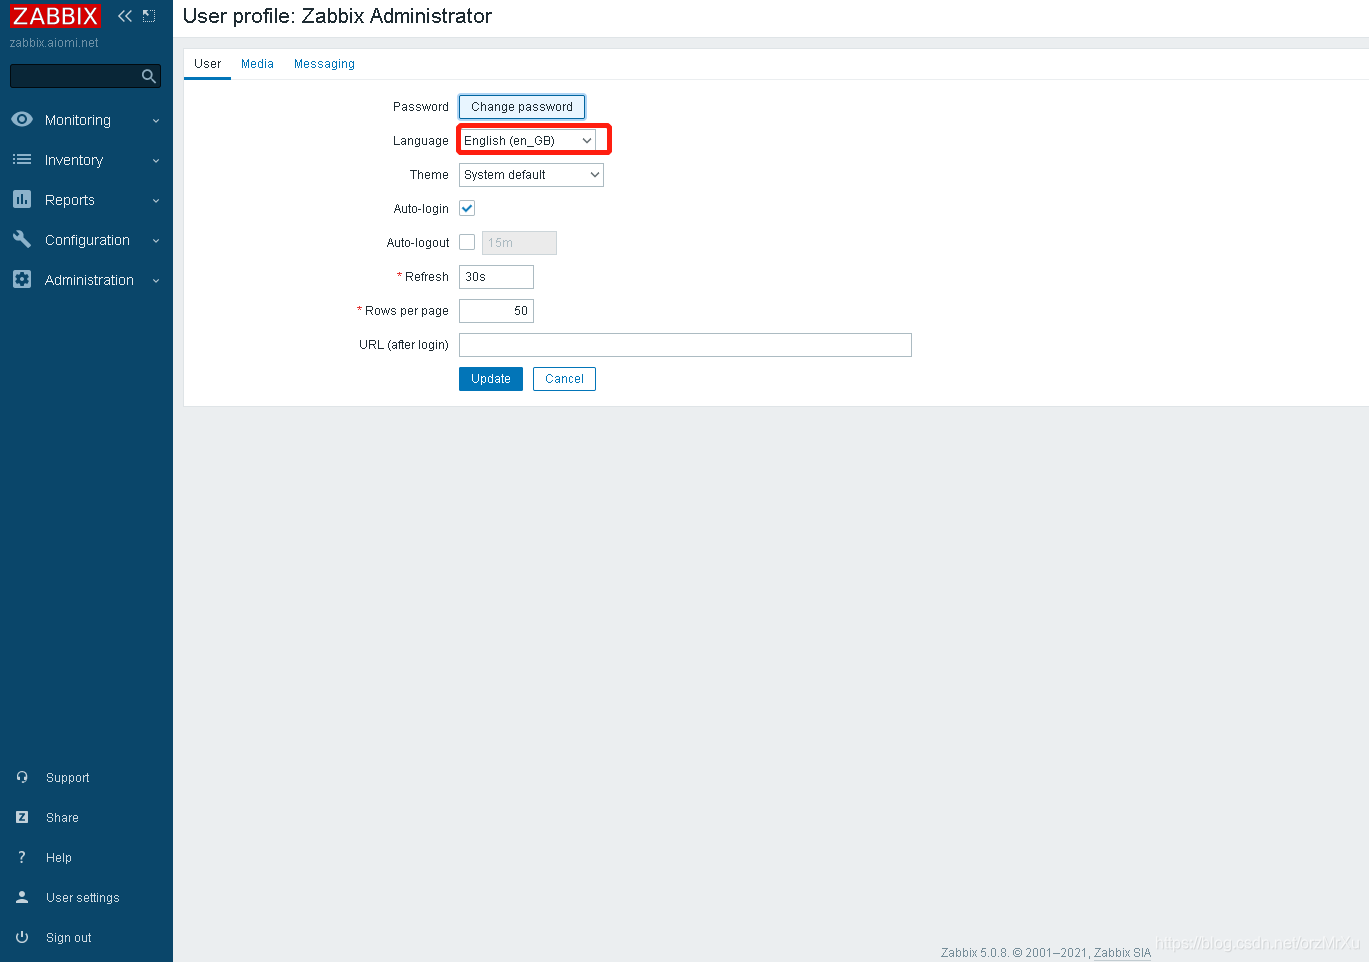
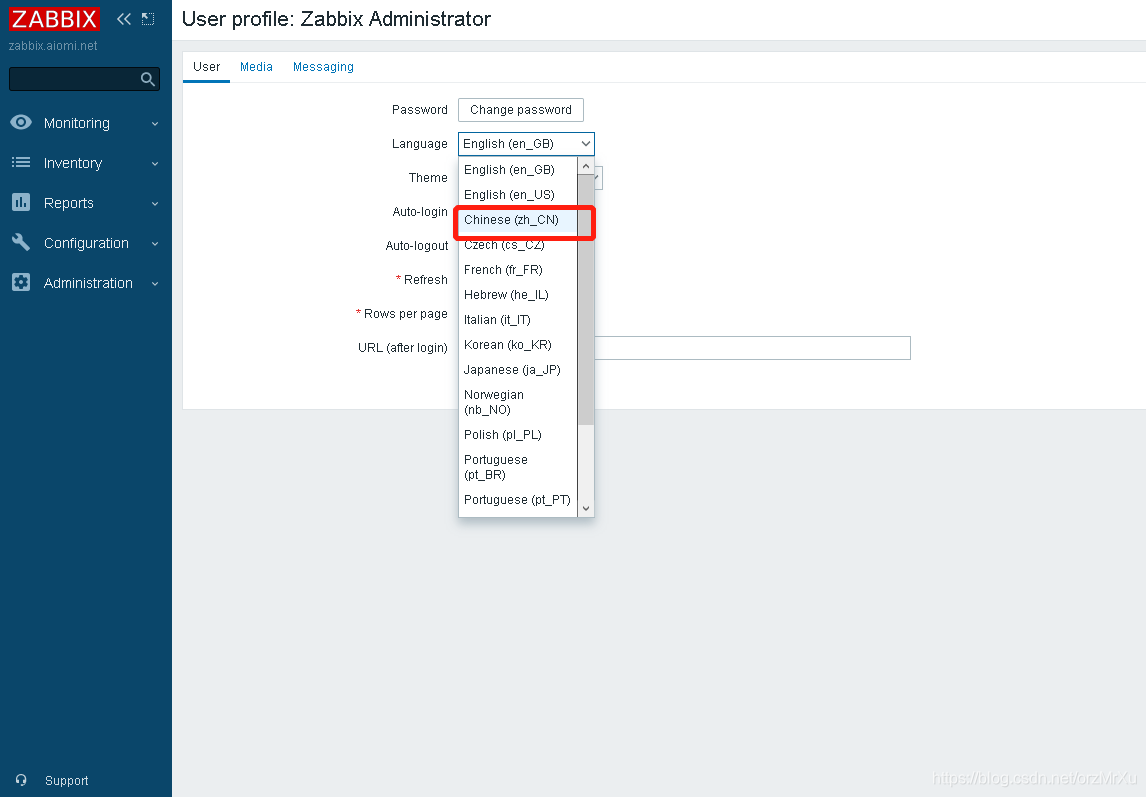
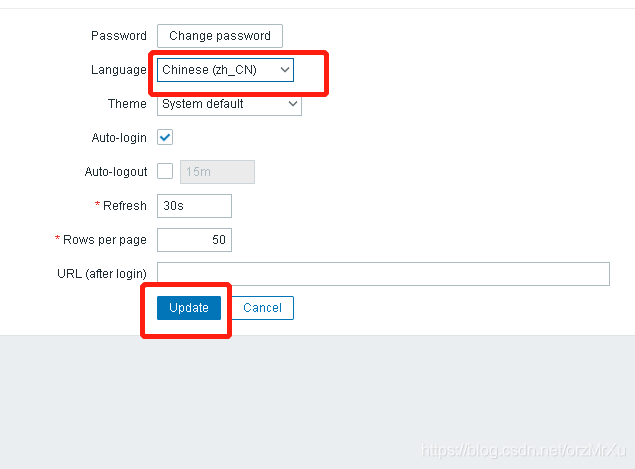
Some friends think that the English interface is not pleasing to the eye. Next, I will teach you a few steps to set it to Chinese.