Article Directory
1. Preparation
1. Install the client:
linux: yum -y install svn
windows: install the TortoiseSVN client software, if not, it does not matter, there is a sharing link
below: https://pan.baidu.com/s/1UIh_qvqETozEaTq_SeGPpg
extraction code: 8888
2. Install server
yum install subversion
3. Verify
svnversion --version # view the version of svn server

2.svn service configuration
1. Create the svn repository directory
mkdir /home/ops/svn
2. Create a version library (use the created version library directory as the version library)
svnadmin create /home/ops/svn
After creating the version library, the following directories and files will be generated under the version library directory:
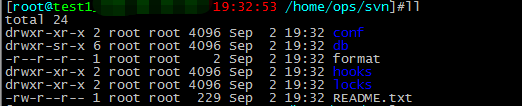
3. Understand the svn configuration file
[root@test1 /home/ops/svn]# ls -l
total 24
drwxr-xr-x 2 root root 4096 Sep  2 19:32 conf
drwxr-sr-x 6 root root 4096 Sep  2 19:32 db
-r--r--r-- 1 root root    2 Sep  2 19:32 format
drwxr-xr-x 2 root root 4096 Sep  2 19:32 hooks
drwxr-xr-x 2 root root 4096 Sep  2 19:32 locks
-rw-r--r-- 1 root root  229 Sep  2 19:32 README.txt
[root@test1 /home/ops/svn]# cd conf
[root@test1 /home/ops/svn/conf]# ls -l
total 12
-rw-r--r-- 1 root root 1080 Sep  2 19:32 authz
-rw-r--r-- 1 root root  309 Sep  2 19:32 passwd
-rw-r--r-- 1 root root 3090 Sep  2 19:32 svnserve.conf
authz permission control file
passwd account password file
svnserve.conf SVN service configuration file
4. Configure account password
[root@test1 /home/ops/svn/conf]# vim passwd
[users]
harry = 123456     ----->账号 = 密码
tom = 123456
tom1 = 123456
tom2 = 123456
mike = 123456
mike1 = 123456
mike2 = 123456
5. Set account permissions
[root@test1 /home/ops/svn/conf]# vim authz
[/]
harry = rw        ----->目录[/](代码库根目录)下的所有文件,如果没有特殊的约定,harry将具有读和写的权限,我们一般将这类用户做为svn管理用户
# * =        ----->其他用户无权限

[groups]
tt = tom,tom1,tom2        ----->创建组tt,组成员有tom,tom1,tom2
yy = mike,mike1,mike2

[/test]
@tt = rw        ----->设置组tt的权限
* =             ----->设置了* = ,则除了组内用户,其他用户皆无权限,包括harry用户

[/test1]
@yy = rw        ----->设置组yy的权限
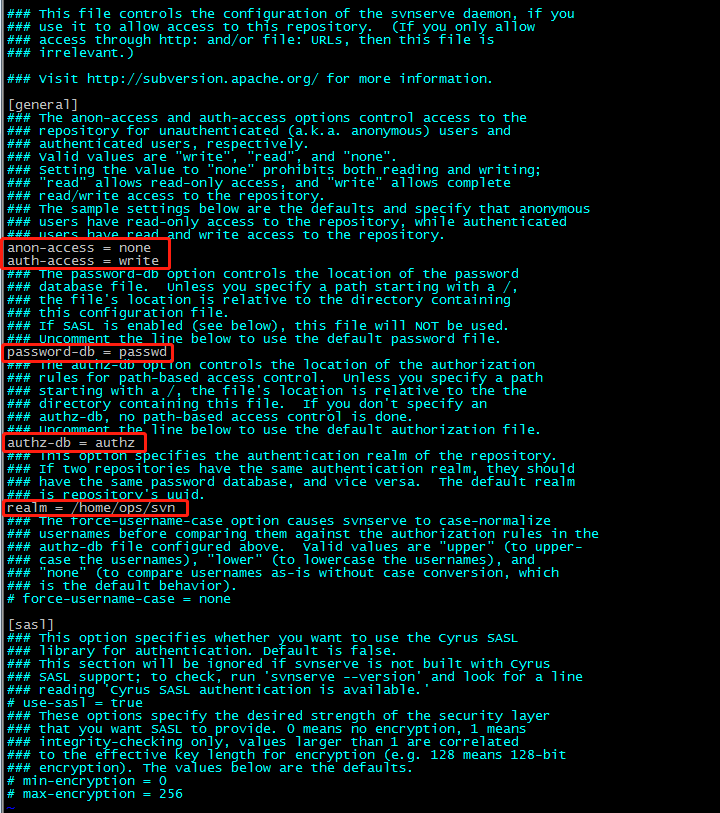
6. Modify the SVN service configuration file. For
specific configuration modifications, see the red box in the figure below:
7. Start svn service
Syntax: svnserve -d -r svn warehouse directory
[root@test1 /home/ops/svn/conf]# svnserve -d -r /home/ops/svn
kill all svnserve (stop svn service command)
Problems encountered in startup:
svnserve: E000098: Can't bind server socket: Address already in use
Reason: The previously configured svn service is not closed and deleted directly.
Solution: ps -aux | grep svn ---->Find the process and kill
root     28112  0.0  0.0 162184   920 ?        Ss   16:27   0:00 svnserve -d -r /var/svn/svnrepos
root     28616  0.0  0.0 112648   968 pts/0    S+   19:46   0:00 grep --color=auto svn
kill -9 28112
Kill the process and restart it
8. Access test on windows: The default port of svn is 3690. If the server is on Alibaba
Cloud, you must open the security group and allow port 3690 to access
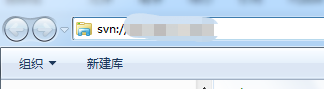
a. Install tortoiseSVN, enter the address: svn://ip
username: harry (previously configure the harry user to have read and write permissions for /, we will use the harry user as the administrative user, and use the harry user to create the directory for the tom user and the mike user )
b. Password: 123456
As shown in the figure below, after entering the harry account password, you can create a directory and start version management:

9.Linux connection test
svn co svn://ip:/test --username tom ----->tom user download test directory