Docker
1. How to create a Docker image
In addition to being the core technology of Docker, Docker image is also a standard format for application publishing.
1.1 Create based on an existing image
The essence of creating based on an existing image is to package the program running in a container and the operating environment of the program to generate a new image.
grammar:
docker commit 选项 容器ID/名称 仓库名称:标签
Common options:
- -m: description information
- -a: author information
- -p: Stop the container during the generation process
chestnut:
(1) Start a container.
PS: Modify the modification in the container, and then submit the modified container as a new image, but you must remember the ID number of the container
[root@docker ~]# docker pull centos:7
7: Pulling from library/centos
75f829a71a1c: Pull complete
Digest: sha256:19a79828ca2e505eaee0ff38c2f3fd9901f4826737295157cc5212b7a372cd2b
Status: Downloaded newer image for centos:7
[root@docker ~]# docker run -itd --name  test1 centos:7
3b0129182db30debbc0a75cb4cb13e8639affd2c7847f61725e0e3319ee12b27
[root@docker ~]# docker ps
CONTAINER ID        IMAGE               COMMAND             CREATED             STATUS              PORTS               NAMES
3b0129182db3        centos:7            "/bin/bash"         9 seconds ago       Up 8 seconds                            test1
(2) Create a local mirror
Container ID 3b0129182db3
[root@docker ~]# docker commit  -m "dhcp"  -a "liuyue"  3b0129182db3 centos:dhcp
sha256:4803a544bc33f1fe226b589706e76067d023d57beb468f3f1d0f0af80ca4da7c
(3) View the list of local mirrors
[root@docker ~]# docker images
REPOSITORY          TAG                 IMAGE ID            CREATED             SIZE
centos              dhcp                4803a544bc33        2 minutes ago       203MB
centos              7                   7e6257c9f8d8        2 weeks ago         203MB
1.2 Create based on local template
The image can be generated by importing the operating system template file. The template can be downloaded from the OPENVZ open source project. The download address is http://openvz.org/Download/template/precreated
Download the ubuntu template compressed package and use the docker import command to import it as a local image.
[root@localhost ~]# wget http://download.openvz.org/template/precreated/ubuntu-14.04-x86_64-minimal.tar.gz
--2020-04-22 16:46:01--  http://download.openvz.org/template/precreated/ubuntu-14.04-x86_64-minimal.tar.gz
正在解析主机 download.openvz.org (download.openvz.org)... 185.231.241.69
正在连接 download.openvz.org (download.openvz.org)|185.231.241.69|:80... 已连接。
已发出 HTTP 请求,正在等待回应... 200 OK
长度:78421150 (75M) [application/x-gzip]
正在保存至: “ubuntu-14.04-x86_64-minimal.tar.gz”

100%[====================================================================>] 78,421,150   172KB/s 用时 4m 46s

2020-04-22 16:50:51 (267 KB/s) - 已保存 “ubuntu-14.04-x86_64-minimal.tar.gz” [78421150/78421150])
[root@localhost ~]# cat ubuntu-14.04-x86_64-minimal.tar.gz | docker import - daoke:new     //导入为本地镜像,名为daoke:new
sha256:641362b013d6ebf773c1e71173d37da3f80fca9226a7080b7317a9e97f06aa23
View local mirror
[root@localhost ~]# docker images | grep new
daoke                         new                 641362b013d6        2 minutes ago       215 MB
1.3 Create based on Dockerfile
A Dockerfile is a file composed of a set of instructions. Each instruction corresponds to a command in Linux. The Docker program will read the instructions in the Dockerfile to generate a specified image.
The Dockerfile structure is roughly divided into four parts: basic image information, maintainer information, image operation instructions, instructions to be executed when the container is started, Dockerfile supports one instruction per line, and each instruction can carry multiple parameters, and supports the use of "#" Comment at the beginning.
Docker operation instructions:
| instruction | meaning |
|---|---|
| FROM | Specify the mirror on which to base |
| MAINTAINER | Describe the maintainer information of the image |
| RUN | Shell commands to run when building the image |
| CMD | Shell commands executed when running the container |
| EXPOSE port number | Declare the service port of the container |
| ENV | Set container environment variables |
| ADD | Copy files or directories to the mirror, if it is a URL or compressed package, it will be automatically downloaded or automatically decompressed |
| COPY | Copy files or directories to the mirror container, similar to ADD, but does not have the function of automatic download or decompression |
| VOLUME | Specify the container mount point to the automatically generated directory or other container of the host |
| USER | Specify the running user for RUN, CMD, and ENTRYPOINT execution commands |
| WORKDIR | Set the working directory for RUN, CMD, ENTRYPOINT, COPY and ADD, meaning to switch directories |
| HEALTHCHEC | health examination |
| ARG | Some parameters specified during the build, for example: FROM centos:7 ARG user USER $user |
chestnut:
1. Create a working directory
[root@docker ~]# mkdir apache
[root@docker ~]# cd apache/
2. Create and write a Docker file
[root@docker apache]# docker pull centos:7
7: Pulling from library/centos
Digest: sha256:19a79828ca2e505eaee0ff38c2f3fd9901f4826737295157cc5212b7a372cd2b
Status: Downloaded newer image for centos:7
[root@docker apache]# vim Dockerfile
#基于的基础镜像centos
FROM centos:7
#维护该镜像的用户信息
MAINTAINER The CentOS  Project <[email protected]>
#镜像操作指令安装apache软件包
RUN yum -y update
RUN yum -y install httpd
#开启80端口
EXPOSE 80
#复制网站首页文件
ADD index.html /var/www/html/index.html
#将执行脚本复制到镜像中
ADD  run.sh /run.sh
RUN  chmod 775 /run.sh
#设置apache服务不自行启动
RUN systemctl disable httpd
#启动容器时执行脚本
CMD ["/run.sh"]
3. Write and execute script content and test page
[root@docker apache]# cat run.sh
#!/bin/bash
rm -rf /run/httpd/*
#清理httpd的缓存
exec /usr/sbin/apachectl -D FOREGROUND
#启动apache服务
[root@docker apache]# vim index.html
欢迎访问本网站!祝您生活愉快!!!
<div id="datetime">
    <script>
        setInterval("document.getElementById('datetime').innerHTML=new Date().toLocaleString();", 1000);
    </script>
</div>
[root@docker apache]# ls
Dockerfile  index.html  run.sh
4. Use Dockerfile to generate a mirror
grammar:
docker build 选项 Dockerfile路径
- -t: Specify the label information of the mirror
[root@docker apache]# docker build -t  httpd:centos .
......
[root@docker apache]# docker images   | grep httpd
httpd               centos              44442f50883d        52 seconds ago      419MB
5. Use the image to create a container
[root@docker ~]# docker run -itd --name  web1 -p 1234:80 httpd:centos
ccb1eac2aae0a4269e6c9c423cff4e3b70404bfa8a5869e730f6f1e8b1175049
[root@docker ~]# docker  exec -it  web1  /bin/bash
[root@ccb1eac2aae0 /]# curl  127.0.0.1
欢迎访问本网站!祝您生活愉快!!!
<div id="datetime">
    <script>
        setInterval("document.getElementById('datetime').innerHTML=new Date().toLocaleString();", 1000);
    </script>
</div>
View the mapping from local port 12345 to port 80 of the container
[root@docker ~]# docker ps -a  | grep  httpd
ccb1eac2aae0        httpd:centos        "/run.sh"           2 minutes ago       Up 2 minutes        0.0.0.0:1234->80/tcp   web1
6. Visit the website

Second, build a private warehouse
The registry is an official tool that can be used to build a private mirror repository. You can run it by getting the official registry image
the first method
2.1 Install and run docker-registry
Use the registry to build a local private warehouse
[root@docker ~]# docker pull registry
Using default tag: latest
Trying to pull repository docker.io/library/registry ...
latest: Pulling from docker.io/library/registry
cbdbe7a5bc2a: Pull complete
47112e65547d: Pull complete
46bcb632e506: Pull complete
c1cc712bcecd: Pull complete
3db6272dcbfa: Pull complete
Digest: sha256:8be26f81ffea54106bae012c6f349df70f4d5e7e2ec01b143c46e2c03b9e551d
Status: Downloaded newer image for docker.io/registry:latest
2.2 Modify the configuration file
Modify the Docker configuration file to set the private hidden dragon URL, otherwise an error will be reported when uploading the image in the custom private warehouse, and restart the Docker service after the modification
[root@docker ~]# vim /etc/sysconfig/docker
OPTIONS='--selinux-enabled --log-driver=journald --signature-verification=false'
#把此行修改成下面这条
OPTIONS='--selinux-enabled  --insecure-registry=192.168.1.40:5000'
[root@docker ~]# systemctl restart docker
The IP address is the IP of the machine
2.3 Start a container
Start a private warehouse service locally. The listening port number is 5000. The warehouse is stored in the /tmp/registry directory in the container. The -v option is to mount the local directory to the /tmp/registry directory in the container.
[root@docker ~]# docker run -d -p 5000:5000 -v /data/registry:/tmp/registry registry
4ae0455d8676750b09e307a4c84e8574d322d5af8174d2087387237aafc43425
2.4 Upload image
(1) Mark the mirror
Use the dockertag command to mark the image docke.io/registry to be uploaded as 192.1681.40:5000/registry
[root@docker ~]# docker tag docker.io/registry 192.168.1.40:5000/registry
(2) Upload mirror
[root@docker ~]# docker push  192.168.1.40:5000/registry
The push refers to a repository [192.168.1.40:5000/registry]
b3f465d7c4d1: Pushed
a5f27630cdd9: Pushed
239a096513b5: Pushed
f5b9430e0e42: Pushed
3e207b409db3: Pushed
latest: digest: sha256:e09ed8c6c837d366a501f15dcb47939bbbb6242bf3886270834e2a0fa1555234 size: 1363
2.5 View the uploaded image
View uploaded image
[root@docker ~]# curl -XGET http://192.168.1.40:5000/v2/_catalog
{"repositories":["registry"]}
View the tag name of the uploaded image (registry)
[root@docker ~]# curl -XGET http://192.168.1.40:5000/v2/registry/tags/list
{"name":"registry","tags":["latest"]}
The second method
2.6 Install and run docker-registry
[root@docker ~]# docker pull  registry:2
2: Pulling from library/registry
cbdbe7a5bc2a: Pull complete
47112e65547d: Pull complete
46bcb632e506: Pull complete
c1cc712bcecd: Pull complete
3db6272dcbfa: Pull complete
Digest: sha256:8be26f81ffea54106bae012c6f349df70f4d5e7e2ec01b143c46e2c03b9e551d
Status: Downloaded newer image for registry:2
PS: Here we are using the registry: 2 version, there is also a registry mirror, there is no big difference between the two. registry: is written in Python, and registry:2 is written in Go. In theory, registry:2 runs faster.
2.7 Run private warehouse
(1) Create a container
[root@docker ~]# docker run -itd --name  registry --restart=always -p 5000:5000 -v /registry:/var/lib/registry registry:2
5e75274c469b5a49e13e62e388fcf0f19b30316a1272e9f1b9c48f00fa4278ff
- -p: Port mapping. Host port: the port exposed at the same time
- -p 80: If only one port is written after the -p option, then this port means that the port number exposed by the container is randomly mapped to the host (starting from 32768...)
- -P: No port parameters are connected behind. Then it will randomly map all ports exposed by the container to the host
- -v: Mount the directory. The directory of the host: the directory inside the container
(2) Mirror rename
PS: Because of the private image we use, when uploading or downloading, we need to directly rename the name of the image and indicate the IP address of its private warehouse: the exposed port. Remember it is necessary, otherwise the warehouse will not be recognized and upload or download will fail.
[root@docker ~]# docker tag  registry:2  192.168.1.40:5000/registry:2.1
[root@docker ~]# docker images | grep  192.168.1.40:5000/registry
192.168.1.40:5000/registry   2.1                 2d4f4b5309b1        2 months ago        26.2MB
2.8 Edit Docker configuration file
PS: Because Docker downloads images from dockehub by default, you need to specify the IP and port of the private warehouse locally. This is because Docker does not allow non-HTTPS to push images by default. If this step is not done, an HTTPS error will be reported.
Specify the private warehouse address:
[root@docker ~]# vim /usr/lib/systemd/system/docker.service
#查找这一行 并删除更改为带IP的哪一行
ExecStart=/usr/bin/dockerd -H unix://

ExecStart=/usr/bin/dockerd --insecure-registry 192.168.1.40:5000
[root@docker ~]# systemctl  daemon-reload
[root@docker ~]# systemctl  restart docker.service
PS: Since it is a private warehouse, you must consider the sharing of multiple DockerHosts. If there are other DockerHosts who want to use a private warehouse, you only need to modify the docker configuration file and specify the IP and port of the private warehouse. Of course don't forget, after changing the configuration file, daemon-reload and restart docker service.
2.9 Upload
[root@docker ~]# docker push 192.168.1.40:5000/registry:2.1
The push refers to repository [192.168.1.40:5000/registry]
b3f465d7c4d1: Pushed
a5f27630cdd9: Pushed
239a096513b5: Pushed
f5b9430e0e42: Pushed
3e207b409db3: Pushed
2.1: digest: sha256:e09ed8c6c837d366a501f15dcb47939bbbb6242bf3886270834e2a0fa1555234 size: 1363
View uploaded image
View uploaded image
[root@docker ~]# curl  -XGET http://192.168.1.40:5000/v2/_catalog
{"repositories":["registry"]}
View tags of uploaded images
[root@docker ~]# curl  http://192.168.1.40:5000/v2/registry/tags/list
{"name":"registry","tags":["2.1"]}
PS: /registry/ in the command is the name of the uploaded image
Three, Harbor
3.1 Introduction to Harbor
Harbor is an open source solution for building enterprise-level private docker image warehouses. It is a more advanced package of DockeRegistry. In addition to providing friendly Web UI interface, role and user rights management, user operation auditing and other functions, it also integrates K8s Add-ons warehouse, that is, Helm downloads, manages, and installs K8s plugins through the chart method, and chartmuseum can provide a warehouse for storing chart data [Note: Helm is equivalent to k8s yum]. In addition, it also integrates two open source security components, one is Notary, the other is Clair, Notary is similar to a private CA center, and Clair is a container security scanning tool, which uses the CVE vulnerability library provided by major vendors to obtain the latest Vulnerability information, and scan the container uploaded by users for known vulnerability information. These two security functions are very meaningful for enterprise-level private warehouses.
3.2 Harbor installation method
- Online installation: Download Harbor related images from Docker Hub, so the installation package is very small
- Offline installation: the installation package contains the relevant images of the deployment, so the installation package is relatively large
- OVA installer: When the user has a vCenter environment, use this installer to start Harbor after deploying OVA. This article records deployment through offline installation
3.3 Install Harbor
Here to save time, choose offline installation
Since the private warehouse has been created before in the document, all containers created before should be deleted
3.3.1 Download Docker-compse tool
[root@docker ~]# curl -L  https://github.com/docker/compose/releases/download/1.25.0/docker-compose-`uname -s`-`uname -m` -o /usr/local/bin/docker-compose
  % Total    % Received % Xferd  Average Speed   Time    Time     Time  Current
                                 Dload  Upload   Total   Spent    Left  Speed
  0     0    0     0    0     0      0      0 --:--:--  0:00:05 --:--:--     0
......
[root@docker ~]# ls
docker-compose.1.25.0.tar.gz
[root@docker ~]# tar -zxPf docker-compose.1.25.0.tar.gz -C /usr/local/bin/
[root@docker ~]# chmod  +x /usr/local/bin/docker-compose
[root@docker ~]# docker-compose -v    #查看版本号,并验证命令可以
docker-compose version 1.25.0, build 0a186604
[root@docker ~]# yum -y install yum-utlis device-mapper-persistent-data lvm2 #安装依赖包
3.3.2 Harbor-offline offline mode download
There are two ways to deploy the harbor directly from Baidu search harbor into the official website. There are two ways: online and offline. Considering the network speed, we use offline downloading here.
[root@docker ~]# wget https://storage.googleapis.com/harbor-releases/release-1.7.0/harbor-offline-installer-v1.7.4.tgz
[root@docker ~]# ls
harbor-offline-installer-v1.7.4.tgz  docker-compose.1.25.0.tar.gz
[root@docker ~]# tar -zxf harbor-offline-installer-v1.7.4.tgz  -C /usr/local/
3.3.3 Modify configuration file
Specify the harbor host
[root@docker ~]# cd /usr/local/harbor/
[root@docker harbor]# vim harbor.cfg
......
hostname = 192.168.1.40
......
PS: Here we change the host name directly to our IP address. In fact, you can also use the domain name. If you use the domain name, you need to modify the hosts file on the windows host. The address is C:\Windows\System32\drivers\etc, and the domain name and ip Just add it.
Part of the configuration file explained
[root@docker harbor]#  vim harbor.cfg
## Configuration file of Harbor
#hostname设置访问地址,可以使用ip、域名,不可以设置为127.0.0.1或localhost
hostname = 192.168.1.100
#访问协议,默认是http,也可以设置https,如果设置https,则nginxssl需要设置on
ui_url_protocol = http
#最大连接数
max_job_workers = 10
#是否生成证书
customize_crt = on
ssl_cert = /data/cert/server.crt
ssl_cert_key = /data/cert/server.key
secretkey_path = /data
admiral_url = NA
#关于日志切割选项
log_rotate_count = 50
#关于日志切割的大小,可以是KB、MB、GB
log_rotate_size = 200M
#是否启用代理访问
http_proxy =
https_proxy =
no_proxy = 127.0.0.1,localhost,core,registry
#邮件设置,发送重置密码邮件时使用
email_identity =
email_server = smtp.mydomain.com
email_server_port = 25
email_username = [email protected]
email_password = abc
email_from = admin <[email protected]>
email_ssl = false
email_insecure = false
#启动Harbor后,管理员admin,UI登录的密码,默认是Harbor12345
harbor_admin_password = Harbor12345
#认证方式,这里支持多种认证方式,如LADP、本次存储、数据库认证。默认是
db_auth,mysql   #数据库认证
auth_mode = db_auth  #是否开启自注册
self_registration = on
#token有效时间,默认30分钟
token_expiration = 30
#用户创建项目权限控制,默认是everyone(所有人),也可以设置为adminonly(只能管理员)
project_creation_restriction = everyone
Execute the script and download the dependent image
PS: After modifying the configuration file, execute ./install.sh in the current directory, Harbor service will start to download the dependent images according to the docker-compose.yml in the current directory, detect and start them in order, and note that harbor The default port is 80, it is best to confirm whether there is a conflict, or you can modify the corresponding port in docker-compose.yml
[root@docker harbor]# ./install.sh

[Step 0]: checking installation environment ...

Note: docker version: 18.09.0

Note: docker-compose version: 1.25.0

[Step 1]: loading Harbor images ...

......

[Step 4]: starting Harbor ...
Creating network "harbor_harbor" with the default driver
Creating harbor-log ... done
Creating registryctl        ... done
Creating harbor-adminserver ... done
Creating redis              ... done
Creating registry           ... done
Creating harbor-db          ... done
Creating harbor-core        ... done
Creating harbor-portal      ... done
Creating harbor-jobservice  ... done
Creating nginx              ... done

✔ ----Harbor has been installed and started successfully.----

Now you should be able to visit the admin portal at http://192.168.1.40.
For more details, please visit https://github.com/goharbor/harbor .
View and monitor
[root@docker harbor]# docker ps
CONTAINER ID        IMAGE                                    COMMAND                  CREATED              STATUS                        PORTS                                                              NAMES
8c9c2fb4ddd3        goharbor/nginx-photon:v1.7.4             "nginx -g 'daemon of…"   About a minute ago   Up About a minute (healthy)   0.0.0.0:80->80/tcp, 0.0.0.0:443->443/tcp, 0.0.0.0:4443->4443/tcp   nginx
e2cc243ef392        goharbor/harbor-jobservice:v1.7.4        "/harbor/start.sh"       About a minute ago   Up About a minute                                                                                harbor-jobservice
03436a45b849        goharbor/harbor-portal:v1.7.4            "nginx -g 'daemon of…"   About a minute ago   Up About a minute (healthy)   80/tcp                                                             harbor-portal
538fb5aeda5d        goharbor/harbor-core:v1.7.4              "/harbor/start.sh"       About a minute ago   Up About a minute (healthy)                                                                      harbor-core
dfd29fc79ae1        goharbor/harbor-db:v1.7.4                "/entrypoint.sh post…"   About a minute ago   Up About a minute (healthy)   5432/tcp                                                           harbor-db
1eb92c20f18e        goharbor/registry-photon:v2.6.2-v1.7.4   "/entrypoint.sh /etc…"   About a minute ago   Up About a minute (healthy)   5000/tcp                                                           registry
645c7dd0a5e6        goharbor/harbor-registryctl:v1.7.4       "/harbor/start.sh"       About a minute ago   Up About a minute (healthy)                                                                      registryctl
38ca301e2593        goharbor/redis-photon:v1.7.4             "docker-entrypoint.s…"   About a minute ago   Up About a minute             6379/tcp                                                           redis
05c0bbfcaa90        goharbor/harbor-adminserver:v1.7.4       "/harbor/start.sh"       About a minute ago   Up About a minute (healthy)                                                                      harbor-adminserver
db8622719dab        goharbor/harbor-log:v1.7.4               "/bin/sh -c /usr/loc…"   2 minutes ago        Up About a minute (healthy)   127.0.0.1:1514->10514/tcp                                          harbor-log
3.3.4 Harbor use
PS: The docker-compose command can manage the harbor service, but it should be noted that if you want to use the start, stop, and restart commands, they must be in the same directory as the docker-compose.yml file. In fact, it is managed by managing this file harbor warehouse
- Proxy: It is a front-end proxy of nginx, proxy Harbor's registry, UI, token and other services.
- db: Responsible for storing data such as user permissions, audit logs, and Dockerimage grouping information.
- UI: Provide a graphical interface to help users manage mirror images on the registry and authorize users.
- jobsevice: jobsevice is responsible for mirror replication. He communicates with the registry, pulls the image from one registry and then pushes it to another registry, and records the job_log.
- Adminserver: It is the configuration management center of the system to check storage usage. When ui and jobserver are started, the configuration of adminserver needs to be loaded.
- Registry: Mirror warehouse, responsible for storing mirror files.
- Log: In order to help monitor the operation of Harbor, it is responsible for collecting logs of other components for future analysis
start up
[root@docker harbor]# docker-compose  start
Starting log         ... done
Starting registry    ... done
Starting registryctl ... done
Starting postgresql  ... done
Starting adminserver ... done
Starting core        ... done
Starting portal      ... done
Starting redis       ... done
Starting jobservice  ... done
Starting proxy       ... done
stop
[root@docker harbor]# docker-compose stop
Reboot
[root@docker harbor]# docker-compose restart
3.3.5 Browser access
http://192.168.1.40/harbor/sign-in
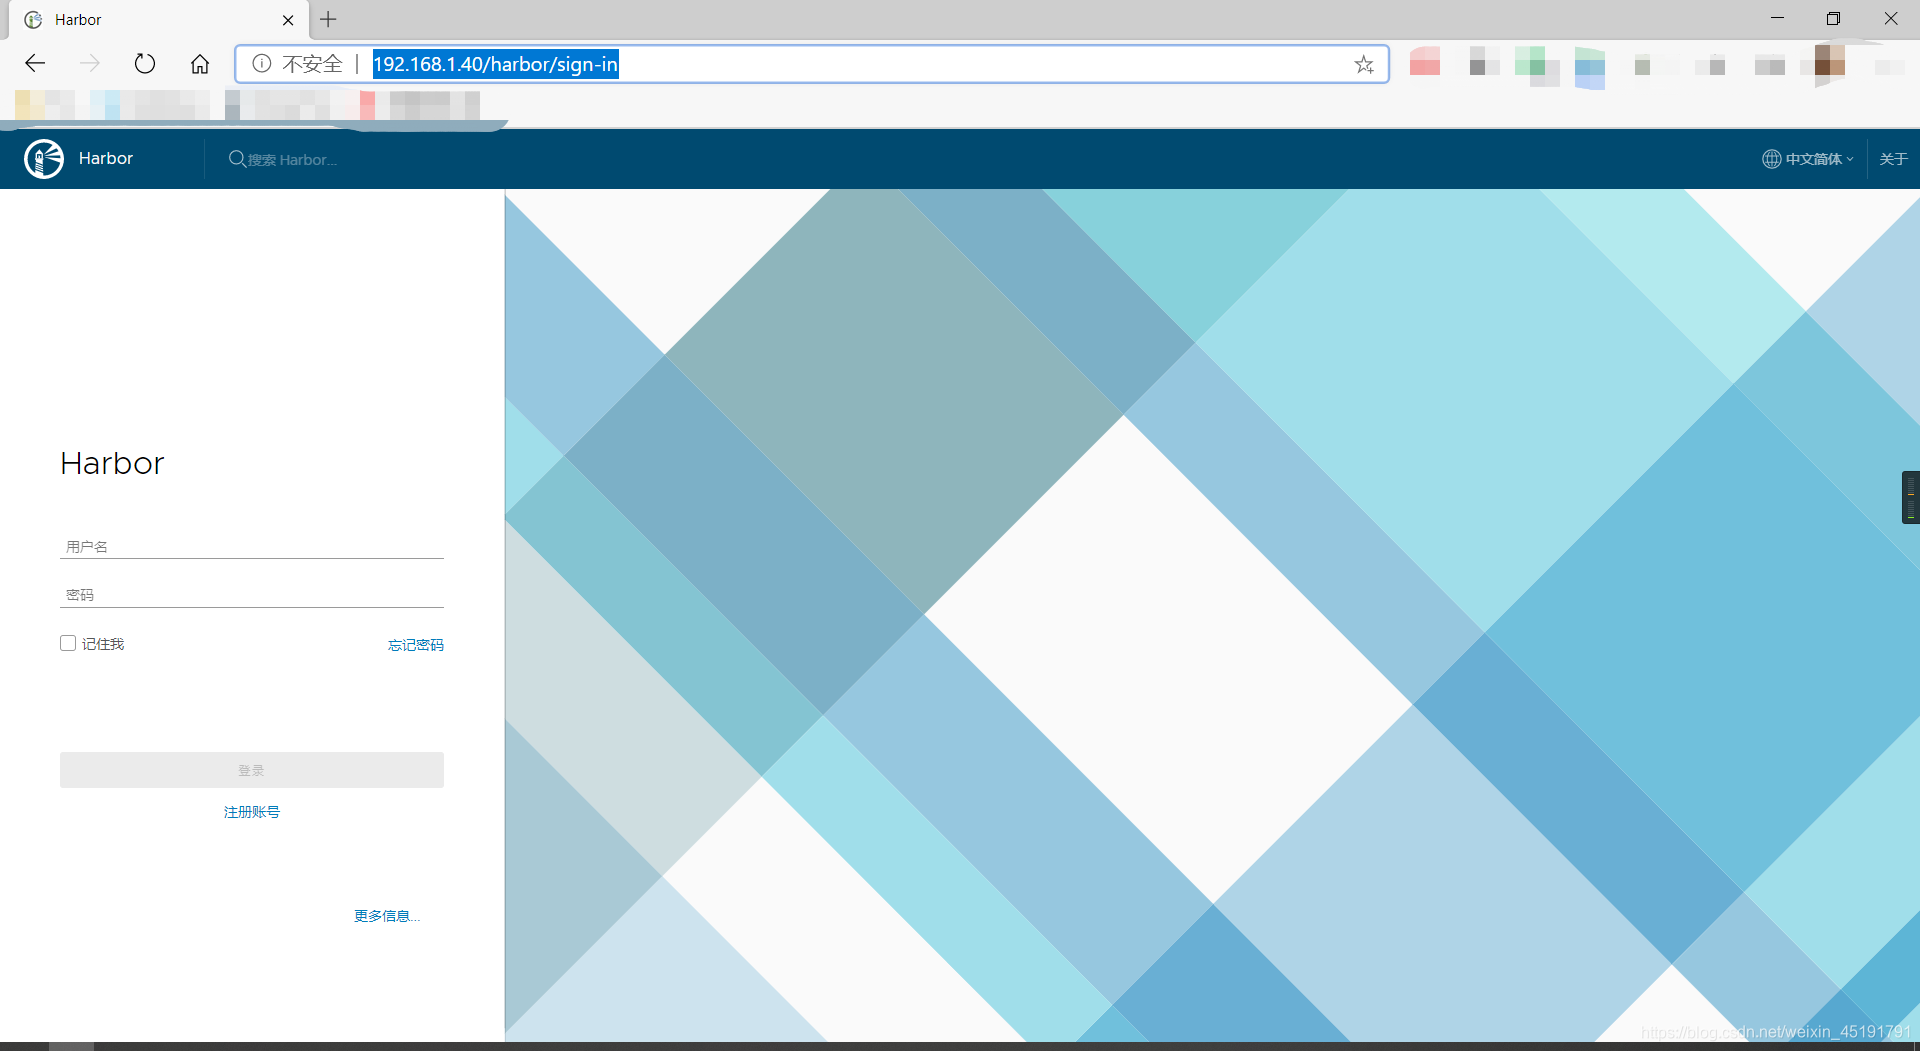
Login name: admin
Password: Harbor12345
Username and password can be set in Harbor configuration file
3.4 Harbor case
surroundings
| Host IP | CPU name |
|---|---|
| 192.168.1.40 | docker |
| 192.168.1.41 | docker-client |
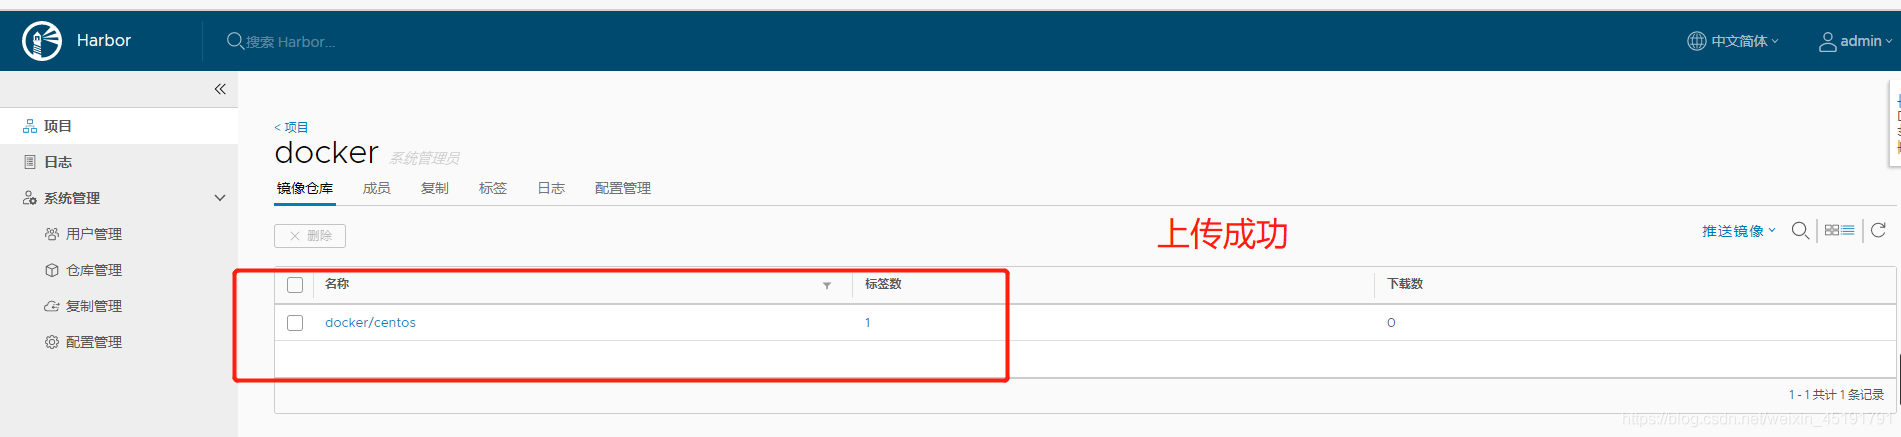
1. Access the browser on the docker host to create a warehouse named docker


2. Configure on docker-client
2.1 Change the docker configuration file
PS: For the same reason, because docker does not support https, we also need to change the docker configuration file
[root@docker-client ~]# vim /usr/lib/systemd/system/docker.service
#查找这一行 并删除更改为带IP的哪一行
ExecStart=/usr/bin/dockerd -H unix://

ExecStart=/usr/bin/dockerd --insecure-registry 192.168.1.40
[root@docker-client ~]# systemctl daemon-reload
[root@docker-client ~]# systemctl restart docker
2.2 Client login warehouse
[root@docker-client ~]# docker login  -uadmin -pHarbor12345 192.168.1.40
WARNING! Using --password via the CLI is insecure. Use --password-stdin.
WARNING! Your password will be stored unencrypted in /root/.docker/config.json.
Configure a credential helper to remove this warning. See
https://docs.docker.com/engine/reference/commandline/login/#credentials-store

Login Succeeded
2.3 Delete private image
Download the centos mirror to the local in advance
[root@docker-client ~]# docker tag  centos:7  192.168.1.40/docker/centos:7.1
[root@docker-client ~]# docker push  192.168.1.40/docker/centos:7.1
The push refers to repository [192.168.1.40/docker/centos]
613be09ab3c0: Pushed
7.1: digest: sha256:fe2347002c630d5d61bf2f28f21246ad1c21cc6fd343e70b4cf1e5102f8711a9 size: 529
2.4 Check whether the upload is successful in the browser
Four, Docker data management
In order to facilitate the viewing of data generated in a container or sharing of data between multiple containers, data management operations of the container are involved. There are two main ways to manage data in Docker containers: Data Volumes and Data Volumes Containers
4.1 Data volume
4.1.1 Create Data Volume
[root@docker ~]# docker run -itd -v /data1 -v /data2 --name web centos:latest
d16e5e3410deab053cc81f9104e537964d7073254f9d579647267db4ddd6ebd3
Enter the container, you can see that the data volume has been successfully created and mounted separately
[root@docker ~]# docker exec  -it web  bash
[root@d16e5e3410de /]# ls -l
total 0
lrwxrwxrwx   1 root root   7 May 11  2019 bin -> usr/bin
drwxr-xr-x   2 root root   6 Sep  2 08:44 data1
drwxr-xr-x   2 root root   6 Sep  2 08:44 data2
4.1.2 Mount the host directory as a data volume
Use -v to create the data volume while mounting the host's directory to the data volume for use, which has achieved data migration between the host and the container. But it should be noted that the local directory path of the host is the experimental absolute path. If the path does not exist, docker will automatically create the corresponding path.
Mount the /var/www/ directory of the host to the container
To achieve data migration between the host and the container
[root@docker ~]# mkdir -p /var/www
[root@docker ~]# cd /var/www/
[root@docker www]# touch hell.sh
[root@docker www]# ls
hell.sh
[root@docker www]# docker run -itd -v /var/www/:/data1 --name web-1 centos:latest
f345b6e63b79afaba5433356b49f43de561b192b6d8f05759a2eade70c7ad16b
[root@docker www]# docker exec  -it web-1 bash
[root@f345b6e63b79 /]# ls
bin  data1  dev  etc  home  lib  lib64	lost+found  media  mnt	opt  proc  root  run  sbin  srv  sys  tmp  usr	var
[root@f345b6e63b79 /]# cd data1/
[root@f345b6e63b79 data1]# ls
hell.sh
[root@f345b6e63b79 data1]# exit
exit
[root@docker www]# touch 1.txt
[root@docker www]# docker exec  -it web-1 bash
[root@f345b6e63b79 /]# cd data1/
[root@f345b6e63b79 data1]# ls
1.txt  hell.sh
Same: Created in a container, the host also has corresponding content
4.2 Data volume container
PS: The data volume container is a function of sharing between containers
Use the previous data volume container web to create a new data volume container
[root@docker ~]# docker run  -itd --volumes-from web --name db1 centos:latest
fd1cc14e4ef2ccaccf45c7f42ca24854a22a8720f8a3f81e49ffb6de5d20b9a6
[root@docker ~]# docker exec  -it db1  bash
[root@fd1cc14e4ef2 /]# ls
bin  data1  data2  dev	etc  home  lib	lib64  lost+found  media  mnt  opt  proc  root	run  sbin  srv	sys  tmp  usr  var
PS: The content viewed by ls in the db1 container is the same as that of the web container
Create files in db1, which can also be viewed in the web
[root@fd1cc14e4ef2 /]# cd /data1/
[root@fd1cc14e4ef2 data1]# touch 12 123 213
[root@fd1cc14e4ef2 data1]# ls
12  123  213
[root@fd1cc14e4ef2 data1]# exit
exit
[root@docker ~]# docker exec  -it web bash
[root@d16e5e3410de /]# cd /data1/
[root@d16e5e3410de data1]# ls
12  123  213
So far, data sharing between containers has been realized
Use the container web to create a new data volume container**
[root@docker ~]# docker run  -itd --volumes-from web --name db1 centos:latest
fd1cc14e4ef2ccaccf45c7f42ca24854a22a8720f8a3f81e49ffb6de5d20b9a6
[root@docker ~]# docker exec  -it db1  bash
[root@fd1cc14e4ef2 /]# ls
bin  data1  data2  dev	etc  home  lib	lib64  lost+found  media  mnt  opt  proc  root	run  sbin  srv	sys  tmp  usr  var
PS: The content viewed by ls in the db1 container is the same as that of the web container
Create files in db1, which can also be viewed in the web
[root@fd1cc14e4ef2 /]# cd /data1/
[root@fd1cc14e4ef2 data1]# touch 12 123 213
[root@fd1cc14e4ef2 data1]# ls
12  123  213
[root@fd1cc14e4ef2 data1]# exit
exit
[root@docker ~]# docker exec  -it web bash
[root@d16e5e3410de /]# cd /data1/
[root@d16e5e3410de data1]# ls
12  123  213
So far, data sharing between containers has been realized
PS: The advantage of this is that the container fails during operation, and the user does not have to be afraid of data loss. If an accident occurs, just re-create the container. Save a lot of time.