1. Integrate MyBatis
A. Add dependency
<?xml version="1.0" encoding="UTF-8"?>
<project xmlns="http://maven.apache.org/POM/4.0.0" xmlns:xsi="http://www.w3.org/2001/XMLSchema-instance"
         xsi:schemaLocation="http://maven.apache.org/POM/4.0.0 https://maven.apache.org/xsd/maven-4.0.0.xsd">
    <modelVersion>4.0.0</modelVersion>
    <!--继承父项目-->
    <parent>
        <groupId>org.springframework.boot</groupId>
        <artifactId>spring-boot-starter-parent</artifactId>
        <version>2.4.2</version>
        <relativePath/> <!-- lookup parent from repository -->
    </parent>
    <groupId>com.zzt</groupId>
    <artifactId>demo</artifactId>
    <version>SpringBoot-01</version>
    <name>demo</name>
    <description>Demo project for Spring Boot</description>
    <properties>
        <java.version>1.8</java.version>
    </properties>
    <dependencies>
        <!--web开发-->
        <dependency>
            <groupId>org.springframework.boot</groupId>
            <artifactId>spring-boot-starter-web</artifactId>
        </dependency>
        <!--SpringBoot集成MyBatis-->
        <dependency>
            <groupId>org.mybatis.spring.boot</groupId>
            <artifactId>mybatis-spring-boot-starter</artifactId>
            <version>2.1.3</version>
        </dependency>
        <!--Mysql驱动-->
        <dependency>
            <groupId>mysql</groupId>
            <artifactId>mysql-connector-java</artifactId>
        </dependency>
        <!--SpringBoot测试-->
        <dependency>
            <groupId>org.springframework.boot</groupId>
            <artifactId>spring-boot-starter-test</artifactId>
            <scope>test</scope>
        </dependency>
    </dependencies>

    <build>
        <plugins>
            <!--SpringBoot打包-->
            <plugin>
                <groupId>org.springframework.boot</groupId>
                <artifactId>spring-boot-maven-plugin</artifactId>
            </plugin>
        </plugins>
        <!--配置资源过滤-->
        <resources>
            <resource>
                <directory>src/main/java</directory>
                <includes>
                    <include>**/*.xml</include>
                </includes>
            </resource>
            <resource>
                <directory>src/main/resources</directory>
                <includes>
                    <include>**/*.xml</include>
                </includes>
            </resource>
        </resources>
    </build>

</project>
B. SpringBoot configuration file
#数据库连接配置
spring.datasource.url = jdbc:mysql://localhost:3306/study_mybatis?serverTimezone=GMT%2B8
spring.datasource.driver-class-name = com.mysql.cj.jdbc.Driver
spring.datasource.username = ****
spring.datasource.password = ****
#引入mybatis主配置文件
mybatis.config-location=classpath:mybatis-config.xml
#引入mapper.xml文件(如果与dao接口处于同一包下可以不指定,用@MapperScan指定包路径)
#mybatis.mapper-locations=com/zzt/dao/*.xml
MyBatis main configuration file
<?xml version="1.0" encoding="UTF-8" ?>
<!DOCTYPE configuration PUBLIC "-//mybatis.org//DTD Config 3.0//EN"
        "http://mybatis.org/dtd/mybatis-3-config.dtd">
<configuration>
    <!--实体类别名-->
    <typeAliases>
        <package name="com.zzt.vo"/>
    </typeAliases>
</configuration>
C.dao layer (note that Mapper.xml needs to have the same name as the dao interface, @Mapper interface declares that this is a component)
package com.zzt.mapper;

import com.zzt.vo.Student;
import org.apache.ibatis.annotations.Mapper;
import org.apache.ibatis.annotations.Param;

@Mapper
public interface StudentMapper {
    public Student queryStudentById(@Param("id") int id);
}
<?xml version="1.0" encoding="UTF-8" ?>
<!DOCTYPE mapper PUBLIC "-//mybatis.org//DTD Mapper 3.0//EN"
"http://mybatis.org/dtd/mybatis-3-mapper.dtd">
<mapper namespace="com.zzt.mapper.StudentMapper">
<select id="queryStudentById" resultType="Student">
select id,name,age from t_stu where id=#{id}
</select>
</mapper>D. Service layer (using interface + implementation class)
package com.zzt.service;

import com.zzt.vo.Student;

public interface StudentService {
    public Student queryStudentById(Integer id);
}
package com.zzt.service.Impl;

import com.zzt.mapper.StudentMapper;
import com.zzt.service.StudentService;
import com.zzt.vo.Student;
import org.springframework.beans.factory.annotation.Autowired;
import org.springframework.stereotype.Service;

@Service
public class StudentServiceImpl implements StudentService {

    @Autowired
    private StudentMapper studentMapper;

    public Student queryStudentById(Integer id) {
        return studentMapper.queryStudentById(id);
    }
}
E. Test the injection of dao (@MapperScan is used to scan the Mapper.xml file, applicable to the same package as Mapper.xml and the interface)
package com.zzt;

import com.zzt.service.Impl.StudentServiceImpl;
import com.zzt.service.StudentService;
import org.mybatis.spring.annotation.MapperScan;
import org.springframework.boot.SpringApplication;
import org.springframework.boot.autoconfigure.SpringBootApplication;
import org.springframework.context.ApplicationContext;


@SpringBootApplication()
@MapperScan("com.zzt.mapper") // 当mapper接口和xml文件处于同一包下,使用这种方式
public class DemoApplication {

    public static void main(String[] args) {
        ApplicationContext ctx = SpringApplication.run(DemoApplication.class, args);
        System.out.println("容器创建成功");
        StudentService studentService = ctx.getBean(StudentServiceImpl.class);
        System.out.println(studentService.queryStudentById(1));
    }

}
6. Execution results

2. Use JSP to display data
A.Controller
package com.zzt.controller;

import com.zzt.service.StudentService;
import org.springframework.beans.factory.annotation.Autowired;
import org.springframework.stereotype.Controller;
import org.springframework.web.bind.annotation.RequestMapping;
import org.springframework.web.bind.annotation.RequestParam;
import org.springframework.web.servlet.ModelAndView;

@Controller
@RequestMapping("/student")
public class StudentController {

    @Autowired
    private StudentService studentService;

    @RequestMapping("/queryStudentById")
    public ModelAndView queryStudentById(@RequestParam("id") Integer id) {
        System.out.println("进入方法");
        ModelAndView mv = new ModelAndView();
        mv.addObject("student",studentService.queryStudentById(id));
        mv.setViewName("showStudent");
        return mv;
    }
}
B. JSP resolution dependency
When we were working on the project before, we used external Tomcat (some parsing packages integrated in the Tomcat software) to parse JSP, and SpringBoot is embedded Tomcat, and does not include packages for parsing JSP by default, so we still Need to add analysis dependency:
        <!--内嵌Tomcat对JSP的解析包-->
        <dependency>
            <groupId>org.apache.tomcat.embed</groupId>
            <artifactId>tomcat-embed-jasper</artifactId>
        </dependency>
        <!--jstl循环的依赖,按需要加入-->
        <dependency>
            <groupId>javax.servlet</groupId>
            <artifactId>jstl</artifactId>
        </dependency>
C. View resolver configuration
#配置视图解析器 /表示webapp根目录
spring.mvc.view.prefix=/
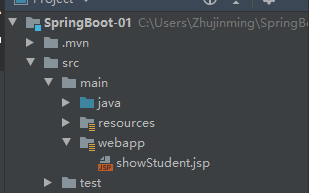
spring.mvc.view.suffix=.jspD. Create a new webapp and include webapp resources during configuration compilation
            <resource>
                <directory>src/main/webapp</directory>
                <targetPath>META-INF/resources</targetPath>
                <includes>
                    <include>**/*.*</include>
                </includes>
            </resource>
E. JSP page/showStudent.jsp
<%@ page contentType="text/html;charset=UTF-8" language="java" %>
<%
    String basePath = request.getScheme()+ "://" +
            request.getServerName() + ":" + request.getServerPort() +
            request.getContextPath() + "/";
%>
<html>
<head>
    <title>标题</title>
    <base href="<%=basePath%>" />
</head>
<body>
    ${student.id}--${student.name}--${student.age}
</body>
</html>
F. Start the project, visit the address: http://localhost:8080/student/queryStudentById?id=1

3. Hot deployment plug-in JRebel-to solve the problem of restarting when the project is modified
Method 1: Search for automatic installation (will be slower, there is a ladder to try)

Method 2: Download the compressed package and unzip it in the plugins directory of ideal

Need to activate, please refer to: http://www.cicoding.cn/other/jrebel-activation/ (may still need a ladder)
Now we use Rebel to start the project:


If the code changes, we only need to rebuild it.


[Note]: If you think XRebel (bundled and downloaded with JRebel) to activate the pop-up window is troublesome, you can also choose to activate it~